
Hola amigos, es un placer para mí saludarlos en una más de mis publicaciones sobre manualidades.
Nunca es un impedimento realizar manualidades, porque podemos innovar con lo que tengamos en nuestra casa y crear hermosos adornos, lo importante es reciclar cualquier material que nos pueda ser útil para reutilizar.
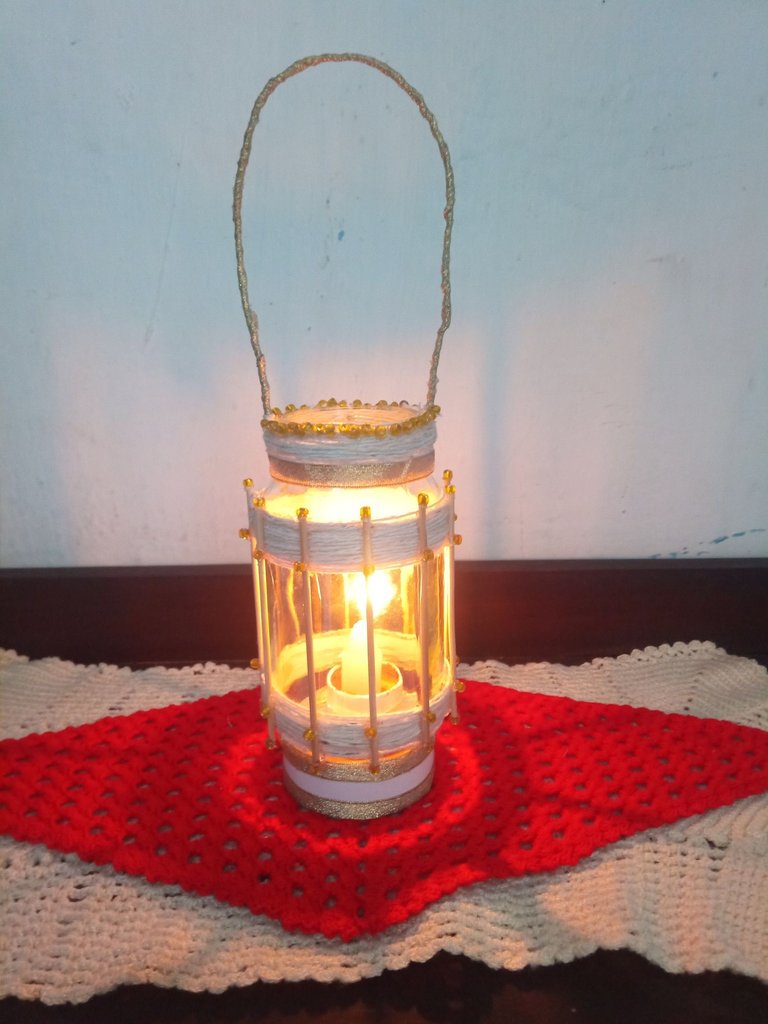
En este caso, hoy te presento un farol decorativo que realice con envase de mayonesa, palos de altura, entre otros materiales que más adelante iremos observando.
Las fotografías que verán a continuación, fueron tomadas con mi teléfono modelo Alcatel_5044R.

Hello friends, it is a pleasure for me to greet you in one more of my publications on crafts.
It is never an impediment to make crafts, because we can innovate with what we have in our house and create beautiful decorations, the important thing is to recycle any material that can be useful to reuse.
In this case, today I present a decorative lantern that I made with mayonnaise container, sticks, among other materials that we will see later.
The pictures you will see below were taken with my Alcatel_5044R model phone.

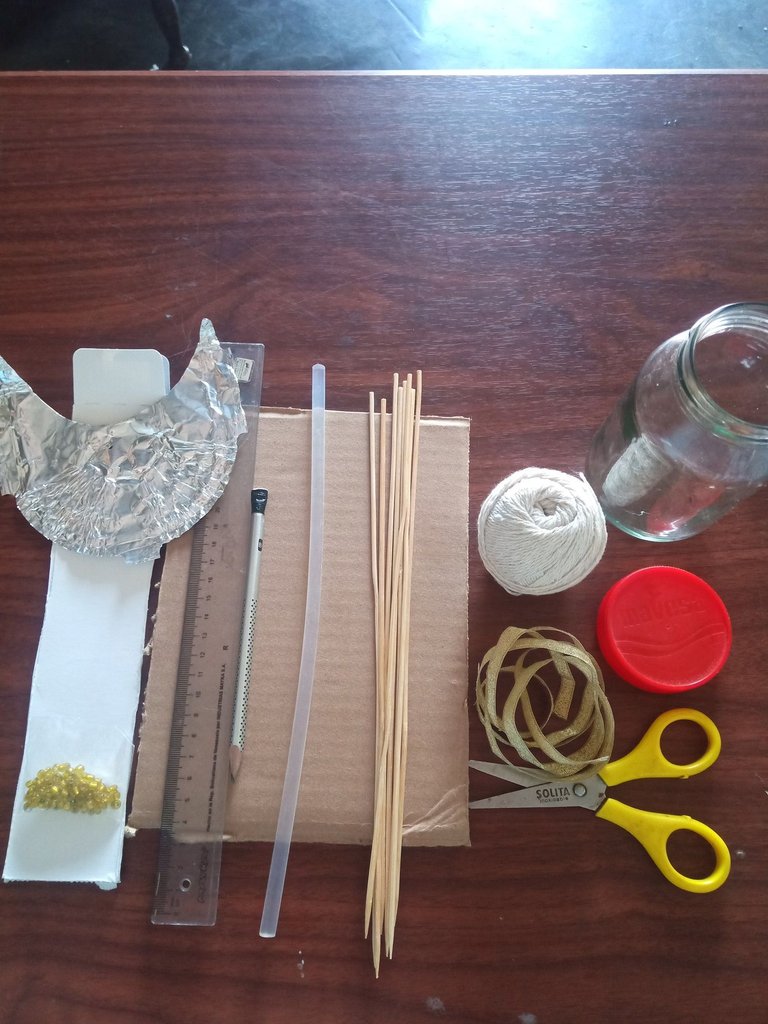
Materiales:
Cartón.
Embace de vidrio con tapa.
Pabilo.
Silicona.
Tijera.
Lápiz.
Regla.
Papel aluminio.
Palos de altura.
Cinta dorada.
Mostacillas.
Alambre.
Materials:
Cardboard.
Glass jar with lid.
Wick.
Silicone.
Scissors.
Pencil.
Ruler.
Aluminum foil.
Sticks of height.
Gold ribbon.
Wire.

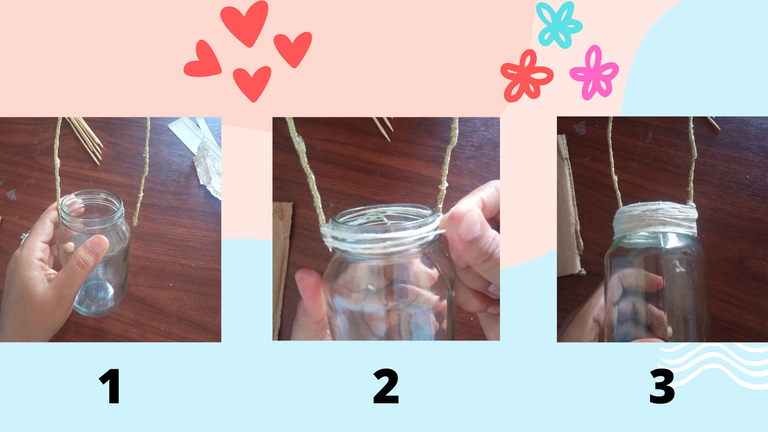
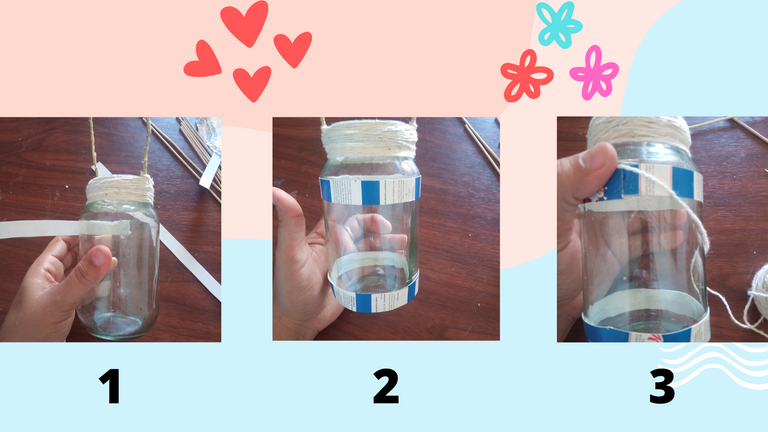
Mi primer paso fue forrar un trozo de alambre que sería el asa del farol, con una cinta dorada y silicona caliente, posteriormente le fui agregando la silicona caliente mientras forraba todo el trozo de alambre.
Al tenerla totalmente forrada procedí a doblarlo en forma de (U) y ya tendría listo el asa para este lindo farol.
Seguidamente, sostuve el asa en ambos lados del envase y comencé ajustarlo con pabilo color blanco hasta cubrir toda la rosca del envase, finalmente pegue con un punto de silicona caliente la culminación del pabilo que utilice para sujetar el asa.
Esto debe quedar muy bien ajustado para que no se salga el asa, hay que hacerle mucha presión y colocarle suficiente pabilo.
My first step was to line a piece of wire that would be the handle of the lantern, with a golden ribbon and hot silicone, then I added the hot silicone while lining the entire piece of wire.
Once I had it completely lined, I proceeded to bend it in a U-shape and I would have the handle ready for this beautiful lantern.
Next, I held the handle on both sides of the container and began to adjust it with white wick until it covered the entire thread of the container, finally I glued with a dot of hot silicone the end of the wick that I used to hold the handle.
This must be very well adjusted so that the handle does not come off, you have to put a lot of pressure on it and place enough wick.
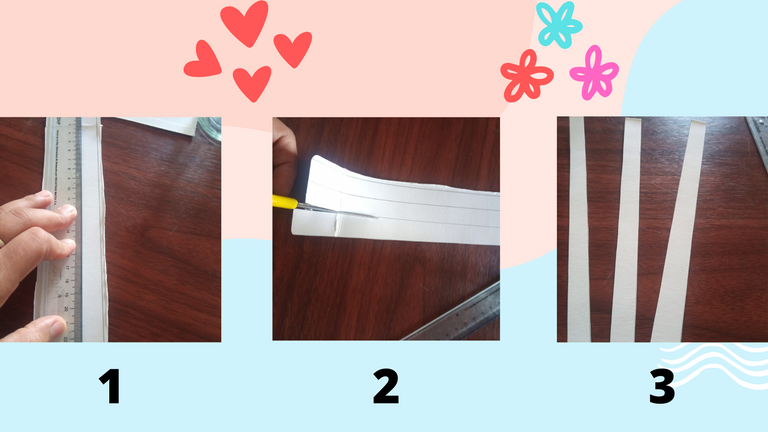
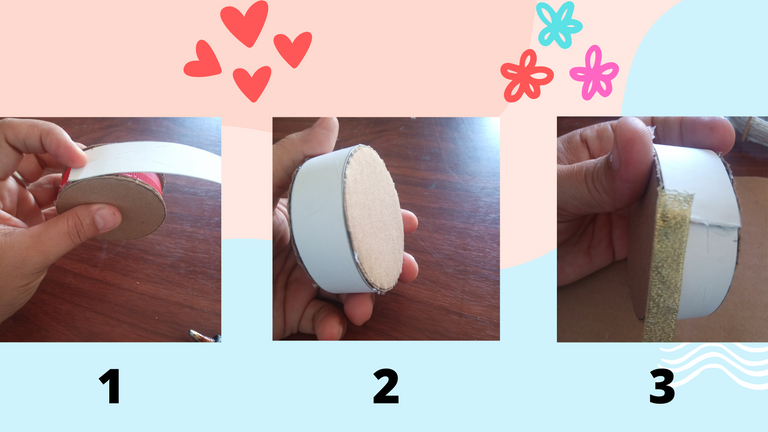
Una vez terminado con el asa, mi siguiente paso fue recortar 2 Cintas de cartulina de 1 centímetros de ancho.
Posteriormente, pegue las Cintas con un punto de silicona caliente al rededor de la botella, tanto en la parte superior como inferior, para seguidamente cubrirlas con pabilo, de la misma manera como lo realice en el paso anterior.
Once finished with the handle, my next step was to cut 2 cardboard ribbons 1 cm wide.
Then, glue the ribbons with a dot of hot silicone around the bottle, both at the top and bottom, and then cover them with wick, in the same way as I did in the previous step.
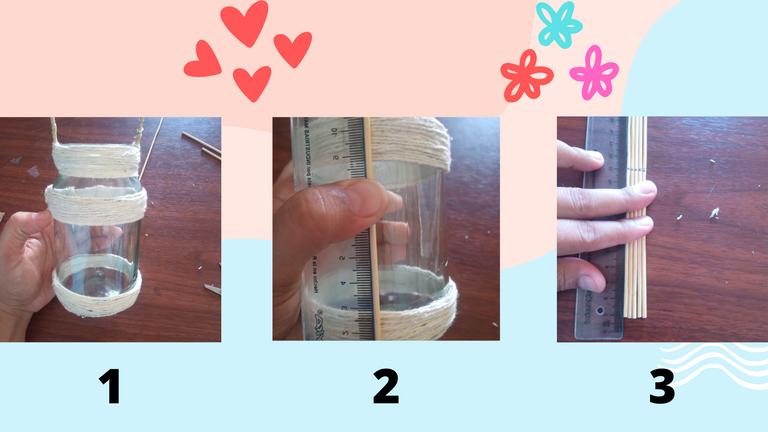
Al tenerla totalmente forrada con pabilo, medí la botella de un aproximado de la altura que desee colocar, donde con el uso de una regla y un palo de altura saque la medida de 11 centímetros de altura para recortar cada uno de los palos que utilizaré como decoración en esta manualidad.
Teniendo todos los palos de altura ya recortados, procedí a pegarlos con silicona caliente a una distancia de 4 centímetros cada uno. Terminado este paso empecé hacer la base con cartón, utilizando como guía la tapa del frasco.
Having it completely lined with wick, I measured the bottle of an approximate height that I wanted to place, where with the use of a ruler and a height stick I took the measure of 11 centimeters in height to cut each of the sticks that I will use as decoration in this craft.
Having all the sticks already cut out, I proceeded to glue them with hot silicone at a distance of 4 centimeters each. Once this step was finished, I started making the base with cardboard, using the lid of the jar as a guide.
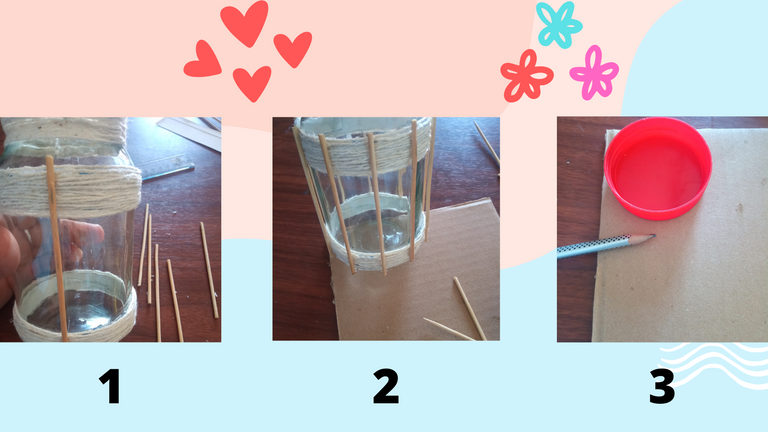
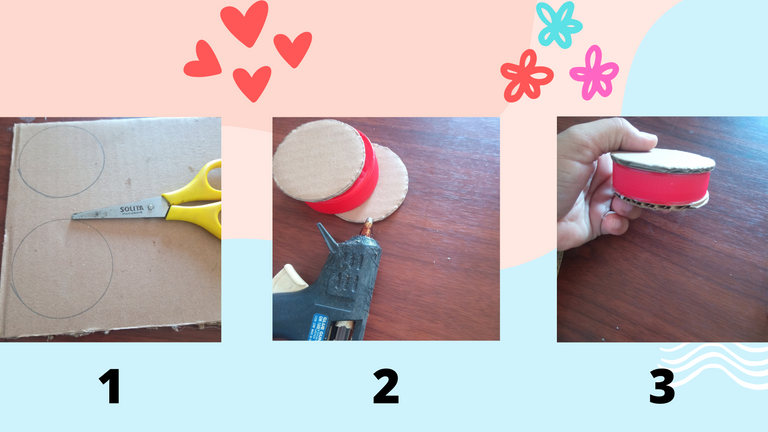
Con la tapa dibujé dos círculos para colocarlos en ambos lados de la misma.
Luego de pegarlos con silicona, utilice una de las cintas de cartulina que tenía recortada y la pegue por todo el contorno de la tapa, para darle mayor estética, decore los bordes con una cinta de color dorado y ya estaría lista para colocarla en el farol.
With the lid I drew two circles to place on both sides of the lid.
After gluing them with silicone, I used one of the cardboard ribbons I had cut out and glued it all around the lid. To give it more aesthetics, I decorated the edges with a gold ribbon and it was ready to be placed on the lantern.

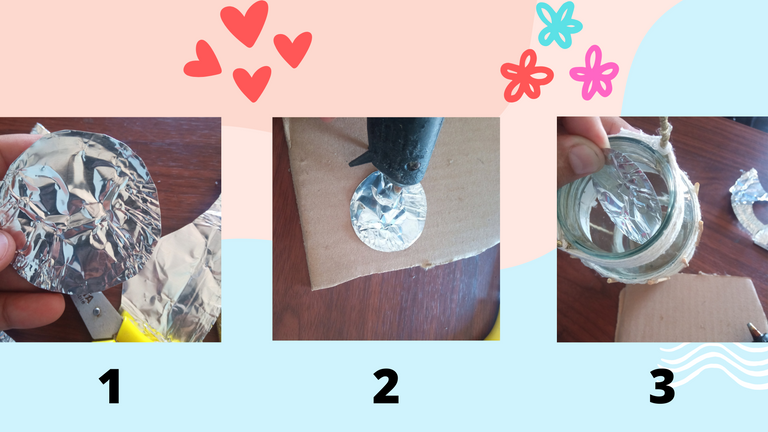
Luego de pegar la base del farol, coloque esta base sobre un trozo de aluminio para recortar una circunferencia que ira en la parte interna del pote para crear un efecto donde resalte más la iluminación de la vela.
Después de tener el aluminio recortado con forma de círculo, le aplique silicona caliente y lo introduje dentro del frasco y con la ayuda de un palo de altura, lo fije en el fondo del mismo.
After gluing the base of the lantern, place this base on a piece of aluminum to cut out a circle that will go on the inside of the pot to create an effect where the lighting of the candle stands out more.
After having the aluminum cut out in the shape of a circle, I applied hot silicone and inserted it inside the jar and with the help of a tall stick, I fixed it to the bottom of the jar.
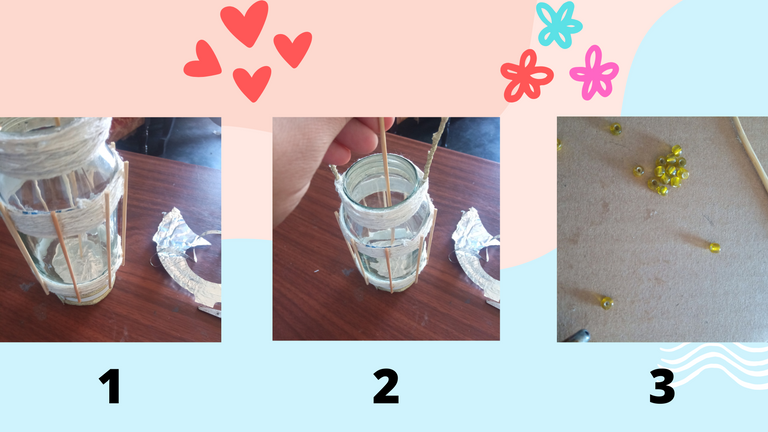
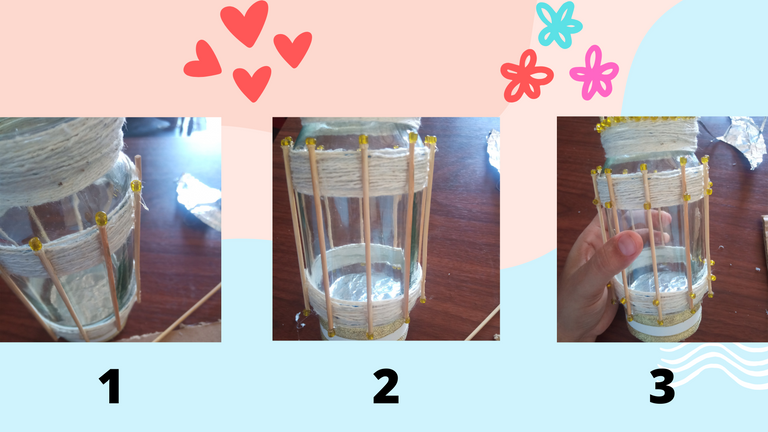
Aquí pueden notar como estoy fijando el aluminio dentro del frasco con el palo de altura, seguido a esto, comience a decorar el farol con unas mostacillas amarillas, que También son favorables para resaltar la iluminación del farol.
Si desean pueden colocarle lentejuelas o escarchas, toda la decoración es parte de la creatividad, en este caso quise hacerlo sencillo para que resalte en cualquier espacio.
Así culmina el paso a paso para realizar este decorativo farol.
Nota: la iluminación la realice con un trozo de vela normal, pero les recomiendo colocarles una vela aromática de llama suave u una vela artificial, que sería recomendable donde hay niños.
Es importante colocar la vela centrada para evitar recalentar el vidrio del farol.
Here you can notice how I am fixing the aluminum inside the jar with the height stick, followed by this, start decorating the lantern with some yellow beads, which are also favorable to highlight the illumination of the lantern.
If you want you can put sequins or frost, all the decoration is part of the creativity, in this case I wanted to make it simple so that it stands out in any space.
This is the end of the step by step to make this decorative lantern.
Note: I made the lighting with a piece of normal candle, but I recommend placing a soft flame scented candle or an artificial candle, which would be advisable where there are children.
It is important to place the candle centered to avoid overheating the glass of the lantern.
social networks / redes sociales
![]()
![]()
Traductor Deepl
Translated Deepl
Ediciones Canva
Editions Canva


Quedó bien bonita esa linterna,.imagínate colocar varias como centros de mesa en la noche buena. Me gustó mucho ese dato que diste con el papel aluminio. Voy a intentar hacer una, espero quede tan linda como la tuya. Saludos amiga 😊😃
Aww me alegro que te haya gustado mi hermosa lamparita, de verdad que tienes razón, me diste otra idea amiga, muchas gracias por tu comentario @estefania3
Muy linda y creativa, me encanta la forma que tiene, está bellisima ♥️
Gracias amiga, me alegro de que te haya gustado, es fácil de hacer, saludos.
Que lindo trabajo, se nota el esmero que haces cuando realizas tus manualidades.
Todo duro trabajo tiene sus frutos, gracias por tu comentario amiga, un abrazo @crisch23
Que ciertas son tus palabras
Esta muy buena, demasiado creativa, me gustó todo el proceso que llevó para realizarla. Felicidades!
Gracias amigo @fixie, bendiciones para ti
Hola 👋, está hermosa la lámpara y muy fácil de hacer, mucho éxito 👍
Gracias, igualmente para ti, bendiciones y muchos exitos
Es una muestra más de su creatividad. Un trabajo muy bonito. ¿Una duda que me quedo, ¿dejo usted una entrada de aire en la tapa, cierto? Qué de seguro se le pasó indicarlo.
Hola amigo, muchas gracias por tu comentario, en realidad había mencionado que la tapa de este frasco la use como base, pero si no mencione que la parte superior del frasco estaría sin nada
Vale, así no habría problema con el paso del aire. Muy listo de su parte.
Congratulations @lauracraft! You have completed the following achievement on the Hive blockchain and have been rewarded with new badge(s):
Your next target is to reach 800 replies.
Your next target is to reach 1000 upvotes.
You can view your badges on your board and compare yourself to others in the Ranking
If you no longer want to receive notifications, reply to this comment with the word
STOPTo support your work, I also upvoted your post!
Check out the last post from @hivebuzz:
Support the HiveBuzz project. Vote for our proposal!
~~~ embed:1590102601613606912 twitter metadata:MTQyMjQxMzkxNTI3NTgxMjg2NHx8aHR0cHM6Ly90d2l0dGVyLmNvbS8xNDIyNDEzOTE1Mjc1ODEyODY0L3N0YXR1cy8xNTkwMTAyNjAxNjEzNjA2OTEyfA== ~~~
The rewards earned on this comment will go directly to the people( @fixie, @mariajcastro28 ) sharing the post on Twitter as long as they are registered with @poshtoken. Sign up at https://hiveposh.com.