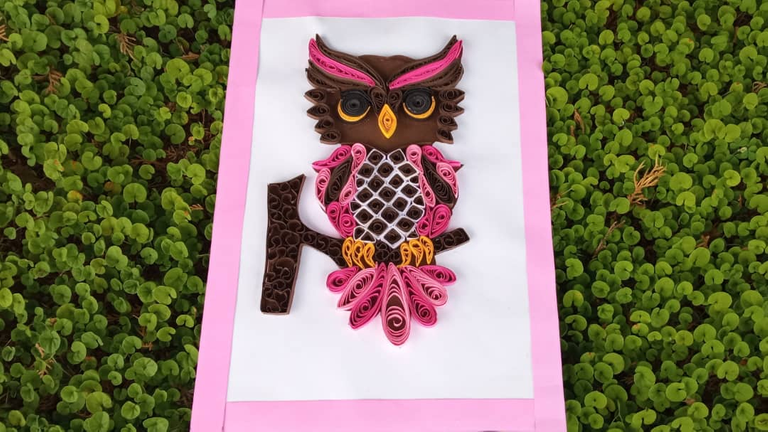
Hola mis queridos amigos de #HIVEDIY, espero que todos se encuentren bien al lado de sus seres queridos, hoy vengo de nuevo con un lindo tutorial en filigrana, como ya han visto en todos mis post amo esta técnica y trato cada día de aprender un poquito más y así poder enseñarle a todos las cosas lindas que podemos hacer con esta bella técnica, hoy quise realizar un lindo búho y usé colores pasteles ya que es un obsequio para la habitación de la niña de una amiga, pronto estará de cumpleaños y me pareció lindo hacerle un adorno para regalarle en su día.
Hello my dear friends of #HIVEDIY, I hope you are all well with your loved ones, today I come again with a nice filigree tutorial, as you have seen in all my posts I love this technique and I try every day to learn a little more and so I can teach everyone the beautiful things we can do with this beautiful technique, today I wanted to make a cute owl and I used pastel colors because it is a gift for the room of a friend's girl, she will soon have a birthday and I thought it would be nice to make an ornament to give her on her day.
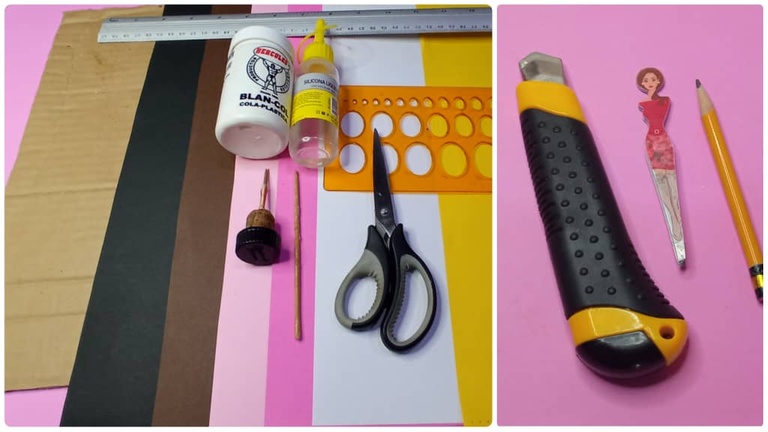
Una de las cosas que mas me gusta de estos trabajos es que los materiales son muy económicos y el resultado siempre es lindo, así que vamos acompáñame al paso a paso.
One of the things I like most about these works is that the materials are very inexpensive and the result is always nice, so come with me to the step by step.
Cuadro de Búho en filigrana
Picture of Owl in filigree
Materiales
Materials
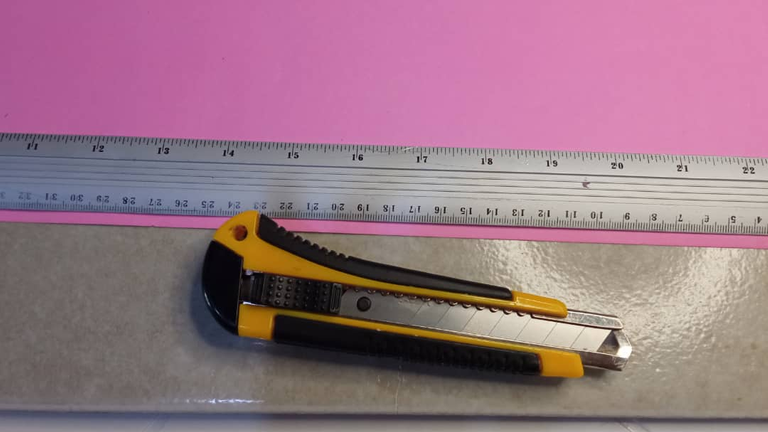
Cardstock (brown, pink, yellow, yellow, black, white) Cardboard Rolling pin Ruler Liquid silicone White glue Tweezers Scissors Cutter Blade
Pasos para la elaboración
Steps for the elaboration
.
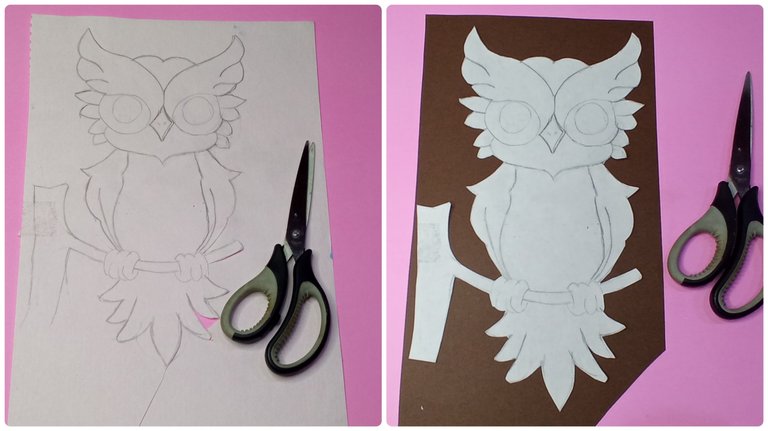
Paso 1
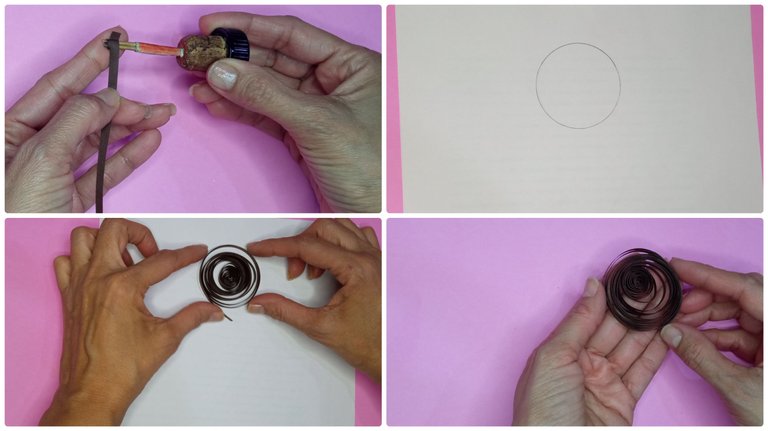
Lo primero que haremos es dibujar un lindo búho y recortamos, luego lo transferimos a la cartulina marrón, cortamos la silueta con cuidado.Step 1
The first thing we will do is draw a cute owl and cut it out, then transfer it to the brown cardboard, cut the silhouette carefully.
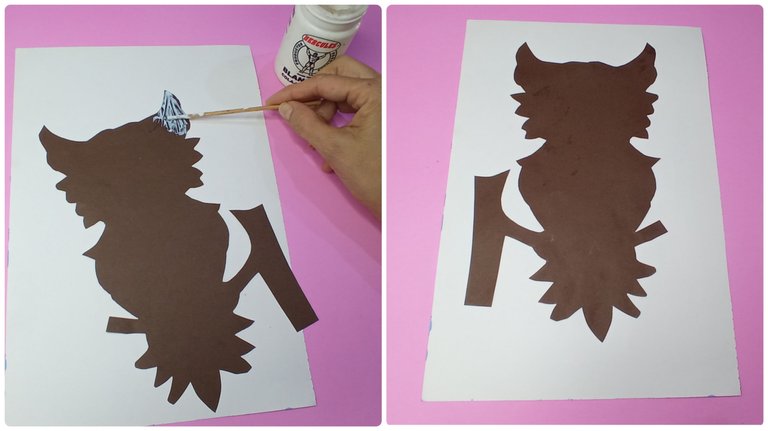
Paso 2
Luego procedemos a pegar la silueta del búho sobre la cartulina blanca que será nuestra base.Step 2
We then proceed to glue the silhouette of the owl on the white cardboard that will be our base.
Paso 3
Seguidamente procedemos a cortar con cúter las tiras que usaremos para el cuadro, (cartulina rosada, marrón, negra amarilla y blanca) estas tiras las venden especialmente para trabajar el filigrana pero siempre será mejor hacerlas nosotros mismo y así sale más económico.Step 3
We then proceed to cut with cutter the strips that we will use for the picture, (pink, brown, black, yellow and white cardboard) these strips are sold especially to work the filigree but it is always better to make them ourselves and it is more economical.
Paso 4
Luego tomamos 4 tiras de 0,5 cm por 43 cm y pegamos con pegamento blanco formando una tira larga, luego introducimos en el enrollador y damos vuelta sobre ella misma hasta el final, ya tendremos listo en una hoja una circunferencia de 4,5 cm de diámetro para que todos los círculos queden del mismo tamaño, soltamos y después colocamos pegamento blanco en la punta y así tendremos un circulo abierto grande.Step 4
Then we take 4 strips of 0.5 cm by 43 cm and glue with white glue forming a long strip, then we introduce in the winder and turn over itself until the end, we will have ready on a sheet a circumference of 4.5 cm in diameter so that all the circles are the same size, we release and then put white glue on the tip and so we will have a large open circle.
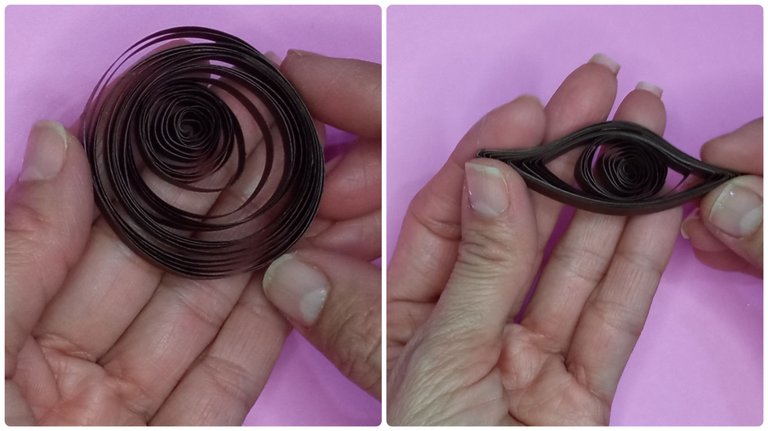
Paso 5
Ahora con el círculo abierto ya listo procedemos a elaborar la forma de óvalo, para ello presionamos los extremos con los dedos índice y pulgar de ambas manos, haremos óvalos marrones y rosados.Step 5
Now with the open circle ready we proceed to elaborate the oval shape, to do this we press the ends with the index finger and thumb of both hands, we will make brown and pink ovals.
Paso 6
Después comenzamos a pegar los óvalos en la parte de arriba de la cabeza alternando los colores y pegándolos juntos.Step 6
Then we start gluing the ovals on the top of the head by alternating the colors and gluing them together.
Paso 7
Para los ojos del búho usaremos 4 tiras de 0,5 cm por 43 cm las pegamos para formar una tira larga, con ayuda del enrollador damos vuelta hasta el final formando un círculo cerrado, haremos dos círculos para los ojos.Step 7
For the eyes of the owl we will use 4 strips of 0.5 cm by 43 cm we glue them to form a long strip, with the help of the winder we turn until the end forming a closed circle, we will make two circles for the eyes.

Paso 8
Para los parpados inferiores del búho haremos círculos abiertos con tiras de de 0,5 cm por 20 cm, luego presionamos con ambas manos formando una media luna.Step 8
For the lower eyelids of the owl we will make open circles with strips of 0.5 cm by 20 cm, then press with both hands forming a half moon.

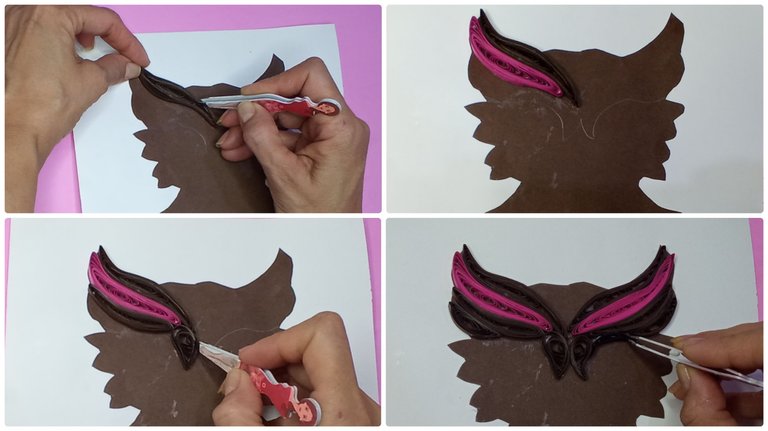
Paso 9
Ahora pegamos los ojos, los parpados inferiores y colocamos una tirita pequeña negra para bordear los ojos.Step 9
Now we glue the eyes, the lower eyelids and place a small black band-aid to border the eyes.

Paso 10
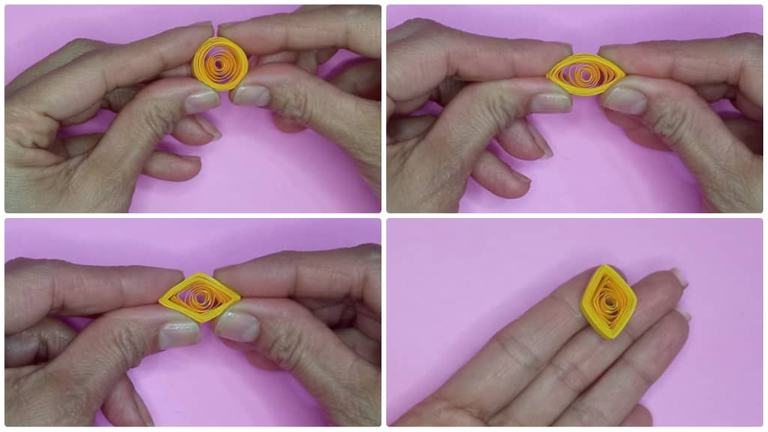
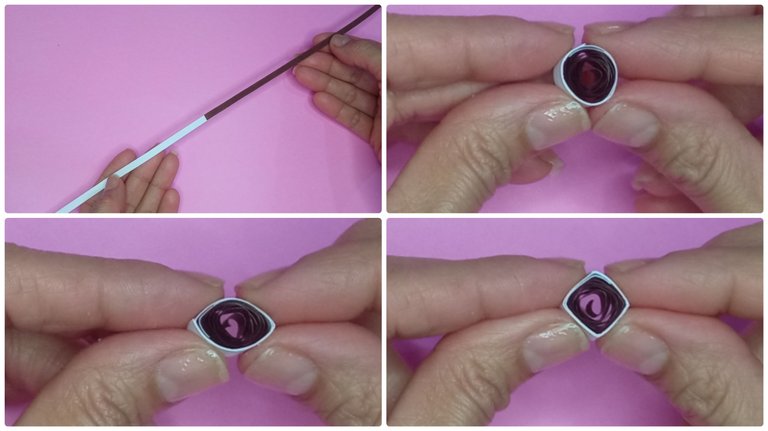
Continuamos con el pico y para este hacemos un circulo abierto con una tira de 0,5 cm por 43 cm, luego hacemos presión suavemente con los dedos índice y pulgar de ambas manos, damos un giro y presionamos de nuevo para formar un rombo.Step 10
Continue with the beak and for this we make an open circle with a strip of 0.5 cm by 43 cm, then we press gently with the index finger and thumb of both hands, turn and press again to form a rhombus.
Paso 11
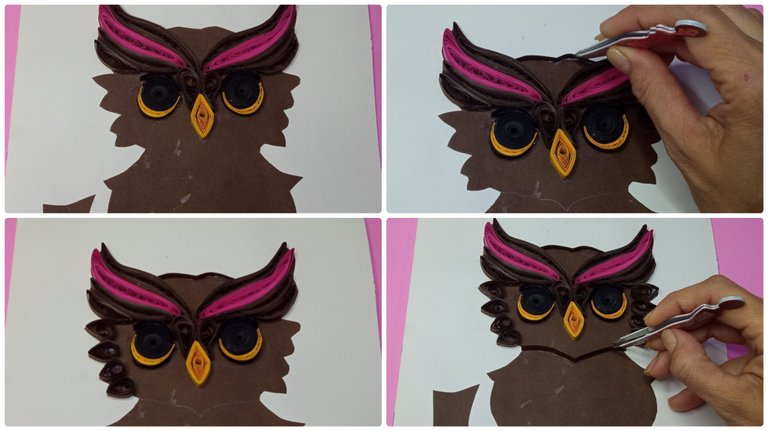
Ahora pegamos tiritas en la parte superior e inferior de la cabeza y pegamos el pico.Step 11
Now we glue strips on the top and bottom of the head and glue the beak.
Paso 12
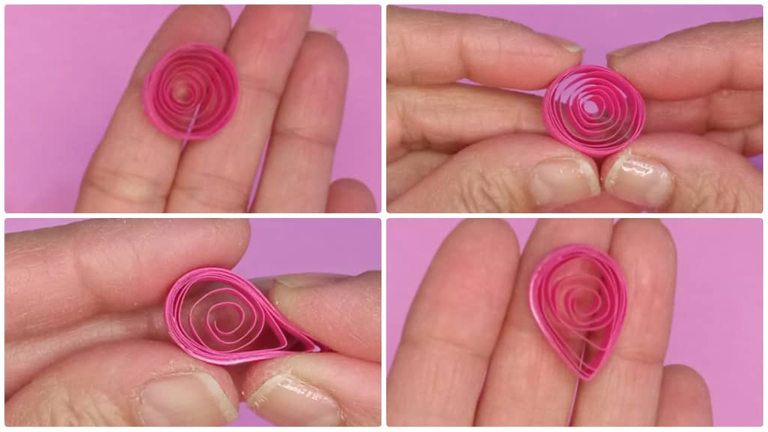
Para las alas de nuestro búho haremos la forma de filigrana llamada gota, para ella partiremos de un circulo abierto y luego con los dedos índice y pulgar de la mano derecha hacemos presión y ya estará lista la gota.Step 12
For the wings of our owl we will make the filigree shape called drop, for it we will start from an open circle and then with the index finger and thumb of the right hand we make pressure and the drop will be ready.
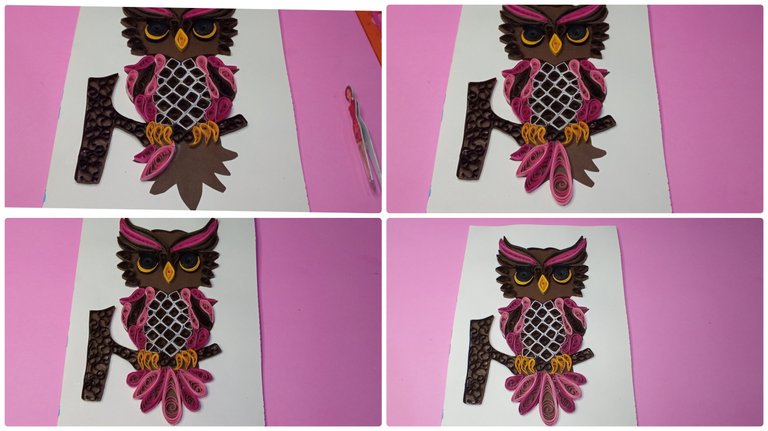
Paso 13
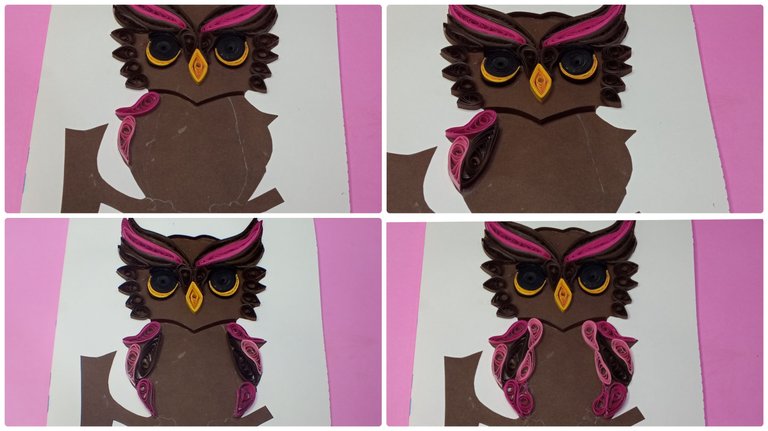
Procedemos a pegar las formas de gotas en la parte de las alas, alternando los colores.Step 13
Proceed to glue the droplet shapes on the wing part, alternating the colors.
Paso 14
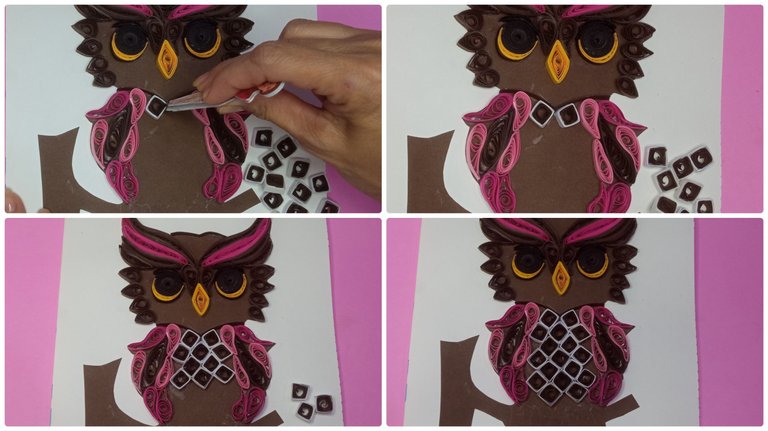
Luego haremos rombos como ya lo explicamos en el paso 9, solo que acá pegamos dos tiras una blanca y una marrón de 15 cm por 0,5 cada una.Step 14
Then we will make rhombuses as explained in step 9, only here we glue two strips, one white and one brown, 15 cm by 0.5 cm each.
Paso 15
Después vamos pegando con pegamento blanco los rombos en el pecho del búho, vamos colocando una pegadita de la otra dando forma.Step 15
Then we glue with white glue the rhombuses on the chest of the owl, we place one glued to the other giving shape.
Paso 16
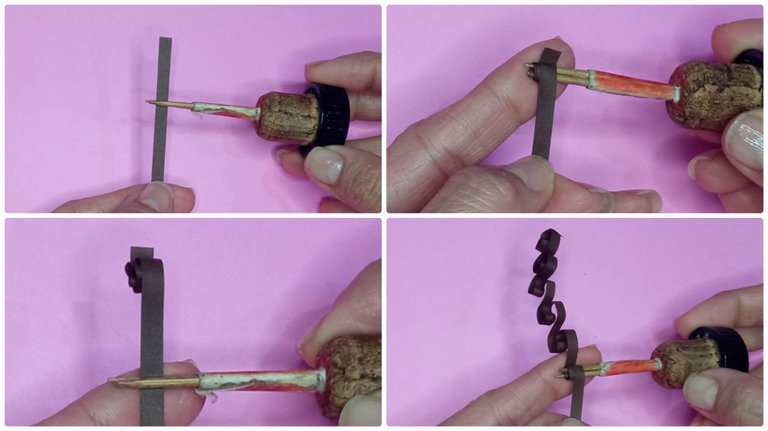
Seguidamente tomamos una tira color marrón para elaborar la forma de filigrana llamada connected scrolls, tomamos el enrollador y lo deslizamos por la tira dejamos una separación de 3 cm y enrollamos, luego repetimos y así hasta finalizar toda la tira.Step 16
Next we take a brown strip to make the filigree shape called connected scrolls, we take the winder and slide it through the strip leaving a separation of 3 cm and roll it up, then repeat and so on until the end of the whole strip.
Paso 17
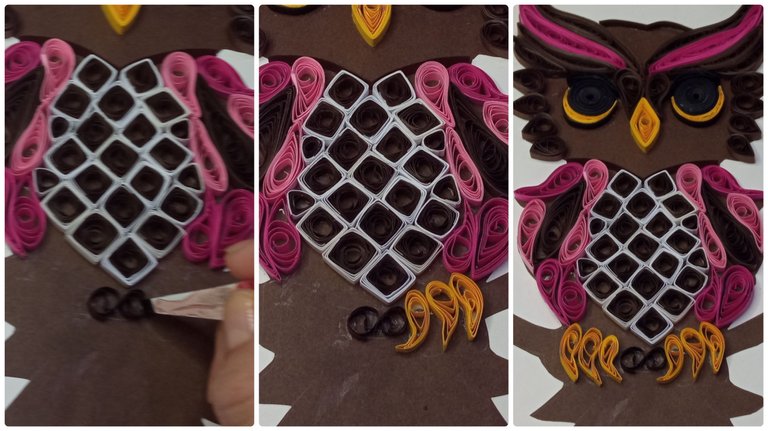
Cortamos 2 rollitos de la forma connected scrolls y pegamos parte de lo que será la rama donde esta apoyado el búho, luego pegamos las garras que son hechas con la forma de gota, solo que al pegarlas se les da una inclinación en la punta para darle realismo.Step 17
Cut 2 rolls of the connected scrolls shape and glue part of what will be the branch where the owl is resting, then glue the claws that are made with the drop shape, only that when gluing them is given a tilt at the tip to give realism.
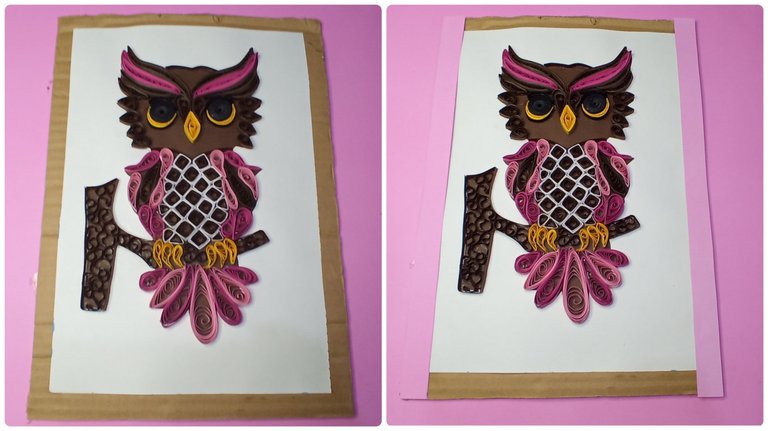
Paso 18
Seguimos rellenando todo el tronco con la forma connected scrollsy y bordeamos con una tira marrón.Step 18
Fill the whole log with the connected scrollsy shape and border it with a brown strip.

Paso 19
Para la cola usaremos la forma de gota, ya explicada en el paso 12, así que vamos pegando una al lado de la otra para decorar lo que será la cola del búho.Step 19
For the tail we will use the drop shape, already explained in step 12, so we glue one next to the other to decorate what will be the owl's tail.
Paso 20
Por ultimo pegamos con silicón líquido la cartulina blanca sobre el cartón y colocamos un marquito con cartulina rosada, esto lo hacemos para que se vea mas lindo y mejor presentado.Step 20
Lastly we glue the white cardboard on the cardboard with liquid silicone and place a little mark with pink cardboard, we do this to make it look nicer and better presented.
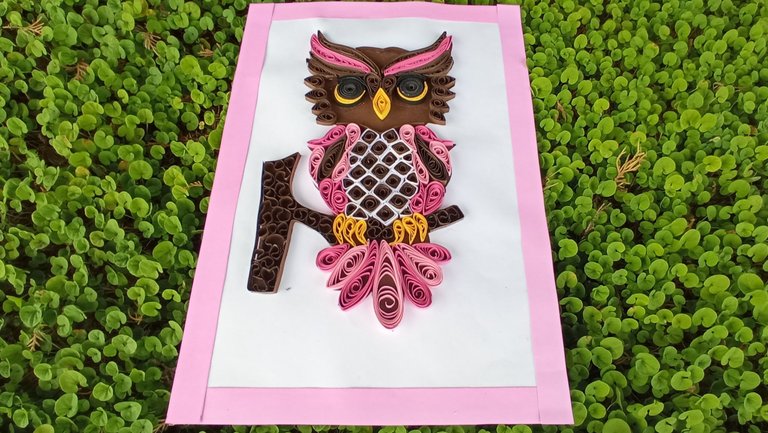
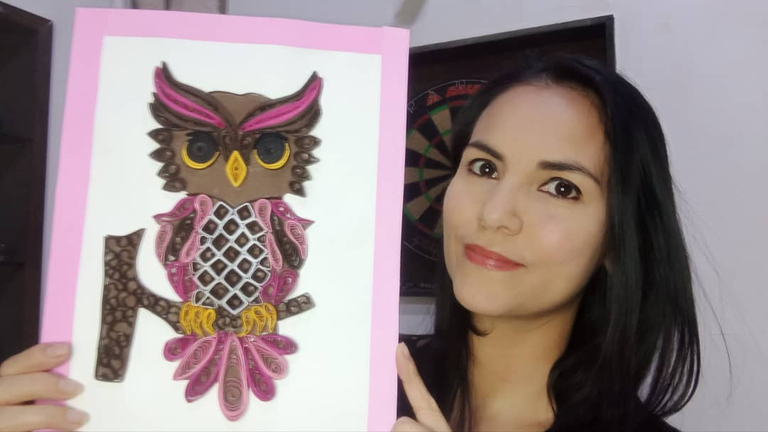
Listo amigos, así quedo mi bello cuadro de búho, espero sea del agrado de todos.
Ready friends, this is how my beautiful owl painting turned out, I hope you all like it.
Todas las fotos son tomadas de mi teléfono Redmi 9, para los collages usé la aplicación collage maker y para la traducción usé el traductor Deepl.
All photos are taken from my Redmi 9 phone, for the collages I used the collage maker application and for the translation I used Deepl translator.
Hola bella, espero estés bien, tienes un problema con las imágenes de los pasos 7 y 8, no se ven y en su lugar sale lo que parece ser el link de las imágenes, si puedes editar el post para arreglar eso, sería genial.
Hola amiga, gracias por la observación, ya lo edité, ya puedes verlas bien?
Si, ahora si lo veo perfecto!! no tienes que agradecer, para eso estamos! Saludos
Congratulations @lilianap15! You have completed the following achievement on the Hive blockchain and have been rewarded with new badge(s):
Your next target is to reach 20 posts.
You can view your badges on your board and compare yourself to others in the Ranking
If you no longer want to receive notifications, reply to this comment with the word
STOPTo support your work, I also upvoted your post!
Check out the last post from @hivebuzz:
Support the HiveBuzz project. Vote for our proposal!
El arte y los artistas definitivamente tienen distintas maneras de expresarse. Me parece muy bonito esto que hiciste aquí y me llama la atención la forma en que lo hiciste. Podria intentar hacer algo así para decorar la casa, de verdad me parece muy bonito.
Saludos, gracias por compartirlo.
Gracias por tus palabras amigo, me satisface que te guste mi trabajo lo aprecio mucho, el filigrana es una técnica muy bonita y fácil de hacer, solo hay que tener paciencia y dedicación.
Que lindoooo quedo ese buho❤ la combinación de los colores excelente. Felicitaciones y bendiciones amiga
Muchas gracias amiga.
Yay! 🤗
Your content has been boosted with Ecency Points, by @gaboamc2393.
Use Ecency daily to boost your growth on platform!
Support Ecency
Vote for new Proposal
Delegate HP and earn more
Thank you
Es un hermoso Búho, buen trabajo te felicito.
Gracias amiga.
Thank you for sharing this amazing post on HIVE!
Your content got selected by our fellow curator @rezoanulvibes & you just received a little thank you via an upvote from our non-profit curation initiative!
You will be featured in one of our recurring curation compilations and on our pinterest boards! Both are aiming to offer you a stage to widen your audience within and outside of the DIY scene of hive.
Join the official DIYHub community on HIVE and show us more of your amazing work and feel free to connect with us and other DIYers via our discord server: https://discord.gg/mY5uCfQ !
If you want to support our goal to motivate other DIY/art/music/homesteading/... creators just delegate to us and earn 100% of your curation rewards!
Stay creative & hive on!
Muchas gracias por el apoyo.
Que hermoso trabajo e impecable, me encanta como quedó ese búho, me gusta el relieve que le da esa técnica, jamás he trabajado con ella pero tal vez lo haga, gracias por compartir este tutorial, saludos!
Gracias amiga, me complace mucho que te guste, anímate la verdad es fácil.