Hola mis amigo creadores
Hello my creator friends
Otro día más para compartir mis creaciones con ustedes, espero se encuentren muy bien y tengan un lindo y Bendecido día.
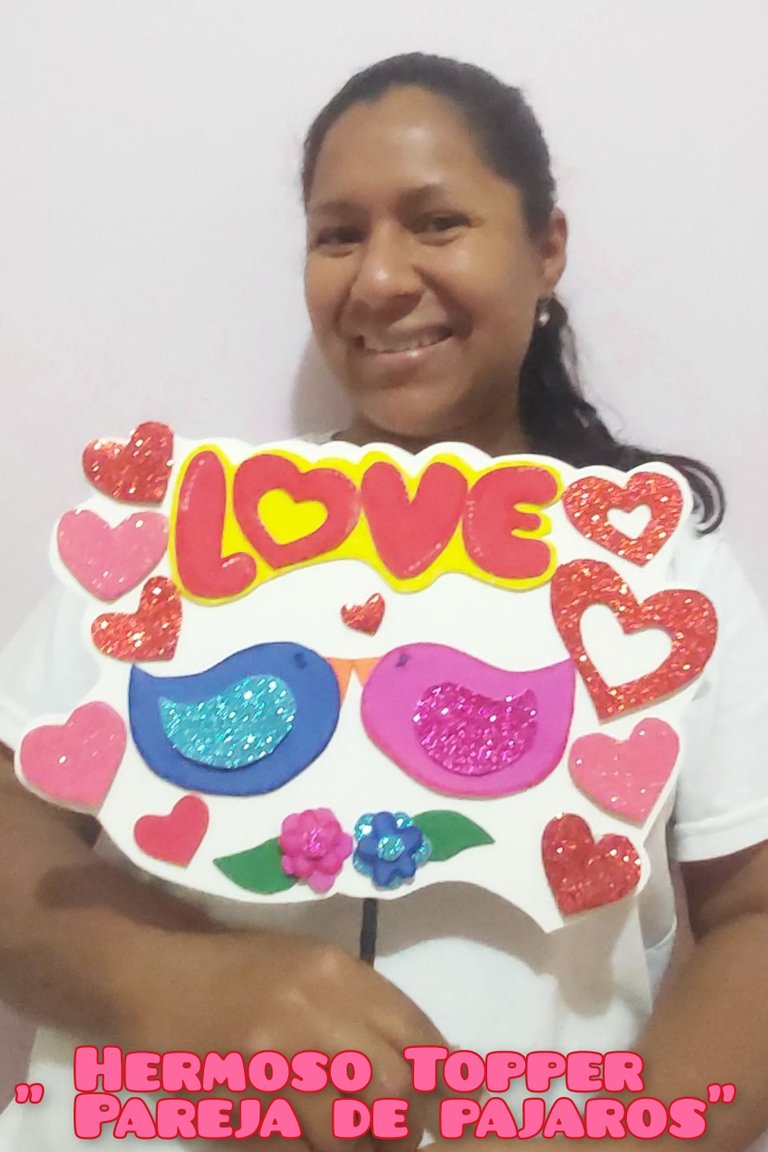
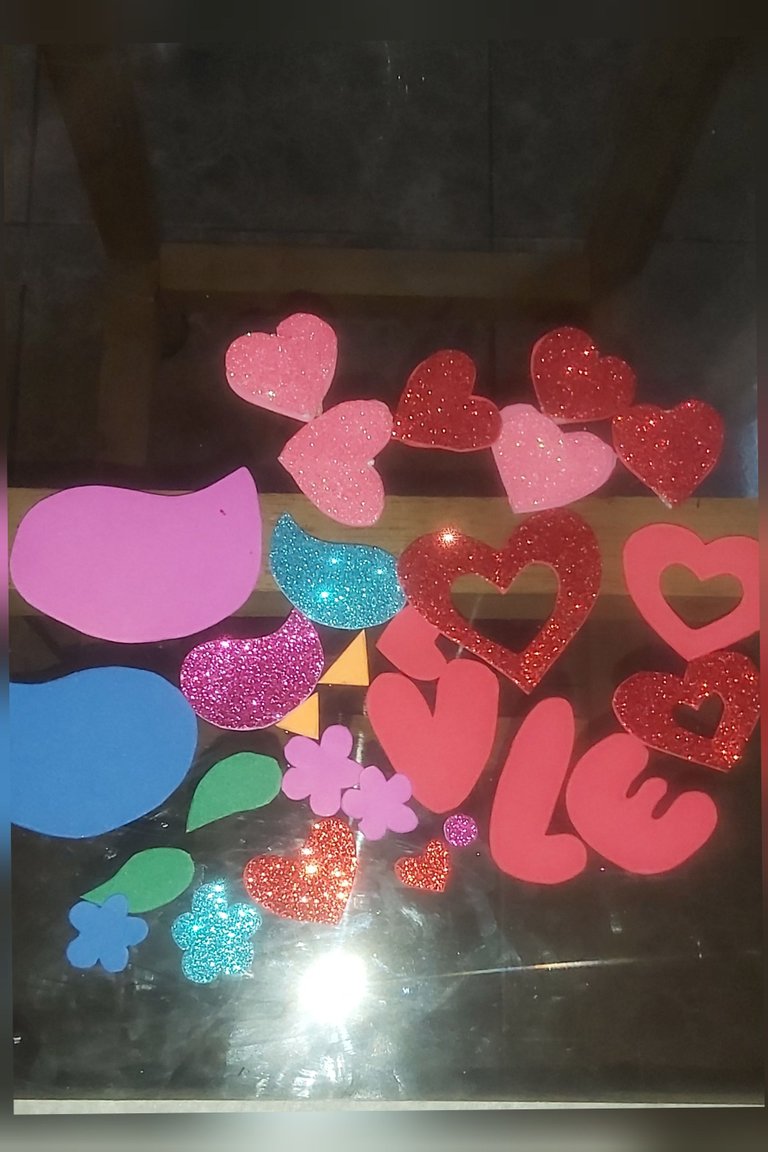
Esta ocasión les voy a mostrar como elaborar un hermoso topper de una pareja de pájaros enamorados, seguimos con detalles especiales para regalar el día del amor y la amistad.
Another day to share my creations with you, I hope you are very well and have a nice and blessed day.
This time I am going to show you how to make a beautiful topper of a couple of birds in love, we continue with special gifts for the day of love and friendship.
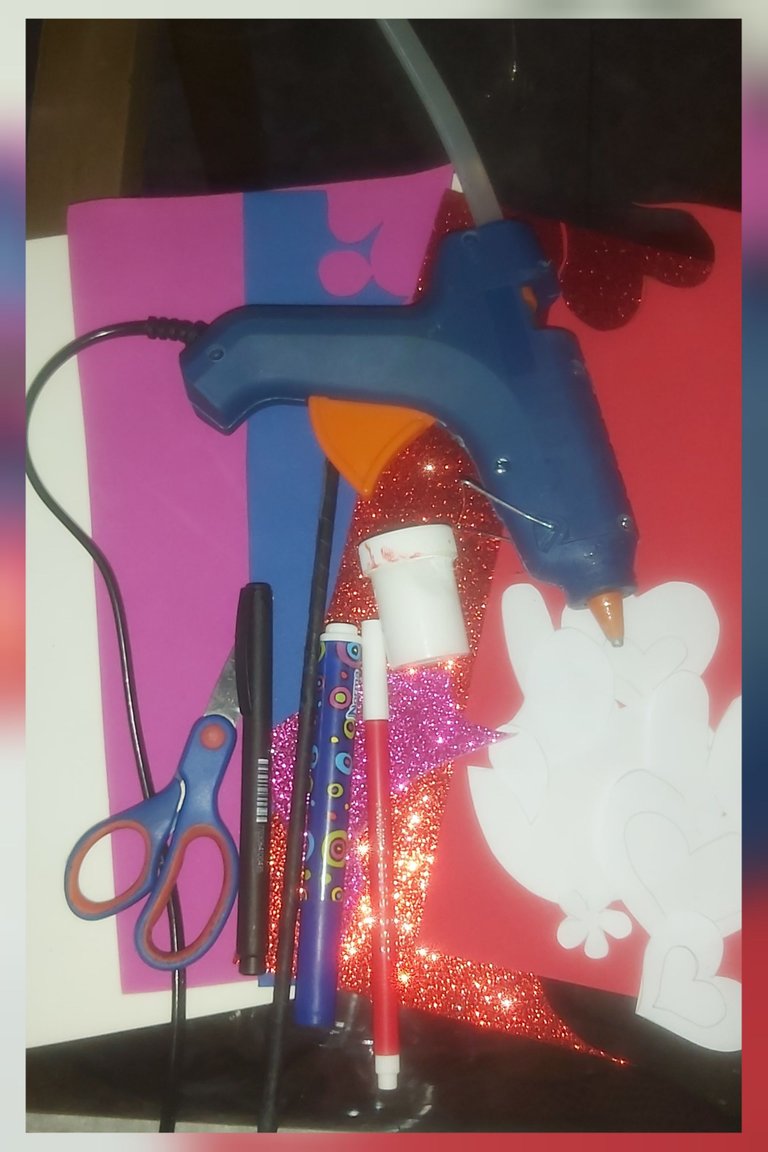
MATERIALES
❤ Foamy de colores
❤ Tujera
❤ Barra de silicón
❤ Pistola de silicón
❤ Lapiz
❤ Moldes
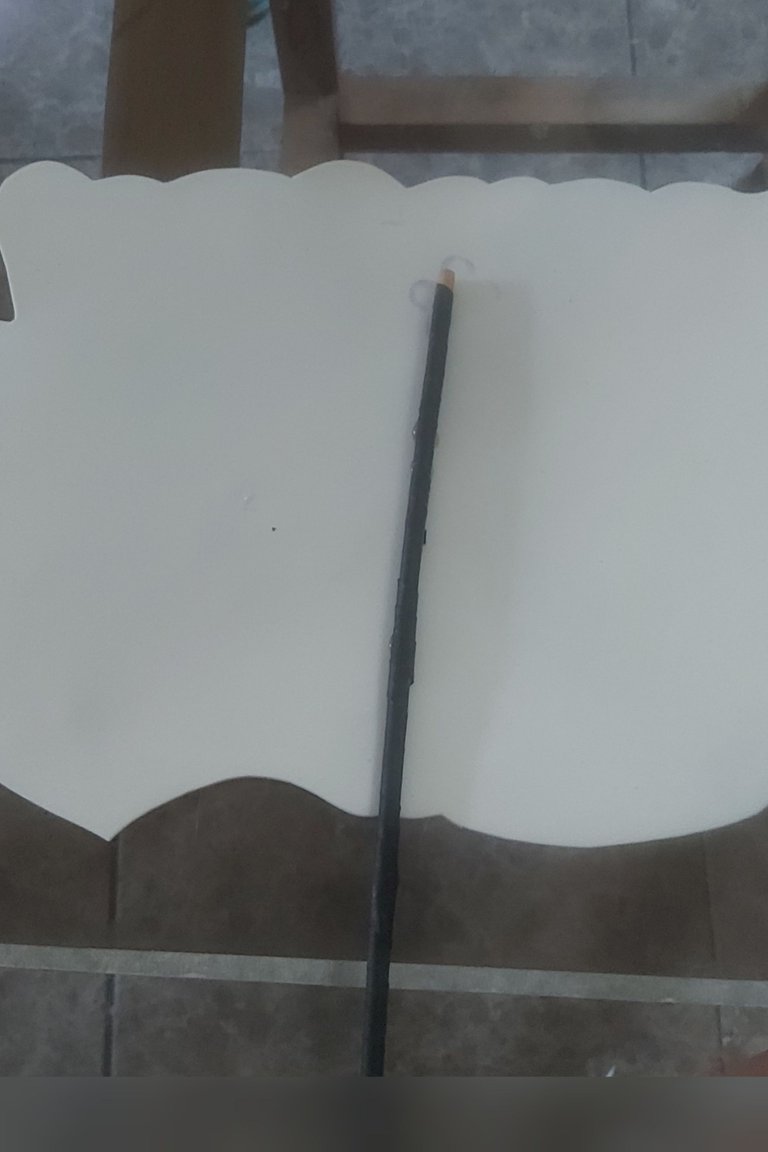
❤ Palillo de altura
MATERIALS
❤ Colored foamy
❤ Scissors
❤ Silicone stick
❤ Silicone gun
❤ Pencil
❤ Molds
❤ Height stick
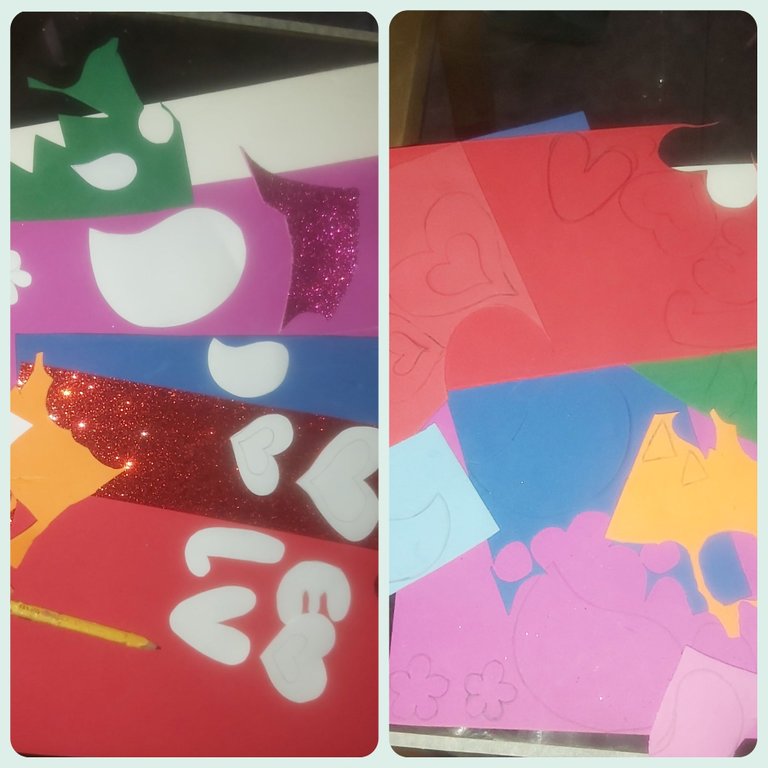
Paso 1
Lo primero que hacemos es colocar los moldes en los foamy de los distintos colores, marcamos y recortamos cada pieza.
Step 1
The first thing we do is to place the molds in the foamy of the different colors, mark and cut out each piece.
Paso 2
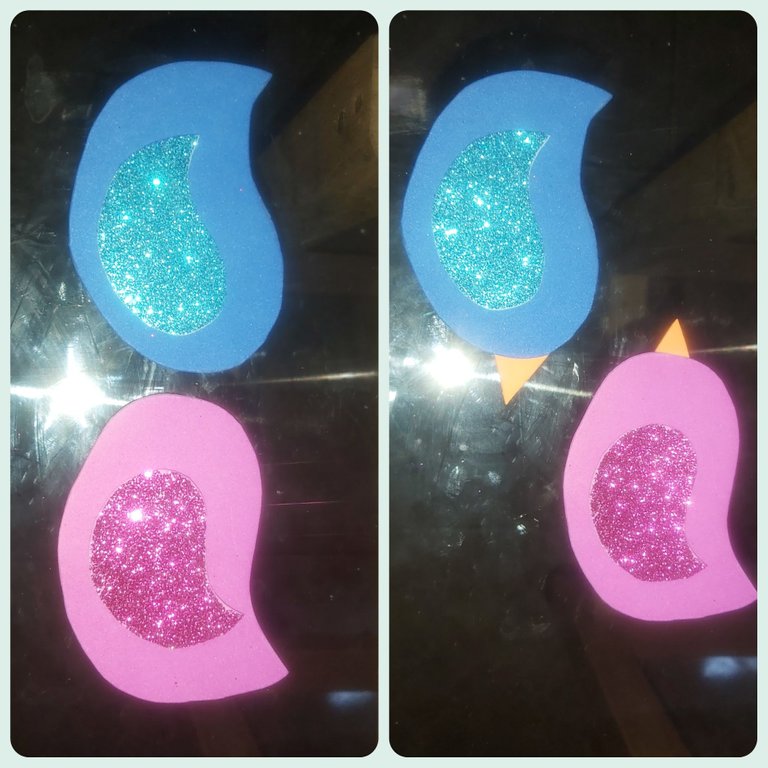
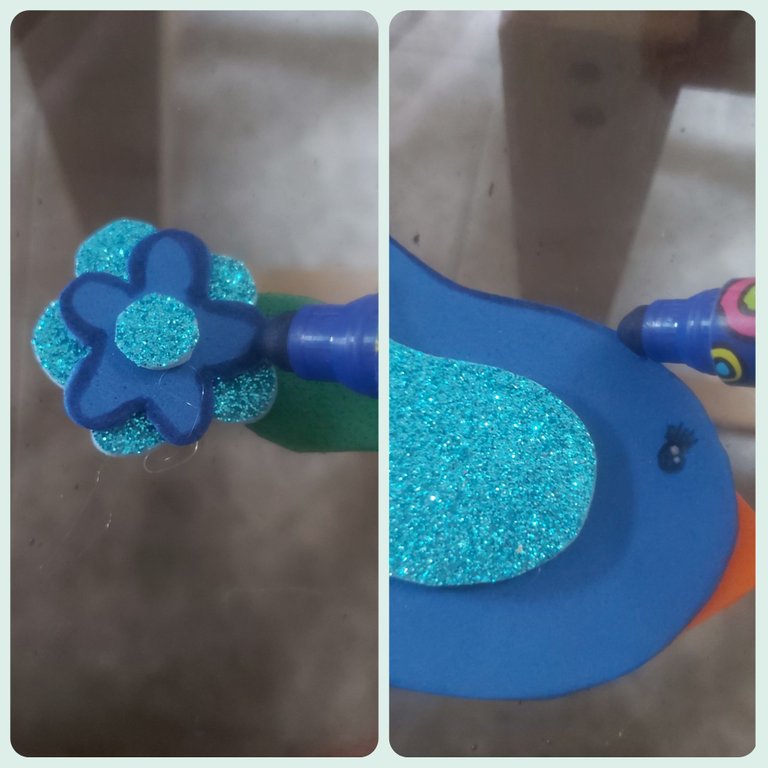
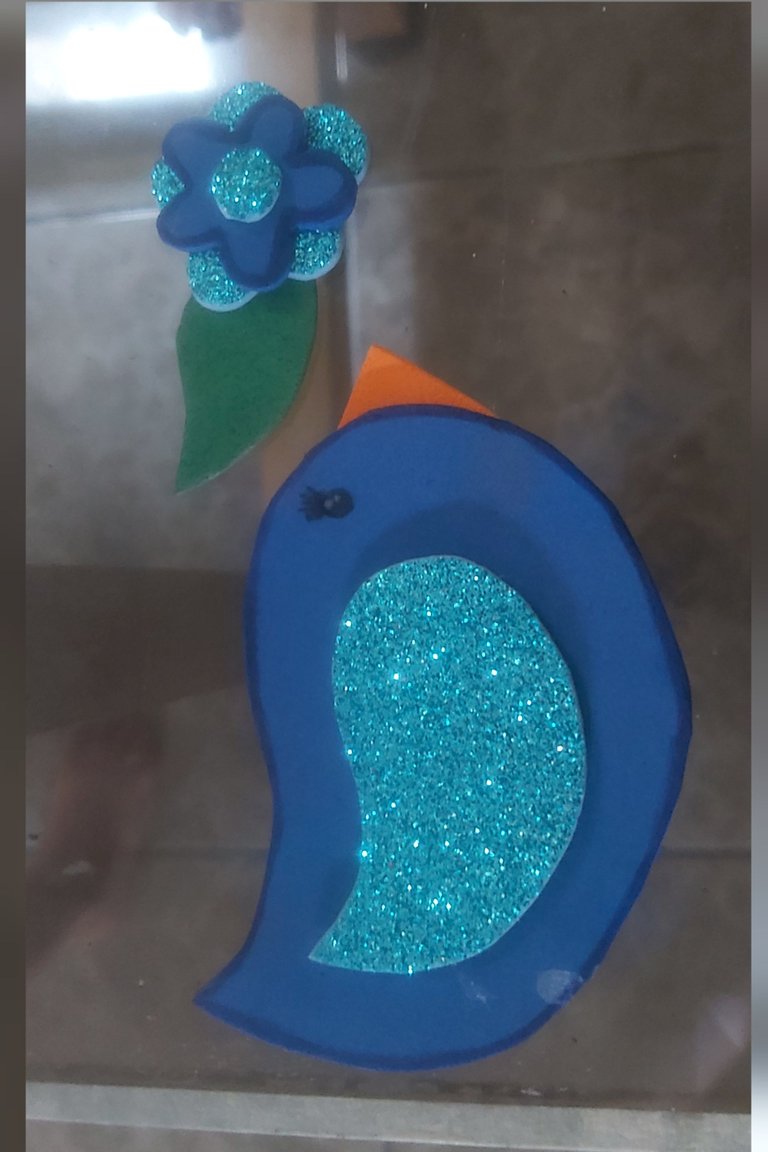
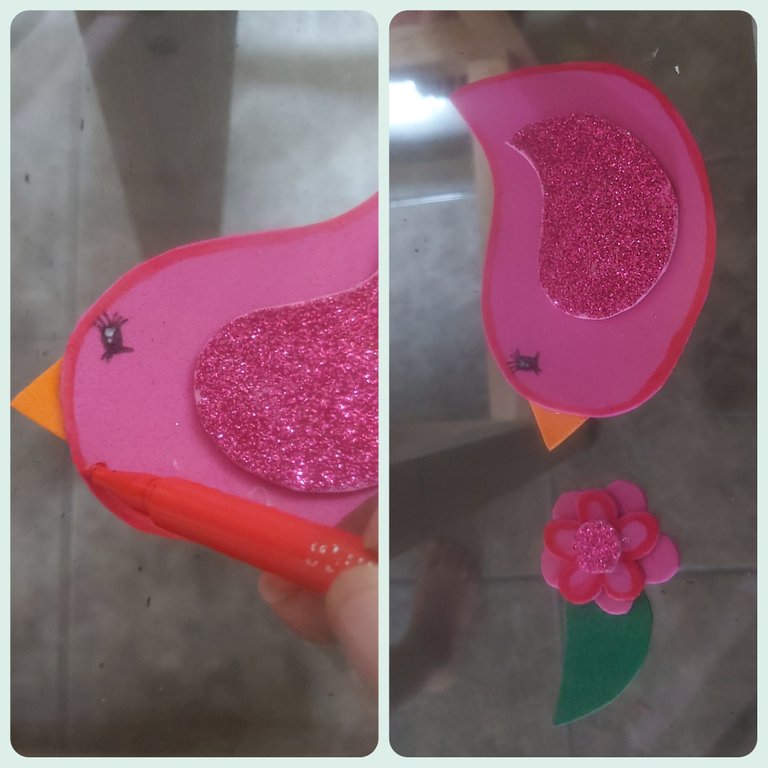
Al terminar de recortar todo comenzamos a armar el topper, pegamos las alas y el picó de los 2 pájaros 🐦
Step 2
When we finish cutting out everything we start to assemble the topper, we glue the wings and the 2 birds 🐦.
Paso 3
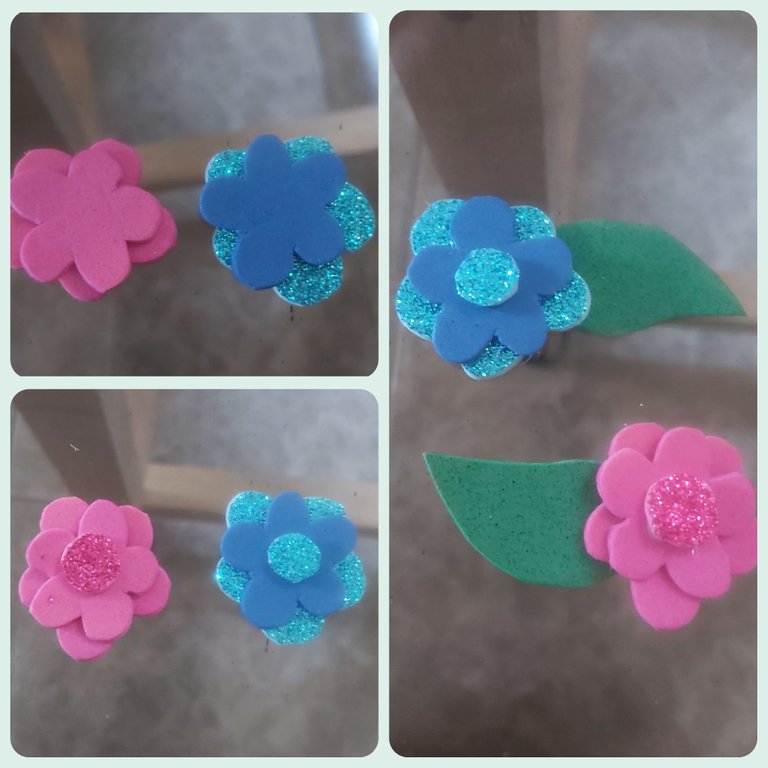
Luego armamos las flores, pegamos la flor más pequeña encima de la grande, arriba le colocamos un círculo pequeño y le gemamos una hoja debajo de la flor.
bStep 3
Then we assemble the flowers, glue the smallest flower on top of the big one, place a small circle on top of it and we stick a leaf underneath the flower.
Paso 4
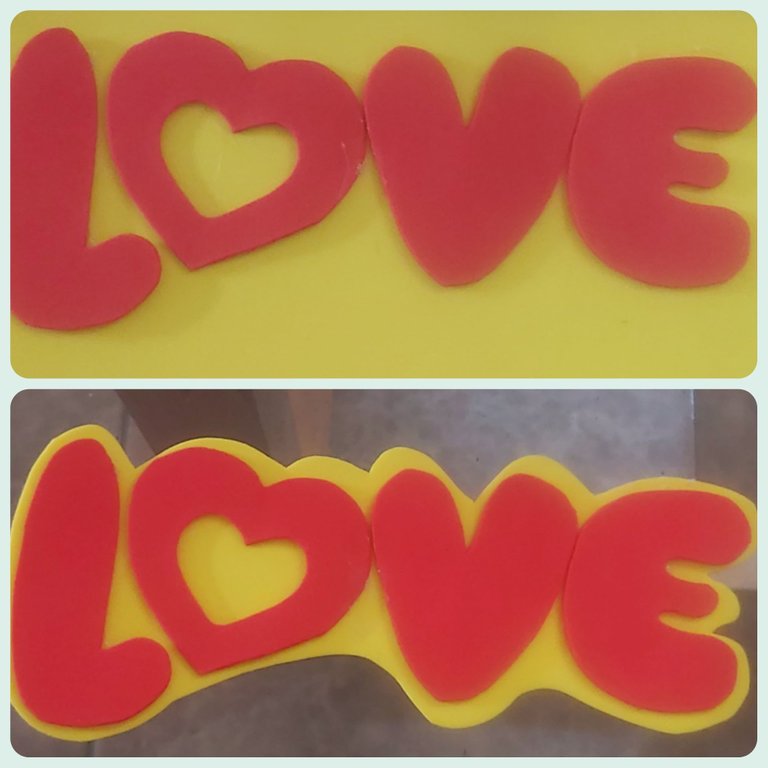
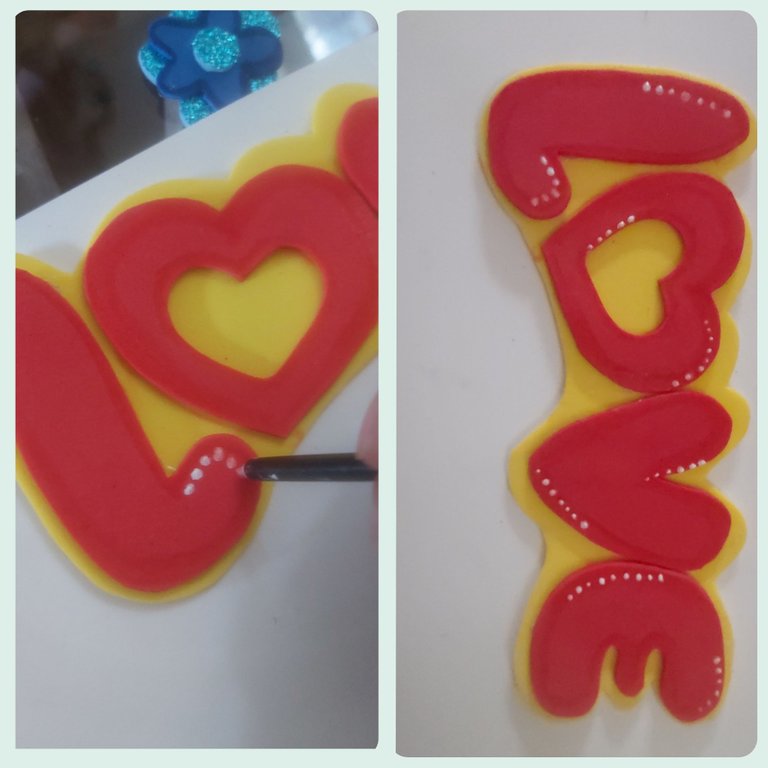
En este paso vamos a armar la palabra LOVE, pegando cada letra encima el foami amarilloby recortamos dejando un borde para que resalte la palabra.
Step 4
In this step we are going to make the word LOVE, gluing each letter on top of the yellow foami and cutting it out, leaving a border to highlight the word.
Paso 5
Con el marcador azul resaltamos por todo el borde una flor y el pájaro azul para darle más vistosidad.
Step 5
With the blue marker we highlight a flower and the blue bird all around the border to make it more colorful.
Paso 6
Luego con el marcador rojo resaltamos todo el borde de la otra flor y el otro pájaro de color rosado.
Step 6
Then with the red marker we highlight all the edge of the other flower and the other pink bird.
Paso 7
Con la pintura blanca hacemos algunos puntos en la palabra LOVE para darle un poco de luz y nos quede más bonita
Step 7
With the white paint we make some dots on the word LOVE to give it a little light and make it more beautiful.
Paso 8
Colocamos todas las piezas ya armadas en el foami blanco darle orden y coordinación a todo, luego lo pegamos al foami y recortamos, para finalizar le colocamos el palillo en la parte trasera y pegamos on silicon.
Step 8
Place all the pieces already assembled in the white foami to give order and coordination to everything, then glue it to the foami and cut, finally we put the toothpick in the back and glue with silicone.
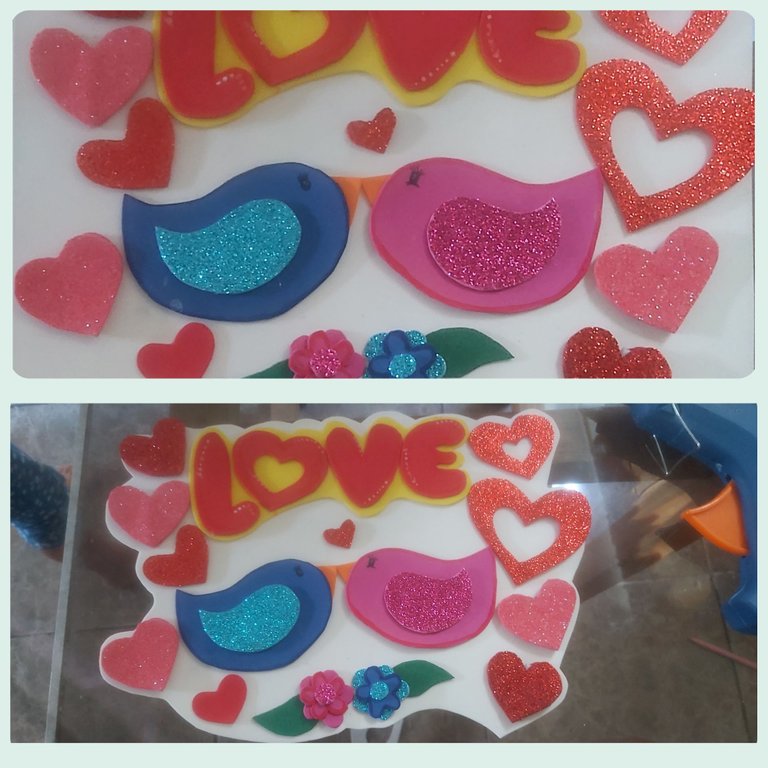
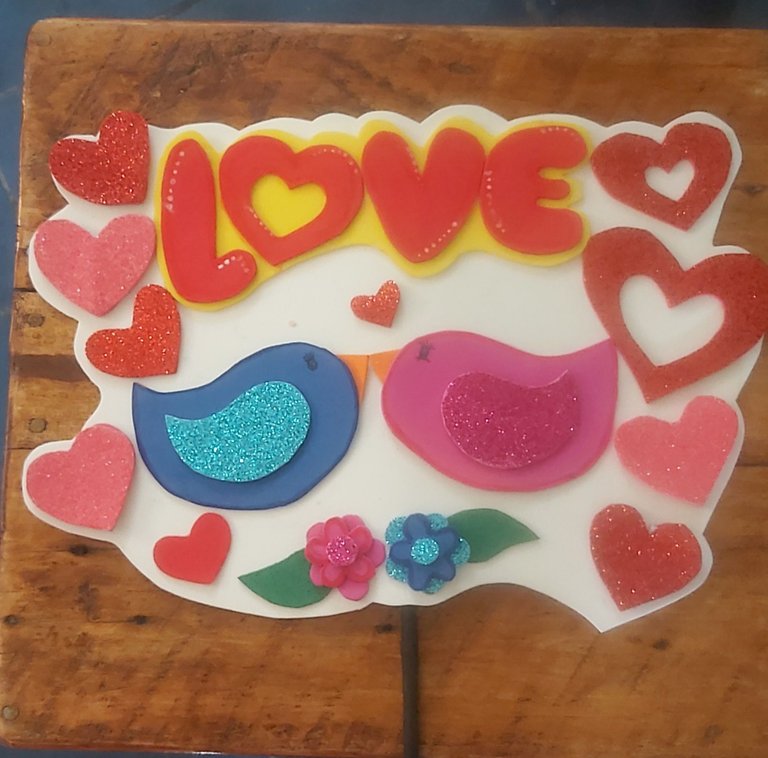
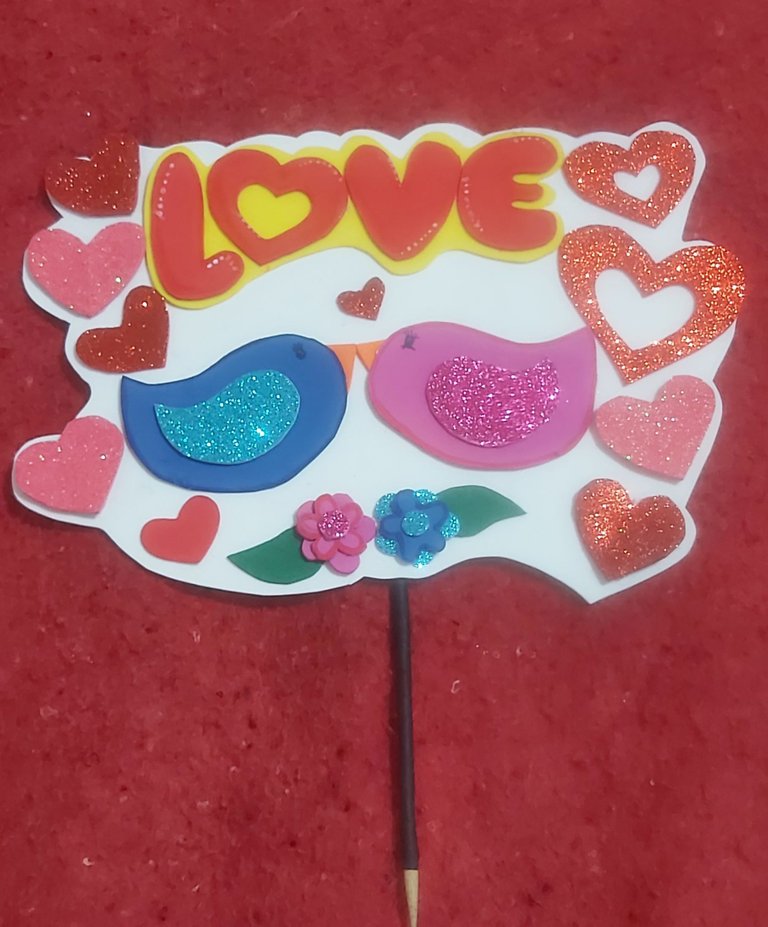
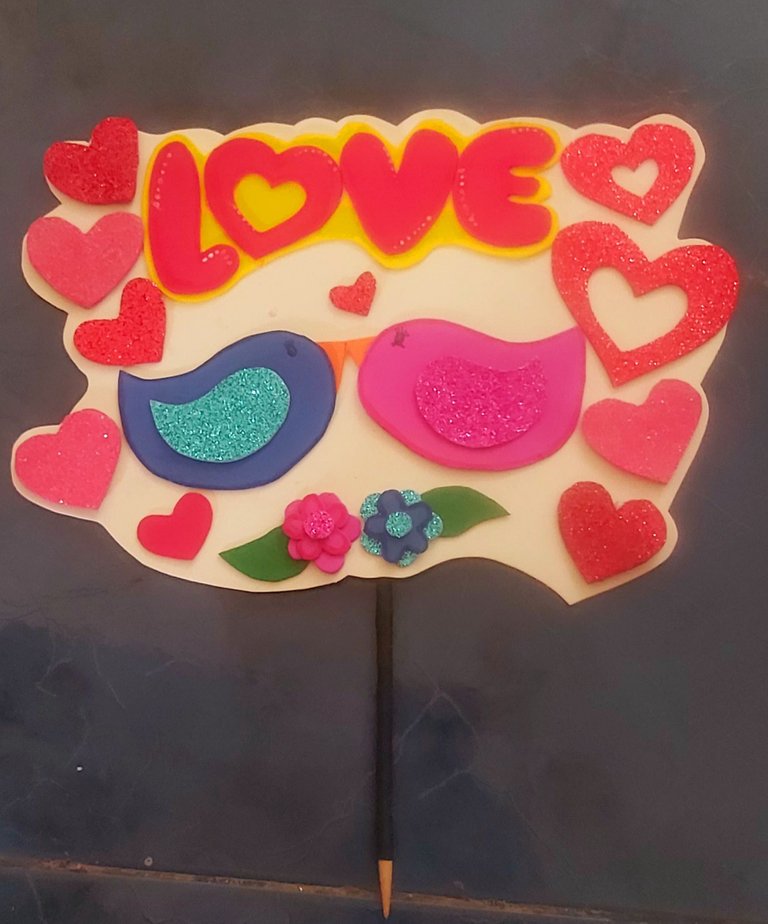
Les muestro el resultado final.
I show you the final result.
Espero les guste y puedan elaborarlo, me despido, que tengan un excelente día en el nombre de Dios, hasta luego.
I hope you like it and can elaborate it, I say goodbye, have a great day in the name of God, see you later.
Muchas gracias por ver mi trabajo
Thank you very much for viewing my work
LAS FOTOS SON DE MI AUTORIA Y EDITADAS EN INCOLLAGE,TRADUCIDOBEN WWW.DEEPL.COM

THE PHOTOS ARE OF MY AUTHORSHIP AND EDITED IN INCOLLAGE, TRANSLATED AT WWW.DEEPL.COM
Hermoso tu trabajo amiga, una sola vez realice un topper para el cumpleaños de mi hijo y me gustó mucho, a pesar de que lo hice en cartón y papel quedó muy bonito. pero quiero hacer uno realmente con foami a ver qué tal queda.
Gracias amiga @johordelis
No es tan difícil trabajar con foamy solo hay que tener pasiencia y cuidado a la hora de cortar para que no quede con filos en los bordes, espero lo puedas hacer y compartir.
Congratulations @rodnellys31! You have completed the following achievement on the Hive blockchain and have been rewarded with new badge(s):
Your next target is to reach 4500 upvotes.
Your next target is to reach 200 comments.
You can view your badges on your board and compare yourself to others in the Ranking
If you no longer want to receive notifications, reply to this comment with the word
STOPTo support your work, I also upvoted your post!
Check out the last post from @hivebuzz:
Support the HiveBuzz project. Vote for our proposal!
Hola Bendiciones para ti y tu poder creativo, está maravilloso este topper, espectacular la distribución cromática en un diseño alegre y muy creativo Felicidades, visitar tu blog siempre será interesante.
Hola Rodnellys31, he venido obserbando tu tabajo y cada día me sorprendes con tu avance en la creatividad y dedicación que le pones a tus obras, Felicidades en el mes del Amor y la Amistad
Gracias por leer mi contenido @rodroj61 eso espero seguir avanzando y creciendo en esta plataforma.