Helloooo, helloooo! How are you? I hope you all are very well and I wish you a very happy day, may it be blessed for all. Me around here again is this amazing place, making more recent my visit, but how to avoid it if it is very comfortable to be here, in this corner of creativity and ingenuity so incredible, I hope I can continue to share with you a little of what I do and you are encouraged to do so.
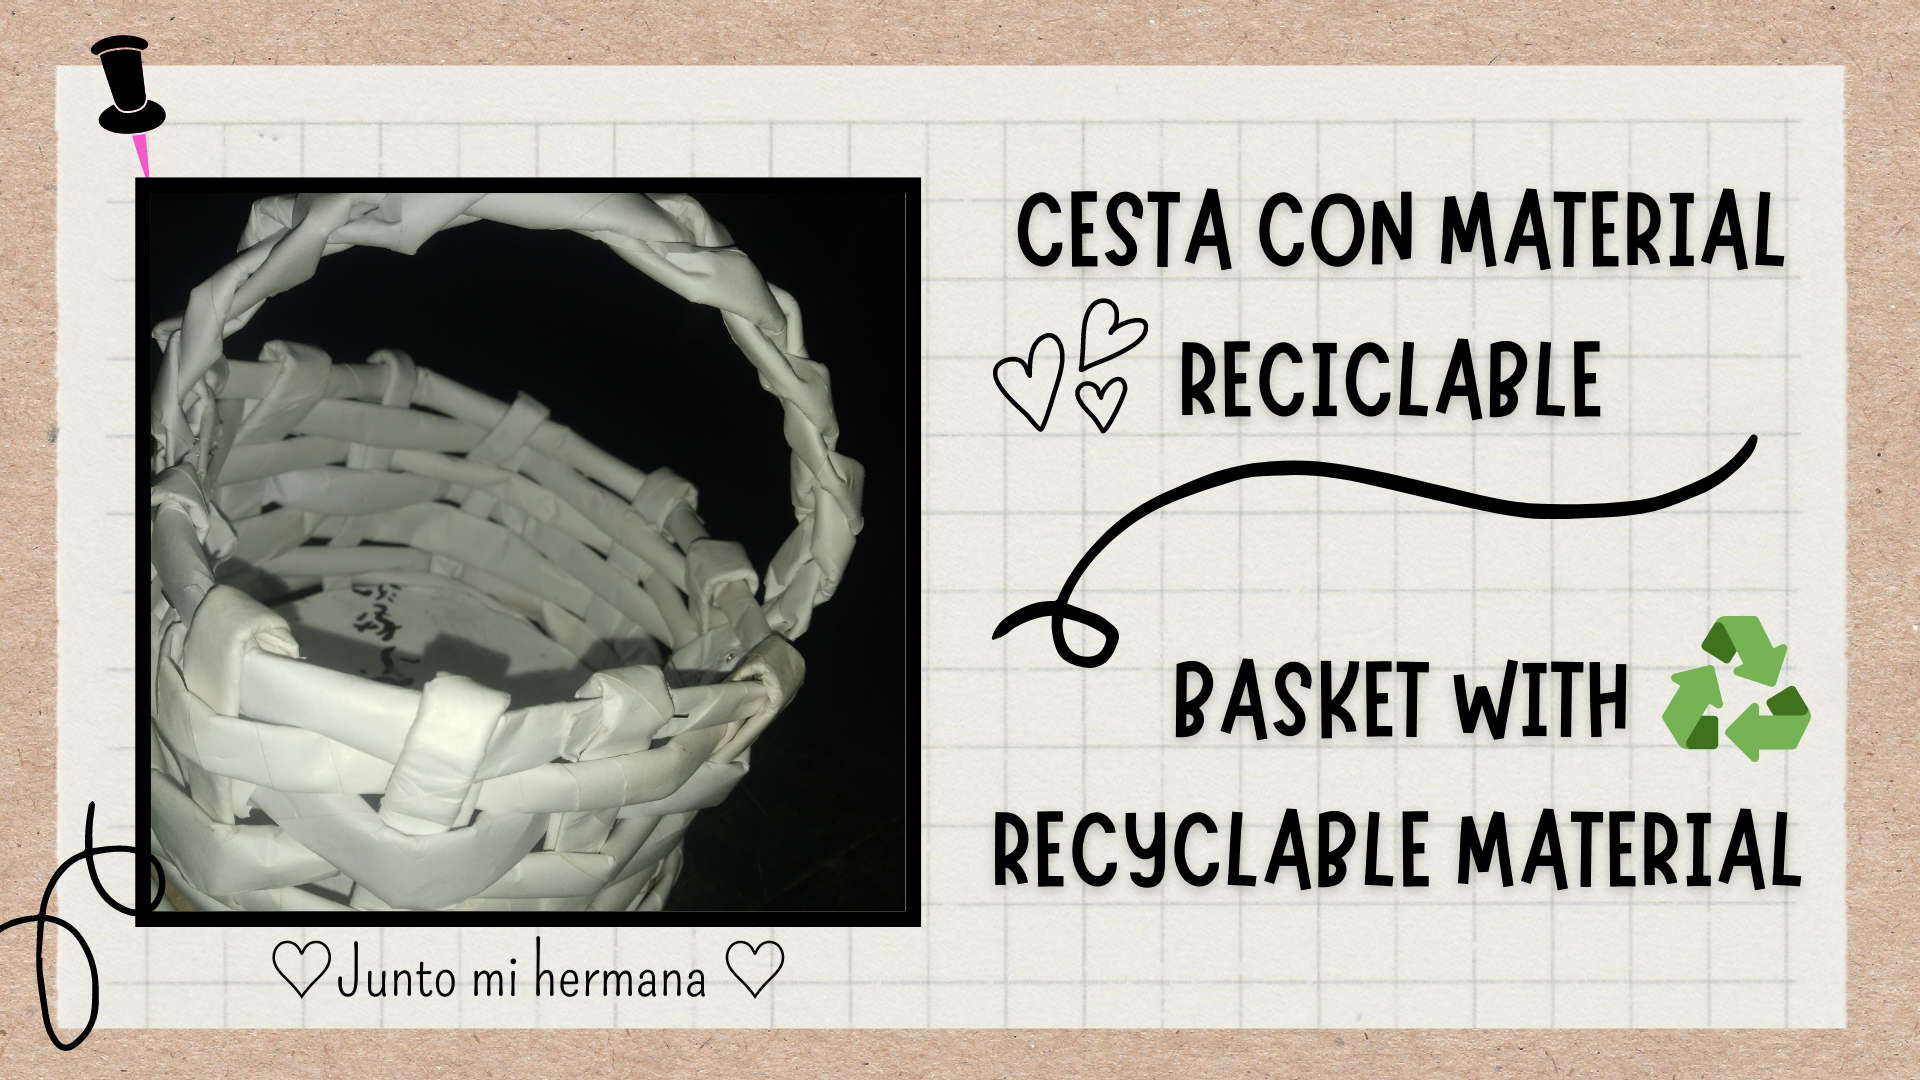
This time I want to show you how I made with my sister again something very nice and useful in a series of simple steps, a basket, it is very useful to store a few things, this one was due a day later, so I got down to work with her, to finish faster, since teamwork makes this type of process even easier. She was asked to make it with recycled paper, but it also looks great with newspaper.
A continuación los materiales que emplee:
The following are the materials used:
- Cartón
- hojas de reciclaje/papel periódico
- Silicón
- Pintura (opcional)
- Palito de altura
- Cardboard
- Recycling sheets/newsprint
- Silicone
- Paint (optional)
- Height stick
Ahora el paso a paso:
Now the step by step:
Paso 1:
Step 1:
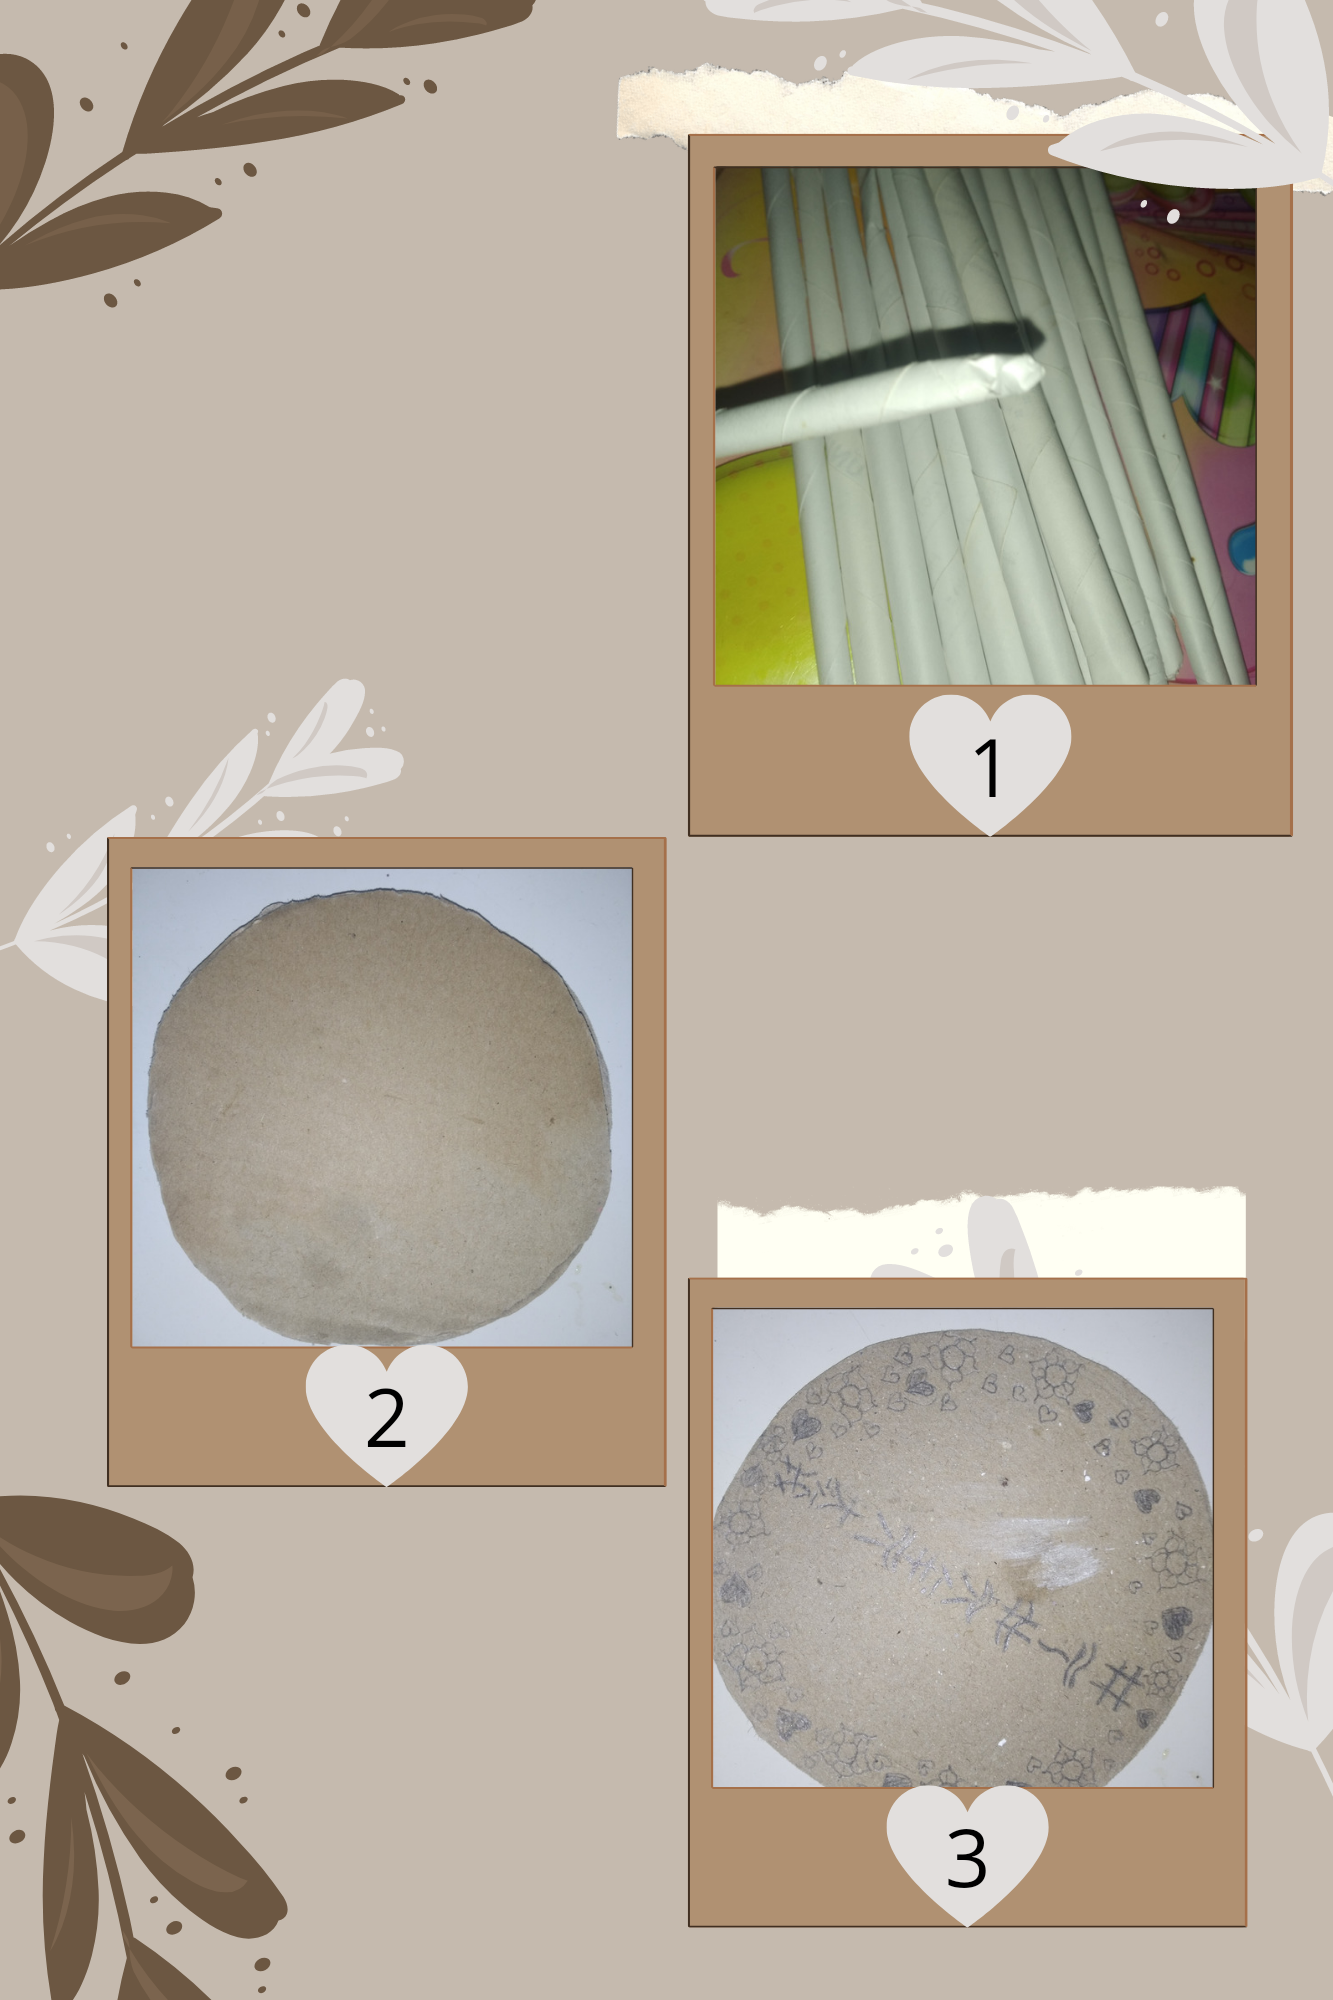
Cómo primer paso vamos a tomar una hoja (o papel periódico) y desde una de nuestras esquinas vamos a ir enrollando la hoja con nuestros palito de altura, sacándolo poco a poco para que no se atore, de esta manera hasta llegar al final, dónde le agregaremos una pequeña gota de pega y así sucesivamente haremos con las hojas, hasta tener aproximadamente 18 palitos de papel (depende del tamaño que elijas). Luego recortaremos dos círculos de cartón (una grueso y el otro fino) del tamaño que queremos la cesta, yo los recorte un poco pequeños.
As a first step we are going to take a sheet (or newspaper) and from one of our corners we are going to roll the sheet with our high stick, taking it out little by little so it does not get stuck, in this way until we reach the end, where we will add a small drop of glue and so on we will do with the sheets, until we have approximately 18 sticks of paper (depending on the size you choose). Then we will cut out two cardboard circles (one thick and the other thin) of the size we want the basket, I cut them a little small.
Paso 2:
Step 2:
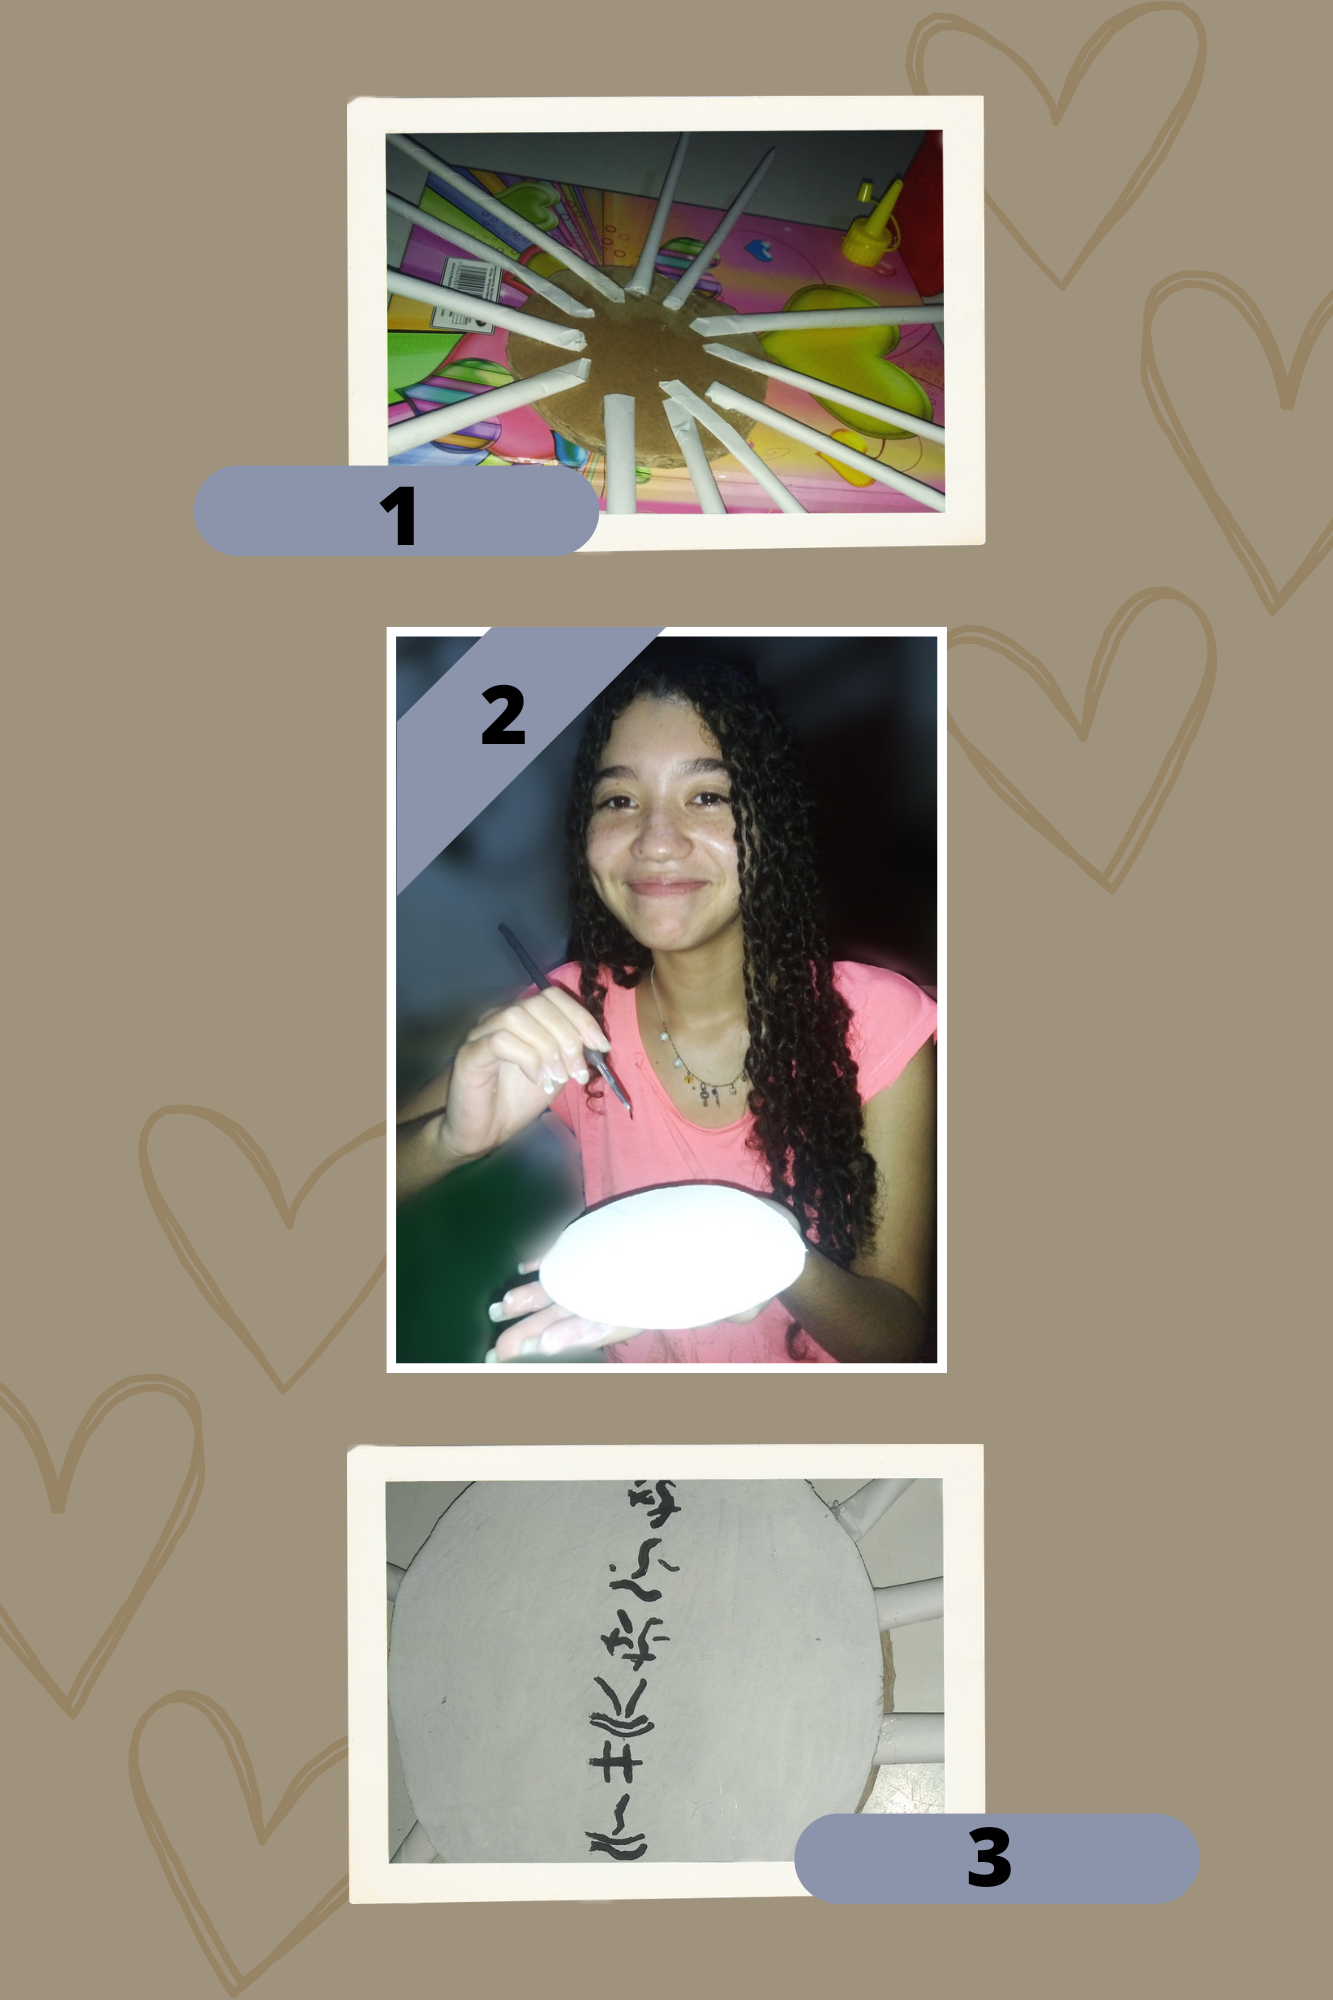
Ya al tener nuestros palitos hechos, vamos a recortar 5 palitos por la mitad y estos los vamos a pegar (con pega o Silicón) en la base del círculo de cartón más grueso y resistente, con un dedo de distancia más o menos, dejando secar y aplastando con algo de peso. Mientras pintamos con pintura al frío, la parte de cartón finito que va a ir por arriba del grueso, nosotros elegimos el color blanco y con una esponja la pinto mi hermana, también le agregó con el color de pintura negro un detalle de letras en japonés (letras al azar). En las imágenes pueden apreciar a Yexi (mi hermana) pintando está, le dió pena la foto estaba muerta de risa JSJAJA.
Once we have our sticks made, we will cut 5 sticks in half and we will glue them (with glue or Silicone) at the base of the thickest and most resistant cardboard circle, with a finger of distance more or less, letting it dry and crushing it with some weight. While we paint with cold paint, the part of thin cardboard that will go above the thicker one, we chose the white color and my sister painted it with a sponge, she also added with black paint a detail of letters in Japanese (random letters). In the pictures you can see Yexi (my sister) painting this one, she felt sorry for the picture, she was dead laughing JSJAJA.
Paso 3:
Step 3:
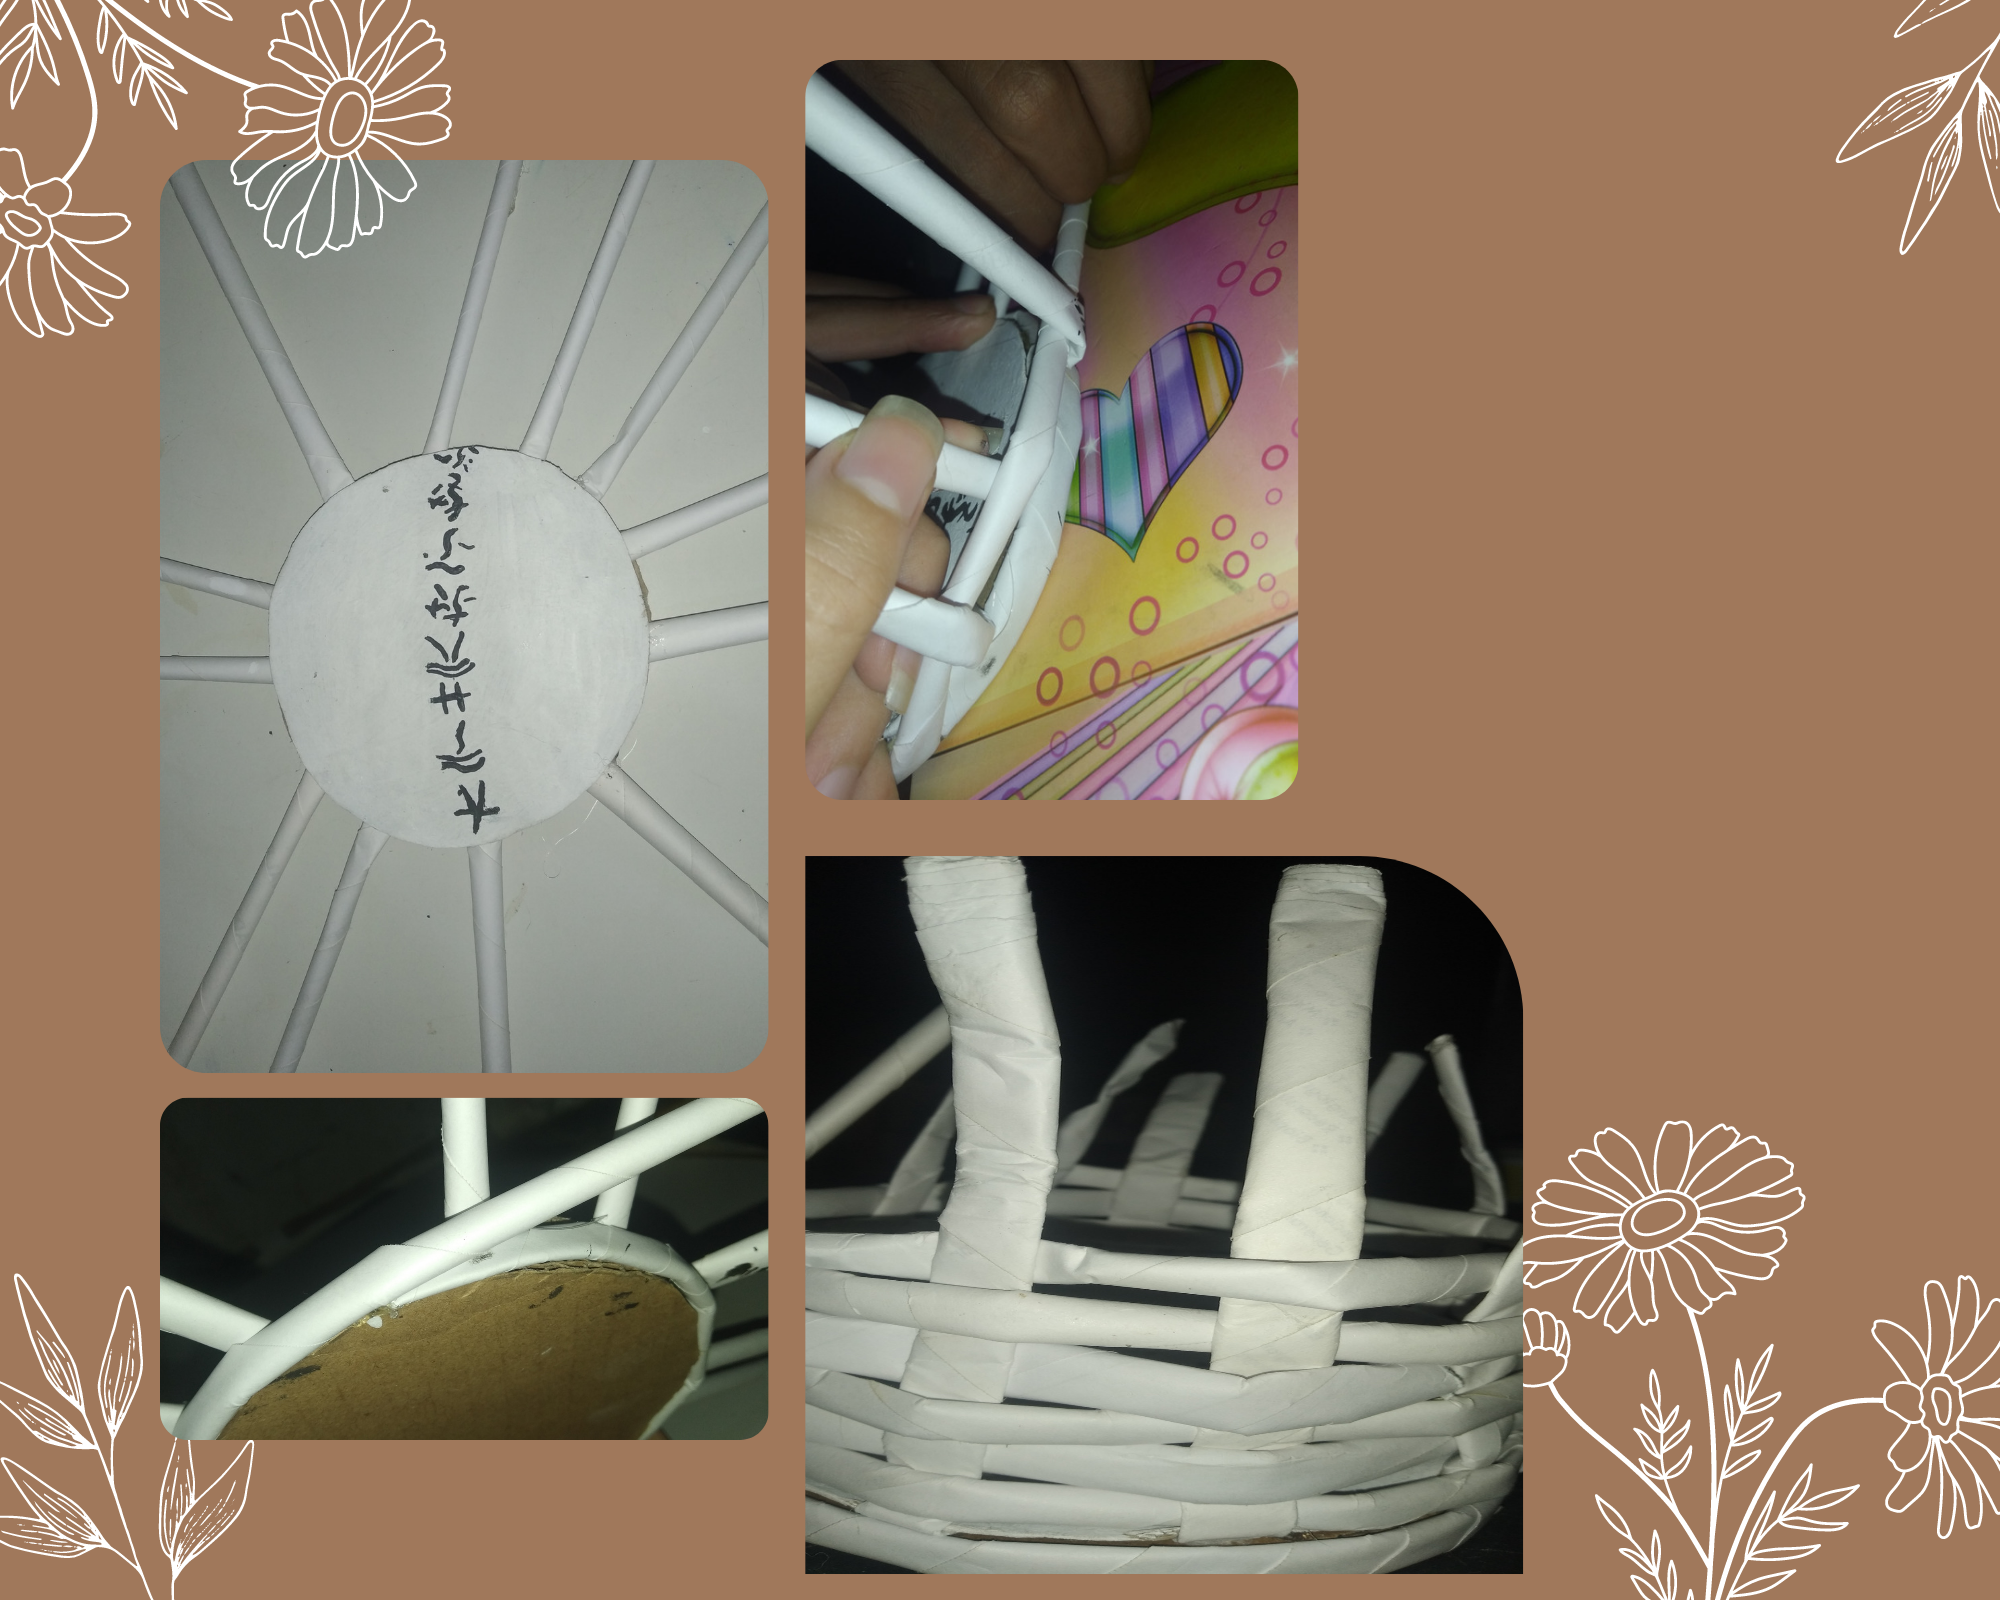
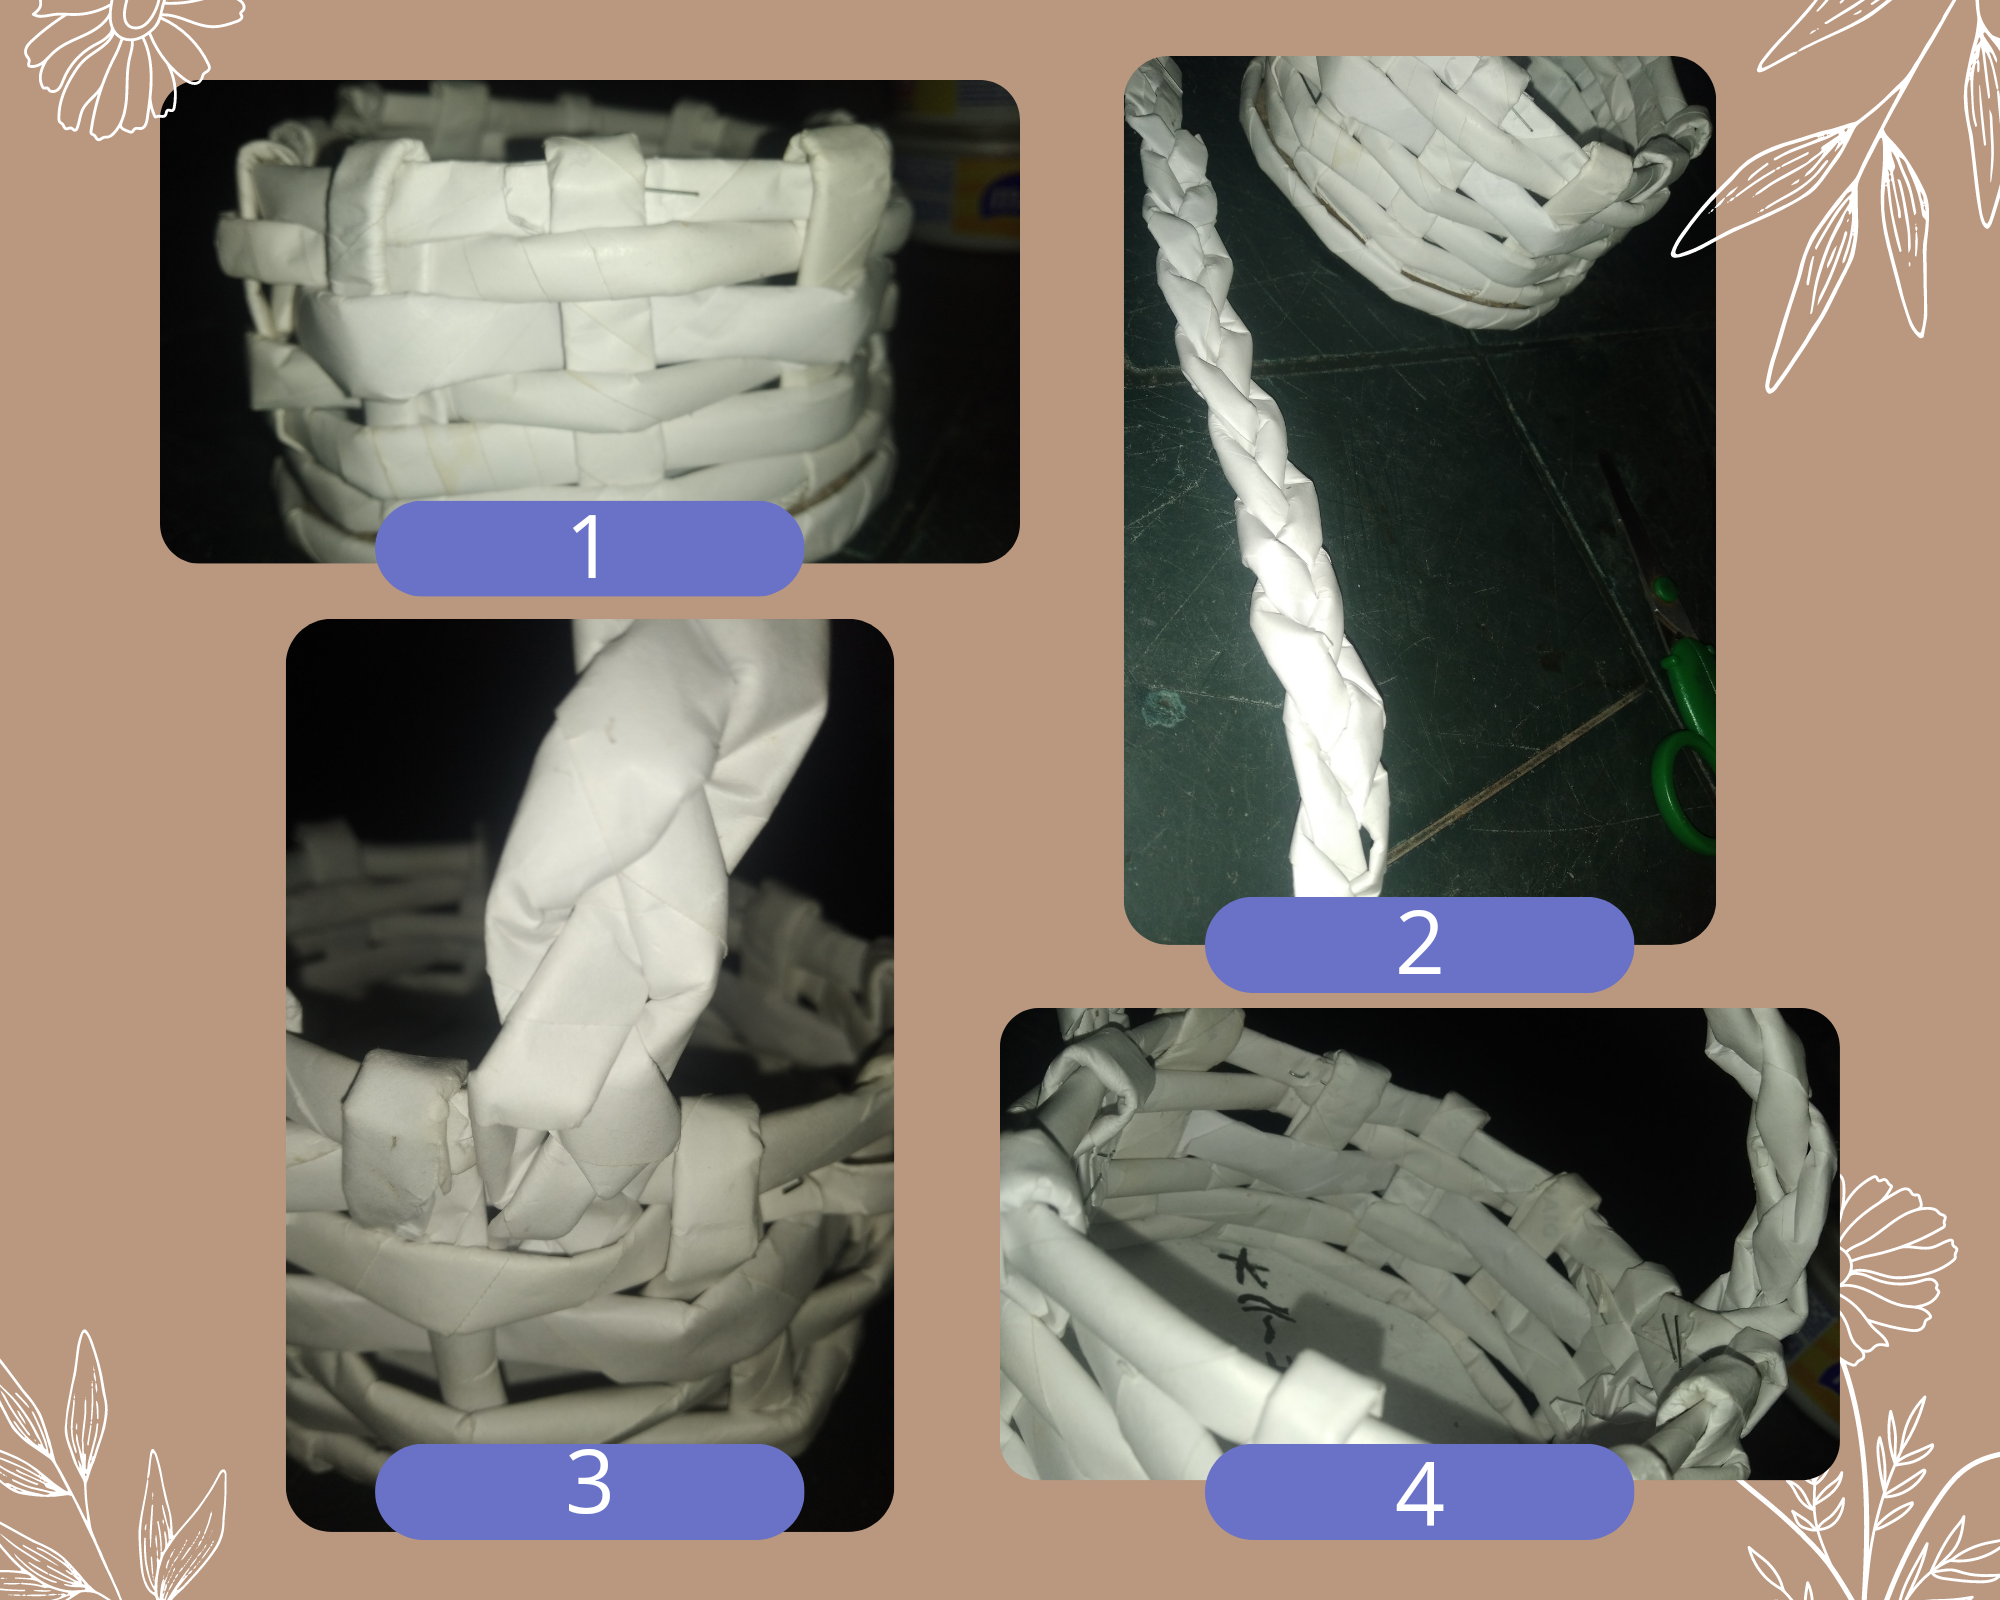
Cuando la parte de arriba este seca, procedemos a pegarla (con silicón de preferencia) encima de los tubitos que organizamos, luego precionamos para que se pegue mejor. Después tomamos una de las tiras (que hayamos dejado largas) y la pasamos por el borde del círculo inferior, así mismo le agregaremos otro tubo, solo metiendo uno dentro de otro (lo suficiente) y comenzamos a tejer, es algo muy sencillo, simplemente es pasar el tubo largo, por delante y por detrás, solo un intercalando uno por encima, otro por debajo y así sucesivamente hasta llegar al tamaño deseado.
When the top part is dry, we proceed to glue it (preferably with silicone) on top of the tubes that we organized, then we press it to make it stick better. Then we take one of the strips (that we have left long) and pass it through the edge of the lower circle, in the same way we will add another tube, just putting one inside the other (enough) and begin to weave, it is very simple, just pass the long tube, in front and behind, just an intercalating one above, one below and so on until you reach the desired size.
Paso 4:
Step 4:
Con los excedentes de largo de lo tubos de papel, solo queda recortarlos lo suficiente y luego meterlos según corresponda, ya sea por fuera o por dentro, por se encuentra una por detrás y otro, por delante. Ahora quedaría con tres tubos de papel hacer un tranza sencilla, ya que está será por dónde se sostenga. Está así se pega a ambos lados muy bien y eso sería todo, también la pueden pintar de cualquier color si gustan, cómo está se veía blanca decidimos dejarla así.
With the excess length of the paper tubes, it only remains to cut them enough and then insert them accordingly, either on the outside or inside, one on the back and the other on the front. Now it would be with three paper tubes to make a simple braid, since this will be where it will be held. This way it sticks to both sides very well and that would be all, you can also paint it in any color if you like, as it looked white we decided to leave it like this.

Espero haya sido de su agrado, está cesta nos puede servir para guardar muchas cosas, es muy útil para organizarnos, encantada de poder compartirles el proceso que realice junto a mi hermana, no quedo tan perfecta, pero nada mejor que algo hecho por nuestra propia mano, a nosotras nos encantó como quedó, disfrutamos el proceso, la verdad.
I hope you liked it, this basket can be used to store many things, it is very useful to get organized, I am happy to share with you the process I did with my sister, it was not so perfect, but nothing better than something made by our own hand, we loved how it turned out, we enjoyed the process, the truth.
¡¡Gracias por leer mis corazones!!
Thanks for reading my hearts!!!
Precioso trabajo! Me ha fascinado! Además que parece difícil, pero no lo es! Felicidades!
Que bueno saberlo, te agradezco tu lindo comentario, así mismo, es más fácil de lo que parece, graciasss, saludos.💗✨
Graciasss, y me tienta, lo más probable es que descargue la app luego, saludos.💗
Congratulations @stefania16! You have completed the following achievement on the Hive blockchain and have been rewarded with new badge(s):
Your next target is to reach 1750 upvotes.
You can view your badges on your board and compare yourself to others in the Ranking
If you no longer want to receive notifications, reply to this comment with the word
STOPCheck out the last post from @hivebuzz:
Support the HiveBuzz project. Vote for our proposal!