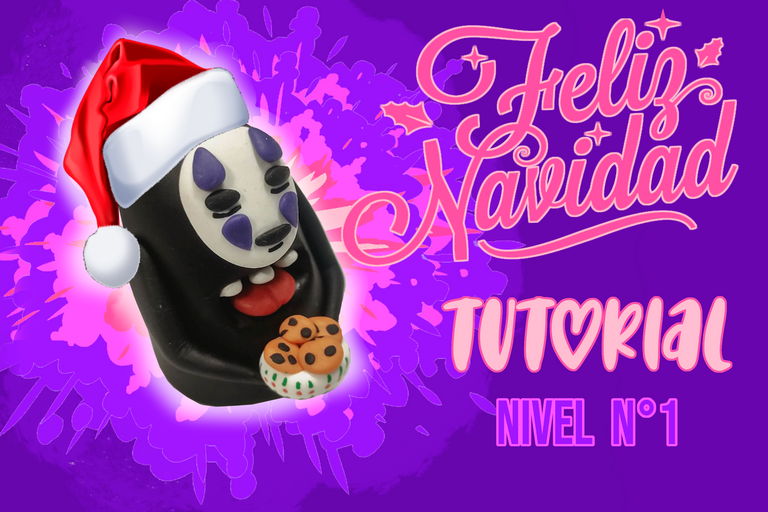
Español
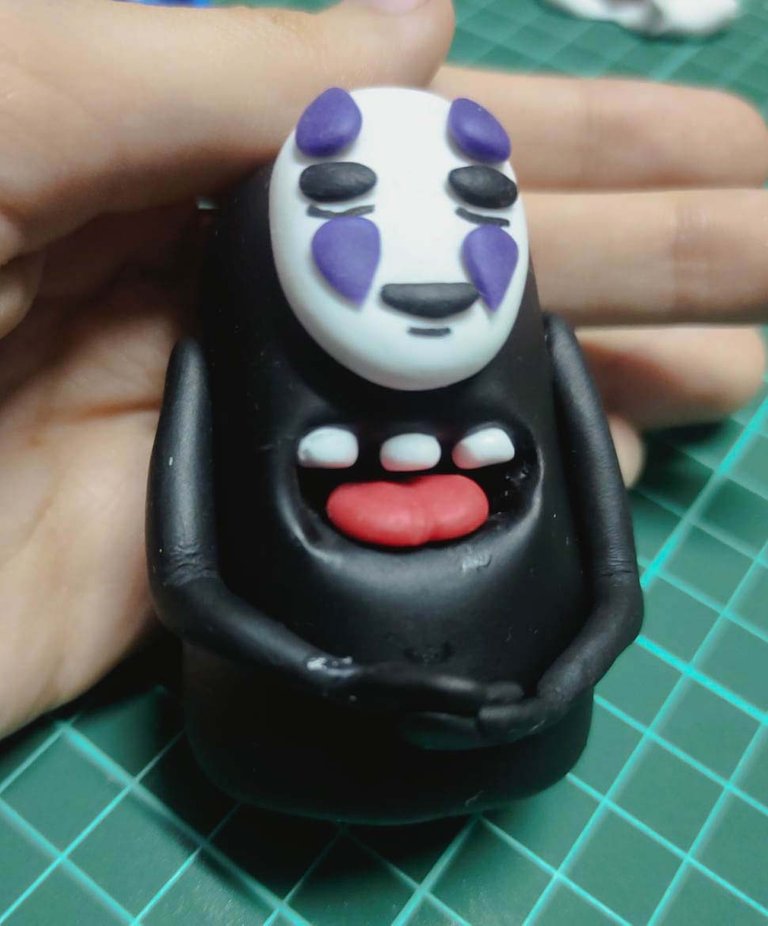
En la clase de hoy aprenderemos a hacer una pequeña figura para navidad! En este caso me inspire en el viaje de Chihiro!
English
In today's class we will learn how to make a small figure for Christmas! In this case I was inspired by Spirit Away

Para comenzar en esta aventura debemos tener unas poderosas herramientas primero ...
To start on this adventure we must have some powerful tools first ...
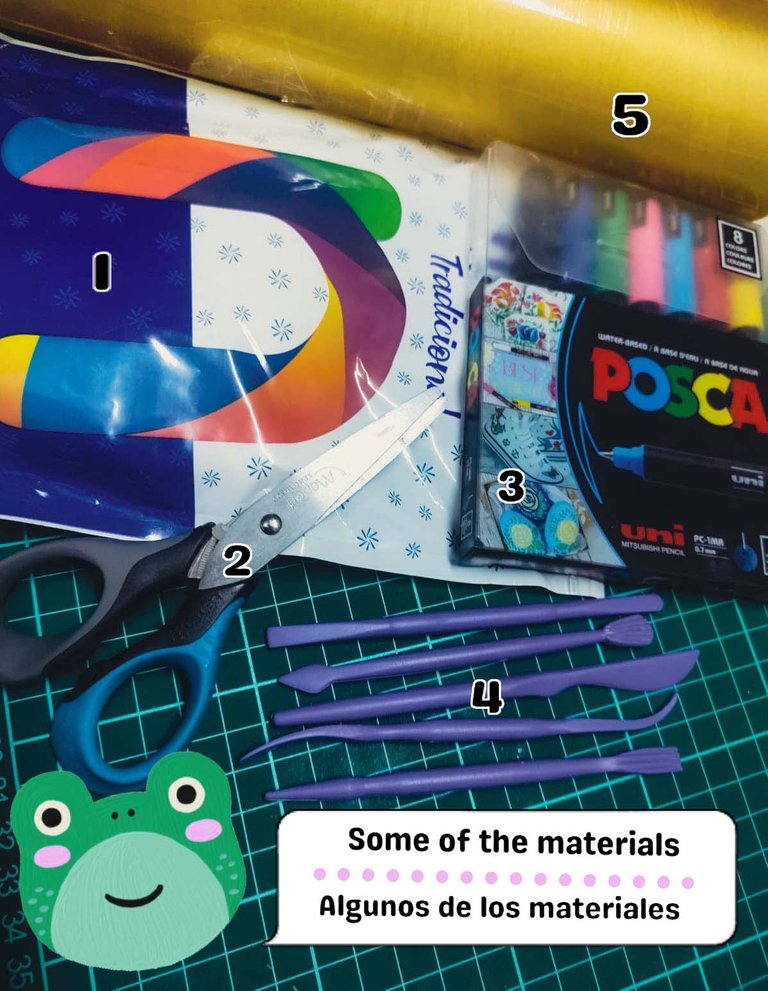
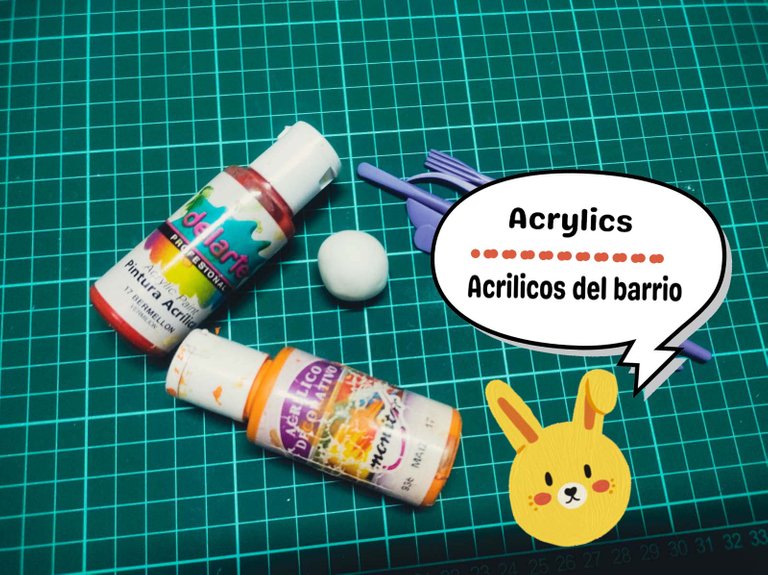
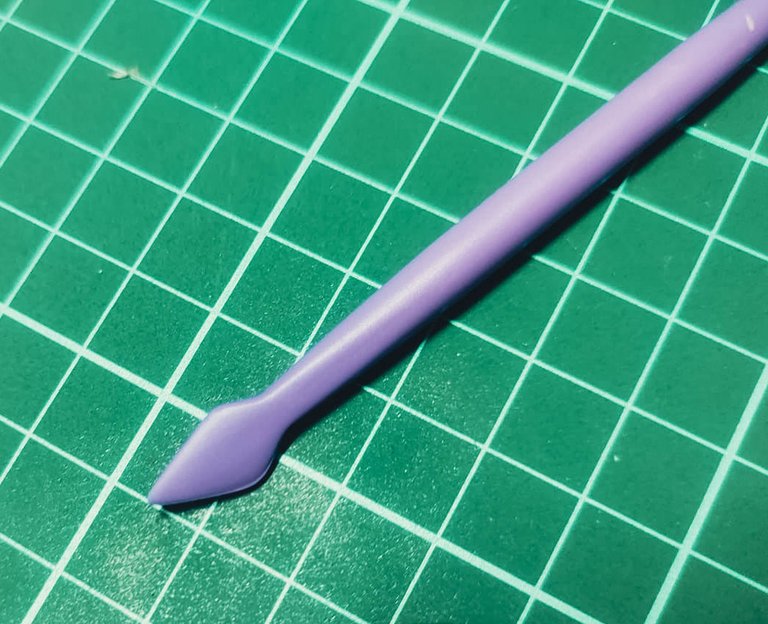
¡Y estas son nuestras herramientas mágicas!
( Las que tienen una barra / es por que pueden ser cambiadas por esas otras opciones)
| Español - Materiales |
|---|
| 1- Porcelana fría / Arcilla polimérica / Foamy |
| 2- Tijeras / Cutter |
| 3- Posca / Fibron indeleble / Microfibra |
| 4- Herramientas para porcelana fría |
| 5- Film plástico/ Papel film / Alusa |
| 6- Plasticola / Pegamento |
| 7- Acrilicos (OPCIONAL) |
La marca de porcelana que estoy utilizando es "Nicron"
And these are our magic tools!
(The ones with a slash / are because they can be exchanged for these other options)
| English - Materials |
|---|
| 1- Cold porcelain / Foamy / Polymer clay |
| 2- Scissors / Cutter |
| 3- Posca/ Indelible fibers / Microfiber |
| 4- Tools for clay or polymeric clay |
| 5- Film plástico/ Papel film / Alusa |
| 6- Glue |
| 7- Acrylics (OPTIONAL) |
The brand of porcelain I am using is "Nicron"
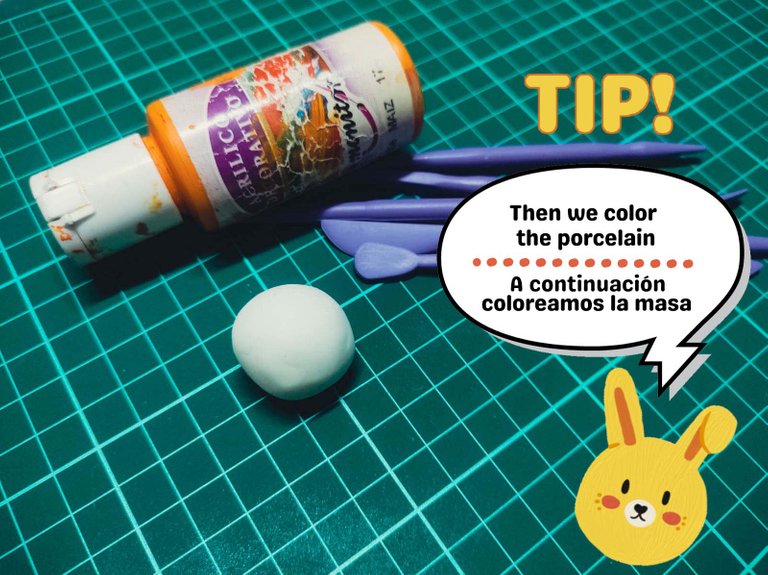
                        Primera lección  - Coloreando masa (OPCIONAL)
                              First lesson - Coloring dough (OPTIONAL)
Okey ! Una vez que tengamos todos los materiales listos necesitaremos una zona limpia donde empezar a trabajar.
Este paso es un poco opcional ya que si tenemos foamy o arcilla polimérica de colores no necesitaremos hacer lo siguiente.
Okey ! Once we have all the materials ready we will need a clean area to start working.
This step is a bit optional because if we have foamy or colored polymer clay we will not need to do the following.
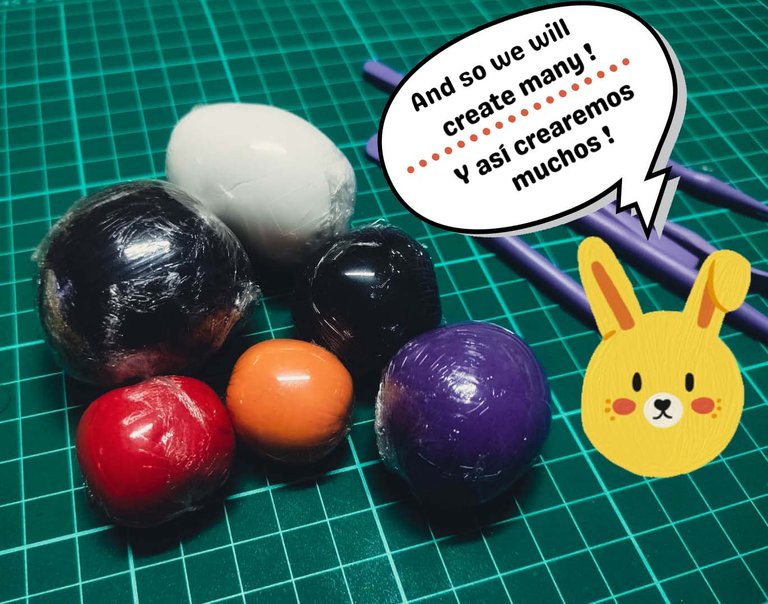
Para teñirla utilizaremos acrílicos también pueden utilizar colorantes vegetales o pigmentos, pero lo mas económico que encontré fueron estos acrílicos en la tienda de mi barrio.
To dye it we will use acrylics, you can also use vegetable dyes or pigments, but the cheapest I found were these acrylics in my local store.
TIP ! - En mi caso, la porcelana que voy a utilizar tiene un color "blanco de base" que en realidad es transparente ya que si se seca no queda de color blanco. Es por eso que deben teñir hasta el color blanco. También por ultimo para conservar esta masa de colores recortaremos un pedazo de papel film y lo envolveremos super bien!
TIP ! - In my case, the porcelain I am going to use has a "base white" color that is actually transparent because if it dries it does not remain white. That is why you must dye it to white. Finally, to preserve this colorful dough, we will cut a piece of plastic wrap and wrap it very well!
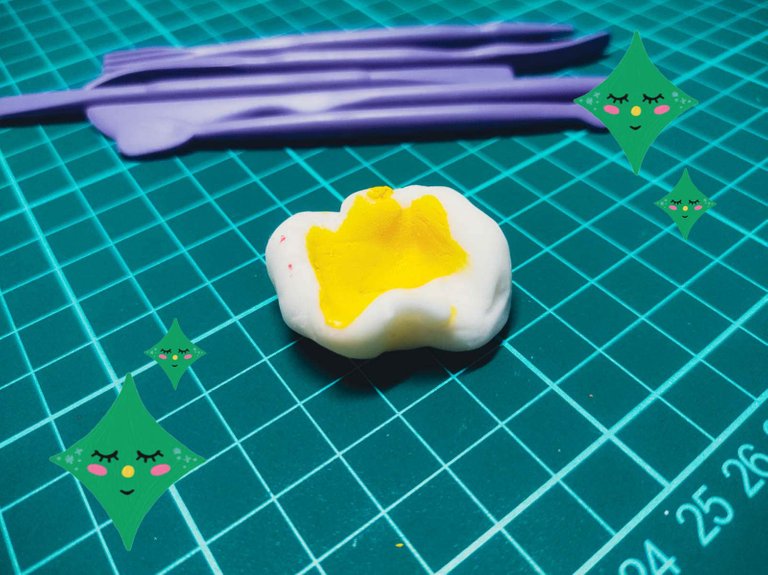
Como lo vimos en las imágenes anteriormente realizaremos los siguientes pasos en ese orden.
- Crearemos una bola de porcelana o material que utilicemos
- Luego le haremos un hueco en el centro
- Por ultimo introducir el color deseado
- Mezcla, mezcla, mezcla.
No le pongas mucho puede ser un caos !!! Es mejor ponerle poco pigmento e ir agregándole mas según el color que necesitemos ...
As we saw in the images above, we will perform the following steps in that order.
- We will create a porcelain ball or any other material we use.
- Then we will make a hole in the center
- Finally introduce the desired color
- Mix, mix, mix.
Do not put too much, it can be a chaos! It is better to put a little pigment and add more according to the color we need ...
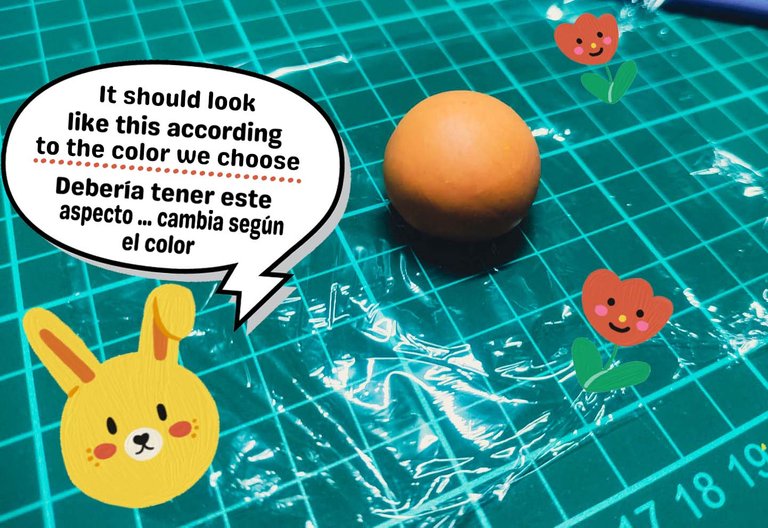
Esta es una muy buena opción para hacer colores que tal vez no vendan en tu país o sean muy costosos!
This is a very good option to make colors that may not be sold in your country or are very expensive!
                                     Segunda lección  - Armado de Personaje
                                          Second Lesson - Character Assembly
Para empezar a armar el personaje tomaremos una imagen de referencia. Es muy importante a la hora de hacer cualquier personaje que tomemos estas referencias o los conozcamos bien ya que nos permitirá entender la anatomía del mismo y realizar una pieza perfecta!
To begin to build the character we will take a reference image. It is very important when making any character that we take these references or know them well because it will allow us to understand the anatomy of the character and make a perfect piece!
Okey es hora de poner manos a la obra!!!!!!!
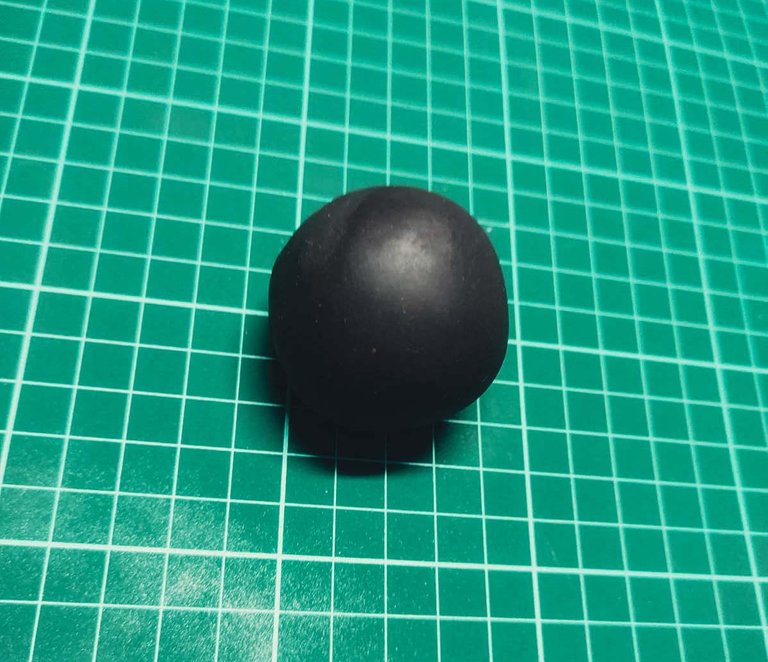
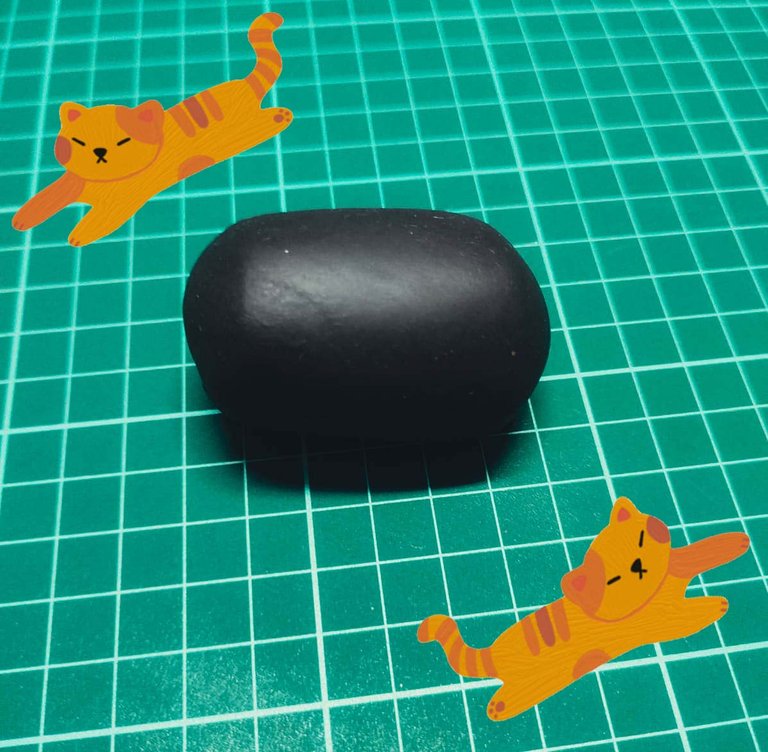
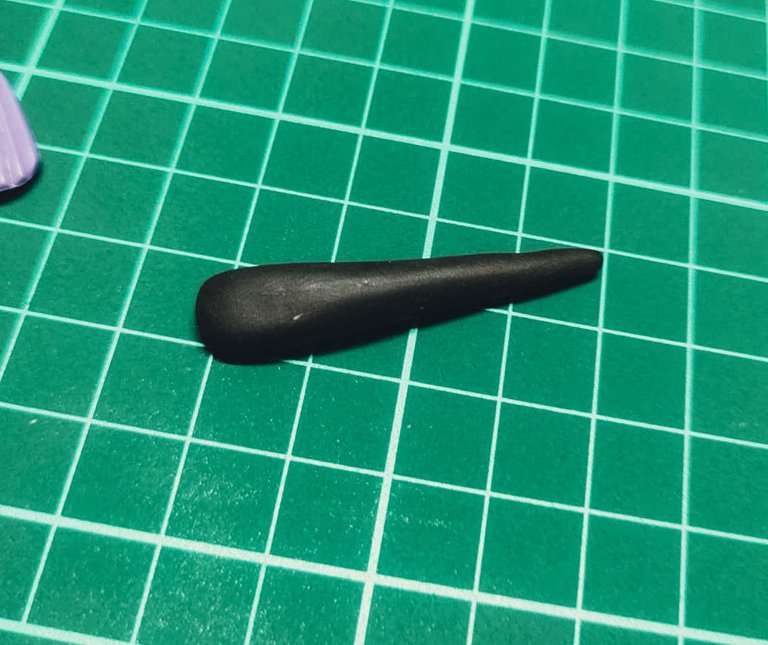
Lo primero que vamos a hacer es armar una bola de color negro. Como podemos apreciar en la imagen es el color del cuerpo de nuestro personaje.
Okay, it's time to get to work!!!!!!!
The first thing we are going to do is to make a black ball. As we can see in the image it is the color of the body of our character.
Una vez que la tengamos procederemos a amasarla (rodarla) en forma de gatito acostado como se ve en la imagen!
Once we have it, we will proceed to knead it (roll it) in the shape of a kitten lying down as shown in the image!
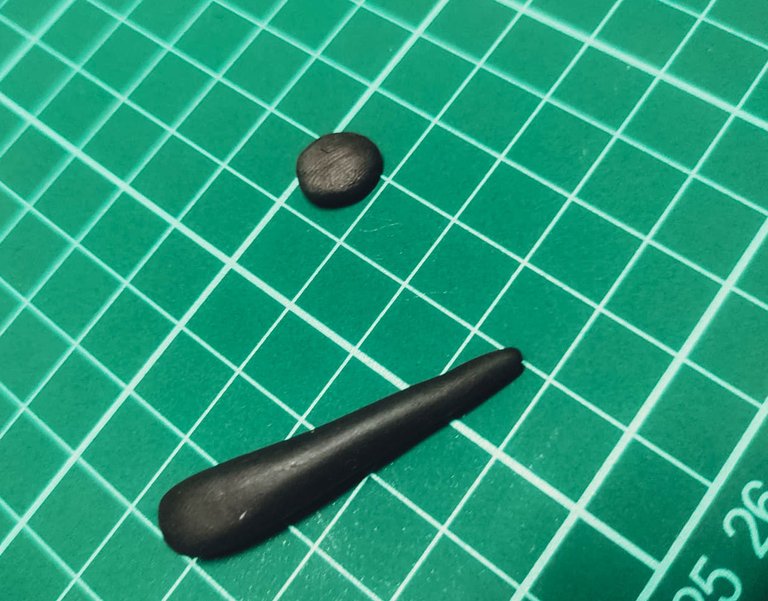
Lo logramos! excelente para continuar deberemos parar la pieza asi tendremos mejor percepción del cuerpo de nuestro personaje.
We did it! excellent to continue we must stop the piece so we will have a better perception of the body of our character.
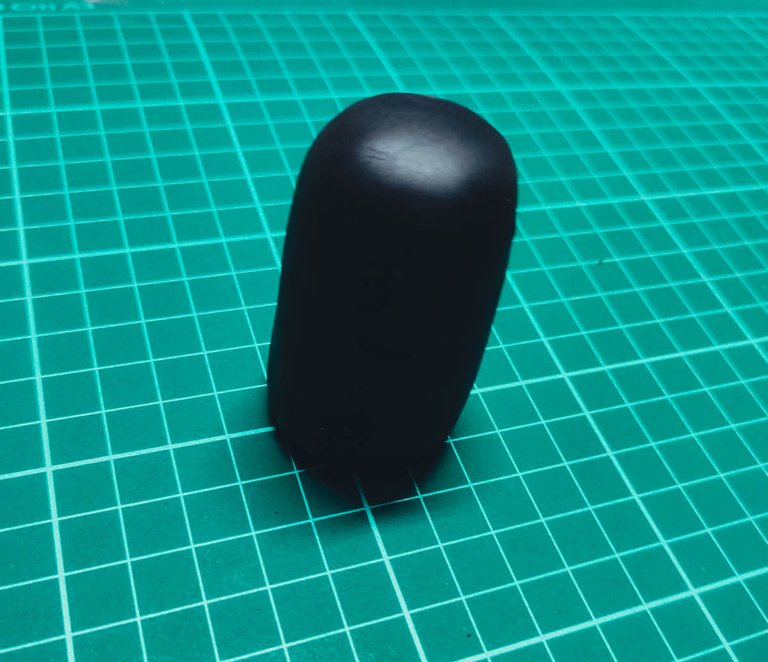
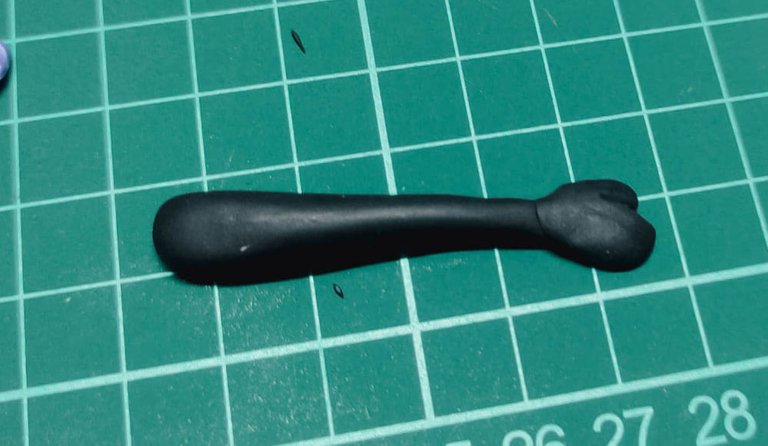
Ya se esta pareciendo más... Ahora solo nos falta hacerle a nuestro "Sin cara" su carita ¿Suena ilógico cierto?
It's looking more and more like it... Now we just need to make our "Faceless" his little face. Sounds illogical, doesn't it?
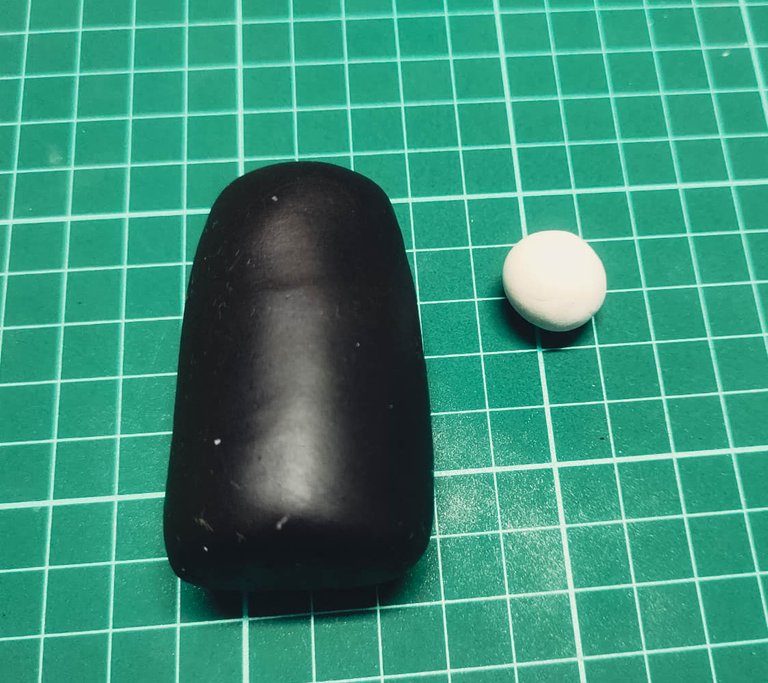
Como les mencione anteriormente es muy importante tener nuestra mesa de trabajo limpia! . Ya que si no les pasara lo que vemos en la imagen, pequeños puntitos blancos en mi perfecta masa negra! :(
Pero en fin, ahora el siguiente paso será sacar un pedazo de masa blanca para poder realizar su cara!
As I mentioned before, it is very important to have a clean work table, otherwise what you see in the picture will happen, little white dots on my perfect black dough! :(
But anyway, now the next step will be to take out a piece of white dough to make his face!
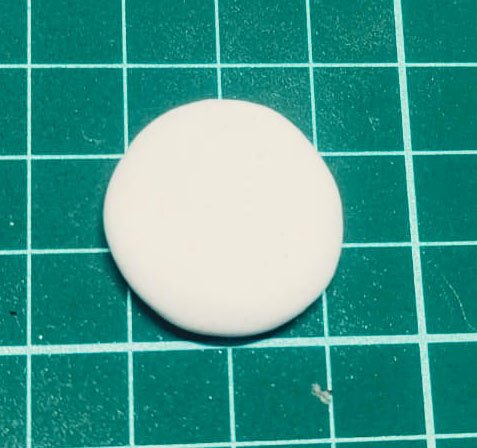
Okey, para comenzar a hacer su cara o mascara empezaremos con un circulo blanco de esta manera
Okay, to start making your face or mask we'll start with a white circle like this
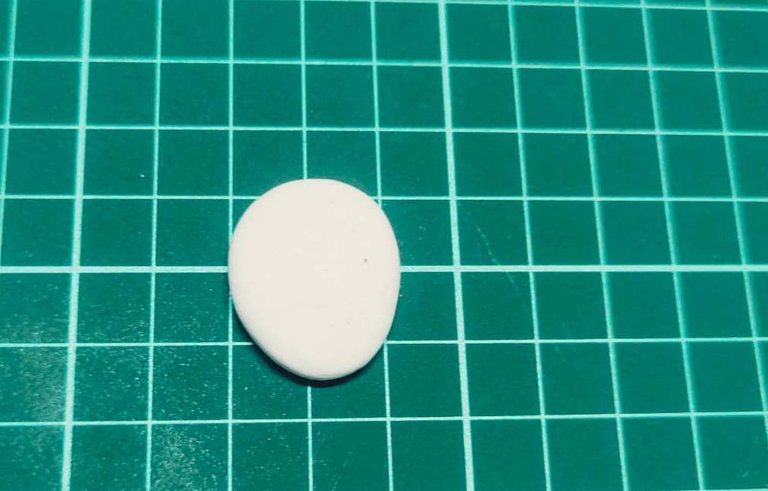
Luego le daremos a ese circulo una forma mas ovalada como si se tratara de la forma de un alíen !!! 👽👽👽👽
Then we will give that circle a more oval shape as if it were the shape of an alien !!!! 👽👽👽👽
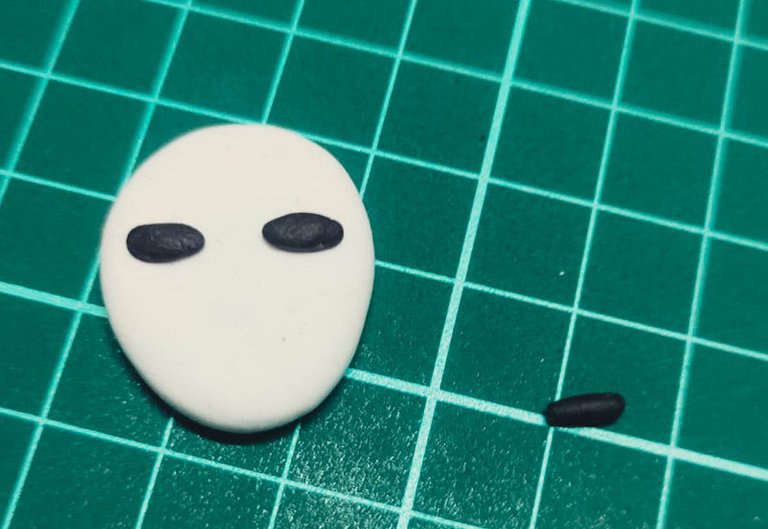
A esta cara le falta algo... OJOS! 👁️👄👁️ los cuales realizaremos de la siguiente forma. También la boca la haremos de la misma forma con muy pequeñas partes de porcelana color negro
This face is missing something... EYES! 👁️👄👁️ which we will make as follows. We will also make the mouth in the same way with very small parts of black porcelain.
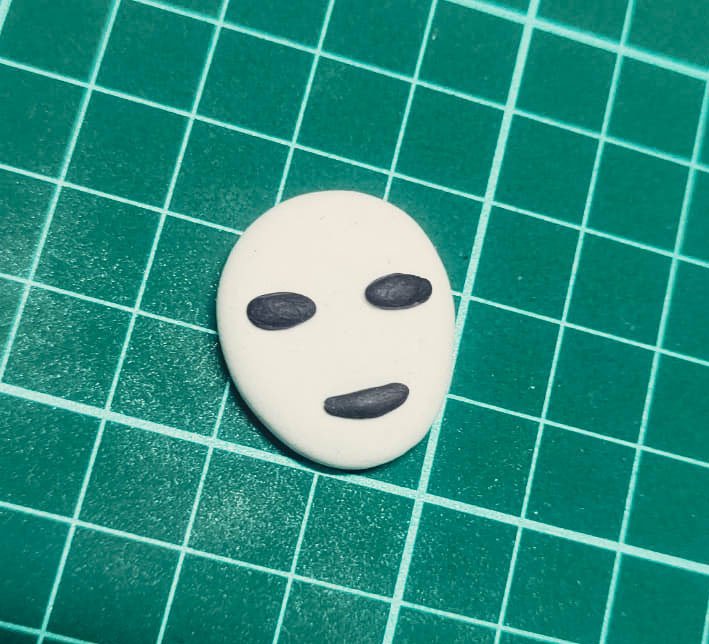
Aunque se vea un poco extraño ahora les prometo que luego tendra todo sentido! Heyyy que el esfuerzo vale la pena...
Anteriormente hablamos de las referencias y ahora estas nos ayudaran a agregarle mas detalles a esta cara para hacerla %100 igual al del personaje
Even if it looks a little strange now I promise it will make perfect sense later! Heyyy it's worth the effort....
Previously we talked about the references and now these will help us to add more details to this face to make it %100 the same as the character.
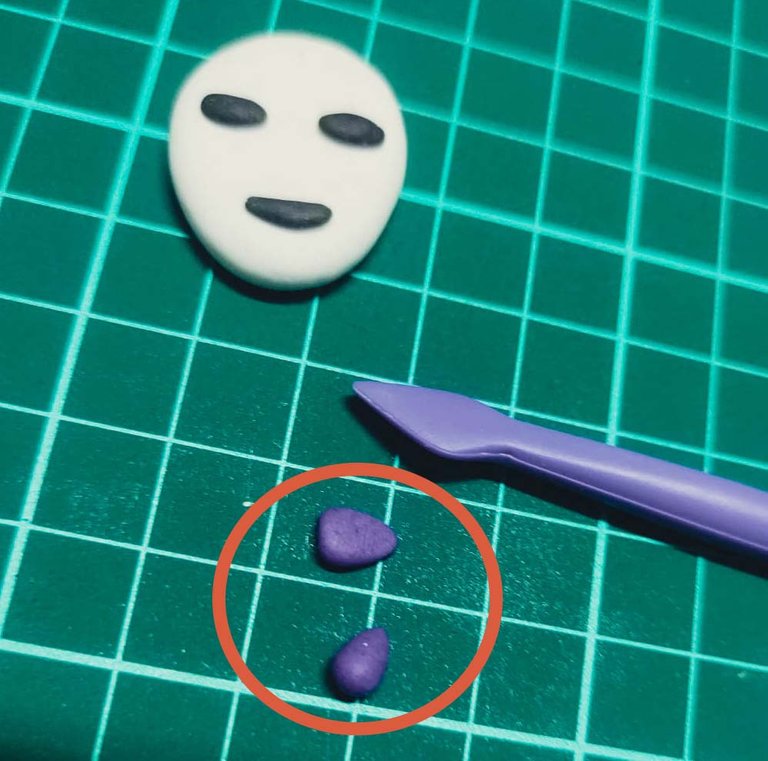
Es por eso que agregaremos estos pequeños triángulos a la composición.
Para realizarlos primero deberemos hacerlos en forma de gotita y luego aplastarlos suavemente hasta que queden con la forma anteriormente dicha "pequeños triángulos"
That is why we will add these small triangles to the composition.
To make them we must first make them in the shape of droplets and then crush them gently until they have the aforementioned shape of "small triangles".

Realizaremos dos más para la parte de abajo.
We will make two more for the bottom part
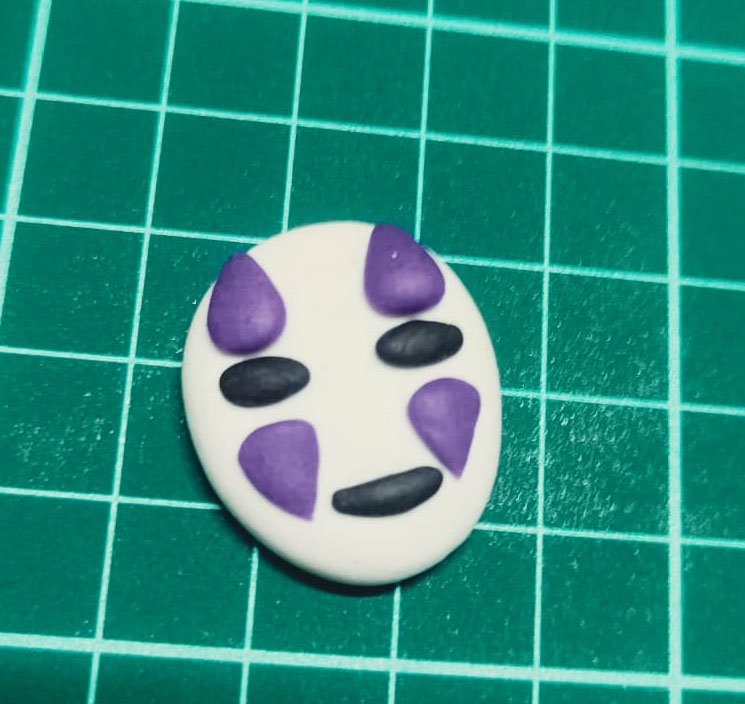
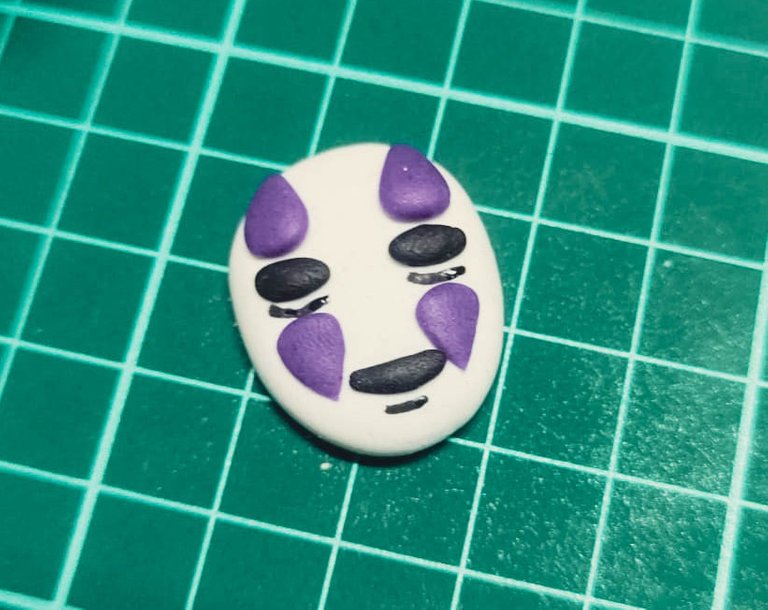
Y este es el hermoso resultado!!!! Aunque soy un poco perfeccionista y agregue unas líneas que tiene el personaje con mi fibra Posca color negro para darle detalles mas precisos...
And this is the beautiful result!!!! Although I'm a little perfectionist and I added some lines that the character has with my black Posca fiber to give him more precise details...
Una vez que tengamos estas dos piezas listas! (El cuerpo por un lado y la cara por el otro). Procederemos a unirlos.
Once we have these two pieces ready! (The body on one side and the face on the other). We will proceed to join them together.
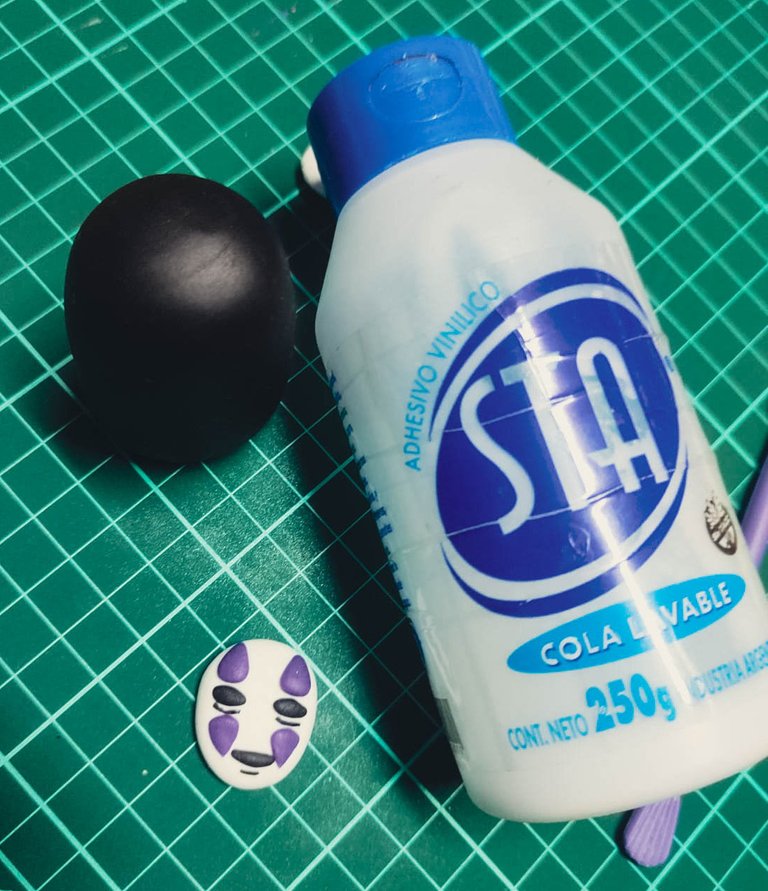
Es así como vamos a utilizar la plasticola para unir estas dos piezas! En mi caso utilice la que vemos en la imagen, pero ustedes pueden utilizar cualquier tipo de pegamento super resistente.
This is how we are going to use the plastic glue to join these two pieces! In my case I used the one shown in the image, but you can use any type of super strong glue.
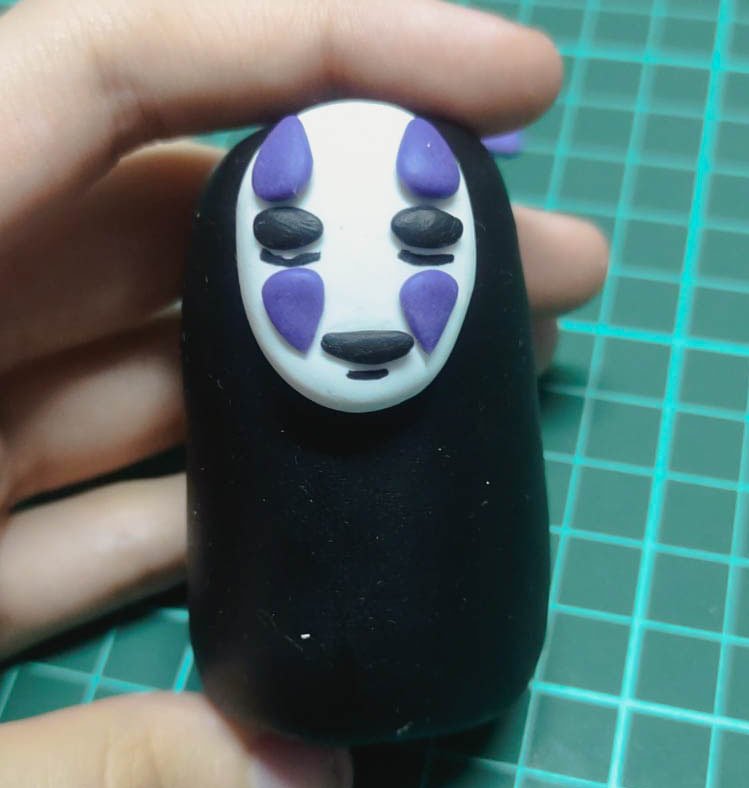
Este seria el resultado! Ya estamos por la mitad del proceso felicidades por llegar hasta aquí. A continuación dejare una nota que podría servirte!
This would be the result! We are half way through the process, congratulations for making it this far. Here is a note that might help you!
Continuemos con los detalles finales!!!
Let's continue with the final details!!!

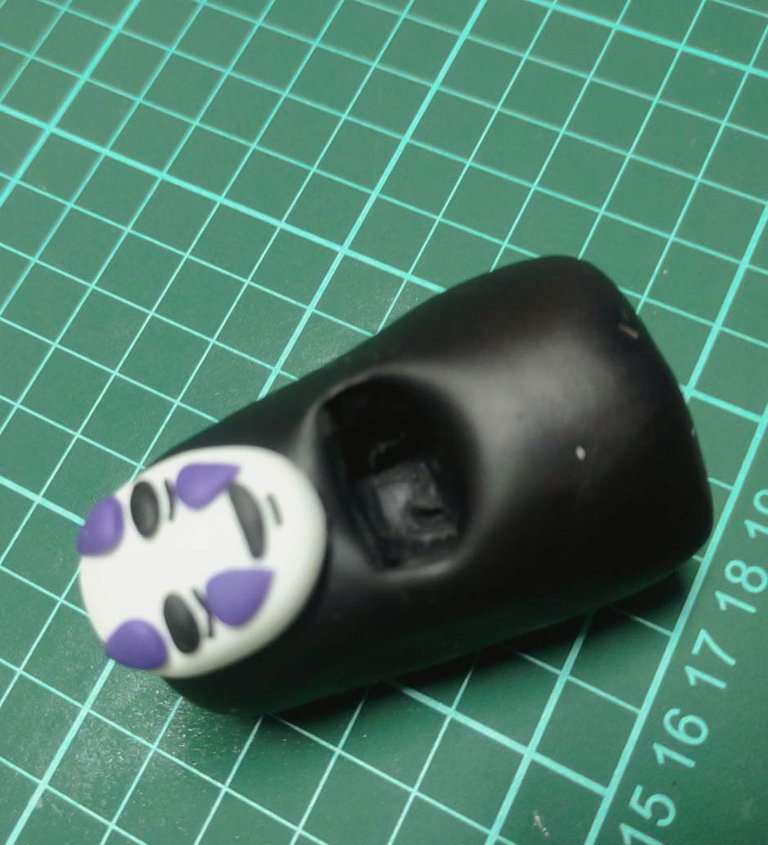
A continuación realizaremos un corte como esta marcado en la foto....
Y para esto utilizaremos las siguientes herramientas.
Next, we will make a cut as shown in the photo....
And for this we will use the following tools.
Esta primera herramienta para hacer el corte.
This first tool to make the cut.
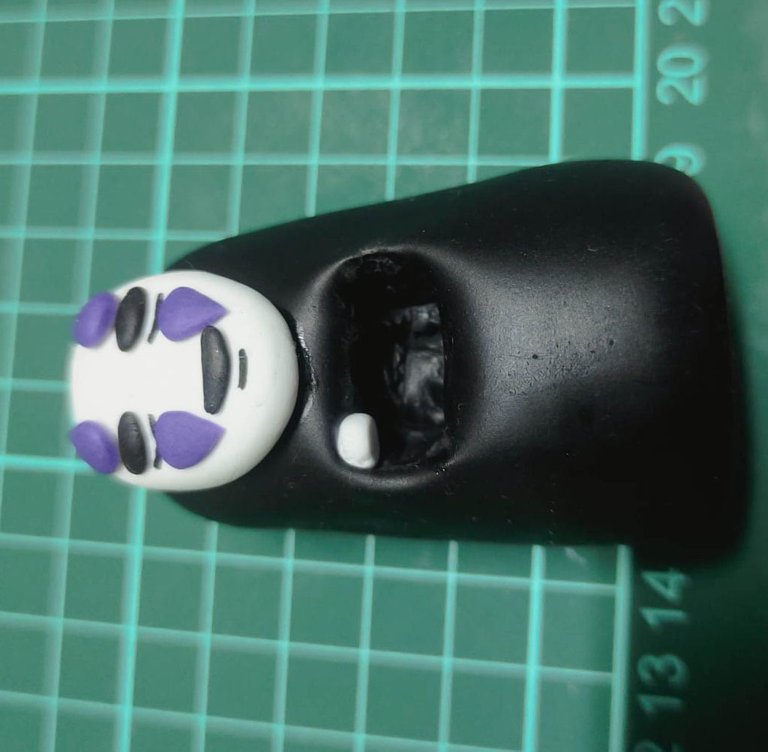
Y esta segunda herramienta para hacer el hueco.
Debería quedarnos algo así.
And this second tool to make the hole.
We should be left with something like this.
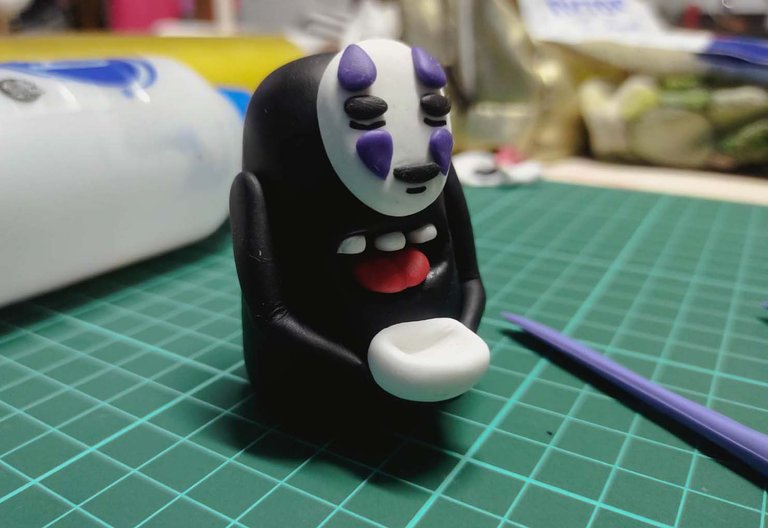
Ahora si terminamos con el cuerpo del personaje.
Now we finish with the body of the character.
                                        Tercera lección  - Detalles de Personaje
                                             Third Lesson - Character Details
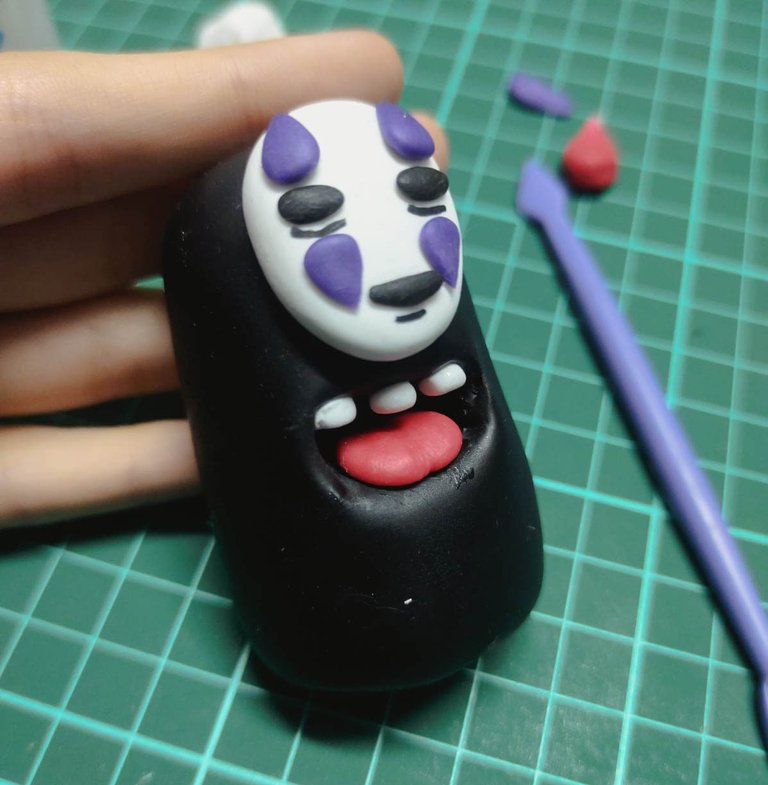
En esta tercera lección terminaremos de realizar todos los detalles faltantes en el personaje como los dientes, la lengua, y brazos
In this third lesson we will finish all the missing details on the character such as teeth, tongue, and arms.
Para hacer este diente manejaremos 3 piezas muy pequeñas de porcelana fria.
To make this tooth we will handle 3 very small pieces of cold porcelain.
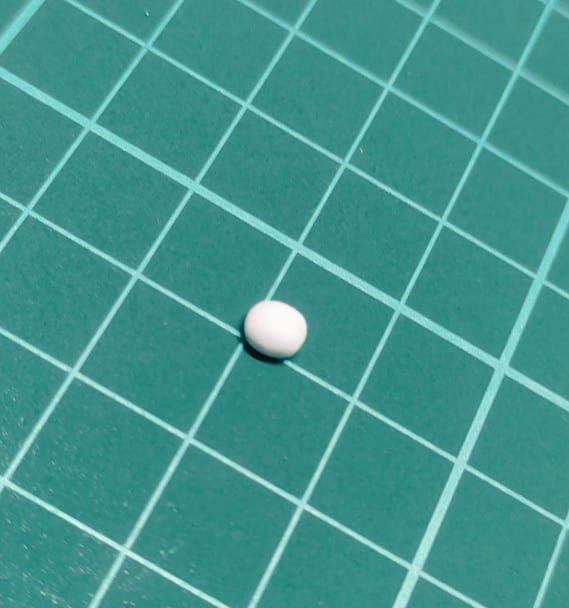
Este seria el tamaño ideal. No te preocupes de hacer estas piezas cuando este todo en conjunto tendrá sentido!
This would be the ideal size. Don't worry about making these pieces when it all comes together it will make sense!
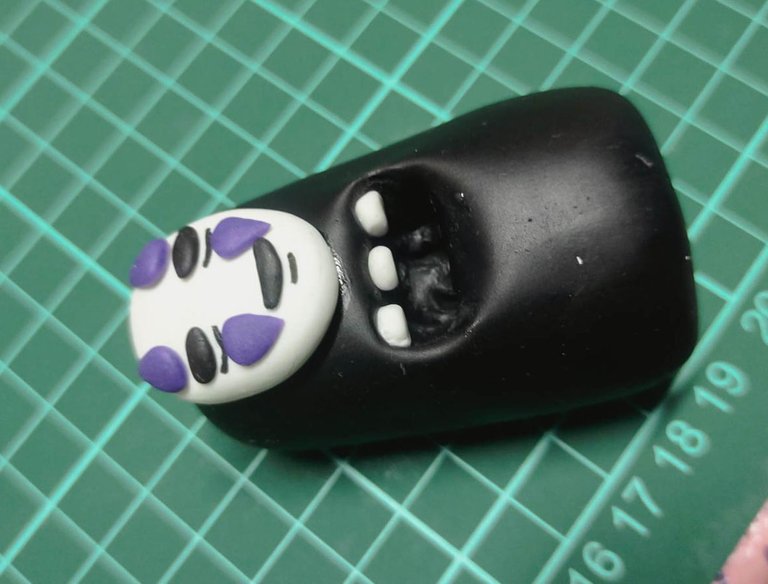
Ahora que nuestro personaje tiene dientes deberá cuidarlos y visitar al dentista seguido! 😂
Now that our character has teeth, he will have to take care of them and visit the dentist often! 😂
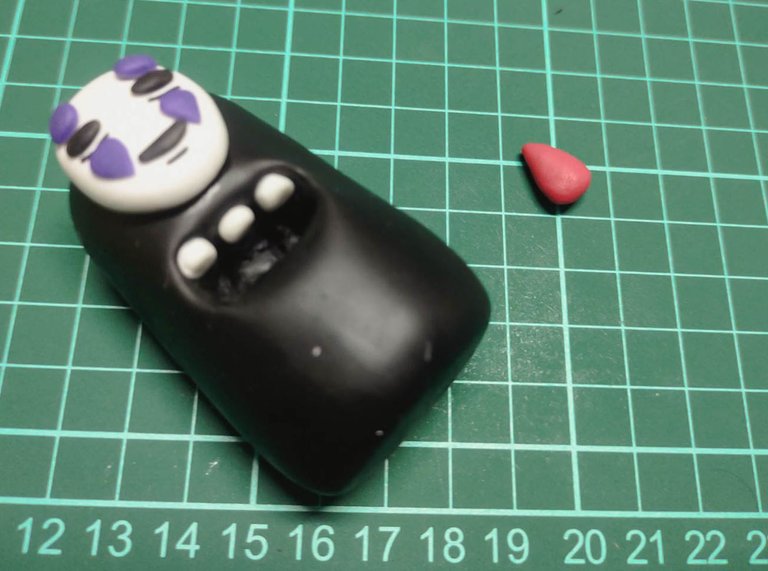
A continuación realizaremos la lengua, este paso es muy similar a uno que hicimos antes. Si ! el de la cara con los triángulos violeta, solo que ahora el triángulo es un rojo y el triangulo es más grande!
Next we will make the tongue, this step is very similar to one we did before. Yes, the one with the purple triangles, only now the triangle is a red one and the triangle is bigger!
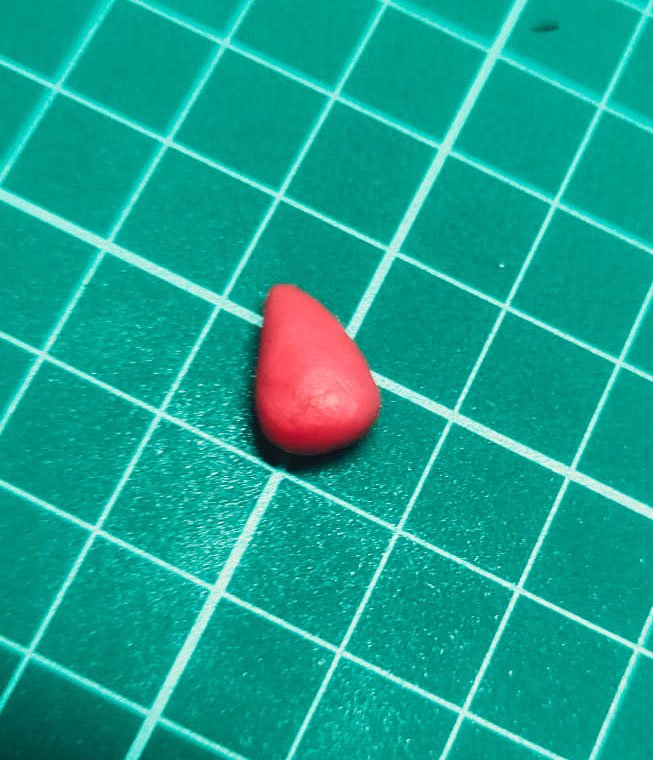
Precisamente de esta forma.
Precisely in this way.
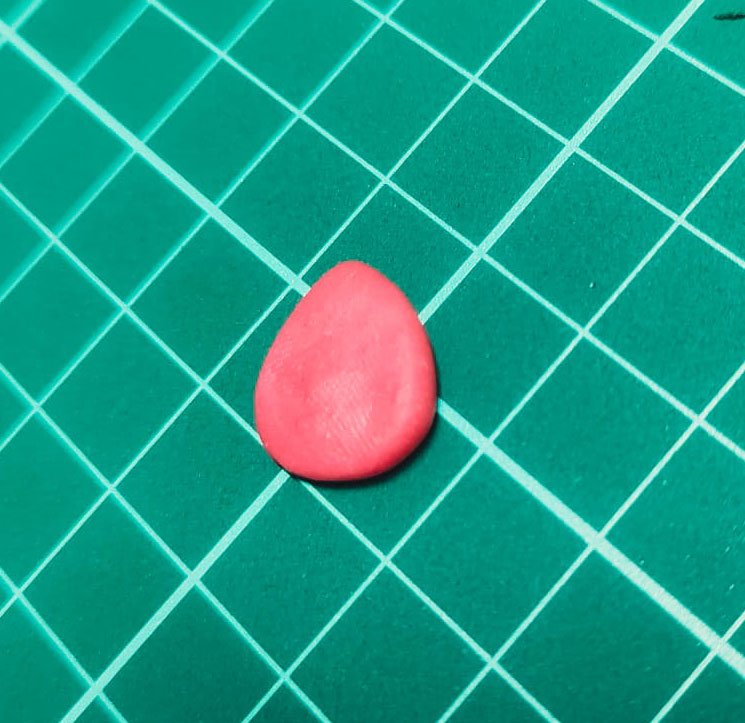
La aplastaremos como hicimos anteriormente con los triángulos de la cara.
We will flatten it as we did previously with the triangles of the face.
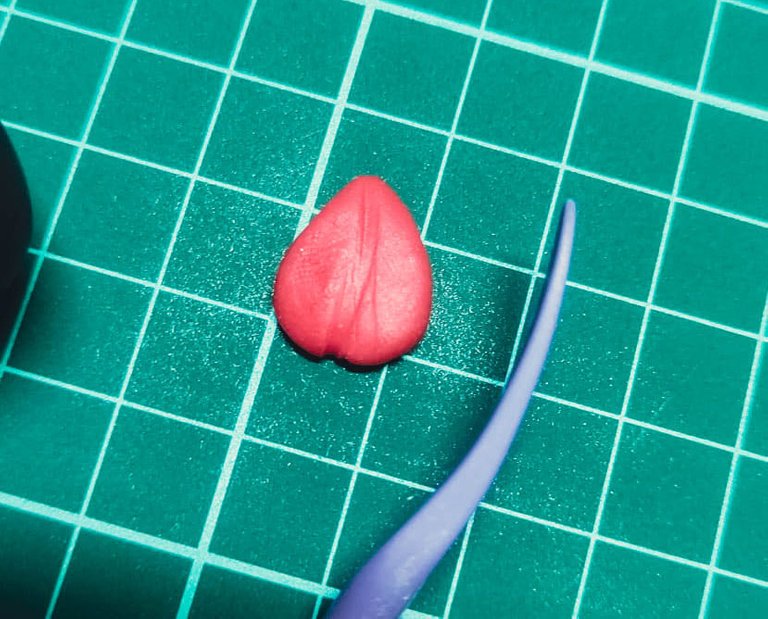
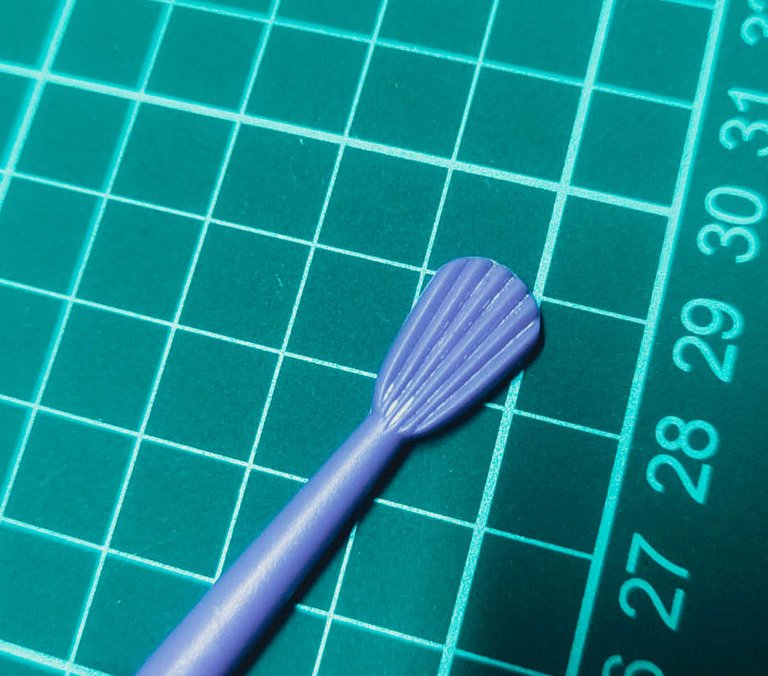
Y con esta herramienta o alguna de las que mostré anteriormente podemos realizar esta linea, básicamente seria hacer un pequeño corazón.
And with this tool or any of the ones I showed before we can make this line, basically it would be to make a small heart.
Para pegar la lengua debemos aplicarle un poco de pegamento ! Y finalmente debería quedarnos de esta forma.
To glue the tongue we must apply some glue ! And finally it should look like this.
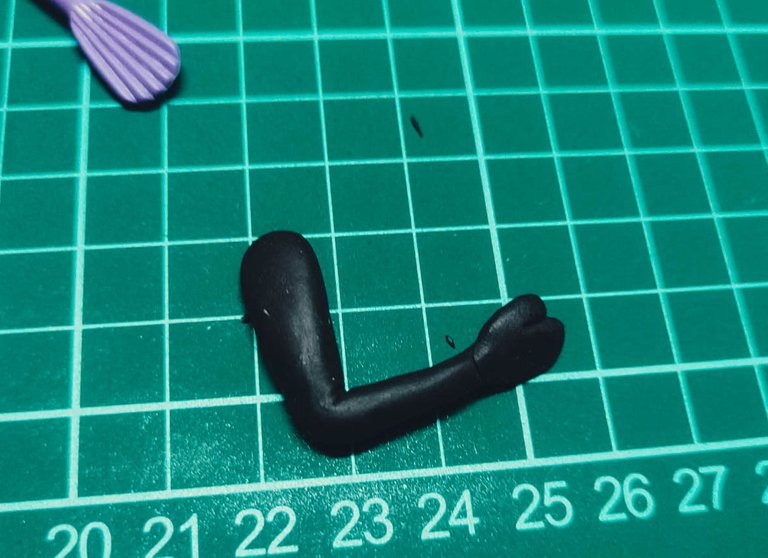
Ahora realizaremos los brazos de nuestro personaje los cuales yo realice de la siguiente manera.
Trataremos de hacer esta forma de trompo o triangulo alargado.
Now we will make the arms of our character, which I made as follows.
We will try to make this elongated spinning top or triangle shape.
Agregaremos un pequeño circulo, esto mas adelante serán sus manos.
A continuación los uniremos.
We will add a small circle, this will later become your hands.
We will then join them together.
Realizaremos un pequeño tajo para separar los dedos y luego lo uniremos de esta forma. Finalmente obtendremos el brazo... con esto podemos darle la forma que queramos ! (Para unirlo lo haremos como todo lo demás con pegamento!!!)
We will make a small cut to separate the fingers and then we will join them in this way. Finally we will get the arm... with this we can give it the shape we want ! (To join it we will do it like everything else with glue!!!!)
Okey! ahora de unirlo al cuerpo
Okay! now to attach it to the body
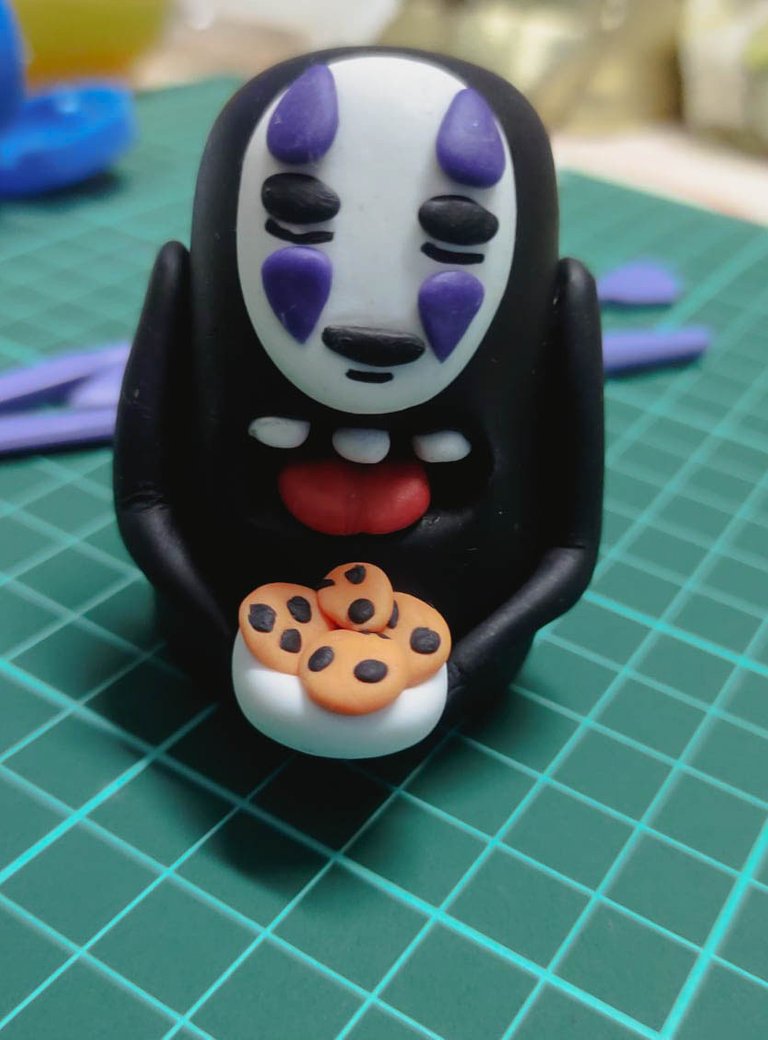
Ya tenemos todo el personaje completo! Es hora de agregarle unos complementos finales. Para esto llamare a un amigo mío que es experto !
We already have the complete character! It's time to add some final complements. For this I will call a friend of mine who is an expert !
                                            Cuarta lección  - Acessorios
                                            Fourth Lesson - Accessories
Para empezar a hacer los accesorios les presento a mi amigo!
To start making the accessories I introduce you to my friend!
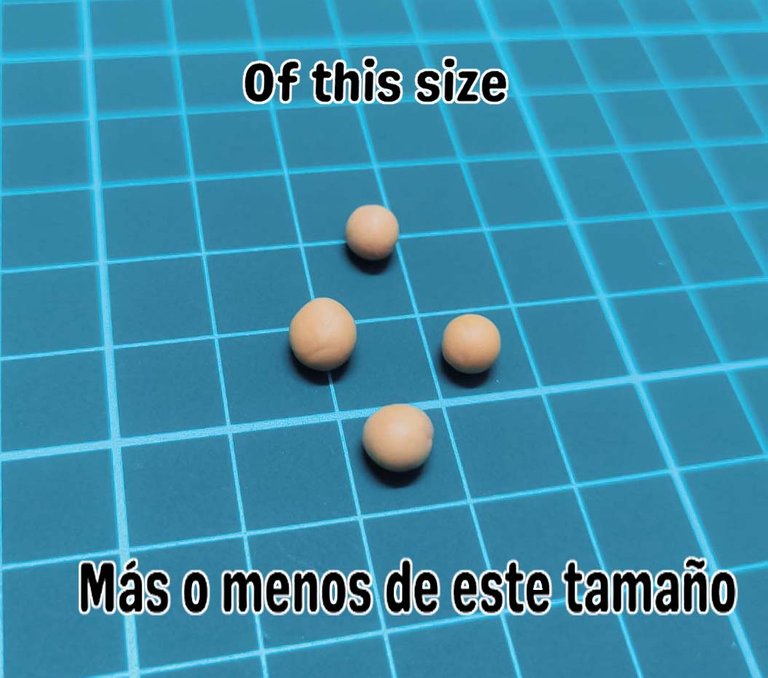
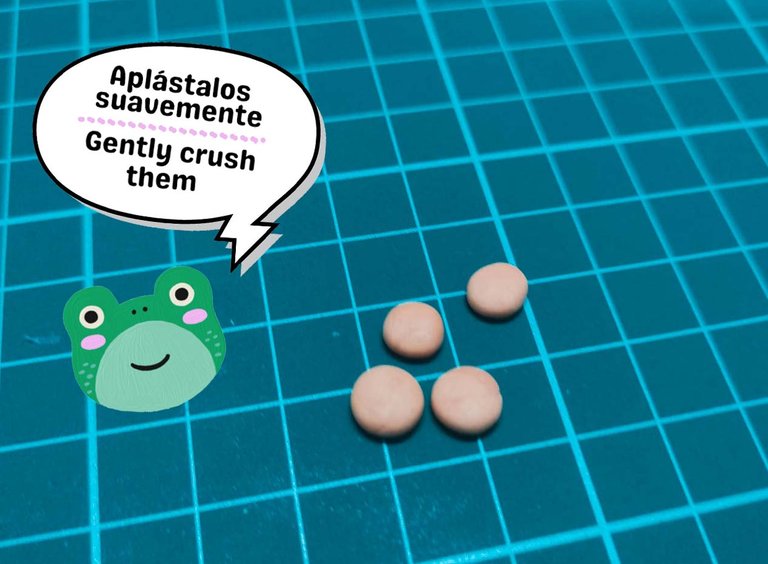
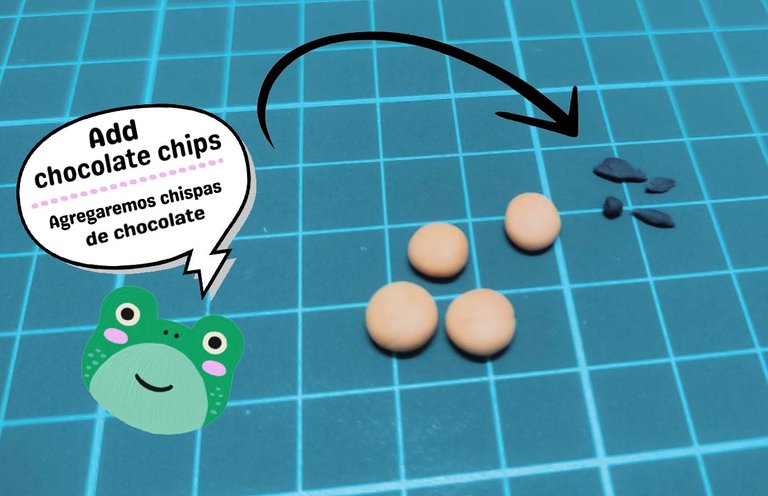
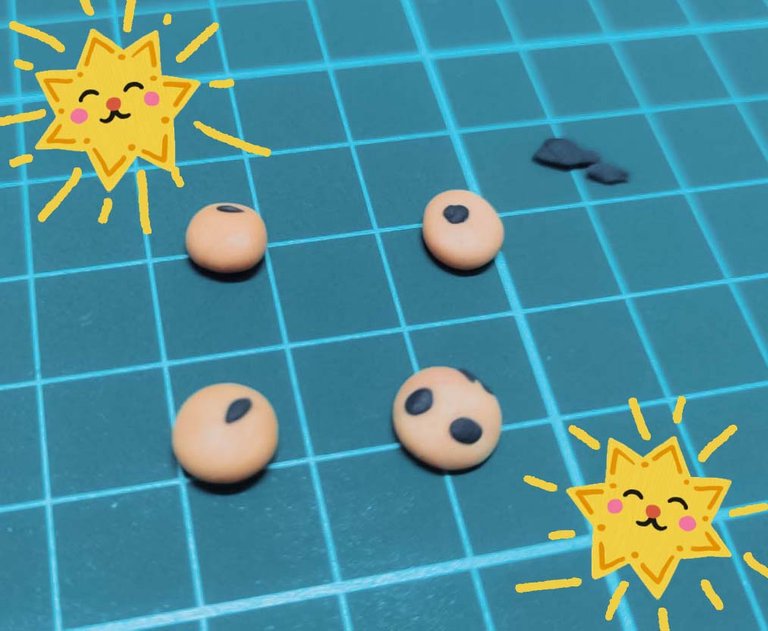
Hola a todos! Hoy realizaremos unas galletitas deliciosas para la navidad de nuestro personaje... Me encantan hacer galletitas y es por eso que me llamaron! Okey okey empezaremos haciendo 4 circulitos de porcelana maso menos de color marrón claro o naranja claro (digamos de color galleta), también pueden hacerlo del color que ustedes quieras en mi caso les enseñare el proceso pero los colores y gustos son de ustedes!!!!!!
Hello everyone! Today we are going to make some delicious cookies for our character's Christmas.... I love making cookies and that's why I was called! Okey okey we will start making 4 porcelain circles more or less light brown or light orange ( let's say cookie color), you can also do it the color you want in my case I will show you the process but the colors and tastes are yours!!!!!!
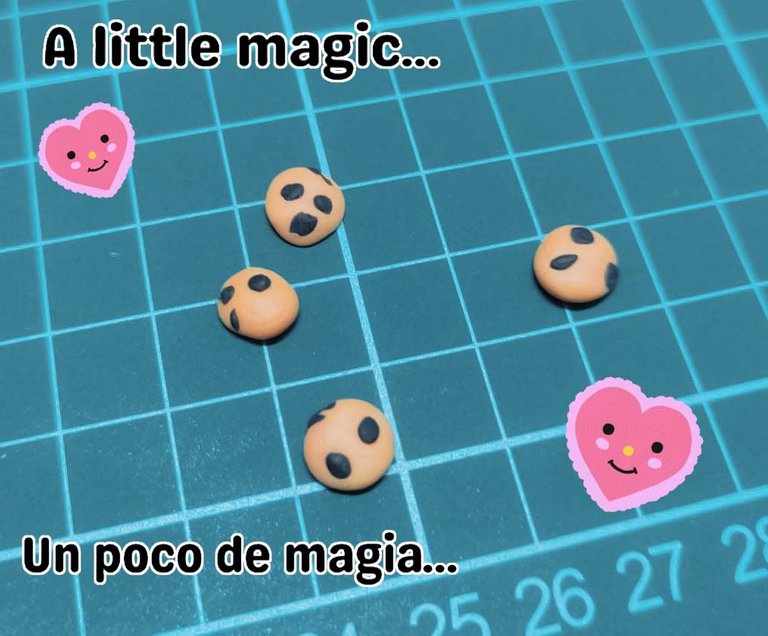
Y es así como yo las realizo! Espero que les haya servido me vuelvo a mi pantano!!! Tengo muchas galletitas que hornear!!!!
And this is how I make them! I hope you found it useful, I'm going back to my bog! I have a lot of cookies to bake!!!!
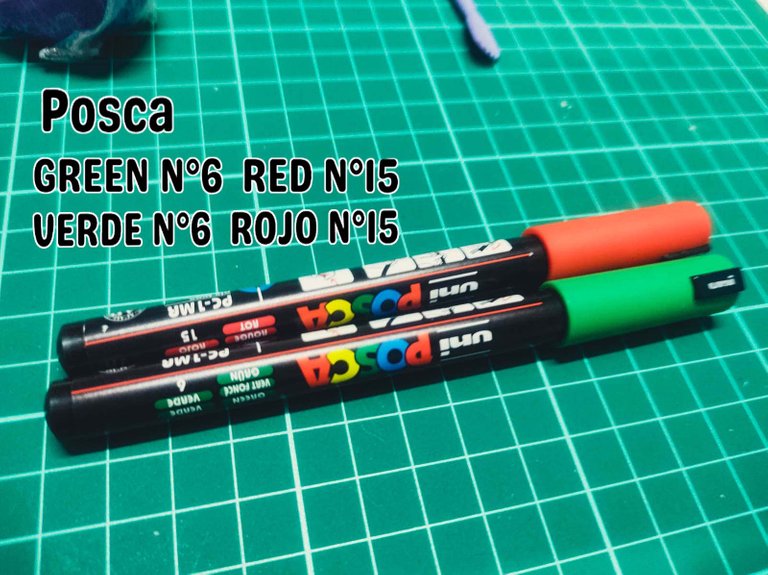
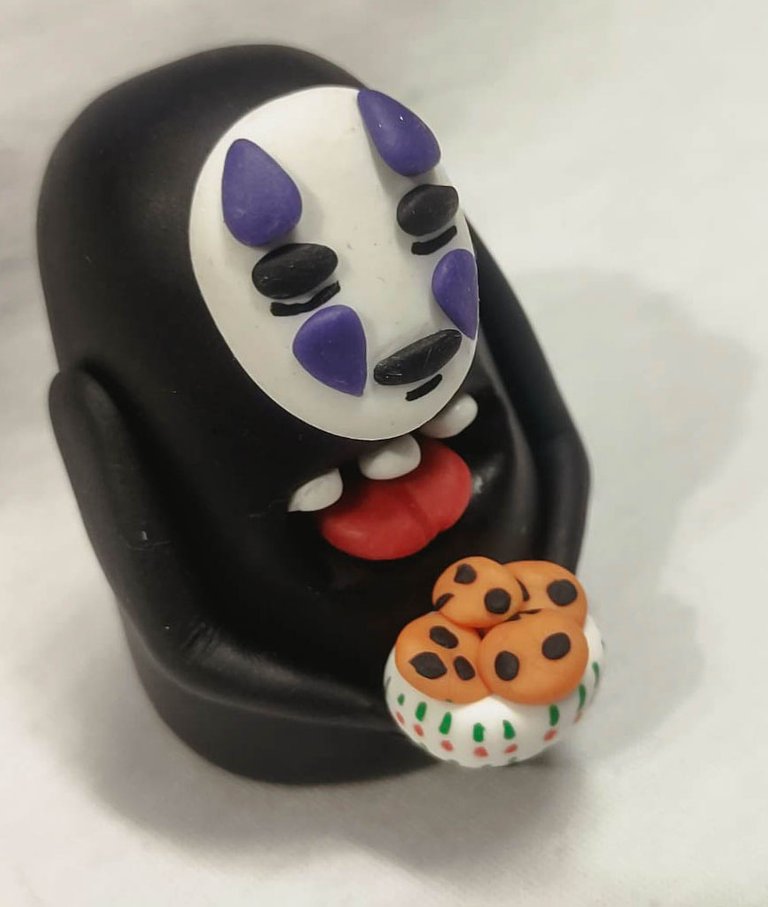
También podemos agregarle un plato o cuenco donde apoyar las galletas. Básicamente es hacer un mini circulo blanco o del color que deseen y realizarle un hueco en el centro. Por ultimo utilice dos fibrones posca para darle unos detalles navideños!
We can also add a plate or bowl to support the cookies. Basically it is to make a mini white circle or the color of your choice and make a hole in the center. Finally, use two posca fibrons to give it some Christmas details!
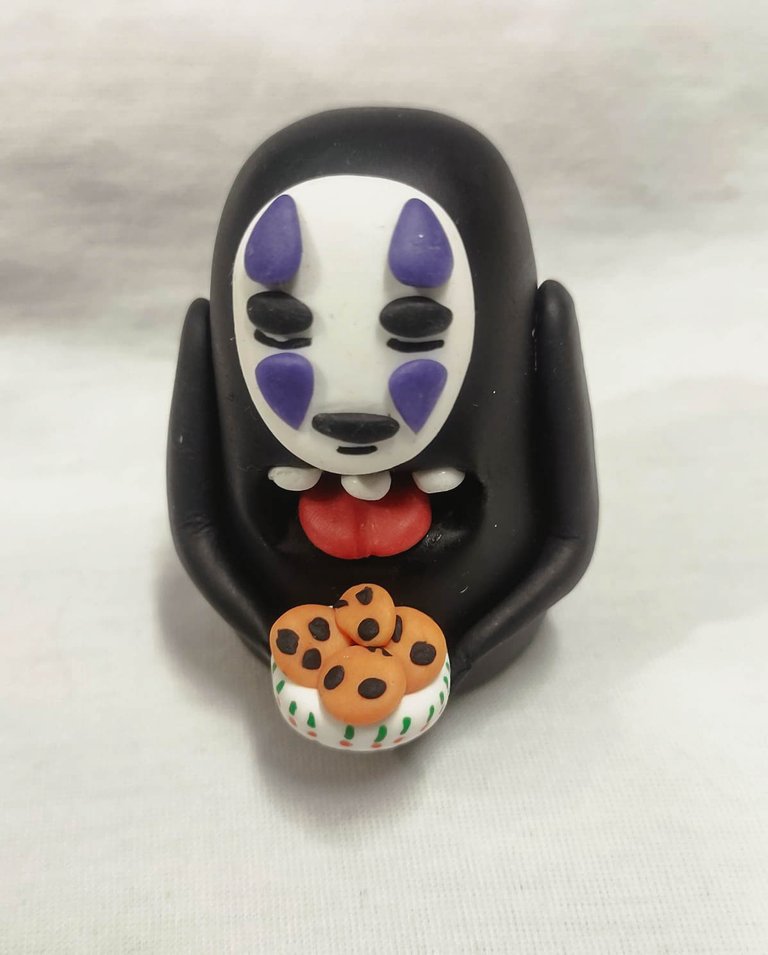
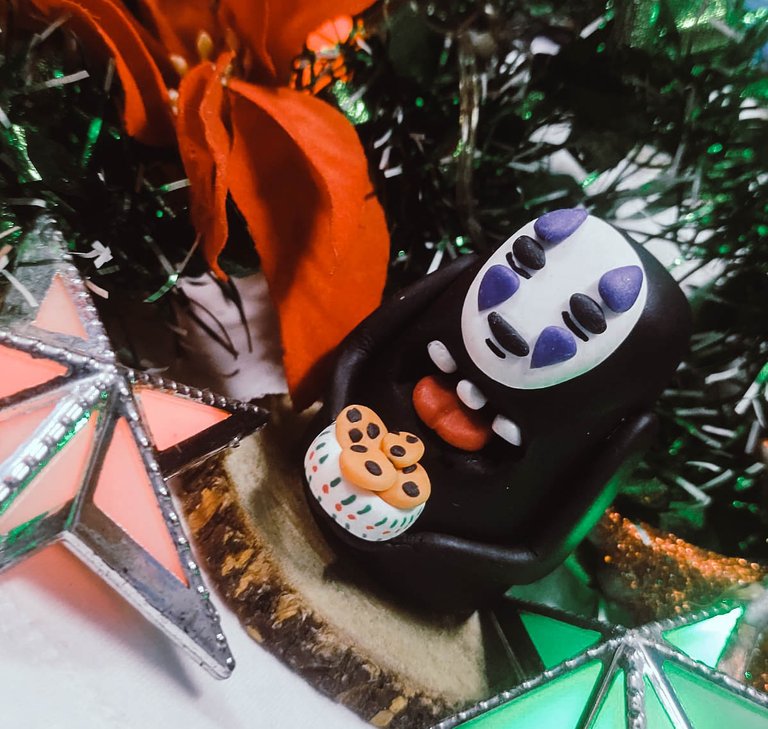
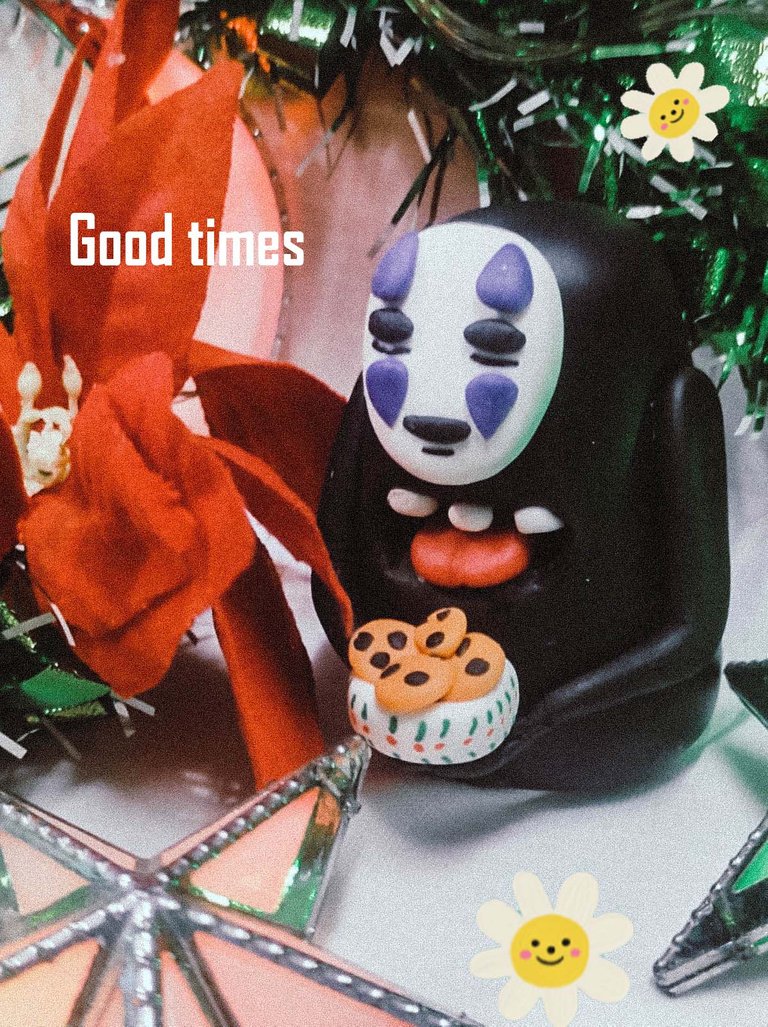
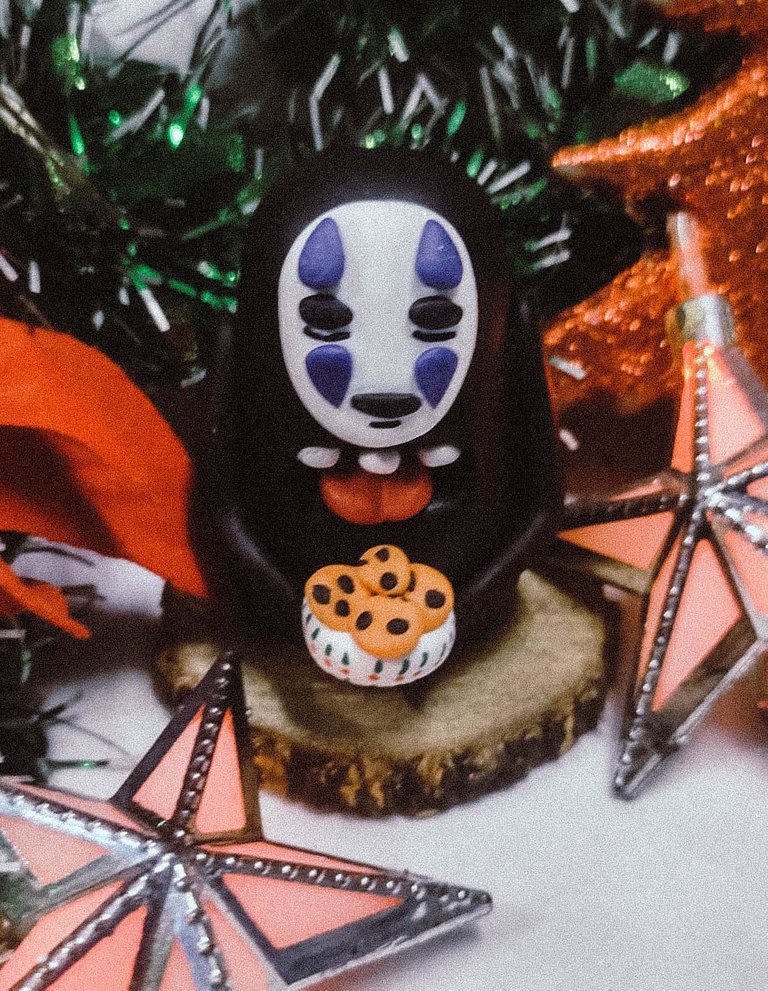
Y eso es todo el proceso de como realice esta pieza!! Espero que les haya gustado y puedan realizarlo!!!! Tanto este personaje como cualquier otro.. Si llegan a hacerlo por favor no se olviden de mostrármelo por mi instagram!!! Me haría muy muy feliz de que esto pasara
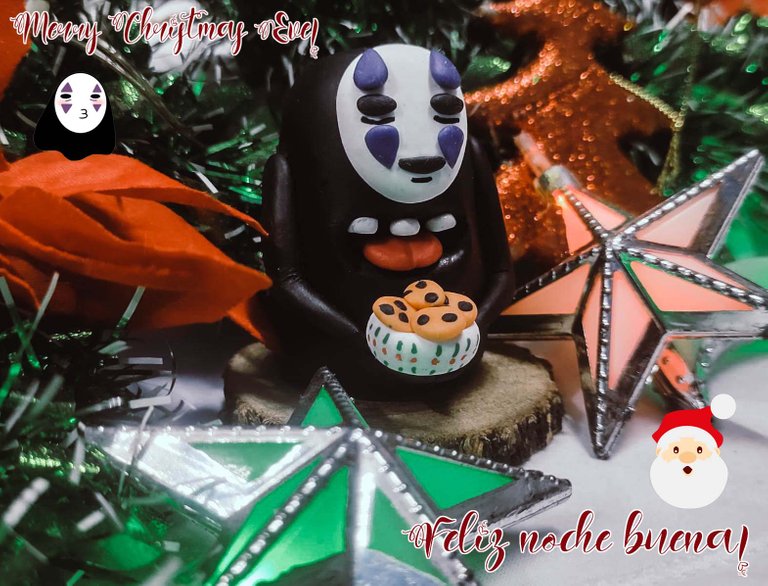
Me despido! MUY FELIZ NAVIDAD Y NOCHE BUENA !!!!! <3
And that's the whole process of how I made this piece! I hope you liked it and that you can make it!!!! This character as well as any other... If you get to make it please don't forget to show me on my instagram!!!! I would be very very happy for this to happen.
I bid you farewell! MERRY CHRISTMAS AND NEW YEAR'S EVE !!!!! <3
Cualquier consulta no dudes en visitar y hablarme en ..... !
If you have any questions, do not hesitate to visit and talk to me at ..... !
Congratulations @vittocrypto! You have completed the following achievement on the Hive blockchain and have been rewarded with new badge(s):
Your next target is to reach 100 upvotes.
You can view your badges on your board and compare yourself to others in the Ranking
If you no longer want to receive notifications, reply to this comment with the word
STOPCheck out the last post from @hivebuzz:
Support the HiveBuzz project. Vote for our proposal!
I LOVE IT! ♥