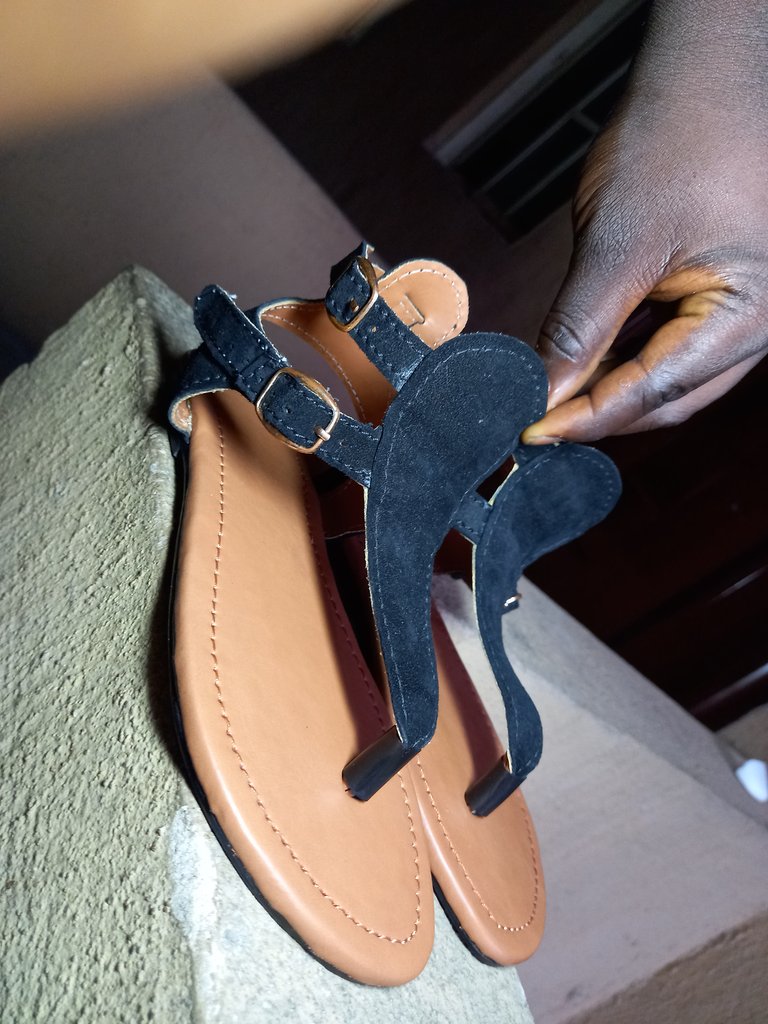
Hello everyone, I'm back with another shoe-making post. Today I'll be show you how I made this pair of sandals for @demilade2all
She told me she wanted to make a pair of sandals a little bit over a month ago, but at first we couldn't think of a style, and even after that, we both kept stalling, but now it's finally done.
Okay, let me get to how I made it. Here's a list of the materials I used :
- leather
- bontex
- maco
- gum
- buckle
- Hose
- rubber (Nora)
And here's a list of the tools and equipment:
- filing machine
- hammer
- punch
- scissors
- last
The process
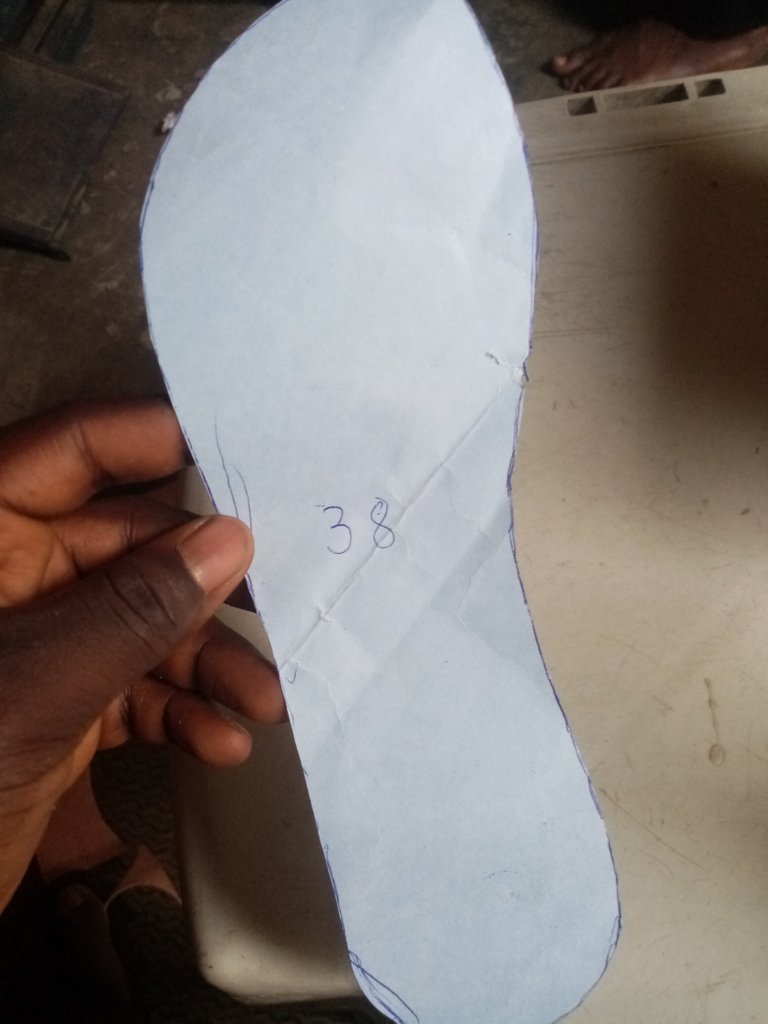
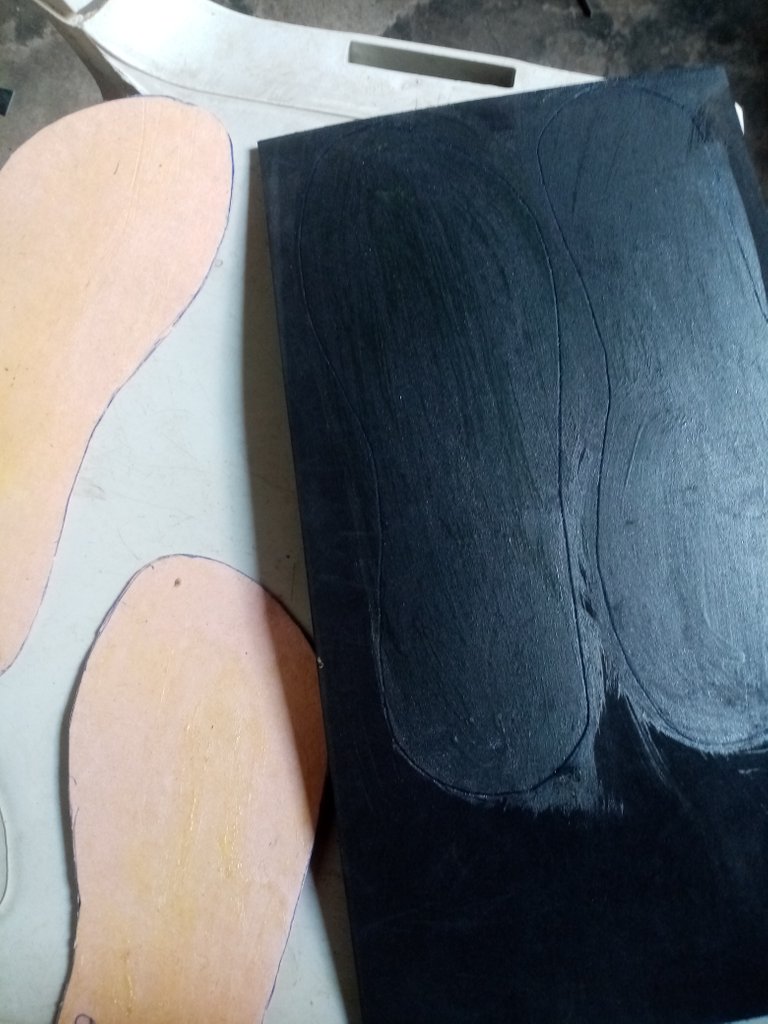
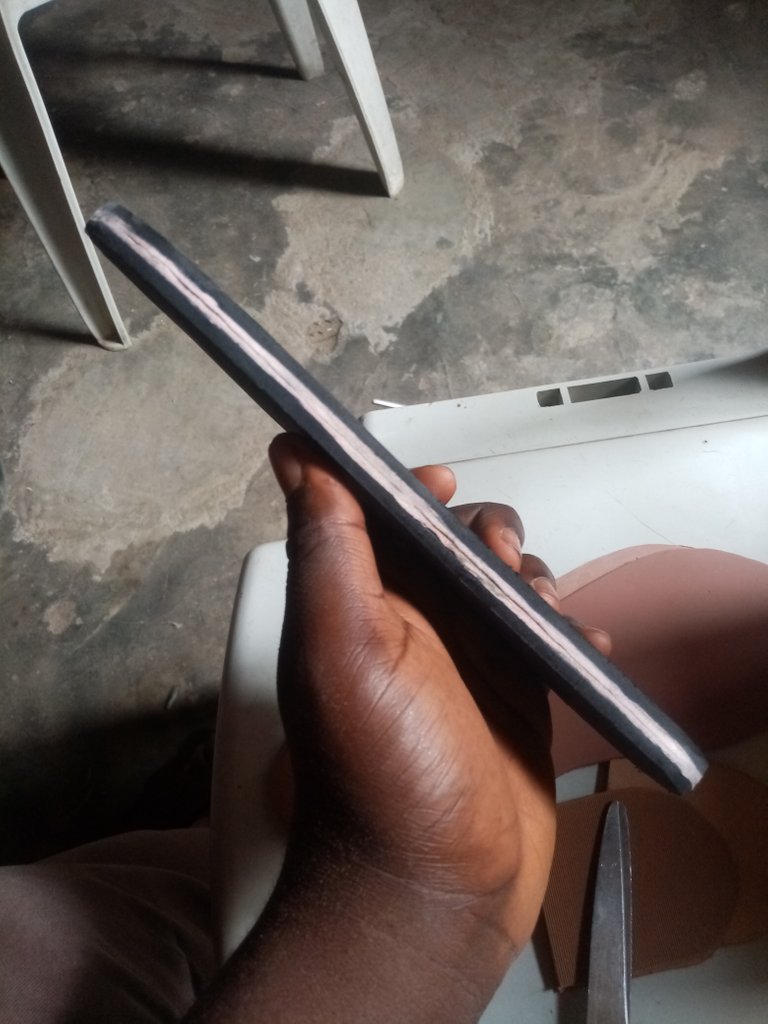
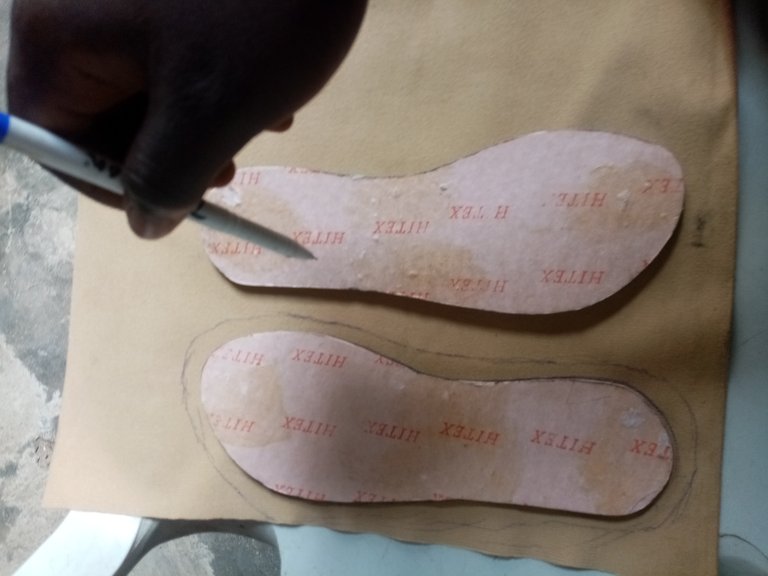
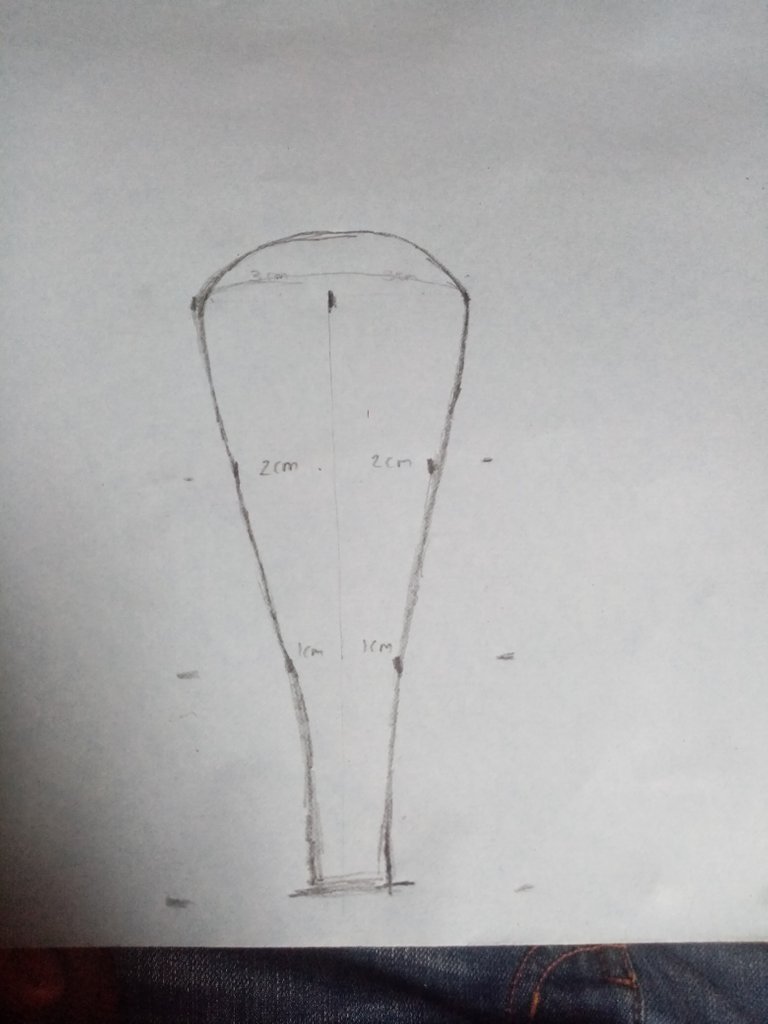
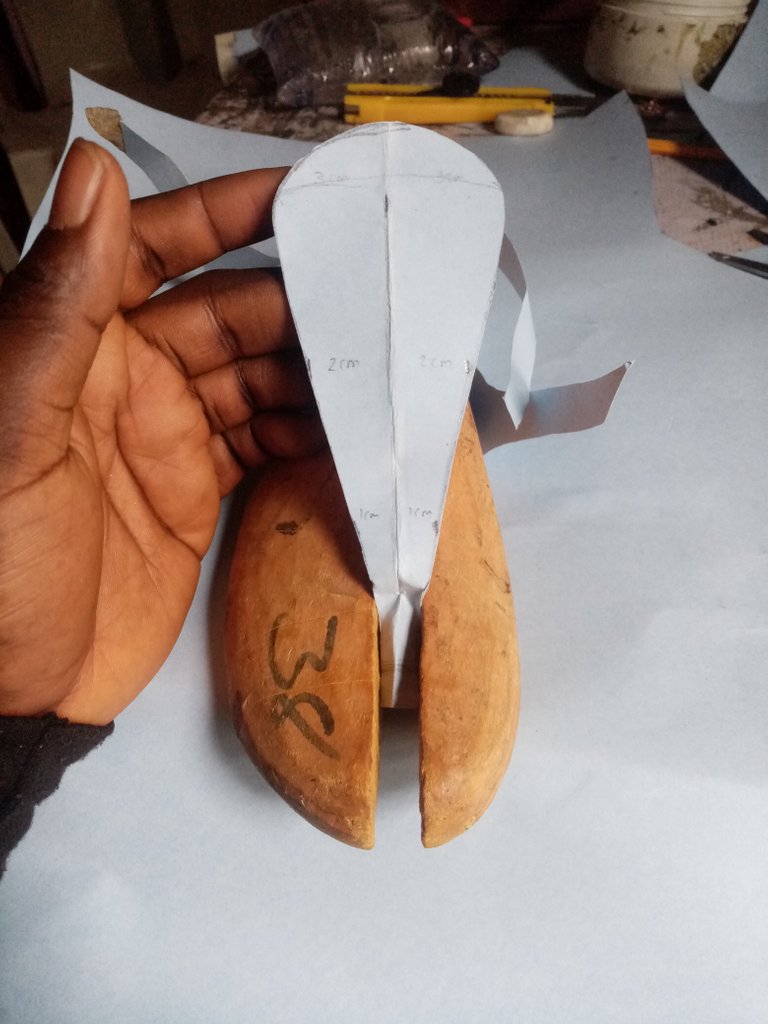
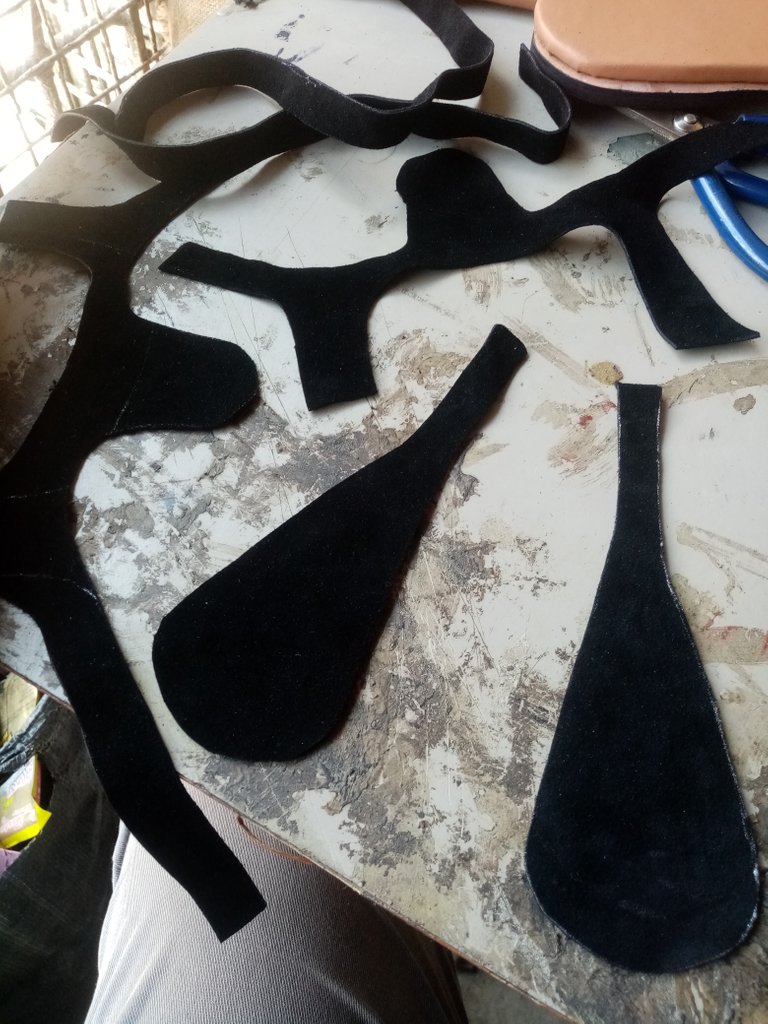
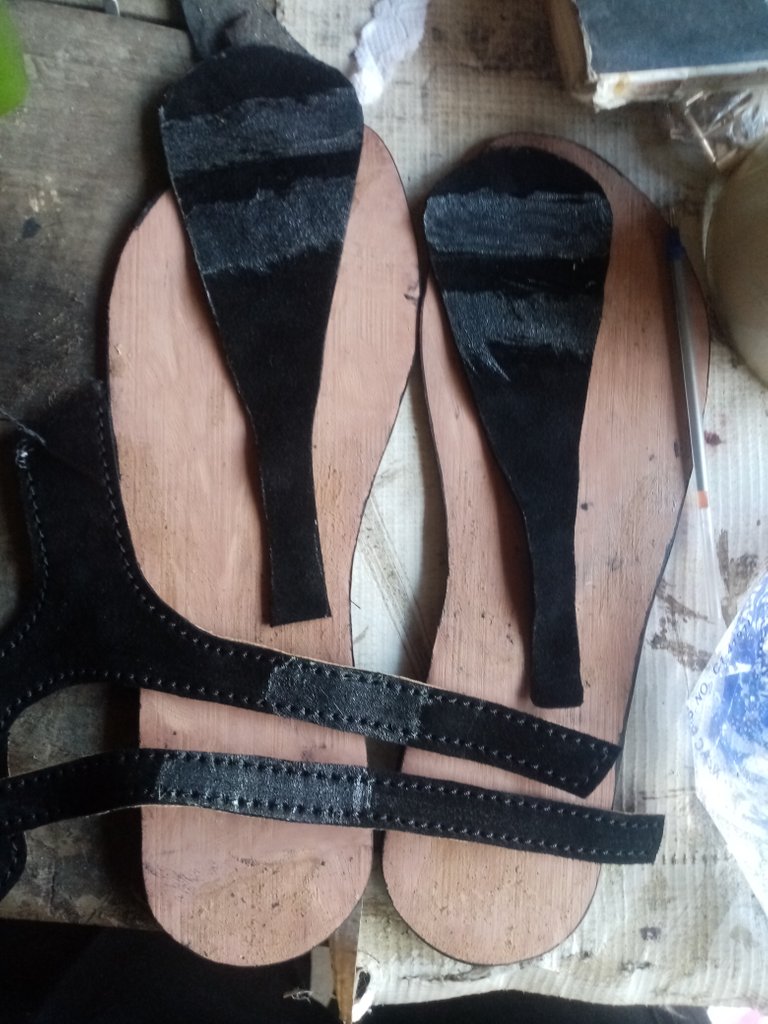
So first I got a size 38 foot pattern and used It sketch on the rubber(nora), maco and bontex. Then I cut the shape out on only the rubber and bontex
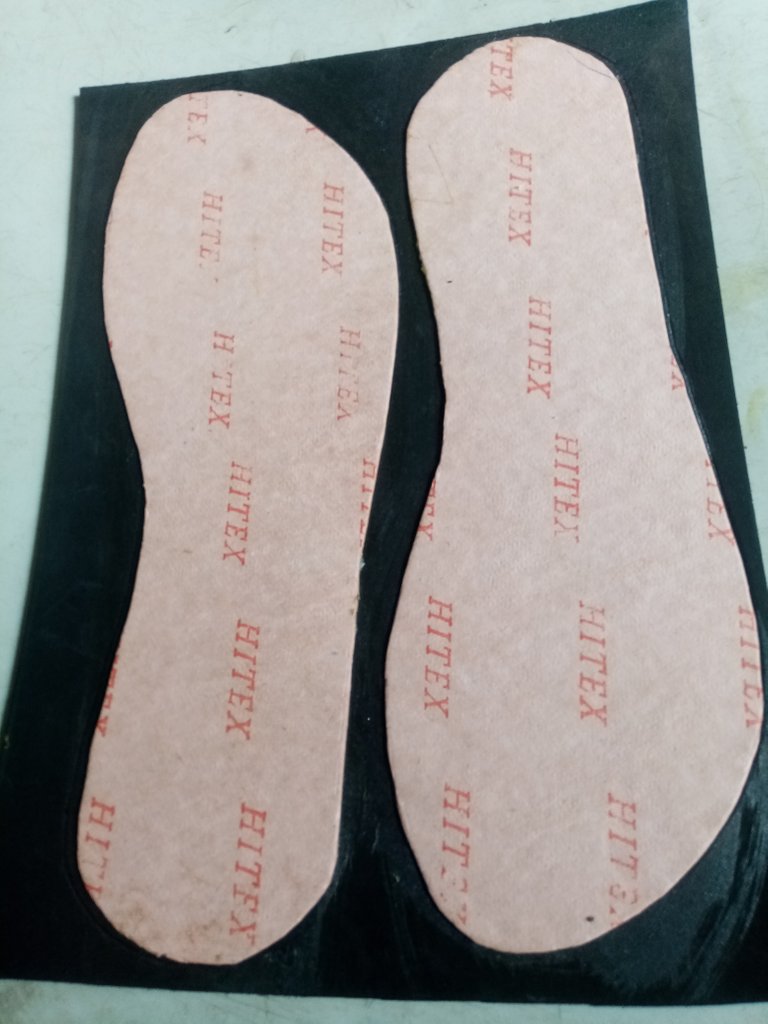
Then I applied gum to one face of the bontex and one face of the maco (only the parts I sketched),waited a bit for it to dry and stuck the bontex on the maco. I then cut out the maco bontex shape
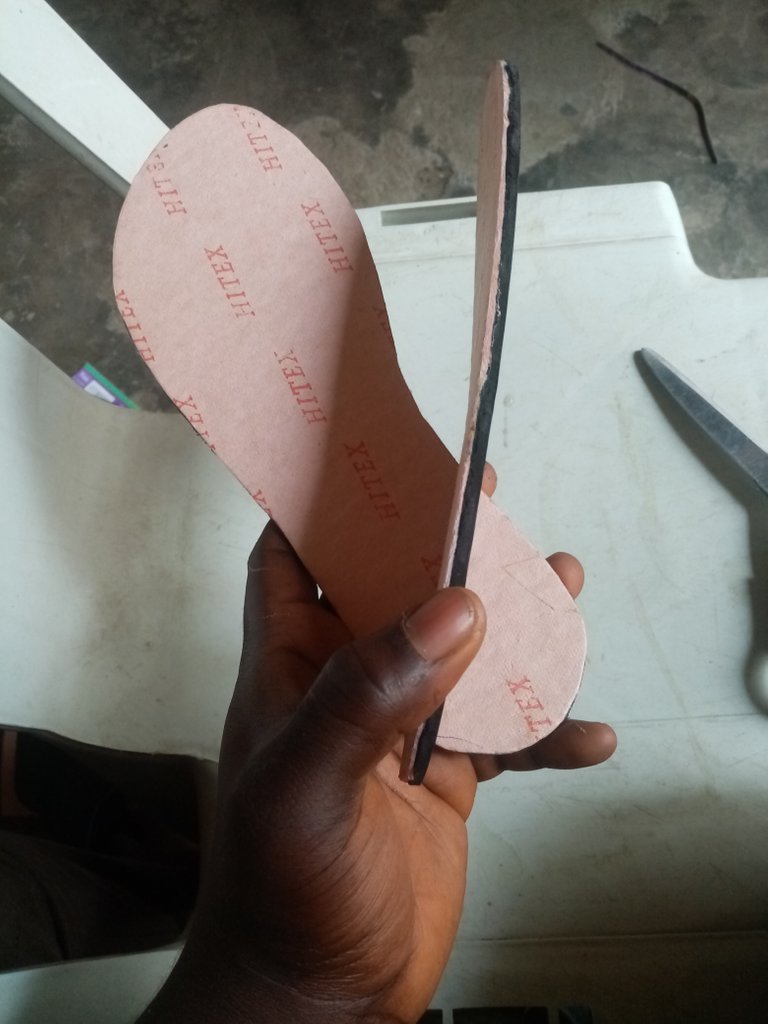
Then I applied little gum at the edges of the bontex side of the Insole sandwich, and stuck the two legs together. Then I smoothened the edges with a filling machine
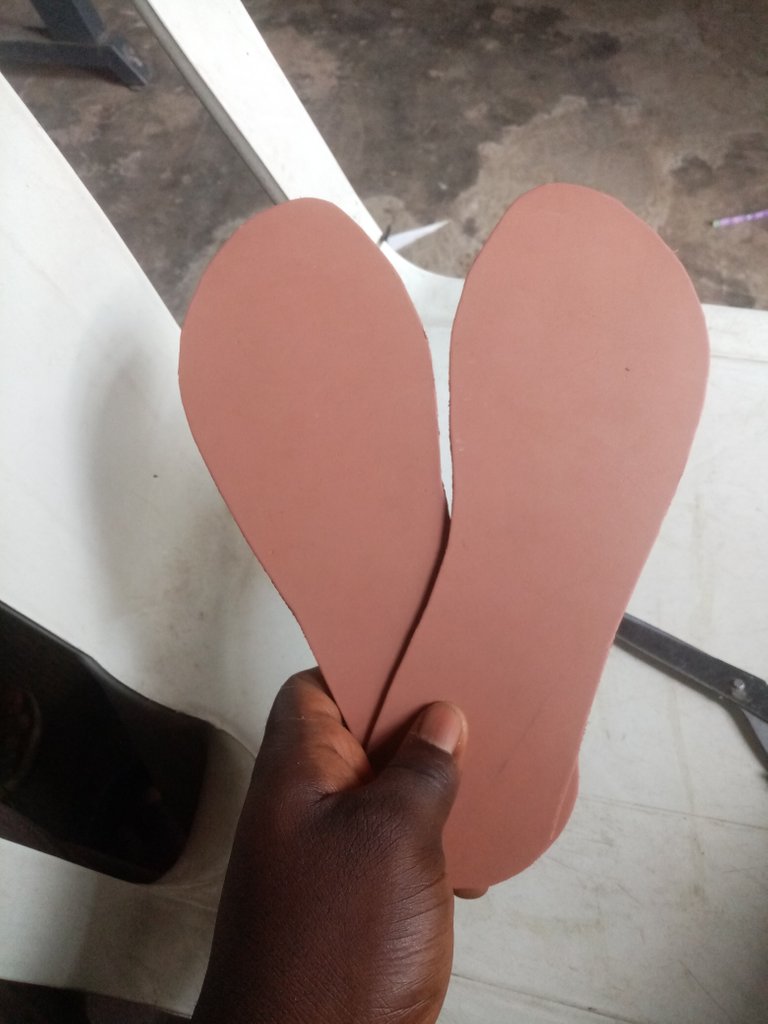
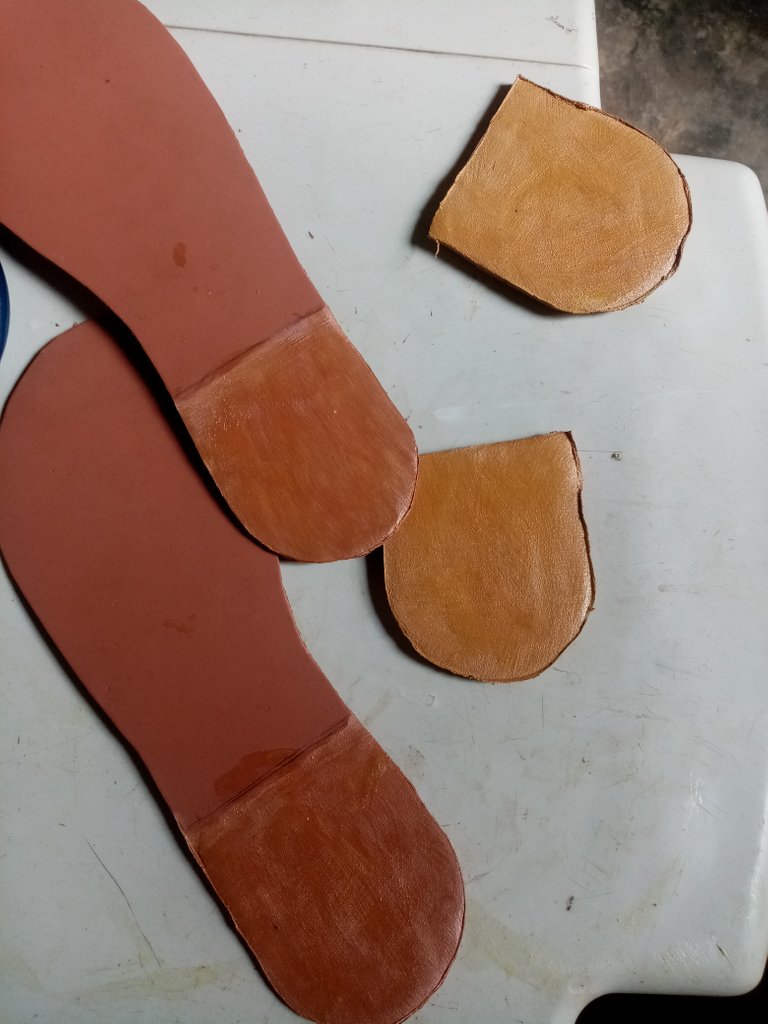
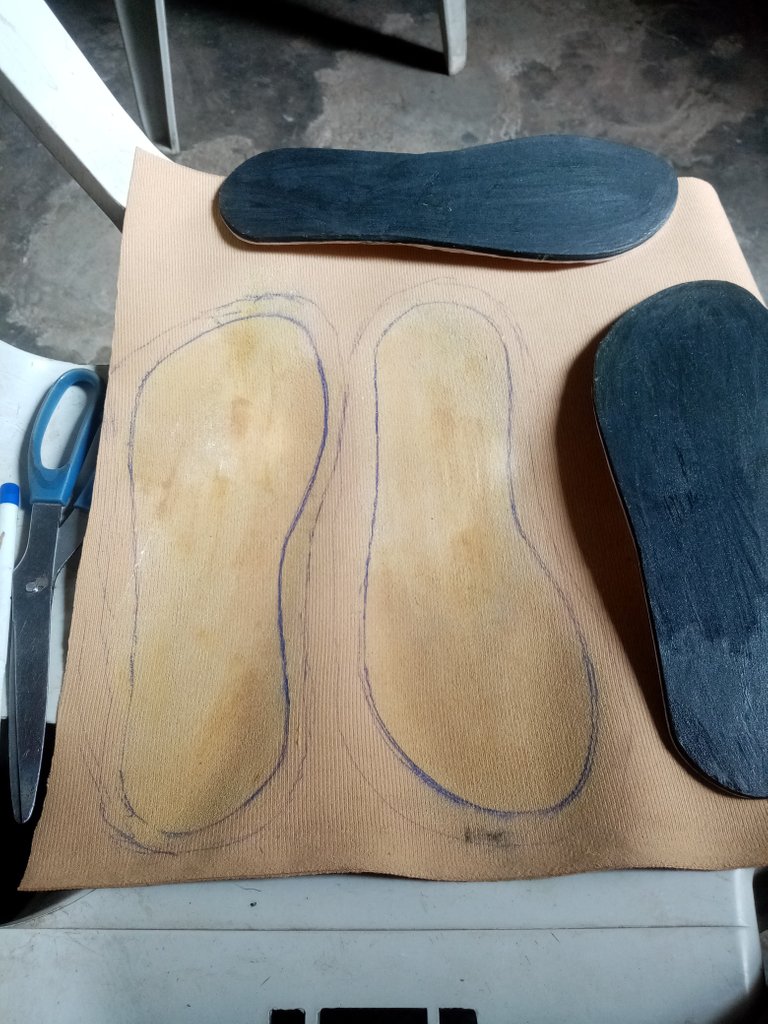
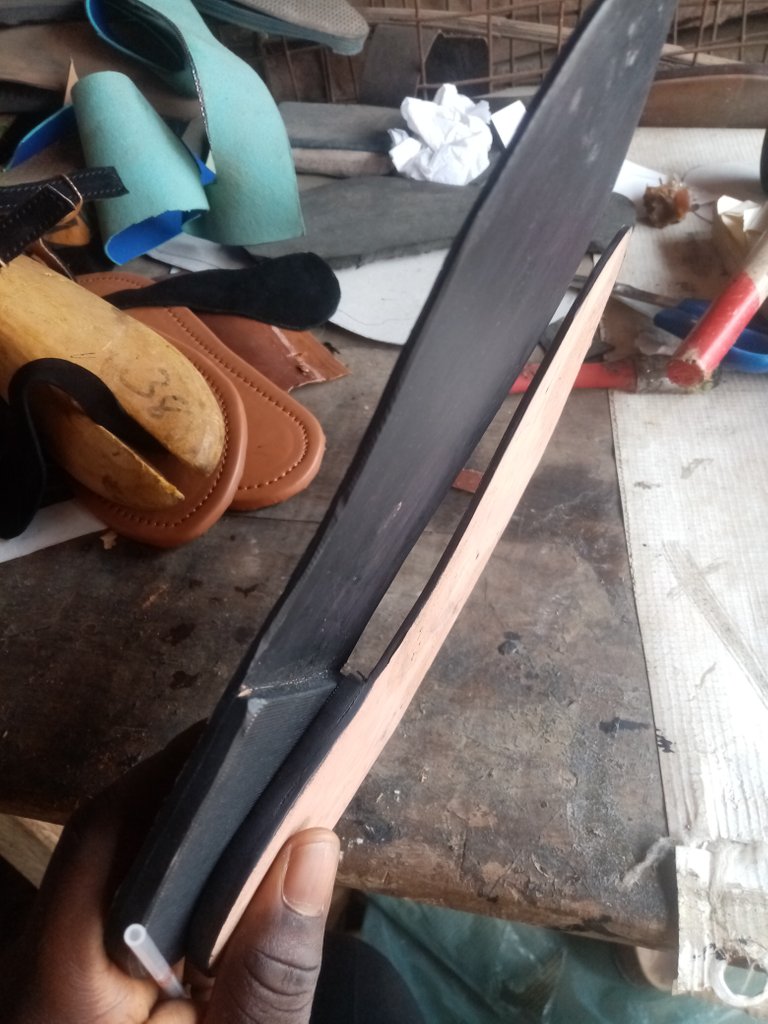
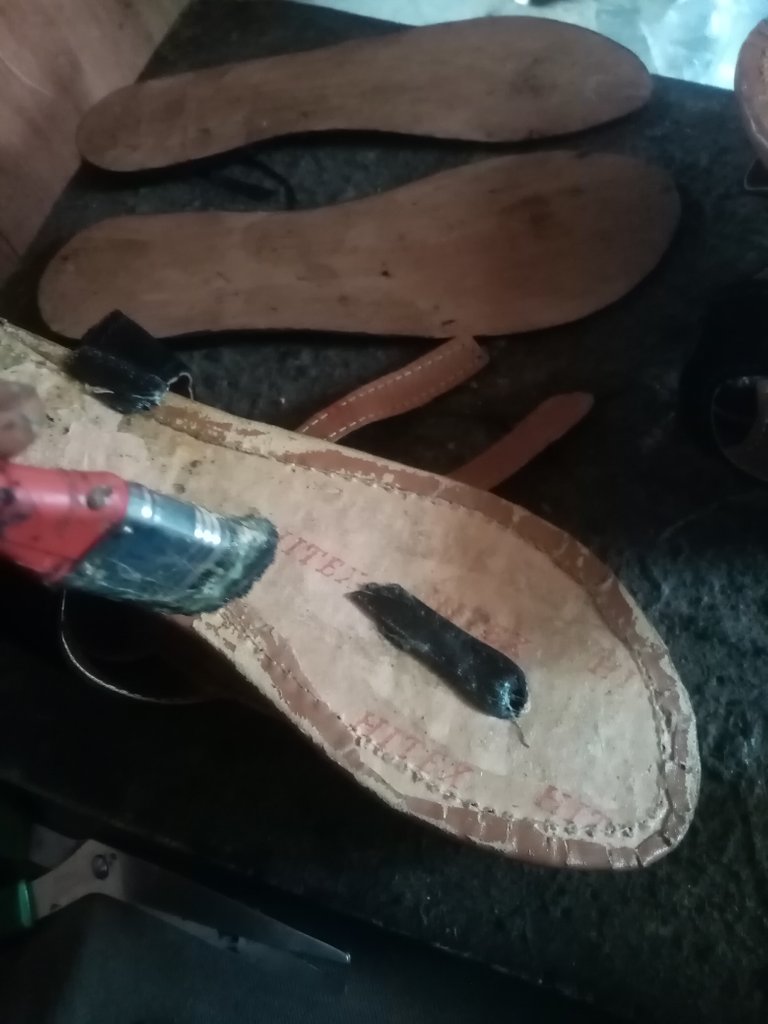
I kept the insole aside and sketched out the heel of the sole on another piece of rubber, using the bottom of the shape I'd cut out earlier on. I then cut it out
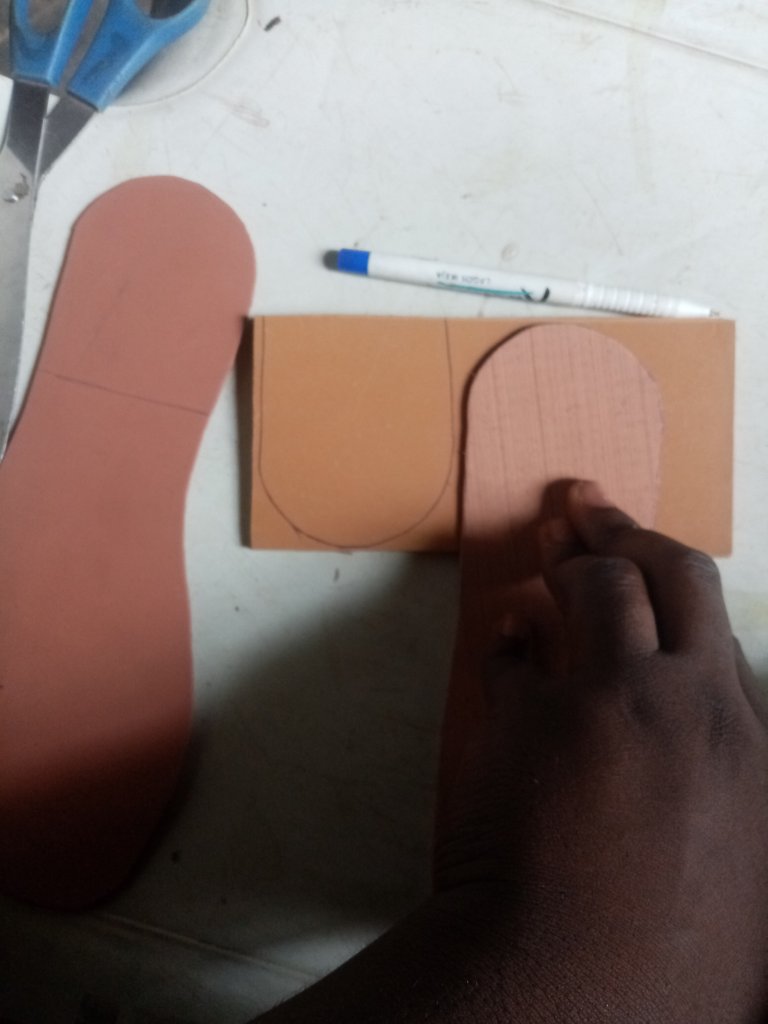
Now, I used a filing machine to smoothen one side of the sole, the heel, and the space where the heel will stay
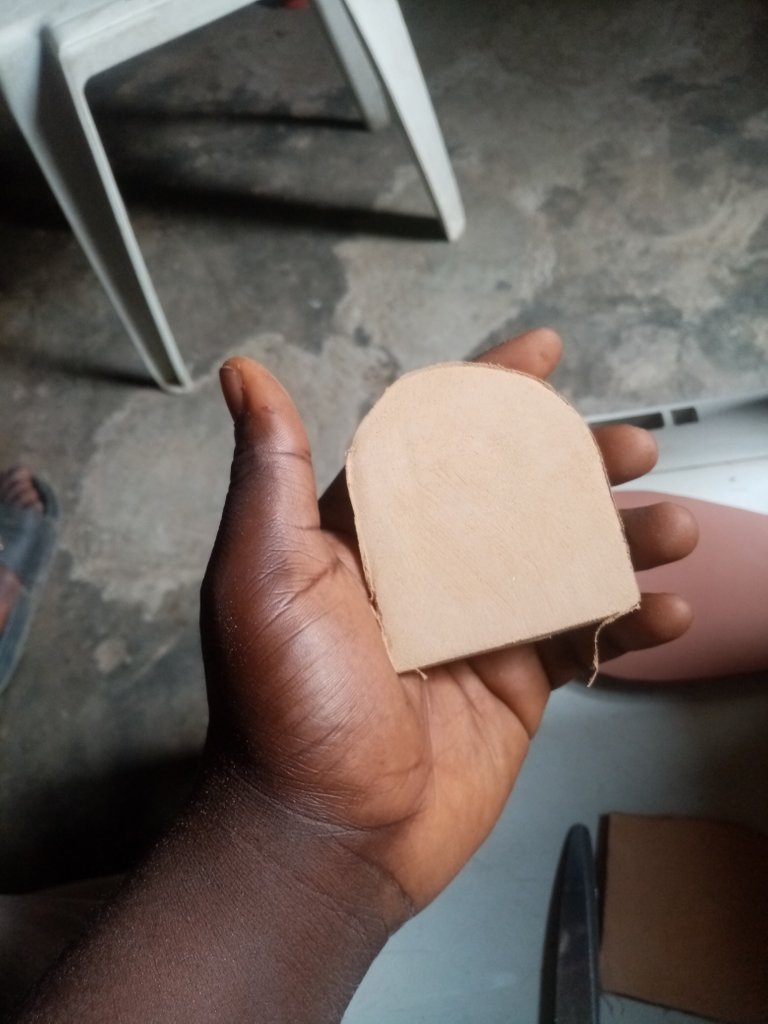
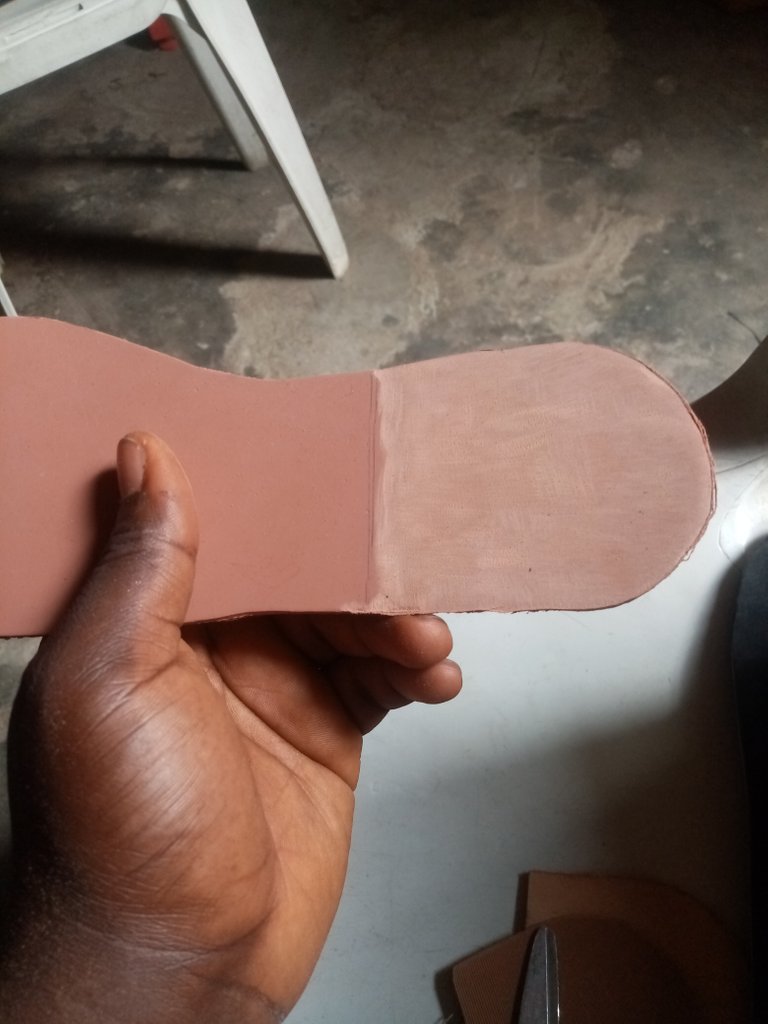
Then I gummed the heel unto the sole.
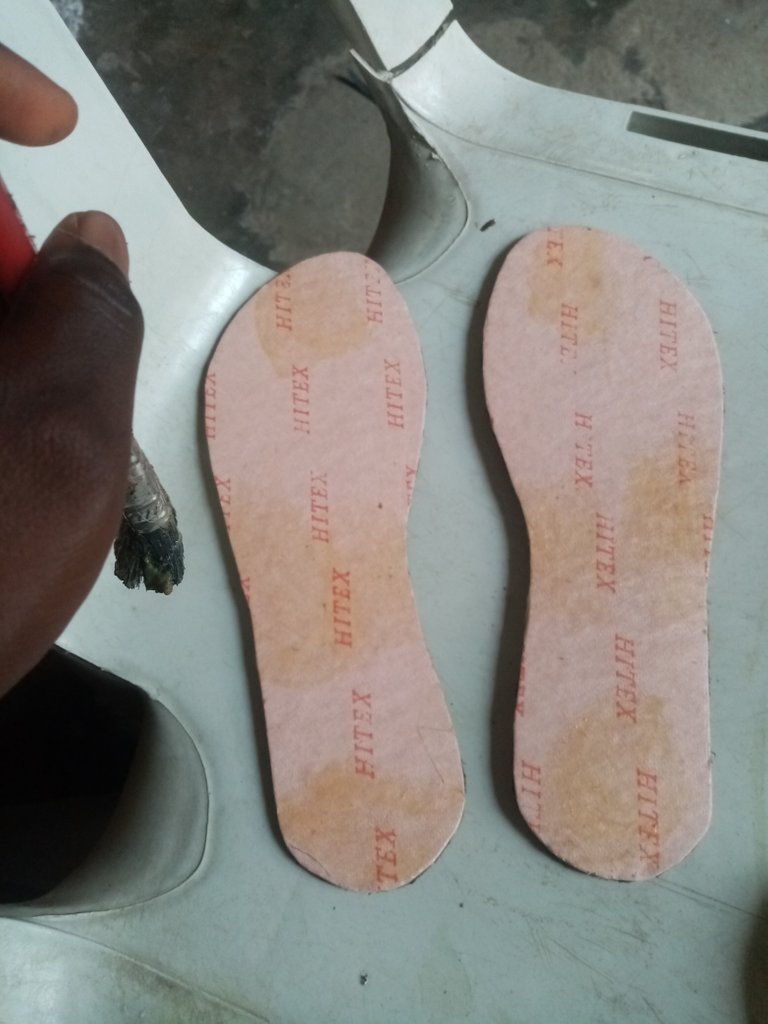
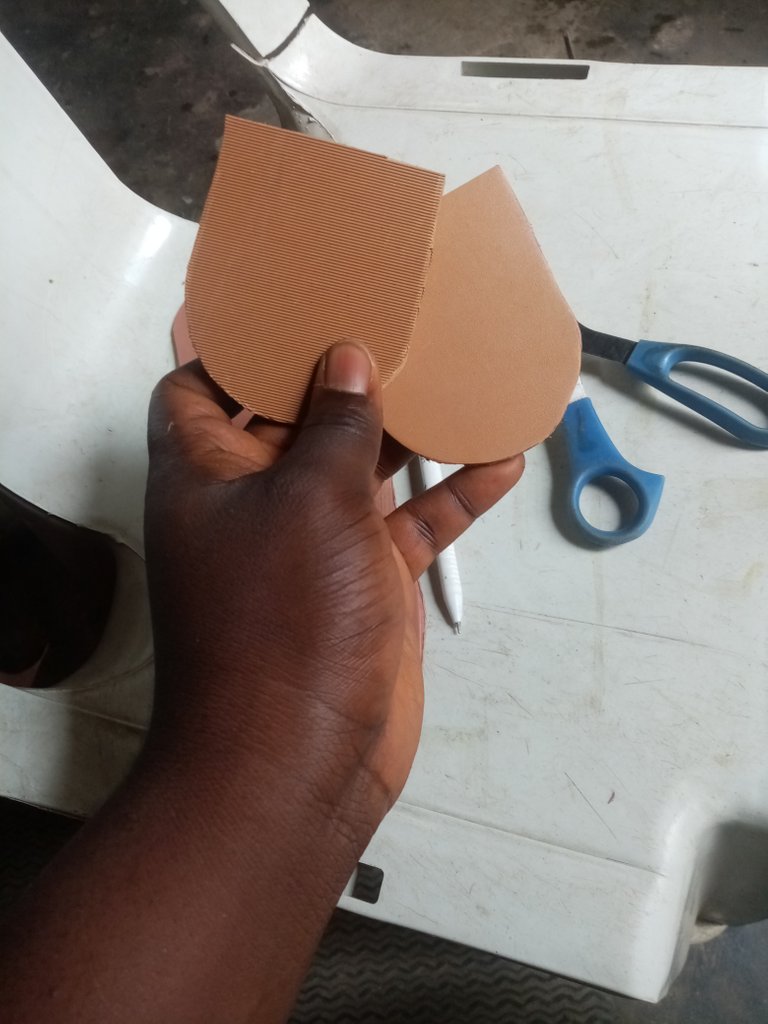
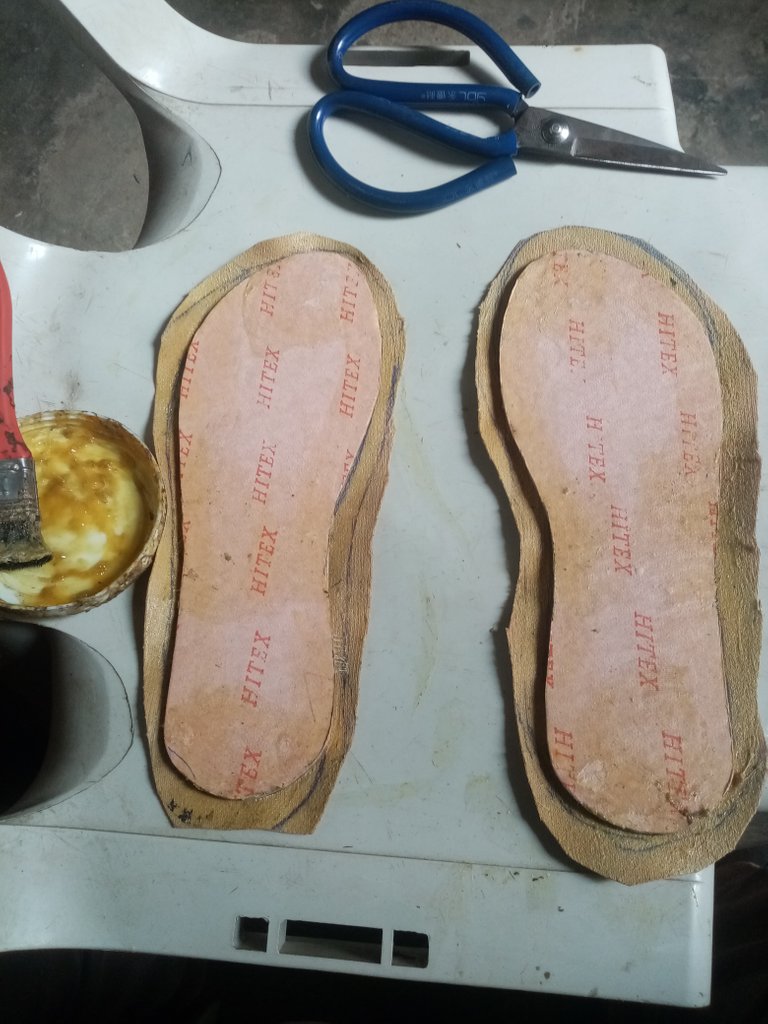
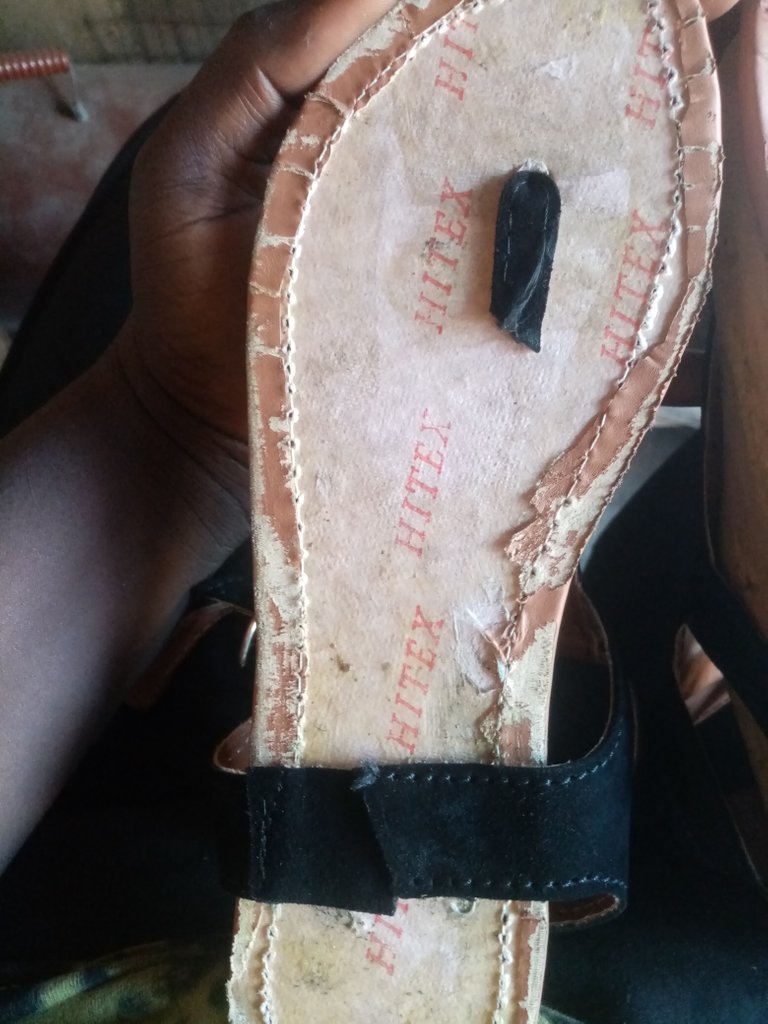
I put the sole aside and picked up the insole. I traced with space on
the insole shape on my brown leather. I then applied gum to maco side of the Insole and the leather (only the part I traced).
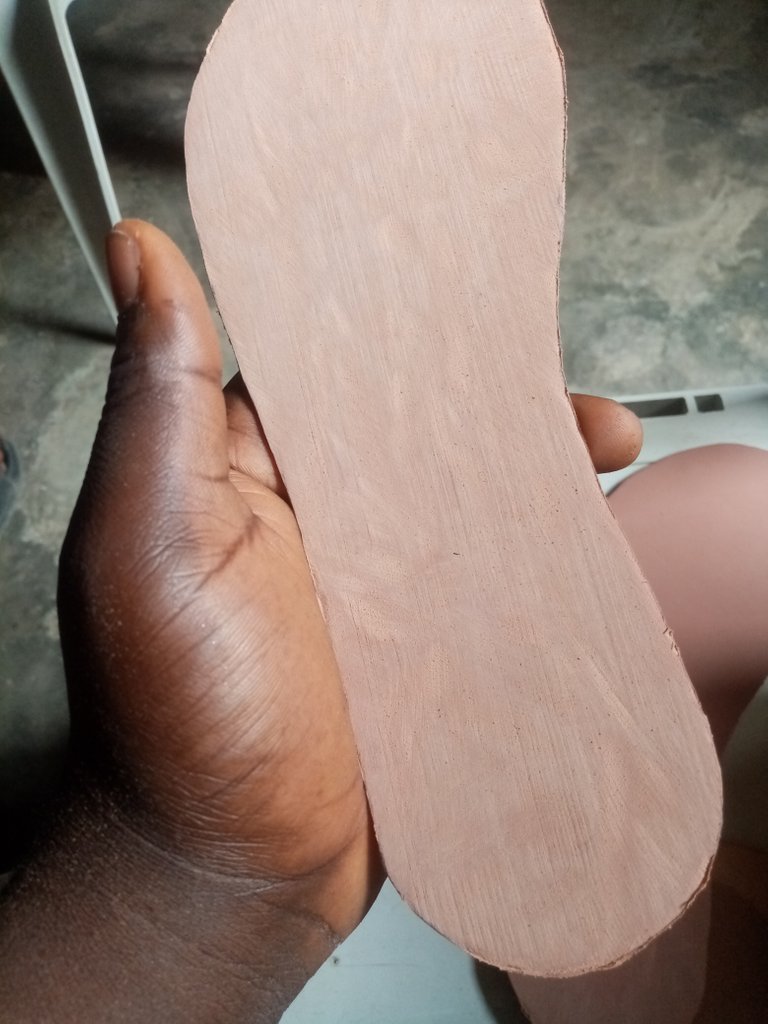
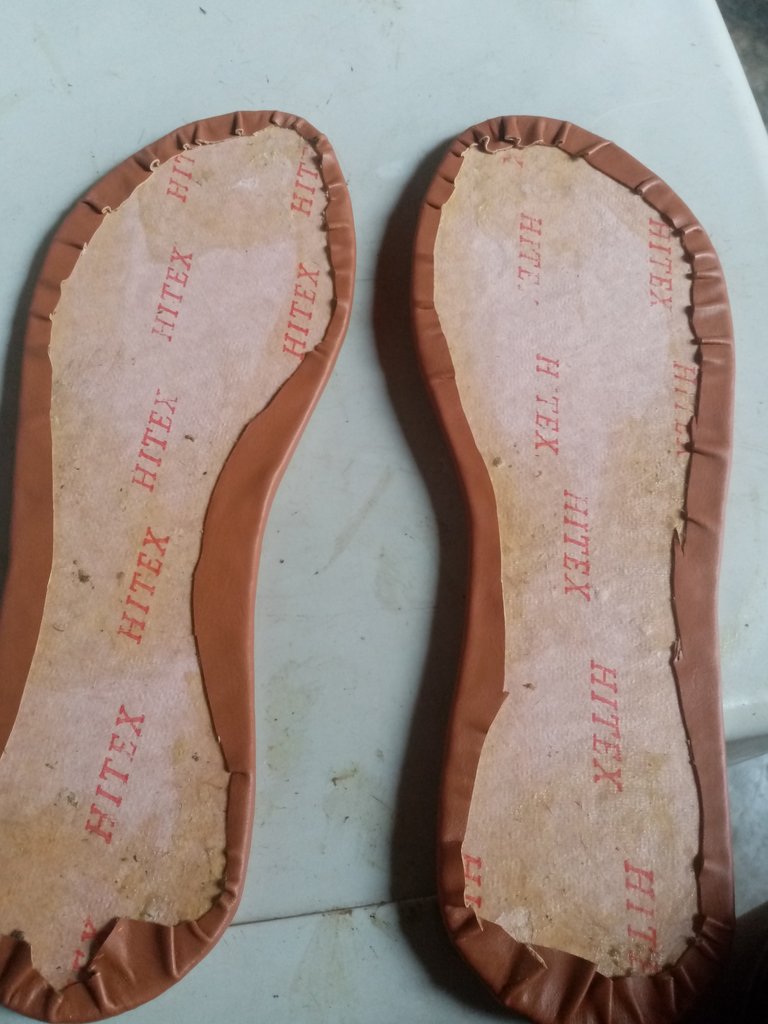
Once it was dry, I cut it out and applied gum at the edges of the bontex. Then I wrapped the leather around the edges of the bontex
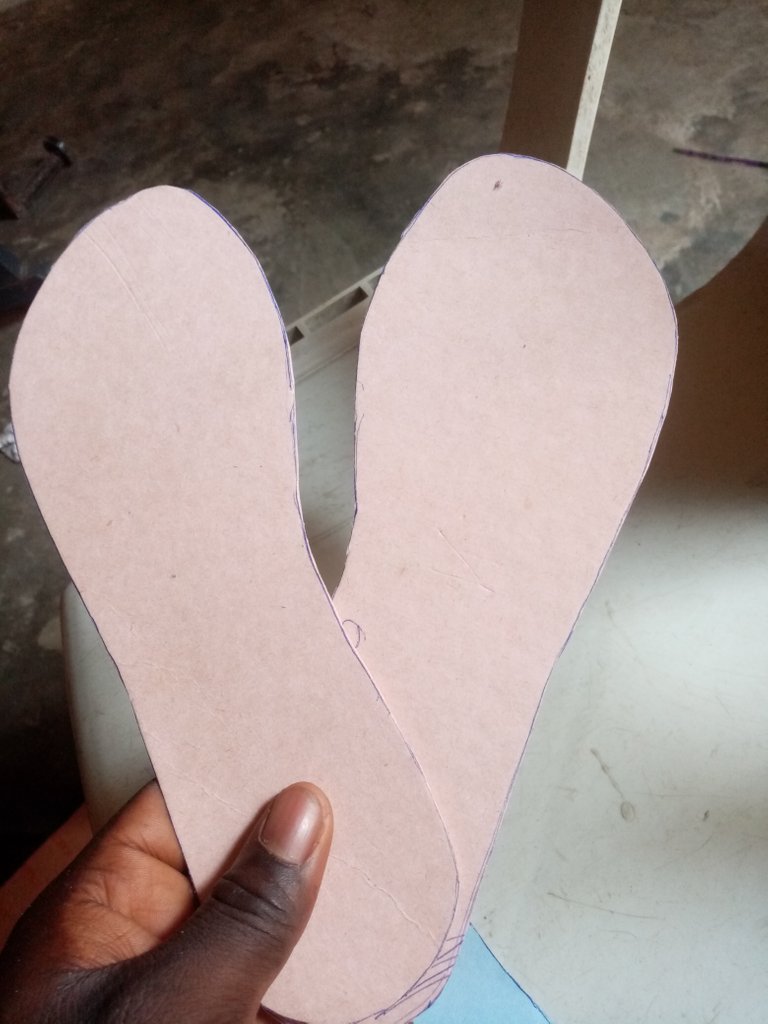
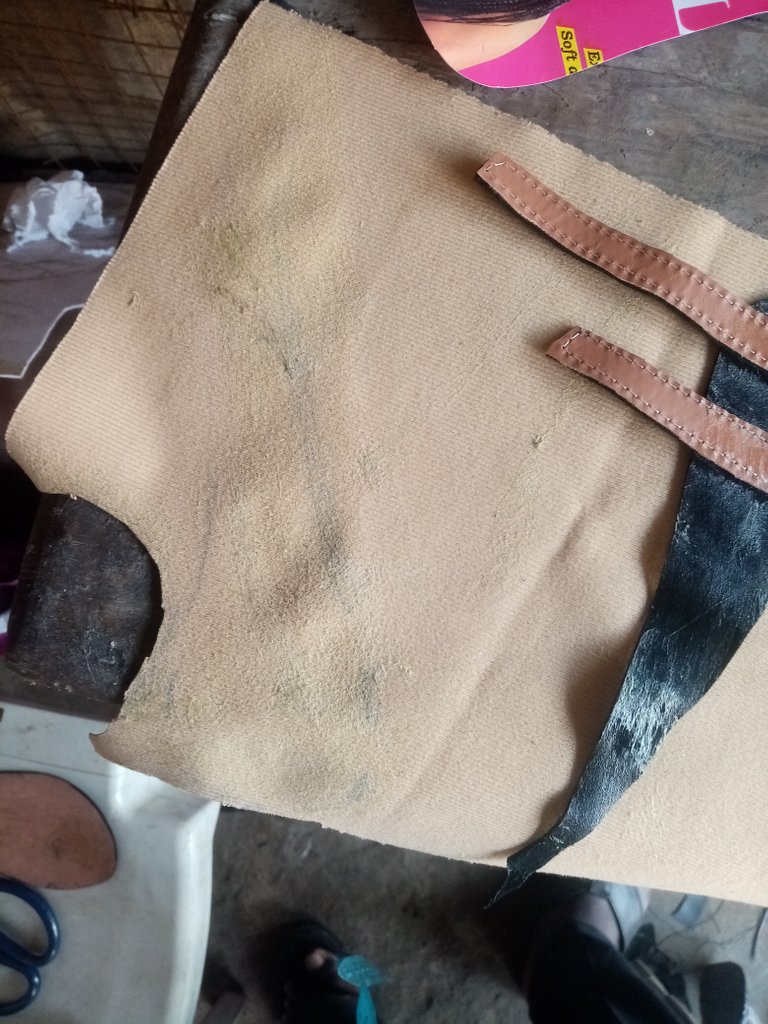
I put the insole aside. I sketched the pattern for the upper on cardboard and cut it out.
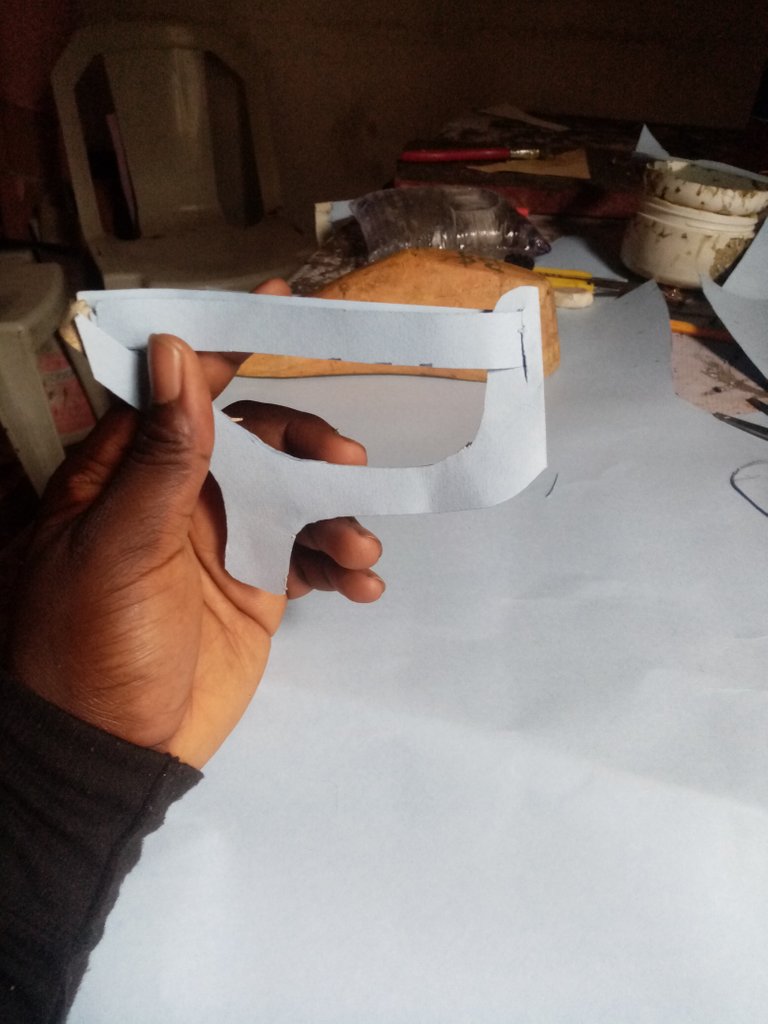
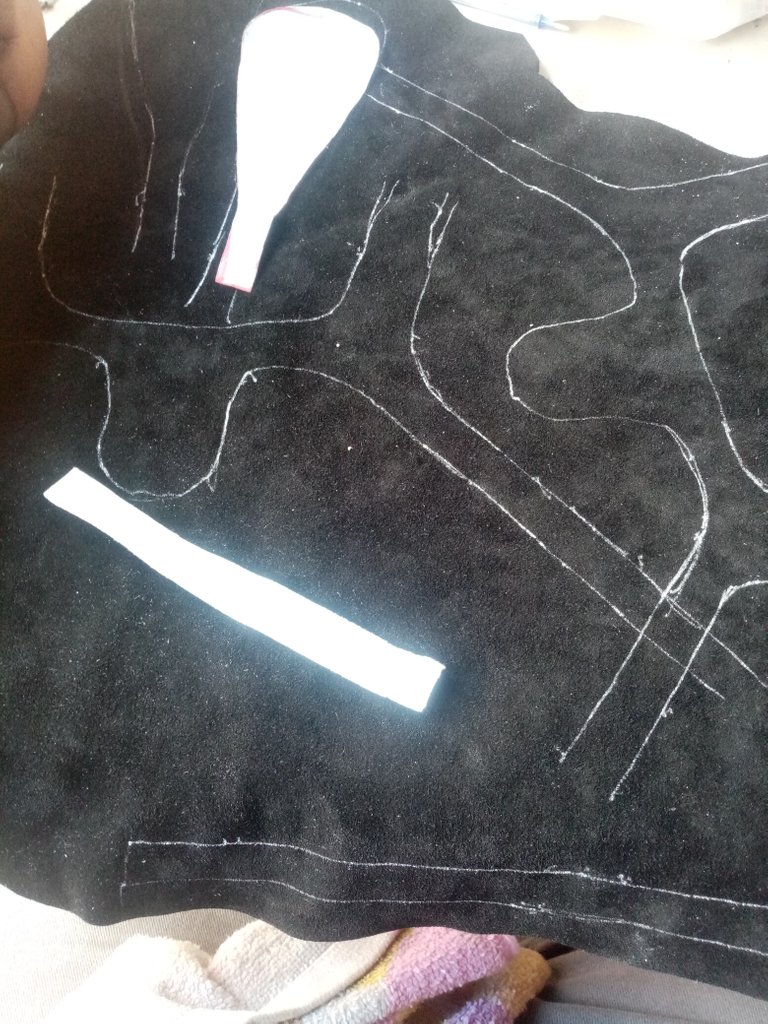
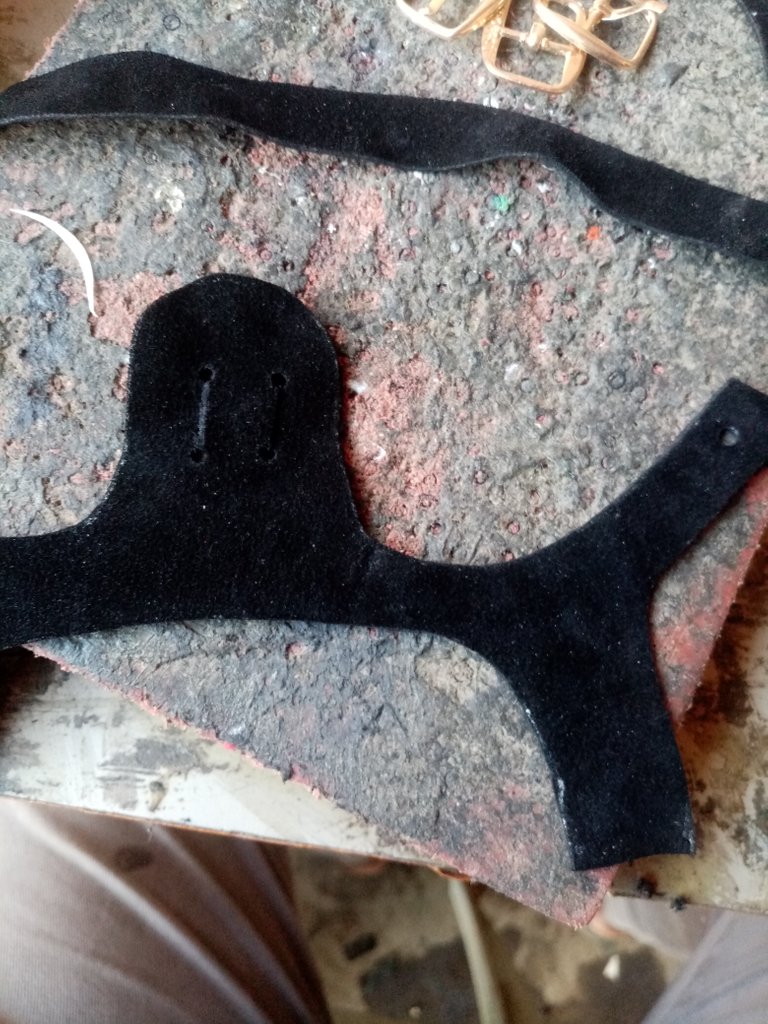
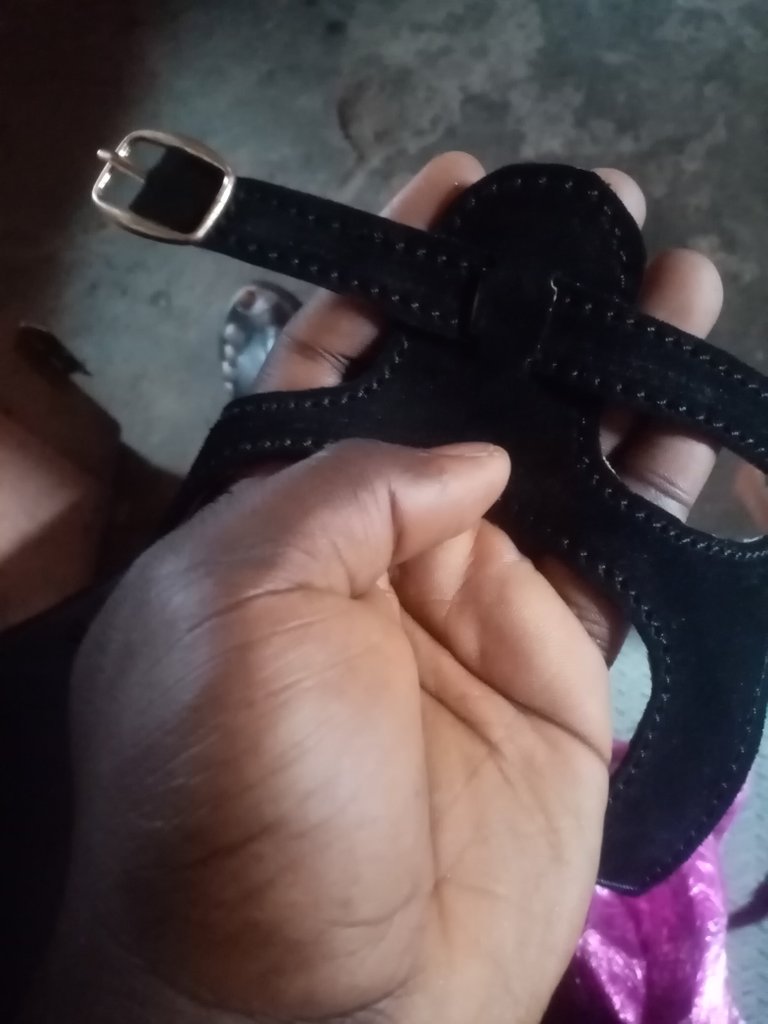
Then I traced and cut out the shapes on my black suede leather
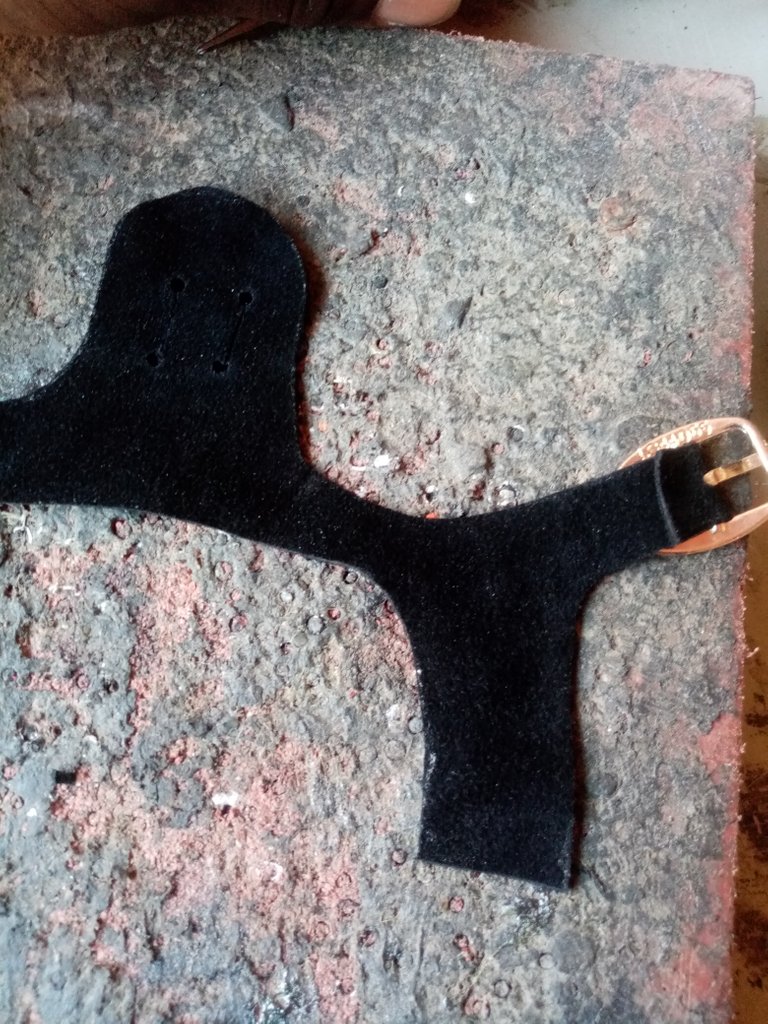
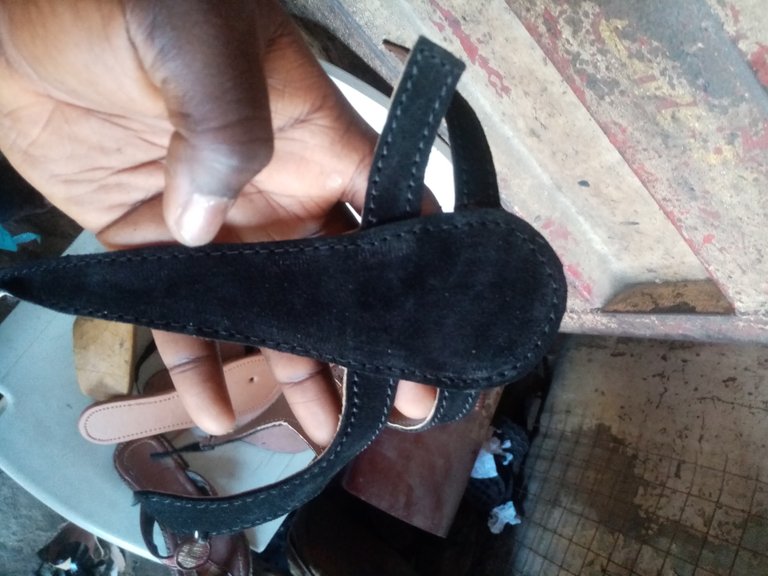
I used a cutting knife and a punch to cut the appropriate slits and holes. Then I added the buckles, lined everything except the front part, and took it along with the insole to a tailor to sew it appropriately.
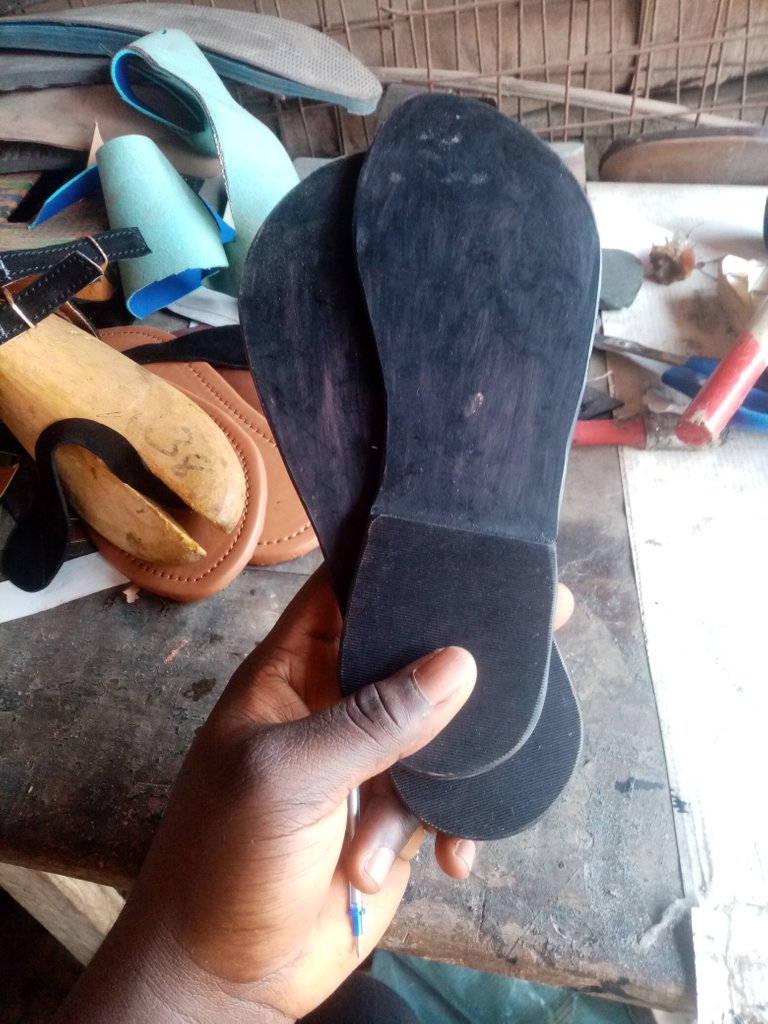
While he was sewing I dyed the sole black (I couldnt find black rubber) and smoothed it round with the filing machine.
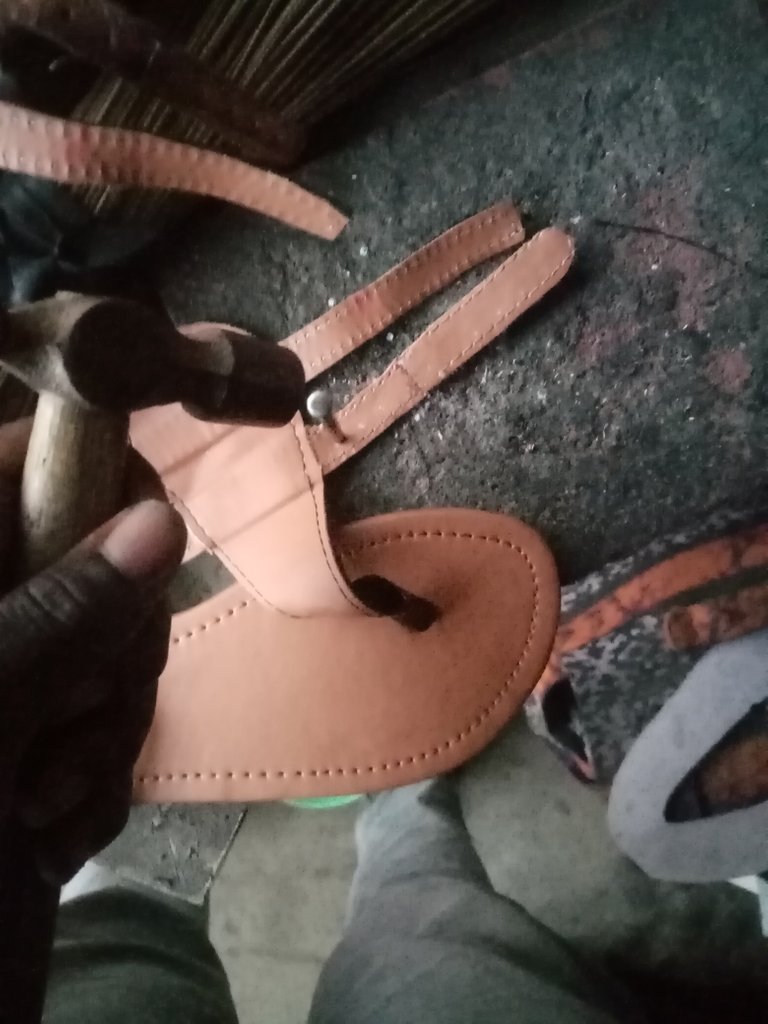
Now I set the upper on a last and marked where the straps would pass through on the front part. Then I applied gum to those parts and put them together.
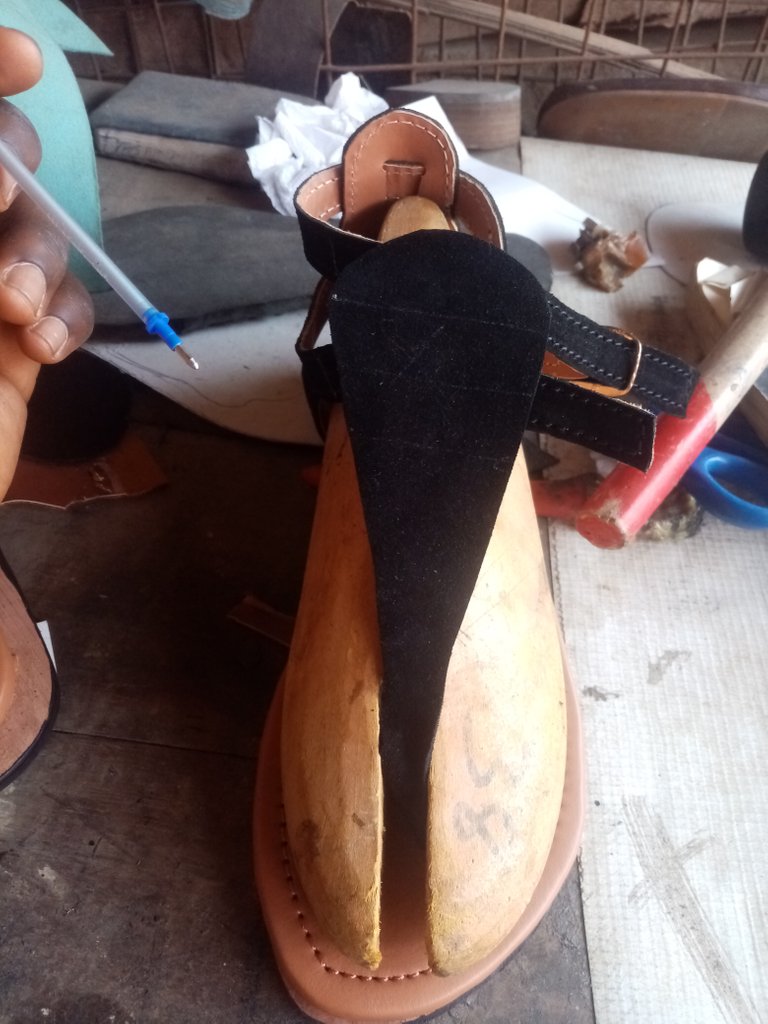
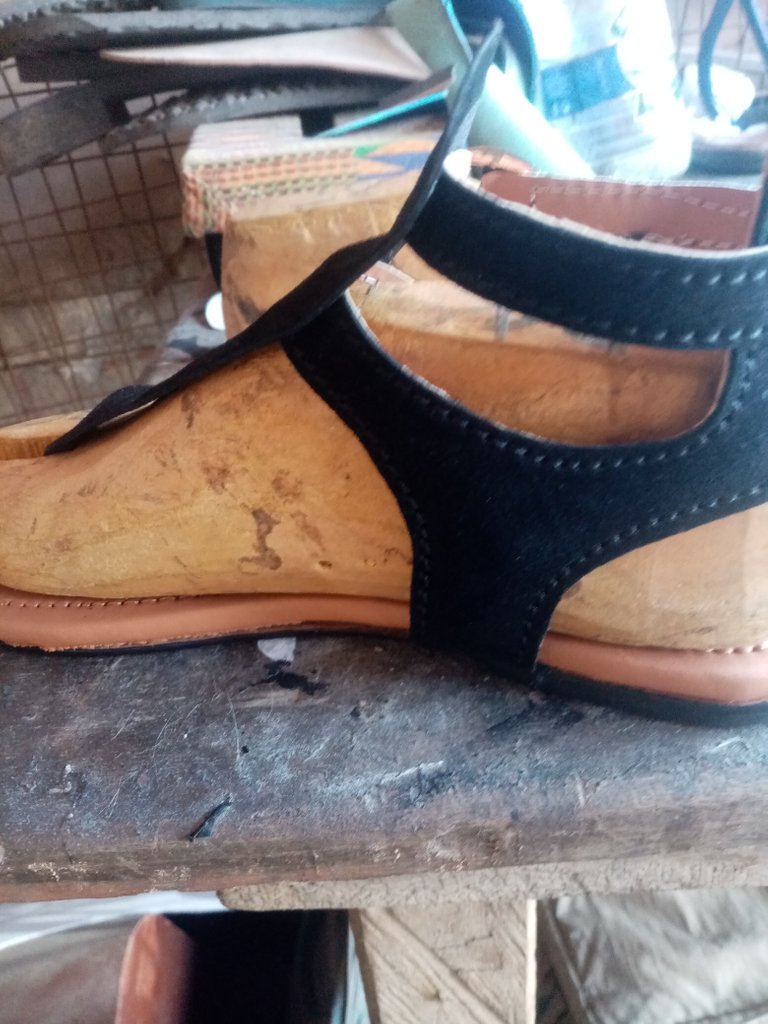
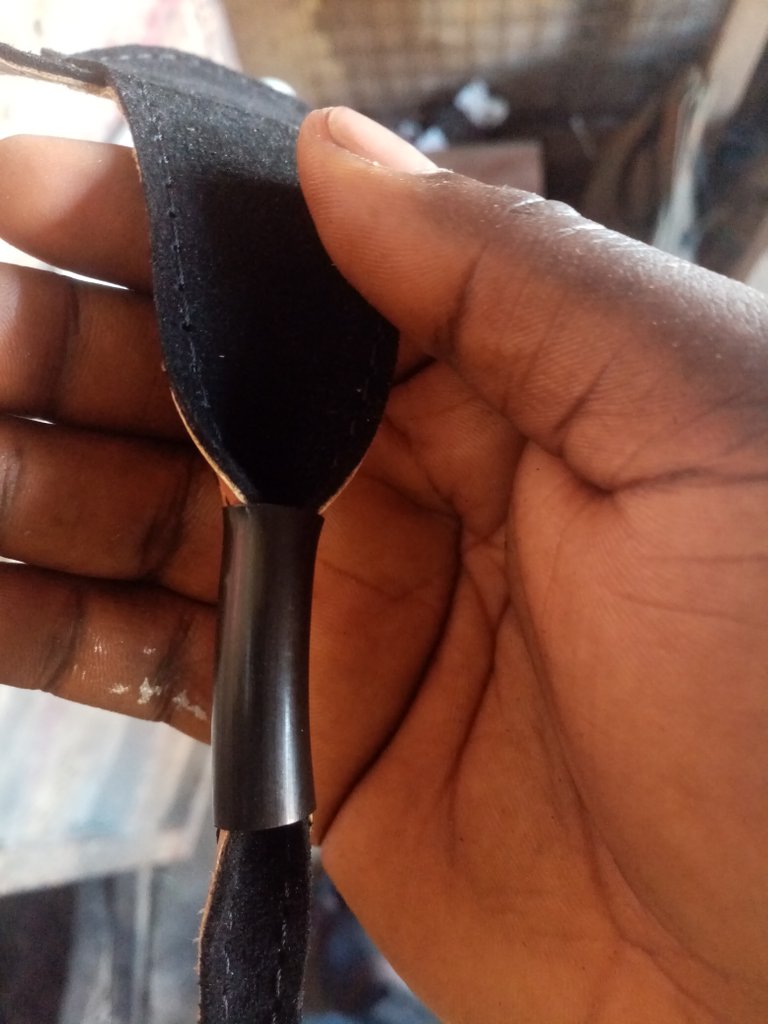
Now I lined it and added the tube

Then I lasted it

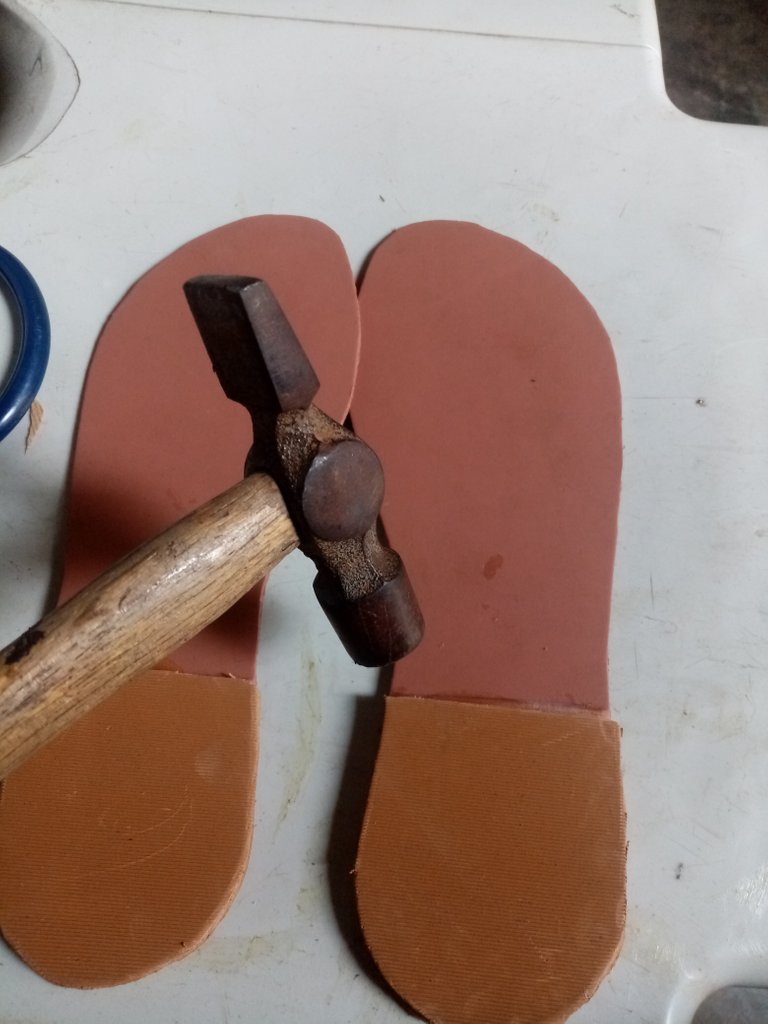
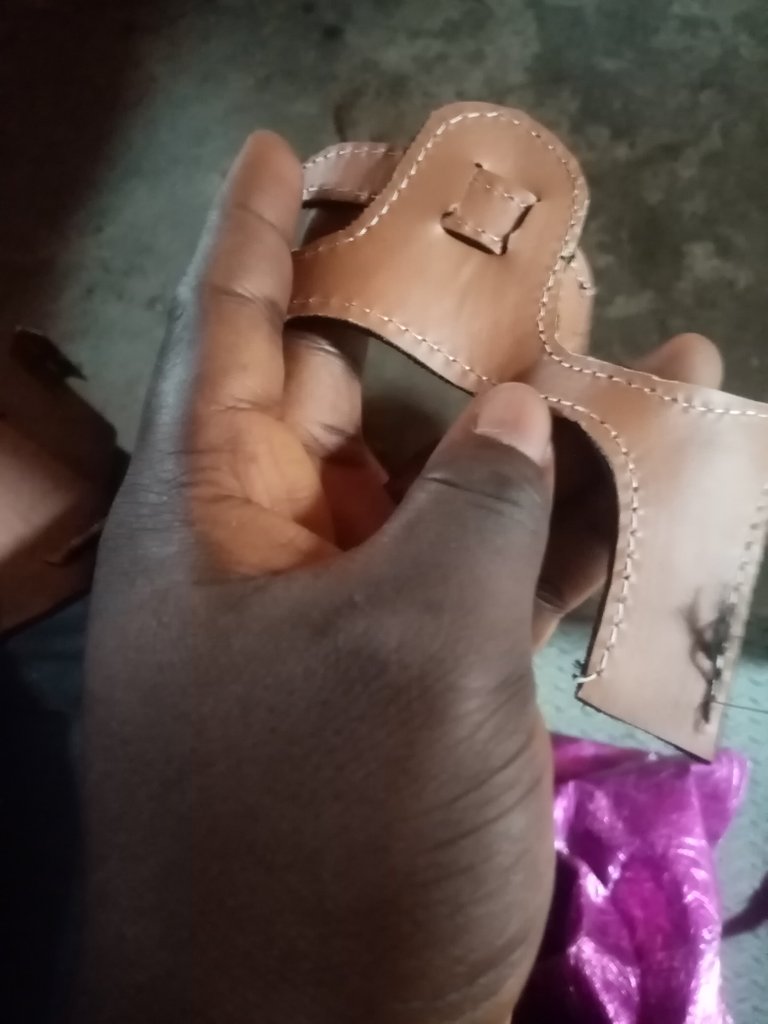
After that I applied gum to the sole and the insole, waited for some time till it was dry, and I put them together. I used a hammer to beat the edges to make sure it wouldn't separate again.
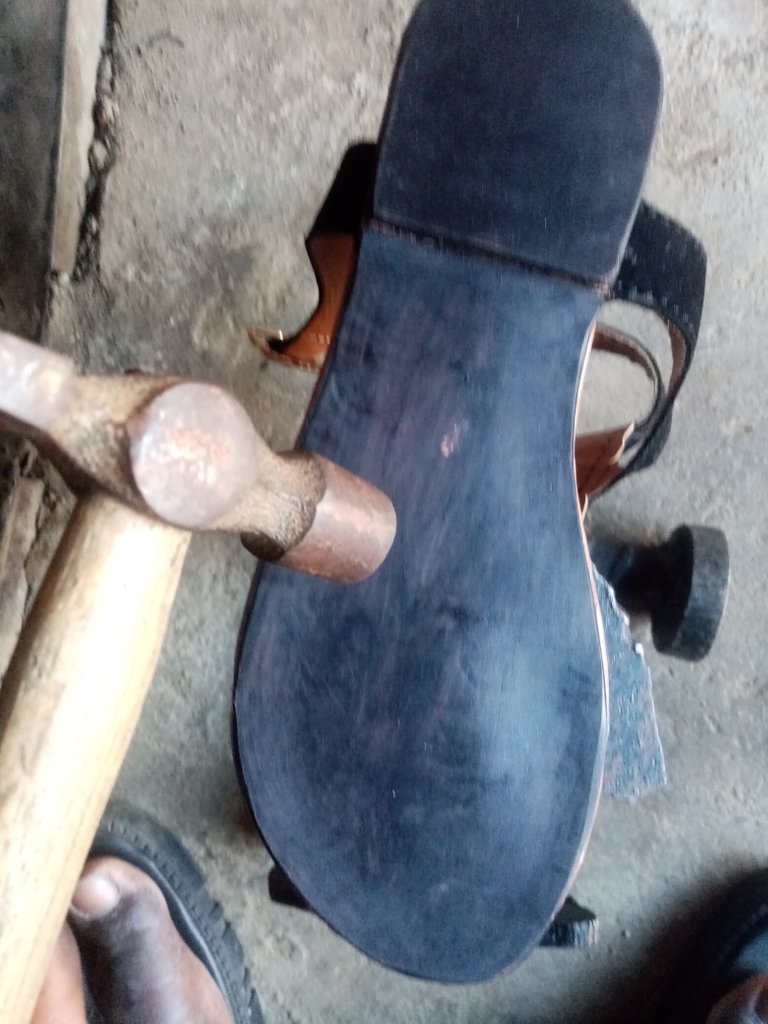
Then I used a punch and hammer to make the holes on the straps
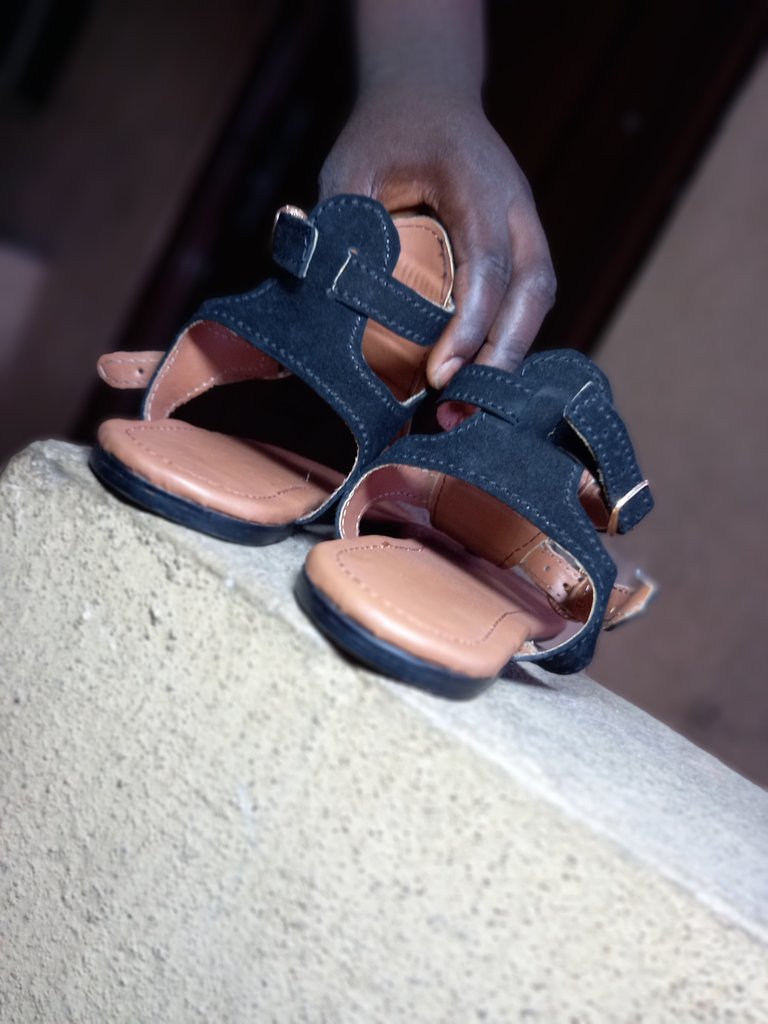
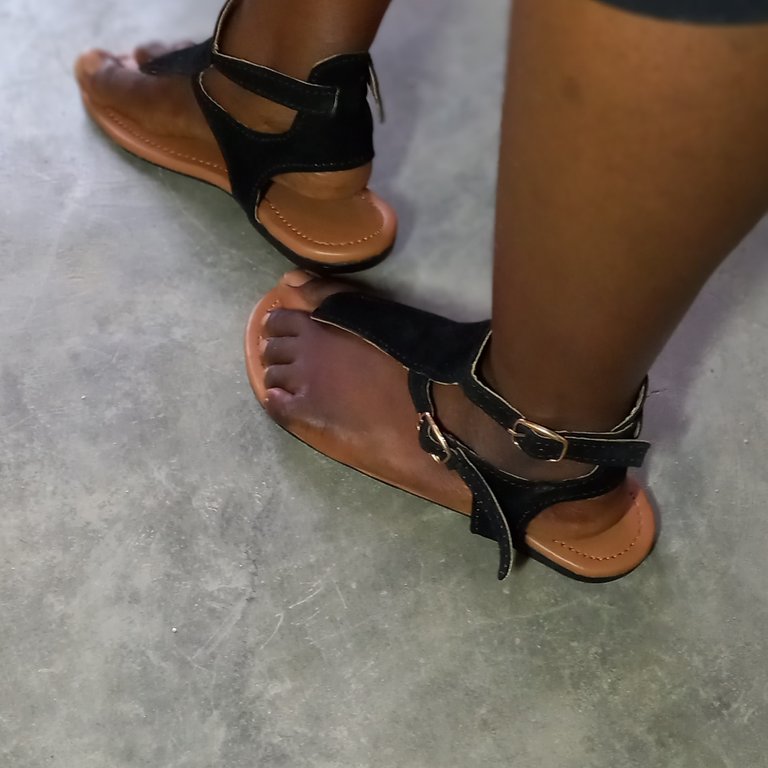
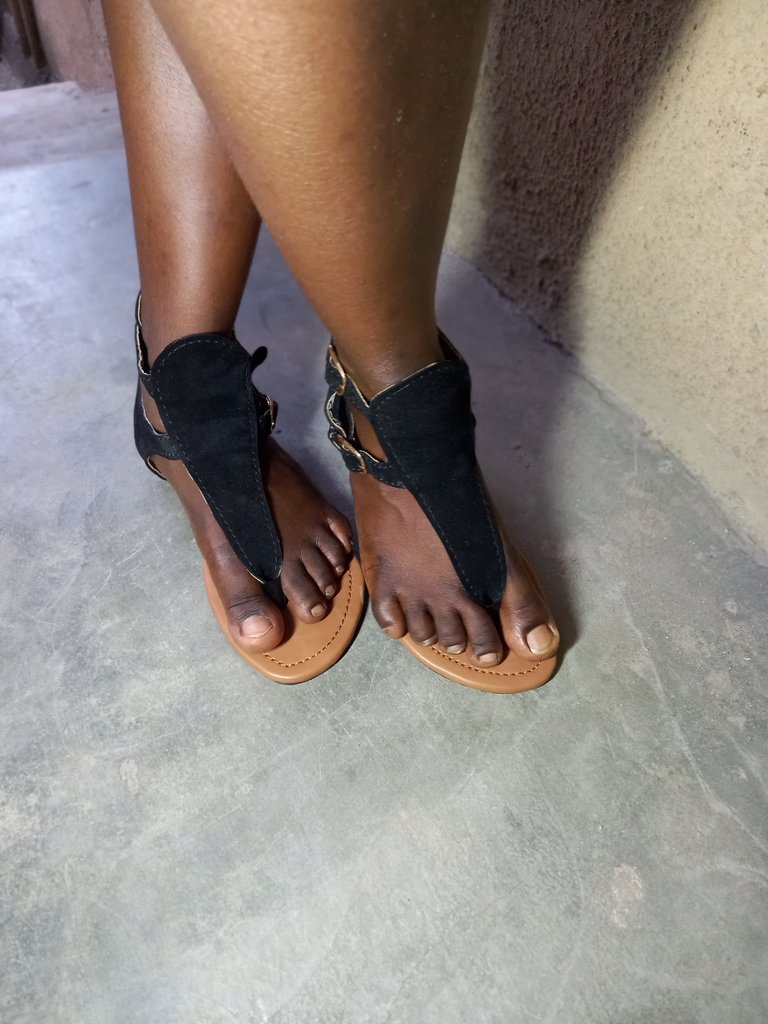
And, that's it. Some parts where a bit tricky, but I was able to overcome. I really enjoyed working on this. Here are some pictures I and @demilade2all took using her phone.

Thank you for taking your time to read this post your support and feedback is greatly appreciated. Have a blessed day.
All pictures were taken by me unless stated otherwise
Wow!!!
A step by step tutorial on how to make the leather slippers.
Thank you for sharing
You are welcome. Thanks for reading
This is the most amazing post I have seen recently. I am at awe if your work. I never actually knew you could do shoes. I just learnt a process of shoe making for free. Thanks so much for sharing this with us.... And it looks so fine... Kudos.. You deserve some accolade...
I would suggest you do a video next time.. That would really boost you... Just a suggestion though..
Thank you so much.
The problem at the moment is I'm still learning, therefore I don't have my own work space. You should see the looks I get when I take this pictures after almost every step
I understand that.. Guess you are working towards that... God will see you through..
Amen. Thank you for reading
Congratulations @b0s! You have completed the following achievement on the Hive blockchain and have been rewarded with new badge(s) :
Your next target is to reach 600 comments.
You can view your badges on your board and compare yourself to others in the Ranking
If you no longer want to receive notifications, reply to this comment with the word
STOPTo support your work, I also upvoted your post!
Check out the last post from @hivebuzz:
Support the HiveBuzz project. Vote for our proposal!
You are really creative. This is impressive and Fabulous. Well Done Bro.
I'm really impressed to see the step by step approach you took in doing this.
That size pattern though. It's a nice work. Keep it up
I'm sending this to @dreemport. Heheh. I'm sure that our readers will enjoy reading this
Thanks a lot for your kind words and support. I hope they enjoy it
Wow.
Just wow..
Thank you
You really captured the whole process with the photos and clear explanation on each step
You did a great job making these sandals a long process but they look awesome
Do you have a pattern or design them yourself
Thank you
The pattern for the leg size was already designed by my boss. But the one for the upper I drew it out myself
Awesome
Thanks
Most welcome
This is really beautiful and the step-by-step tutorial makes it so easy to replicate, I hope she loves it.
Meanwhile, #dreemport brought me here
Thank you, she does
I think it's beautiful ❤️
Thank you
Hello @b0s. This is the second pair of sandals I have seen you create as a craft project. Your work looks sturdy enough to wear, and it looks lovely. I like your step-by-step tutorial as you work. Your post would do well, I believe and I've mentioned it before, being published in the Build-It or DIY Community, with tags #buidl, and #diy.
Keep up the good work, and thanks for sharing this labor-intensive project.
Take care.
Read through @dreemport
Thank you
I must have missed it . I'll be sure to post it in one of those next time.
Thanks a lot.
I must say this is a tough process but would be easier for someone who is already an expert in it. You really did well and I like the sandals. So cute. Keep it up
@dreemport led me here
Thank you very much
Wow 😮 what a talent 👍 don't know if I would have the patience to go through so many levels 🥴 to produce a single pair of shoes but the end result is gorgeous.
Thank you. I'm sure you can do it if you want to
This was so unbelievably impressive!!! I can't believe all the parts of this - and handmade!!!! wow!
Do you do many posts about creating sandals?? hehehehe I want to see the process for each new shoe you make!!!
really really lovely work!
Yes I do, anytime I create one I post it here.
Sure, I'll share anytime I create. Thanks for stopping by
hehehe you can always tag me in the post or comment section so I come see them!!! just in case i miss them! I would love to see each new creation - i'm a fan already! :)
Consider it done.
Yippee🎉🎉 I have my first fan.
hehehehe and very proud to be!!!
hehehehe
I like those sandals, they're cute! Great job on these! 😃
Thank you very much.
Kudos! One of the most comfortable footwears I have😊
Woohoo