

Hola queridos amigos de hive! 😃❤️ Hello dear friends of hive!
Hoy les traigo esta hermosa manualidad inspirada en el personaje de la famosa serie animada Bob esponja, útil e ideal para guardar los cepillos dentales de los más pequeños de la casa. Me tome muy enserio la iniciativa de la amiga @jennyzer, ya que esta elaborado básicamente con todos los materiales reciclados que pude encontrar en casa, no se si estoy a tiempo pero igual la intención es lo que cuenta.
Muchas veces tenemos cartones de huevo y rollos de papel higiénico que no sabemos que hacer con ellos, pero ahora con este proyecto podemos darle un nuevo uso, y convertirlo en este divertido porta cepillo, además les podría servir como una linda decoración para la habitación de sus niños.
Como ya se pudieron dar cuenta en mis anteriores post, me encanta recrear en mis trabajos dibujos y series animadas con material reciclado, es en lo que más me suelo inspirar. Así que no se diga más y conozcamos los materiales!
Today I bring you this beautiful craft inspired by the character of the famous cartoon series SpongeBob, useful and ideal for storing the toothbrushes of the youngest in the house. I took very seriously the initiative of my friend @jennyzer, since it is made basically with all the recycled materials I could find at home, I do not know if I am on time but still the intention is what counts.
Many times we have egg cartons and rolls of toilet paper that we don't know what to do with them, but now with this project we can give it a new use, and turn it into this fun brush holder, also it could serve as a nice decoration for your children's room.
As you may have noticed in my previous posts, I love to recreate in my work cartoons and cartoon series with recycled material, it's what I usually get inspired by. So let's say no more and get to know the materials!
Materiales |📋🎨| Materials

Para esta manualidad necesitaremos:
For this craft we will need:
- Cartón de huevos
- Rollo de papel higiénico
- Cd
- Botella de plastico
- Foami o goma eva
- Cortador
- Esponja
- Pinturas al frío
- Tijera
- Silicon liquido
- Molde de la figura(Bob esponja)
- Pincel
- Lápiz
- Egg carton
- Toilet paper roll
- Cd
- Plastic bottle
- Foami or eva rubber
- Cutter
- Sponge
- Cold painting
- Scissors
- Liquid silicon
- Figure Mold(Sponge Bob)
- Brush
- Pencil
Procedimiento (paso a paso) |✂️📏| Process (step by step)
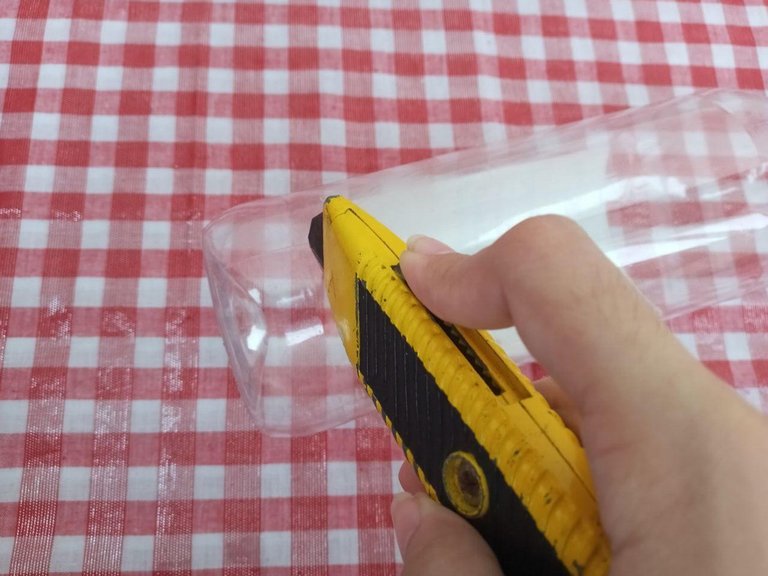
🔘 Lo primero que vamos hacer es cortar la botella de plástico, tal como les muestro en la imagen. Luego la lavamos bien con nuestro limpiador habitual, con un paño limpio la secamos para continuar.
The first thing we are going to do is to cut the plastic bottle, as I show you in the picture. Then we wash it well with our usual cleaner, with a clean cloth we dry it to continue.

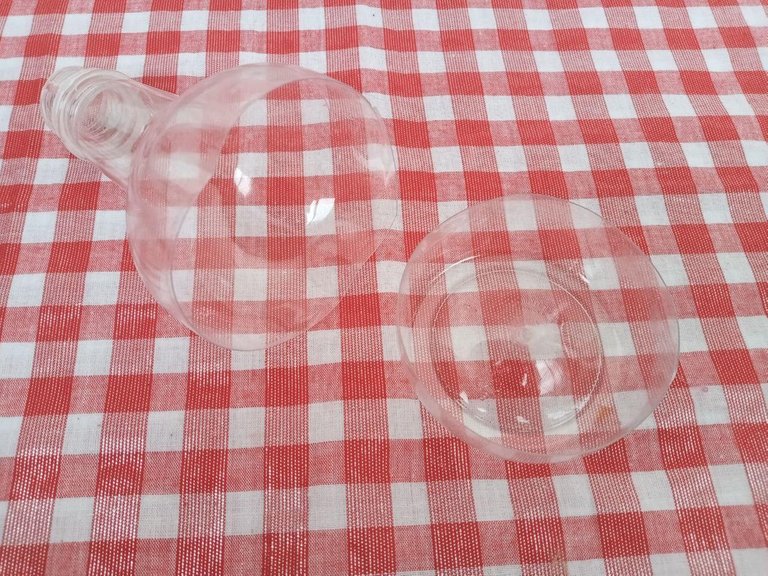
🔘 Ahora les quiero mostrar como quedarían ambas partes luego de realizarle los cortes, seguidamente tratamos de unirlas hasta embonar.
Now I want to show you how both parts would look after the cuts, then we try to join them until they fit.

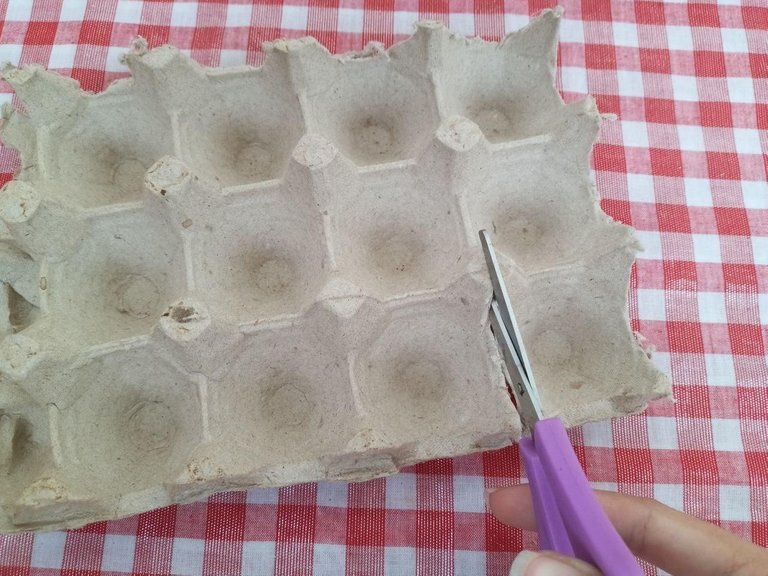
🔘 El próximo material que vamos a utilizar sera el cartón de huevos, lo que haremos sera recortar cada agujero(donde irían colocados los huevos), tal como se los muestro en la siguiente imagen.
The next material we are going to use will be the egg carton, what we will do is cut out each hole (where the eggs would be placed), as shown in the following image.
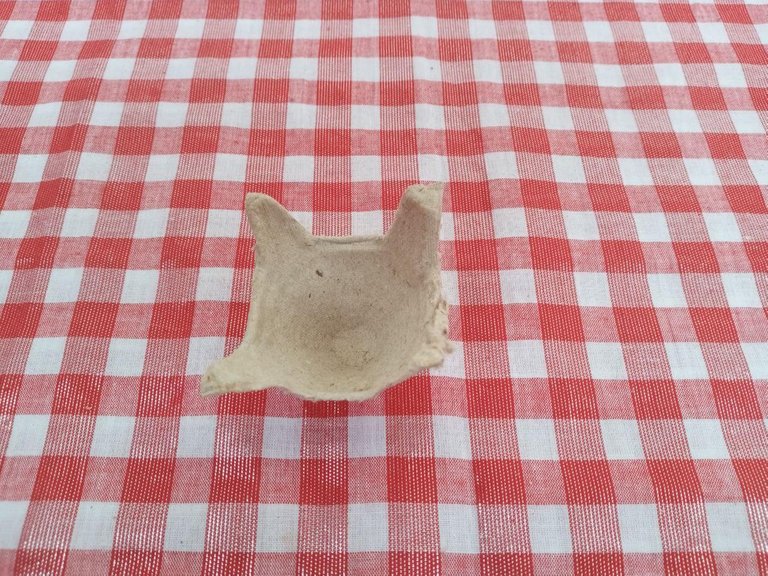
🔘 Ahora les enseñare hacer como especie de pétalos, que nos servirán para simular una piña,¡ Si es una piña!. Lo primero que haremos sera recortar pequeñas lineas, nos ira quedando una flor. Luego en la parte superior le damos una forma redondeada a cada una.
Now I will teach you how to make a kind of petals, which will serve to simulate a pineapple, if it is a pineapple! The first thing we will do is to cut small lines, we will be leaving a flower. Then at the top we give a rounded shape to each one.


🔘 Una vez tengamos la "flor" armada, comenzaremos a recortar cada pétalo, aproximadamente utilizaremos todo el cartón completo, ya listo procedemos a pegar.
Once we have the "flower" assembled, we will begin to cut out each petal, approximately using the entire cardboard, and then proceed to paste.


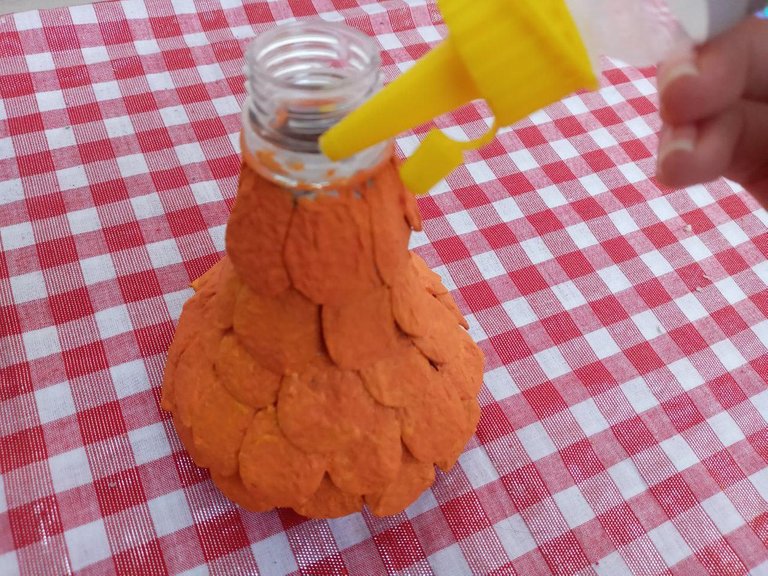
🔘 Con mucha paciencia vamos pegando cada una hasta rellenar y cubrir toda la botella.
With a lot of patience we are gluing each one until we fill and cover the whole bottle.


🔘 Ahora pintaremos, con la esponja comenzaremos a dar toques, asegurándonos de cubrir toda la piña, eso nos dará un efecto muy realista.
Now we will paint, with the sponge we will begin to give touches, making sure to cover all the pineapple, that will give us a very realistic effect.


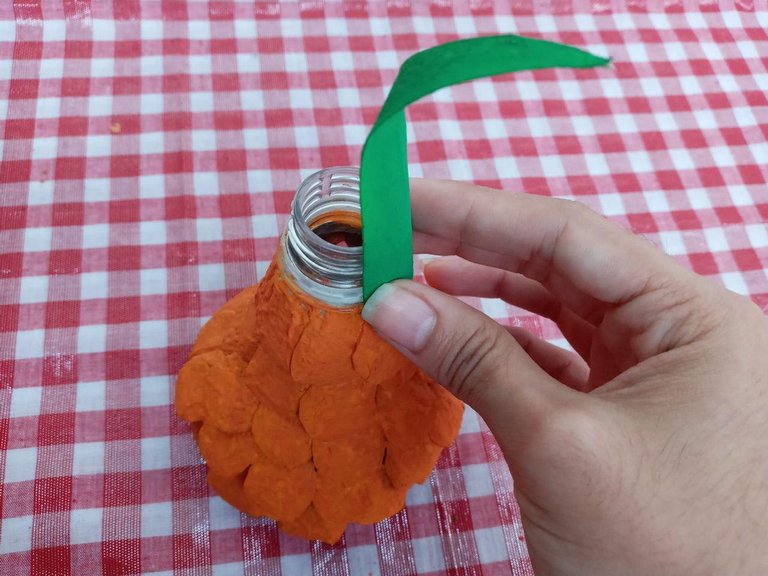
🔘 Para hacer las hojas de la piña utilizaremos el rollo de cartón, siguiendo las lineas que éste trae de fabrica, las recortamos de varios tamaños y las pintamos con varios tonos de verde, para que tenga un toque muy real.
To make the leaves of the pineapple we will use the cardboard roll, following the lines that this one brings of factory, we cut them of several sizes and we paint them with several tones of green, so that it has a very real touch.


🔘 Cuidadosamente aplicamos silicon a cada hoja, y las colocamos en la parte superior, alternando las hojas grandes atrás y las mas pequeñas adelante.
We carefully apply silicone to each sheet, and place them on top, alternating the large sheets in the back and the smaller ones in the front.
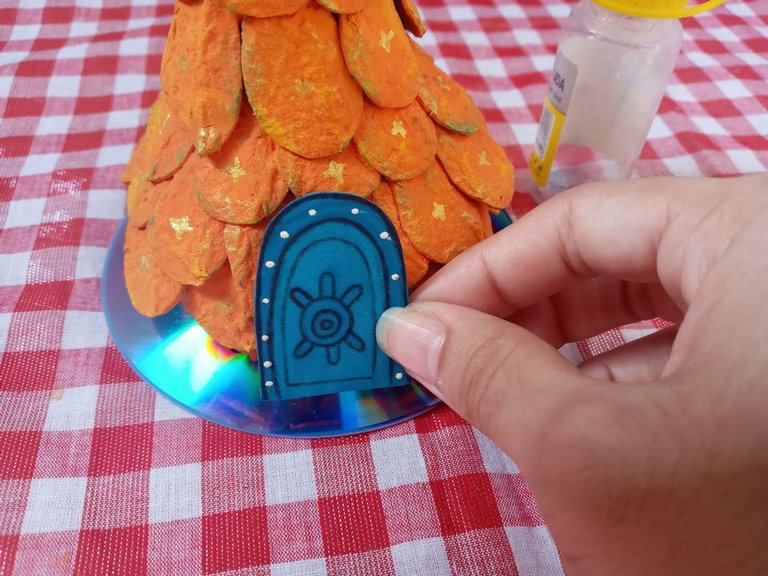
🔘 Aplicamos un poco de silicon en el centro del cd y pegamos nuestra piña, mantenemos presionado unos segundos hasta que seque bien.
We apply a little silicone in the center of the cd and paste our pineapple, keep pressed for a few seconds until it dries well.


🔘 Le agregamos detalles a la piña con pintura verde y dorada, ésto lo haremos con el pincel seco, casi nada de pintura, y en forma circular lo pasamos alrededor de cada pétalo, así le daremos un poco más de realismo a nuestra piña, también le agregamos pequeños detalles que simularan las espinas con dorado.
We added details to the pineapple with green and gold paint, we will do this with the dry brush, almost no paint, and in a circular shape we pass it around each petal, so we give a little more realism to our pineapple, we also added small details that simulate the thorns with gold.


🔘 Ahora realizaremos las figuras en foami o goma eva. Nuestro personaje amarillo y los detalles de su casa, como la puerta y ventanas.
Now we will make the figures in foami or eva rubber. Our yellow character and the details of your house, like the door and windows.


🔘 Copiamos la figura en el foami y las recortamos todas, luego comenzamos a pintar cada uno de sus detalles.
We copied the figure on the foami and cut them all out, then began to paint each of its details.


🔘 Finalmente le añadimos los últimos detalles delineando todas las piezas, y lo pegamos con silicon a la piña.
Finally we add the last details outlining all the pieces, and we stick it with silicon to the pineapple.

✅¡LISTO! hemos terminado nuestro divertido porta cepillo, seguro a nuestros niños les encantara y lo mas importante es que mantendrán a salvo y en orden sus cepillo de dientes y se divertirán en el proceso. Los invito trabajar y crear lindos proyectos con material reciclado, así de paso ayudamos al medio ambiente.♻️🌏
Ready! We have finished our fun toothbrush holder, I'm sure our kids will love it and most importantly, they will keep their toothbrush safe and tidy and have fun in the process. I invite you to work and create beautiful projects with recycled material, that way we help the environment. ♻️🌏


Anímate a crear seguro te divertirás🎨😄Dare to create for sure you will have fun.
Imágenes propiedad del autor| Images property of the author
Tablet Samsung GT-P62000L
Traductor|Translator
Deepl
Un gran abrazo a todos mis seguidores y a los usuarios que siempre apoyan mis publicaciones con un voto positivo e incluso con sus apreciados comentarios.♥️
Nos vemos en el siguiente post.
A big hug to all my followers and to the users who always support my publications with a positive vote and even with their appreciated comments.♥
See you in the next post.
Congratulations @edwarlyn11! You have completed the following achievement on the Hive blockchain and have been rewarded with new badge(s) :
You can view your badges on your board And compare to others on the Ranking
If you no longer want to receive notifications, reply to this comment with the word
STOPDo not miss the last post from @hivebuzz:
Muy original tu participación, gran creatividad para usar todo esos materiales, me gustó mucho.
Gracias por participar, espero te hayas divertido reciclando.
Me gusto mucho participar, me divierte crear manualidades con estos materiales, porque aunque no lo creas se pueden hacer proyectos muy lindos!