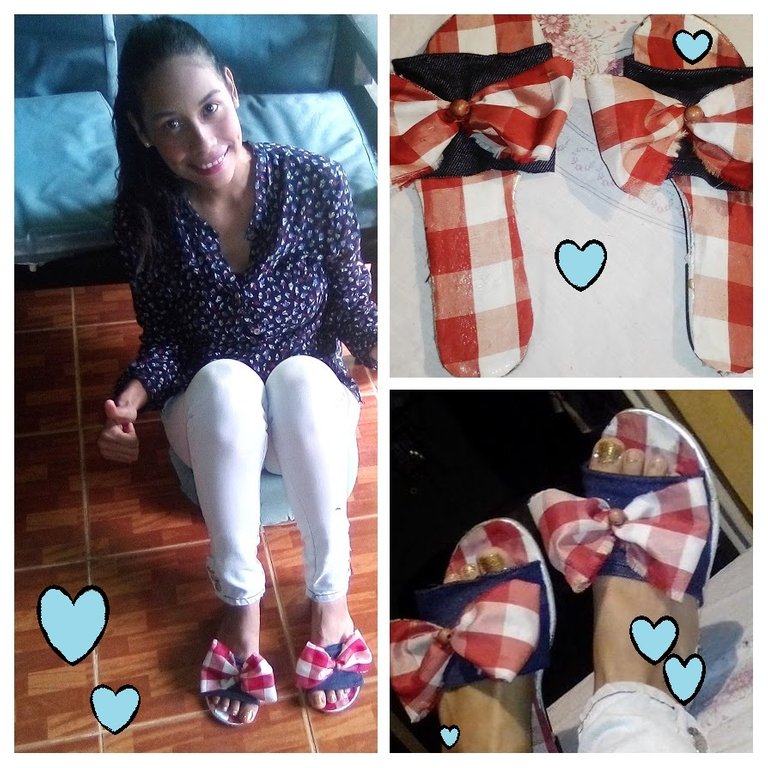
Hello! Dear friends of the hive. I guess they do well from the comfort of their homes. Greetings to everyone in this great community, I thank you because you know how to appreciate my content, and that is why this time I brought you a craft not made before for me, and I wanted to try something different, show something very nice. girls something that they would like for its striking colors.
I'll start by telling you a bit about how I came up with this idea. This requires you to ask these questions that you may have heard before. Home Who doesn't like new things? Do you see your wardrobe and sometimes you want to wear something different?.
Well, this is how I started this whole adventure, with these questions in my head that I could not ignore and the next thing I did was take some already deteriorated sandals that I had stored and I only kept the soles.
So I searched and searched how to improve it and Tarara got some scraps of fabric in my room. Whoops! What ideas of mine, but I immediately thought of using those fabrics to color my shoes.
I will explain to you how to carry out this disturbing idea, developed by me.
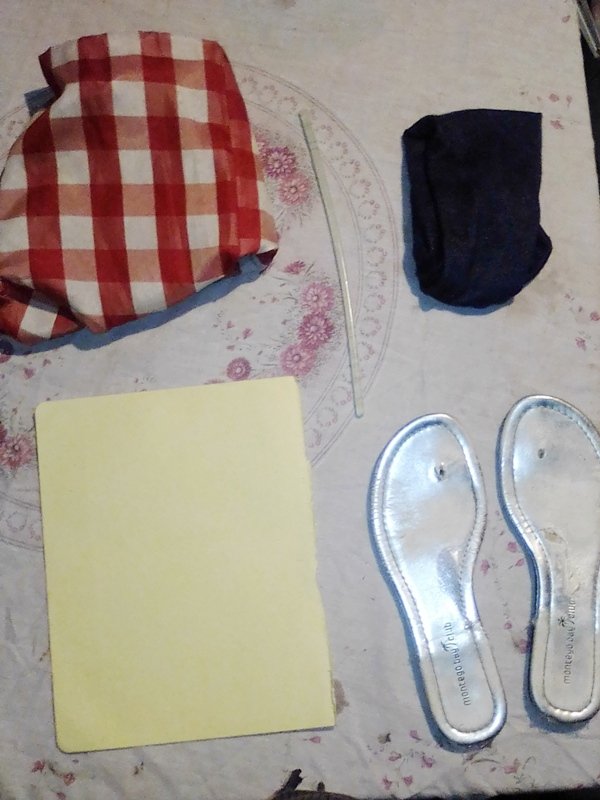
The materials I used were
A pair of soles
Fabrics of different colors
Two bracelet stones
Shoe glue or silicone
Needle
Thread
STEP BY STEP
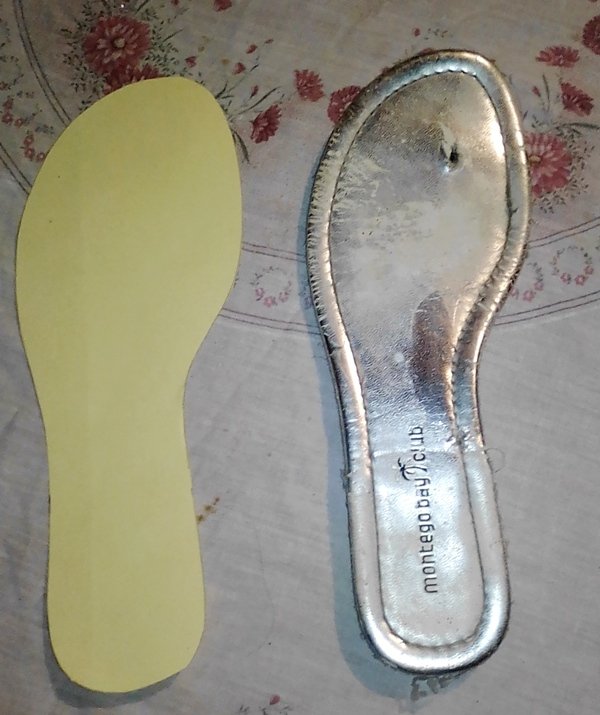
STEP 1
We mark around the soles to make the pattern.
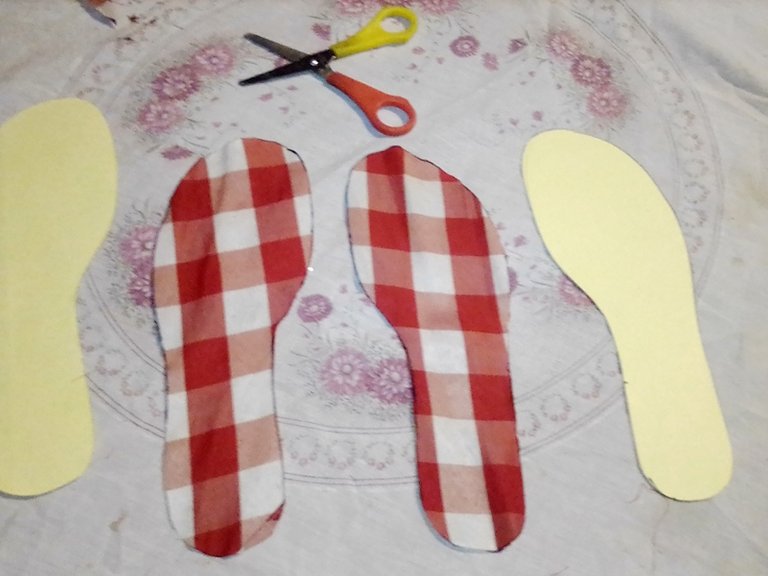
STEP 2
We use the pattern to draw the shapes of the sole on the fabric. This is what we will use to cover the base of the foot of the shoe.
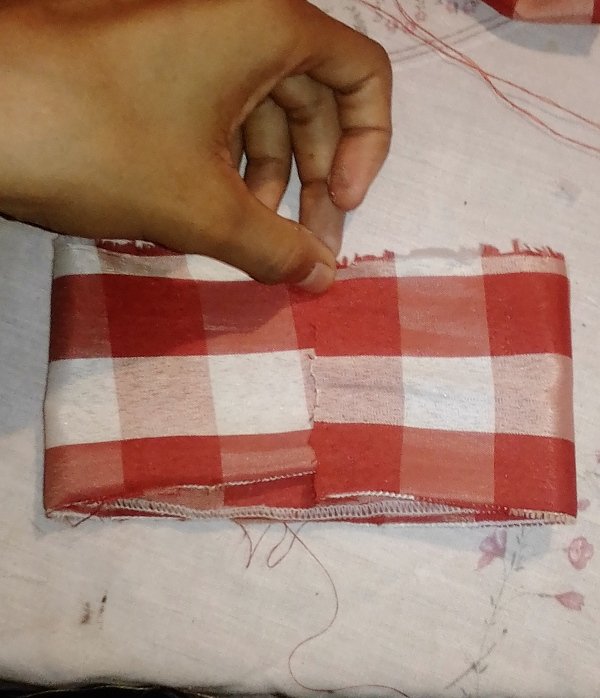
STEP 3
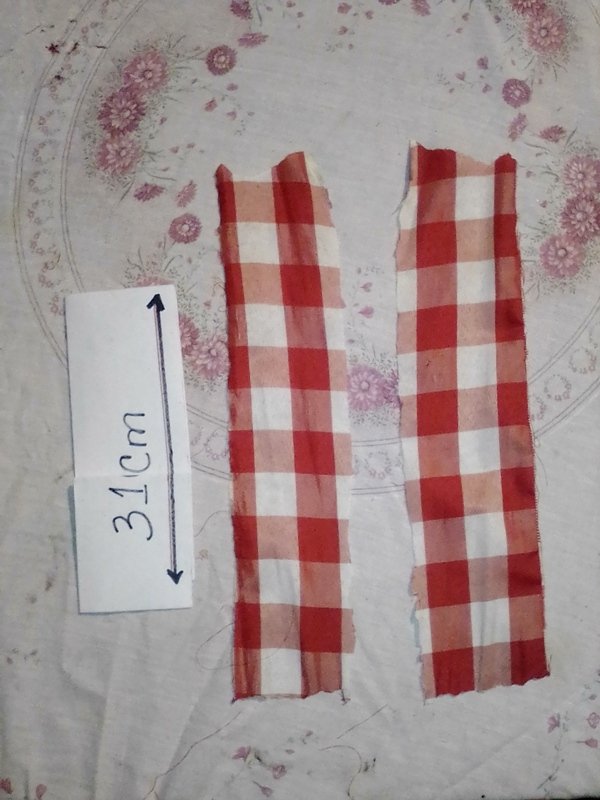
We take other pieces of fabric of the same design and cut 31 cm long and 6 cm wide.
STEP 4
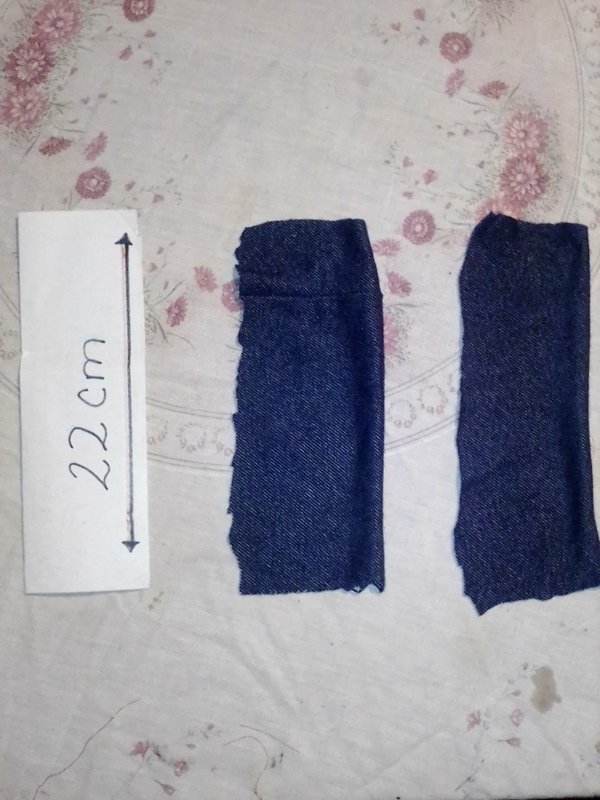
Take different pieces of fabric and cut 22 cm long and 9 cm wide.
STEP 5
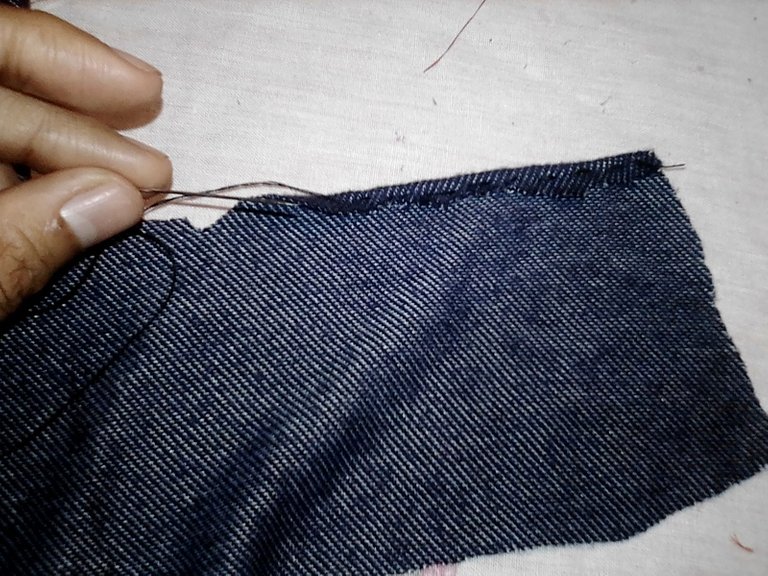
I gather the cut edges of the blue fabric with thread. (In my case I sewed it by hand)
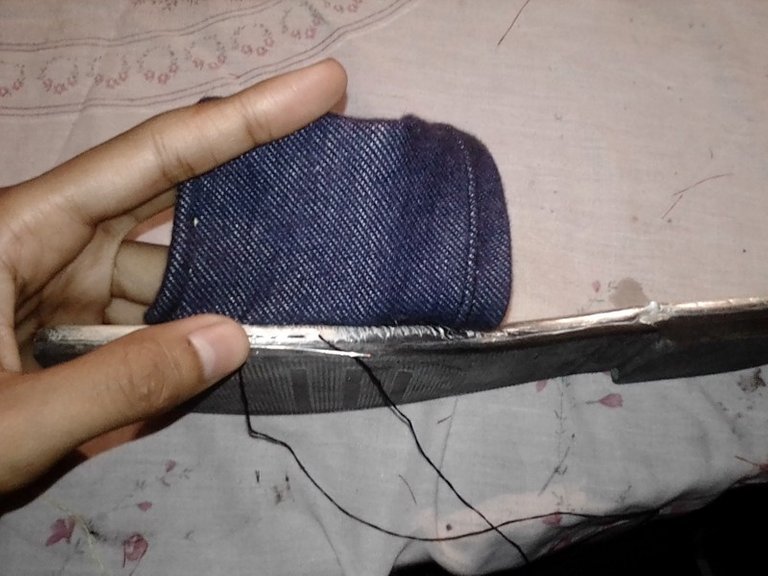
STEP 6
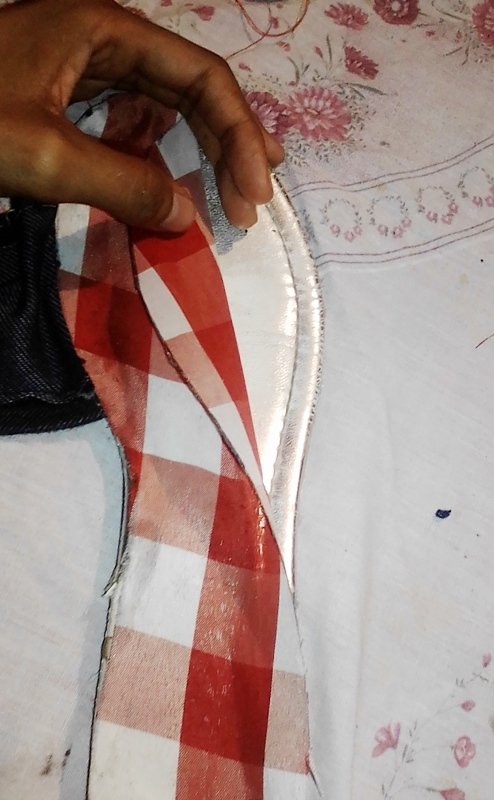
Now we are going to cover the upper part of the shoe with shoe glue or Silicon
STEP 7
Glue and sew the fabric that fits the feet. For them the measurements vary, so it is better to put on the shoes and adjust them to their size. And so cut off the excess fabric that is left over.
STEP 8
We make a large loop, joining both ends of the fabric.
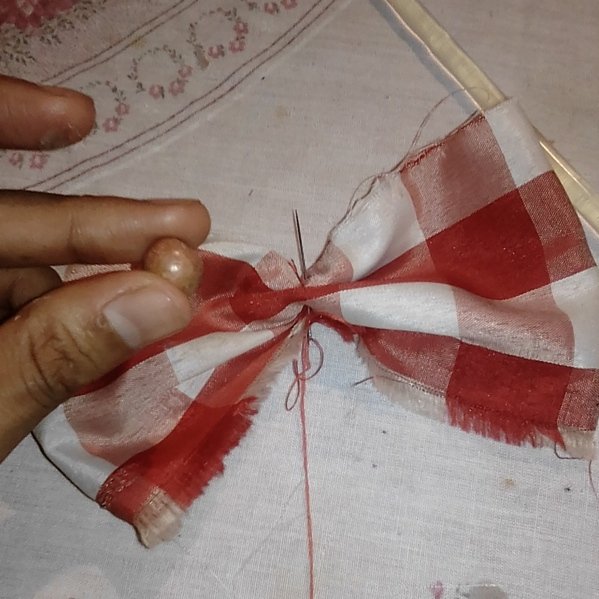
STEP 9
Here we join the center of the fabric with a pin and sew it. We add a bracelet stone as a decoration.
STEP 10
After doing all the previous steps, so we will have our work finished.
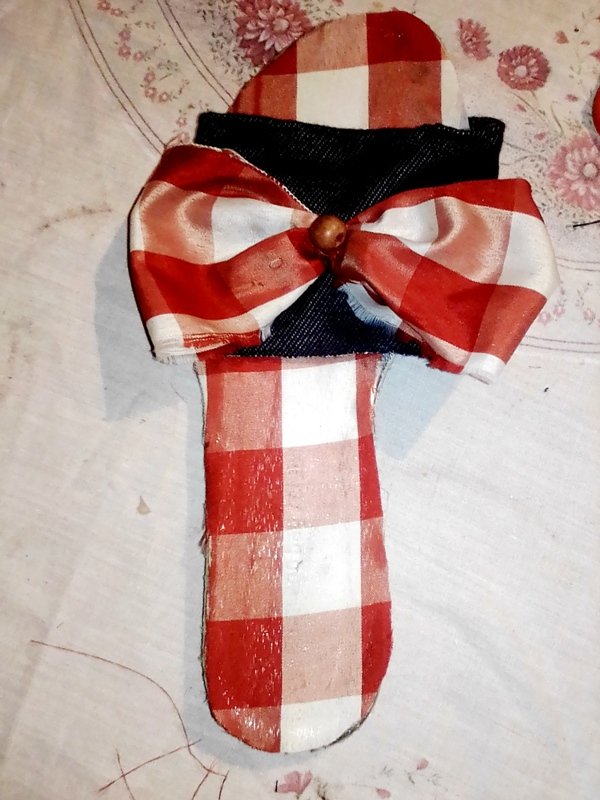
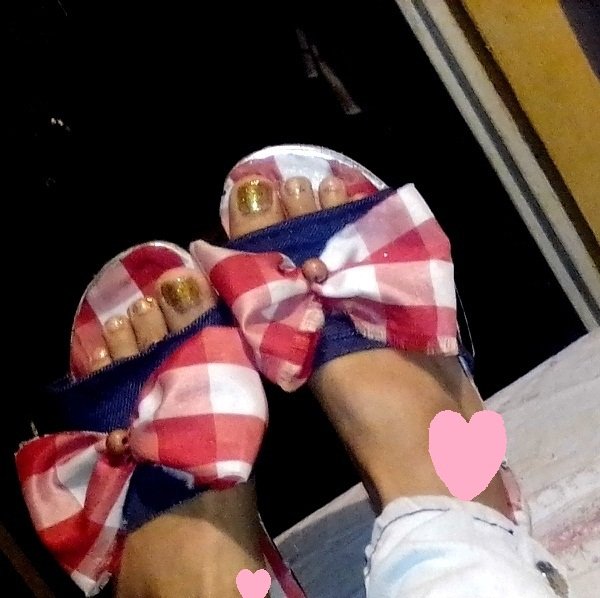
How cute, right? .. I HOPE YOU LIKE IT! . It's a recent idea that I made in my closet and I wanted to share it with you right away. Tell me what you think. Comment your opinions on what was presented, every day we learn new things and today I show you what I have been developing.

This humble servant says goodbye and I hope you have a great day. Kisses
Copyright @eulymer - All rights reserved
Congratulations @eulymer! You have completed the following achievement on the Hive blockchain and have been rewarded with new badge(s) :
You can view your badges on your board And compare to others on the Ranking
If you no longer want to receive notifications, reply to this comment with the word
STOPDo not miss the last post from @hivebuzz: