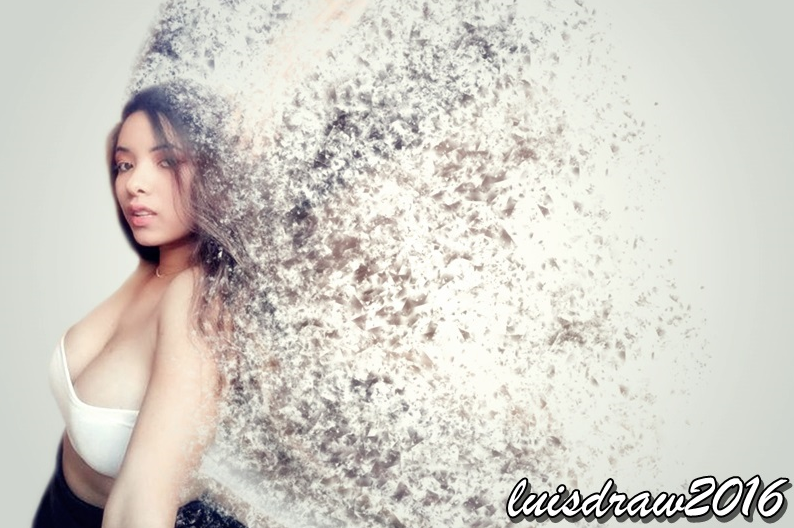
¡Hola! ¿Como están chicos? les cuento resumidamente que en el año 2013 hice un pequeño curso de
"Diseño gráfico"
el cual tenia completamente abandonado hasta el día de hoy que decidí hacer un pequeño diseño usando el efecto de desintegración. No se preocupen que les explicaré como lo realicé en caso de que deseen hacerlo ustedes también ¡Así que vamos a comenzar!
Hello! How are you guys? I will tell you briefly that in 2013 I did a small course on
"Graphic Design"
which I had completely abandoned until today when I decided to do a small design using the disintegration effect. Don't worry, I'll explain how I did it in case you want to do it too. So let's get started!
Escogeremos la foto que nos guste y con la herramienta de selección vamos a
"Recortar"
el espacio que deseamos, luego de hacerlo apretaremos la tecla "Q"
esa nos dejara el fondo como lo observan en la imagen. Luego con la herramienta pincel vamos a ir dandole el tono rojo y dejando en color negro por todo el lado que no deseamos utilizar; ya luego usamos nuevamente la tecla "Q"
y les debe quedar seleccionado solo la modelo o lo que ustedes desean.We will choose the photo that we like and with the selection tool we will
"Crop"
the space we want, after doing so we will press the key "Q "
that will leave us the background as seen in the image. Then with the brush tool we are going to give it the red tone and leaving black all over the side that we do not want to use; Then we use the "Q"
key again and only the model or what you want should be selected.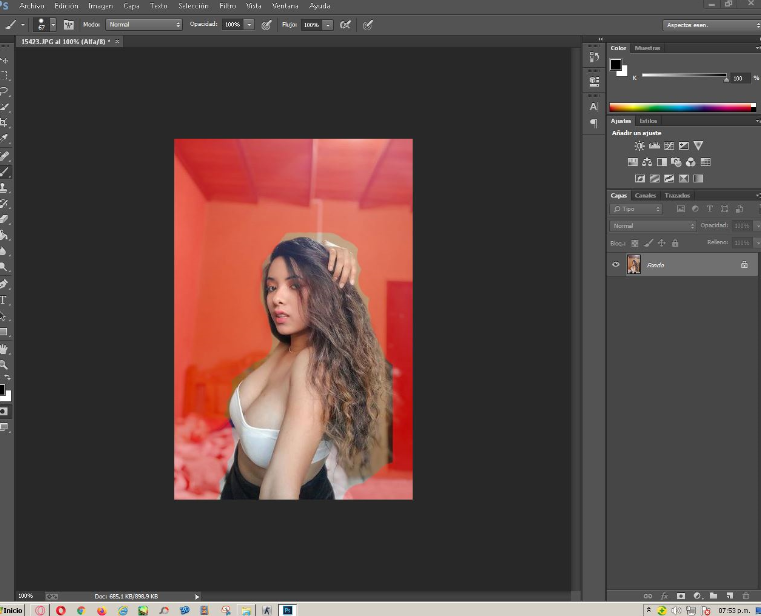
Una vez hecho lo anterior crearemos un nuevo lienzo al cual le daremos una dimensiones de 1200x800
pixeles y transparente, luego volvemos al anterior y damos
"Edición - Copiar y pegamos en el nuevo lienzo"
Ponen la imagen donde deseen, en mi caso la puse del lado derecho y con la herramienta de difuminado daré pequeños detalles por el borde para que no se vean tan copia y pega, eso hará que el borde se difumine solo un poco dependiendo de la intensidad que le den. Once the above is done we will create a new canvas to which we will give a dimensions of 1200x800
pixels and transparent, then we go back to the previous one and give
"Edition - Copy and paste on the new canvas"
Put the image where you want, in my case I put it on the right side and with the blur tool I will give small details around the edge so that they do not look so copy and paste, that will make the edge blur only a little depending on the intensity that they give it.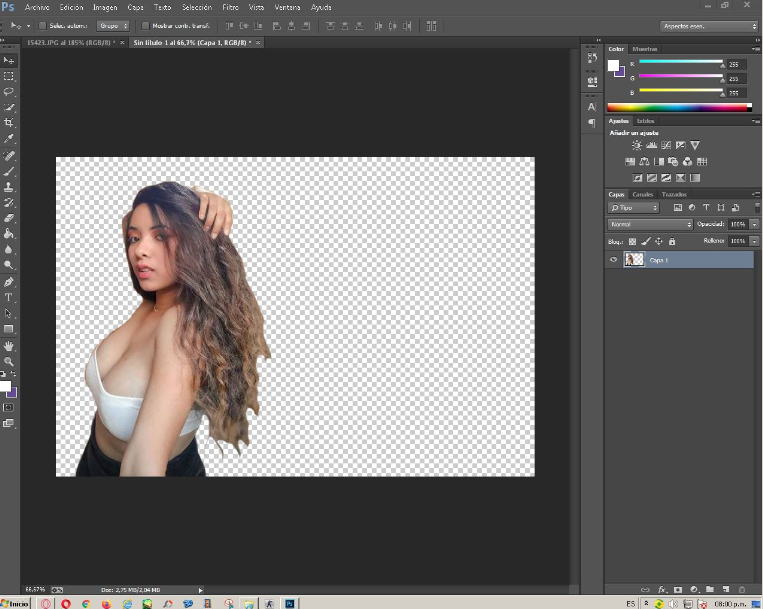
El siguiente paso es crear una mascara de capa vectorial la cual se encuentra en la parte baja al lado de la opción estilo de capa, luego crearemos una capa valga la redundancia pero con la opción de
"Degradado"
Les deberá salir el cuadro que notan en la imagen de referencia y seleccionan el degradado blanco y negro, en el color negro colocan el color blanco y en el blanco colocan el siguiene código de color "acb3b5"
le dan ok. The next step is to create a vector layer mask which is in the lower part next to the layer style option, then we will create a layer worth redundancy but with the option of
"Gradient"
You should see the box that you notice in the reference image and select the black and white gradient or in the black color place the white color and in the white place the following color code "acb3b5"
give it ok.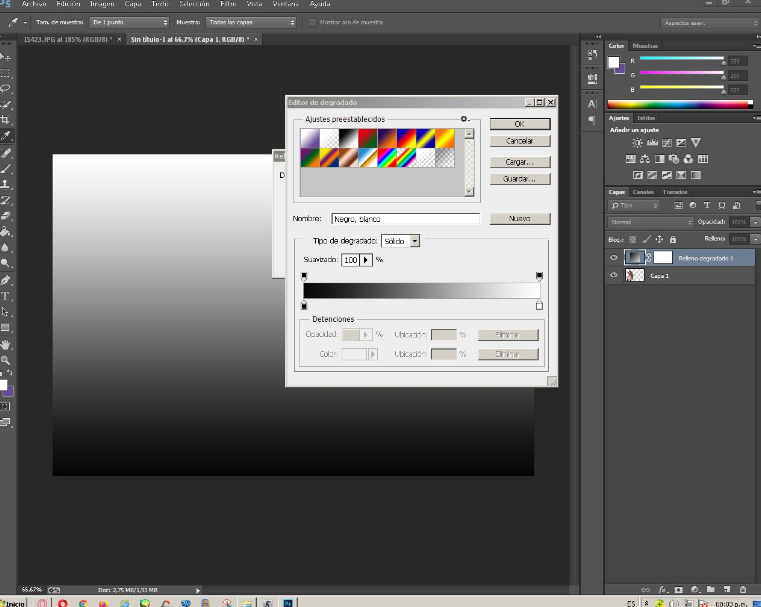
No obstante la siguiente parte es algo más sencilla, en la opción de estilo colocaremos
"Radial"
y un angulo de 36 dejando el degradado de adentro hacia afuera.; esa capa la pondremos abajo de la primera.However, the following part is somewhat simpler, in the style option we will place
"Radial"
and an angle of 36 leaving the gradient from the inside out .; We will put that layer below the first one.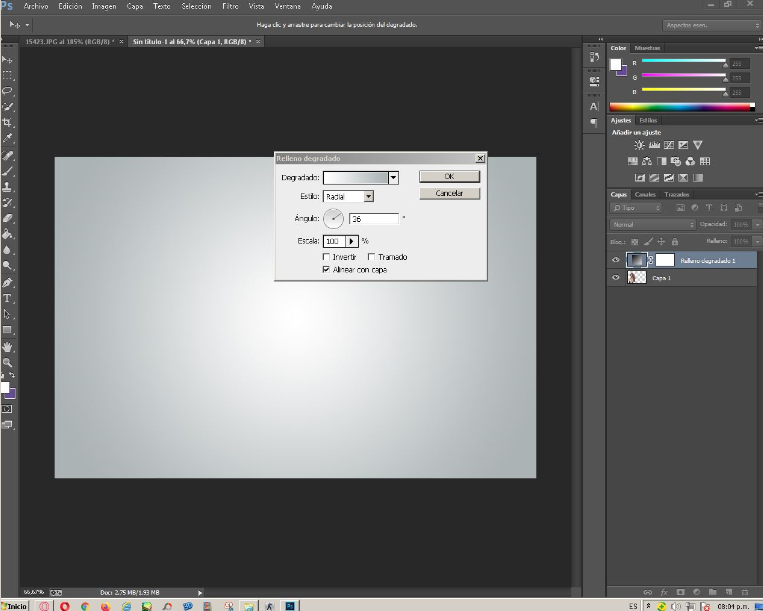
¡Ahora bien! En el siguiente paso debemos duplicar nuestra capa de modelo 2 veces, en la capa que queda de primera la cual les dirá
"Capa 1 copia 2"
o el nombre que le hallan dado, le daremos las siguientes características vamos a la opción "Filtro - Licuar"
Una vez dentro vamos a distorsionar la imagen del lado que deseamos hasta cubrir todo el lado. However! In the next step we must duplicate our model layer 2 times in the layer that is first, which will tell you
"Layer 1 copy 2"
or the name that they have given it, We will give the following characteristics we will go to the option "Filter - Liquify"
Once inside we will distort the image of the side we want to cover the entire side. 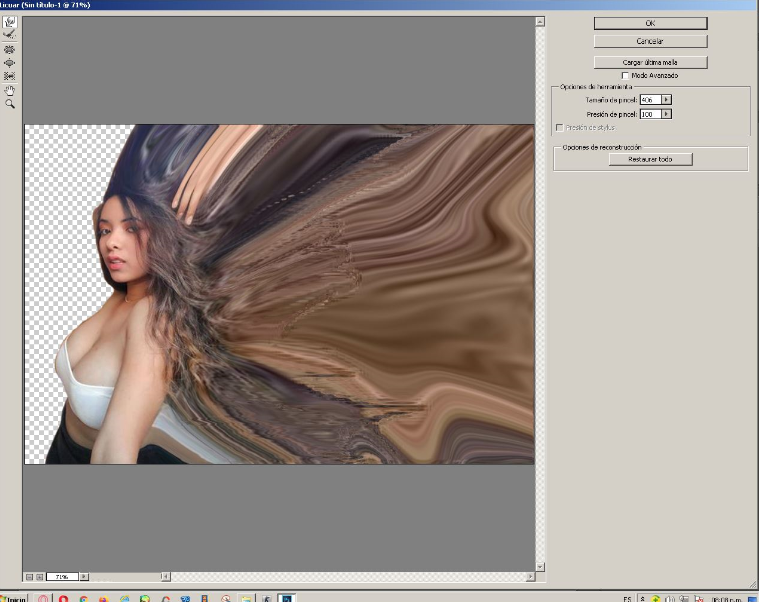
Llegamos a la parte donde daremos el efecto desintegrado creando una mascara de capa en la segunda capa creada valga la redundancia luego se oculta la primera y la original, seguidamente seleccionamos la herramienta pincel y le damos segundo click y en la pequeña tuerca damos
"Click derecho - Remplazar pinceles"
No te preocupes si no posees los pinceles ya que te los dejaré en la parte baja de la imagen para que los descargues. Luego usaremos los pinceles que deseamos para darle esos pequeños detalles de desintegración. en mi caso usé unos 4 o 5 pinceles exactamente. We arrive at the part where we will give the disintegrated effect creating a layer mask in the second layer created, worth redundancy, then the first and the original are hidden, then we select the brush tool and we give it a second click and in the small nut we give
"Right click - Replace brushes"
Don't worry if you don't have the brushes as I'll leave them at the bottom of the image for you to download. We will then use the brushes we want to give it those little disintegration details. in my case I used exactly 4 or 5 brushes.
¡Chicos! cada vez falta menos ¡Genial! Continuamos creando una nueva mascara de capa en la primera que tenemos señalada usando la tecla
"Alt - Click en añadir mascara de capa"
Luego colocamos el color blanco como frontal y damos clicks para que aparezcan las partículas de desintegración. Boys! less and less is missing Great! We continue creating a new layer mask in the first one that we have indicated using the key
"Alt - Click on add layer mask"
Then we place the white color as the front and click so that disintegration particles appear.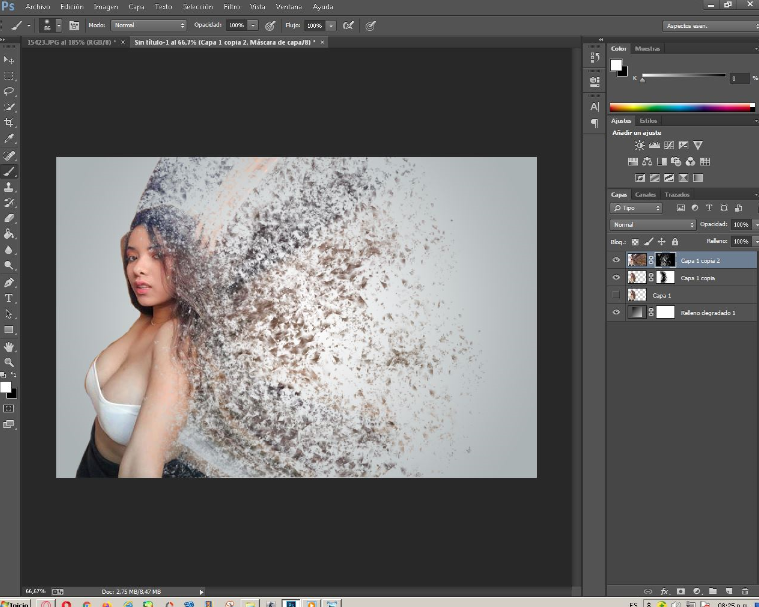
Ahora vamos a difuminar algunas zonas para que se vea un poco mas desintegrado y lo haremos de la siguiente manera: Seleccionamos la mascara de capa y apretamos
"Shift - click sobre ella"
con eso la quitaremos momentáneamente, luego damos click en la miniatura de la capa, después seleccionamos la herramienta pincel mezclador y pondrán las características que les mostraré en la imagen de referencia. Now we are going to blur some areas to make it look a little more disintegrated and we will do it as follows: We select the layer mask and press
"Shift - click on it"
with that We will remove it momentarily, then we click on the layer thumbnail, then we select the mixer brush tool and they will put the characteristics that I will show you in the reference image.
Deberán habilitar la opción que se refleja y ponerlo en limpiar pincel, dejando los porcentajes indicado en la mezcla, flujo, humedad y carga. Eso les permitirá difuminar algunas zonas de la imagen, podrán hacerlo al gusto de ustedes; una vez terminado repiten el mismo procedimiento para quitar la opción
"Shift - click sobre la capa"
They must enable the option that is reflected and set it to clean brush, leaving the percentages indicated in the mixture, flow, humidity and load. This will allow you to blur some areas of the image, you can do it to your liking; once finished repeat the same procedure to remove the option 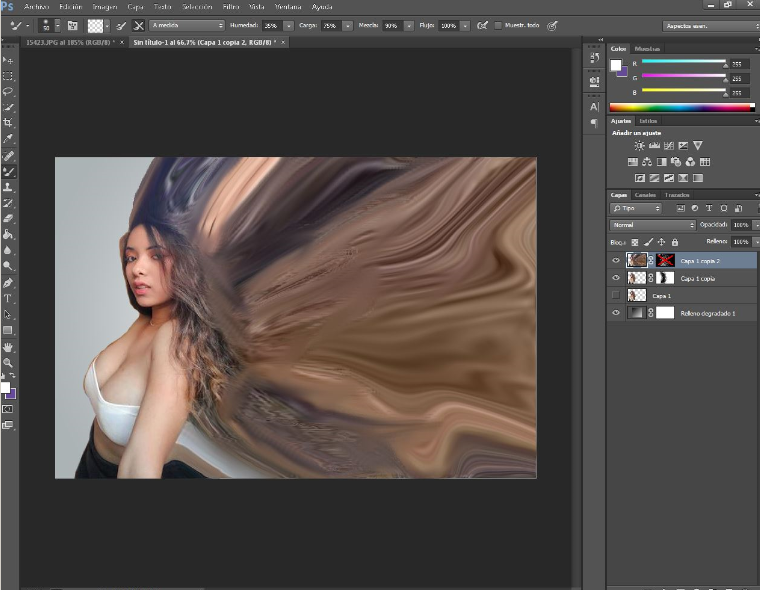
"Shift - click on the layer".
Luego de ese ultimo paso ya tendremos listo el diseño chicos! La verdad les pido una disculpa si el proceso escrito es muy largo ya que trate de explicarles lo más detallado posible como realizar el diseño, en próximas ocasiones intentaré hacer un vídeo para resumir toda esta parte. Si te ha gustado como quedo te invito a hacermelo saber en los comentarios y si tienes dudas tratare de aclararlas.
After that last step we will have the design ready guys! The truth is, I apologize if the written process is very long and try to explain as detailed as possible how to make the design, in the future I will try to make a video to summarize all this part. If you liked how it turned out, I invite you to let me know in the comments and if you have questions I will try to clarify them.
¡Felicidades! Esta publicación obtuvo upvote y fue compartido por @la-colmena, un proyecto de Curación Manual para la comunidad hispana de Hive que cuenta con el respaldo de @curie.
Si te gusta el trabajo que hacemos, te invitamos a darle tu voto a este comentario y a votar como testigo por Curie.
Si quieres saber más sobre nuestro proyecto, acompáñanos en Discord: La Colmena.
Excelente post!
Muchas gracias mi pana!
Congratulations @luisdraw! You have completed the following achievement on the Hive blockchain and have been rewarded with new badge(s) :
You can view your badges on your board and compare yourself to others in the Ranking
If you no longer want to receive notifications, reply to this comment with the word
STOPDo not miss the last post from @hivebuzz:
Hola brothr, este efecto se hizo viral cuando Avengers End Game.. también diseño y de verdad es uno de los efectos que más me gusta. Gracias por compartir!
🔥💪🏻
Si, tienes razón! Por eso quise compartirlo a ver si se animan a hacerlo también y gracias :)
Muy atractivo efecto visual, y didácticamente explicado paso a paso. Gracias y saludos, @luisdraw.
***
Tu post ha sido votado por @CELFmagazine, una iniciativa autónoma en favor del contenido de calidad sobre arte y cultura. Apóyanos con tu voto aquí para mantener y mejorar nuestra labor. Nuestra comunidad es #hive-111516
Your post has been upvoted by @Celfmagazine, an autonomous initiative in favour of quality content on art and culture. Support us with your vote here to maintain and improve our work. Our community is #hive-111516