Hello Hive family💋
English Version:
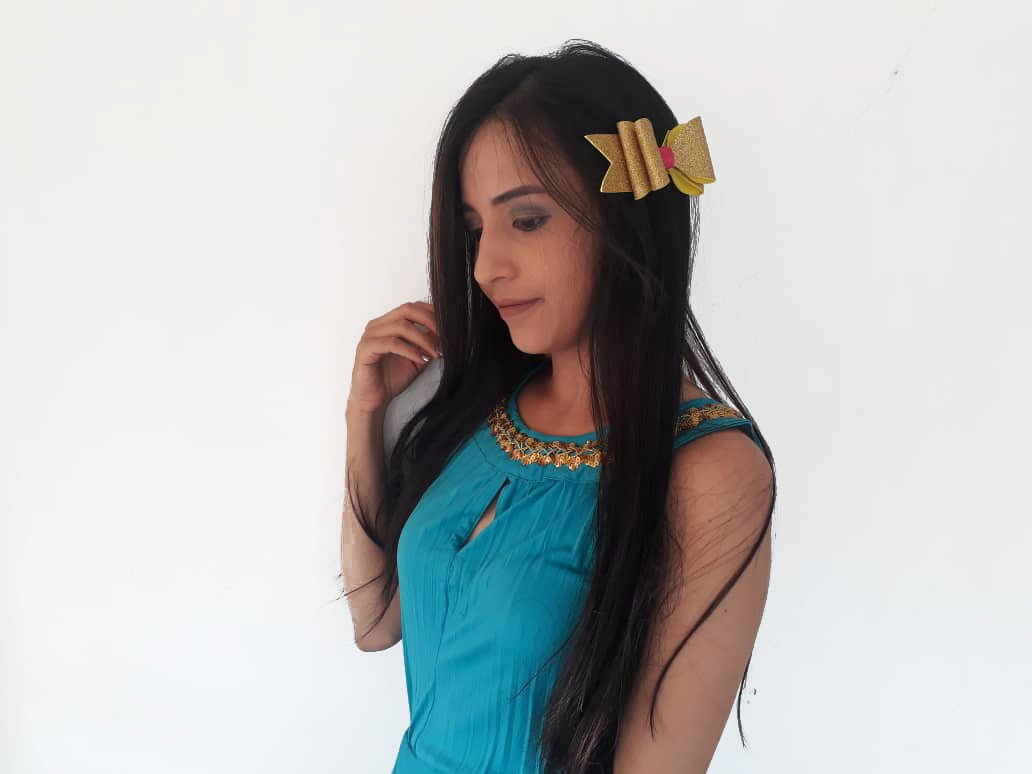
This beautiful Tuesday I bring you a new and simple tutorial, where we will learn how to make a "foamy tie", very practical to make, with very easy to get materials. So, you can not miss this beautiful and educational journey, ideal to spend a pleasant time with our little ones at home, since, they can go, little by little, developing their creativity and ingenuity and getting a little closer to artistic work.What are they waiting for?
This new technique will allow our girls to spend a pleasant time designing their own ties, using very cheap materials. These beautiful ties could be used to show them off, to give them away, or as an undertaking. Before we start, let's not forget to wash our hands.

To make this beautiful gift bag we will need:
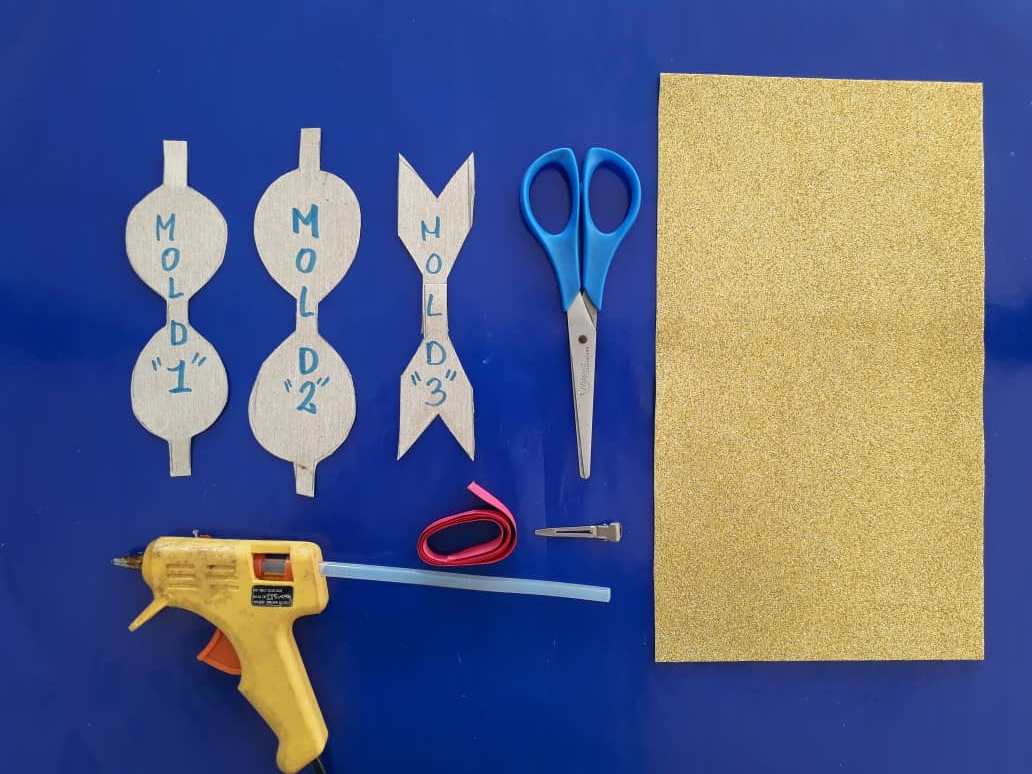
- Molds.
- oamy sheet or Eva foam.
- Scissors.
- Pencil or marker.
- Hot silicone applicator.
- Decorative ribbon.
- Bra or hair hook.
Process (step by step)


Thank you once again for joining me in this new step-by-step that is part of my project called "developing children's creativity". In this new episode we can all learn how to make a beautiful foamy tie. Thus allowing us to develop our creativity and ingenuity, in addition, to spend a pleasant time with our girls and more now in times of quarantine that we need to distract our mind into something fun. And in this case, we would have several ways to take advantage of this new idea, since we could wear them, use them as a gift at special times, and they could even be used to sell them.
I hope you like it and thank you all very much for your support 🍎
Esta nueva técnica permitirá a nuestras niñas pasar un rato agradable diseñando sus propios lazos, utilizando materiales muy económicos. Estos hermosos lazos podrían utilizarse para lucirlos, para regalarlos o como emprendimiento. Antes de comenzar no olvidemos lavarnos nuestras manos.
Versión en Español:
Hola querida comunidad de habla hispana de Hive 💋 Este hermoso Martes les traigo un nuevo y sencillo tutorial, en donde aprenderemos a realizar un "lazo de foamy", muy práctico de hacer, con materiales muy fáciles de conseguir. Así que, no pueden perderse este hermoso y educativo trayecto, ideal para pasar un rato agradable con nuestras pequeñas en casa, ya que, pueden ir, poco a poco, desarrollando su creatividad e ingenio y acercándose un poco más al trabajo artístico.
¿Qué están esperando?
Para hacer esta hermosa bolsa de regalo necesitaremos:
Procedimiento (paso a paso)
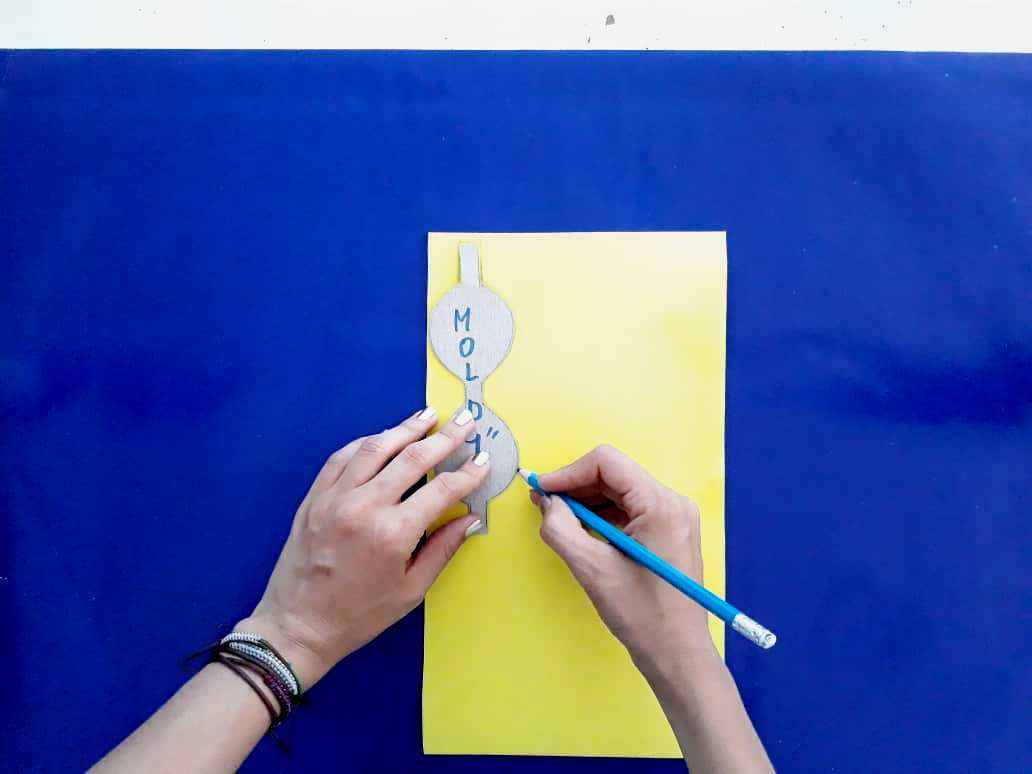
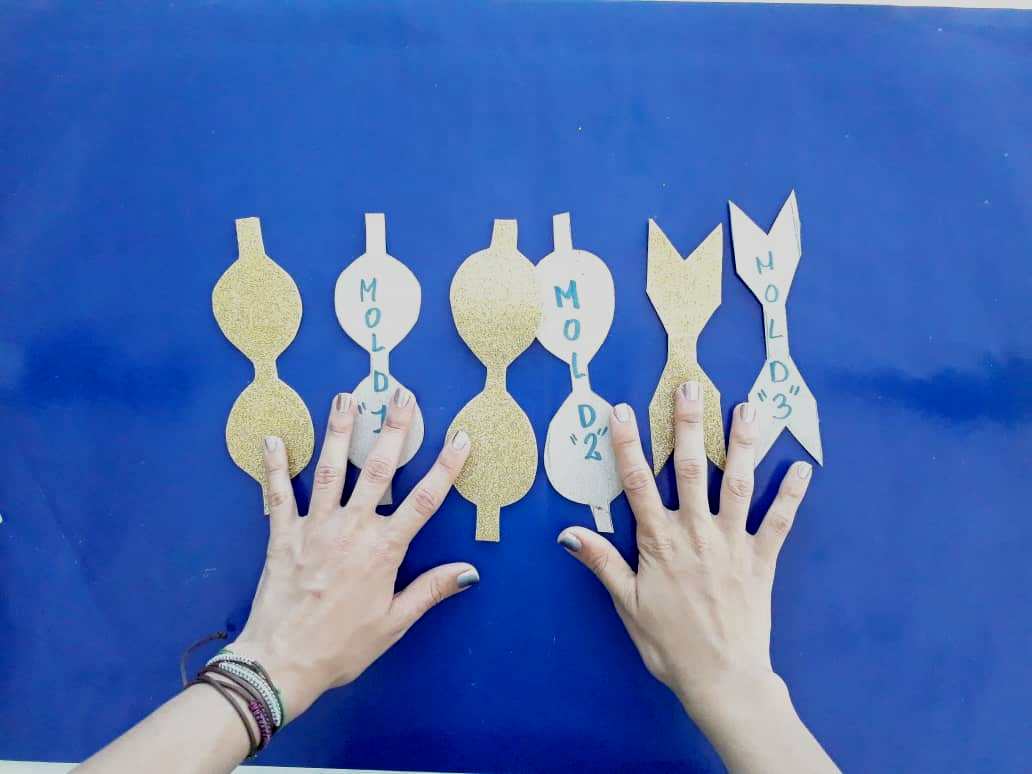
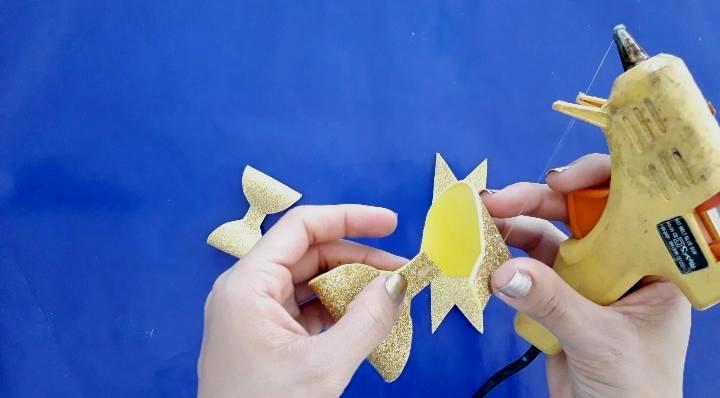
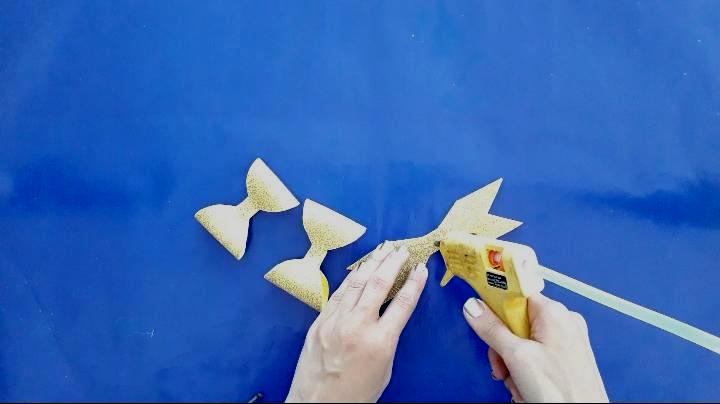
Primero, Transferimos los moldes con mucho cuidado para que sus medidas permanezcan intactas.
Ahora, decoramos nuestro lazo con un trozo de cinta en el centro. Pueden utilizar la figura decorativa de su preferencia. Lo importante es dejar volar nuestra imaginación.
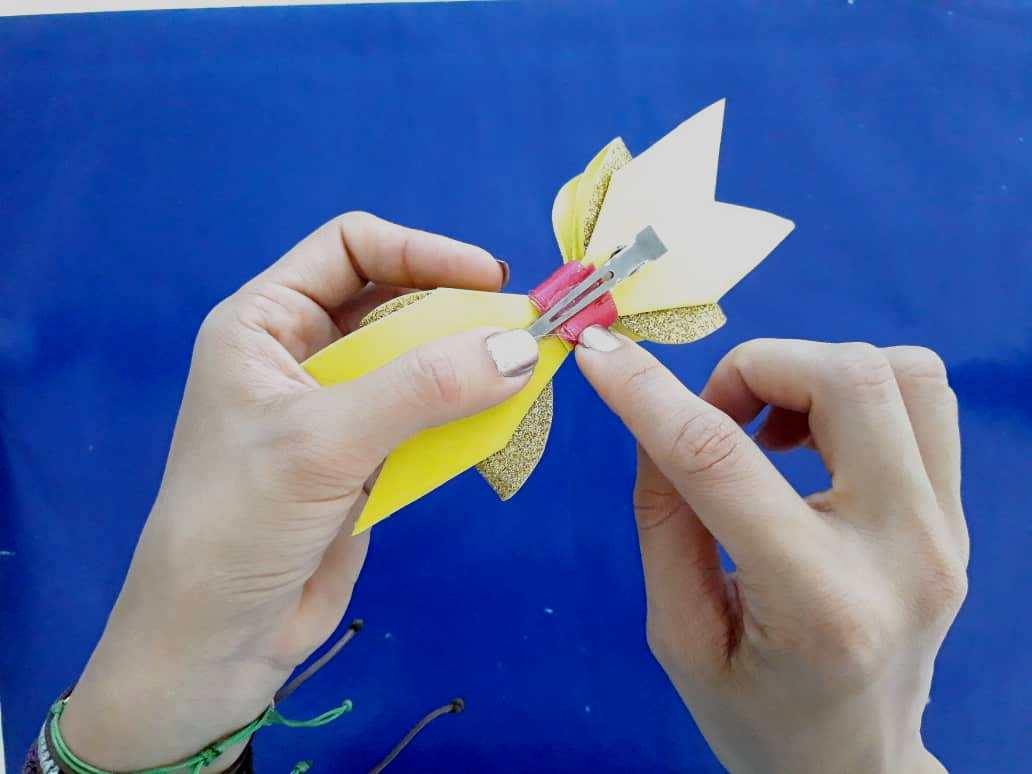
Por último, utilizamos silicona caliente para pegar un gancho o sujetador en la parte trasera del lazo. Así podemos sujetarlo a nuestro cabello.
Gracias una vez más por acompañarme en este nuevo paso a paso que forma parte de mi proyecto llamado "desarrollando la creatividad de los niños". En este nuevo episodio todos podemos aprender a realizar un precioso lazo de foamy. Permitiendo así, desarrollar nuestra creatividad e ingenio, además, de pasar un rato agradable con nuestras niñas y más ahora en tiempos de cuarentena que necesitamos distraer nuestra mente en algo divertido. Y en este caso tendríamos diversas maneras de aprovechar esta nueva idea, ya que podríamos lucirlas, utilizarlas como obsequio en momentos especiales, e incluso se podrían utilizar para venderlas.
Espero que les guste y muchas gracias a todos por su apoyo 🍎

 ✯@saracampero✯
Muchísimas gracias por el apoyo :D
Mil gracias por este apoyo. Y feliz de estar en la comunidad.
Estamos a la orden cariño. Saludos.
my #posh in twt.
Your post has been curated by us! Received 22.00% upvote from @opb. Do consider delegate to us to help support our project and earn 100% of daily rewards!
Do join our discord channel to give us feedback, https://discord.gg/dS6Cfn
* Please note that the curation was carried out by experimental bot, based on the criteria : 1. Not plagiarised, 2. Post > 5min, 3. Author reputation > 25, 4. higher upvote for monthly subscriberDo upvote this commment if you 💚 our service :)
Thank you very much for the invitation. I will be without a doubt. Although the invitation appears wrong to me. Would you send it to me again?
Me gustó, está muy bonito! Gracias por compartir cómo realizarlo :)
Muchas gracias, es lo mejor de esta comunidad, que nos permite enseñar a hacer cosas nosotros mismos en cualquier parte y sin muchos recursos. Saludos :D
Muy original, felicitaciones
Gracias por el comentario amigo. Espero seguir viendote por aca..
Muy buen trabajo sara, excelente la explicacion, se lo voy a mostrar a mi mamá para que lo haga.
Gracias por apreciar esta técnica amigo. Es súper fácil de hacer. Saludos Espero verte de nuevo
Great job, you worked a lot for It!
Really nice, lovely little girl!😀👏
Thank you for your comment and fortunately my daughter loves to take photos always smiles. I hope to see you again.
You seems really happy together!😀
Congratulations @saracampero!
You raised your level and are now a Minnow!
Do not miss the last post from @hivebuzz:
Support the HiveBuzz project. Vote for our proposal!
I don't have that Silicon Applicator, when I find one I'm gonna try this out.
You can find it in any Chinese. And very economical.
I wish i had a daughter
Thanks friends. Grettings!
This post earned a total payout of 17.820$ and 8.910$ worth of author reward that was liquified using @likwid.
Learn more.