

¡Hola mis hermosos lectores!
Un gran saludo y bendecida tarde mis queridos lectores, espero su mitad de semana vaya súper bien. Hoy vengo a mostrarle como realicé un porta lapices con materiales reciclables que solemos tener en casa.
De esta manera estaremos creando algo de mucha utilidad y al mismo tiempo colaboramos con el medio ambiente al evitar tirar estos desechos rehusando.
Es muy lindo el diseño que se obtiene, no solo nos sirve como porta lapices, sino como cotillón o hasta para realizar un arreglo para obsequiar alguien especial.
Hello my beautiful readers!
A big greeting and blessed afternoon my dear readers, I hope your midweek goes super well. Today I come to show you how I made a pencil holder with recyclable materials that we usually have at home.
In this way we will be creating something very useful and at the same time we collaborate with the environment by avoiding throwing away these wastes by refusing.
The design that is obtained is very beautiful, it not only serves as a pencil holder, but also as a party favors or even to make an arrangement to give someone special.
Acompáñame en el paso a paso.
⇊⇊⇊ 📝
Join me in the step by step.
⇊⇊⇊ 📝
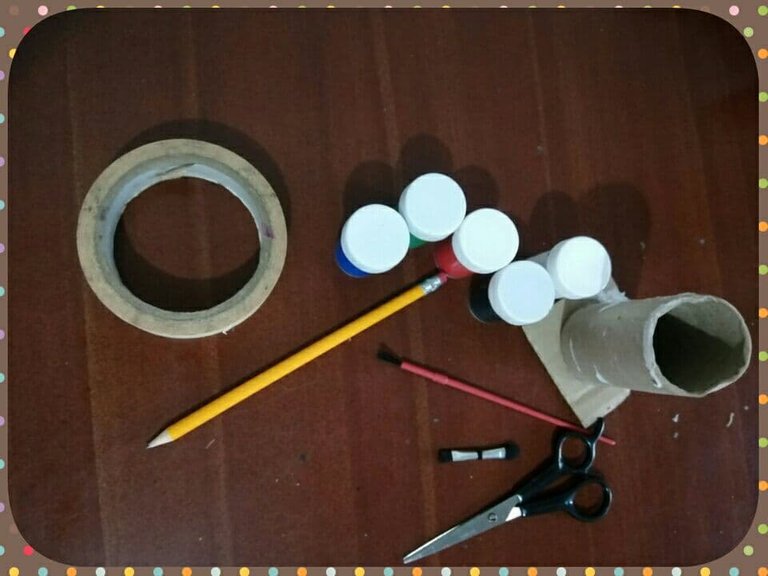
Materiales:
- Cinta adhesiva.
- Temperas.
- Lápiz.
- Pincel.
- Cartón.
- Rollo de papel higiénico.
- Tijera.
Materials:
- Scotch tape.
- Tempera.
- Pencil.
- Brush.
- Paperboard.
- Roll of toilet paper.
- Scissor.
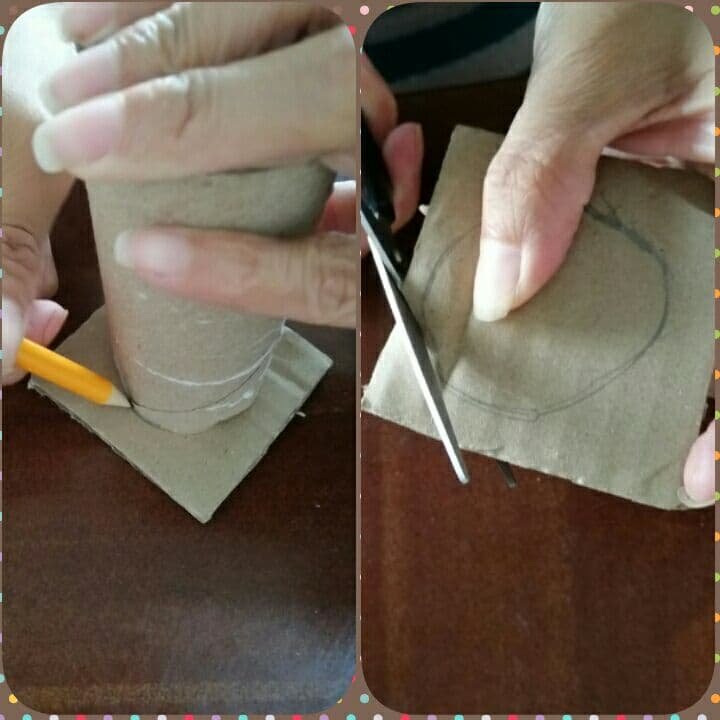
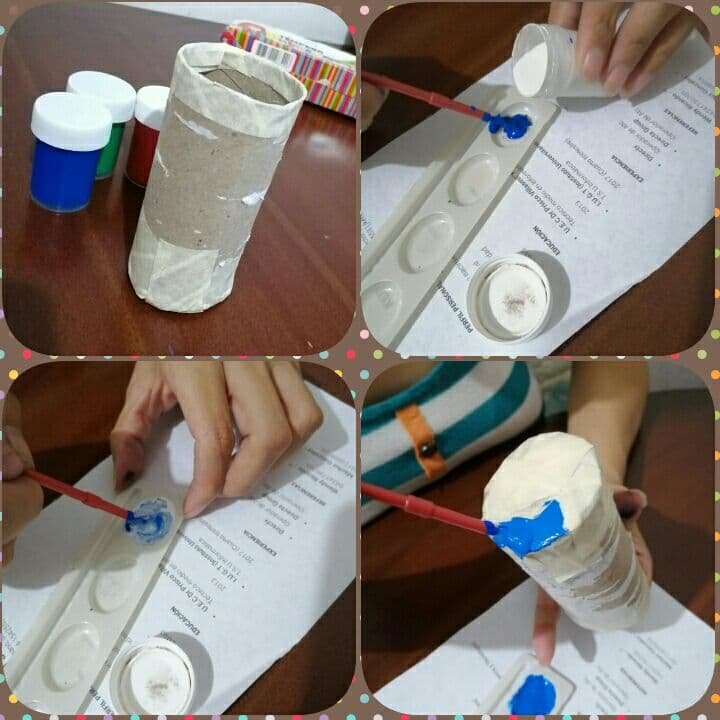
Para comenzar tomé el rollo de papel higiénico y lo coloqué encima del cartón, con el lápiz fui formando el circulo y luego recorté.
To begin, take the roll of toilet paper and place it on top of the cardboard, with the pencil I formed the circle and then cut out.
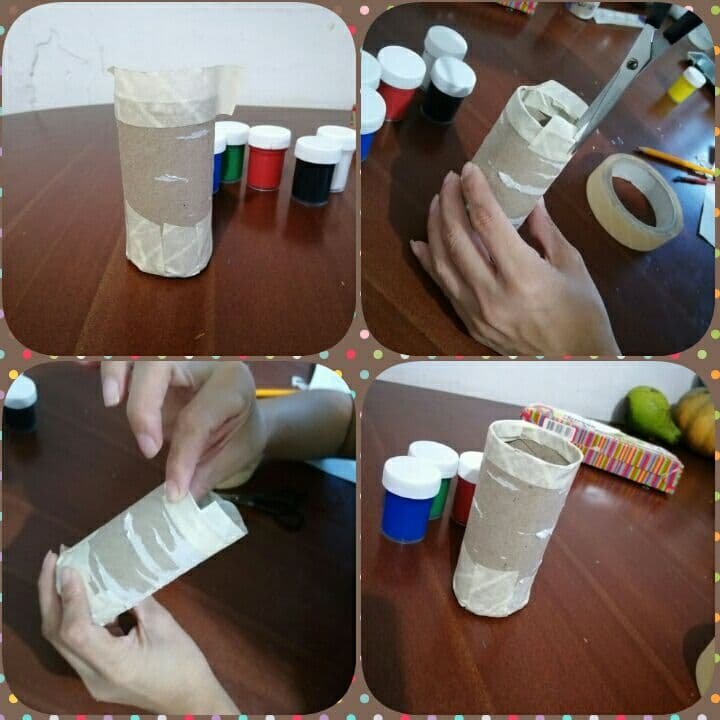
Una vez con la base lista la uní al rollo con la ayuda de la cinta adhesiva.
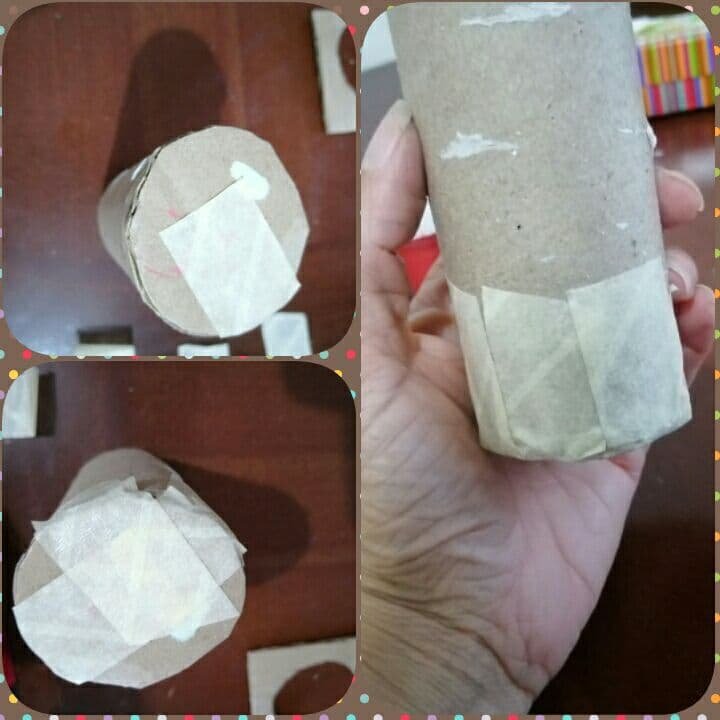
En la parte superior usé nuevamente la cinta para tapar todo el borde y tener mejor firmeza.
Elegí un color azul cielo, pero el que tenia era muy oscuro y mezclé con blanco para aclarar, comencé a pintar desde la base.
I chose a sky blue color, but the one I had was very dark and mixed with white to clarify, I began to paint from the base.
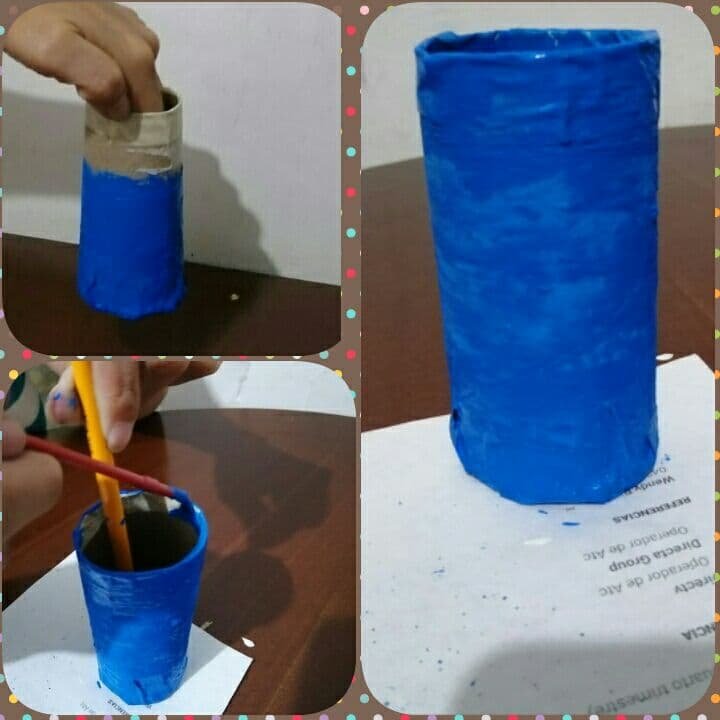
Luego todo el cilindro y por último la parte de adentro. Lo dejé secar por 15 minutos.
Then the whole cylinder and finally the part inside. Let it dry for 15 minutes.
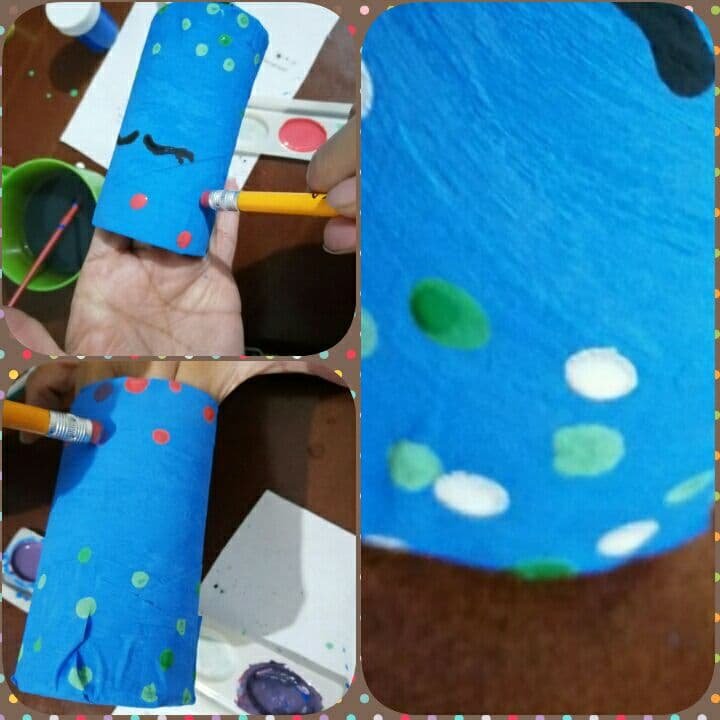
Ya totalmente seco le dibuje unos lindos ojos. 😊
Completely dry I draw some pretty eyes. 😊
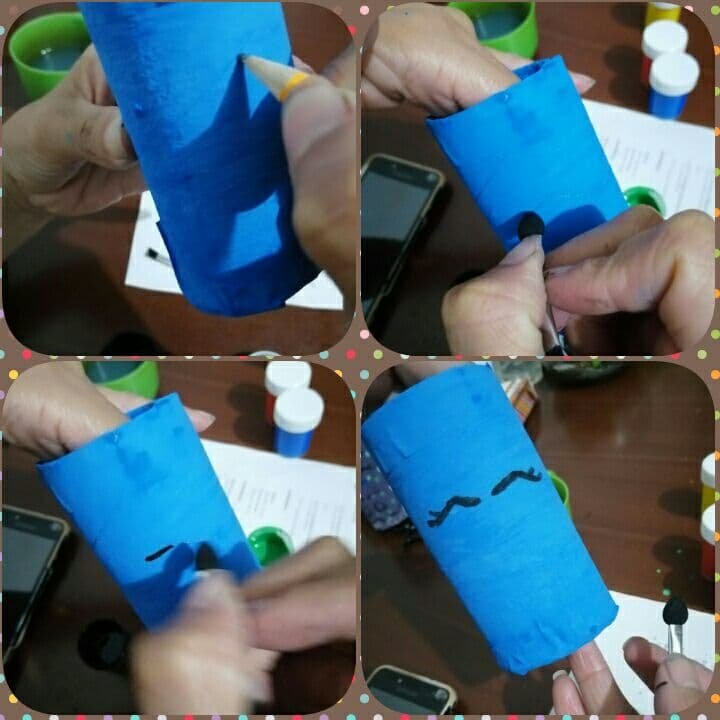
Usé el lápiz por la parte superior, donde se encuentra el borrador para hacer estos puntos.
Use the pencil across the top where the eraser is to make these points.
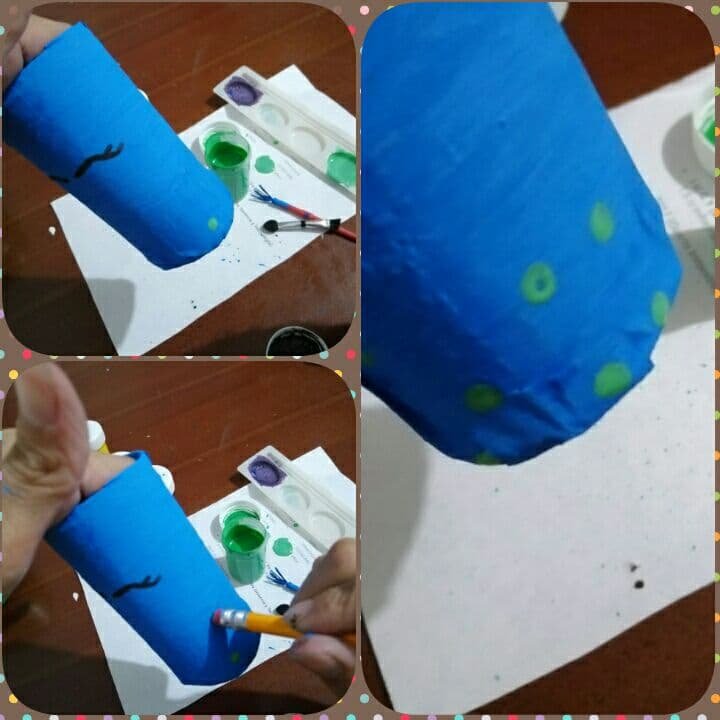
Los hice verde claro, verde oscuro, rosado, morado y blanco para dar luz al diseño.
I made them light green, dark green, pink, purple, and white to give the design light.
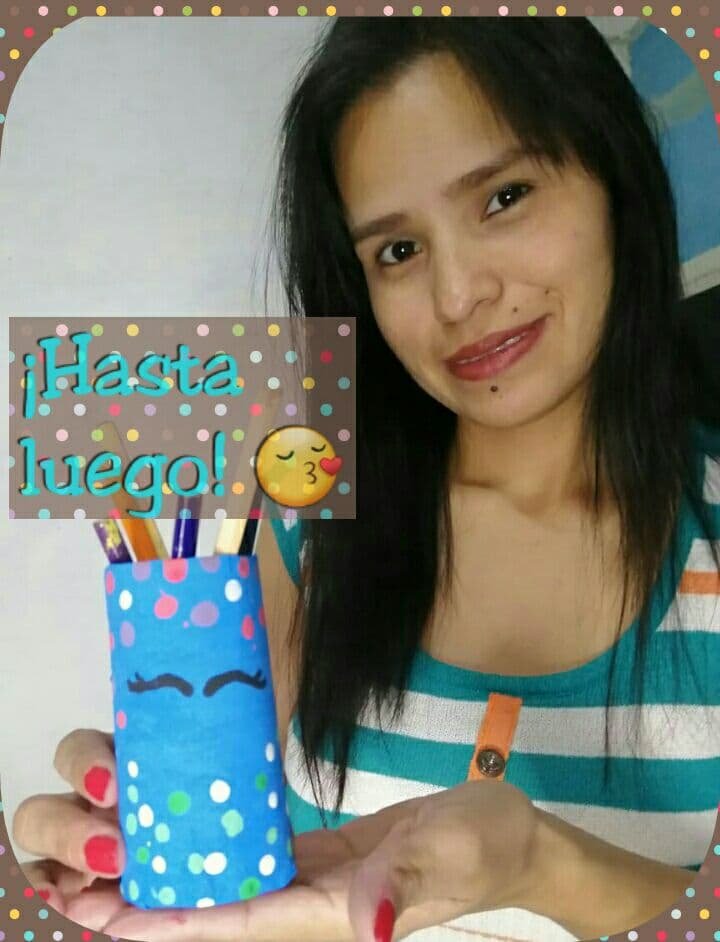
Y listo.... Este fue el resultado, muy lindo. 😍
And voila .... This was the result, very nice. 😍

Es muy fácil de hacer y lleva poco tiempo en su proceso, a mi me gustaron estos tonos, pero si se animan hacerlo son libres para decidir entre tantos colores que disfrutamos, todo es cuestión de dejar volar nuestra imaginación, gracias por leerme y espero sea de utilidad para ustedes este post.
It is very easy to do and it takes a short time in the process, I liked these tones, but if you dare to do it, you are free to decide between so many colors that we enjoy, everything is a matter of letting our imagination fly, thanks for reading me and I hope it is useful for you this post.
Hasta una nueva oportunidad mis queridos amigos, lluvia de bendiciones 🙏
Todas las fotos son personales.
Editadas en: PhotoScape.
Separador de: www.pngwing.com/
Disculpen si poseo errores de traducción, mi unico lenguaje es el castellano.
Until a new opportunity my dear friends, shower of blessings 🙏
All photos are personal.
Edited in: PhotoScape.
Separator from: www.pngwing.com/
Sorry if I have translation errors, my only language is Spanish.
Congratulations @wendy0520! You have completed the following achievement on the Hive blockchain and have been rewarded with new badge(s) :
Your next target is to reach 20 posts.
You can view your badges on your board and compare yourself to others in the Ranking
If you no longer want to receive notifications, reply to this comment with the word
STOPTo support your work, I also upvoted your post!
Check out the last post from @hivebuzz:
excelente trabajo quedo hermoso
Gracias nena 😘
Lindo, y creativo. Felicidades.
Muchas gracias linda 😊.