
Hello, Hive family💋
English Version:
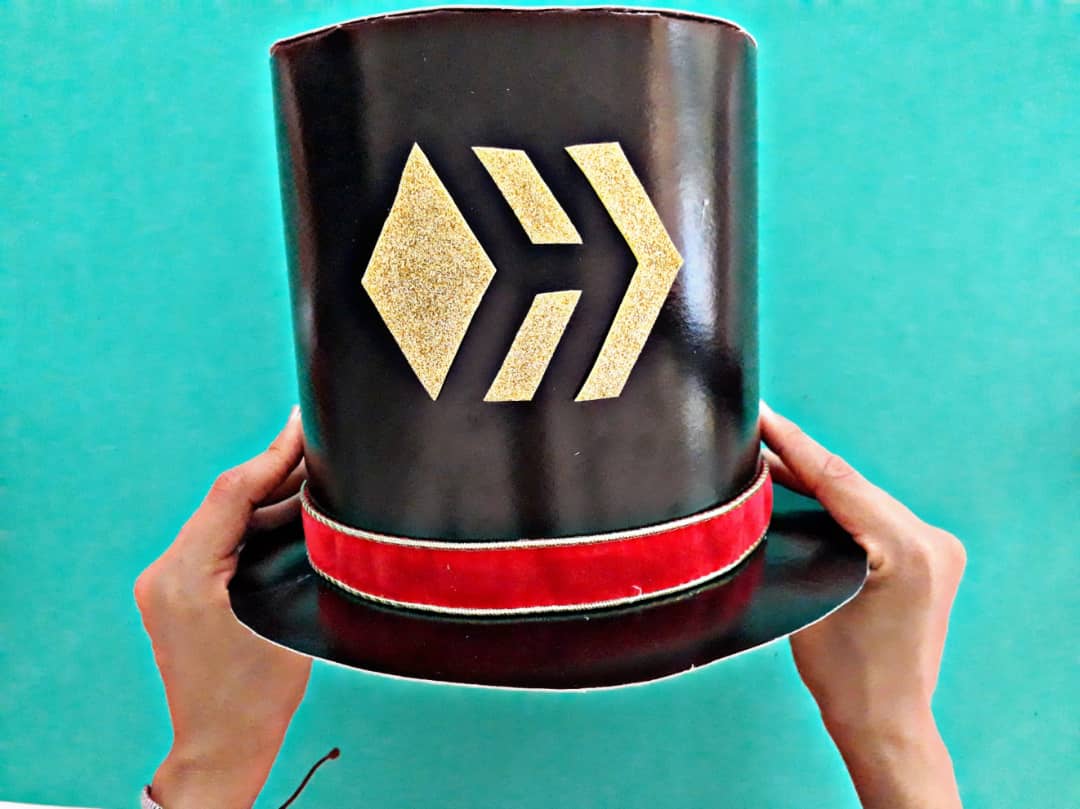
This new Friday I bring you a new and fun tutorial that you cannot miss. Today I am going to teach you how to make a hive cardboard hat, very easy and simple to make, using very cheap and easily available materials. So, I invite you to join this beautiful artistic trip, ideal to spend a pleasant time with our little ones at home, since, they can go, little by little, developing their creativity and ingenuity and getting a little closer to the artistic work.What are they waiting for?
Thanks to this simple technique, our little ones can spend a pleasant time designing their own homemade cardboard hat. So, do not wait any longer and look for a cardboard sheet and transform it into a beautiful hat. Before we start, let's not forget to wash our hands.

To make this beautiful hive hat we will need:
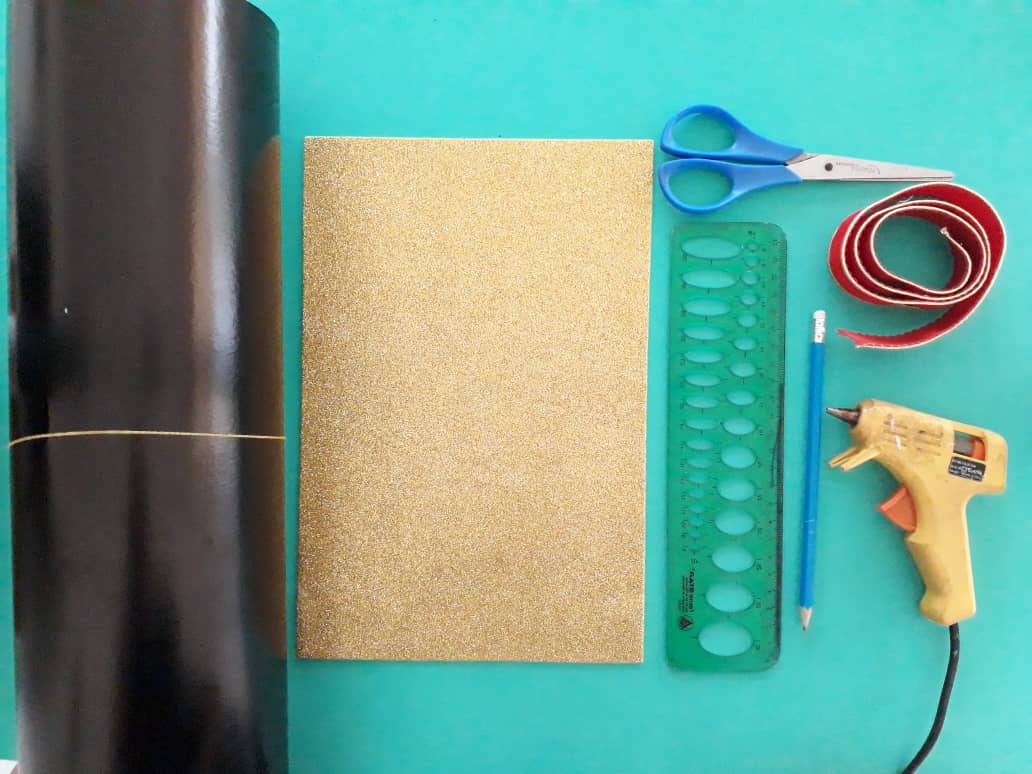
- Cardboard sheet.
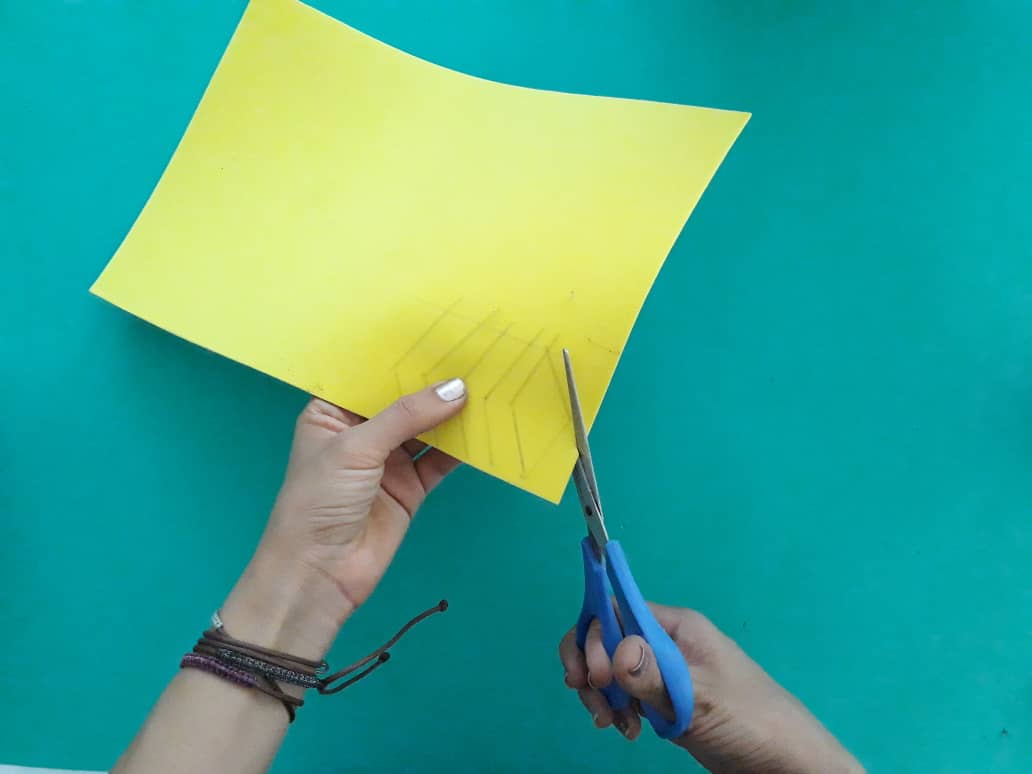
- Foamy sheet or Eva foam.
- Scissors.
- Pencil or marker.
- Decorative ribbon.
- Rule.
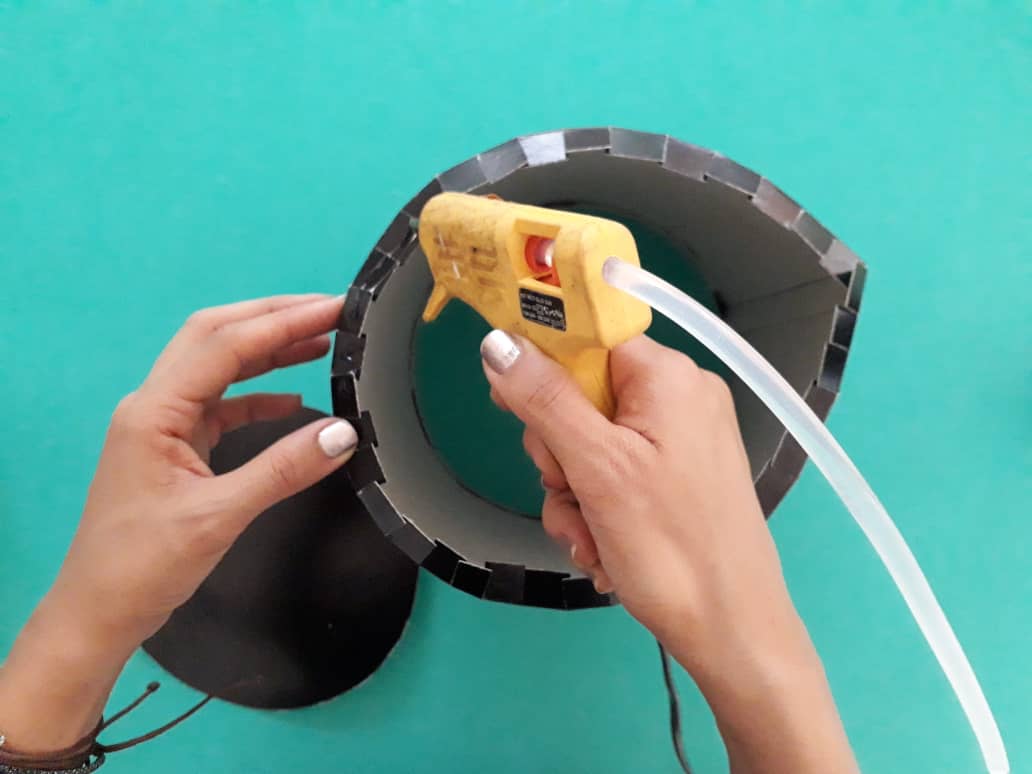
- Hot silicone applicator.

Process (step by step)

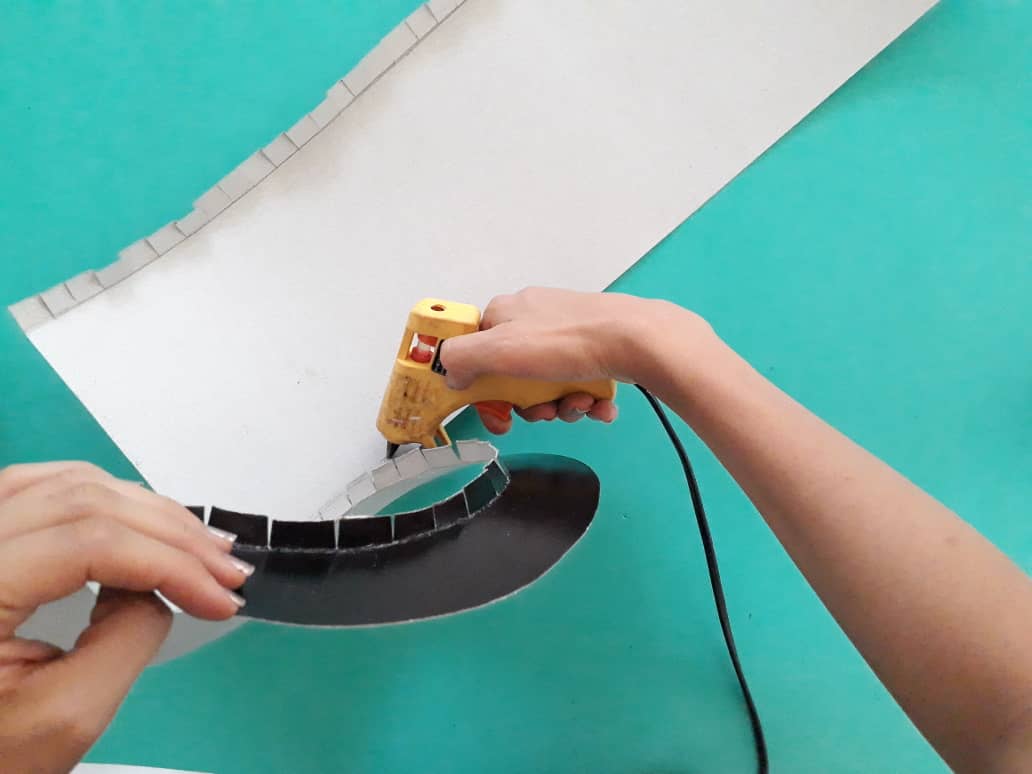
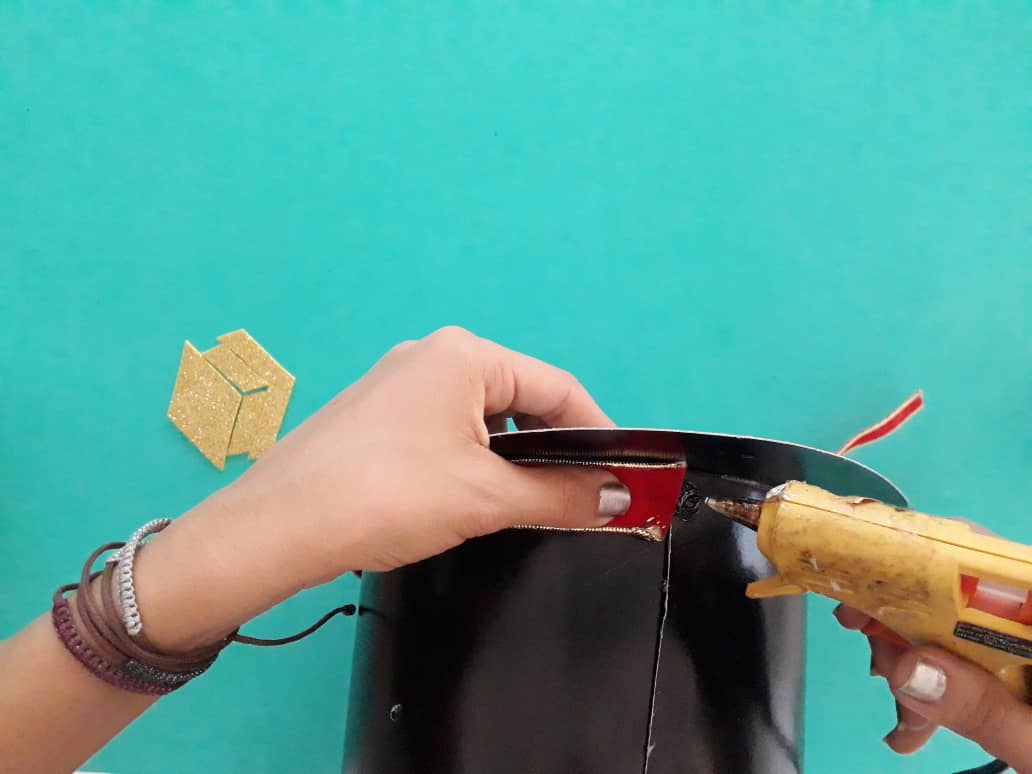
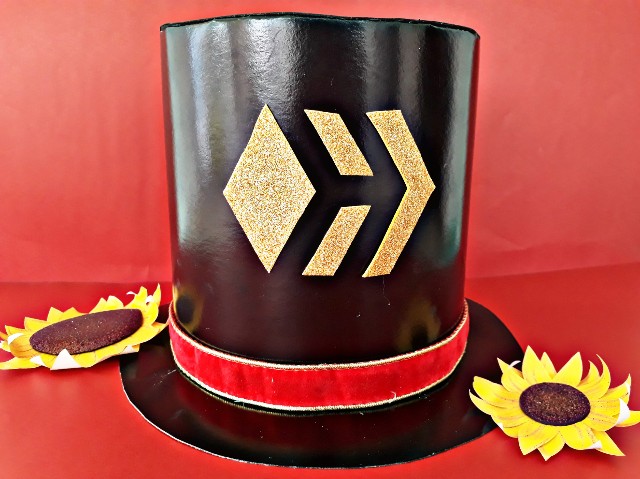
Once again thank you all for joining me in this new and diverse step-by-step that is part of my project "developing children's creativity". With this great exercise, we can learn to make our own homemade hive hat with our own hands. Thus allowing us to develop our creativity and ingenuity, in addition, to spend a pleasant time with our boys and girls. This is a wonderful and perfect activity in these times of quarantine that we need to distract our minds into something fun.
I hope you like it and thank you all very much for your support 🍎
Gracias a esta sencilla técnica nuestros pequeños podrán pasar un rato agradable diseñando su propio sombrero de cartón casero. Así que, No esperen más y busquen una lamina de cartón y transfórmenla en un hermoso sombrero. Antes de comenzar no olvidemos lavarnos nuestras manos.
Versión en Español:
Hola querida comunidad de habla hispana de Hive 💋 Este nuevo viernes les traigo un nuevo y divertido tutorial que no se pueden perder. Hoy les voy a enseñar cómo realizar un sombrero de cartón para hive, muy fácil y sencillo de hacer, utilizando materiales muy económicos y fáciles de conseguir. Así que, los invito a que se unan a este hermoso viaje artístico, ideal para pasar un rato agradable con nuestros pequeños en casa, ya que, pueden ir, de a poco, desarrollando su creatividad e ingenio y acercándose un poco más al trabajo artístico.
¿Qué están esperando?
Para hacer este precioso sombrero hive necesitaremos:
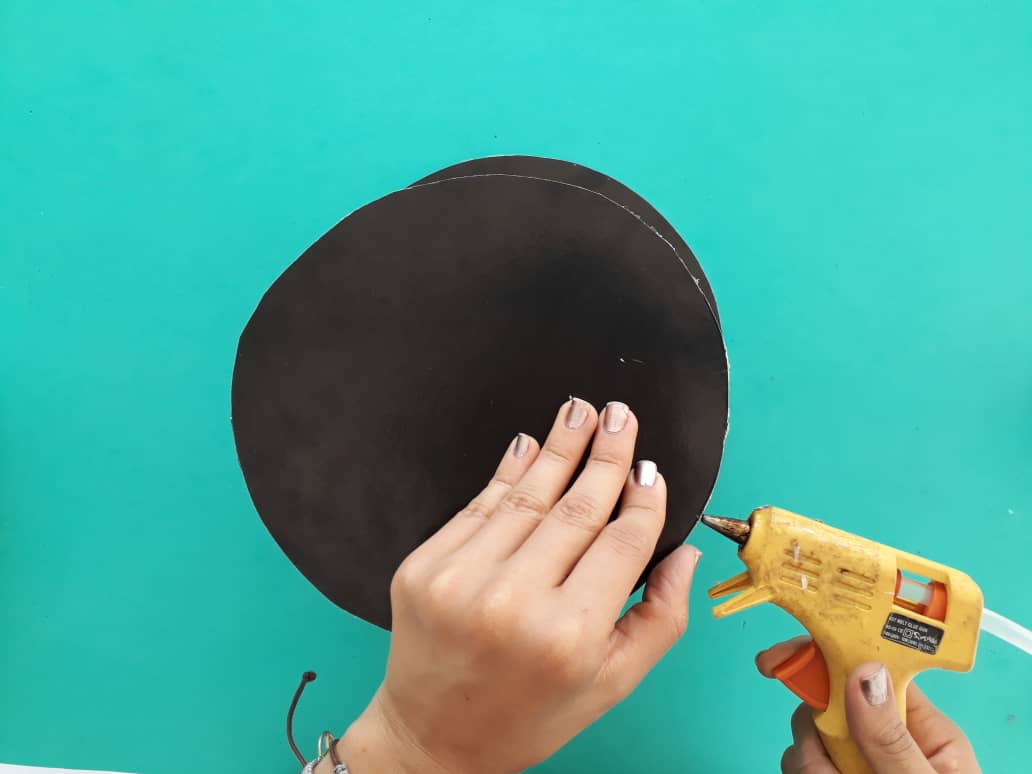
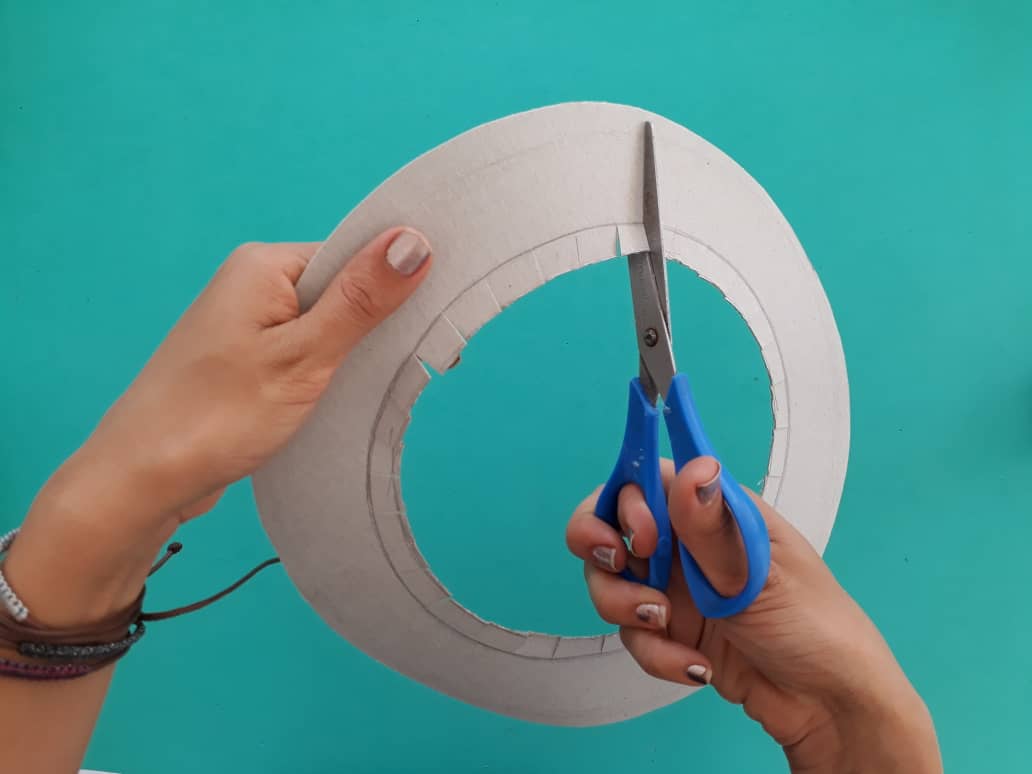
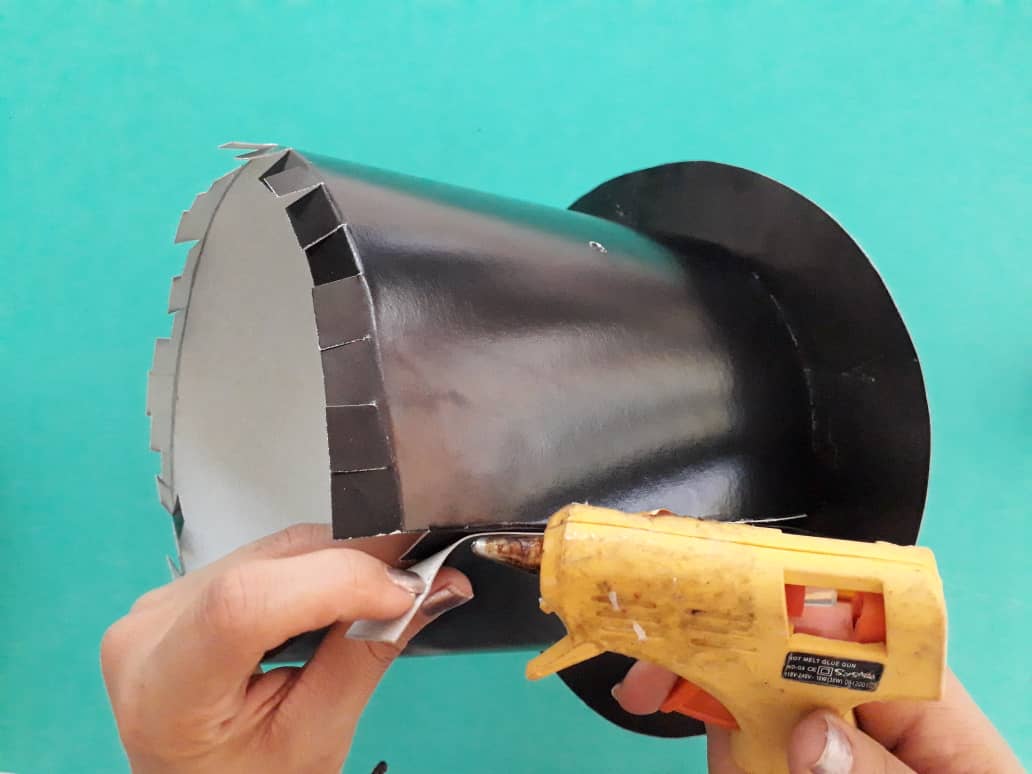
Procedimiento (paso a paso)
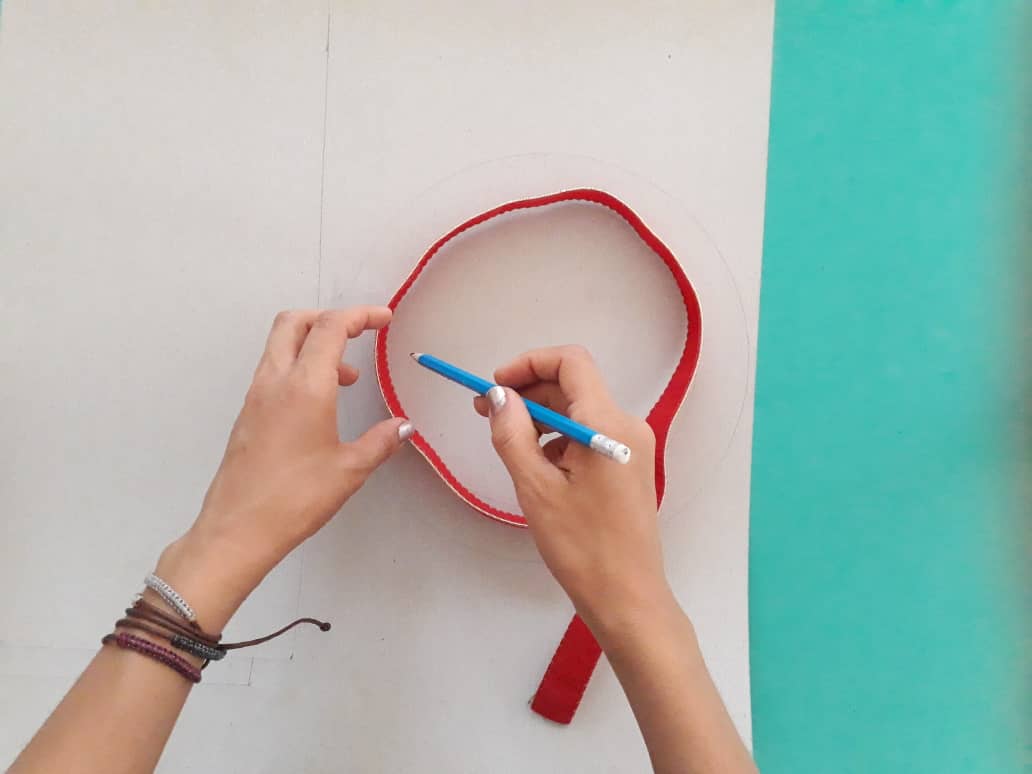
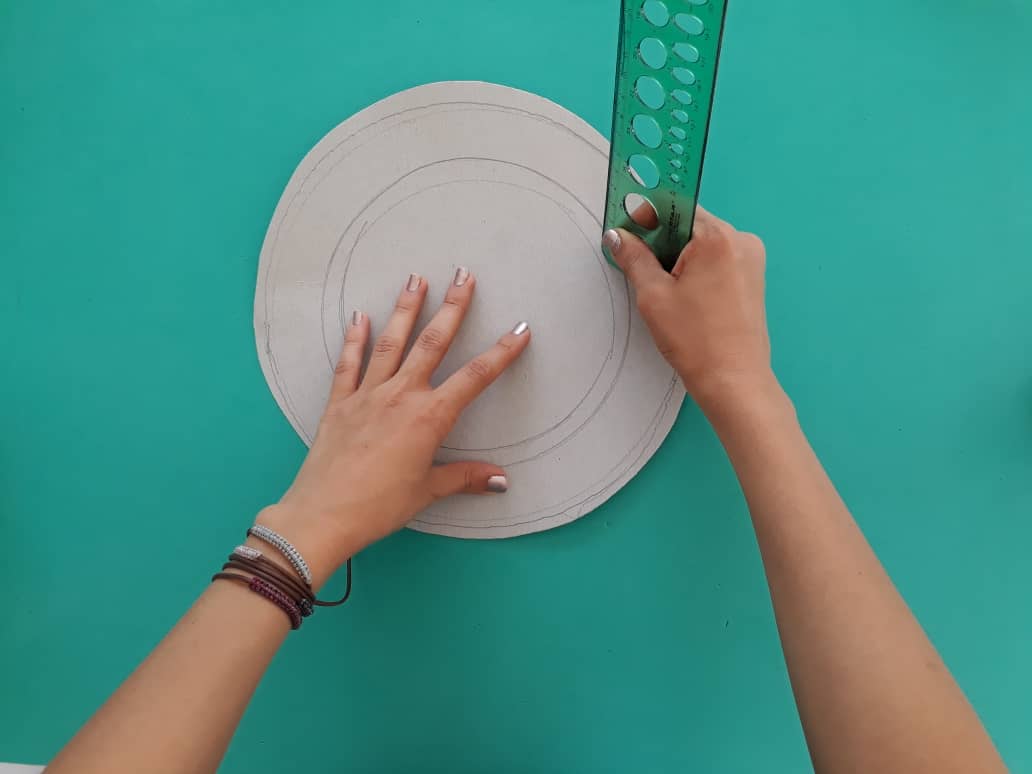
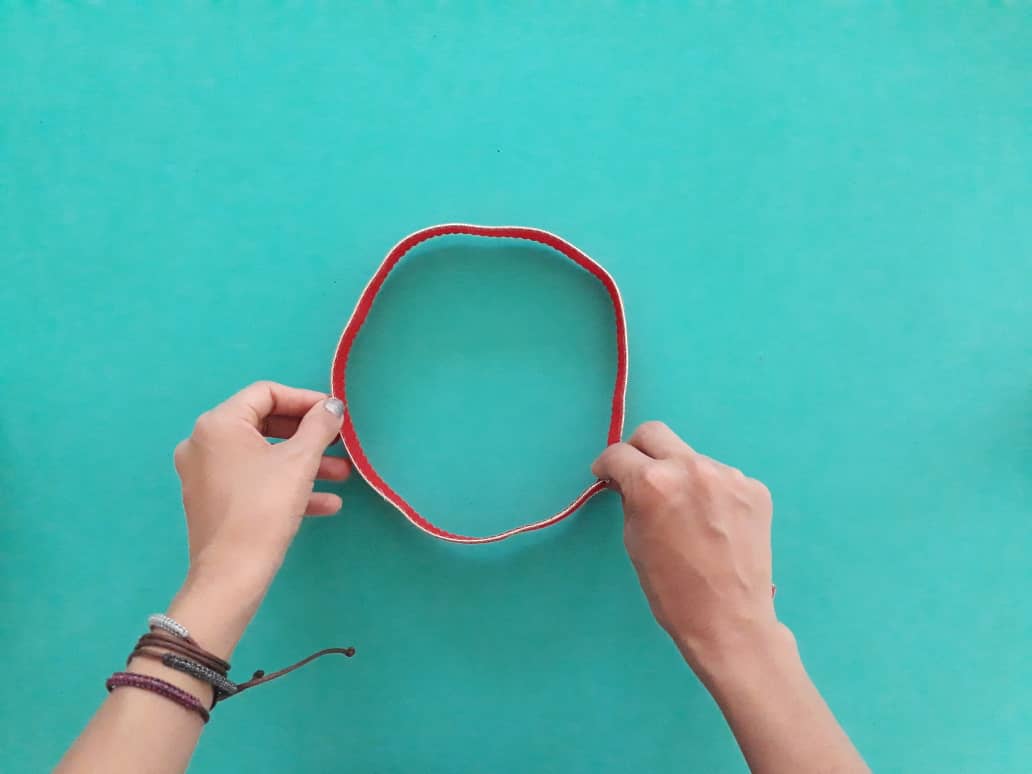
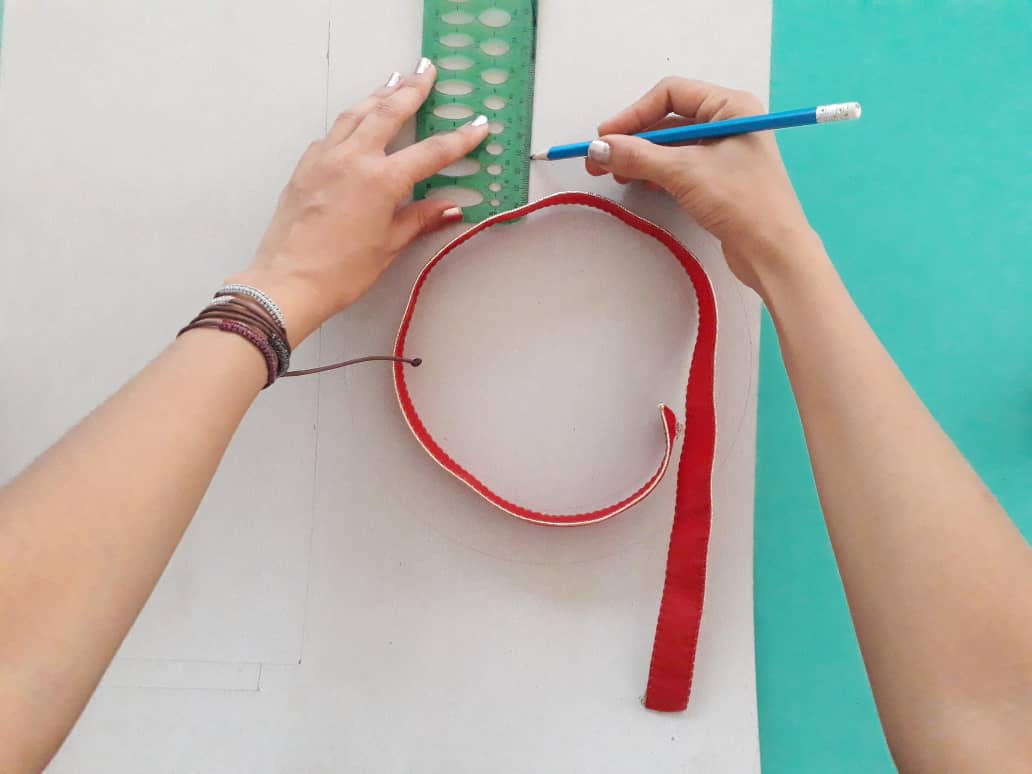
Primero, trazamos un círculo según la medida de la circunferencia de nuestra cabeza. Dicha medida la obtendremos con la ayuda de una cinta. Este primer círculo será la tapa del sombrero.

Una vez más gracias a todos por acompañarme en este nuevo y diversísimo paso a paso que forma parte de mi proyecto "desarrollando la creatividad de los niños". Con este estupendo ejercicio podemos aprender a realizar nuestro propio sombrero hive hecho en casa con nuestras propias manos. Permitiendo así, desarrollar nuestra creatividad e ingenio, además, de pasar un rato agradable con nuestros niños y niñas. Esta es una actividad maravillosa y perfecta en estos tiempos de cuarentena que necesitamos distraer nuestra mente en algo divertido.
Espero que les guste y muchas gracias a todos por su apoyo 🍎

 ✯@saracampero✯
Congratulations @saracampero! You have completed the following achievement on the Hive blockchain and have been rewarded with new badge(s) :
You can view your badges on your board And compare to others on the Ranking
If you no longer want to receive notifications, reply to this comment with the word
STOPTo support your work, I also upvoted your post!
Do not miss the last post from @hivebuzz:
Support the HiveBuzz project. Vote for our proposal!
Thanks for advising. You are incredible bot.
You are very welcome @saracampero! It is a pleasure. We always try our best 😉
It would be very appreciated if you could support our proposal so we can keep up the good work! ❤️
cheers, liz
My #posh twt!.
Muchas gracias por su apoyo!
De nada bella!
Genial amiga. Éxitos
Gracias amigo saludos..
Cheveré tus diseños y creaciones amiga. Saludos
Gracias amigo. Saludos...
This looks really good. Good job!
Thank you very much dear friend for your visit. Blessings to you.
Muy ingenioso! me gustaron los brillitos, saludos de Argentina!!
Muchas gracias por comentar Dra. Que bueno que le haya gustado.. Saludos..
Love the hatter hat , and the diy is so good all steps are visual.
Well done
Thanks for your comment friend. I'm glad you were able to enjoy this step by step.
ajajaj quedo muy lindo, todas las imágenes quedaron genial, se ve que le pusiste dedicación. Saludos!
Jaja. Gracias jenny Como debe ser. Saludos..
This post earned a total payout of 7.584$ and 3.792$ worth of author reward that was liquified using @likwid.
Learn more.
Jaja si muchas gracias. Como dicen "El apuro trae cansancio"