Are you ready for the Oni Collection?
Because the third edition is here my dear Hiver, I am still working on this collection dedicated to the Japanese demons, or rather the beautiful women with horns and distinctive personalities according to their names.
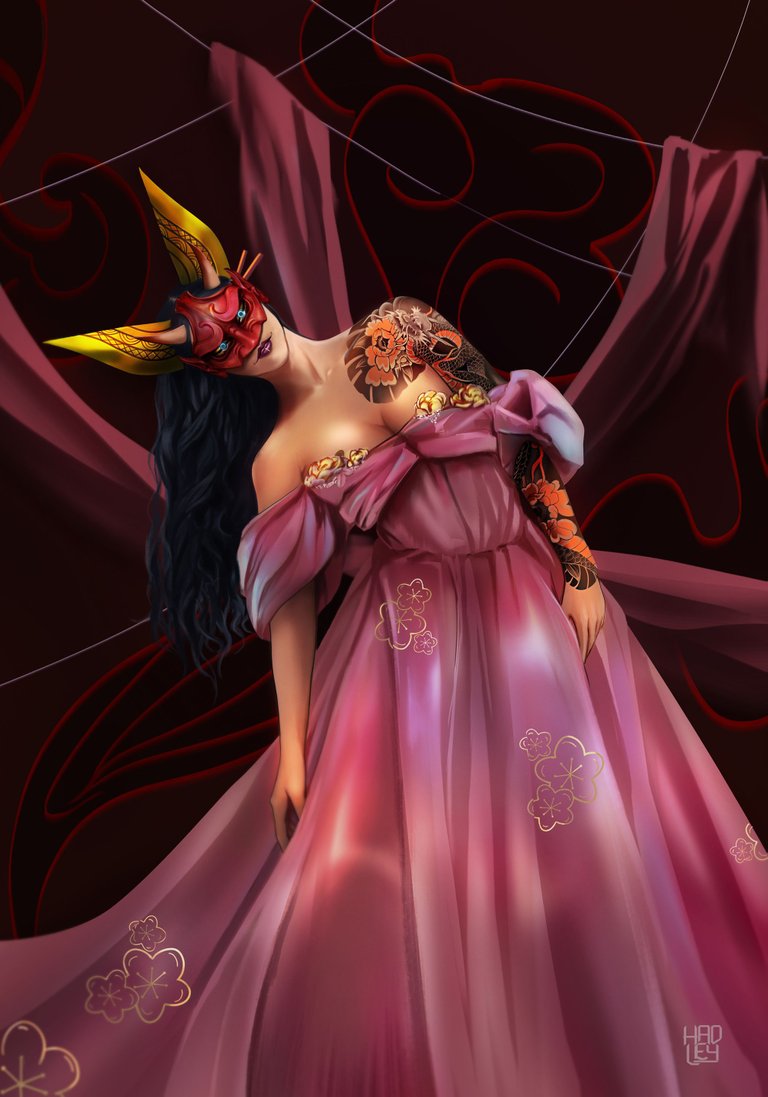
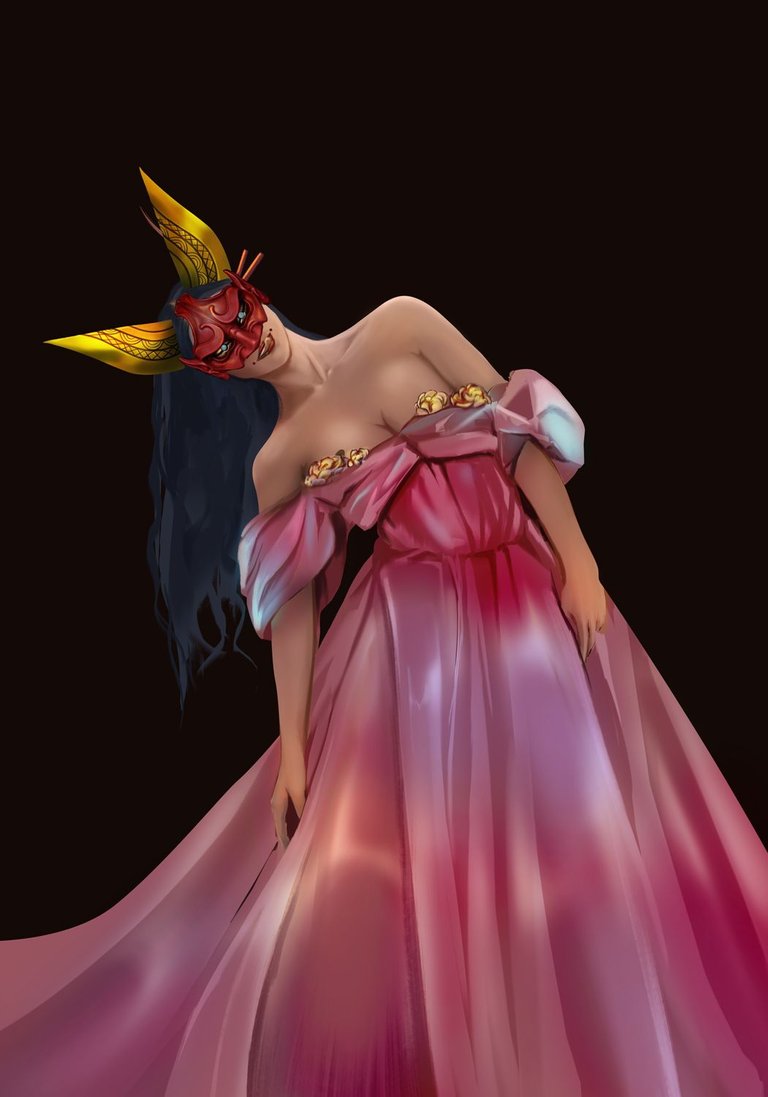
Today I want to introduce you to Ukara, the morning dew. An Oni who hides behind a dark mask, but just like the sun that hides behind the dark mountains just before dawn and shines high in the sky, Ukara hides her beauty and grace in order to chase all evil away from her and to keep her peace and tranquility behind that dark first appearance.

Tools:
- Gaomon S620
- Photoshop
- Brushes courtesy of Imad Awan: Download here
🔰Process🔰
-Step 1:
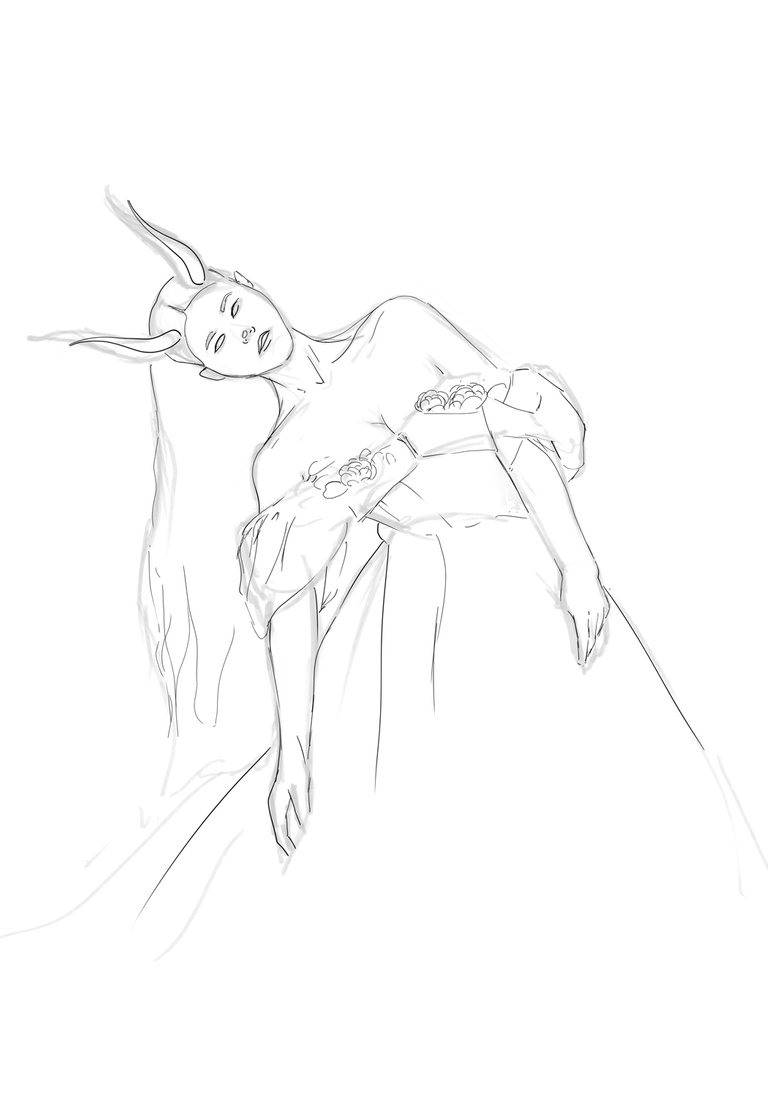
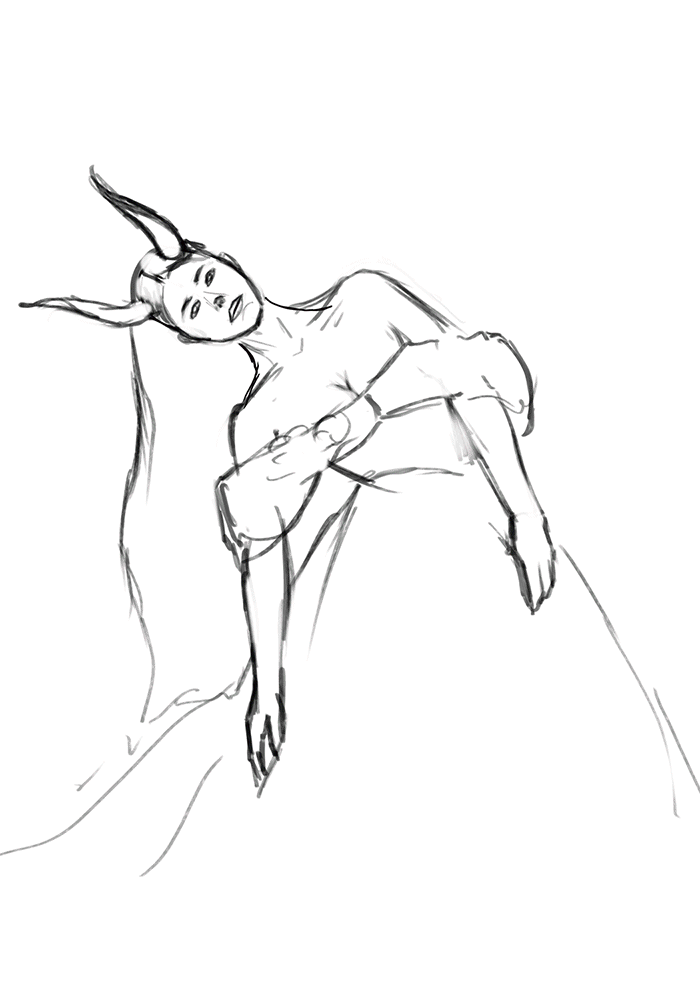
At the beginning of the sketch, I thought to make the face completely visible, and with a youthful and innocent look, but after some thought, I decided to add a little more mystery to the character by adding a Hannya mask, so from these two images you can guess what Ukara's hidden face looks like.
 |  |
|---|
-Step 2:
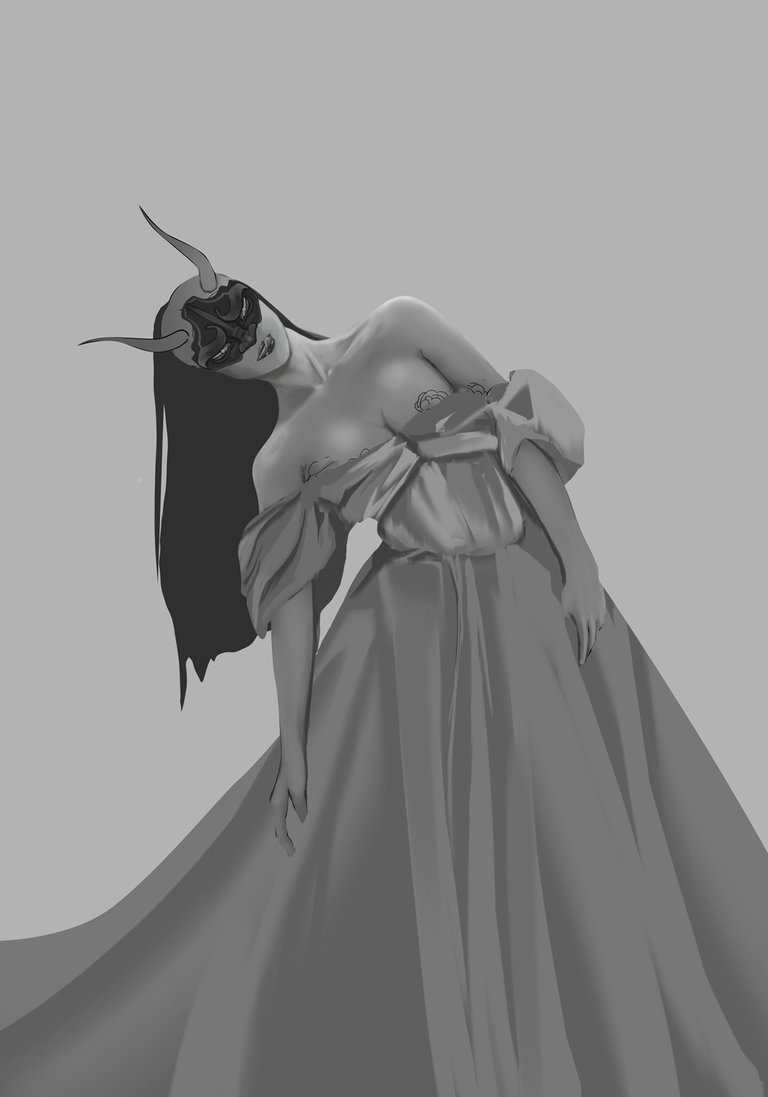
Since the outline done before was very thin, I could quickly cover it while detailing the character in grays, normally I usually do my artwork without any outstanding outlines, but with this collection I've been thinking that maybe it would be good to try a little how it feels to do art where the outline is maintained until the final work, it would be something interesting to do and get out of my comfort zone, what do you think about it?
 |  |
|---|
-Step 3:
I had to look for a 3D model of a Hannya mask because the one I was making looked like a strange mask, and then I realized that it was basically because the head was disproportionate, I noticed this when I added the metal ornaments in the hair, so to not ruin the work, I was correcting little by little by simply painting over it, as a traditional painter would do.
-Step 4:
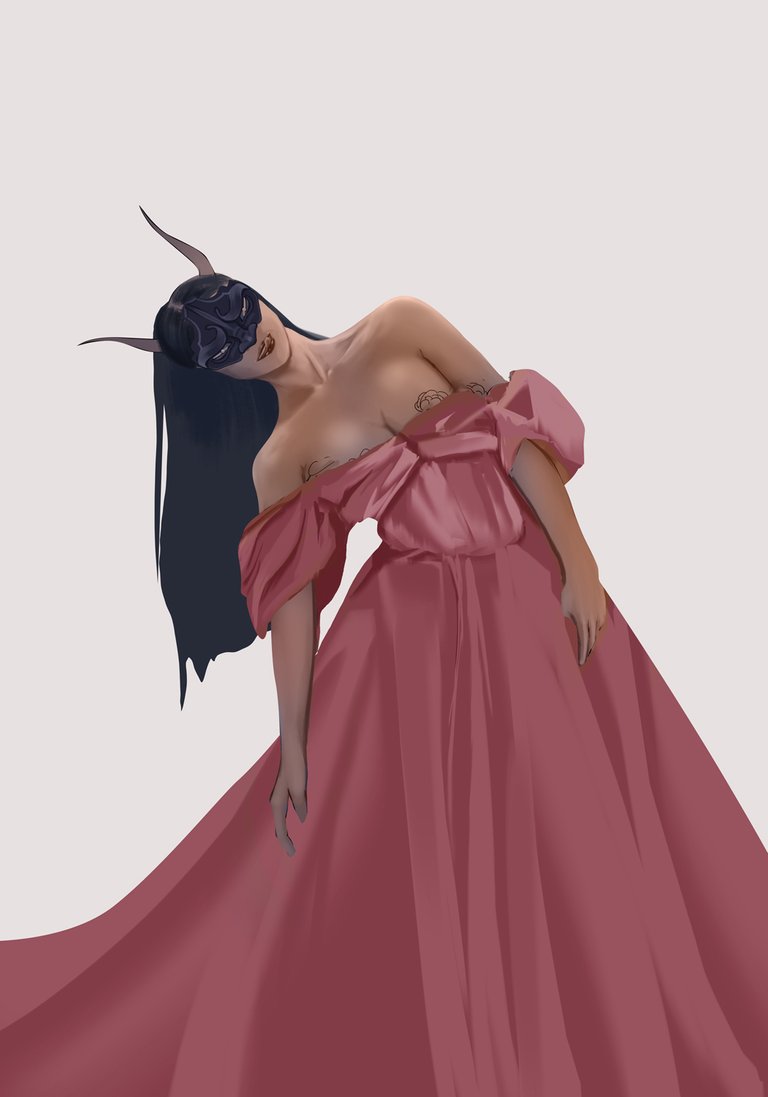
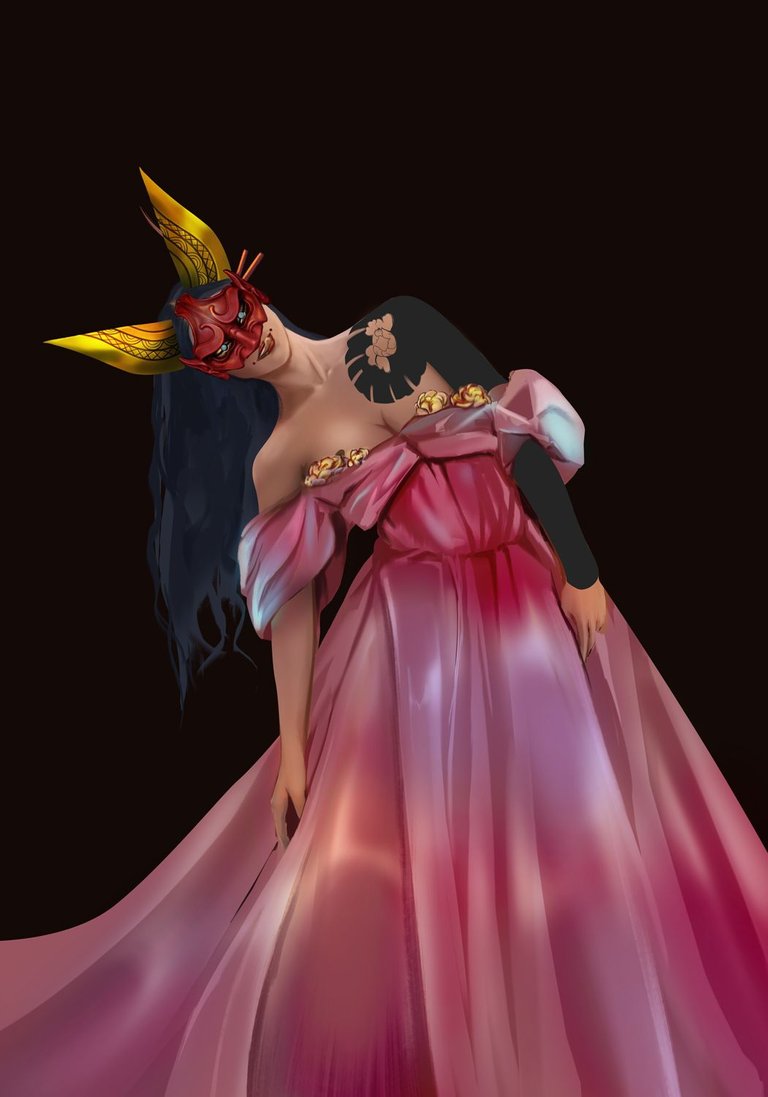
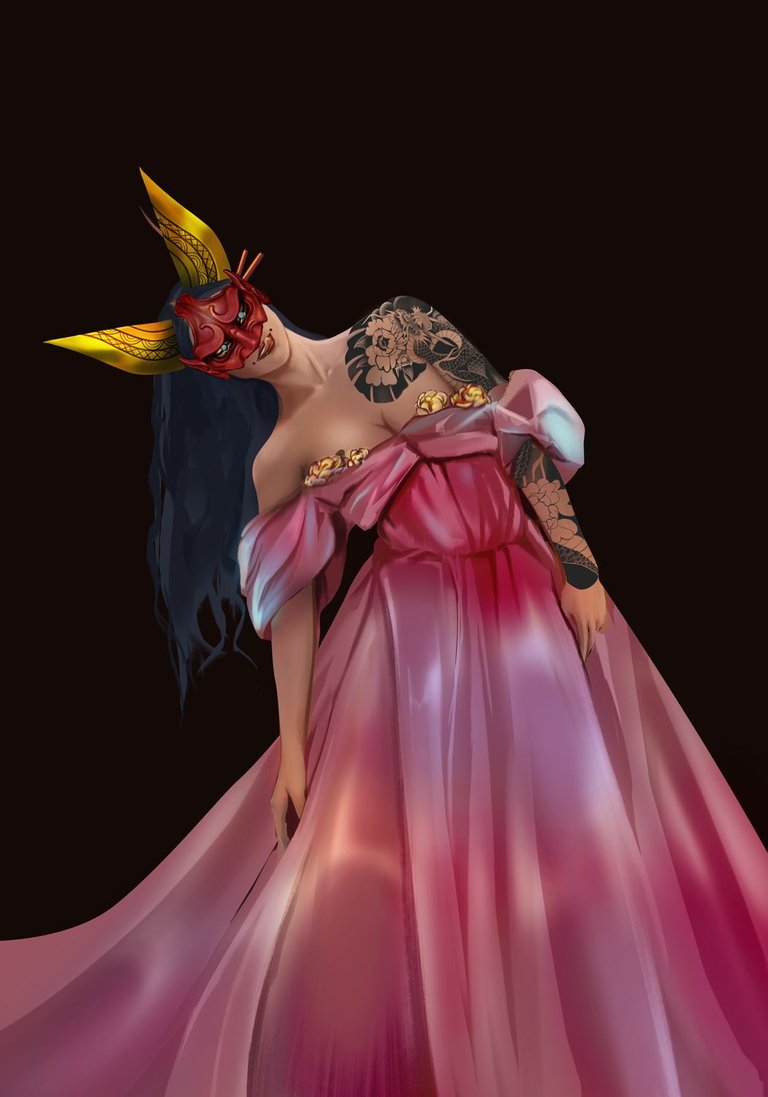
With Hikari (the Oni #2) I practiced an interesting way to make very large tattoos, and that is to fill the area that will occupy the tattoo and then add a layer mask, this way you can draw little by little the design of the tattoo but in the layer mask, where there is no fear of permanently damaging the design you are doing, because by painting in white or black you can erase or reappear the main base gray color, in short, is like erasing and reappear the skin color, but safely.
Also, to add the color tones of the tattoo, in this case orange, simply create a new layer under the tattoo and color it freely, but to give it that more striking touch and that it is not just a gray tattoo without brightness or shadows it is necessary to create a couple of layers in the blend modes "overlay" and "soft light" and with them add new highlights, I recommend using either an orange or pink color for this.
 |  |
|---|
-Step 5:
Curly hair, it is strictly necessary to work it by locks, this is the best way to make the curls look good and mix with each other, so you have to play with the lights and shadows of each curvature of the hair and also avoid drawing hair by hair, imagine that the human head has thousands of individual hairs (I was going to say millions, but a quick glance at google and learned that we have 90 thousand to 150 thousand hairs in our head, you came to see art and now you know how many hairs you have approximately), so drawing them one by one must be a terrible task.
I also tried to make some prints on the dress, but frankly it was a complete failure as I failed to properly integrate the designs into the fabric, but I don’t give up, I’ll keep trying because from practice comes the master and I want this collection to have some nice patterns of prints on the clothes. On the other hand I was fighting to upload the final image because it lost quality and I feel that the art is ruined a little bit 😔.
I will leave you a GIF with the whole process on it, so you can better appreciate the illustration process.
Tell me in the comments that you imagine when you see this illustration.

See you in a future post!
Thank You for Supporting My Artwork
▶️  |
| |
| |
| |
| |
| ◀️
◀️
TWITTER | GHOSTMARKET |TERRA VIRTUA |NFT SHOWROOM | INSTAGRAM | FACEBOOK
⬆️ Follow ⬆️
Super dooope one. Really niiiice. Rehived
Thank you, I'm trying to make each Oni have a big impact 😊
super awesome!
Thank you @not-here!
Brutaaal
❤️❤️❤️❤️
Beautiful
Thank you @gislandpoetic !
Wow.
✨✨✨
TÚ ERES LOCO RAMÓN? ESTA VAINA TE QUEDÓ DEMASIADO BELLÍSIMA!! ♥
Muchas gracias amix ✨
Congratulations @hadley4! You have completed the following achievement on the Hive blockchain and have been rewarded with new badge(s):
Your next target is to reach 74000 upvotes.
You can view your badges on your board and compare yourself to others in the Ranking
If you no longer want to receive notifications, reply to this comment with the word
STOPCheck out the last post from @hivebuzz:
Support the HiveBuzz project. Vote for our proposal!
Hi there @hadley4 !
Love your art style.
We are currently having an art competition for ChiFiBots where we invite artists to draw an in-game character "Hive Power."
Prizes include:
1st: 50 HBD | 1 x Day One Starter Pack | 5 x Base Set Packs | 5000 ONEUP tokens | ChiFiBots Stickers
2nd: 2 x Base Set Packs | 1000 ONEUP tokens | ChiFiBots Stickers
3rd: 1 x Base Set Pack | 500 ONEUP tokens | ChiFiBots Stickers
If that interests you, read the blog for more information.
https://peakd.com/oneup/@nftstudios/hive-power-chifibot-art-competition-or-draw-a-chifibot-to-be-used-in-game
Thanks and have a great day!
Kevin