This document describes how to install both the PC–Mode (Debian) and MS-Windows on an SSD to be used in an Atari–VCS internal M.2 slot. This is a little more difficult than the the Atari suggested technique of using an USB–Stick for each operation system.
Important: If you haven't bought an SSD then consider the following
- SATA M.2 SSD have become quite expensive and have a maximum speed of only 550 MB/s.
- External USB-SSD like the SanDisk Extreme PRO Portable with 2000 MB/s are almost four times faster.
- External USB–sticks like the Kingston DataTraveler Max with
1000 MB/s are almost twice as fast. - Both external options are significantly cheaper (at the time of writing) .
- WinToUSB–Free only works with USB–Sticks. You need the professional version for SDDs.
- WinToHDD–Free will delete the entire HDD. You need the professional versions for for multi OS installations.
- Booting from a USB–Stick can be more convenient then using the cumbersome build in boot–manager.
- Installing rEFInd to improve boot manger convenience is quite cumbersome.
Precondition:
The following tools are needed throughout the process and you should make sure you have them before starting.
- A working Windows 10 or 11 on a desktop computer or in a virtual machine with
- For PC–Mode: balenaEtcher
- For Windows: WinToHDD Professional
- A Debian system (preferably Atari VCS PC–Mode) on an USB–Stick with
- From Store: KDE Partition Manager and Grub Customizer
apt-get installntfs-3g dosfstools fdisk parted
- Watch the following videos to get feel for the skills needed:
- Keyboard with wired or dongle connection (z.B. Logitech K400 Plus) as intermediate testing is done without wireless card installed. The internal boot manager also needs a wired or dongle keyboard to operate.
- Torx 10 screw driver or wrench to open the case.
- An image file of the Atari PC–Mode USB–Stick (pc-mode-image.img).
- An image file with a suitable MS–Windows installation.
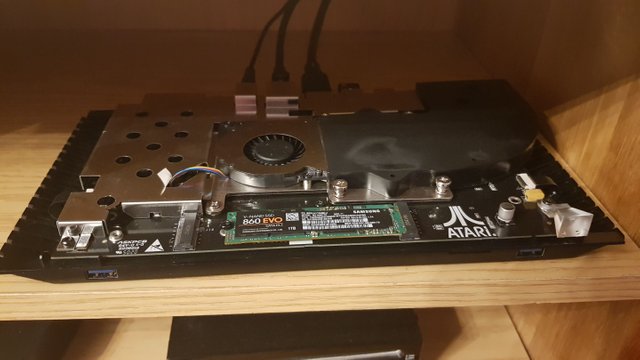
Move SSD to an USB enclosure
If you already used the SSD it is necessary to move all games with high scores and game progress from the SSD to another drive as the SSD will be cleared. A temporary USB–Stick will do as you can return them at the end of the process.
To start removing the SSD remove the screws underneath the rubber feet. There is no need to remove the feed.
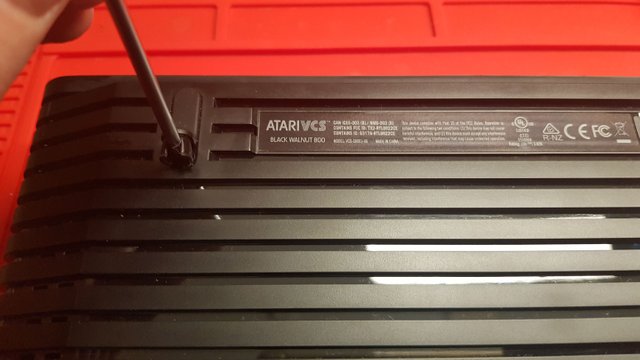
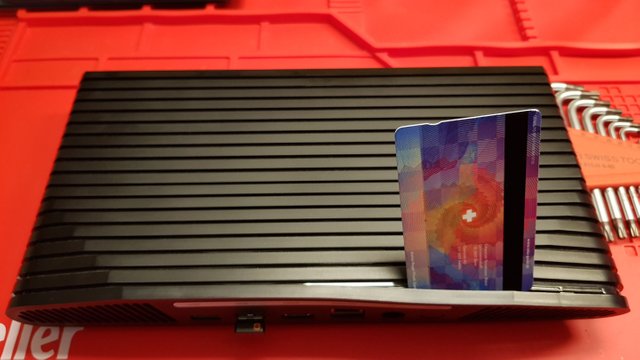
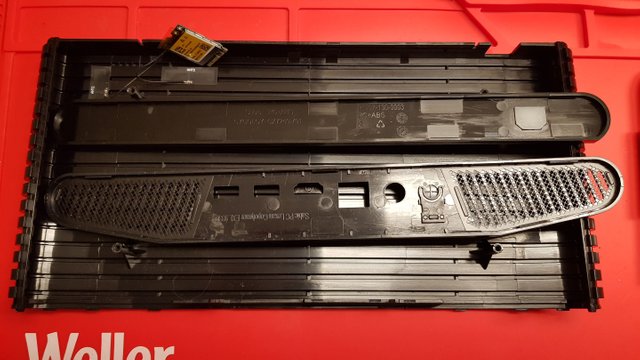
Pry back side off. Use a plastic pry bar or an old credit card. Using a screwdriver will damage the case.
Carefully fold open to the front not to tear off the cable to the wireless aerials.
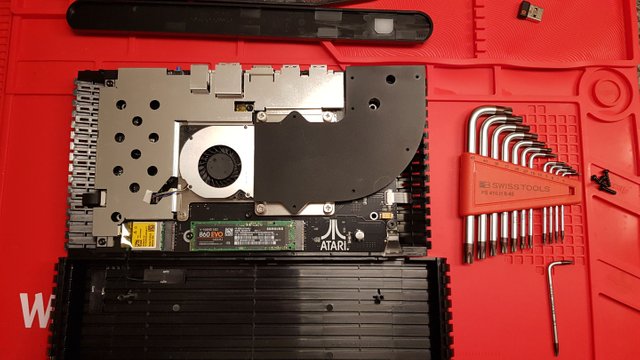
Remove the wireless module for easier manipulation and testing. There is no need to remove the yellow sticker. Just unscrew and carefully pull out.
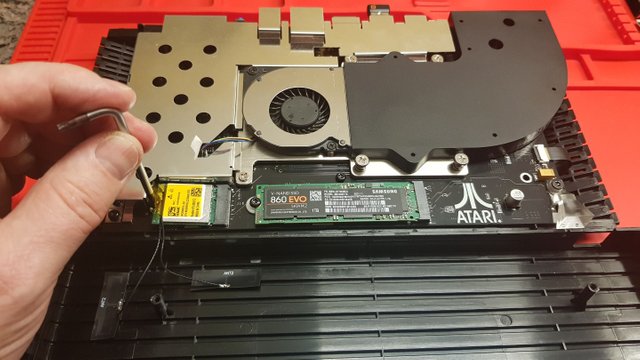
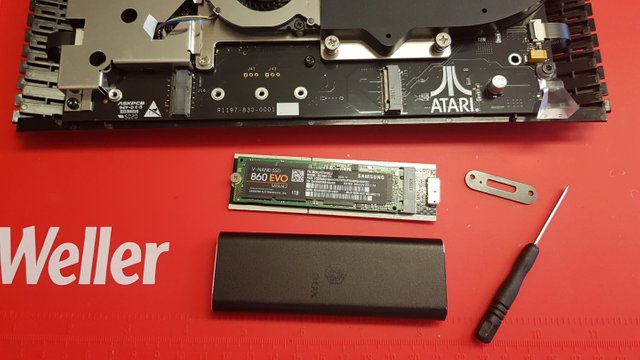
Remove SSD and add the SSD to a compatible USB-SSD enclosure.
Install
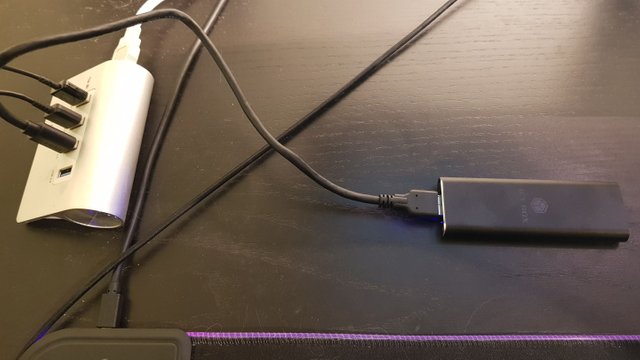
Boot a Windows System (Use VMWare if you are a Linux or macOS user) and connect the USB–SDD adapter.
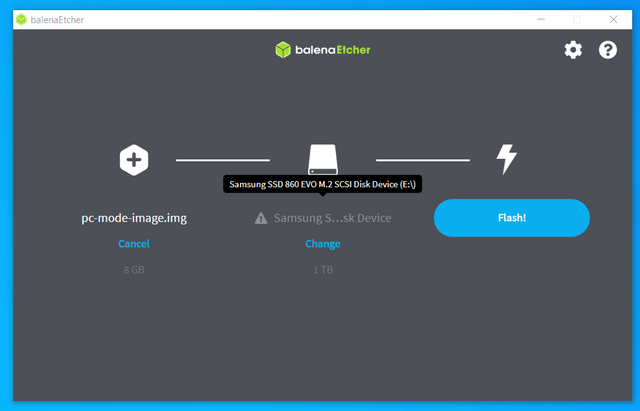
The original documentation for installing onto a new USB–Stick suggest Rufus to flash the drive. However Rufus can't handle SSD drives so for SSD balenaEtcher is used.
Delete the ext4 partition and add an empty windows compatible partition. The partition will be deleted again and is just needed so that balenaEtcher can locate the drive. An extra reboot might be needed for balenaEtcher to notice the new drive.
Select the image file then the freshly created partition, double check and press flash! Note that all data on the drive will be wiped so do indeed double check.
Remove the SSD from the USB-SSD enclosure and add it back to the Atari–VCS. Connect Atari–VCS to power, ethernet and display. No need to attach the wireless module and lid if you have wired ethernet and keyboard.
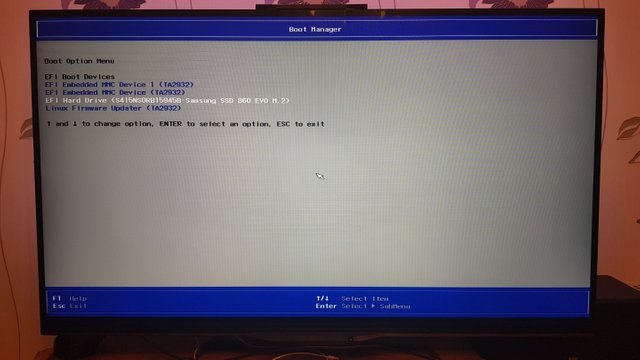
Test
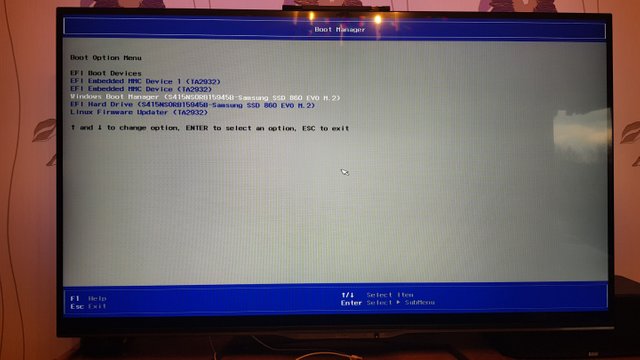
Start your Atari–VCS pressing ESC to open the BIOS then use the boot manager to boot from the SSD:
Set up user and all the other info a newly installed OS needs including performing a system update.
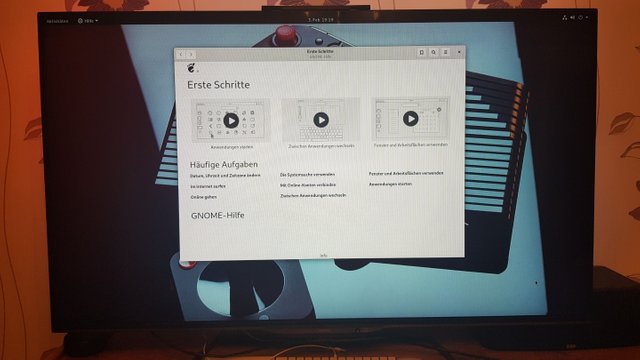
Restart and Test Atari–OS. Try adding one of the installed application to the SSD to test access to the ext4 partition.
Install Windows
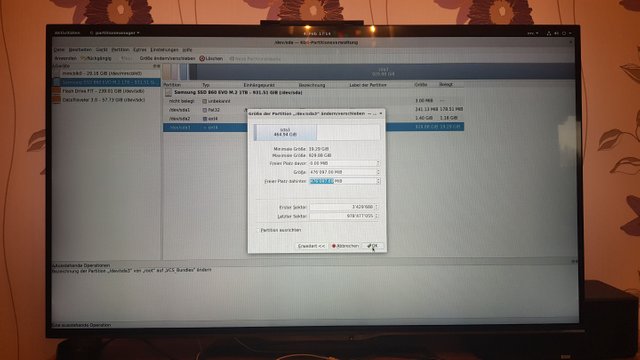
Insert an USB–Stick with a stock Debian or your Atari–VCS. This is needed because you can't shrink a mounted partition. Reboot the Atari–VCS. No need to press ESC as USB–Sticks have priority.
Use KDE Partition Manager to shrink the rename the root partition to „VCS_Bundles“ and then shrink it to make space for the Windows installation.

Remove SSD from Atari VCS and return to USB-SSD enclosure then connect your SSD to your Windows system.
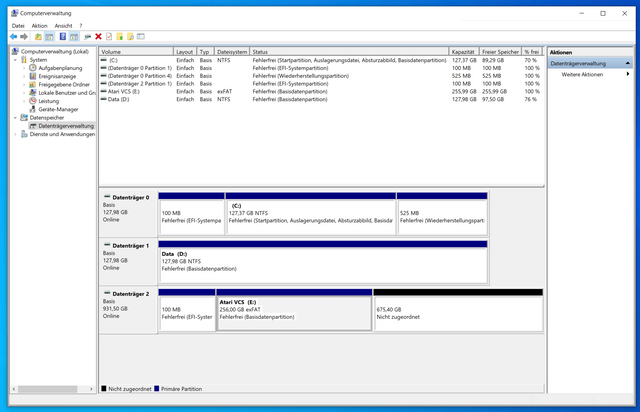
Create a NTFS partition leaving approx. 100 MB free. Create a Fat32 partition in the remaining 100 MB.
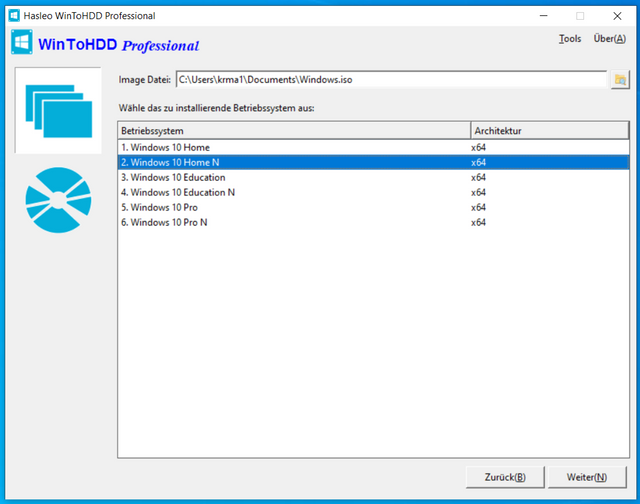
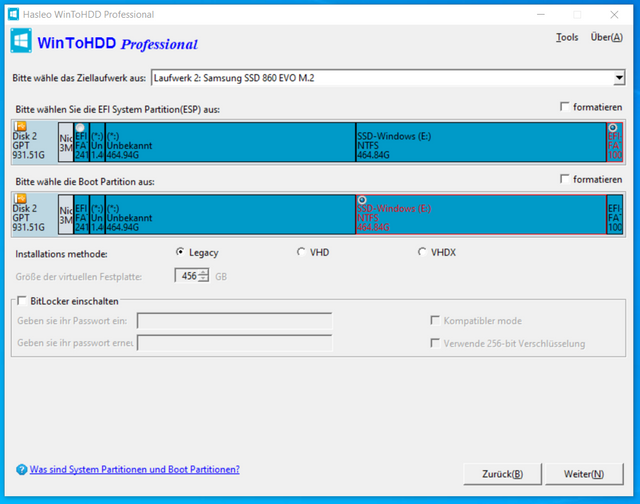
Use WinToHDD Professional to install Windows.

Select keep existing partition layout:
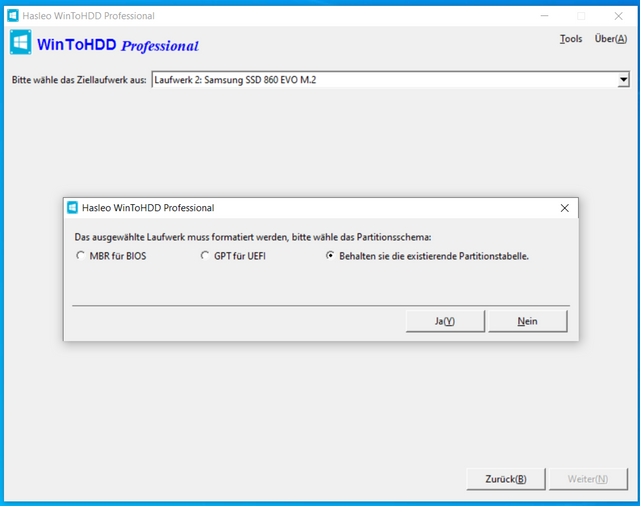
Use Fat32 partition as EFI system partition. Use NTFS partition as boot partition.
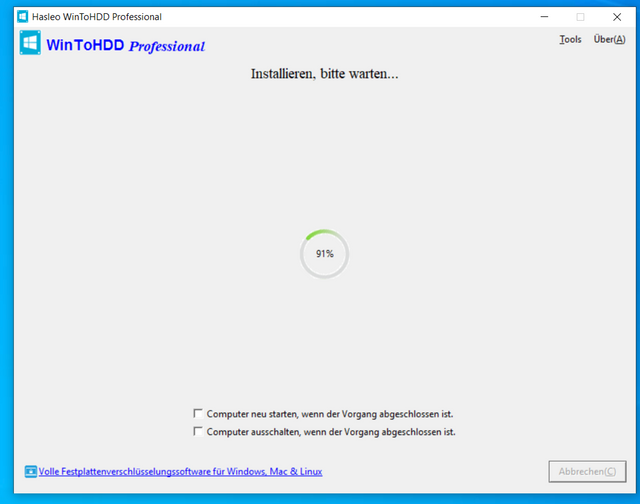
Start installing Windows and then wait for the installation to finish.
Test Windows
Remove the SSD from USB-SSD enclosure and return SSD to the Atari–VCS. Connect Atari–VCS power, ethernet and display. Start your Atari–VCS pressing ESC to open the BIOS then use the boot manager to boot Windows from the SSD.
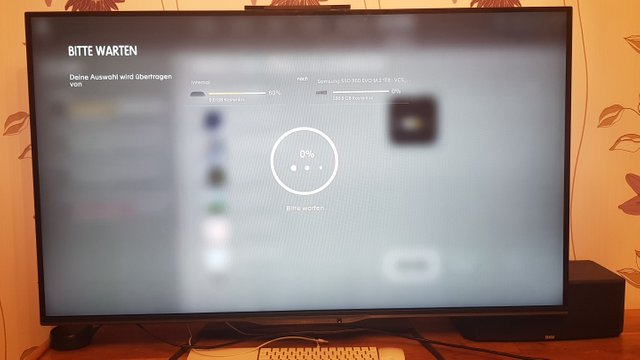
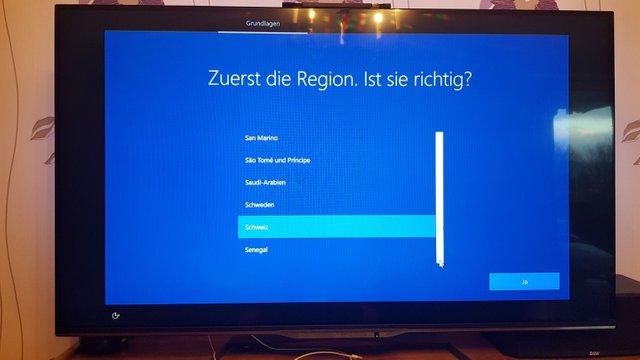
Set up user and all the other info a newly installed OS need. Windows will do multiple reboots which will start Atari–OS. You need to restart manually into Windows.
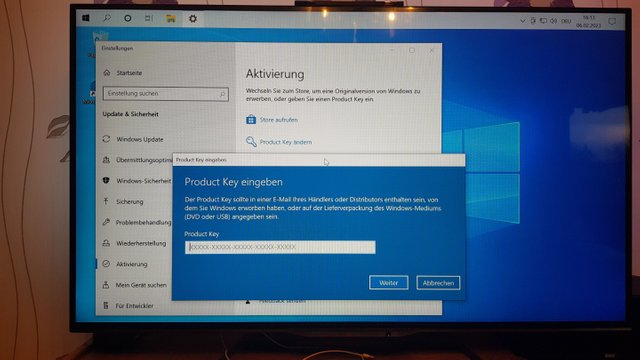
Don't forget to enter your registration key
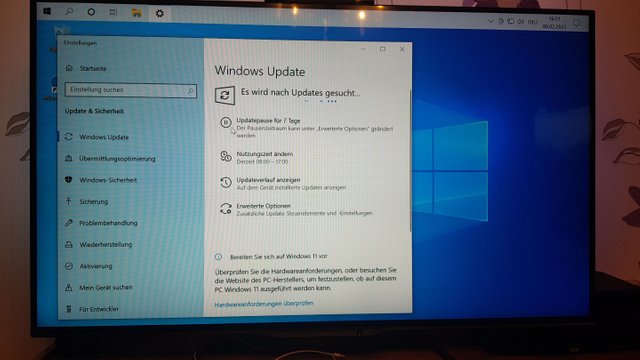
Perform a system update. I had Windows installation fail after update. Especially driver update might be problematic so it's better to make the first update before closing the Atari–VCS again.
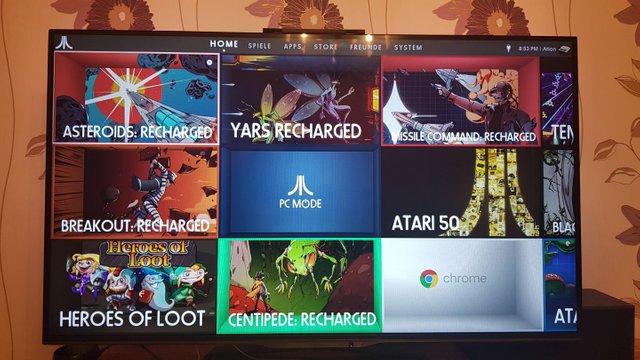
Restart and Test PC–Mode and Atari–OS to see if all three OS are still working.
Finish
Shut down after the last test, reattach the wireless module and close the Atari-VCS the reversing the steps used to open. Enjoy.
I'm gonna file this in my "extremely specific" folder.
!discovery 43
Once you got an Atari VCS you will be glad to have it 😉.
Congratulations @krischik! You have completed the following achievement on the Hive blockchain And have been rewarded with New badge(s)
Your next target is to reach 3000 upvotes.
You can view your badges on your board and compare yourself to others in the Ranking
If you no longer want to receive notifications, reply to this comment with the word
STOPCheck out our last posts:
Support the HiveBuzz project. Vote for our proposal!
This post was shared and voted inside the discord by the curators team of discovery-it
Join our community! hive-193212
Discovery-it is also a Witness, vote for us here
Delegate to us for passive income. Check our 80% fee-back Program
You got my vote.
Just when I thought „Maybe Hive isn't all that bad after all. Maybe Hive has improved” came the down voter to remind me why Hive is the worse of the Graphene based social media sites (Steem, Hive, Blurt, Whaleshares). Sure Hive has the best GUI but what good does it do when Hive has the most nefarious user base?
Seven bad actors spoiling the experience not only for me but for the 111 users which found my posting of interest. How disappointingly petty Hive turned out in the end.
Got some more upvotes. Maybe I should not measure the site by the 12 spoiler but by the 270 well meaning users.