Post number 4 of “The Practical Google Sheets Guide”
These blog posts are part of research I’m doing for a potential new book, hopefully allowing me to further my love for spreadsheets. Theses posts are hoping to provide a practical cookbook of examples to the reader and allow me to learn what people are interested in and how to approach different subjects working with Google Sheets.
TLDR; In the previous post, we set up a Race Pace Calculator to help us figure our our Marathon and Half Marathon race pace for our next race. In this post, part 2, we will extend this example and create a pace band, using the pace calculations from our Google Sheet. The complete Google Sheet can be copied directly from the link:
https://docs.google.com/spreadsheets/d/1CCBpJd1vwX57BZ1tWQPH8UHl8ewuEW2SYaCApL8ZuXk/copy
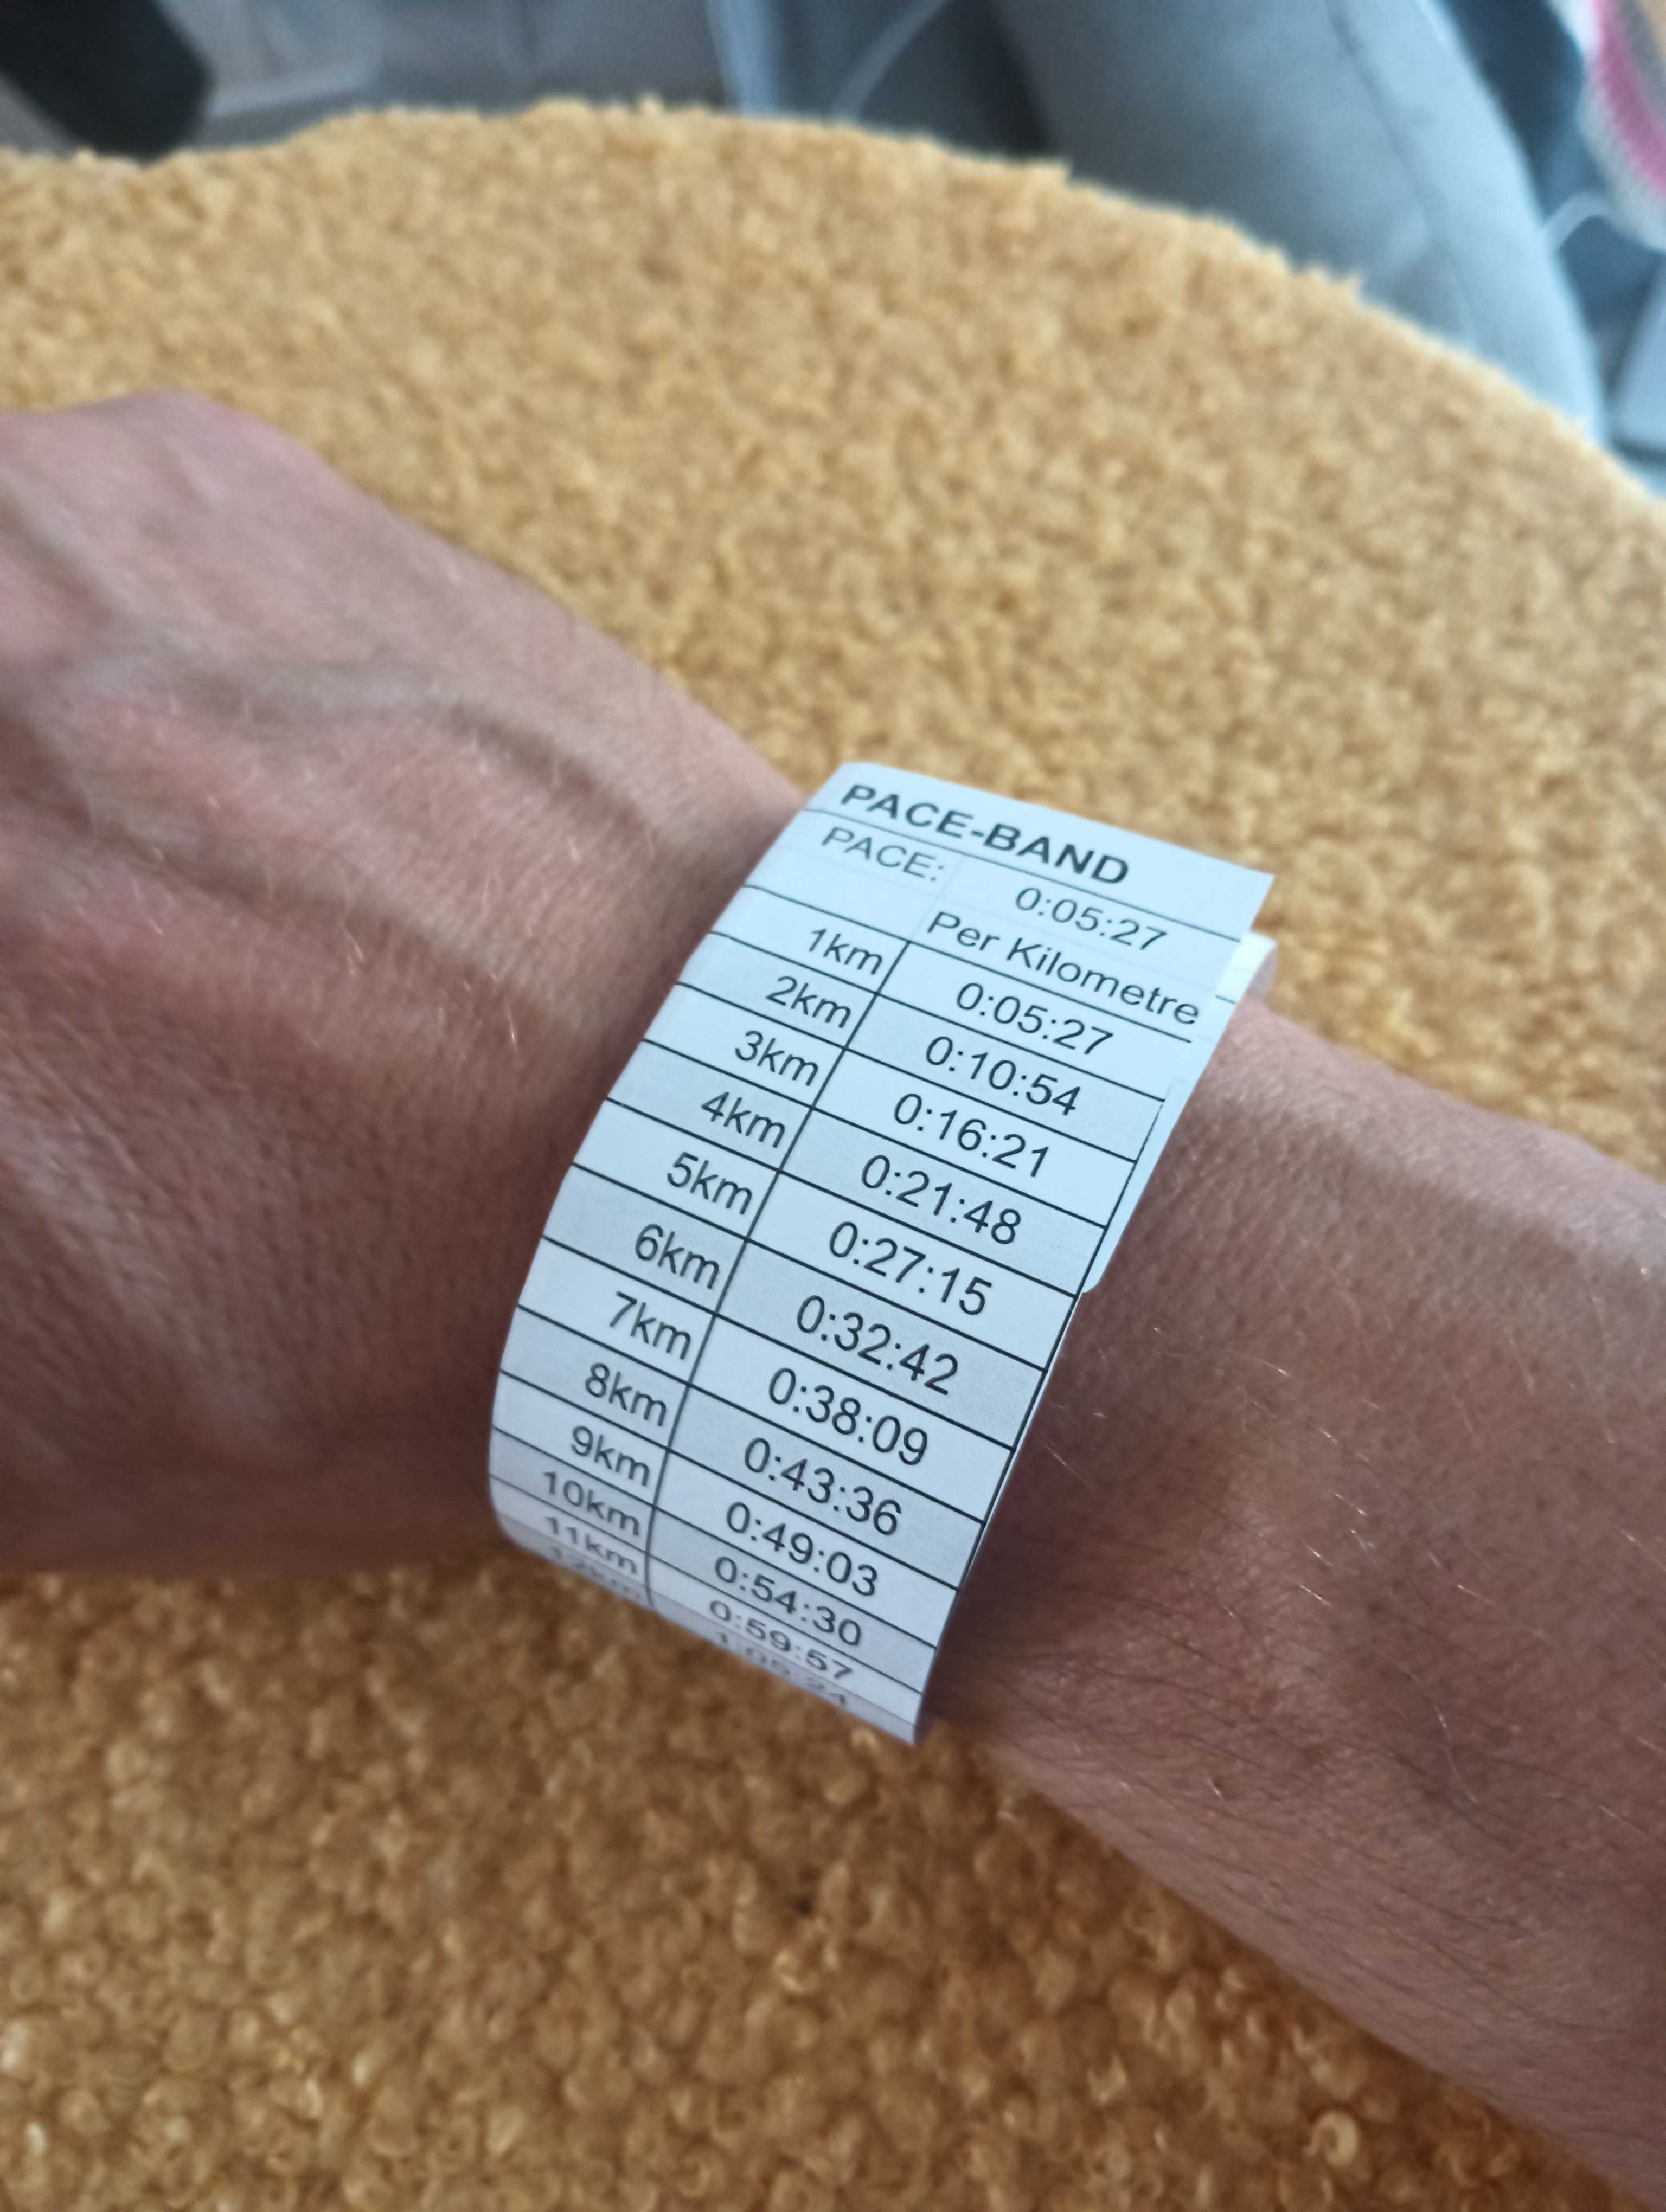
As you can see in the image above, I have the pace band around my wrist, so I know exactly what time I need to be hitting each kilometre or mile marker of my race. I don’t see these being used as much as what they used to, but I personally like to use them occasionally.
What You Need To Know To Get This Done?
If you haven’t worked through the previous post, it might be easier for you to go through that post first, as a lot of the difficult work and math was performed then:
As you can see in the image below, we are going to set up a simple grid that will provide the pace needed per kilometre, then a breakdown of the time the athlete needs to be crossing the kilometre markers.
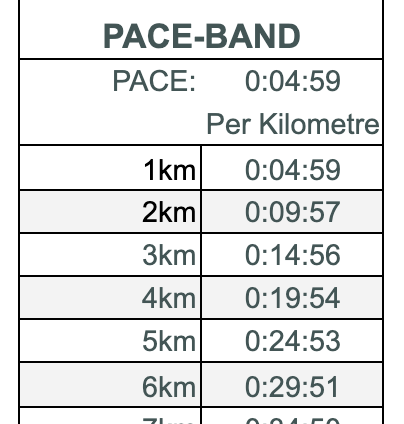
Although this looks pretty simple, it needs to be dynamic to change with the selections made by the user.
- The pace will need to change depending on the selections made by the user.
- The unit of pace will need to change depending on the selections made by the user.
- Lastly, the number of kilometres displayed will also need to update depending on the type of race the user needs the pace band for.
As you will see in the following section when we set it all up, we have one large formula set up using the functions:
- IF
- QUERY
- INDIRECT
All the functions mentioned can be found at the following reference page, in case you need to double check how the function works: https://hive.blog/hive-163521/@strava2hive/my-google-sheets-function-reference
The following steps will walk you through how to create this part of the Marathon/Half Marathon pace calculator. As we mentioned earlier, we have already done the hard work to set up the pace calculations for our goal event.
1.I like to use the space underneath the pace calculator to set up a table of both kilometres and miles that I then use to create the pace band.
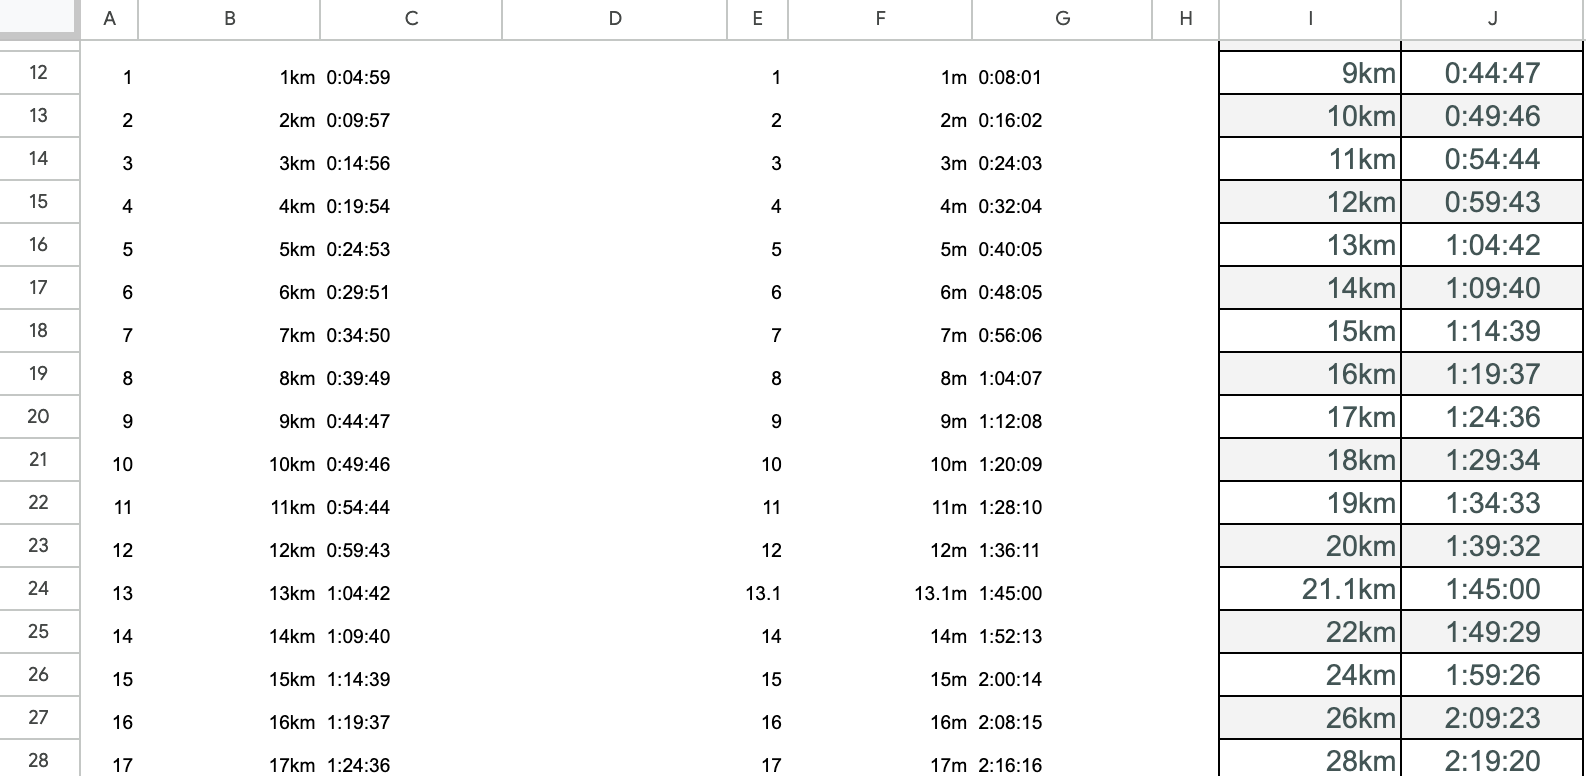
- As you can see from the image below, we have two main tables in columns B, C and F, G. Start by numbering your kilometres in column A from 1 to 42.2.
- Column B then adds a list of kilometre markers that we will use as part of our pace band, again from 1km to 42.2km.
- Then add the pace in column C. From our previous post, the kilometre pace will be displayed in cell F9, so the first cell in column C that represents our pace, will simply refer to this cell with a formula of =F9
- To calculate the rest of the kilometre values we could simply use a basic function that takes the value from F9 and multiplies it with the kilometre number we are at. To do this, we can use the INDIRECT function, that can then use another function to provide the cell reference we are multiplying. In our case we then use the CONCAT function to add the value A and then the row value we are on. The formula for our first row in cell C12 would then be:
=$F$9*INDIRECT(CONCAT("A", ROW(A12))) - We then fill this formula down to the rest of the cells in the row, through to the kilometre 42.2.
2.Once you have set up the kilometres in column C, you can then do the same thing to set out all the miles in column G.
- As you can see we have set up the number of miles in column E and F, ending at 26.2, which is the number of miles in a marathon.
- When we work out the pace for each mile marker, instead of using F9 as the pace, we instead use G9. For our first row, similar to the formula above, we have:
=$G$9*INDIRECT(CONCAT("E", ROW(A12)))
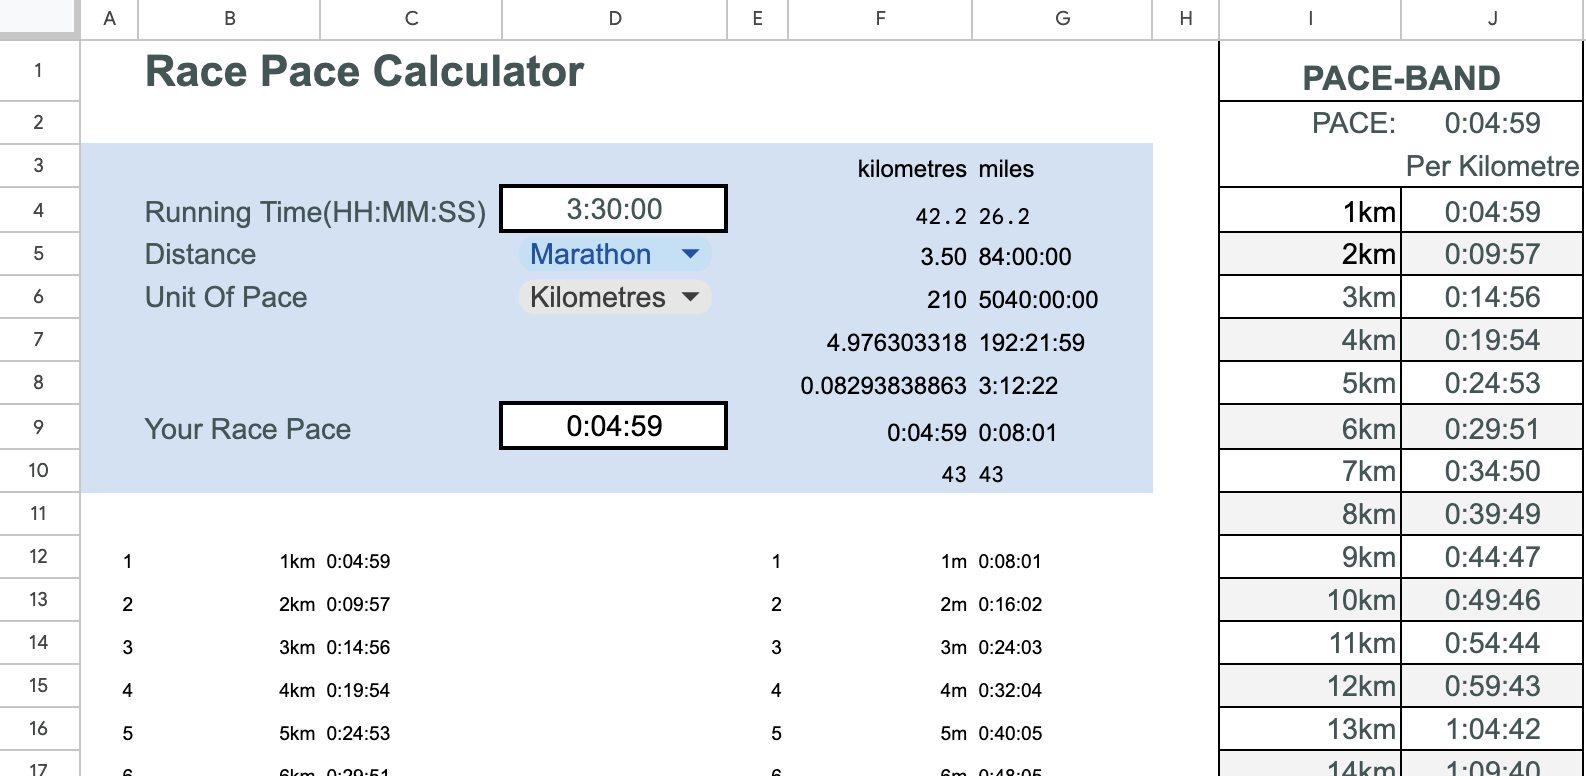
3.Finally, we can set up set up the Pace Band on columns I and J on the right side of the sheet.
- The first thing we need to do is work out how many rows we need to transfer over to our pace band. This will make more sense later in this post, but for now in cells F10 and G10, we set up the basic IF function to test, if we our race is a marathon, then we will using until row 43, otherwise for a half marathon, it will only need 32 rows of data:
=IF(F4=42.2, 43, 32) - Now start to set up a table as we have in the image above, with a PACE-BAND title on the first row.
- The second row will display the overall goal pace from our calculations, specifically the value we calculate in cell D9, which is a simple reference to the value in that cell.
- The third row is a simple IF function that provides if we are using miles or kilometres. The formula in cell J3 refers to the selection made in cell D6, if the value is "Kilometres" we display "Per Kilometre", other wise it is "Per Mile". The full function looks like:
=IF(D6="Kilometres", "Per Kilometre", "Per Mile") - We have a pretty large formula in cell I4 to transfer the data for each kilometre or mile into our table. The function looks like this:
=IF(D6="Kilometres",QUERY(indirect(CONCAT("B12:C",F10))), QUERY(indirect(CONCAT("F12:G",G10))))
There is a lot to it, so we will break it down.
-- First we have an IF statement, to again check cell D6 to see if we need kilometre values or mile values.
-- The values returned are in the shape of a QUERY function. One set up for kilometres, that provides the range we created for kilometres, the second QUERY for miles.
-- This range is then transferred into our pace band.
There is no need to blank out all the working values for the user, but I do this just to make it look a little nicer where I change the text colour of the kilometre and mile tables to white, so they are no longer displayed.
We did a lot in the post using some advanced formulas, and is why I broke this up into two seperate posts. We took our calculator we created in our previous post, and started by setting up tables to calculate mile and kilometre values for our goal race. We then set up a pace band, providing details of our goal race pace and if we are pacing by "Per Kilometre" or "Per Mile". We then set up a function to transfer the data from our working tables and transferring it into our pace band.
There is a lot to it, and I hope I included all the details, but if I have missed anything, please let me know.
About The Author
The post is written by Vincent Sesto, a Aussie Software Engineer, living and working in Auckland, New Zealand. If you are interested in my authors page on Amazon, feel free to checked it out at the following link:
https://us.amazon.com/stores/author/B073R3VW2G
I hadn't seen a pace band before. It's a neat idea to make sure you are on schedule. I guess some watches will do this for you, but sometimes the simple ideas are enough.
Pace bands are definitely a little old school and yeah I think people are generally cool with their GPS watches. Myself and Kirsty will still use them when we are doing pacing duties at a race, just to make sure we are on track to get the correct time. !LUV
@steevc, @strava2hive(1/1) sent you LUV. | tools | discord | community | HiveWiki | <>< daily
For a few months now I've been wanting to start running but with my odd work hours it's quite difficult to build this up. I know about pace but a pace band is something I'm reading for the first time!
Very impressive but kinda daunting at the same time!
Thanks for sharing!
@alstonsjournal I guess a pace band like this is for more experienced runners, but we all start somewhere. Keep going mate and just take some small steps to get active and hopefully you will love running soon as much as I do.
One day mate! for sure!
Thank you!
Awesome, thank you