First of all you need to connect MetaMask to Binance Smart Chain, here's a article explaining step by step how to do it: https://academy.binance.com/en/articles/connecting-metamask-to-binance-smart-chain
After that you will have to download this file which is the solidity code that we're going to use for our token: https://drive.google.com/file/d/1vPRJbxmcm8JfLNFb0u5TdHpb5UGM9tFj/view
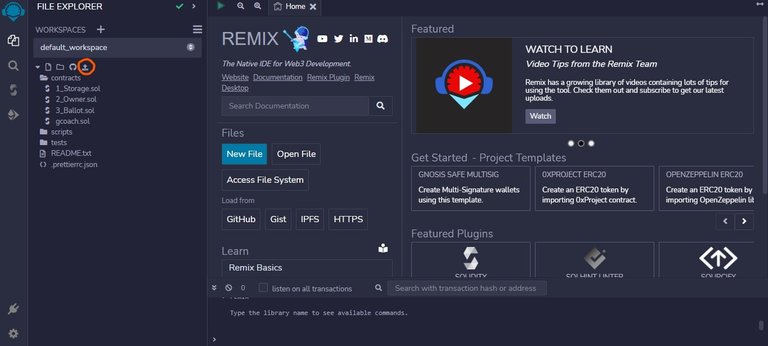
Now open this website: https://remix.ethereum.org/
Click on the button that I highlighted in orange and find the file that you downloaded earlier.
After you upload that file it will appear in the "contracts" folder as "gcoach.sol", now click on that. (In case the file appears somewhere else on that list you can just move the file to the contracts folder)
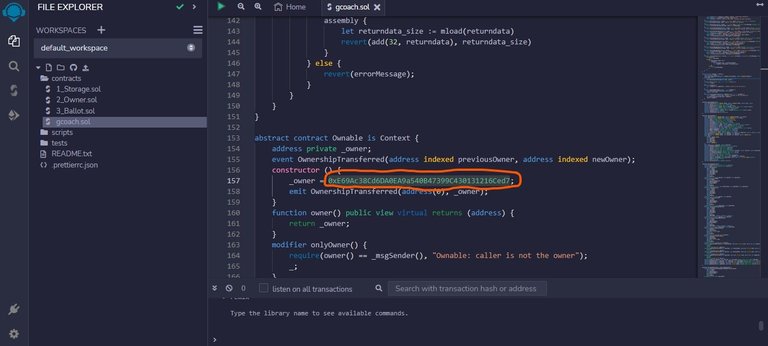
Now we're going to edit some stuff in the code, scroll down to line 157. It says "_owner =" we leave that unchanged, the only thing that we change is the address, you have to input your own BEP-20 address from MetaMask, that address is going to be the owner of the Token.
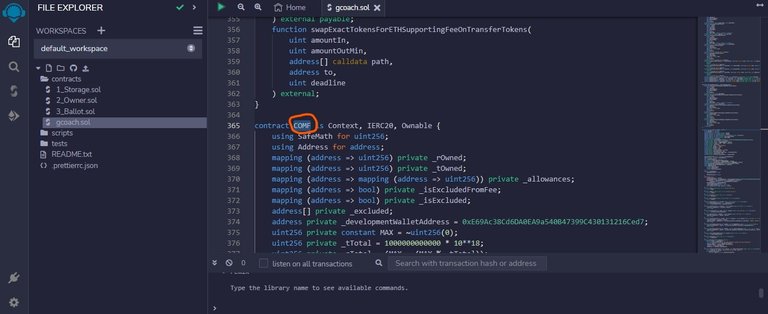
Now scroll down to line 365 and choose a name for your Token, the highlighted text is what you have to change.
Then scroll down to line 374 and do the same thing that you did with line 157, but this time you need to create a second wallet in your MetaMask and input your new address.
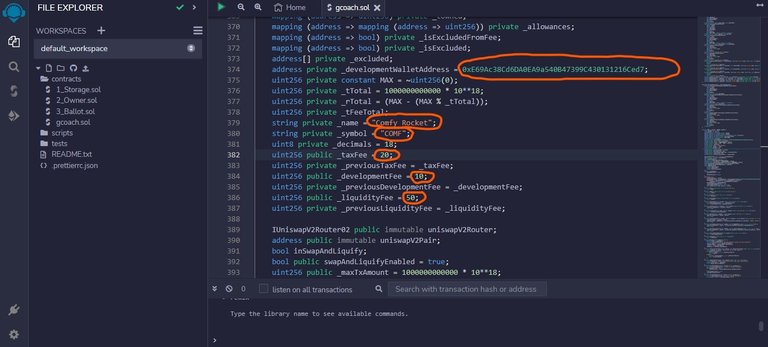
Then go to line 379 and input the name of your Token, just like you did at line 365.
Then line 380 and input the symbol or also called ticker to your Token.
Line 382 represents the fee that is called "reflection", everybody gets this fee on every transaction. You see 50 on screenshot? That means 5%, if you want the fee to be 10% for example - you input 100, there's always an extra 0.
Same rule applies to line 384, by the way _developmentFee function works as a marketing wallet, the second address you entered at line 374 is your marketing wallet.
And the last line 386 represents the fee from every transaction that goes into liquidity pool, you can change the value of it as well.
Now we click on "Solidity Compiler" and select the 0.8.4 compiler version, as in our case, that's the one we're using in our code.
Then turn on the "Auto compile" function & "enable optimization".
Now just click on the blue box that says Compile.

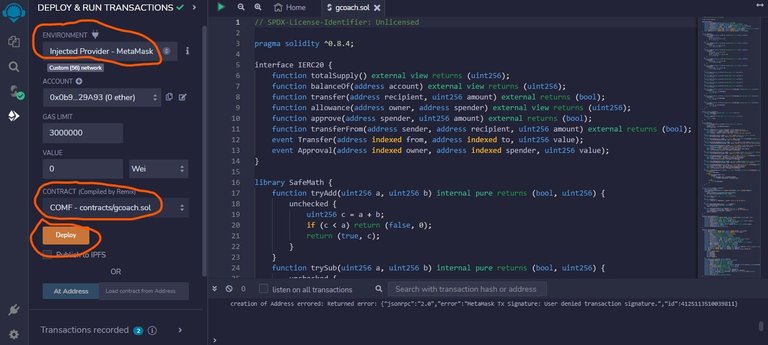
Now we move to final step of deploying our Token.
Click on "Deploy & run transactions", then choose the Environment called "Injected Provider - MetaMask".
Now select the contract with the name of your Token then click "Deploy".
The cost for deploying a contract is around $0.15 USD in BNB, so basically free.
This is a very basic code made to teach new people the basics of Solidity coding. There is infinite tweaks that can be added to a code, the more you practice, the more you understand how things work.
If you need help building something serious or just looking to learn how to build a code with twists such as max wallet, max TX & other stuff - feel free to ask me any questions or contact me on twitter: https://twitter.com/TyrandeCrypto
- Tyrande
Congratulations @tyrandecrypto! You have completed the following achievement on the Hive blockchain And have been rewarded with New badge(s)
Your next target is to reach 50 replies.
You can view your badges on your board and compare yourself to others in the Ranking
If you no longer want to receive notifications, reply to this comment with the word
STOPCheck out our last posts:
Support the HiveBuzz project. Vote for our proposal!
@tyrandecrypto! The Hive.Pizza team manually curated this post.
Join us in Discord!