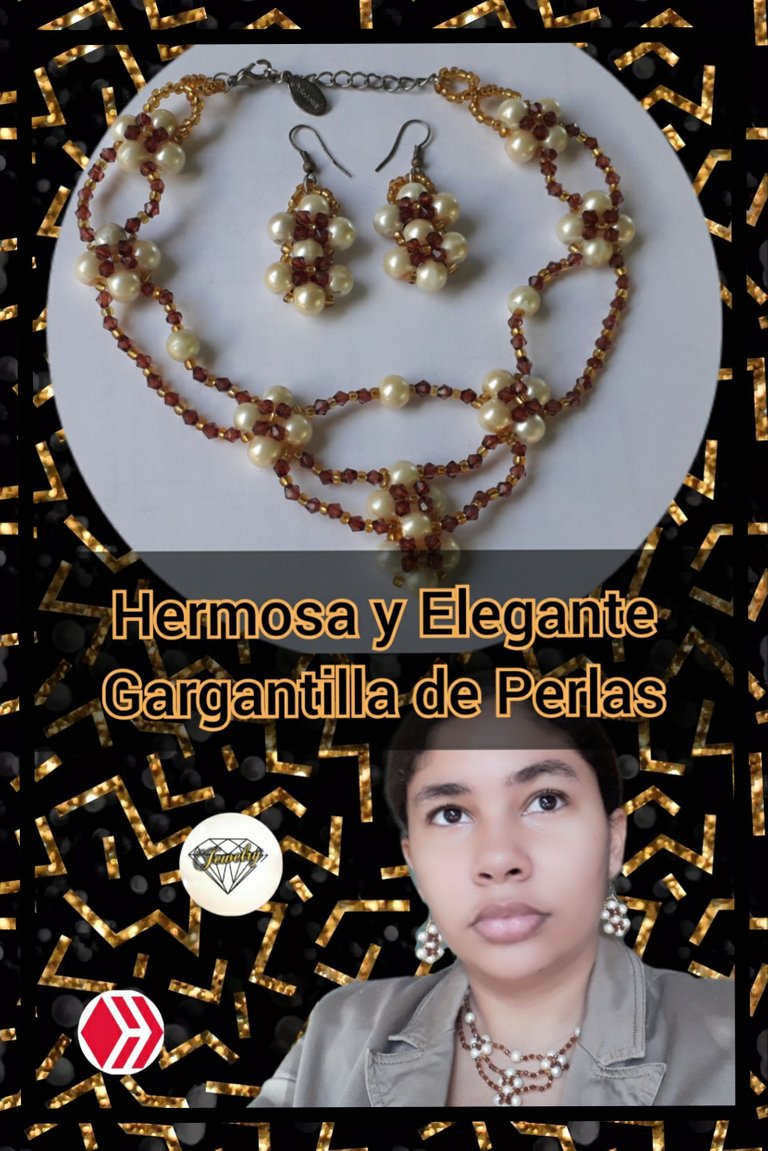

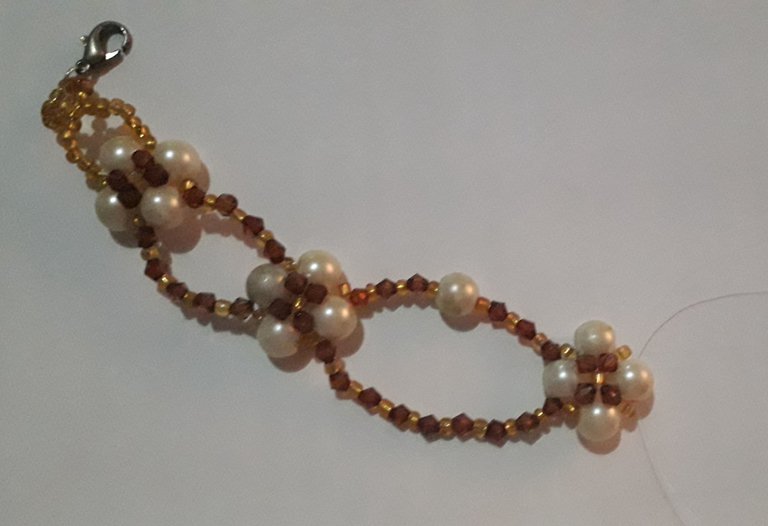
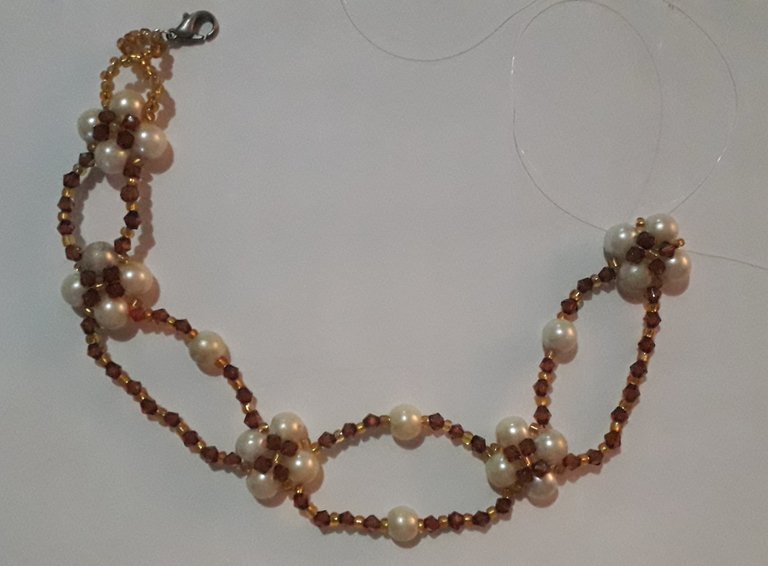
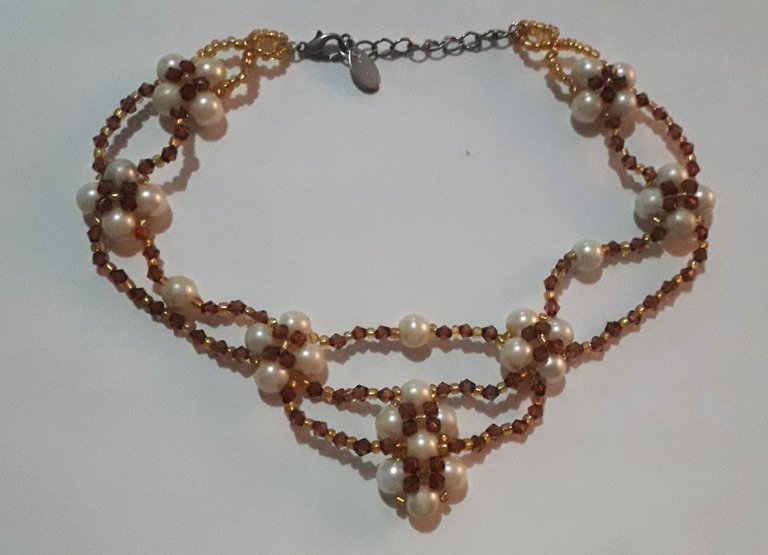
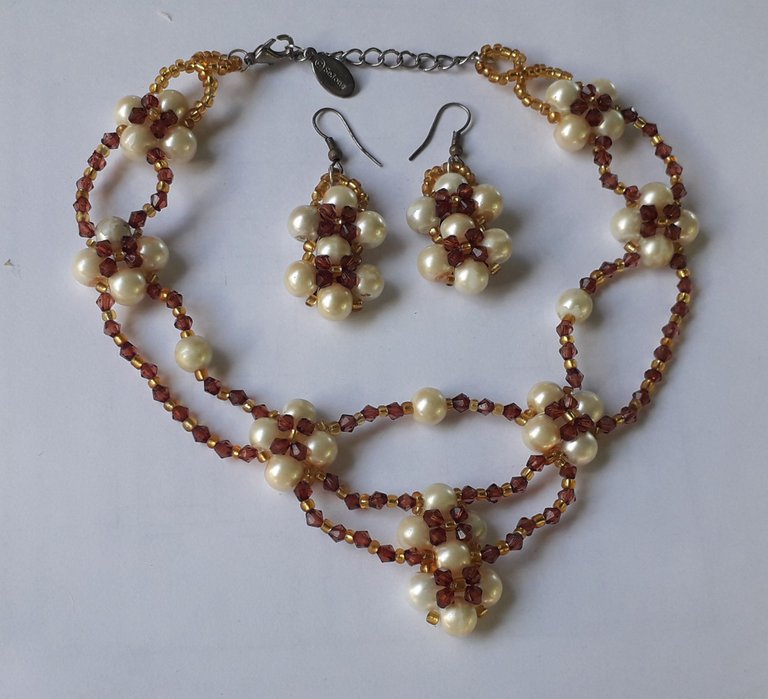
Buenas noches queridos amigos de Hive y de esta gran comunidad de Jewelry, espero se encuentren bien y que hayan tenido un buen día. Hoy les quiero compartir un tutorial sobre cómo hacer esta hermosa gargantilla de perlas que me ha gustado tanto y espero que les guste a ustedes también. Este trabajo fué muy laborioso ya que las gargantillas son largas y el tejido se hace tedioso. Pero les aseguro que vale la pena el resultado.
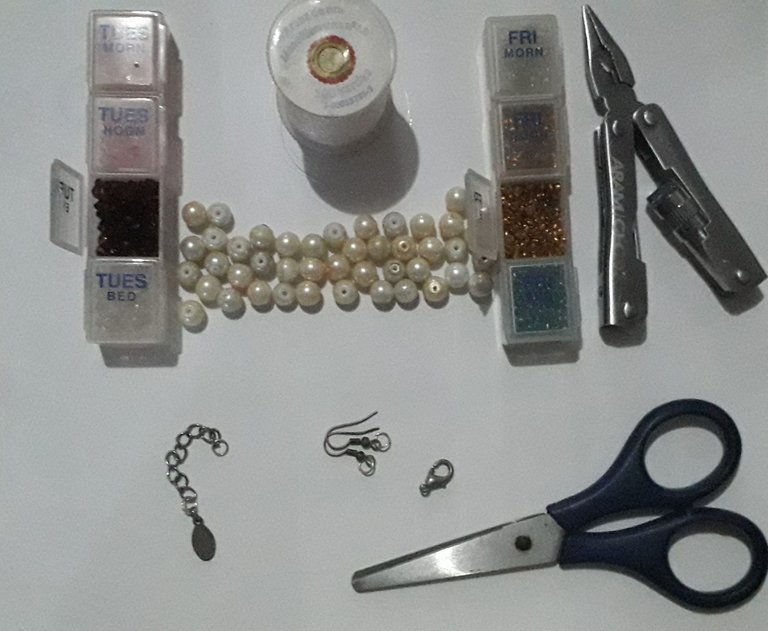
💎 48 Perlas medianas
💎3 dedales de mostacilla dorada
💎137 cristales de 3mm color marrón
💎 Trozo de cadena
💎 Broche y Argolla
💎 2 Anzuelos para Zarcillos.
💎 4 mt. de nylon N° 0,4
💠Paso 1
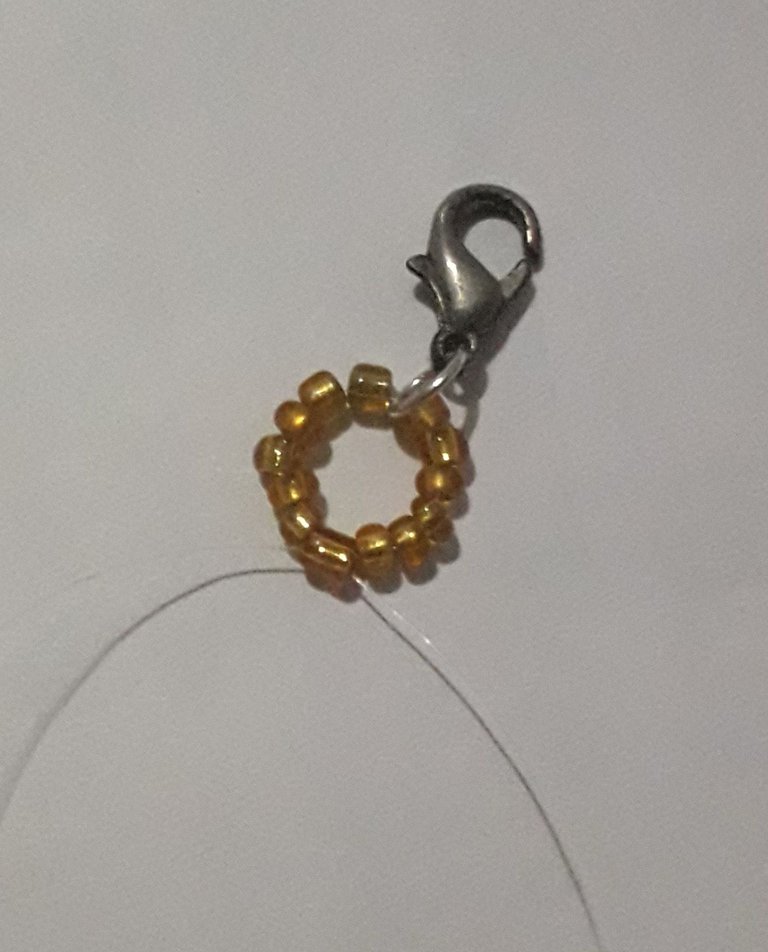
Para empezar vamos a cortar 3mt. de nylon y por el insertamos 12 mostacillas y el broche para cruzar los nylon por una nueva mostacilla.
💠Paso 2
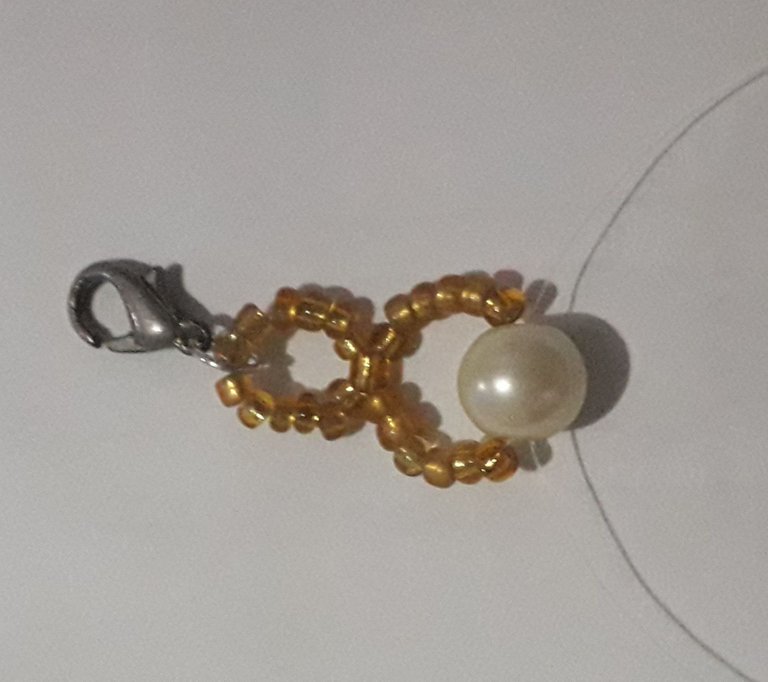
Agregamos 6 mostacillas en cada nylon y cruzamos por una nueva perla.
💠Paso 3
Luego vamos a insertar una mostacilla, una perla y una mostacilla por cada lado y cruzamos los nylon por una nueva perla. Luego introducimos en cada nylon un cristal marrón, cruzamos con una mostacilla, añadimos un cristal más por cada lado y cruzamos los dos nylon por la perla opuesta a la que estamos para luego regresarnos por las perlas hasta la última y seguir con el tejido.
💠Paso 4
Por el nylon derecho añadimos un cristal, una mostacilla, un cristal, mostacilla, cristal, mostacilla y cristal. Por el otro lado añadimos un cristal, una mostacilla, un cristal, mostacilla, cristal, mostacilla, cristal, mostacilla, cristal y cruzamos los nylon por una nueva perla.
💠 Paso 5
Repetimos el paso 3.
💠Paso 6
Por el nylon derecho añadimos un cristal, una mostacilla, un cristal, una mostacilla, un cristal, mostacilla, perla, mostacilla, cristal, mostacilla, cristal, mostacilla y cristal. Por el otro lado agregamos 9 cristales intercalados con mostacillas y cruzamos por una nueva perla.
💠 Paso 7
Repetimos el paso 3.
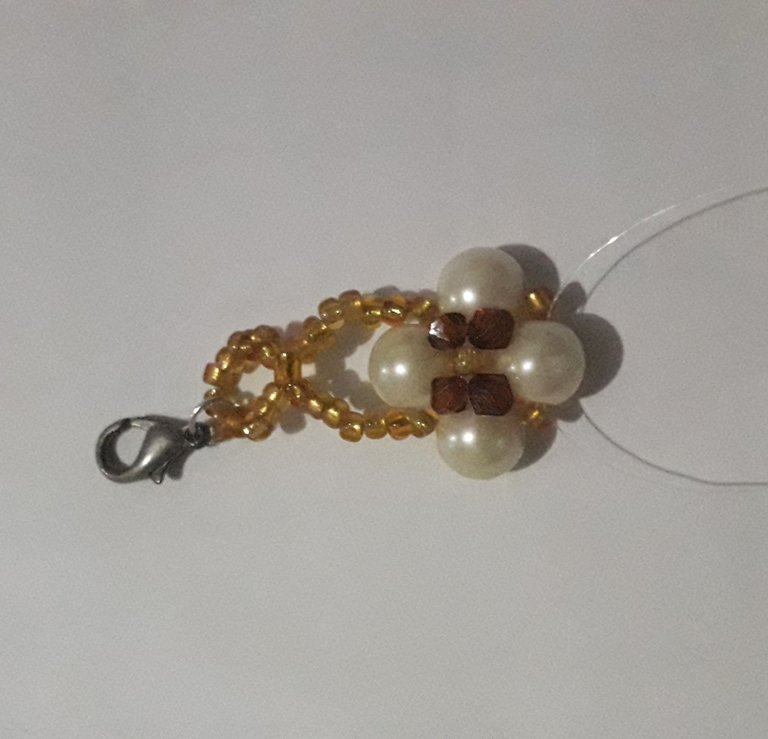
💠Paso 8
En el nylon derecho añadimos 3 cristales intercalados con mostacillas, una perla y 3 cristales más intercalados con mostacillas. Por el nylon izquierdo agregamos 4 cristales intercalados con mostacillas, una perla, 4 cristales intercalados con mostacillas y cruzamos por una nueva perla.
💠Paso 9
Repetimos el paso 3.
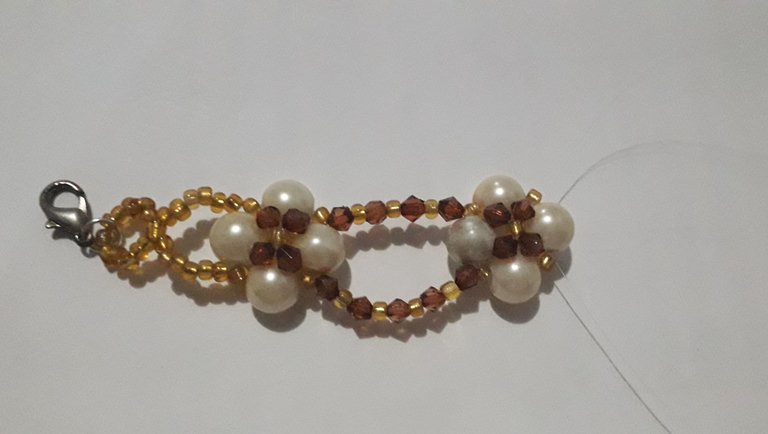
💠Paso 10
Ahora introducimos por el nylon derecho 3 cristales intercalados con mostacillas, una perla y 3 cristales más intercalados con mostacillas. Por el nylon izquierdo insertamos 9 cristales intercalados con mostacillas para cruzar por una nueva perla.
💠Paso 11
Repetimos el paso 3.
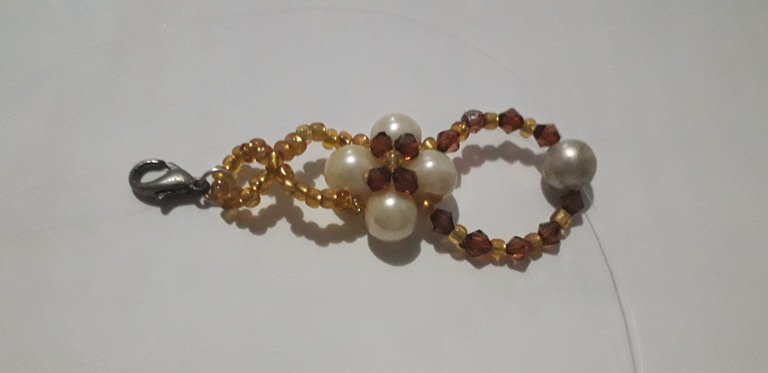
💠 Paso 12
Por el nylon derecho añadimos 4 cristales intercalados con mostacillas y por el otro nylon agregamos 5 cristales intercalados con mostacillas para luego cruzar por una nueva perla.
💠Paso 13
Repetimos el paso 3 una vez más.
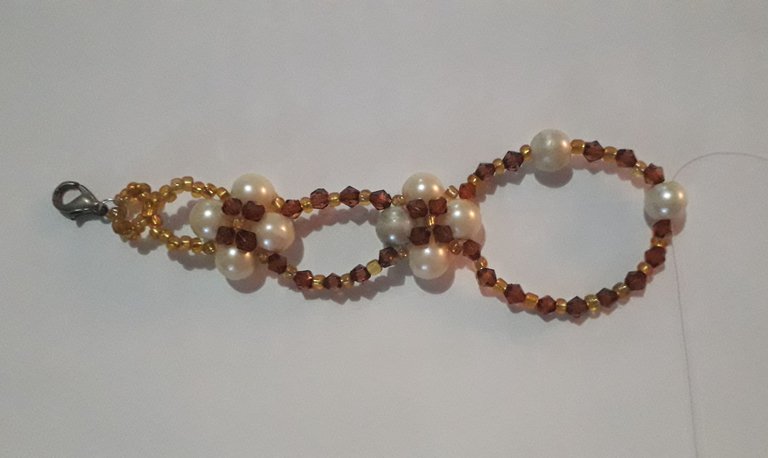
💠Paso 14
Insertamos 6 mostacillas de cada lado y cruzamos por una nueva mostacilla, luego añadimos 6 mostacillas más de cada lado y en uno de los lados agregamos el trozo de cadena con la argolla para anudar.
💠Paso 15
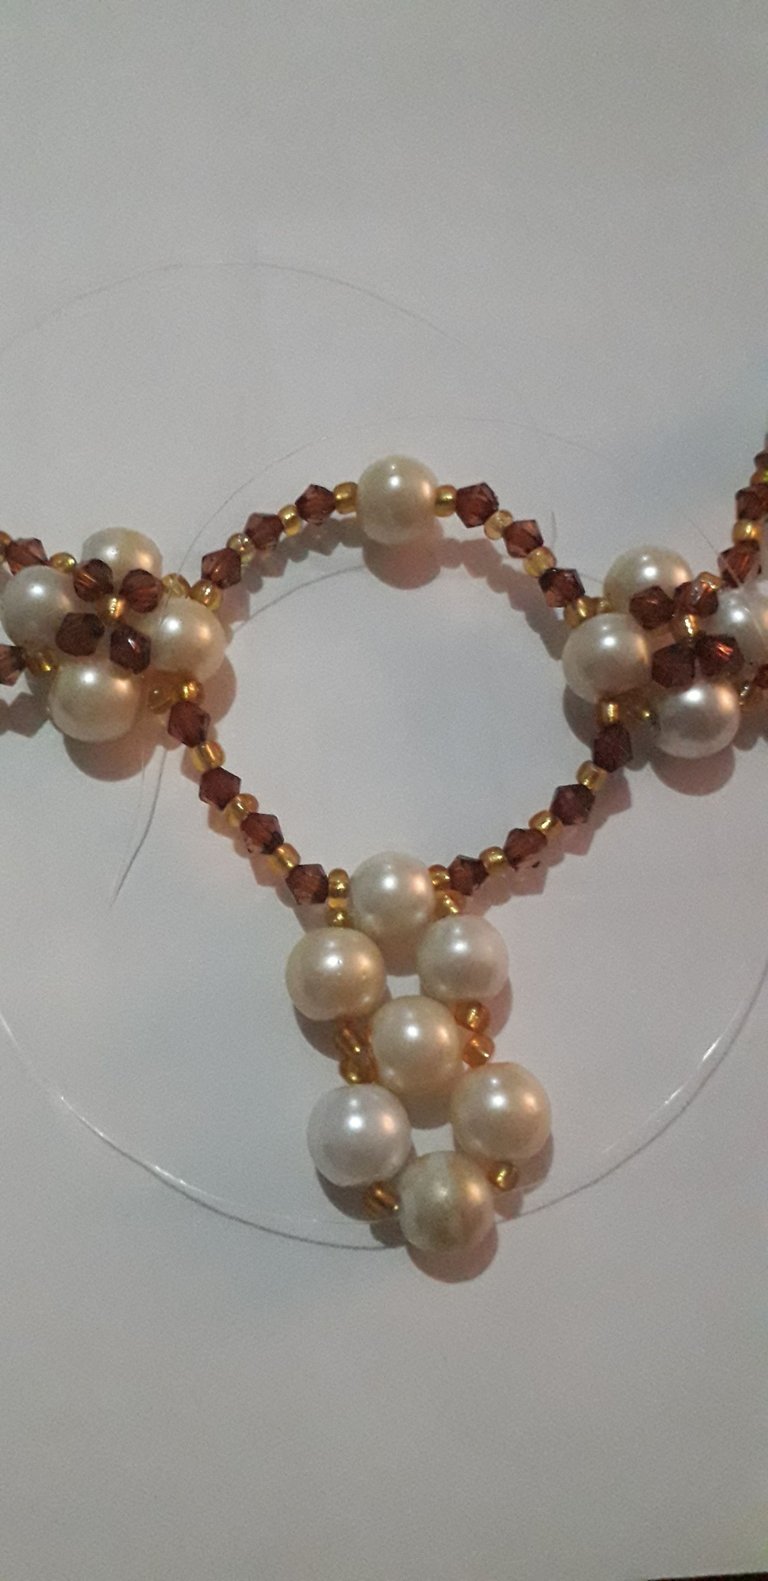
Uno de los nylon sobrantes lo pasamos por la perla de la parte inferior del paso 8 y en cada lado añadimos una mostacilla, una perla, una mostacilla y cruzamos por una nueva perla. Repetimos una vez más.
💠Paso 16
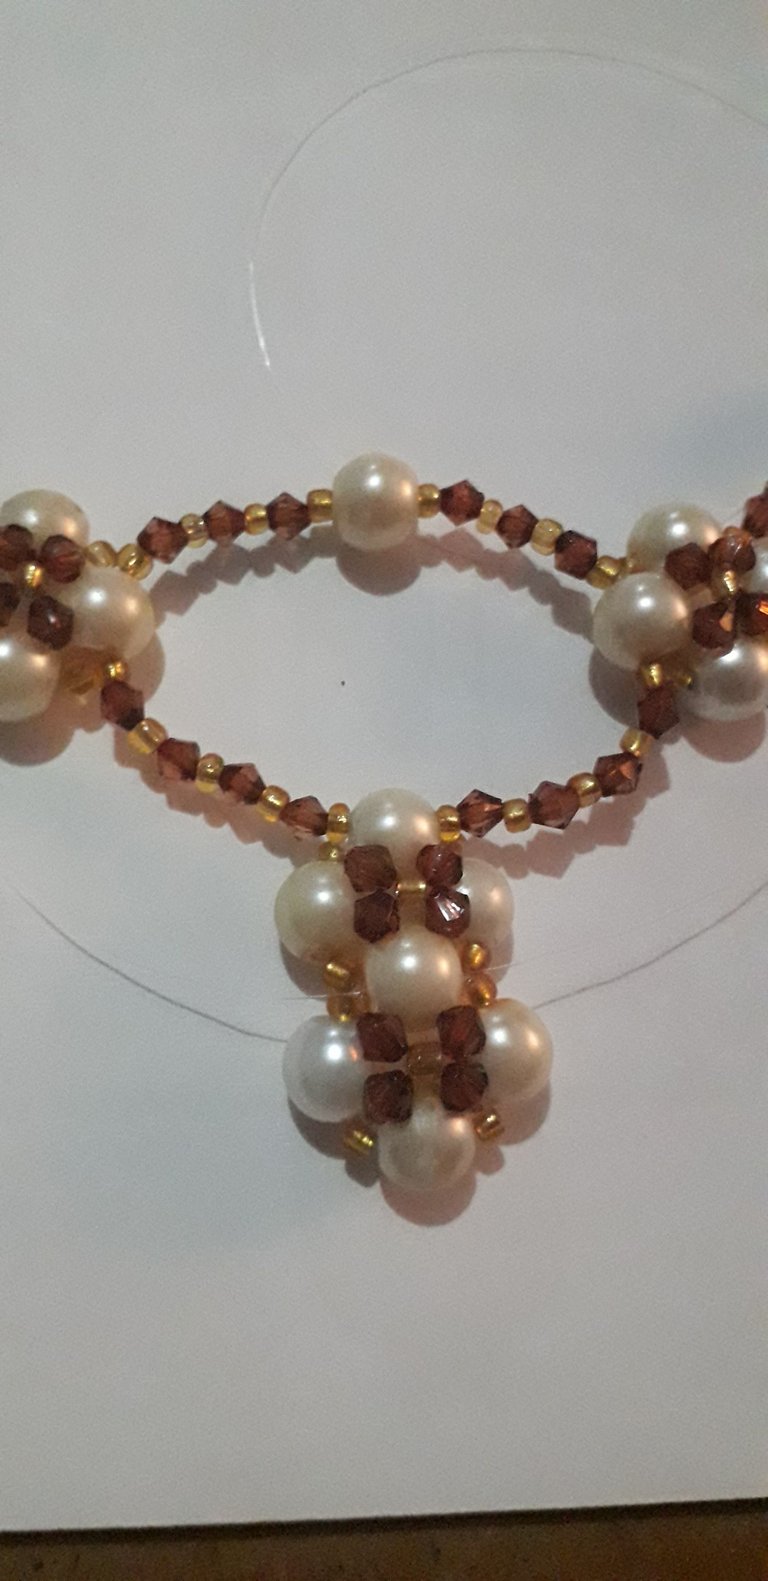
Luego vamos a insertar un cristal por cada nylon y cruzamos por una mostacilla, insertamos 2 mostacillas más y cruzamos por la perla de enfrente. Repetimos una vez más y nos regresamos a la perla horizontal central.
💠Paso 17
Por último añadimos en cada nylon 5 cristales intercalados con mostacillas y uno de los lados lo pasamos por la mostacilla lateral del paso 9 nos regresamos por los cristales hasta la mostacilla lateral inferior del paso 7 para anudar junto con el otro nylon.
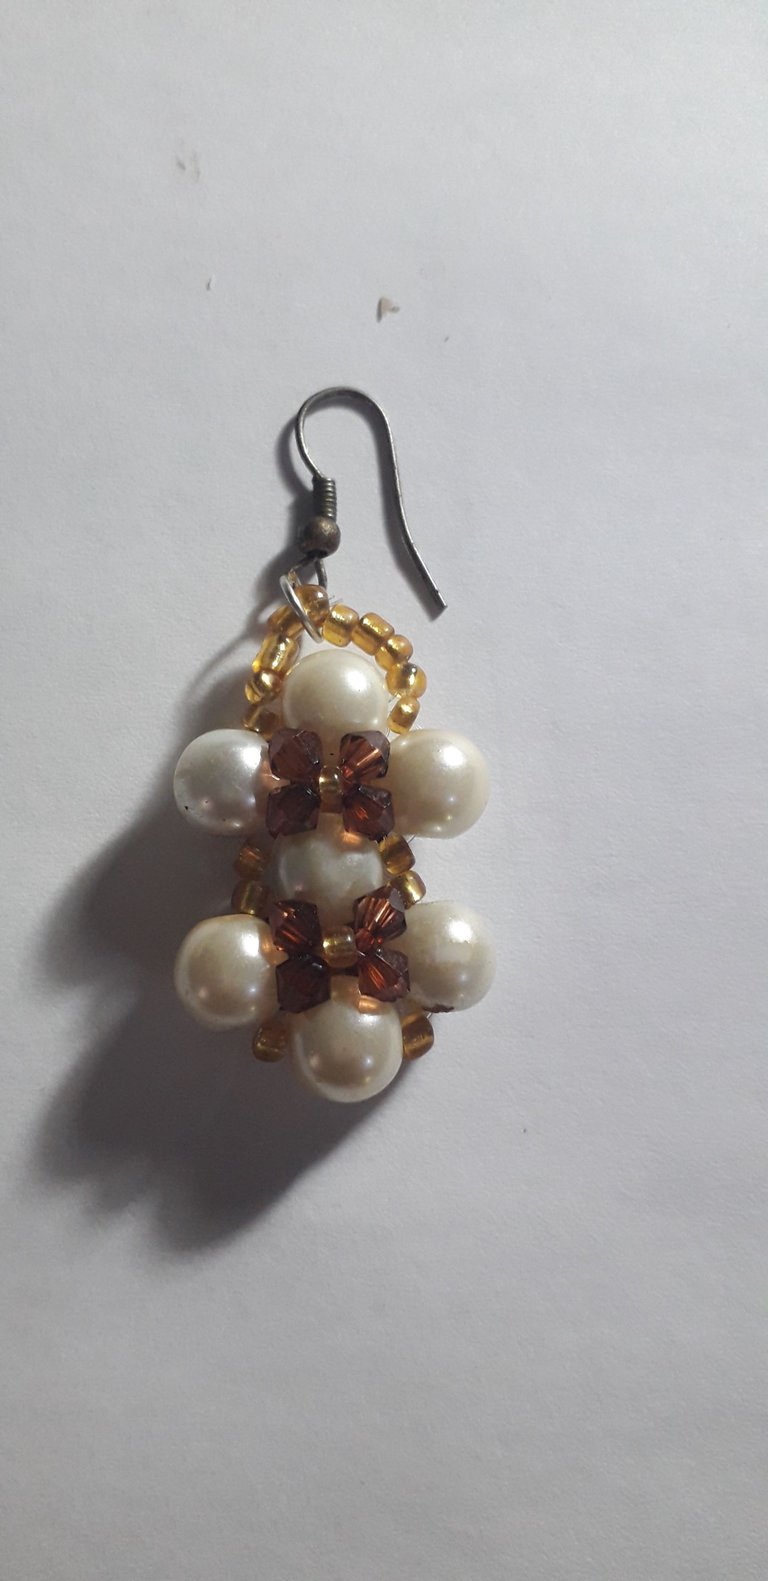
💠Paso 1
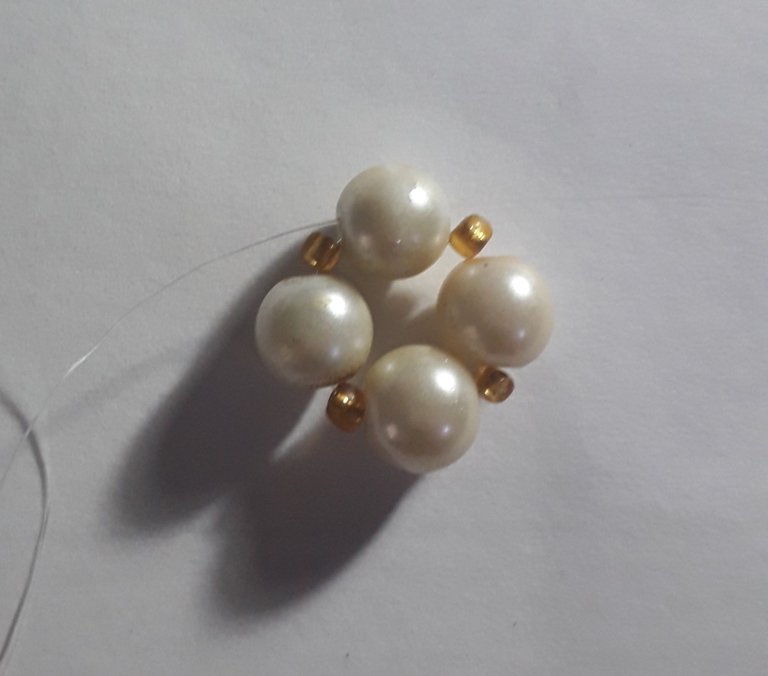
Primeramente vamos a necesitar 75cm de nylon y por el vamos a insertar una mostacilla, perla, mostacilla, perla, mostacilla, perla y mostacilla para cruzar los nylon por una nueva perla.
💠Paso 2
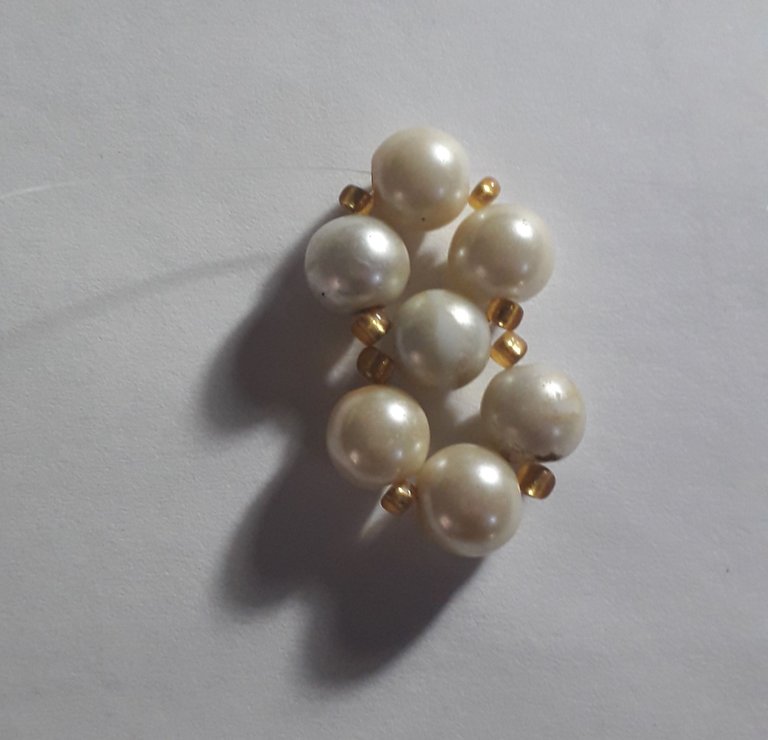
En cada nylon agregamos una mostacilla, perla y mostacilla para volver a cruzar por una nueva perla.
💠Paso 3
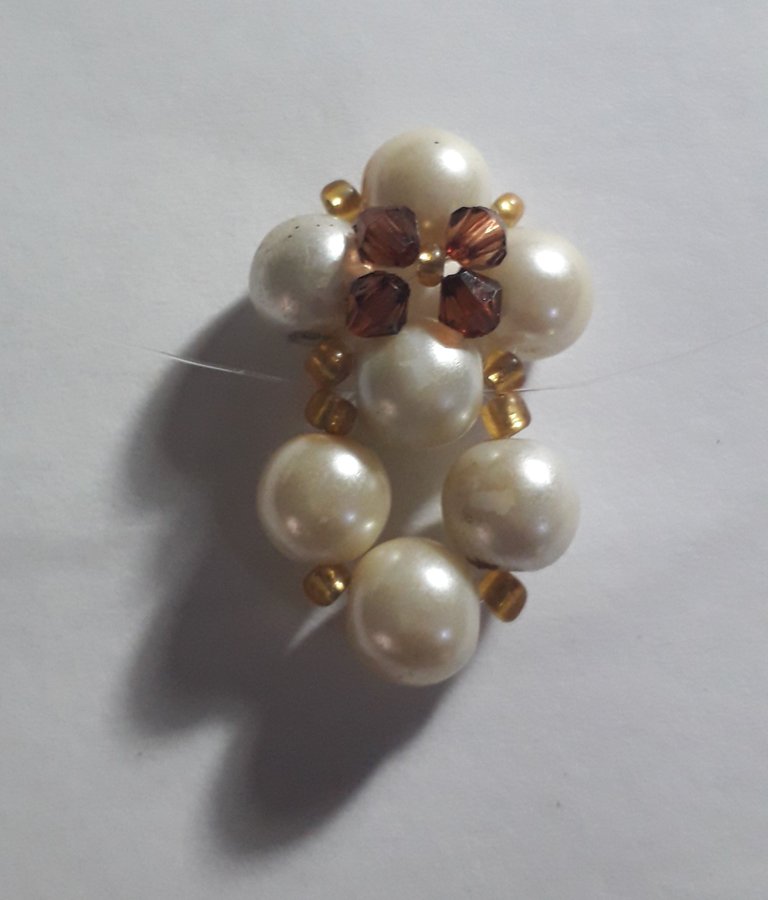
Luego vamos a insertar un cristal de cada lado y cruzamos por una mostacilla, añadimos un cristal más en cada nylon y cruzamos por la perla de enfrente.
💠Paso 4
Repetimos el paso anterior con las perlas de encima.
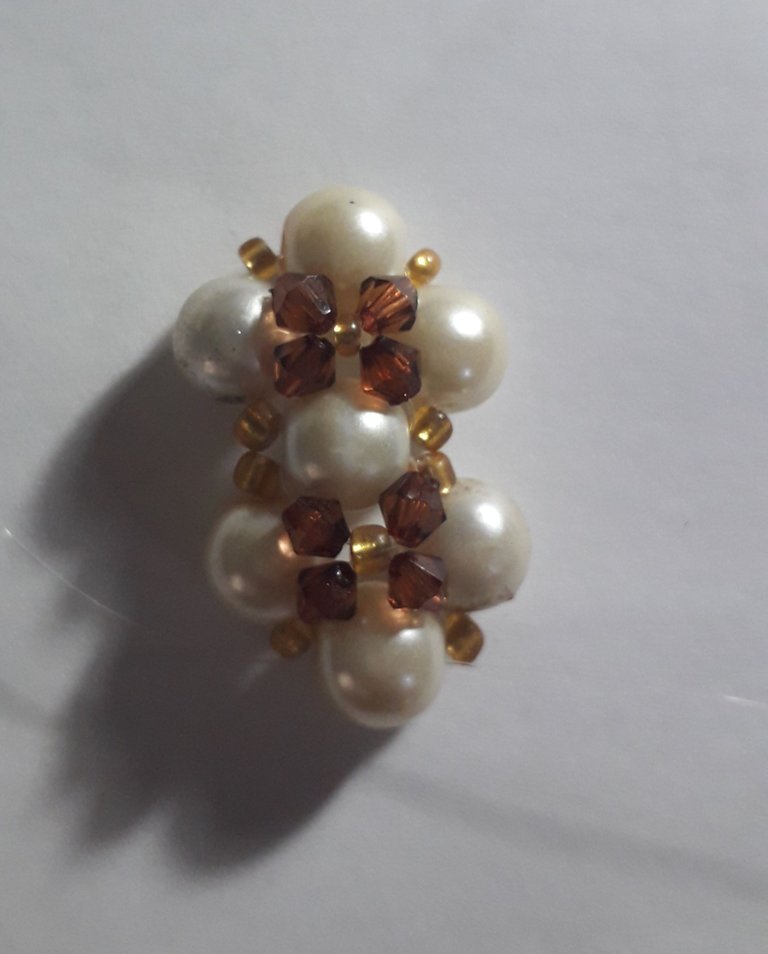
💠Paso 5
Volteamos las perlas y hacemos el paso 3 hasta completar este lado.
💠Paso 6
Añadimos 5 mostacillas de cada lado y el anzuelo para luego anudar.
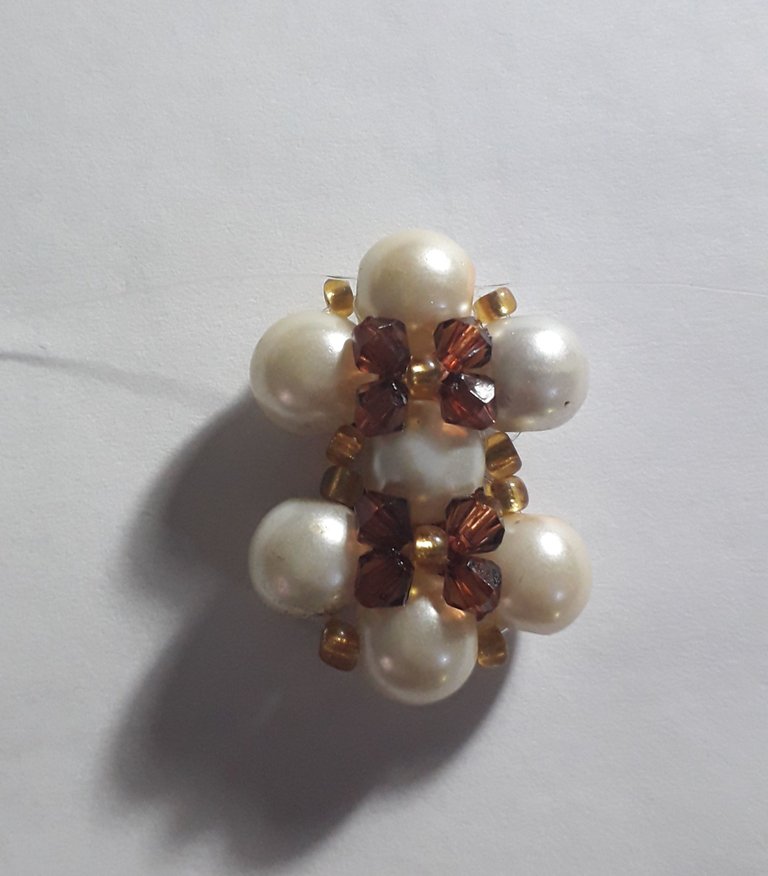
💠Paso 7
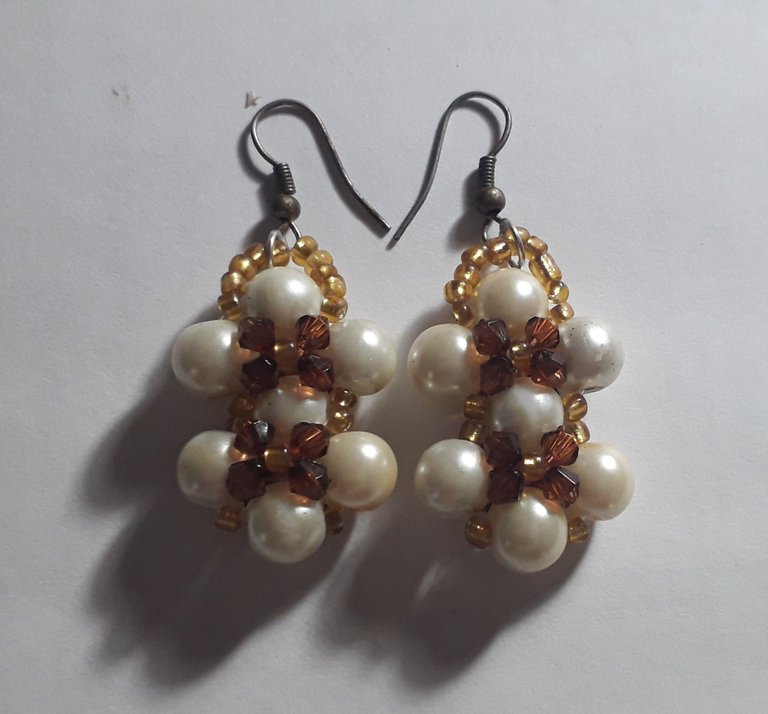
Repetimos todos los pasos para hacer la pareja del zarcillo y listo.
Que Dios los Bendiga 🙏
Fotos de mi autoría y fueron tomadas con un celular Samsung Galaxy J6
Traductor usado: DeepL
Edición de fotos a través de la app Editor de fotos Polish
Separadores hechos con la app Editor de fotos Canva.

Good evening dear friends of Hive and this great Jewelry community, I hope you are well and had a nice day. Today I want to share with you a tutorial on how to make this beautiful pearl choker that I liked so much and I hope you like it too. This work was very laborious since the chokers are long and the weaving becomes tedious. But I assure you that the result is worth it.
💎 48 medium pearls.
💎3 thimbles of gold-colored mustache clay.
💎137 crystals of 3mm brown color.
💎 Piece of chain
💎 Brooch and ring
💎 2 hooks for earrings.
💎 4 mt. Of nylon N° 0,4
💠 Step 1
To start we are going to cut 3mt. Of nylon and through it we insert 12 beads and the clasp to cross the nylons by a new bead.
💠Step 2
We add 6 beads on each nylon and we cross through a new bead.
💠 Step 3
Then we are going to insert a bead, a bead and a bead on each side and cross the nylons by a new bead. Then we insert in each nylon a brown crystal, cross with a bead, add one more crystal on each side and cross the two nylons through the opposite bead to the one we are on and then go back through the beads to the last one and continue weaving.
💠 Step 4
On the right nylon we add a crystal, a bead, a crystal, a bead, a bead, a crystal, a bead, a bead and a crystal. On the other side we add a crystal, a bead, a crystal, a bead, bead, crystal, bead, bead, crystal, bead, bead, bead and cross the nylons through a new bead.
💠 Step 5
Repeat step 3.
💠 Step 6
On the right nylon we add a crystal, a bead, a crystal, a bead, a bead, a crystal, bead, bead, bead, bead, bead, bead, bead, bead, bead, bead and crystal. On the other side we add 9 crystals interspersed with beads and cross through a new pearl.
💠 Step 7
Repeat step 3.
💠 Step 8
On the right nylon we add 3 crystals interspersed with beads, a pearl and 3 more crystals interspersed with beads. On the left nylon we add 4 crystals interspersed with beads, a pearl, 4 crystals interspersed with beads and cross through a new pearl.
💠Step 9
Repeat step 3.
💠Step 10
Now we insert through the right nylon 3 crystals interspersed with beads, a pearl and 3 more crystals interspersed with beads. Through the left nylon we insert 9 crystals interspersed with beads to cross through a new pearl.
💠Step 11
Repeat step 3.
💠 Step 12
On the right nylon we add 4 crystals interspersed with beads and on the other nylon we add 5 crystals interspersed with beads and then cross through a new bead.
💠Step 13
Repeat step 3 one more time.
💠 Step 14
We insert 6 beads on each side and cross through a new bead, then we add 6 more beads on each side and on one of the sides we add the piece of chain with the knotting ring.
💠Step 15
One of the leftover nylon we pass it through the bead at the bottom of step 8 and on each side we add a bead, a bead, a bead, a bead and cross through a new bead. Repeat once more.
💠 Step 16
Then we are going to insert a crystal through each nylon and cross through a bead, insert 2 more beads and cross through the bead in front of it. Repeat one more time and go back to the central horizontal bead.
💠 Step 17
Finally, we add 5 crystals interspersed with beads to each nylon and one of the sides we pass it through the side bead of step 9 and we go back through the crystals to the lower side bead of step 7 to knot it together with the other nylon.
💠Step 1
First we are going to need 75cm of nylon and through it we are going to insert a bead, bead, bead, bead, bead, bead, bead and bead to cross the nylons for a new bead.
💠 Step 2
On each nylon we add a bead, bead and bead to cross again by a new bead.
💠Step 3
Then we are going to insert a crystal on each side and cross through a bead, add one more crystal on each nylon and cross through the bead opposite.
💠 Step 4
We repeat the previous step with the beads on top.
💠 Step 5
We flip the pearls over and do step 3 until we complete this side.
💠Step 6
We add 5 beads on each side and the hook for knotting.
💠 Step 7
Repeat all the steps to make the tendril pair and you’re done.
May God Bless you 🙏
Photos of my authorship and were taken with a Samsung Galaxy J6 cell phone.
Translator used: DeepL
Photo editing using the Polish Photo Editor app.
Separators made with the Canva Photo Editor app.
Verdaderamente muy elegantes.
Congratulations @andreamtovar19! You have completed the following achievement on the Hive blockchain And have been rewarded with New badge(s)
Your next target is to reach 500 comments.
You can view your badges on your board and compare yourself to others in the Ranking
If you no longer want to receive notifications, reply to this comment with the word
STOPTo support your work, I also upvoted your post!
Check out our last posts:
Support the HiveBuzz project. Vote for our proposal!
Un trabajo muy hermoso, realmente hiciste un gran trabajo con este juego, la.forma que le has dado es increíble, muy comprensible para realizar, gracias por tu trabajo.
Te recordamos hacer comunidad, no solo es votar, sino también comentar 😉
Es un lindo trabajo ¡me encantó!, gracias por compartir el procedimiento.
¡Felicitaciones!
Estás participando para optar a la mención especial que se efectuará el domingo 2 de abril del 2023 a las 8:00 pm (hora de Venezuela), gracias a la cual el autor del artículo seleccionado recibirá la cantidad de 1 HIVE transferida a su cuenta.
¡También has recibido 1 ENTROKEN! El token del PROYECTO ENTROPÍA impulsado por la plataforma Steem-Engine.
1. Invierte en el PROYECTO ENTROPÍA y recibe ganancias semanalmente. Entra aquí para más información.
2. Contáctanos en Discord: https://discord.gg/hkCjFeb
3. Suscríbete a nuestra COMUNIDAD y apoya al trail de @Entropia y así podrás ganar recompensas de curación de forma automática. Entra aquí para más información sobre nuestro trail.
4. Visita nuestro canal de Youtube.
Atentamente
El equipo de curación del PROYECTO ENTROPÍA