Buenas noches tengan todos hermosa familia @jewelry ,feliz noche para todos ,deseo que hayan iniciado esta semana de bendición,que les vaya bien a todos en sus quehaceres ,hoy les traigo un nuevo tutorial la cual les quiero compartir se trata de unos zarcillos en forma de mariquita ,un pequeño animal inofensivo y muy hermoso de nuestra naturaleza , espero que puedan aprender conmigo y lucir uno igual de esta temática
Good evening to all beautiful family @jewelry ,happy evening to all ,I wish you have started this week of blessing,may you all do well in your chores ,today I bring you a new tutorial which I want to share with you it is about some tendrils in the shape of ladybug ,a small harmless and very beautiful animal of our nature ,I hope you can learn with me and wear one just like this theme.
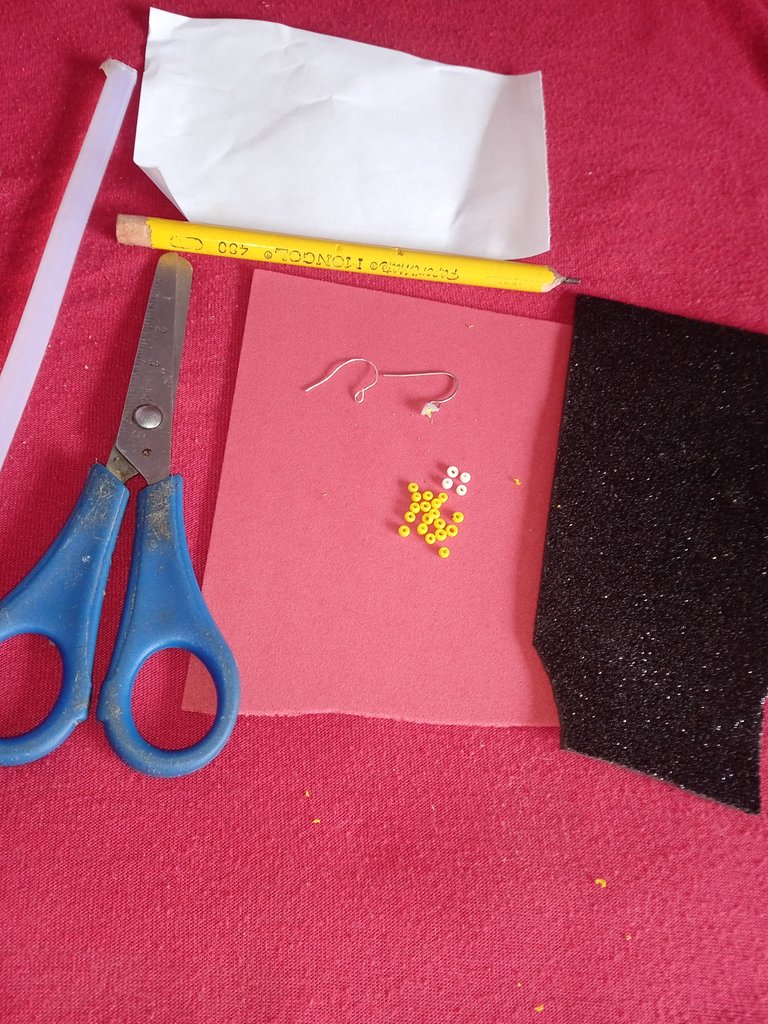
Materiales que utilice para mis zarcillos en forma de mariquita :
-Foamis negro y rojo
-Piedras plástica pequeña
-Tijera
-Silicon
-Hoja
-Zarcillos
Materials I used for my ladybug tendrils:
-Black and red Foamis
-Small plastic stones
-Scissors
-Silicon
-Sheet
-Tendrils
Pasos a seguir para la creación de zarcillos :
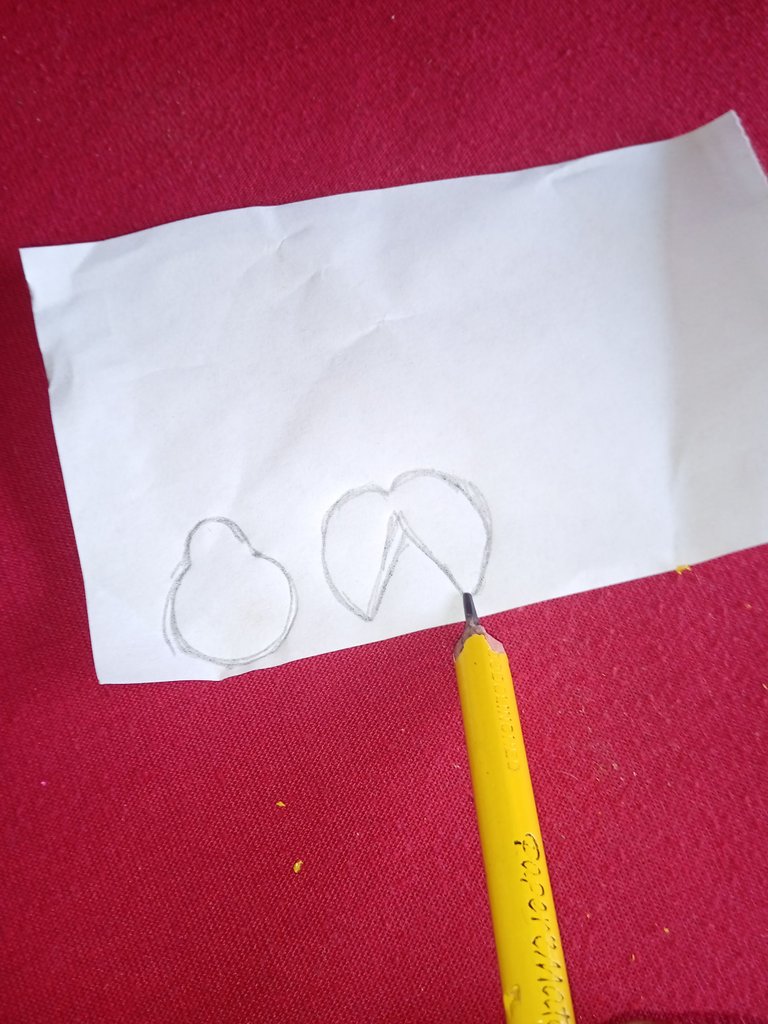
Antes de iniciar con nuestra creación ,vamos tomar una hoja de papel y en ella vamos a dibujar una mariquita que es la temática que escogí en el día de hoy, inicie dibujando el cuerpo de la mariquita y por separado dibuje sus alas como si fuera la mitad de un círculo .
Steps to follow for the creation of tendrils:
Before starting with our creation, let's take a sheet of paper and on it we will draw a ladybug which is the theme I chose today, start by drawing the body of the ladybug and separately draw its wings as if it were half of a circle.
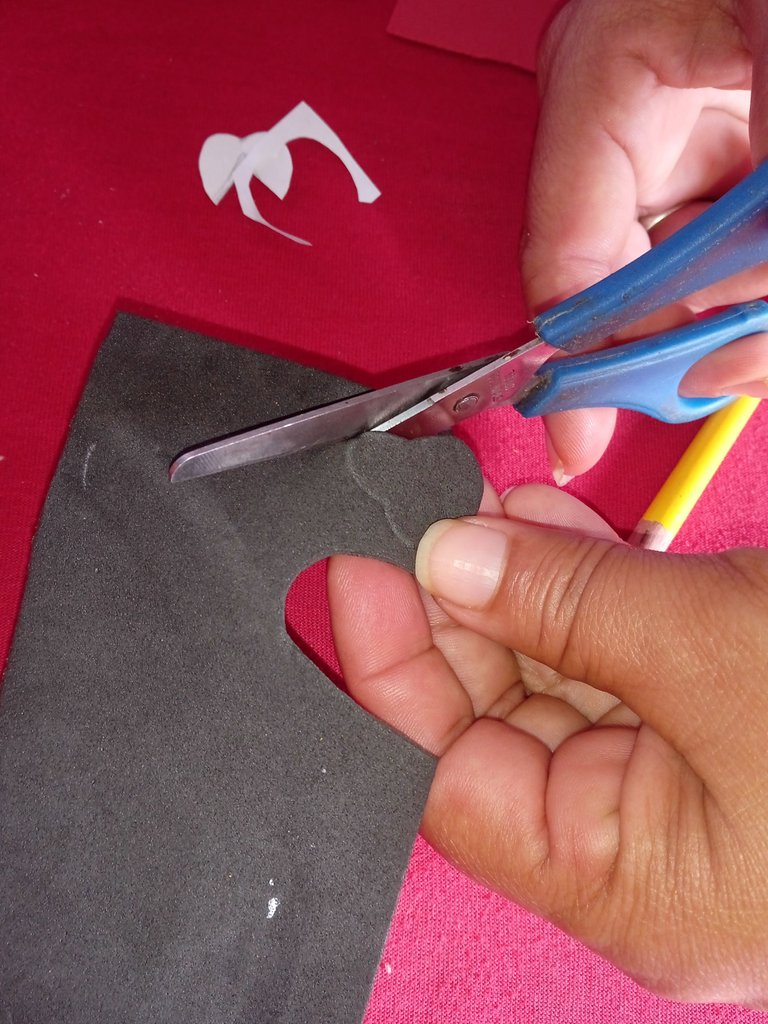
Luego continúe separando el patrón que dibuje con una tijera , seguidamente continúe marcando en el foamis color negro el cuerpo de la mariquita ,marcamos dos porque es un pars completo de zarcillo
Then continue separating the pattern that I drew with a scissors, then continue marking on the black foamis the body of the ladybug, we mark two because it is a complete pair of tendrils.
Luego continuaremos tomando la tijera y recortando el cuerpo de la mariquita con mucho cuidado guiando nos de el molde que dibujamos
Then we will continue taking the scissors and cutting out the body of the ladybug with great care guiding us from the mold we drew.
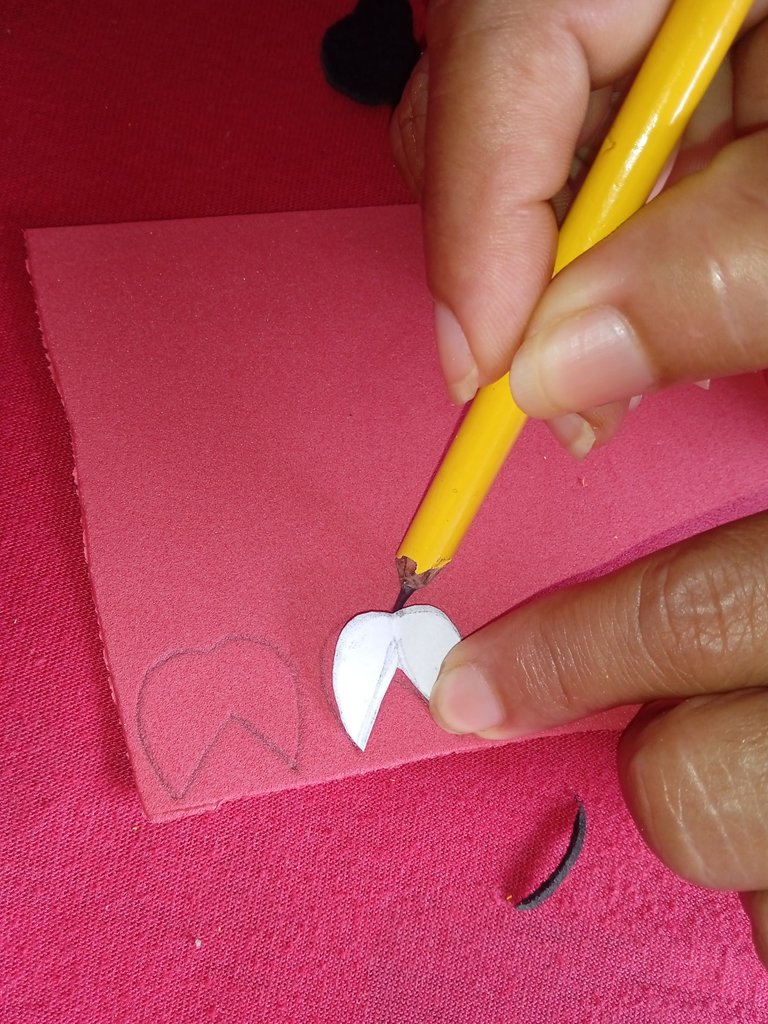
Seguidamente vamos a continuar marcando en el foamis color rojo las alas de la mariquita ,también pueden realizar las alas color amarillo ya que algunas poseen alas como color amarillo ,recuerden que las alas son como un círculo pero abierto o dividido en dos
Then we will continue marking on the red foamis the wings of the ladybug, you can also make the yellow wings because some have wings as yellow, remember that the wings are like a circle but open or divided in two.
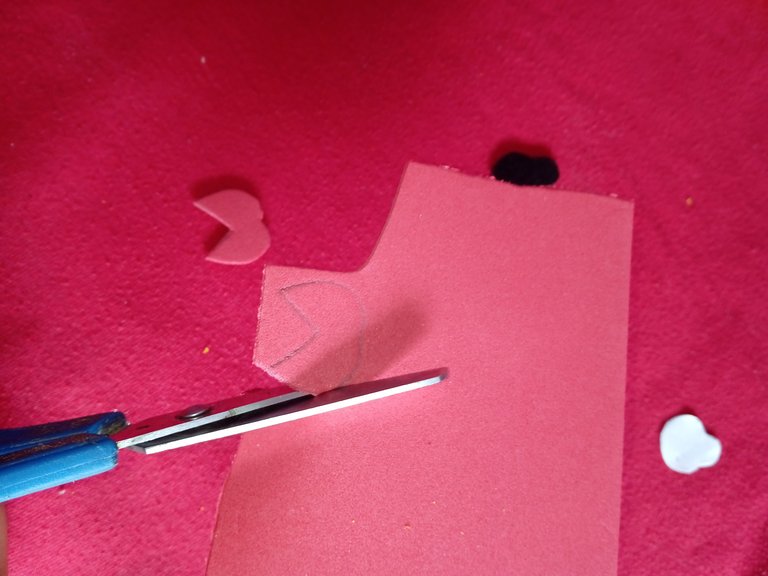
Una vez que marque mos las dos alas de las mariquitas vamos a continuar recortando las con la ayuda de nuestra tijera
Once we mark the two wings of the ladybugs we will continue cutting them with the help of our scissors.
Seguidamente vamos a tomar las alas añadimos silicón en la parte de abajo y pegamos sin abrir las por unos minutos hasta que seque el silicón ,para que de este modo las alas queden paraditas semi abiertas y no queden aplastadas
Next we are going to take the wings, add silicone on the bottom and glue them without opening them for a few minutes until the silicone dries, so that the wings will be semi open and will not be flattened.
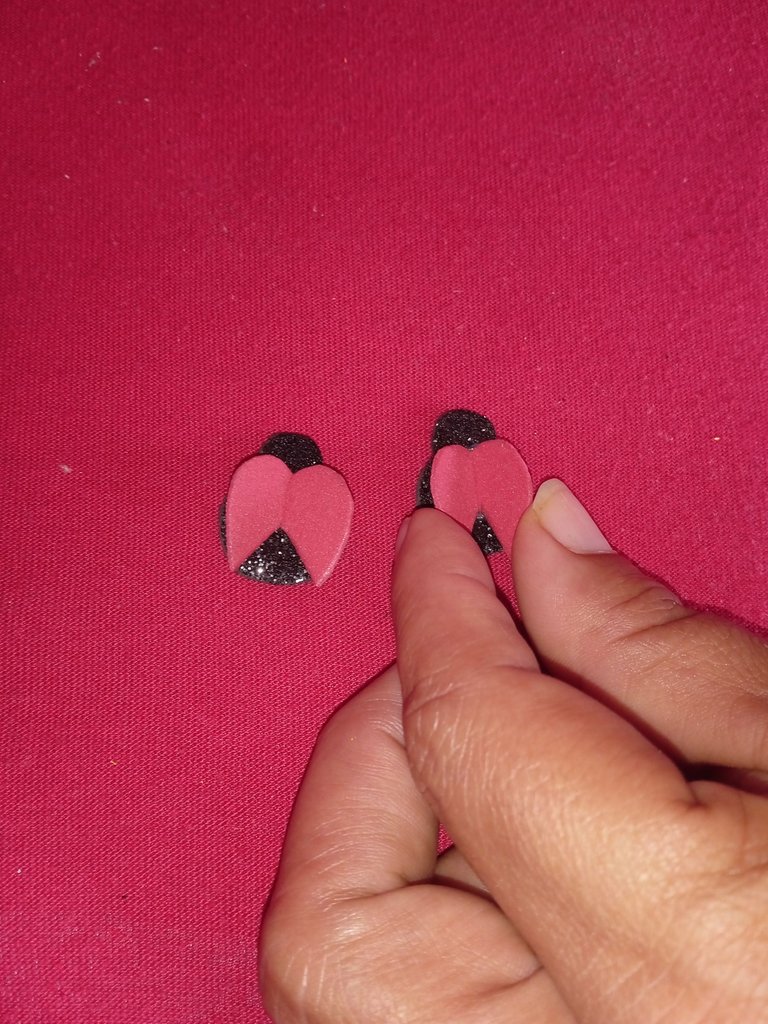
Luego Continuaremos tomando las piedras plásticas (canutillo) color amarillo y las vamos a pegar separadas en las alas de la mariquita realizando así sus lunares hermosas que ellas tienen
Then we will continue taking the yellow plastic stones (canutillo) and we will glue them separately on the wings of the ladybug making their beautiful polka dots that they have.
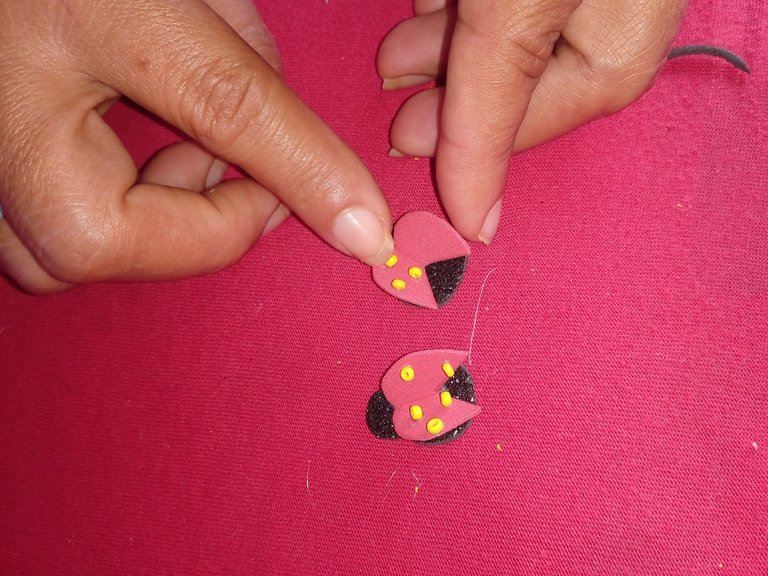
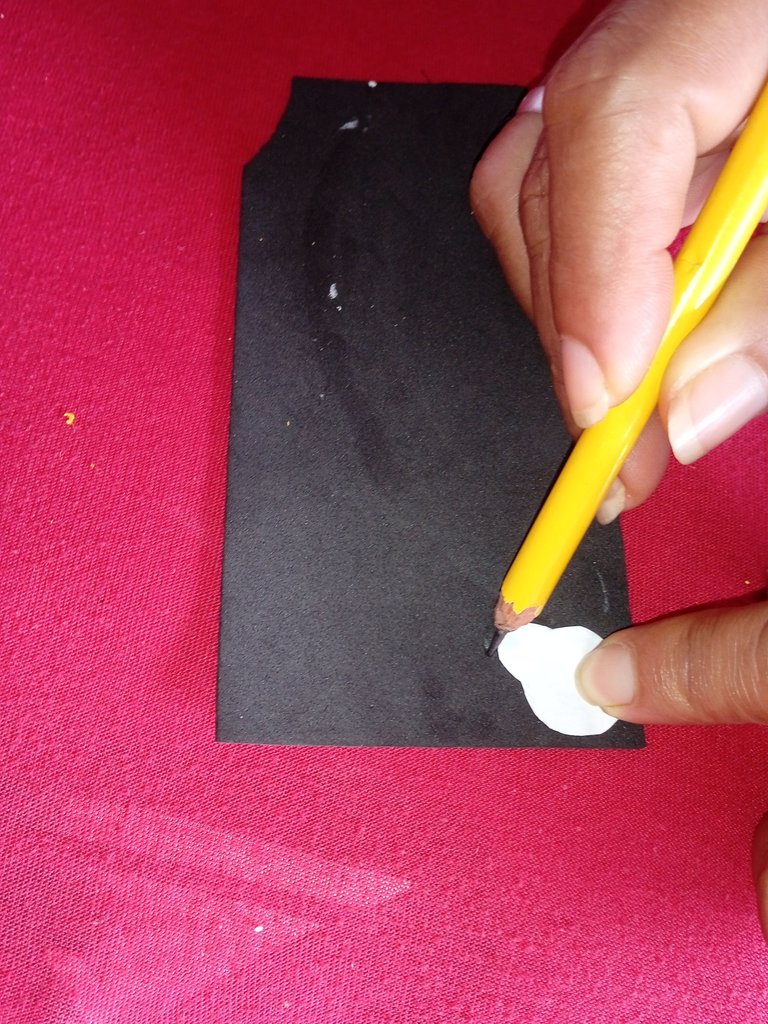
Una vez que decoremos sus alas vamos a continuar pegando sus ojos ,para eso utilice dos piedritas color blanca y la pegue medio separada al lado de la otra
Once we decorate their wings we will continue gluing their eyes, for that we will use two white pebbles and glue them half separated next to each other

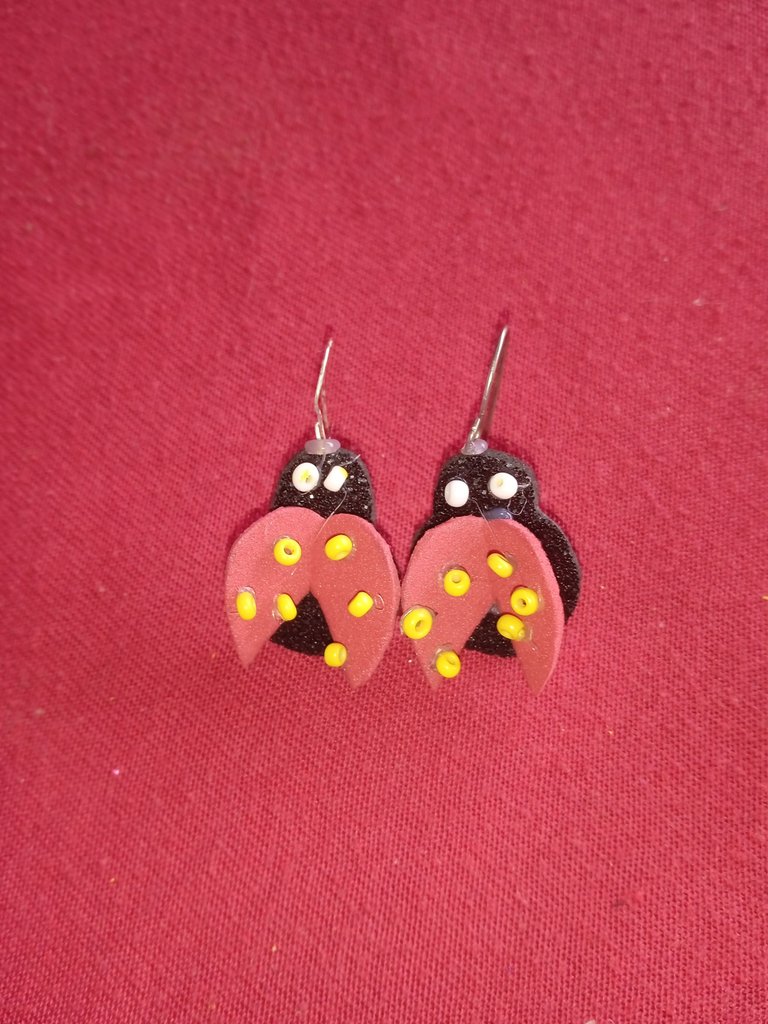
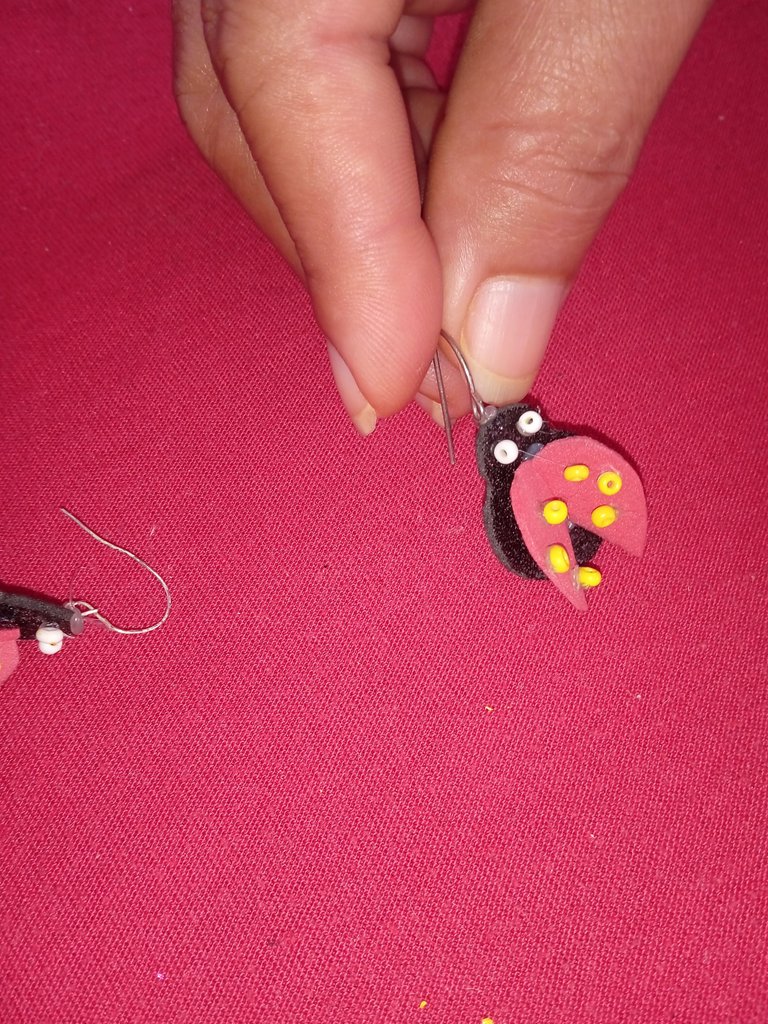
Una vez lista nuestras mariquitas vamos a continuar pegando en la parte de arriba de su cabeza los aros ,terminando así los zarcillos en forma de mariquita ,listos para usar
Once our ladybugs are ready we will continue gluing the hoops on the top of their heads, finishing the ladybug shaped tendrils, ready to use.
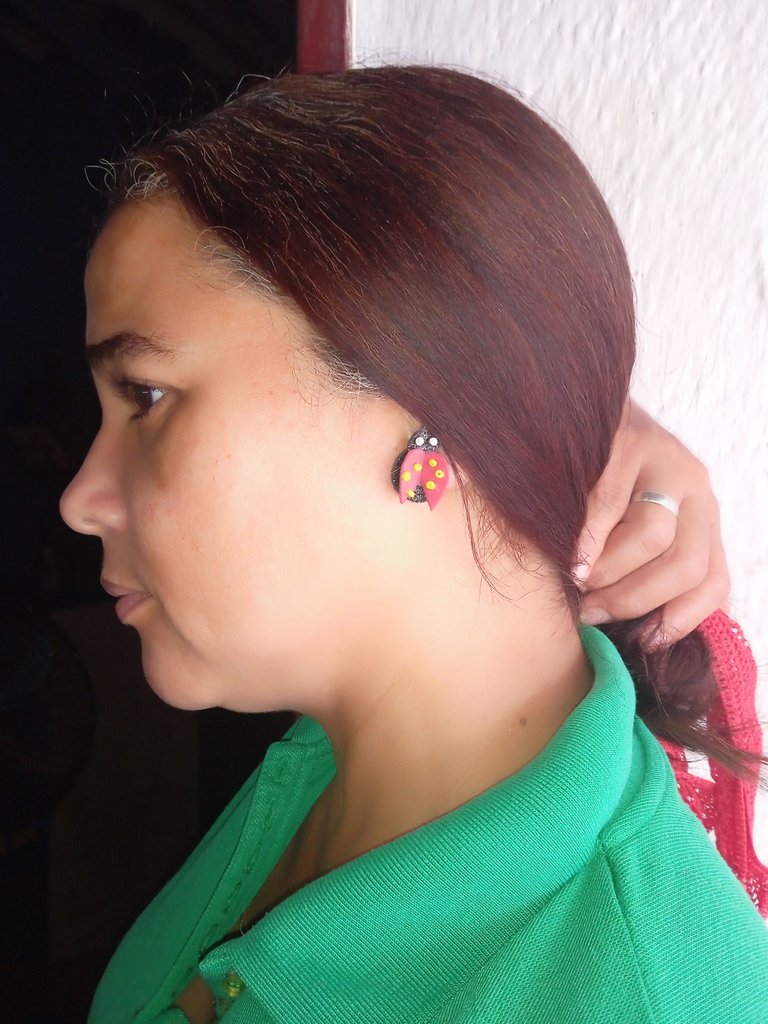
Estos son mis hermosos zarcillos en forma de mariquita ,ideales para nuestras niñas hermosas , sencillas,coquetas ,una manualidad de materiales cómodos de conseguir, sencillos de hacer pero que lleva su tiempo y dedicación , siempre es importante que ellas luzcan bisutería nueva y a la moda ,les agradezco por su atención ,que tengan una noche bendecida ,nos vemos en el siguiente post ,bendiciones
These are my beautiful tendrils in the shape of ladybugs, ideal for our beautiful girls, simple, flirty, a craft materials easy to get, simple to make but it takes time and dedication, it is always important that they look new and fashionable jewelry, I thank you for your attention, have a blessed evening, see you in the next post, blessings.
El foami es una buena herencia para realizar diferentes actividades, nos cómplice ver que realizaste un pequeño tutorial de zarcillos de mariquita, te recordamos que los post en dos idiomas deben ser mayores de 1000 palabras.
Thank you for sharing this post on HIVE!
Your content got selected by our fellow curator rezoanulvibes & you just received a little thank you upvote from us for your great work! Your post will be featured in one of our recurring compilations which are aiming to offer you a stage to widen your audience within the DIY scene of Hive. Next time make sure to post / cross-post your creation within the DIYHub community on HIVE and you will receive a higher upvote ;) Stay creative & HIVE ON!
Please vote for our hive witness <3
Muchas gracias
Congratulations @rameuris! You have completed the following achievement on the Hive blockchain And have been rewarded with New badge(s)
Your next target is to reach 7000 upvotes.
You can view your badges on your board and compare yourself to others in the Ranking
If you no longer want to receive notifications, reply to this comment with the word
STOPCheck out the last post from @hivebuzz:
Support the HiveBuzz project. Vote for our proposal!