Costume jewelry is one of the manual activities that long ago captured my attention and there is nothing more satisfying than using an accessory that has been created by your own hands.

Happy day #jewerly creative people!!! Today is my first time in this community to which I had my eye for quite some time because I love accessories and if they are made by me, much more!
I must confess that I was always a little compulsive when it came to buying accessories, especially bracelets and earrings, so at some point I had so many that I didn't even know what to wear and I always ended up with my favorites and the rest was forgotten in my drawer because I bought mostly for the thrill of buying something new.
But as time went by I became a little more demanding and I didn't like anything I was offered, so I decided to start creating pieces to my liking, and even at one point as a way of entertainment with two friends we set out to buy material and we had our coffee and craft sessions.
And although it was something I enjoyed doing over time I was leaving it, in fact I could say that I have gone through several stages as far as accessories are concerned because as I mentioned above, I had a stage of compulsive buyer, then came my activated creator mode and from there I went to not buy or use practically NOTHING except a fairly simple and discreet steel earrings, but recently the creativity bug has awakened again in me thanks to my little Miranda.
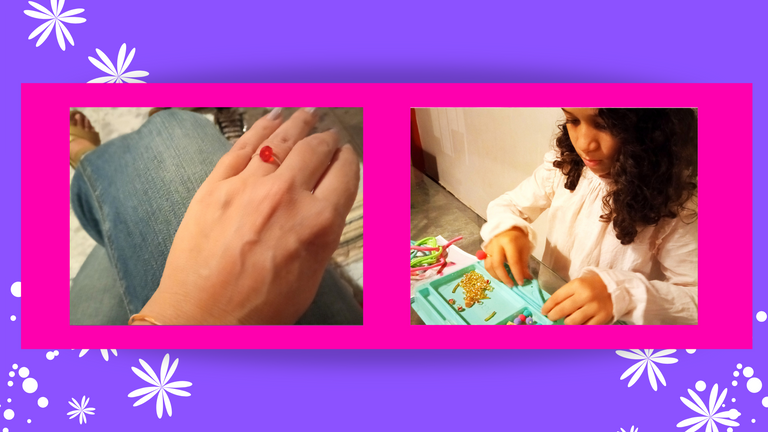
She is quite a creative little girl, and she always made "garments " with any little thing she found at home, so for last Christmas we gave her a kit with beautiful materials for her to create her own accessories. In fact, for Christmas she gave me a bracelet and a ring made with telephone wire and beads! At that moment I knew we had chosen the perfect gift for her.
So with Miranda my desire to create garments, not only for her but also for me, was reawakened and that kit was really beautiful! It had material to create very pretty garments that didn't look like the materials for girls that are usually sold, since it had chains, charms, lycra, colored plastic beads, golden beads and beautiful charms that were the ones that convinced me to buy it.
She made many bracelets and even a necklace and I must say that I was thrilled to see how assertive she was to choose the combinations, as she created very nice bracelets, but with use the pieces that were previously golden lost their color and brightness, so I decided to renew her accessories with costume jewelry pieces to last a little longer.
And I liked the result so much that I wanted to take up again the creation of accessories for my personal use and for my little girl, who now wants us to make some for her friends at school!
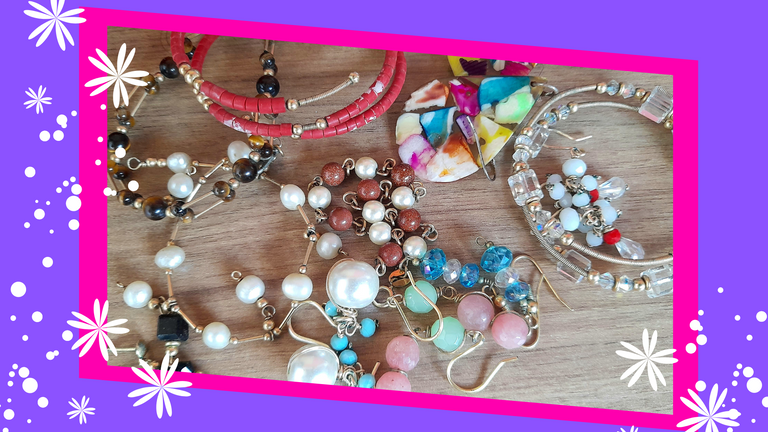
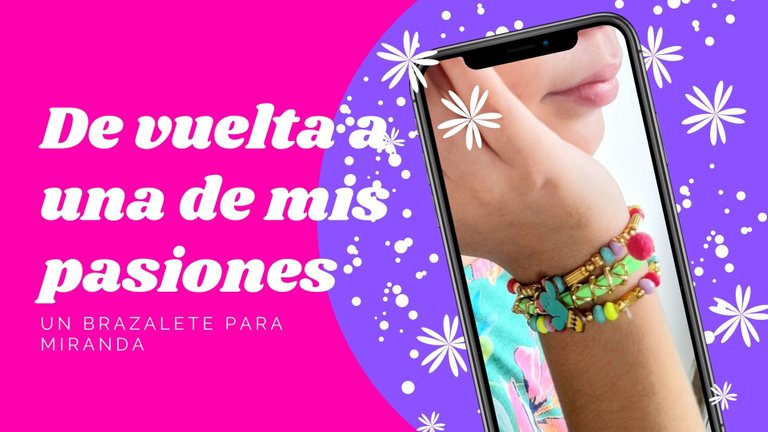
So today I will show you one of the renovations I made to one of her bracelets, replacing the pieces that were already worn with pieces of costume jewelry and as I loved the result, I wanted to share it with you.
To date, I have already made two for her and one for me, a little more elaborate, more adult, although I confess that I want to use hers!
The one I will show you today is very simple, since it is for her I wanted to use the elastic thread, so it really has no complications, it is just to create a nice design, combining different pieces of the new ones I bought, incorporating some of her kit and place the beads and charms on the elastic thread, close and we have a really beautiful accessory.
And now we go with the elaboration of this bracelet that does not necessarily have to be for girls, changing the materials we can create beauties for us and in fact I love the use of the garter because there are some accessories that I like to be tight to my arm and not hanging. But that will depend on the taste of each person and of course the style of the piece.
As I said, it's a pretty simple bracelet and with few materials, so take note and enjoy the creative process that you can even make with your daughters at home!
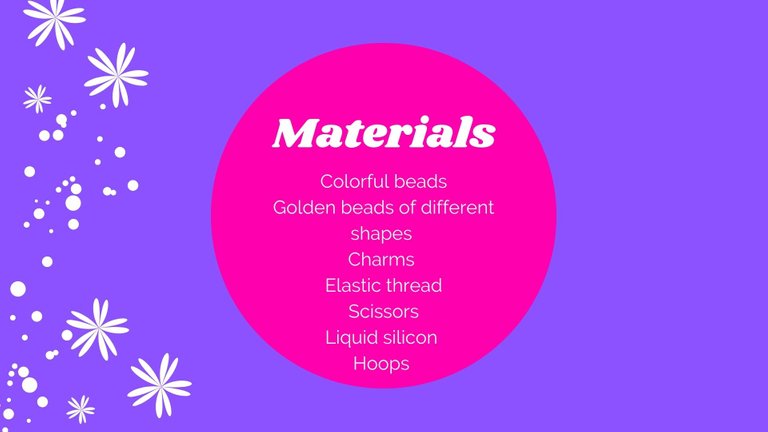
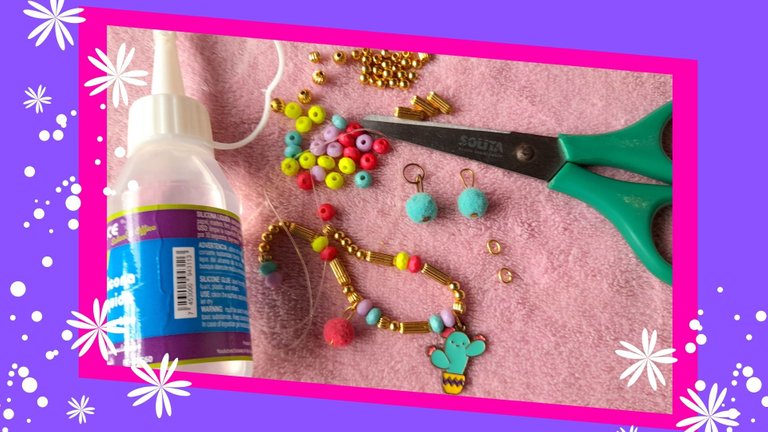
As you can see there are really few!!! And what really matters is to let your imagination and creativity to elaborate a unique piece.
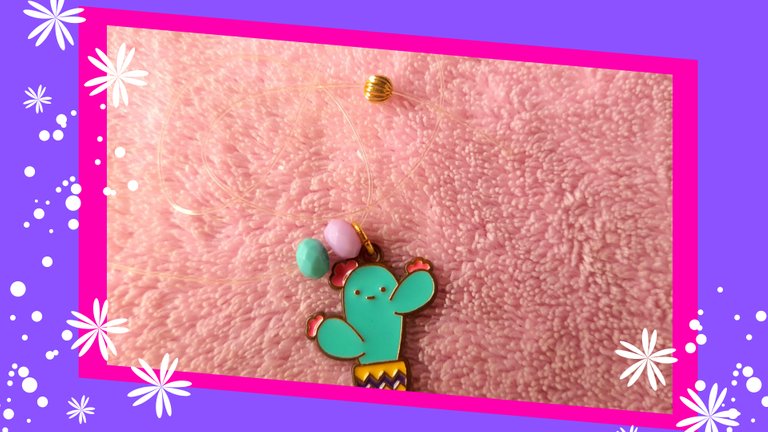
In my case I selected some colorful beads from her previous kit, which are actually my and Miranda's favorite colors. I also selected medium circular beads, some cylindrical beads that I found very nice and together with two charms from her kit that I renewed, I had everything to make the design.
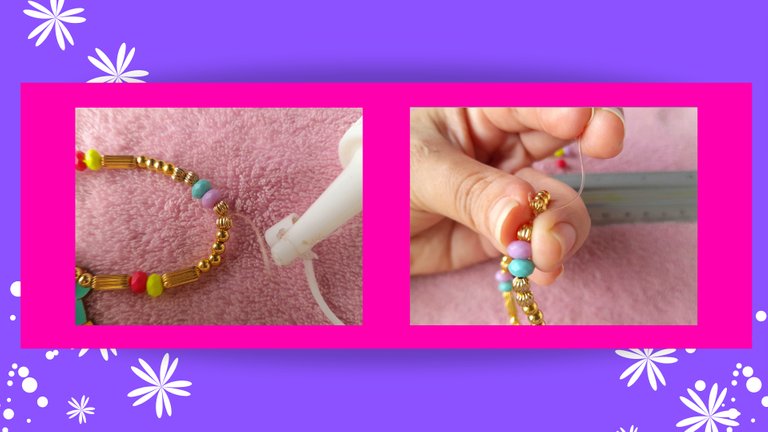
To do this the first thing I do is to place a thick blanket on the table, in case any of the pieces fall, because that way it will not bounce and thus avoid falling to the ground.
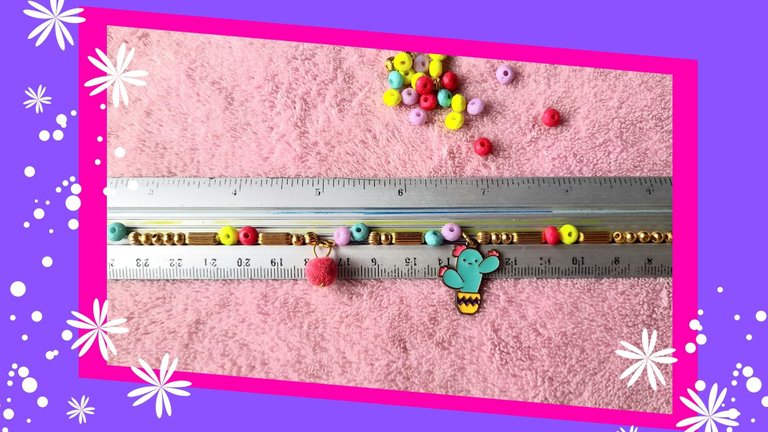
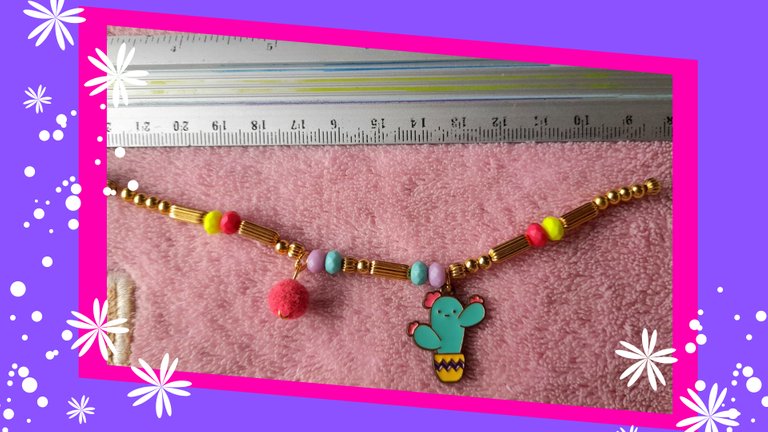
The next thing is to define the pattern I want for the bracelet and place them in an orderly fashion and then insert them into the elastic thread. I use a ruler that has a channel to keep them as neat as possible.
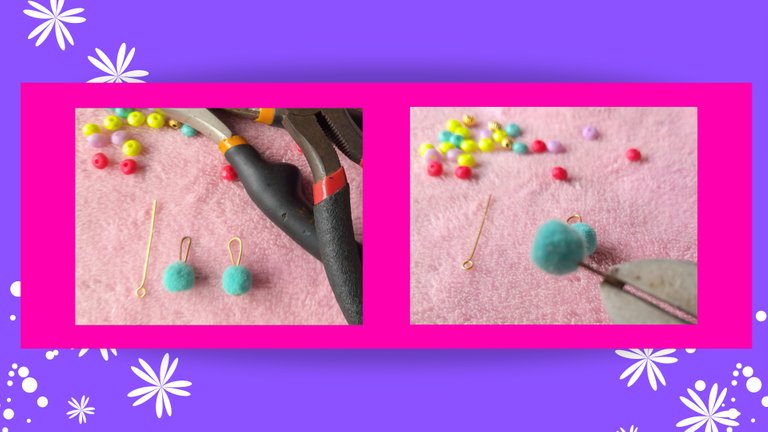
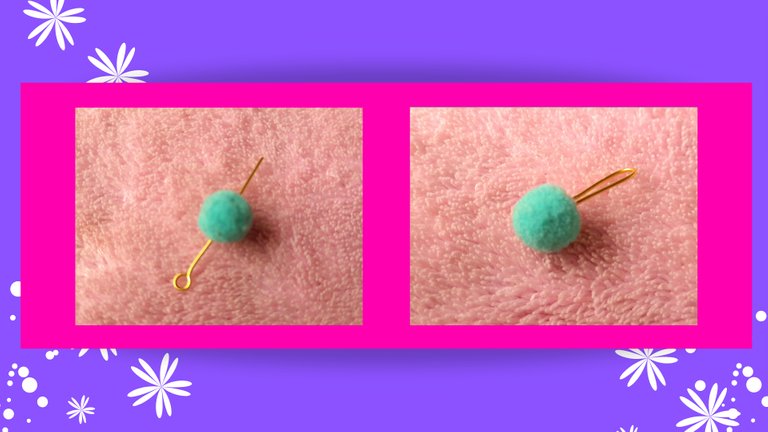
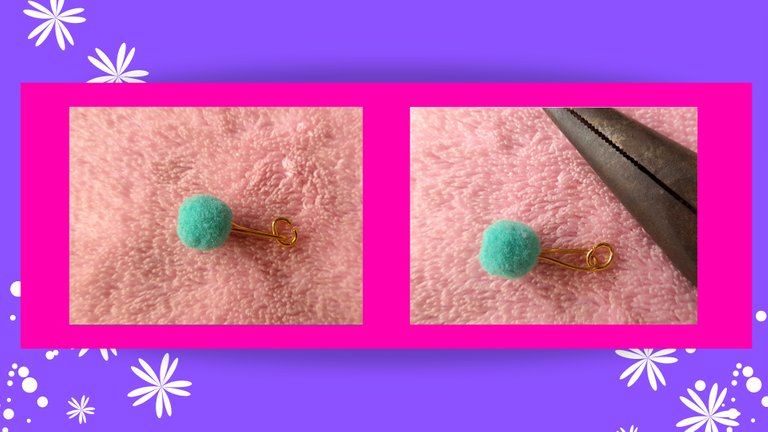
For this bracelet the colored pieces are from her previous kit as well as the charms, which I revamped by changing the ring to the cactus and the fastener to the pompon.
Once our design is ready we will be inserting piece by piece in the elastic thread and at this point I explain that I divide in two the design and insert both ends of the thread so that at the time of making the knot it is not in what will be the front of our bracelet, but it is towards the inside of the arm.

We continue inserting all the beads and charms, we proceed to make a fairly firm knot that we will seal with a dot of liquid silicon to prevent it from untying with use.
Once the silicone has dried we cut the remaining ends and we have finished our accessory.
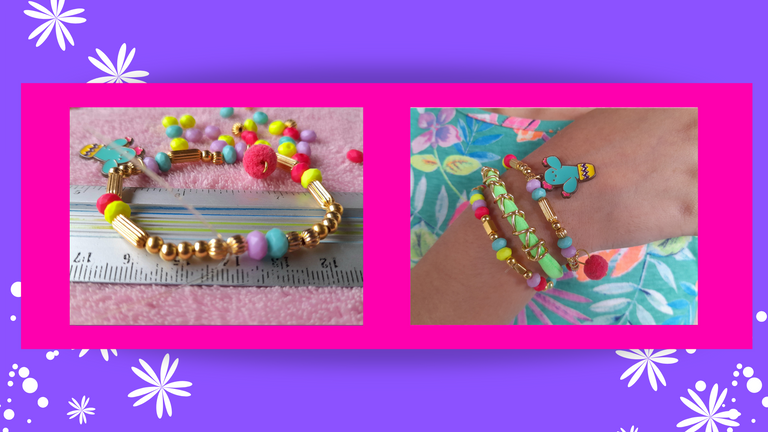
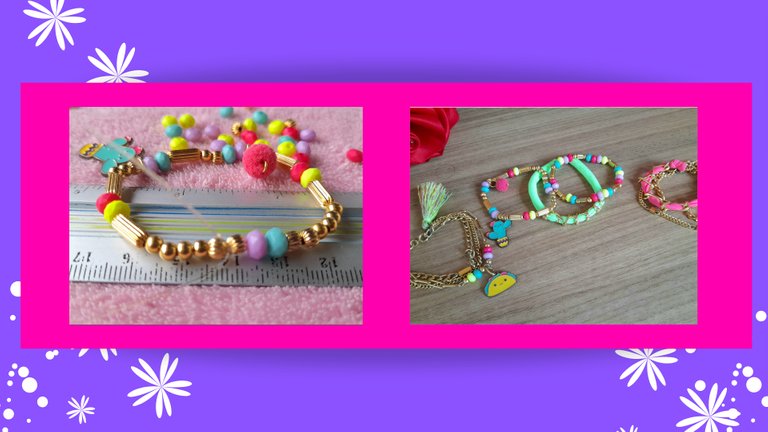
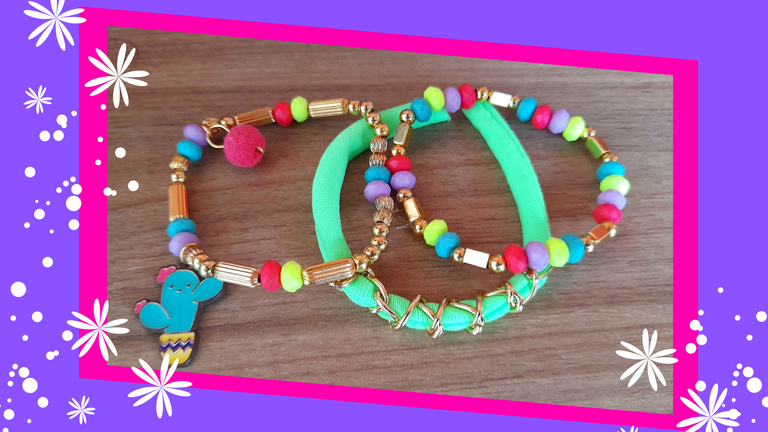
In my case I wanted to make a trio of bracelets with different designs that combine with each other and look how nice it has been and not being united is free to use the three, two or even one and make the combinations you want with which we will create later.
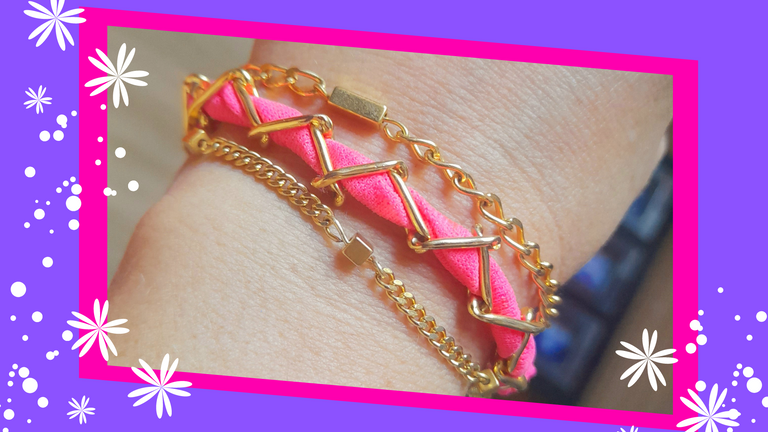
As you can see when working with the elastic thread is much simpler the process of elaboration, but with the right materials we will have a really beautiful accessory. And as mom could not stay behind she also made one for her with a different design, materials and techniques that I will be showing you in a next opportunity and to encourage you and stay tuned here I leave an image of what it is!
I hope you can encourage you to create because there is definitely nothing more satisfying than looking something made by our hands. I wore mine yesterday and I don't know if it happens to you that when you wear something new, even if it's a bracelet you feel super happy, well that's how I was yesterday, especially because I made it myself and to my liking.
I'll say goodbye for now and I'll see you soon to show you how I created mine. Kisses and blessings!
La bisutería es una de las actividades manuales que hace mucho capturó mi atención y es que no hay nada más satisfactorio que utilizar un accesorio que ha sido creado por tus propias manos.
Feliz día gente creativa de #jewerly!! Hoy es mi primera vez en ésta comunidad a la que hace un buen tiempo le había puesto el ojo pues soy amante de los accesorios y si son elaborados por mí, mucho más!
Debo confesar que siempre fui un poco compulsiva a la hora de adquirir accesorios, sobre todo brazaletes y zarcillos, por lo que en algún momento llegué a tener tantos que ni sabía que usar y terminaba siempre con mis preferidos y el resto quedaba olvidado en mi cajón porque compraba más que todo por la emoción de comprar algo nuevo.
Pero con el paso del tiempo me volví un poco más exigente y nada de lo que me ofrecían me gustaba, por lo que decidí comenzar a crear piezas a mi gusto, e incluso en un momento a modo de entretenimiento junto a dos amigas nos dispusimos a comprar material y teníamos nuestras sesiones de café y manualidades.
Y aunque era algo que disfrutaba hacer con el tiempo lo fuí dejando, de hecho podría decir que he atravesado por varias etapas en cuanto a accesorios se refiere porque como les comenté un poco más arriba, tuve una etapa de compradora compulsiva, luego vino mi modo de creadora activada y de ahí pasé a no comprar ni usar prácticamente NADA salvo unos aretes de acero bastante sencillos y discretos, pero hace poco el gusanillo de la creatividad se ha despertado nuevamenente en mi gracias a mi pequeña Miranda.
Ella es una niña bastante creativa, y siempre se hacía "prendas" con cualquier cosita que encontraba en casa, por lo que para la Navidad pasada le regalamos un kit con materiales bellísimos para que creara sus propios accesorios. De hecho casualmente para Navidad ella me regalo una pulsera y un anillo elaborado con cable telefónico y unas cuentas! En ése momento supe que habíamos escogido para ella el regalo perfecto.
Asi que con Miranda despertó nuevamente mi deseo de crear prendas, no sólo para ella sino para mí y es que ése kit era realmente hermoso! Tenía material para crear prendas muy bonitas y que no se veían como suelen verse los materiales para niñas que venden generalmente, ya que traía cadenas, dijes, licra, cuentas plásticas de colores, cuentas doradas y unos dijes hermosos que fueron los que terminaron por convencerme de comprarlo.
Ella en su momento se hizo muchas pulseras e incluso un collar y debo decir que me emociono ver lo asertiva que era para escoger las combinaciones, ya que se creó unas pulseras muy bonitas, pero con el uso las piezas que antes eran doradas perdieron su color y brillo, por lo que me animé a renovarle sus accesorios con piezas de bisutería para que le duren un poco más de tiempo.
Y me gustó tanto el resultado que quise retomar la creación de accesorios para mi uso personal y para los de mi niña, que ahora quiere que hagamos algunas para sus amiguitas de la escuela!
Así que el día de hoy les mostraré una de las renovaciones que hice a uno de sus brazaletes, sustituyendo las piezas que ya estaban desgastadas por piezas de bisutería y como amé el resultado, quise compartirlo con ustedes.
A la fecha, ya he realizado dos para ella y una para mí un poco más elaborada, más de adulto, aunque les confieso que las de ella las quiero usar!!
La que les mostraré hoy es muy sencilla, ya que al ser para ella quise utilizar el hilo elástico, por lo que realmente no tiene ninguna complicación, es sólo crear un bonito diseño, combinando distintas piezas de las nuevas que compré, incorporando algunas de su kit y ubicar las cuentas y dijes en el hilo elástico, cerrar y tenemos un accesorio realmente hermoso.
Y ahora sí vamos con la elaboración de ésta pulsera que no necesariamente debe ser para nenas, cambiando los materiales podemos crear bellezas para nosotras y de hecho me encanta el uso de la liga porque hay algunos accesorios que me gusta queden ajustados a mi brazo y no que cuelguen. Pero eso va a depender del gusto de cada quien y por supuesto él estilo de la pieza.
Como les dije, es una pulsera bastante sencilla y con pocos materiales, así que tomen nota y disfruten del proceso creativo que incluso pueden elaborar con sus hijas en casa!

Como ven realmente son pocos!! Y lo que verdaderamente importa es dejar volar la imaginación y creatividad para elaborae una pieza única.
En mi caso seleccioné unas cuentas de colores de su kit anterior, que de hecho son mis colores favoritos y los de Miranda. Además seleccioné cuentas circulares medianas, unas cuentas cilíndricas que me parecieron muy bonitas y junto a dos dijes de su kit que renové, tenía todo para realizar el diseño.

Para ello lo primero que hago es colocar una manta gruesa sobre la mesa, por si llegase a caer alguna de las pieza, ya que de esa forma no rebotará y así evito que caigan al suelo.
Lo siguiente es definir el patrón que deseo para la pulsera y colocarlo de manera ordenada para luego introducirlas en el hilo elástico. Yo utilizo una regla que tiene un canal para mantenerlas lo más ordenadas posible.
Para ésta pulsera las piezas de colores son de su kit anterior así como los dijes, los que renové cambiando la argolla al cactus y el sujetador al pompon.
Una vez listo nuestro diseño iremos insertando pieza por pieza en el hilo elástico y en éste punto les explico que yo divido en dos el diseño e inserto por ambos puntas del hilo para que al momento de hacer el nudo éste no quede en lo que va a ser la parte delantera de nuestro brazalete, sino que quede hacia la parte interna del brazo.
Continuamos insertando todas las cuentas y dijes, procedemos a hacer un nudo bastante firme que sellaremos con un punto de silicon líquido para evitar que se pueda desatar con el uso.
Una vez haya secado el silicon cortamos las puntas restantes y tenemos finalizado nuestro accesorio.
En mi caso quise hacer un trío de pulseras con distintos diseños que combinaran entre sí y miren que bonita ha quedado y al no estar unidas es libre de usar las tres, dos o incluso una y hacer las combinaciones que desee con las que iremos creando más adelante.
Como pueden ver al trabajar con el hilo elástico es mucho más sencillo el proceso de elaboración, pero con los materiales adecuados tendremos un accesorio realmente bello. Y como mamá no podía quedarse atrás también realizó uno para ella con un diseño, materiales y técnicas diferentes que les estaré mostrando en una próxima oportunidad y para que se animen y estén atentos aquí les dejo una imagen de que se trata!
Espero que puedan animarse a crear porque definitivamente no hay nada más satisfactorio que lucir algo elaborado por nuestras manos. Yo usé la mía ayer y no sé si les pasa que cuando usan algo nuevo, así sea una pulsera se sienten súper felices, pues así estaba yo ayer, sobre todo porque la hice yo y a mi gusto.
Me despido por ahora y nos veremos muy pronto para mostrarles cómo cree la mía. Besitos y bendiciones!
Fotografía por:| Photography by:
@rlathulerie, Samsung Galaxy M12
Edición por:| Edtion by:
@rlathulerie on Canva
Traducido con:| Translated with www.DeepL.com/Translator (free version)
The rewards earned on this comment will go directly to the people( @rlathulerie ) sharing the post on Twitter as long as they are registered with @poshtoken. Sign up at https://hiveposh.com.
Click on the badge to see your board.
Thank you to our sponsors. Please consider supporting them.
Nos encanta que hayas retomado tu pasión y que puedas realizar nuevos accesorios como estas pulseras hermosas que nos regalas hoy.
Tienes un buen gusto y has realizado un gran paso a paso.
Yo creo que muchos pasamos por esas etapas de usar accesorios y luego no y luego nuevamente jejej, saludos gran post.
Muchísimas gracias por la bienvenida y por el bonito mensaje. Hace rato quería pasar, pero soy tan quisquillosa que los tutoriales me toman muchísimo tiempo y hasta que no estoy contenta no paro jeje.
Gracias por las palabras de ánimo, me verán más seguido por aquí!
Un abrazo
Que belleza, me encanta la bisutería con detalles dorados, me parece muy femenino y delicado, me parece genial que hagas estás cosas porque se que ayuda a relajarse. Saludos amiga, tiempo sin pasar por aqui.
Amigaaa, hace rato no te veía! Es lo que dices sobre el dorado,le da un toque muy delicado a pesar que las piezas de colores son plásticas las hace lucir muy delicadas. Es que tu sabes, el brillo hace la diferencia jaja
Un abrazo, me dió mucho gusto verte por aquí 😊
Hola amiga me alegra que te hayas animado a participar y compartir con nosotros en esta comunidad, me encantó tu pulsera, sobre todo por los colores, creo que a mi niña le encantaría.
Saludos.
Hola Emma! Las niñas aman esos colores,bueno,a mi también me encantan! Esa pulsera como es con elástica es súper rápida, para mi lo que más demora es escoger la combinación y cuadrar todo.
La que hice para mí sí lleva más trabajo pero eso es una forma maravillosa de distraerse.
Un abrazo amiga 🤗
Ay no, eso es muchísimo trabajo 😅
Lo bueno es que a mi no me gusta usar pulseras ni nada de esas cosas, además Leo es niño así que dudo mucho que vayan a gustar esas cosas, yo no se qué haría si sí hubiera sido niña 🤣🤣
Un beso mana 😘
No me recuerdes eso que cada vez que lo haces se viene el mensaje de Antonio y mis conversaciones con Laly "chama dijo "el bebé" qué será lo que pasó, será que allá hablan así?" Jajaja
Oye esa es una buena historia para un post!
A mi porque las manualidades siempre me han gustado y me sirve para bajar el estrés aunque ahora la cervical me molesta.
Por cierto, esta es súper fácil, lo que me toma más tiempo es escoger un patrón que me guste, pero con el hilo elástico luego del diseño es súper rápido. La que hice para mí sí es más complicada, pero no tanto.
Un abrazo manita! Besos
Al día de hoy doy gracias porque al final fue niño, jajajaja.
Lo que pasa es que yo no tengo ni la paciencia ni la vista para hacer estas cosas 😅
Yay! 🤗
Your content has been boosted with Ecency Points, by @rlathulerie.
Use Ecency daily to boost your growth on platform!
Support Ecency
Vote for new Proposal
Delegate HP and earn more
Que hermosoooo 😍, yo pensaba que sería mucho más difícil y la verdad que no, hay que tener claro el patrón y cómo lo queremos para que quede más hermoso aún, crear algo con tus propias manos y hacerlo a nuestro propio estilo esta genial ✨✨
Exacto amiga, con la liga es súper fácil el tema es el diseño y que todo vaya cuadrando, es una actividad para dejar la imaginación volar!
HOla Rosi, disculpa el tuteo jejej.
Me encantó esa belleza de pulsera, me hiciste recordar mis tiempos de infancia cuando una tía hacía pulseras para mí, ¡la satisfacción de realizar una pieza es mucho mejor que comprarla! porque es autentica, nadie la tiene y es a tu medida, espero ver mas de tu arte y aprender un poco mas, un abrazo.
Amiga, mil disculpas por la demora, juraba ya había respondido!
Mis amigos me dicen Rosi, así que perfecto!!
Tal como dices, nada como hacer algo con tus manos, a tu gusto, se le quiere mucho más!
Oye, no sabía de esas aficiones tuyas por la bisutería.
Recuerdo que la hermana mayor de mis hijos también disfrutaba hacerlas cuando era pequeña y por supuesto entre los regalos de navidad, siempre había un kit o renovación de cuentas... pero lamentablemente lo abandonó con los años...
Yo en algún momento también usaba muchos y compré y me regalaron montones en mi época de profesora, ya con la llegada de Fabrizzio dejé de usarlas para evitar que me las rompiera y hasta ahora han quedado en el olvido...
Yo hago de todo un poco! Con masa flexible también trabaje un tiempo e incluso vendí piezas por mercadolibre y le vendía un local aquí en Margarita. Todo lo que es manualidades me encanta.
Yo siempre compre muchas cositas y aún tengo muchas pero no me gustan ya porque no están de moda jaja