Hola queridos amigos de esta bonita y hermosa comunidad de @hive y @jewelry un gusto saludarlos le deseo un fin de semana lleno de alegrías bendiciones y éxitos para todos.
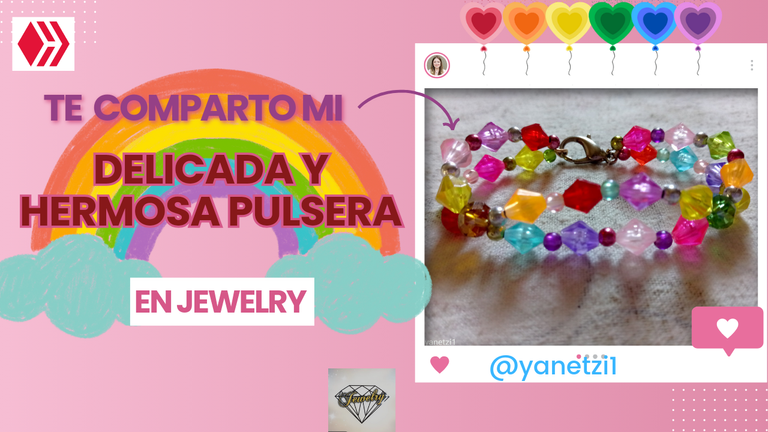
Hoy quiero mostrarles cómo hacer una delicada y bonita pulsera en diamantes de colores y perlas también coloridas, esta pulsera me inspiró mucho ya que tenía estos materiales y pues pensé en qué hacer me gusta mucho tener pulseras de distintos modelos Y esta es una de ellas.
Los materiales utilizados en la elaboración de nuestra pulsera fueron los siguientes:
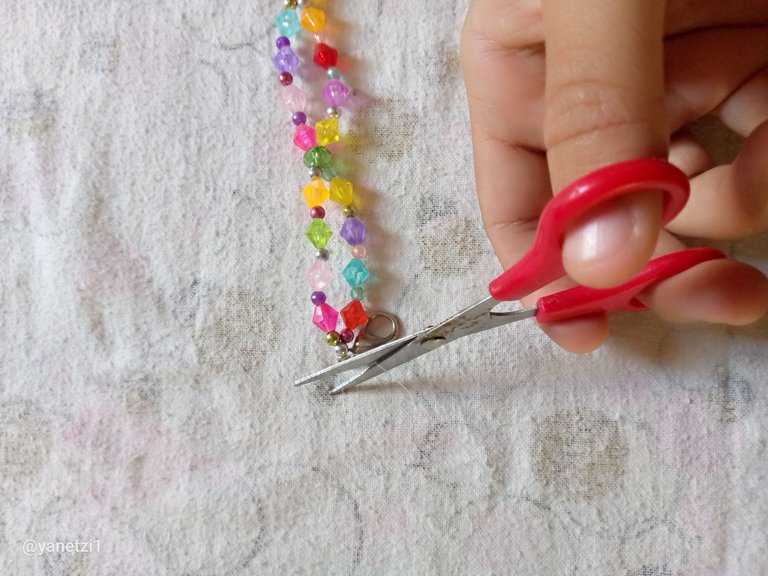
- Nylon número 25
- Tijera
- Perlas pequeñas de diferentes colores
- Diamantes de colores
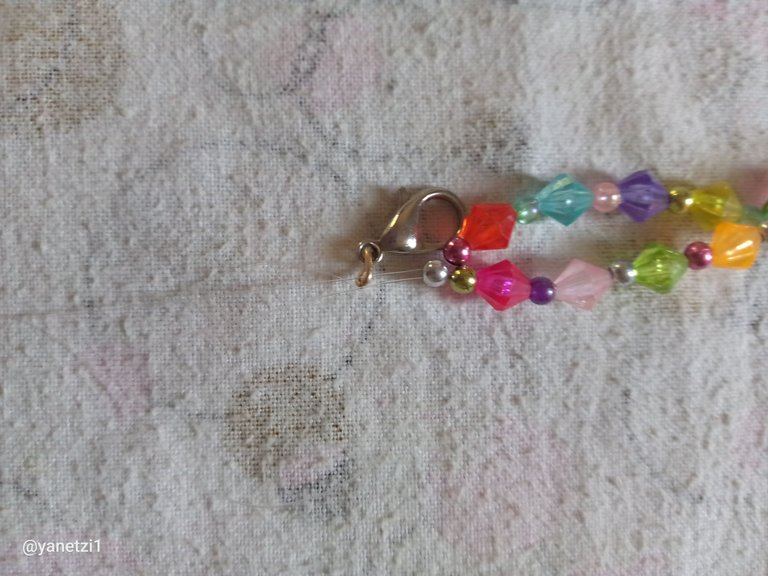
- Trancadero
- Argolla metálica
- Gancho
A continuación les estaré presentando cómo realizar el Paso a Paso.
Paso 1
Lo primero que vamos a hacer es cortar el nylon y ponerlo doble un poquito largo porque recordemos que vamos a hacer estilo brazaletes pero con dos puntas de hilo de esta manera.
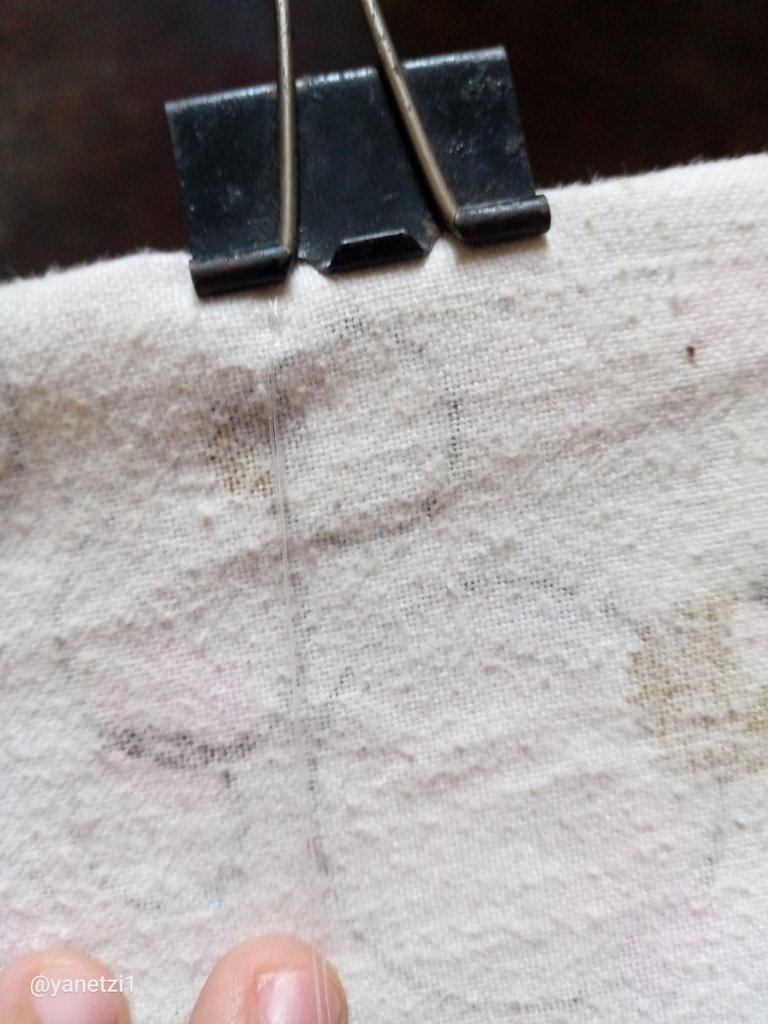
Luego lo que vamos a hacer es con el gancho hacer sostener el nylon de esta manera.
Paso 2
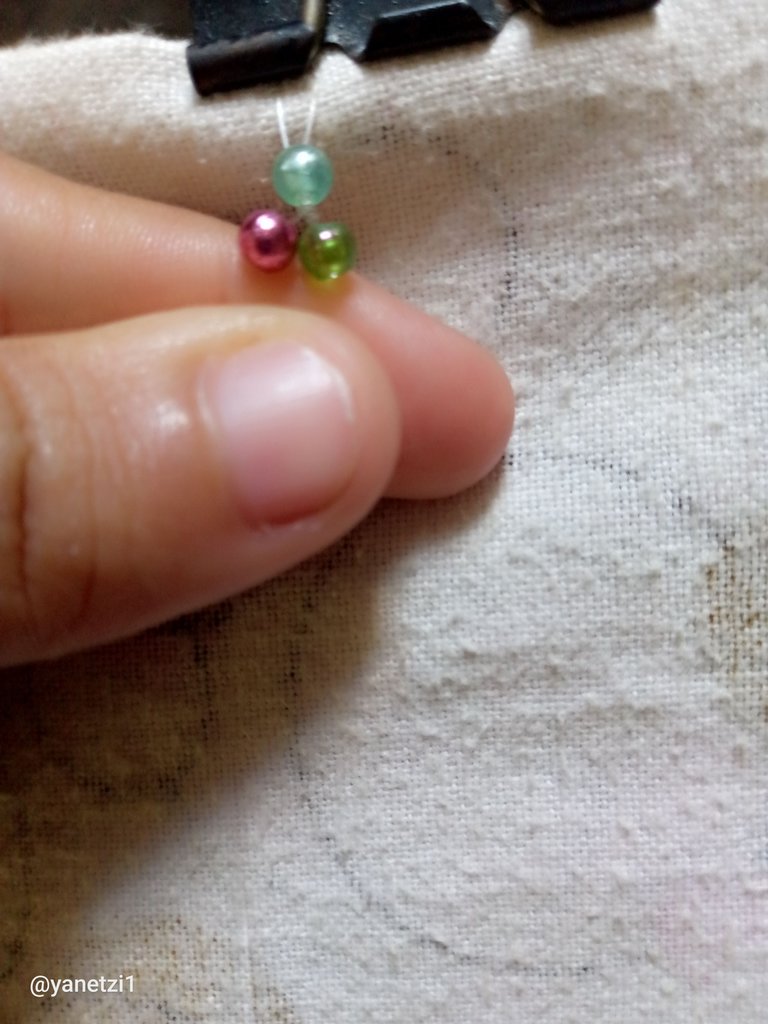
Bueno una vez ya estable los dos hilos con el gancho vamos a unirlo y vamos a meter una piedra entre los dos nylon de esta manera luego vamos a agarrar otras dos Perlas pequeñas y la vamos a introducir en cada hilo para que haga esta forma así como está aquí.
Paso 3
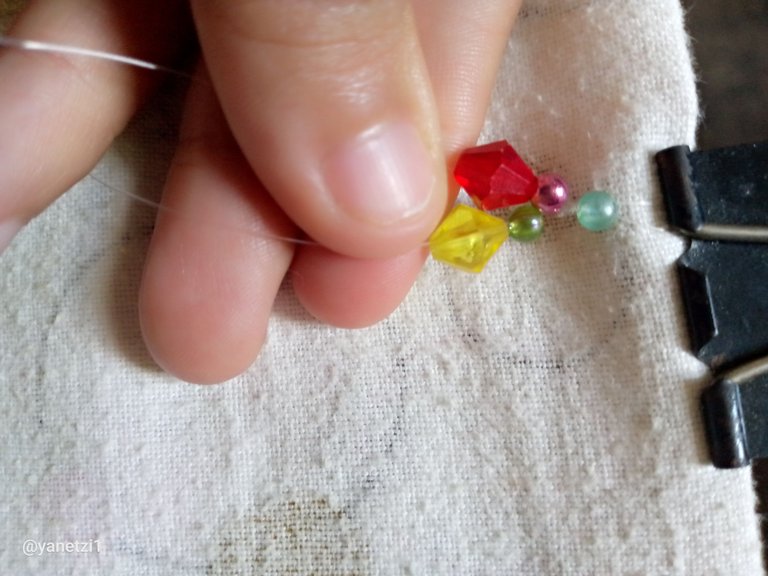
Ahora lo que vamos a hacer es tomar los dos diamantes de diferentes colores y e introducirlo en cada nylon así de esta manera.
Paso 4
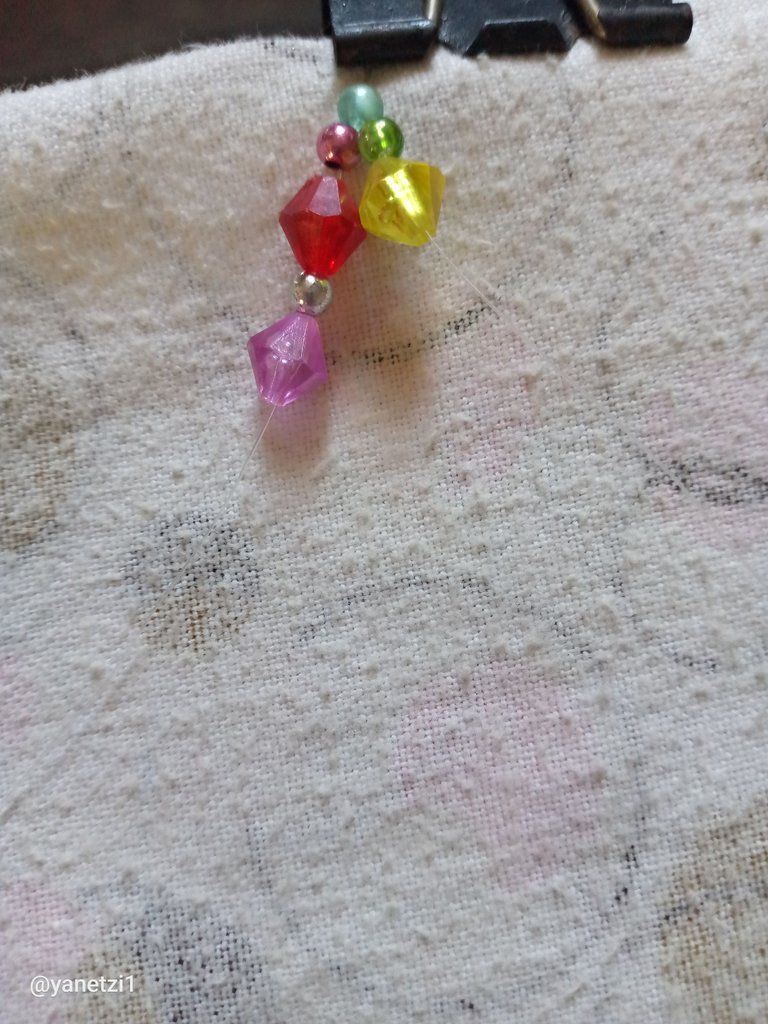
Así de esta manera irá quedando estructurada parte de nuestra pulsera es muy sencillo solamente vamos a ir colocando en cada nylon una perla pequeña y un diente en ambos lados.
Paso 5
Una vez ya hecha la estructura de los dos nylon con los cuatro diamantes de ambos lados, tomamos los dos hilos y los unimos introduciendo este Swarovskis de color marrón claro escarchado.
Unas de las piedras que me gustan mucho la que lucen muy elegantes por si brillo.
Paso 6
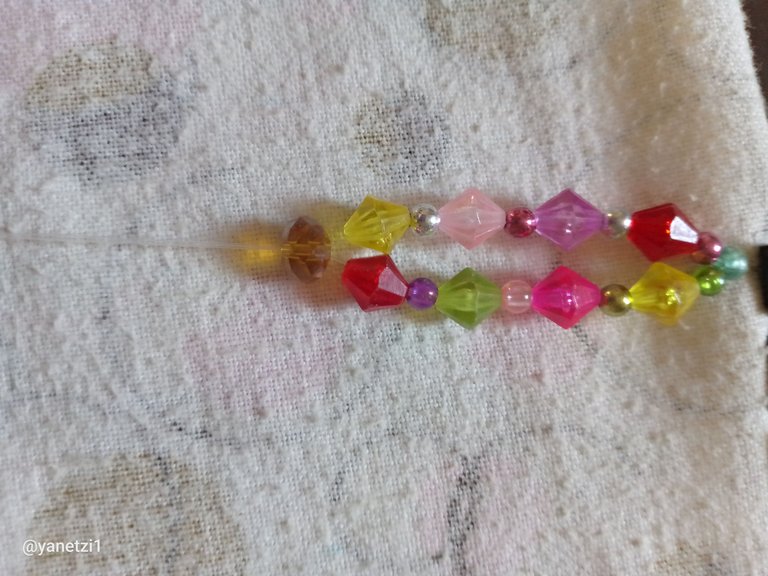
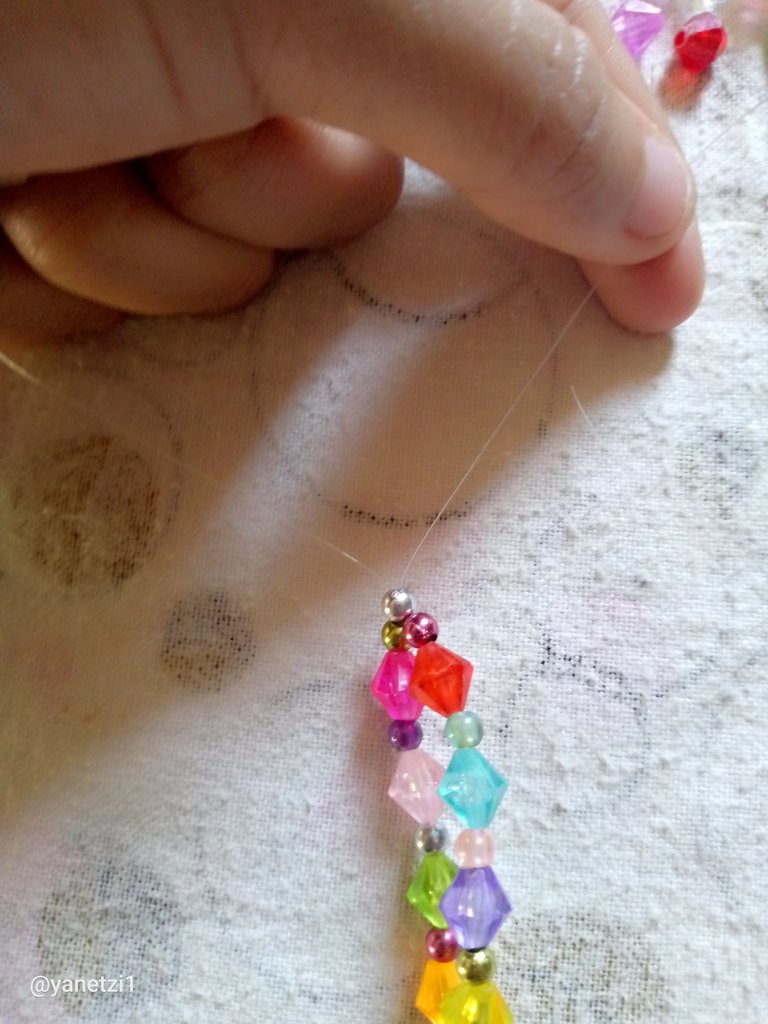
Ahora sólo lo que vamos hacer ese realizar el mismo procedimiento de lado perla junto con el dos diamante de amor la data llegar hasta la puerta piedras y así 12 de la colocar el otro Swarovskis de otro color diferente que es el color verde.

Paso 7
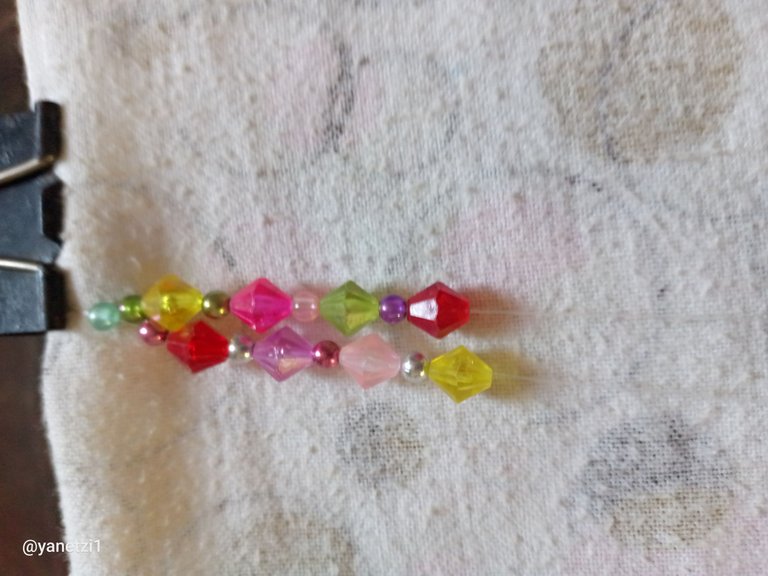
Una vez ya terminados estos pasos que son los que vamos a realizar tres veces.
Ahora solo nos queda agarrar el trancadero y colocarlo entre los dos hilos luego de esto vamos a realizar tres nudos de amarre para que así quede fuerte y no pueda soltarse este mismo lo vamos a realizar con el aro y de este modo ya habremos terminado nuestra pulsera linda y un poco elegante para lucir en cualquier ocasión.

Paso 8
Bueno nuestro paso final sería con la tijera recortar los hilos que queden de ambos lados de nuestra pulsera para que así de una vez quede lista para lucir.
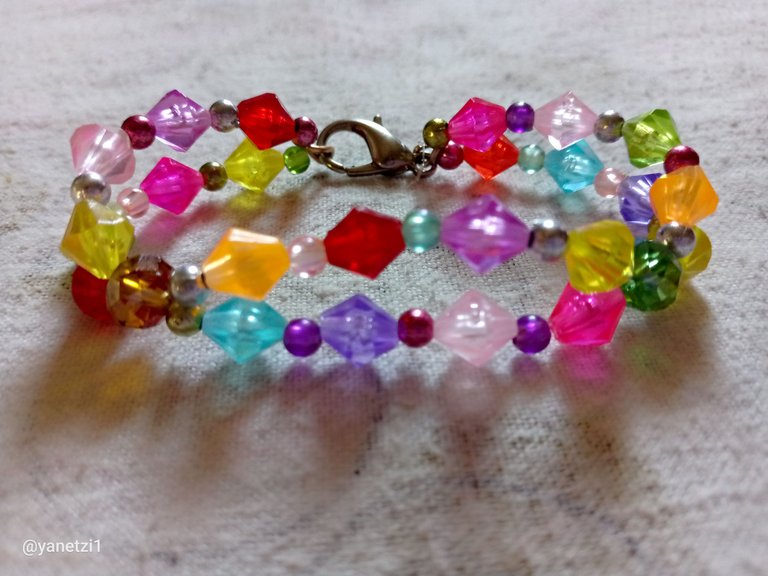
Bueno amigo Espero que les guste mucho en realidad esta pulsera es muy fácil de hacer con pocos pasos podemos obtener una linda y maravillosa pulsera llena de inspiración colores y alegrías este es nuestro resultado final.
Espero que les guste le mando un cordial saludo abrazo y bendiciones para todos.
Hasta la Próxima!
las imágenes son de mi autoria y fueron tomadas por mi teléfono tecno spark go 2023.
traductor utilizado:Deepl traductor
La imagen fue edita en Canva.
Hello dear friends of this nice and beautiful community of @hive and @jewelry a pleasure to greet you I wish you a weekend full of joys blessings and success for all.
Today I want to show you how to make a delicate and beautiful bracelet in colored diamonds and pearls also colorful, this bracelet inspired me a lot because I had these materials and I thought about what to do I really like to have bracelets of different models and this is one of them.
The materials used in the development of our bracelet were as follows:
- Nylon number 25
- Scissors
- Small beads of different colors
- Colored diamonds
- Trancadero
- Metal ring
- Hook
Next I will be presenting you how to make the Step by Step.
Step 1
The first thing we are going to do is to cut the nylon and make it double a little bit long because remember that we are going to make bracelets style but with two ends of thread like this.
Then what we are going to do is with the hook make hold the nylon like this.
Step 2
Well once we have the two threads with the hook we are going to join them and we are going to put a stone between the two nylons in this way then we are going to take two other small pearls and we are going to introduce it in each thread so that it makes this form as it is here.
Step 3
Now what we are going to do is take the two different color diamonds and insert them into each nylon like this.
Step 4
Thus in this way it will be structured part of our bracelet is very simple only we will be placing in each nylon a small pearl and a tooth on both sides.
Step 5
Once the structure of the two nylons with the four diamonds on both sides is done, we take the two strands and join them by inserting this light brown frosted Swarovskis.
One of the stones that I like very much, they look very elegant because of their brilliance.
Step 6
Now only what we are going to do is to perform the same procedure of side pearl together with the two diamond of love the date to reach the door stones and so 12 of the place the other Swarovskis of another different color which is the green color.
Step 7
Once we have finished these steps, which are the ones we are going to do three times.
Now we just have to grab the trancadero and place it between the two strands after this we will make three knots to tie so that it is strong and can not come loose this same thing we will do with the ring and thus we will have finished our beautiful bracelet and a little elegant to wear on any occasion.
Step 8
Well our final step would be with the scissors to trim the remaining threads on both sides of our bracelet so that once and for all it is ready to wear.
Good friend I hope you like it very much actually this bracelet is very easy to make with few steps we can get a nice and wonderful bracelet full of inspiration colors and joys this is our final result.
I hope you like it I send you a warm greeting hug and blessings to all of you!
See you next time!
the images are of my authorship and were taken by my phone tecno spark go 2023.
translator used: Deepl trasleter
Image was edited in Canva
It is so colorful, and beautiful. Good to see how you make this awesome design. Thank you for sharing this.
Hermoso trabajo hermana que bonita pulsera está muy colorida y esos Swarovskis le dan un toque elegante,
Bendiciones y Éxitos 🌈😍💖😉🎁💐
Hermosa pulsera, los colores resaltan su belleza, muy bonito trabajo, Dios te bendiga siempre 🤗
Muchas gracias 😁 mi vida 😘
Me encanta bonita y colorida ..
Muchas gracias amiga 😊
Me encantan los colores amiga .. saludos
Hola, me encanta la variedad de colores se ve muy llamativa
Que bonita te ha quedado amiga. Felicidades
Hola.
Para confirmar su autoría del contenido, ¿podría poner el enlace a su blog de Hive en su cuenta de redes sociales bien establecida como Facebook, Instagram o Twitter (que no se ha creado recientemente)?
Después de poner la palabra "Hive", responda a este comentario con el enlace URL a ese sitio web.
Puede eliminar esta mención, una vez que confirmemos la autoría.
Gracias.
Mas Info: Presentación de informes y búsqueda de verificación de identidad / contenido
https://www.facebook.com/yanetzic.pmendoza.3
Hola.
Para confirmar su autoría del contenido, ¿podría poner el enlace a su blog de Hive en su perfil de Facebook?
https://www.facebook.com/yanetzic.pmendoza.3
Puede eliminar esta mención, una vez que confirmemos la autoría.
Gracias.
Mas Info: Introducing Identity/Content Verification Reporting & Lookup
Sencilla de hacer y muy bonita amiga