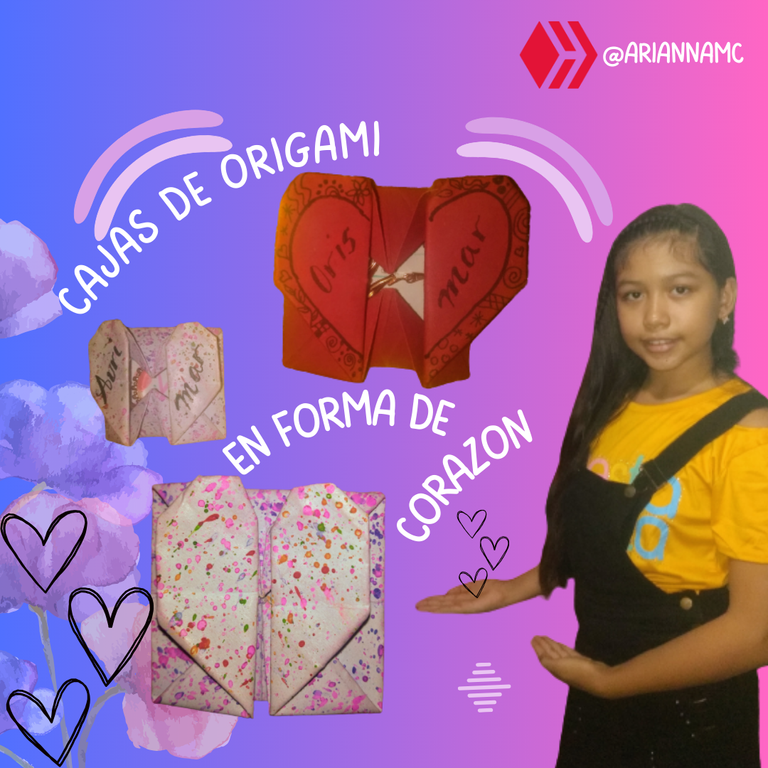

Hola mis queridos amigos de esta hermosa y talentosa comunidad @diyhub, hoy les voy a contar cómo hice una linda caja sorpresa, con la técnica del origami en forma de corazón, para unos regalos, espero que les guste y que vean el procedimiento porque también lo pueden hacer ustedes mismos, empecemos.
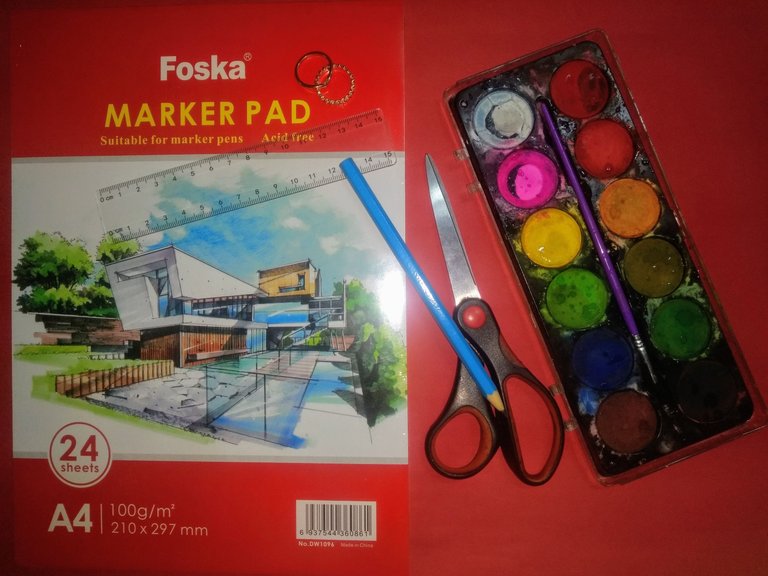
💝 Materiales 🎁
Para hacer esta manualidad, necesitamos pocas cosas, como:
Papel de acuarelas o cartulina.
Acuarelas.
Pincel.
Regla.
Tijeras.
Lápiz.
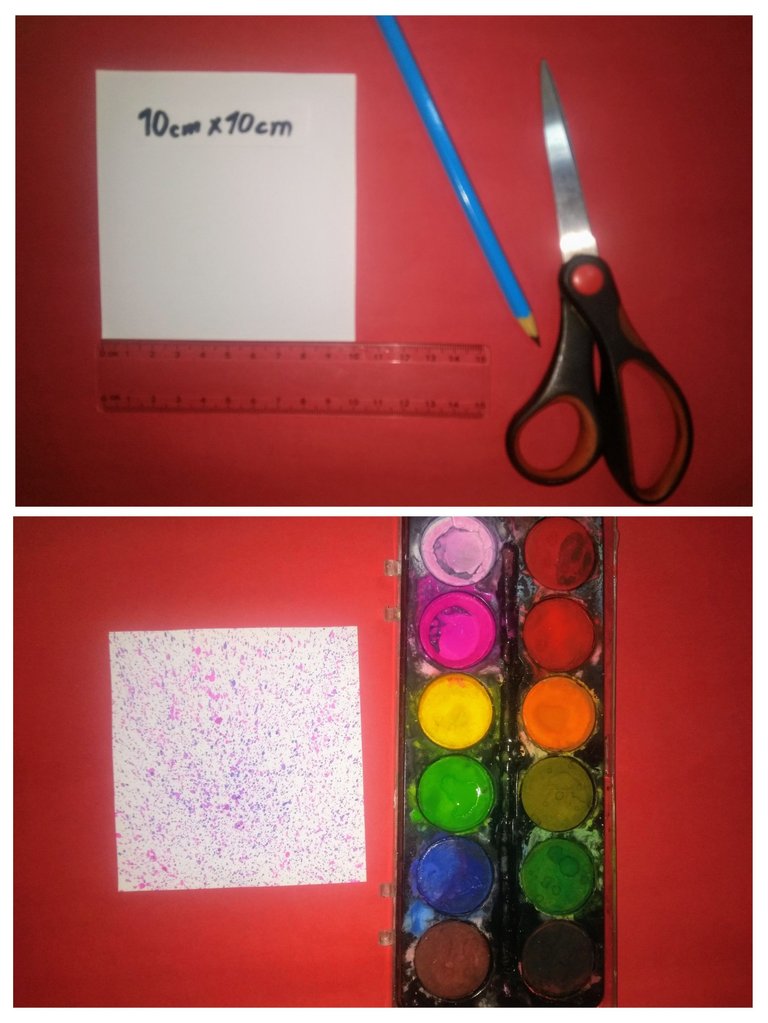
Primer paso:
Cortamos la hoja del tamaño que la queremos, en este caso la hice de 10 cm por 10 cm, luego pinté con acuarelas, con un pincel fui tomando de varios colores y echando chispas, quedó muy bonita y con el color morado que me encanta y a mi prima también, pero si no la quieres pintar la puedes dejar así, igual se ve bonita.
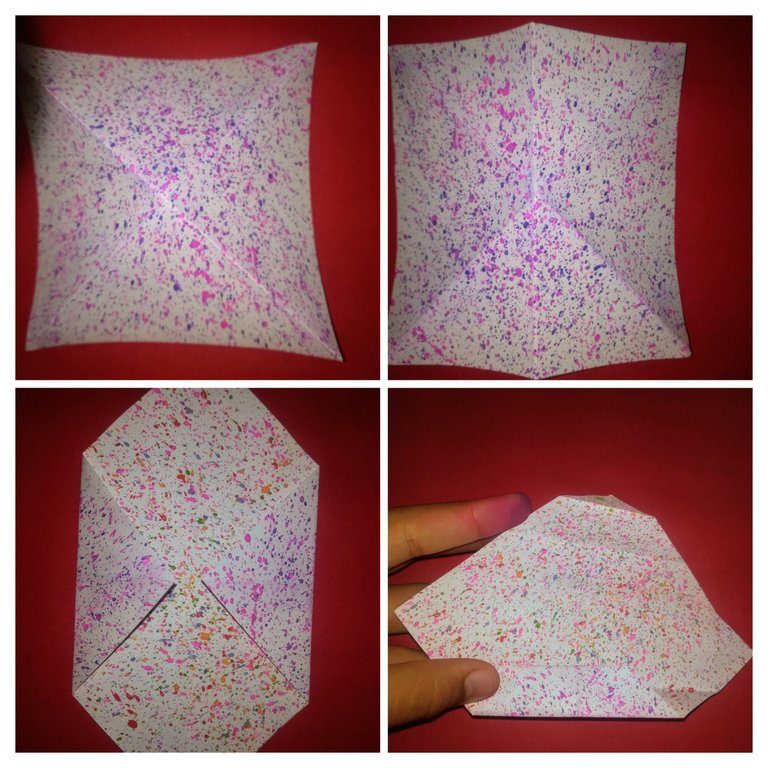
Segundo paso:
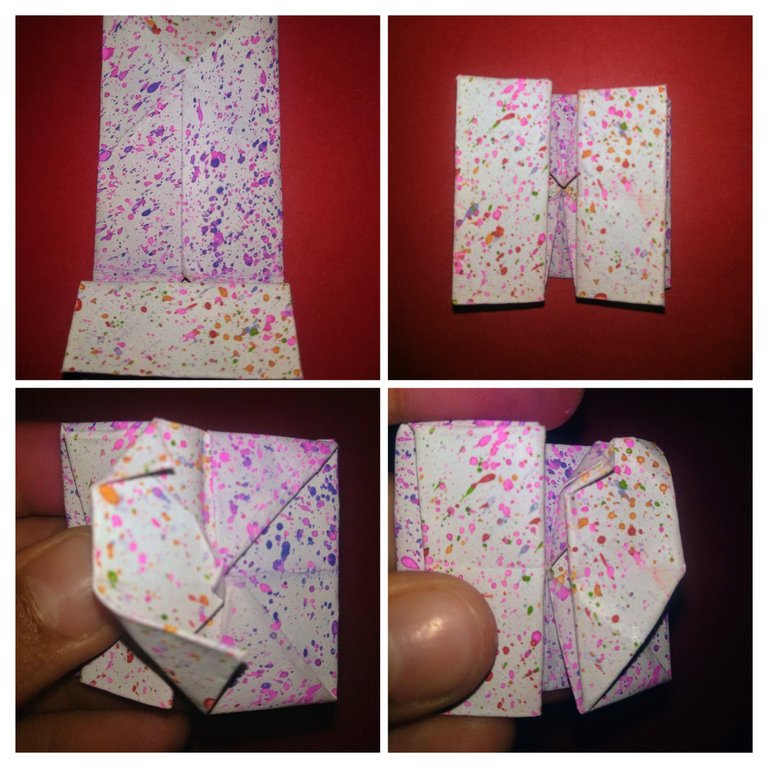
Doblamos el papel en forma de cruz, punta con punta y después lo doblamos por la mitad y por la otra mitad, posteriormente agarramos cualquier punta y la llevamos hacia el centro y agarramos otra punta más y hacemos lo mismo, con ese punto de referencia lo volvemos a doblar cómo se ve en la imagen y lo volvemos a doblar hacia el centro.

Tercer paso:
Ya que quede como si fuera una corbata, vamos a darnos cuenta de que en el medio tiene un pequeño doble, lo vamos a doblar para se vea un poquito mejor y desde ese punto de referencia doblamos el papel en forma diagonal que quede derechito cómo se ve en la foto y eso lo hacemos por los dos lados, en cada esquina vamos a darnos cuenta de que queda como un estilo de silla, eso lo vamos a doblar hacia adentro para que ayude a cerrarlo como se ve en la foto, ahora dobla las esquinas sobresalientes hacia dentro, por el medio también como se ve en la foto.

Cuarto paso:
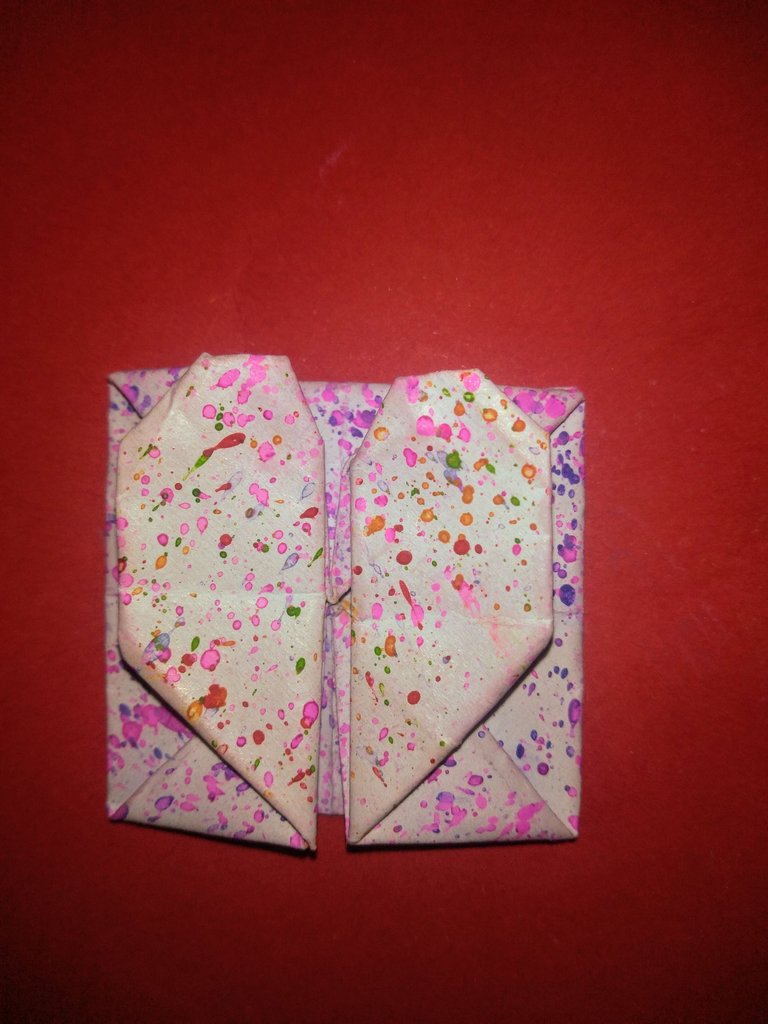
El cuadro que nos quedó lo vamos a doblar hacia la mitad cómo se ve en la foto, así quedó los dos lados doblados completamente, ahora doblamos dos esquinas para que quede la forma del corazón como se ve en la foto y por adelante también le doblamos una pequeña esquina y lo hacemos del otro lado también.
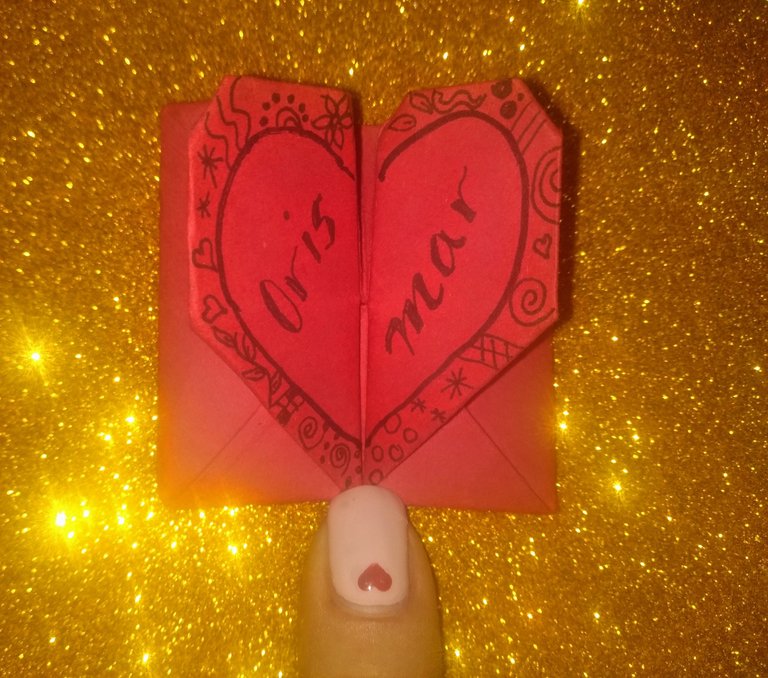
Así quedó nuestra linda cajita sorpresa en forma de corazón, espero que les sirva para ser unos regalos muy bonitos, le metí unos anillos que pague con mis HBD para regalar a mi prima.
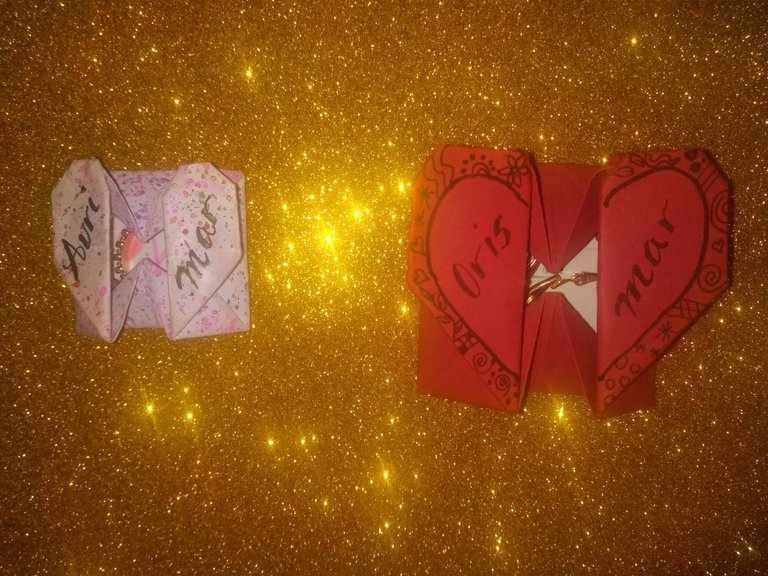
Con el mismo procedimiento le hice una cajita con cartulina escolar roja a mi hermana Orismar que también estaba de cumpleaños el mismo día de mi prima y mi abuela. A esta cajita le hice unos dibujos por el alrededor del corazón para qué resaltará más, porque no le eche acuarelas. También le metí unas lindas argollas que cancele con mis #HBD.
Cuando se las entregué, las dos quedaron muy contentas con sus regalos, pero se me olvidó tomarles la foto.
Espero que les haya gustado mucho, nos vemos próximamente en otra publicación, espero que estén muy, pero muy bien, adiós.

Origami heart-shaped box
Hello my dear friends of this beautiful and talented community @diyhub, today I'm going to tell you how I made a nice surprise box, with the origami technique in the shape of a heart, for some gifts, I hope you like it and that you see the procedure because you can also do it yourselves, let's start.
💝 Materials 🎁
To make this craft, we need few things, like:
Watercolor paper or cardboard.
Watercolors.
Brush.
Ruler.
Scissors.
Pencil.
First step:
We cut the sheet the size we want it, in this case I made it 10 cm by 10 cm, then I painted with watercolors, with a brush I was taking several colors and throwing sparks, it was very nice and with the purple color that I love and my cousin too, but if you do not want to paint it you can leave it like that, it still looks nice.
Second step:
Fold the paper in the shape of a cross, point to point and then fold it in half and in the other half, then grab any point and take it to the center and grab another point and do the same, with that reference point we fold it again as shown in the image and fold it again to the center.
Third step:
Now that it looks like a tie, we are going to notice that in the middle there is a small double, we are going to fold it to make it look a little better and from that reference point we fold the paper diagonally so that it is straight as seen in the photo and we do it on both sides, in each corner we are going to realize that it is like a chair style, we are going to fold it inwards to help close it as shown in the picture, now fold the protruding corners inwards, in the middle also as shown in the picture.
Fourth step:
We are going to fold the square in half as shown in the photo, so the two sides are completely folded, now we fold two corners to make the shape of the heart as shown in the photo and in the front we also fold a small corner and we do it on the other side as well.
This is how our cute little heart-shaped surprise box turned out, I hope it will be a very nice gift, I put some rings in it that I paid for with my HBD to give to my cousin.
With the same procedure I made a little box with red school cardboard for my sister Orismar who also had a birthday the same day as my cousin and my grandmother. I did some drawings around the heart to make it stand out more, because I didn't use watercolors. I also put some pretty rings in it that I cancelled with my #HBD.
When I gave them to them, they were both very happy with their gifts, but I forgot to take a picture of them.
I hope you liked it a lot, see you soon in another post, I hope you are very, very well, bye.
Este post fue realizado en mi teléfono Motorola One, usando las aplicaciones Canva para la edición de las imágenes. Traducción con DeepL.
This post was made on my Motorola One phone, using Canva applications for image editing. Translation with DeepL.
Hermosísimo trabajo!! Eres muy talentosa mi niña. Felicidades 💐🌺🌷🌹
Gracias qué bueno que te haya gustado.
Te quedo muy linda la cajita mi niña. Gracias por regalarnos tu proceso creativo @ariannamc ✨
!DIY
Gracias me gusta mucho compartir mi trabajo para que los otras personas también puedan hacerlo.
Te quedo linda mi princesa, a la tercera va la vencida.
Vi como practicaste varias veces para lograrlo.
Sigue creciendo y creando. Dios te bendiga 🙏
Gracias mami y sí tuve que practicar y practicar para qué me quedara bien y seguiré practicando y creando para hacerlo cada día mejor.
You can query your personal balance by
!DIYSTATSCongratulations @ariannamc! You have completed the following achievement on the Hive blockchain And have been rewarded with New badge(s)
Your next target is to reach 30 posts.
Your next target is to reach 300 upvotes.
You can view your badges on your board and compare yourself to others in the Ranking
If you no longer want to receive notifications, reply to this comment with the word
STOPTo support your work, I also upvoted your post!
Check out our last posts:
@tipu curate 3
Upvoted 👌 (Mana: 45/75) Liquid rewards.
Hola muchas gracias por el apoyo.
Hola muchas gracias.
A really cute little box that could be used as a gift. Bravo.
Gracias me alegra que te haya gustado y esto sirve para hacer pequeños detalles .
Eres una niña muy talentosa! 😊🤗
Está super linda la cajita, me gustó muchísimo...
Your creativity is great. Thank you for sharing.