Hello, dear readers
It’s woodworking time!
Buen día, estimados lectores.
¡Es hora de trabajar!
All things must come to an end. This is the case with this project. It's been a blast and a learning experience. Tackling issues on my own and surmounting them, it's just bliss. Here are the last pieces of work and a little sound test for the cuatro. Thanks to all those kind hivers who stopped by and left their upvotes and kind comments. I will be publishing the next projects for instruments as voice has run and I've been getting requests. Enjoy your time around here!
Todo tiene su final. Es el caso de este proyecto. Ha sido una experiencia edificante. Resolver los problemas que surgieron por mi cuenta ha sido una belleza. Aquí están los últimos detalles del trabajo y una pequeña muesta de sonido. Gracias a todos los hivers amables que pasaron a dejar su upvote y comentatarios. Publicaré los próximos proyectos ya que se ha corrido la voz y ahora tengo otros pedidos. ¡Disfruten de este último post sobre este cuatro!
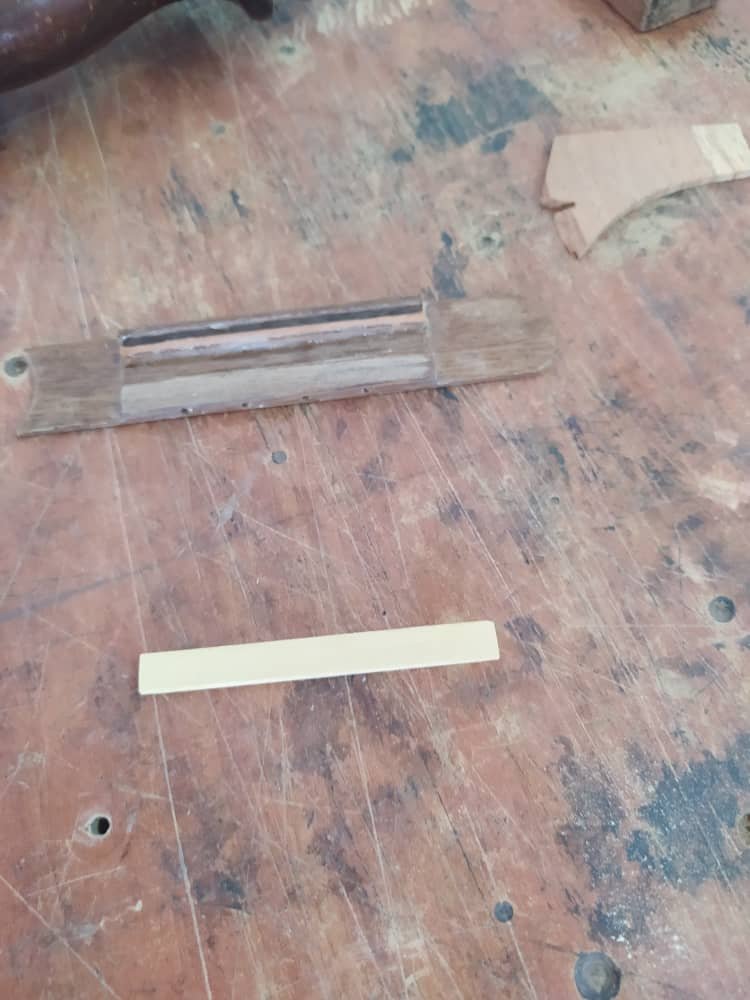
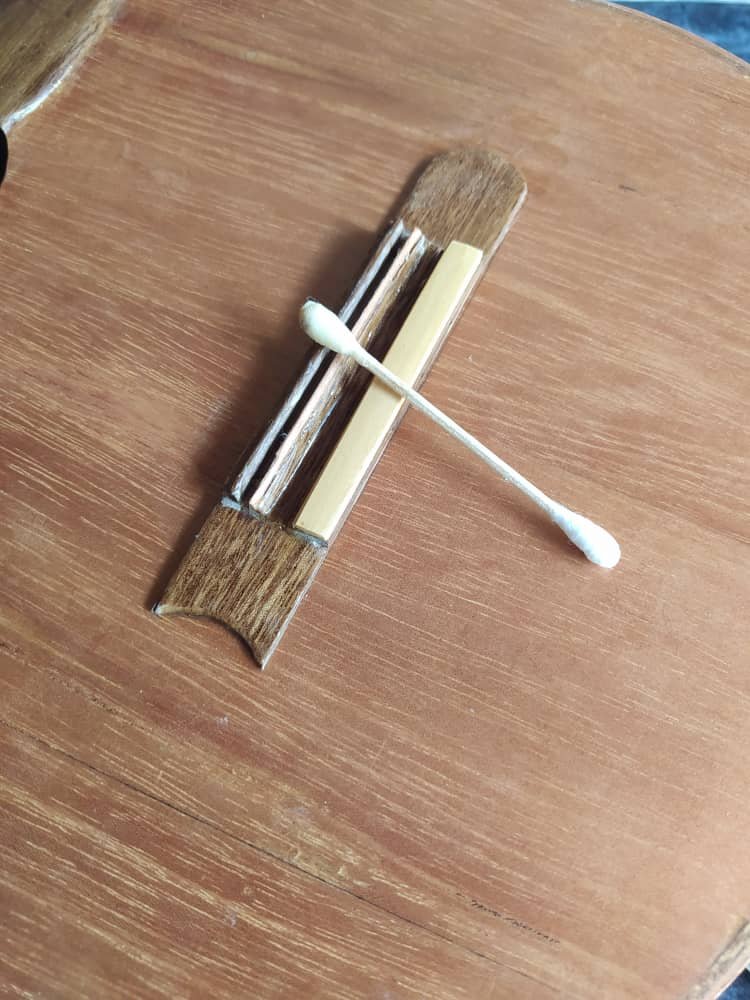
For these final details, I went back to the workshop. I added a reinforcement to the bridge. This way when the stings are tied up, they will have a studier support to grip. The second piece is the nut. I measured the distance between the strings and used some saws of different widths to open the slots.
Para afinar los últimos detalles, fui otra vez al taller. Se añadió un refuerzo al puente para dar un soporte más ancho a las cuerdas. La segunda pieza a terminar era la cejuela. Aquí se midió el espacio entre las cuerdas y se abrieron las ranuras con ayuda de hojas de grosores diferentes.
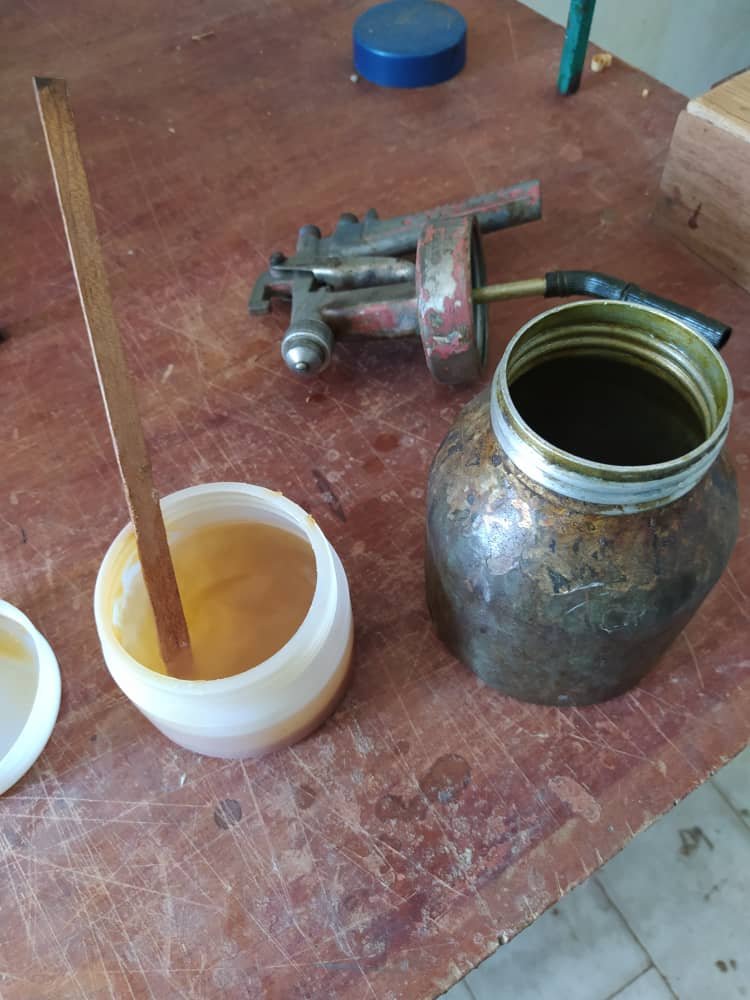
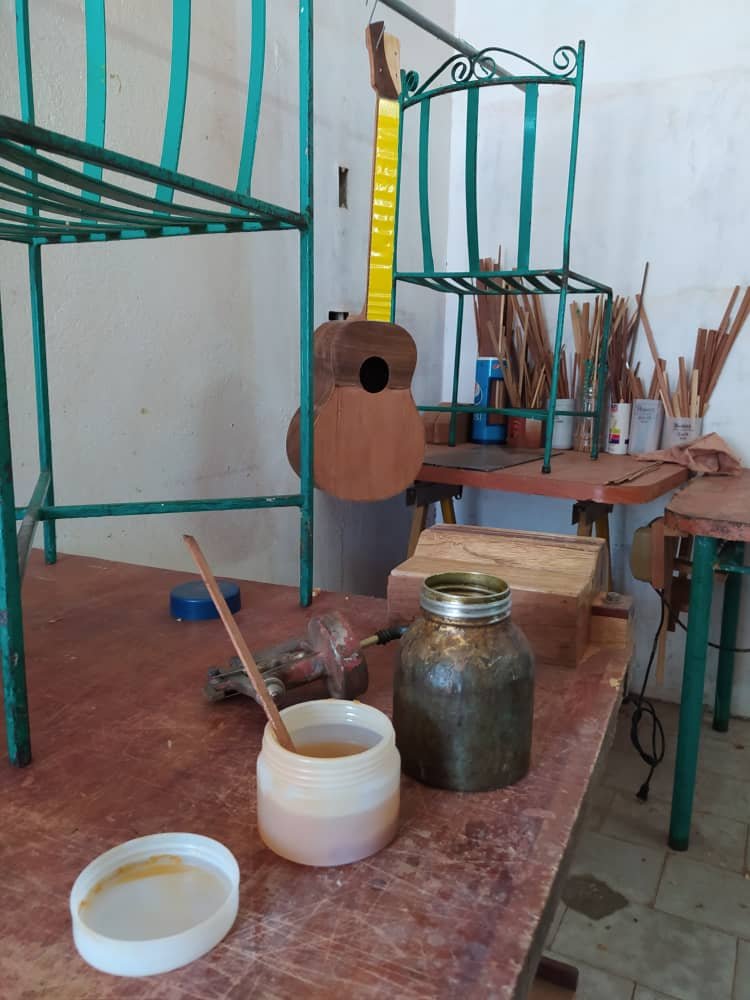
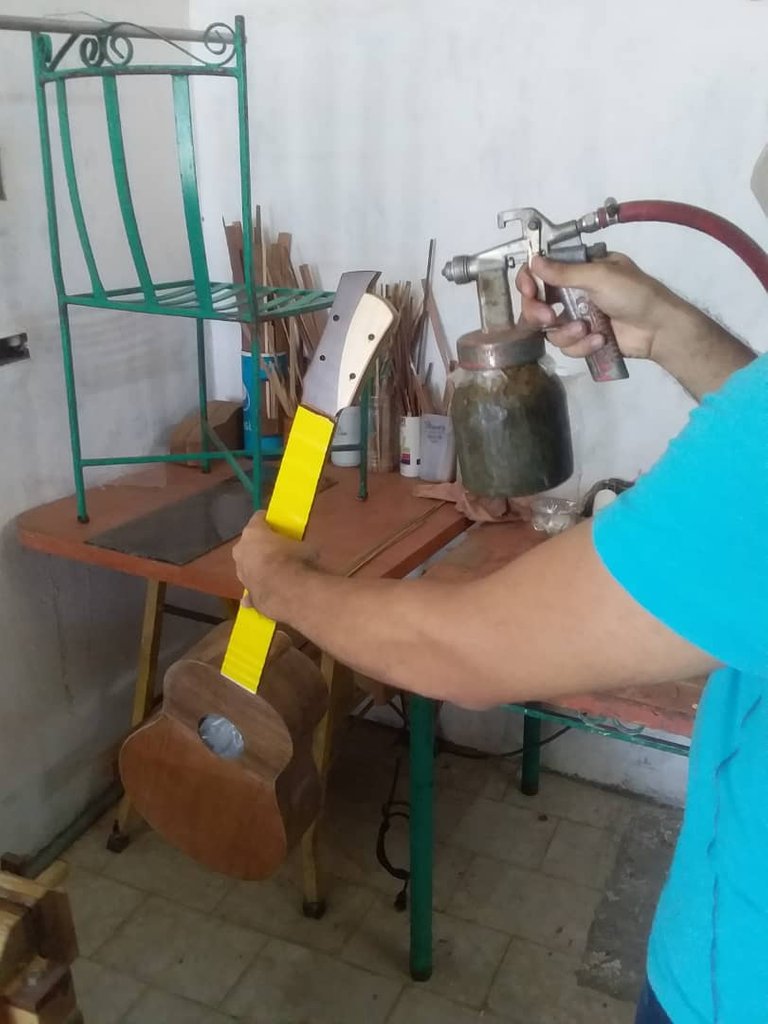
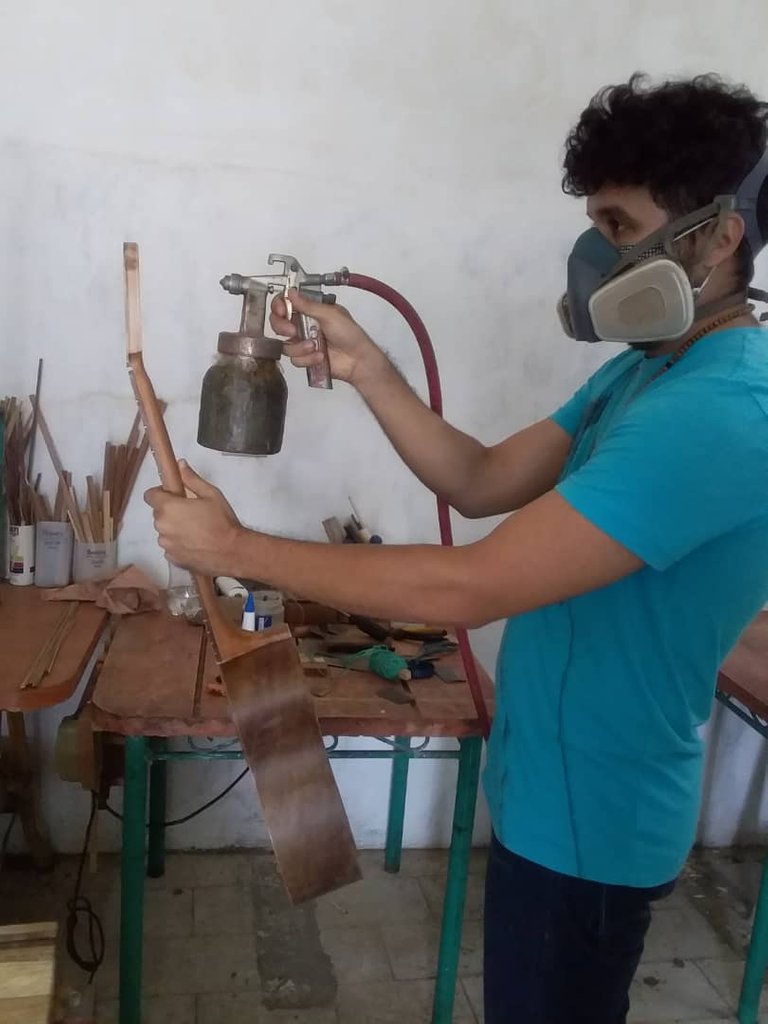
This was the main reason I went to the workshop. I needed to work on the finish of the cuatro. For this, sealant and thinner went into the airbrush and 3 layers of this thin sealant were applied to almost every part of the cuatro. Before doing this, I covered the fretboard and hole of the cuatro to avoid any getting sealant on them. After this, it was just time to go home and get the rest of the stuff ready for set up.
Esta fue la razón principal de mi visita al taller. Había que terminar el acabado del cuatro. Se aplicó sellador diluido en toda la superficie. Fueron necesarias 3 capas de esta mezcla. Además, antes de aplicarla, se cubrieron las áreas del diapasón y la boca para evitar colocar sellador en estas. Al terminar este proceso, era tiempo de regresar a casa y prepararse para instalar la piezas restantes.
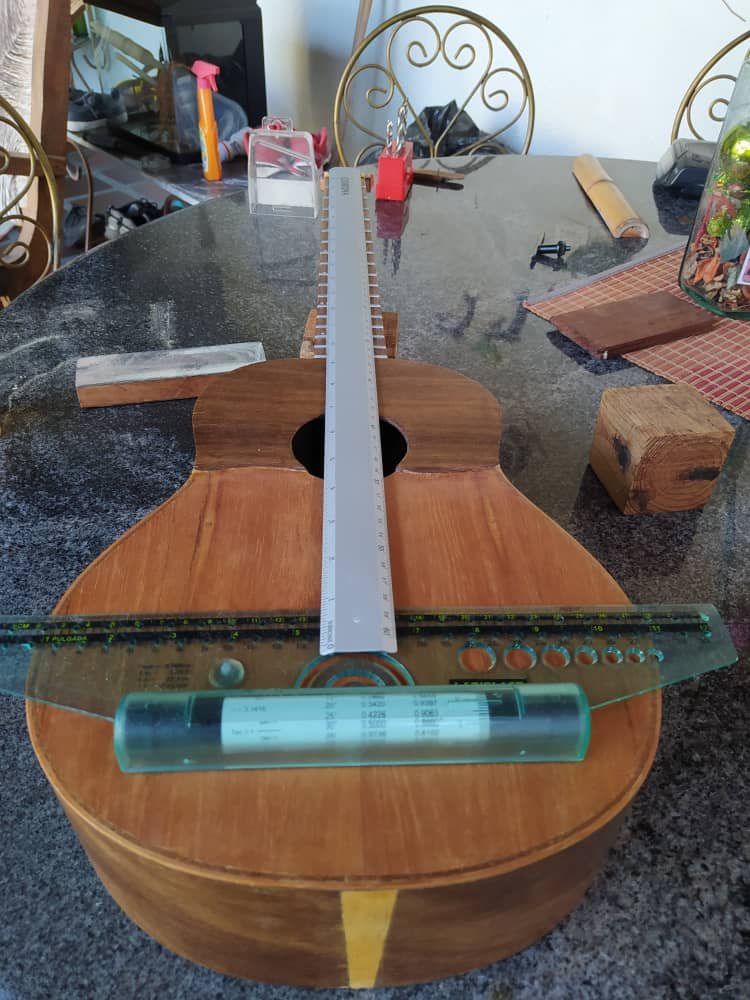
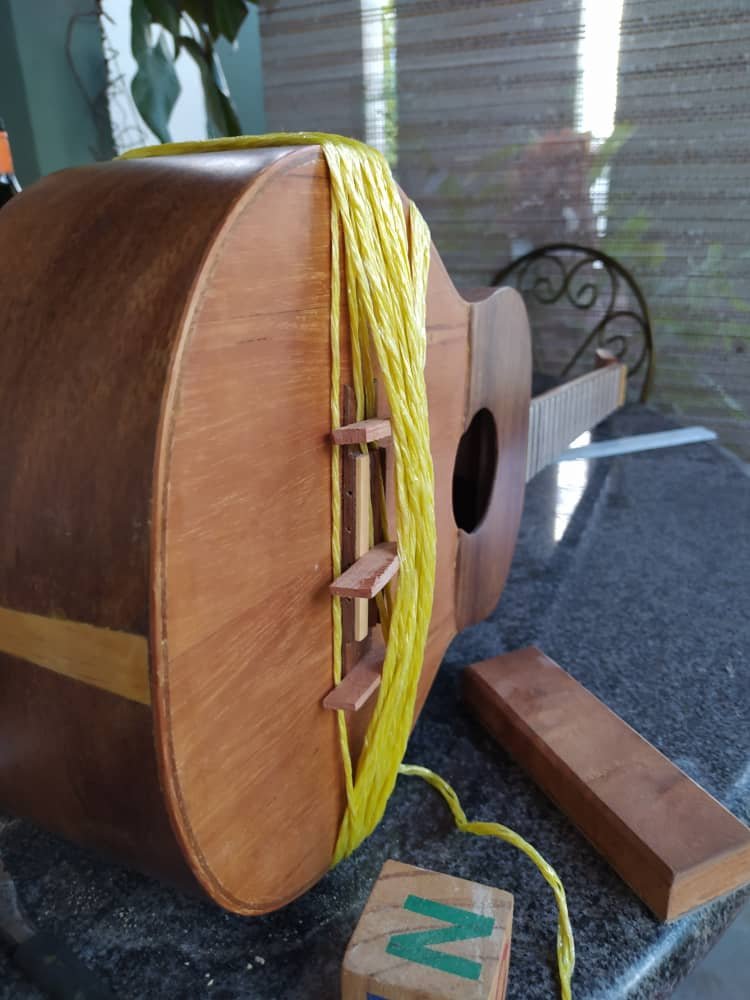
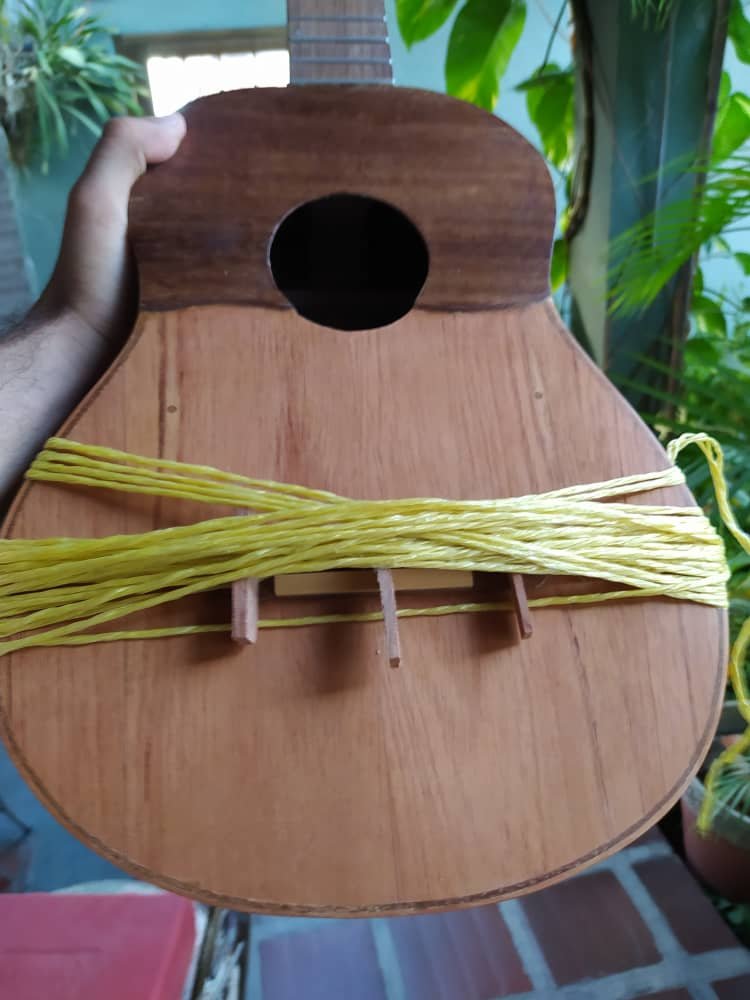
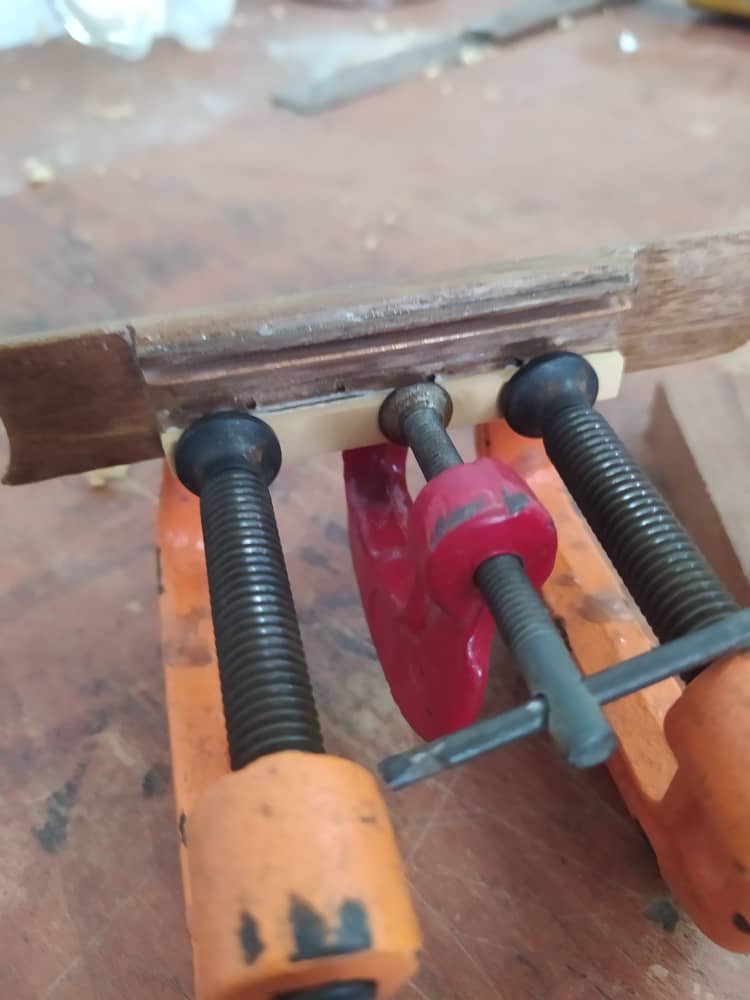
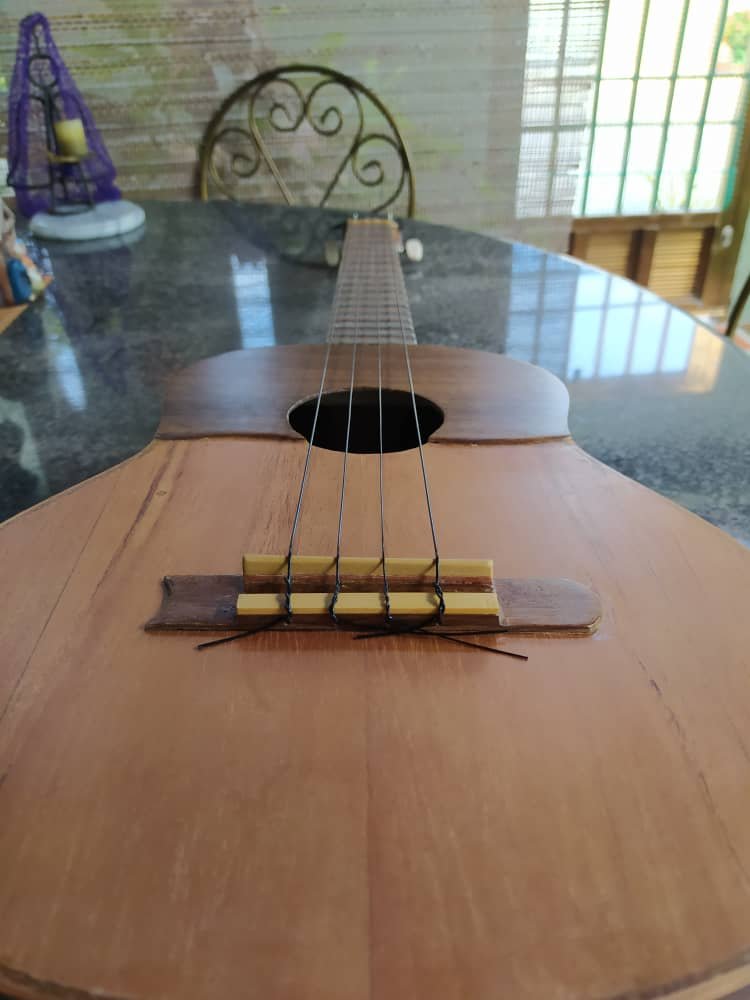
The bridge setup is delicate, but if you have a long ruler it can be done in a second. Basically, you need to measure the distance from fret 0 (the nut) to fret 12. Then, you use the same measure from fret 12 to the sound board. You can use some else to mark the exact place it will be on. I used this other ruler that has a wheel installed. It makes it easier to keep a straight line until the place I needed. After this, you open some hole on the sound board to act as anchors. Then you remove the layer of sealant to have a rough surface and glue the bridge in place. After this, it's time to secure it with some chord and use some pieces of wood apply pressure. This last part is to ensure the bridge is glued tightly onto the sound board. Otherwise, it would come off when the strings are tuned.
Colocar el puente es delicado pero con una regla larga se puede hacer fácilmente. En resumen, se necesita la distancia del traste 0 (cejuela) al traste 12. Luego, esa misma mida su utiliza del traste 12 a la tapa armónica. Se puede usar alguna otra cosa para marcar el lugar de descanso del puente. Yo tengo esta regla que puede rodar sobre la superficie del instrumento. Esto facilita mantener una línea recta. Después de esto, se abren hoyos en la tapa armónica para anclar el puente. Se remueve el sellador de esa parte para tener una superficie áspera y se aplica pegamento al puente. Luego se fija el mismo con cordel y piezas de madera para hacer presión. Esto último asegura que el puente quede bien pegado. De lo contrario, se despegaría al afinar las cuerdas.
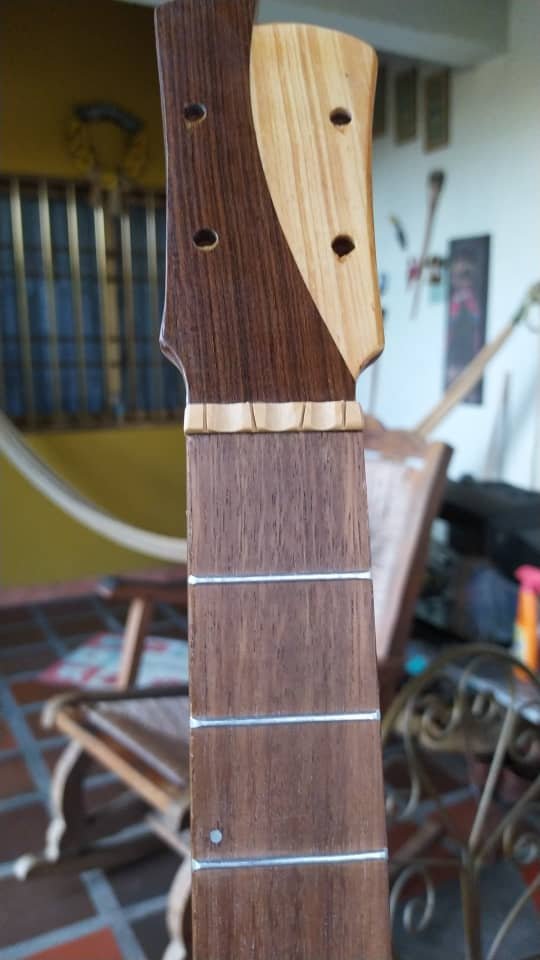
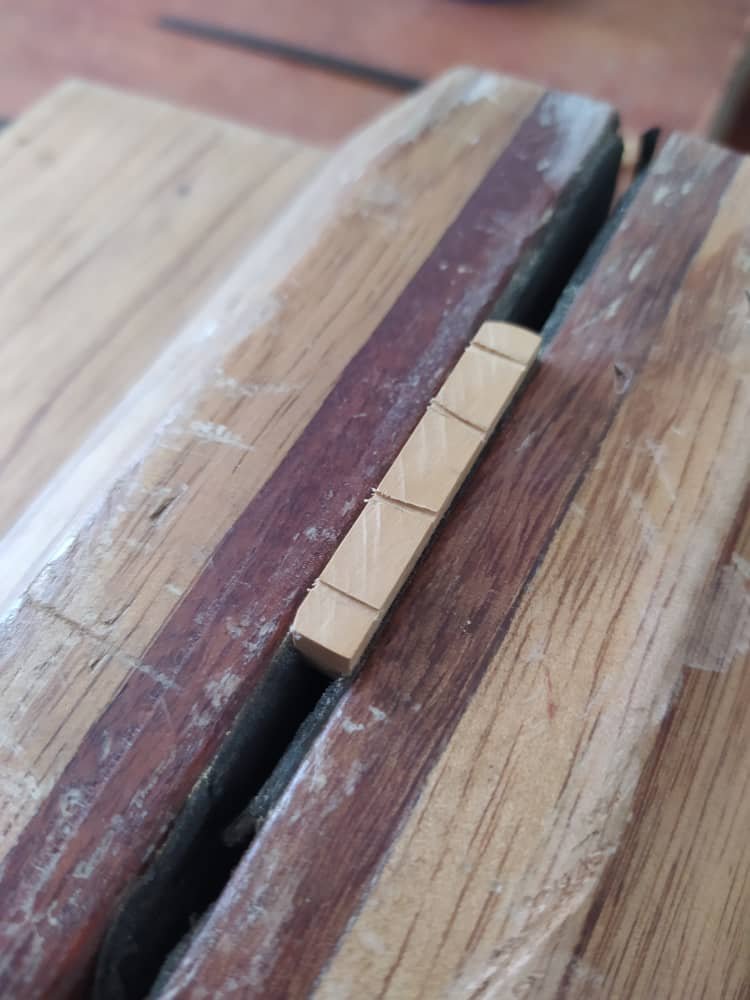
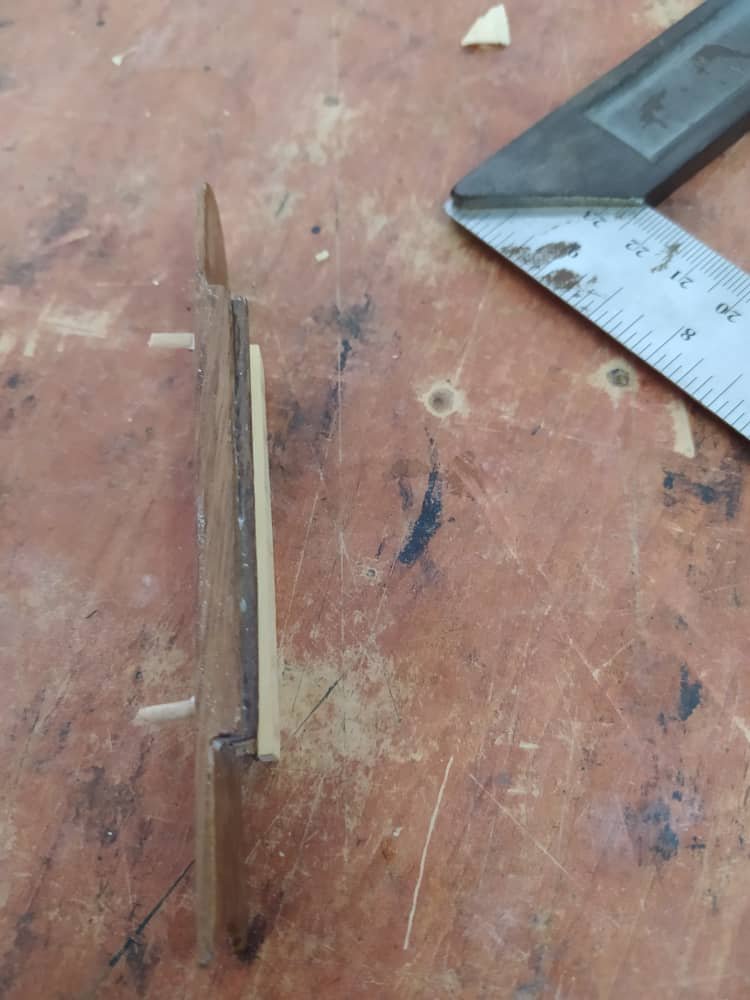
Getting the nut in place is easy as the space between the fretboard and the head stock is already there. You just need to apply glue and get it into place. I also carved a design. I think it looks cool, but that's just my point of view.
Coloca la cejuela es fácil porque el espacio entre el diapasón y el clavijero ya está delimitado. Solo hay que aplicar pegamento y colocarla en su lugar. Le hice un pequeño diseño tallando la madera. Creo que se ve bien, pero eso es mi punto de vista.
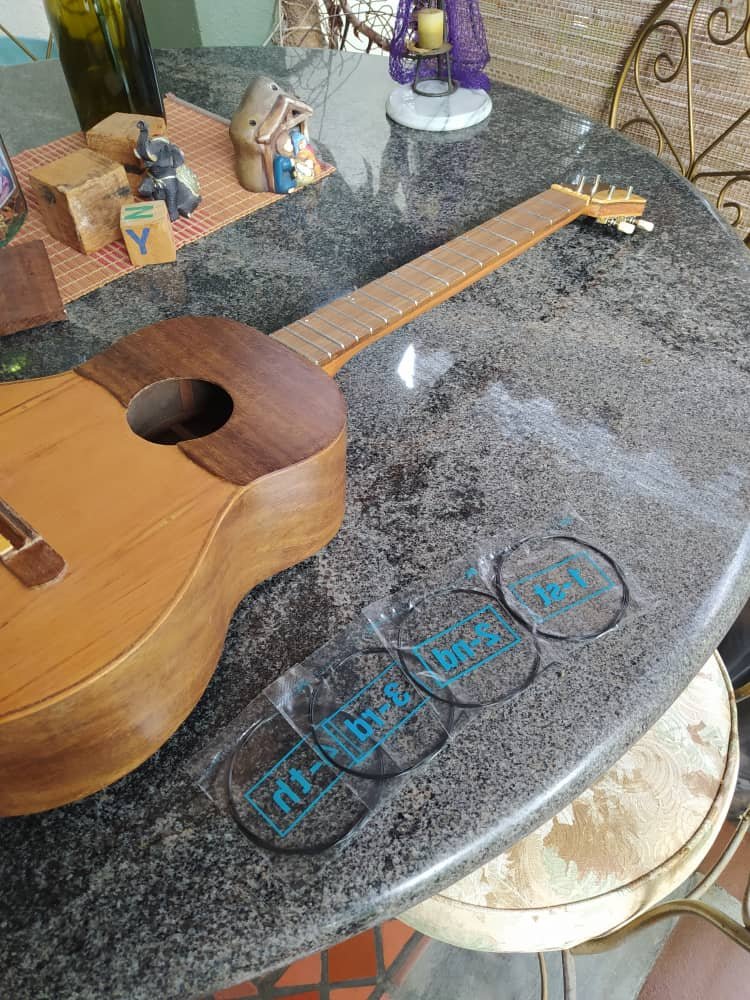
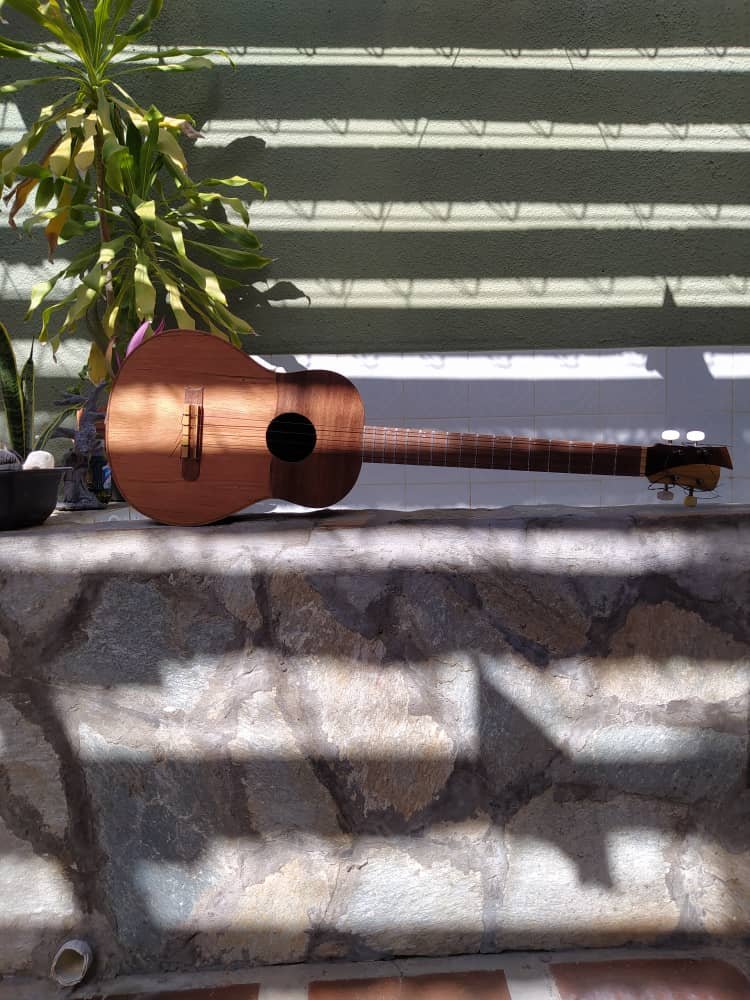
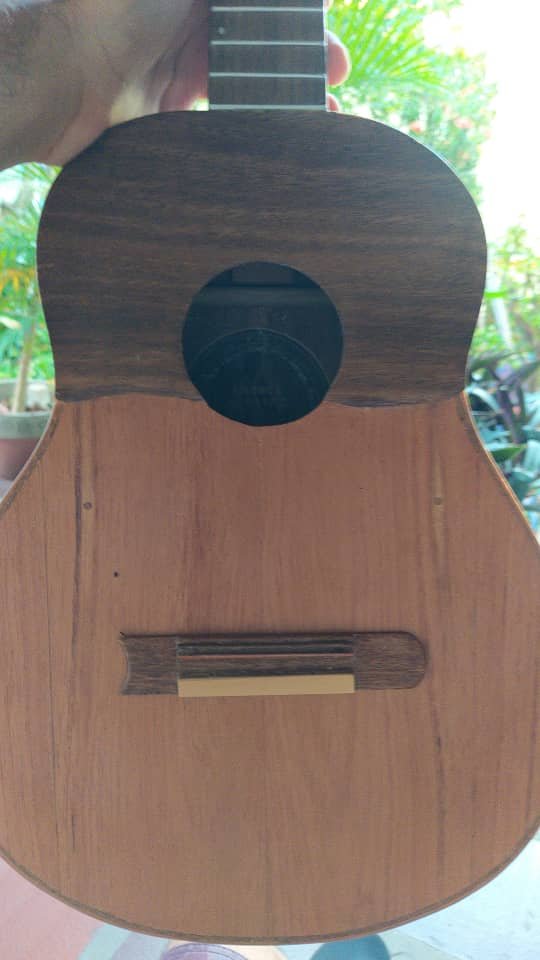
This is the last thing. I applied a little sealant to the briged and sanded it. Then, it was time to put on the strings and tune this beauty. Also, I had to take a good picture to send to the person who asked for this instrument. So that's the last picture.
Esto es lo último. Apliqué un poco de sellador al puente y lo lijé. Luego, llegó la hora de colocar las cuerdas en esta belleza. Además, tuve que tomar una buena foto para enviar a la persona que encargó el instrumento.
And we end this posts with the sound test. Nothing more to say. I'm happy the results were this good. The person who asked for the cuatro is pleased as well. The harmonic progression you listen here is part of a Joropo Sucrense named Azucena composed by my granfather's cousin Francisco "Chico Mono" Cortesía, one of our traditional music composer from Cumaná.
Terminamos con la prueba de sonido. No hay mucho qué decir. Estoy satisfecho con los resultados y la persona quien encargó el instrumento también. La progresión armónica que escuchan es parte de un Joropo Sucrense titulado Azucena, compuesto por Francisco "Chico Mono" Cortesía, primo de mi abuelo, uno de los compositores de música tradicional de Cumaná.
That is all for this entry. Thanks a lot for reading. See you in the next chapter.
Eso es todo por esta ocasión. Gracias por leer. Nos vemos en el próximo post.
All the pictures used in these post were taken with my phone.
Todas las fotos en este post fueron tomadas con mi teléfono.
Hiciste un excelente trabajo, impecable. Felicidades
Muchas gracias. Hay cosas que mejorar, pero todo con paciencia y dedicación.
Nuestras coordenadas:
This is amazing... Talento venezolano 🙏
Thanks a lot. De Venezuela pal mundo! 😂🙌
Congratulations @bertrayo! You have completed the following achievement on the Hive blockchain and have been rewarded with new badge(s) :
Your next target is to reach 1750 replies.
You can view your badges on your board and compare yourself to others in the Ranking
If you no longer want to receive notifications, reply to this comment with the word
STOPCheck out the last post from @hivebuzz:
Hermoso trabajo!
¡Muchas gracias! 🤗
Enhorabuena Andrés por este trabajo tan agotador que realizaste, ahora está acabado el instrumento y felizmente puede ir a las manos de nuevo dueño. Y la prueba de sonido wow wow wow, pues se ha practicado un poco? La canción es muy extraordinaria y tu la tocas igualmente, genial!!
Te felicito 🤗
Es uno de los acompañamientos de Joropos Sucrenses que me sé de memoria. Tocaba la pieza con un amigo flautista que ahora está en Suiza, casado y con hijo. Lo digo así porque nos graduamos de la misma carrera hace 3 años.
Gracias, Gabriela. De verdad que es un trabajo arduo, pero que vale la pena cada minuto.
Y bueno, esta fue la toma número no sé, ja, ja, ja.
¡Gracias otra vez! 🤗
Toma número no sé suele pasar conmigo también 😇
Creo que suele pasar con todos porque o es por un error o porque no nos gusta como sale. 🤣
Normalmente por error...en mi caso 😂 hoy he publicado una canción, a ver si tienes tiempo escuchar y ver donde no está limpio un acorde (quizás dos jejejeje) 😂
Me pasa lo mismo...😂 Siempre un acorde o una nota que queda ahí donde no debería.
Vamos a ver cómo está ese video.
This thing is awesome man! I love it, very well done. I wasn't sure what you were doing at first, I wasn't familiar with the name of the guitar but now I know. The craftsmanship looks awesome! I enjoy the colors of it, with the small differences in shades at the different parts and the head of it having it two tone. Really good work!
Thank you. Don't worry, I know this instrument isn't very famous, but it will get famous as there's too many Venezuelans abroad now, And well, I'm posting this here. That's a good eye for detail. Keep tuned for more projects like this.
Hai juga