English
Intro
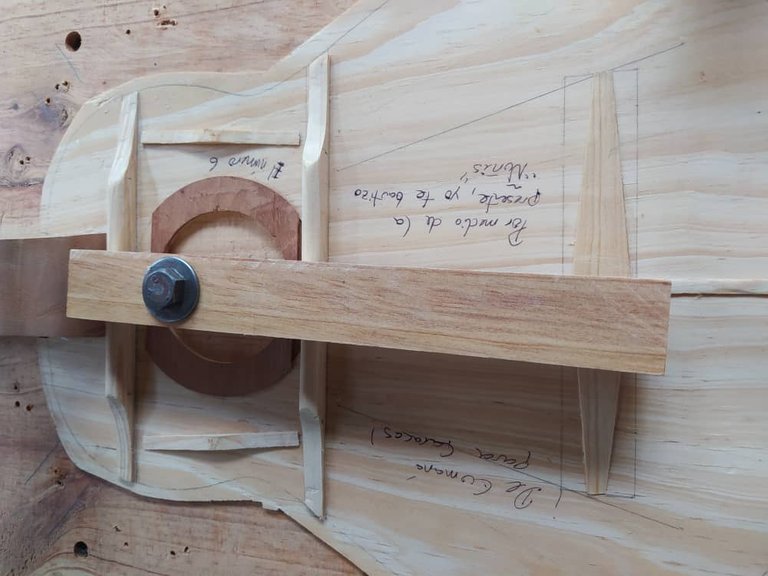
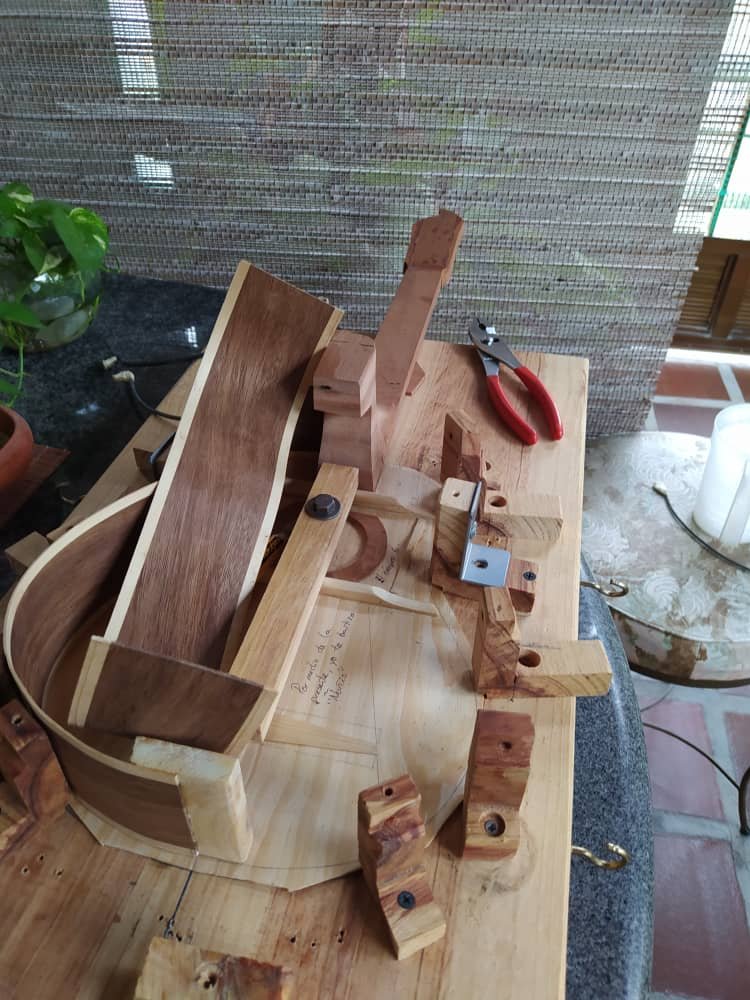
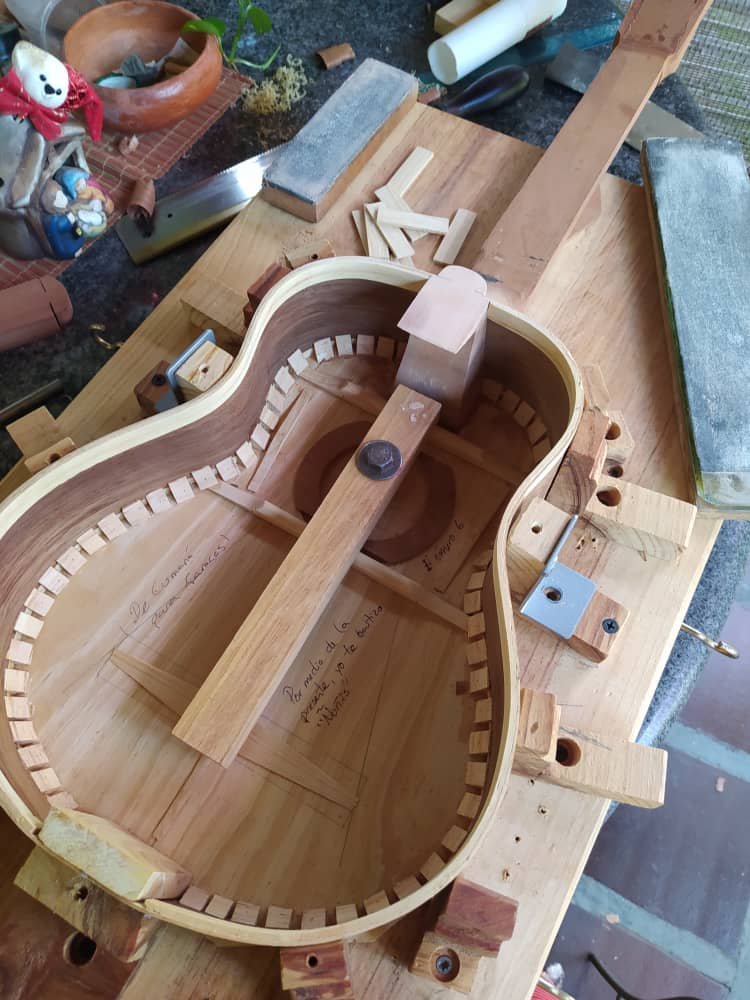
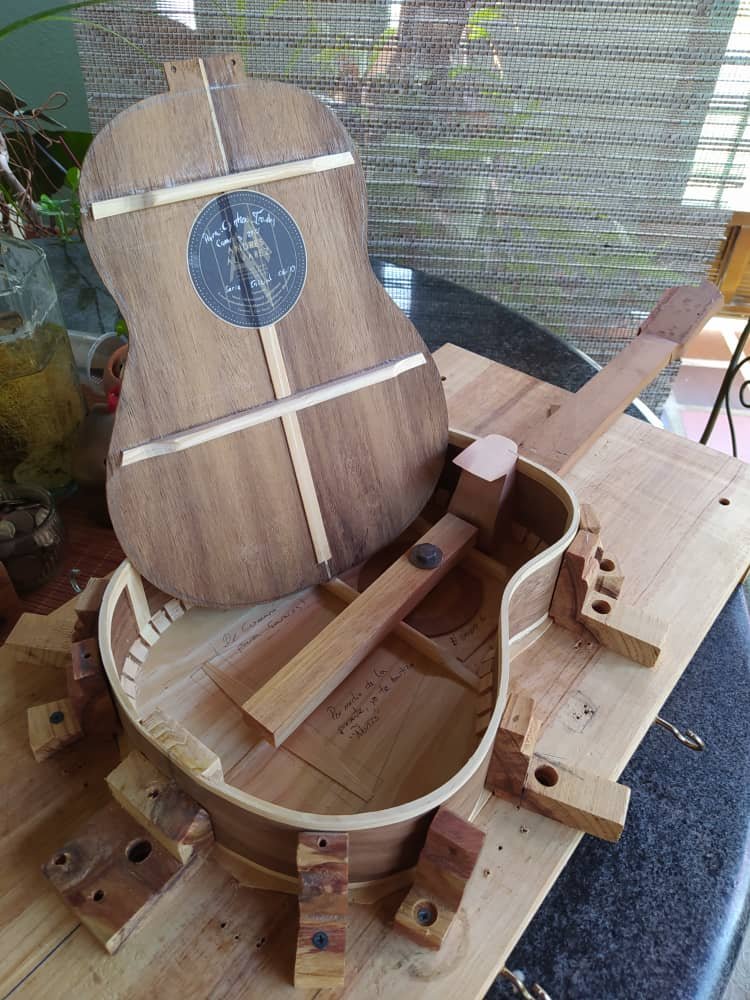
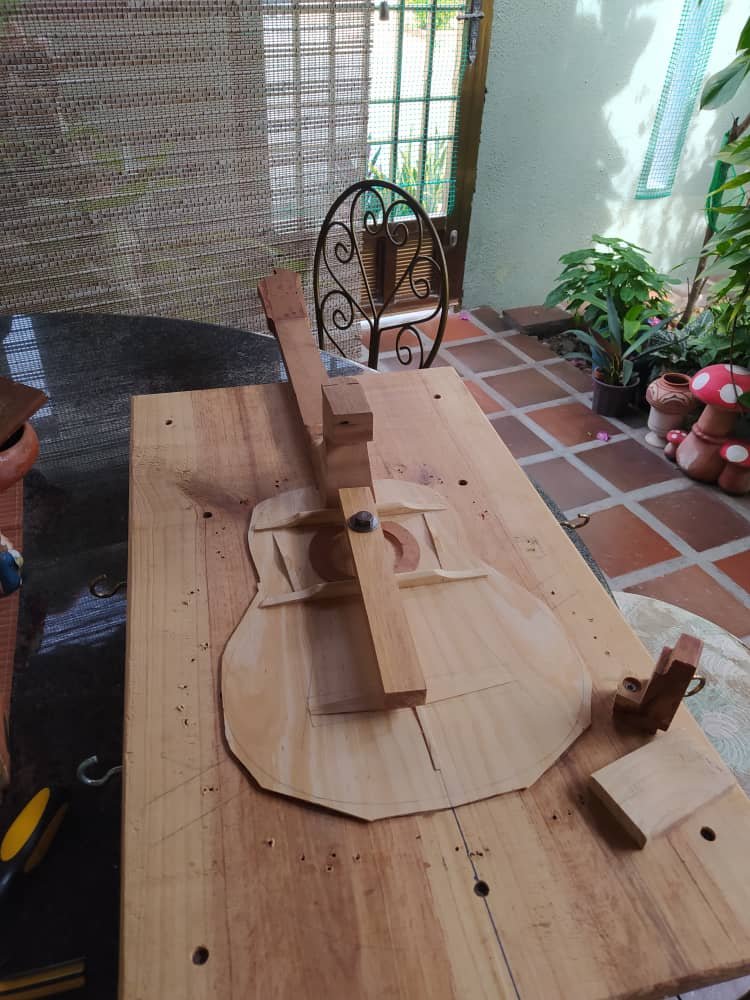
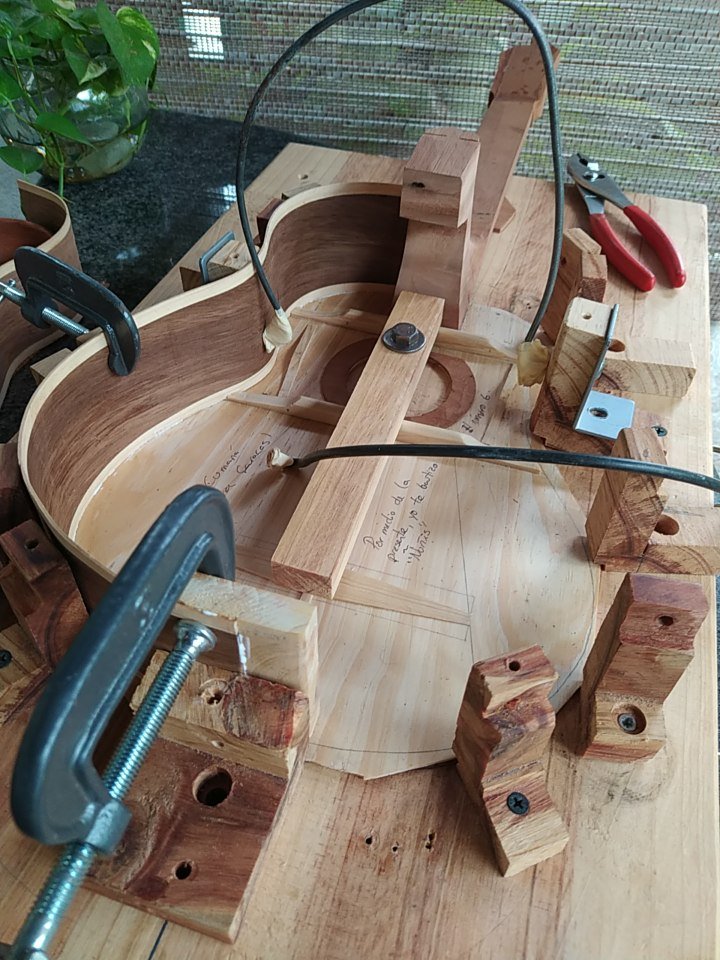
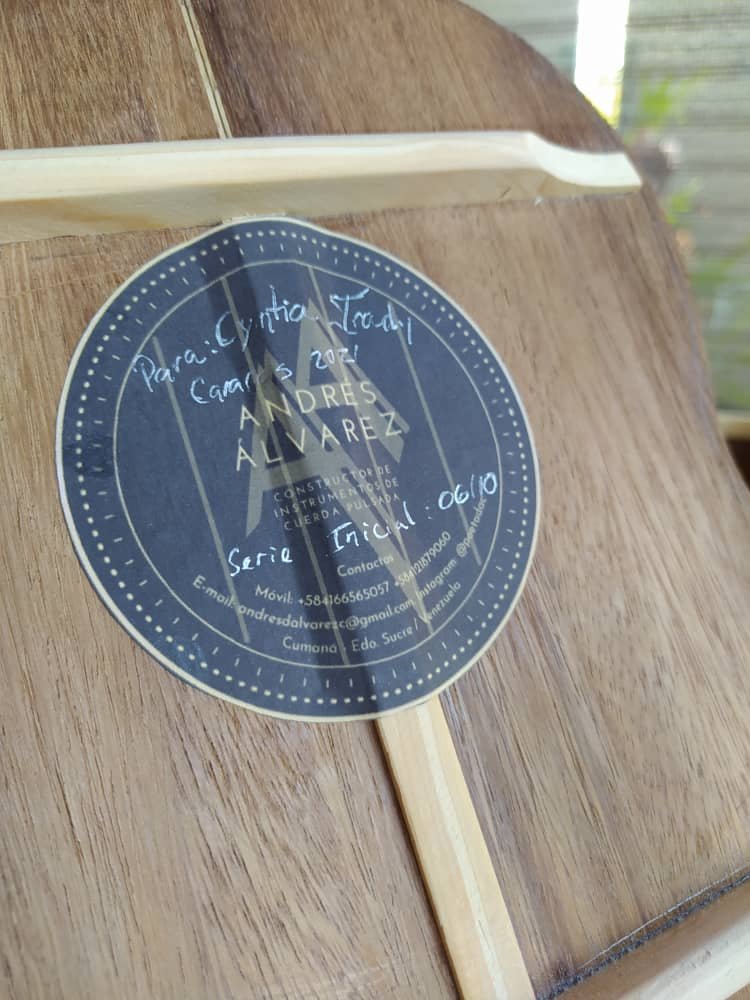
You what this title means! We are back to check on the progress of this instrument. If you are new to this project be sure to check out the first entry by clicking here. Before going into assembly, here's something personal of every luthier. Each handmade instrument has a signature and maybe some words written in the back side of the sound board. Here I put 3: the number, an encouraging message and the name of the instrument.
Tailblock!
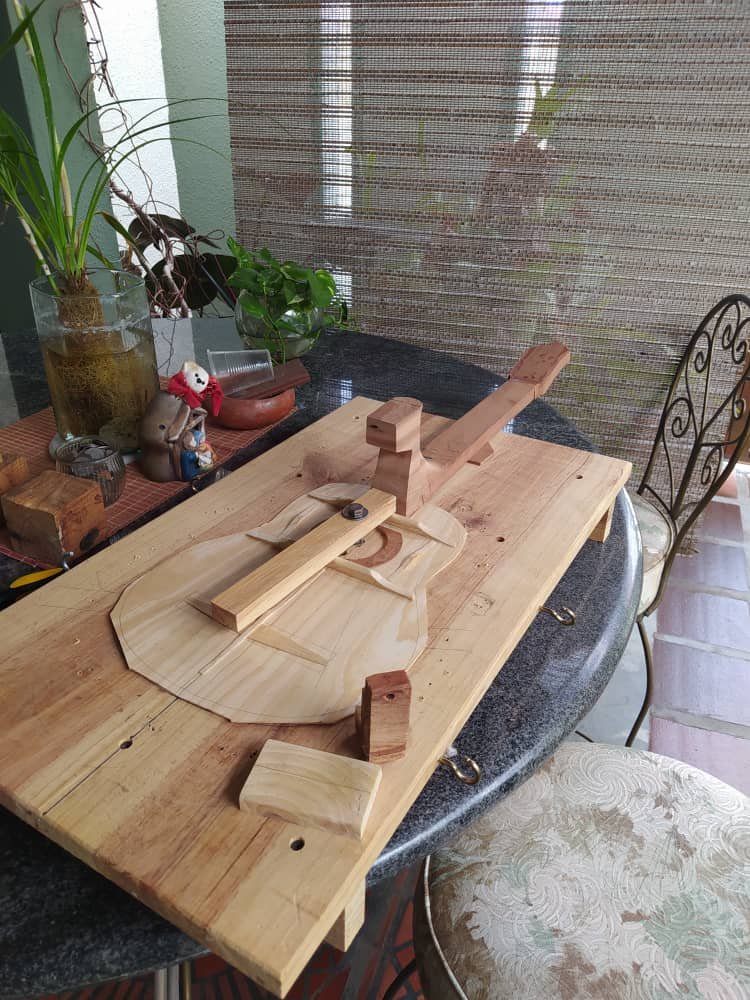
Last time we saw this baby, it was on the solera mould. This means all pieces were ready for assembly. To start, we glue on the tailblock. This piece helps connecting the sides on the bottom on the instrument. Not much to explain here. We try to keep it close to the drawing and aligned the center of the sound board. We apply glue and some pressure of top of it with something that can rest of top of the external heel on the other side of the sound board.
Let's bend it!
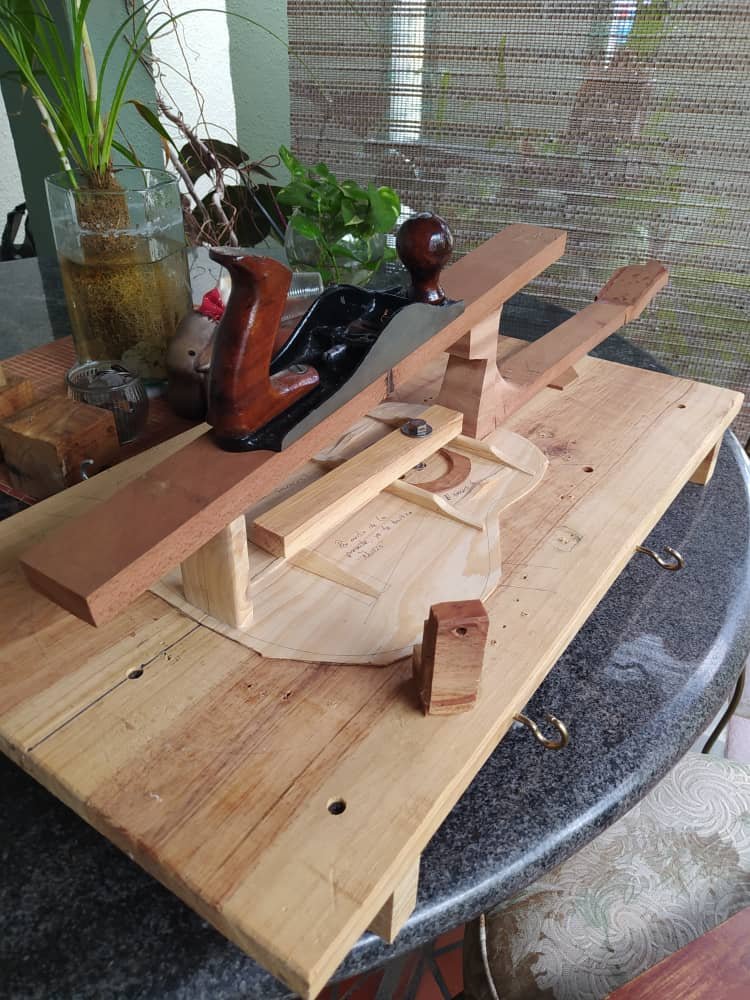
Now, we can start to bend the sides. Remember that we had already thinned them out and checked that they fit in the slots. These are a special kind of side. They have a strip of pine on each side. This means we can't soak them in water, lest we want the pine to fall off. So, we only use a bit of water to wet the brown wood. Since it is already quite thin, only a bit of moisture is enough to help heat do its trick.
Placement
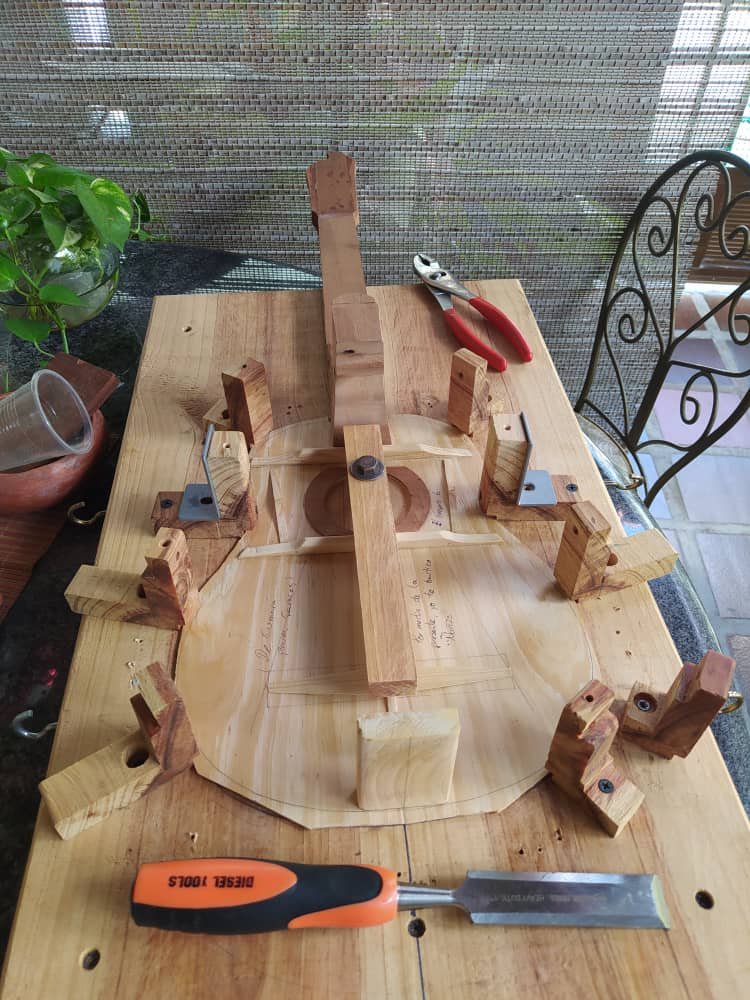
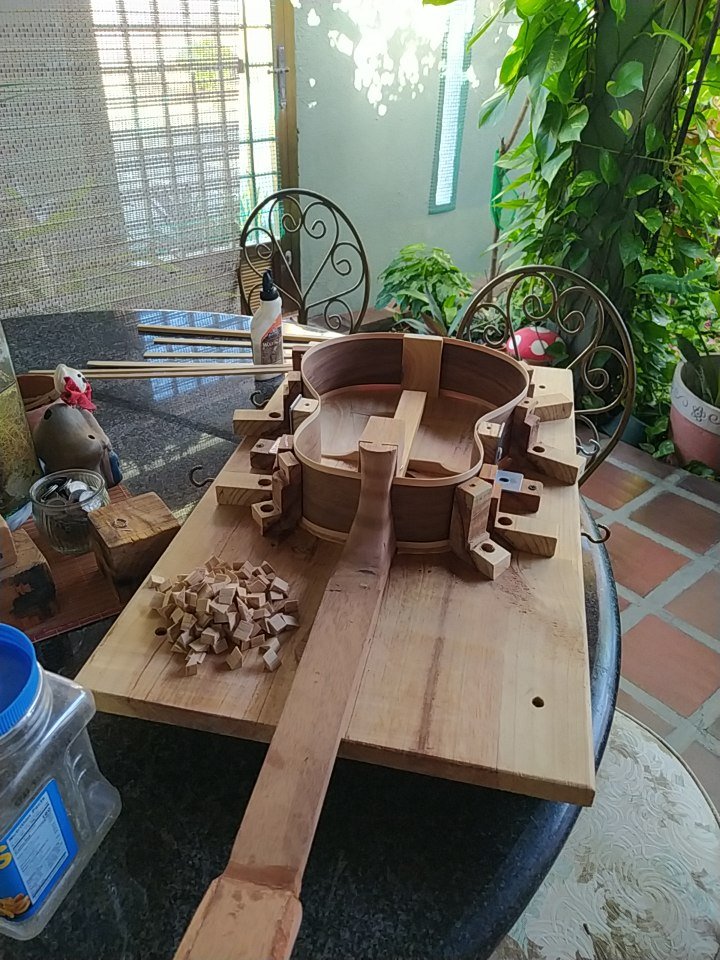
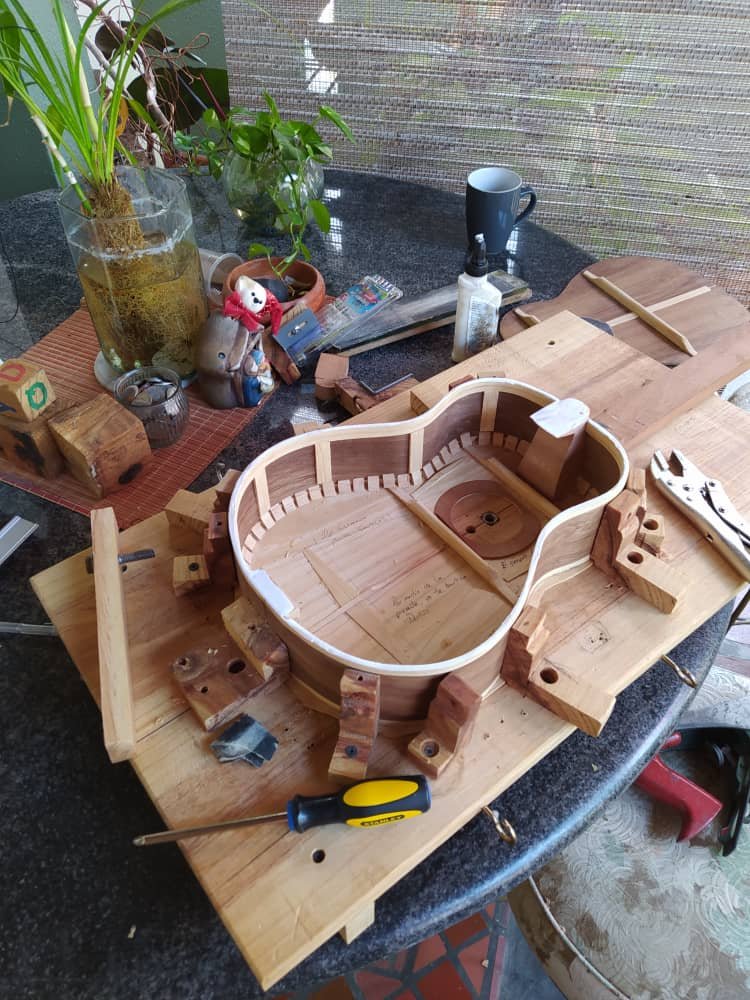
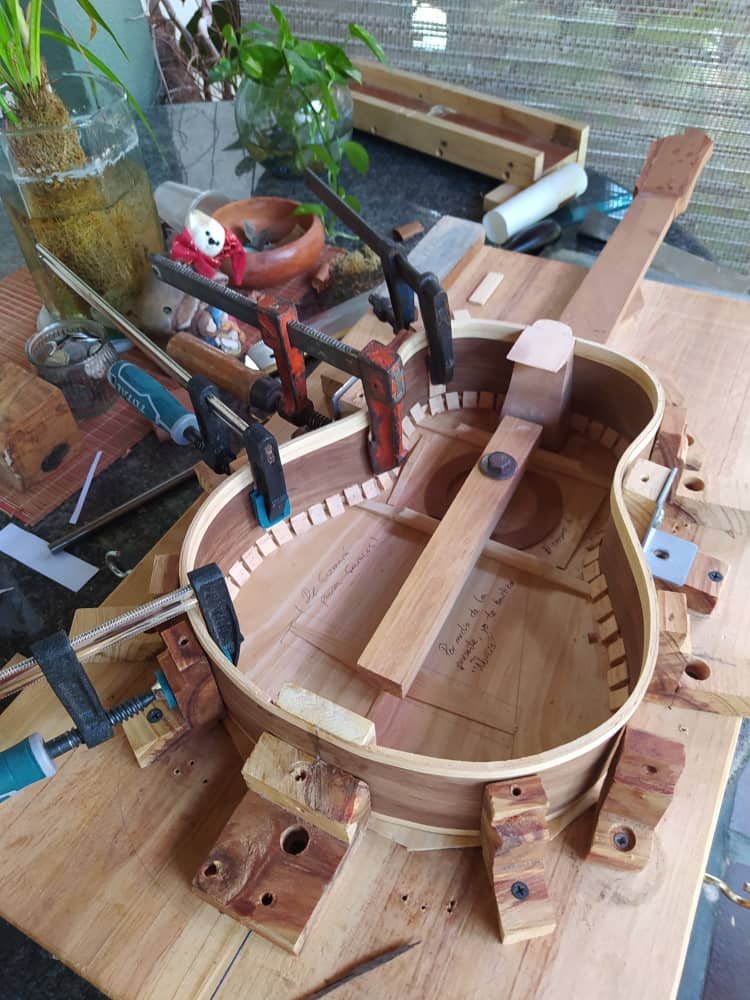
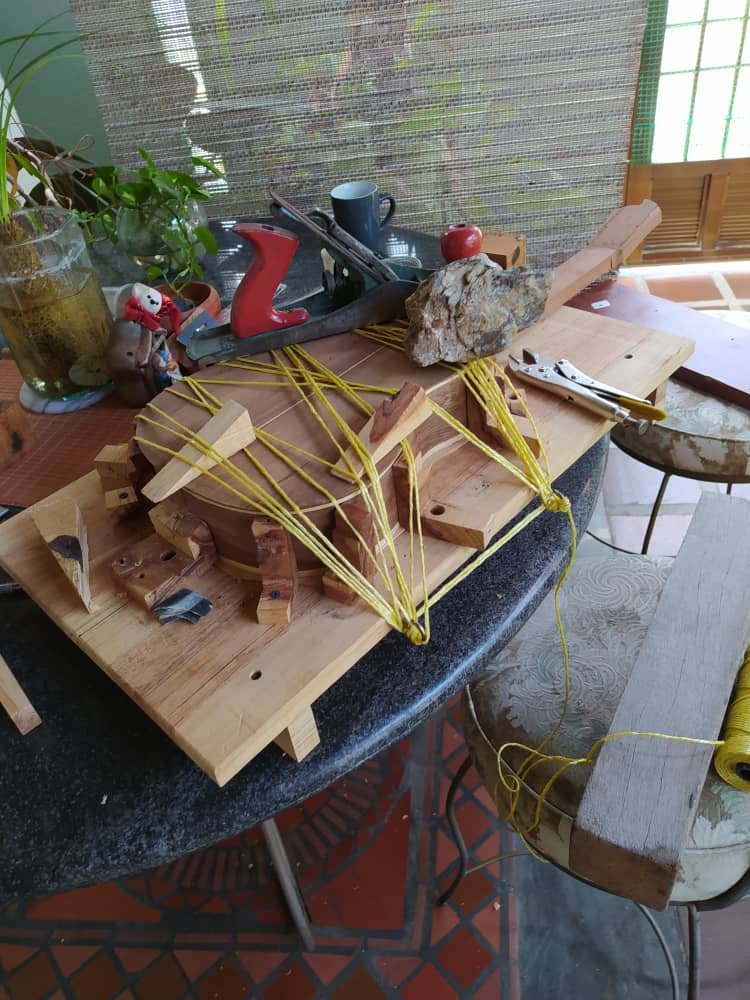
Once these pieces are bent, we let them rest for a moment on their place. Also, it's important to make sure the sides are pressed against the wood angles. This helps us check if there are uneven parts. While we do this, we can measure them on the internal heel to figure out how much to cut in order to fit them. Once all this steps are taken, we can glue the sides to the soundboard.

Kerfing
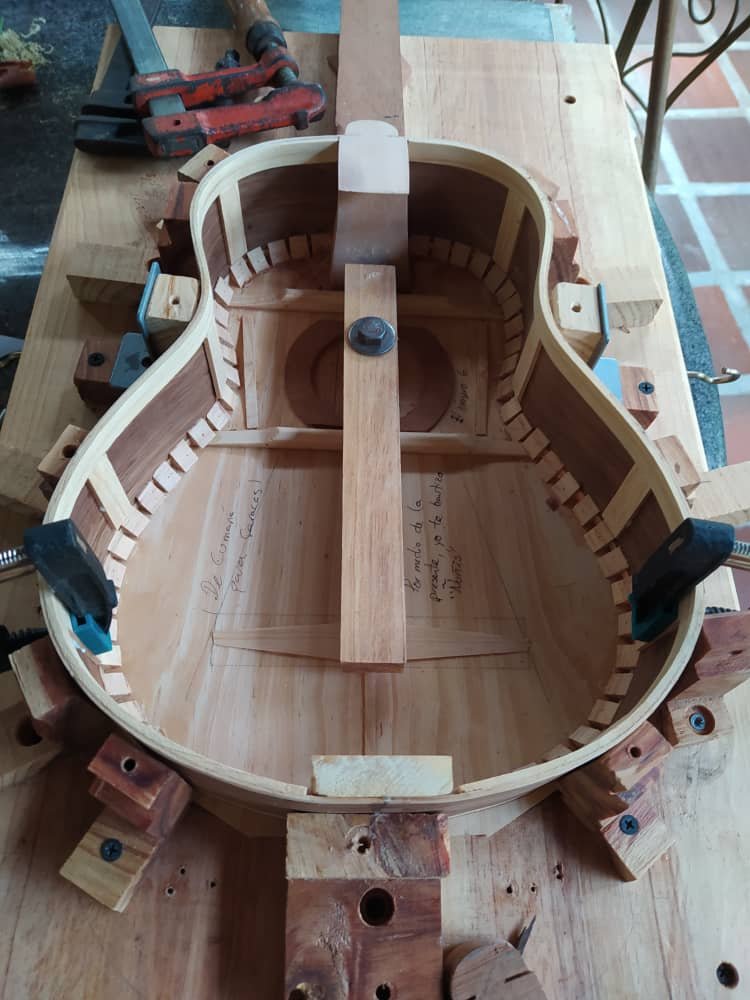
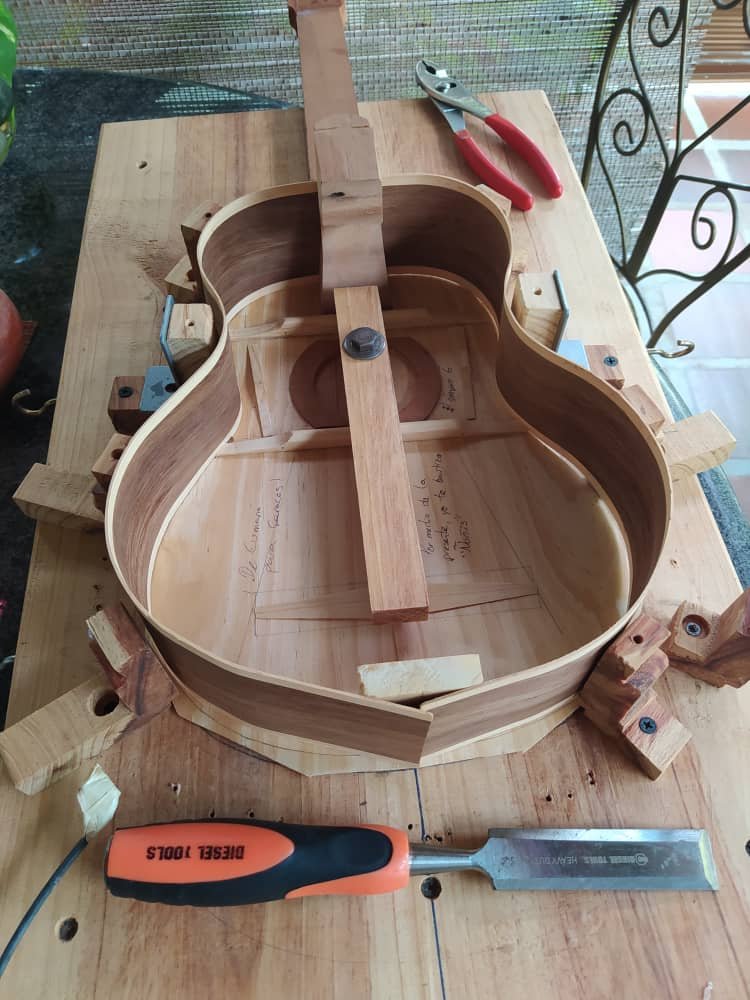
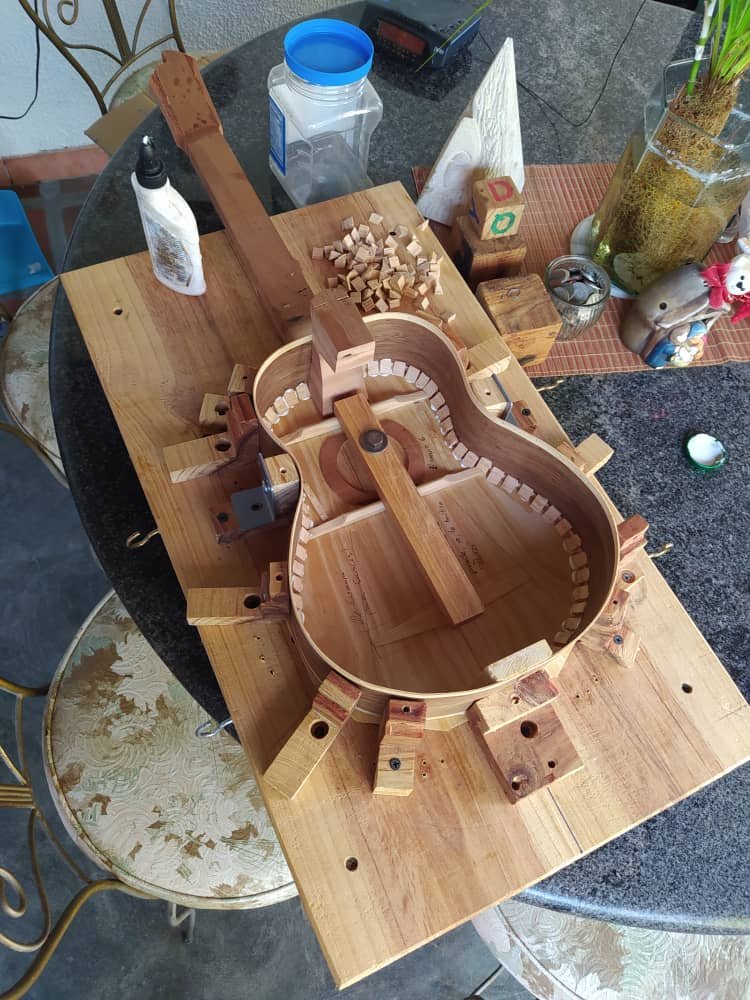
With the sides on their place, it's time to put the kerfing. This usually go on strips in luxury instruments. This isn't one and that also requires more material. So, I'll stick with the ones I had leftover from the previous build. Fortunately, I had enough to fill the space. Their function is to make a bigger contact surface between the sides and the sound board.
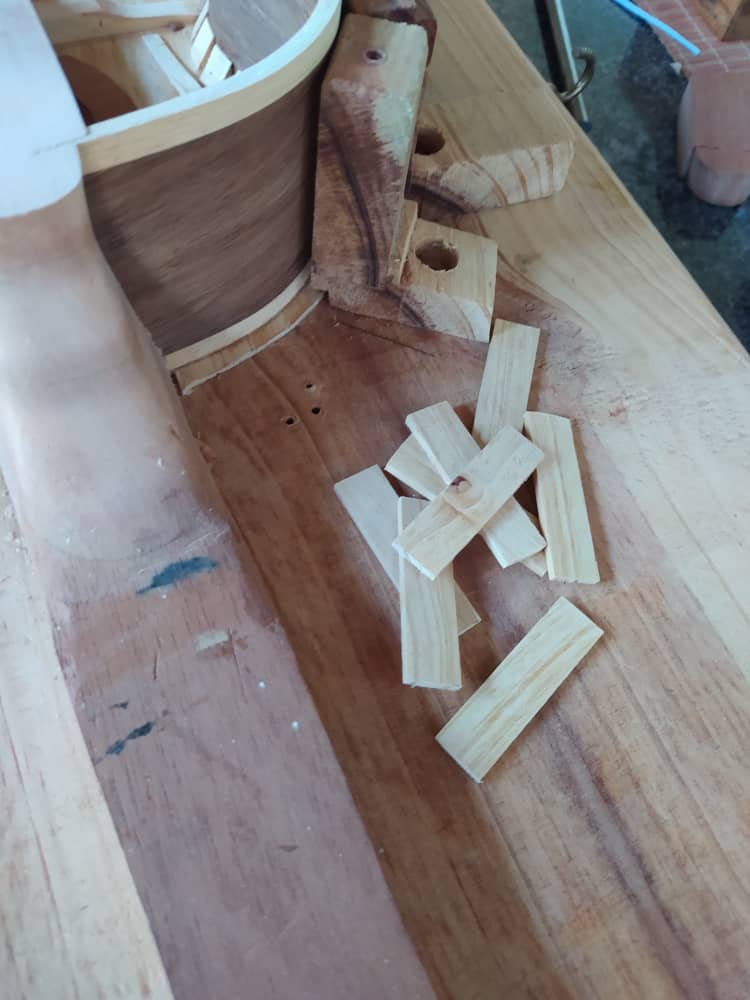
Side reinforcements
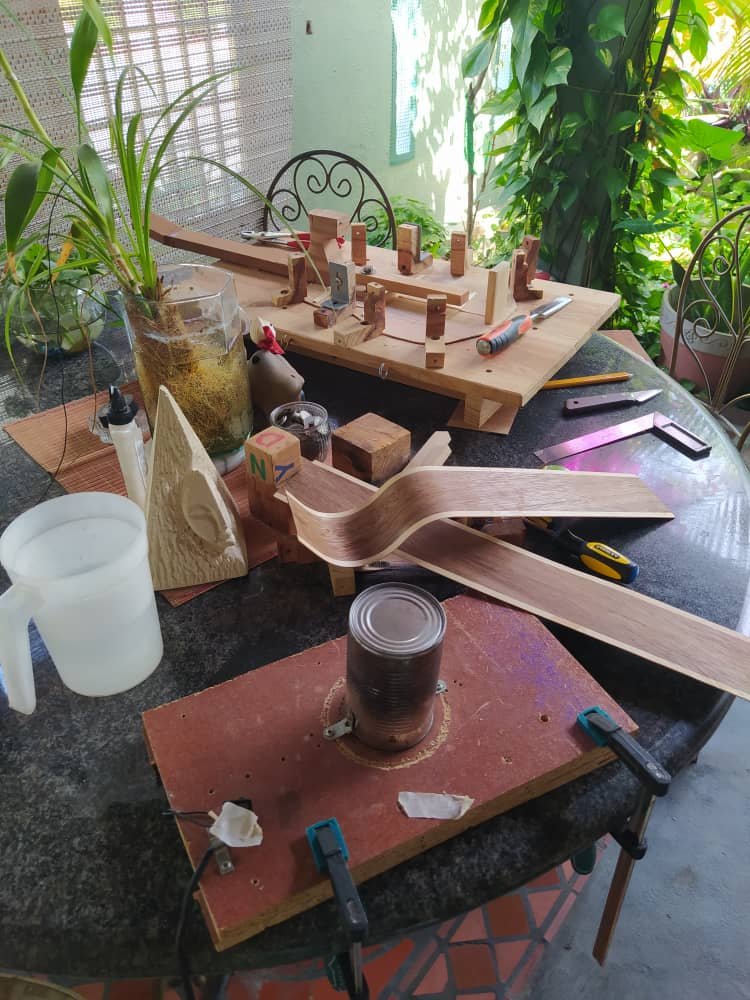
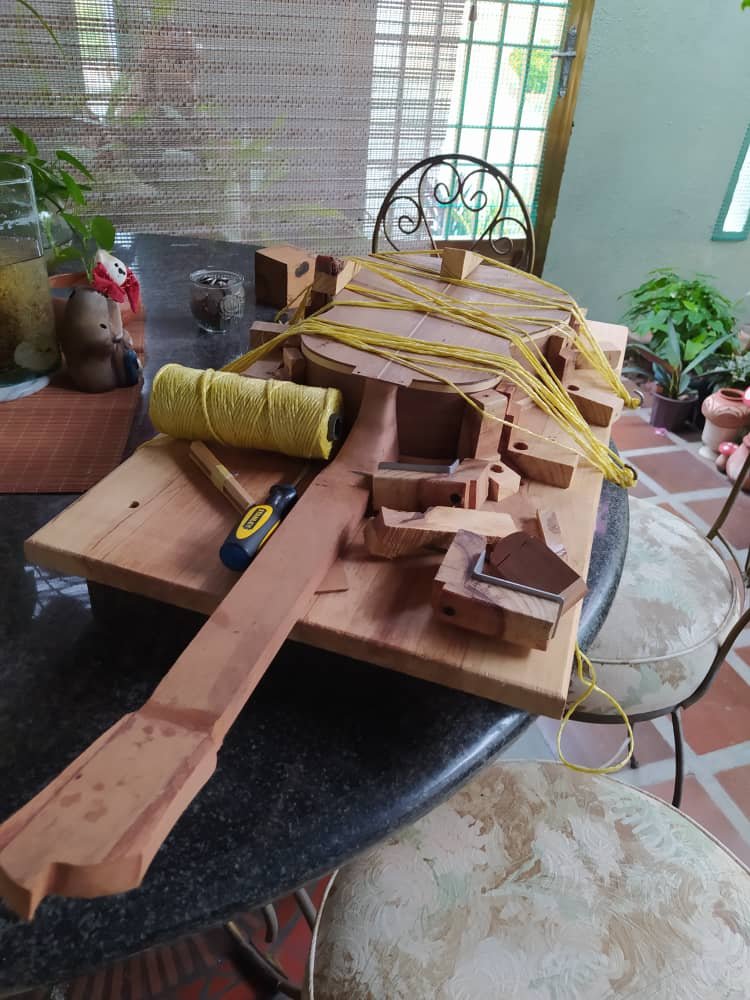
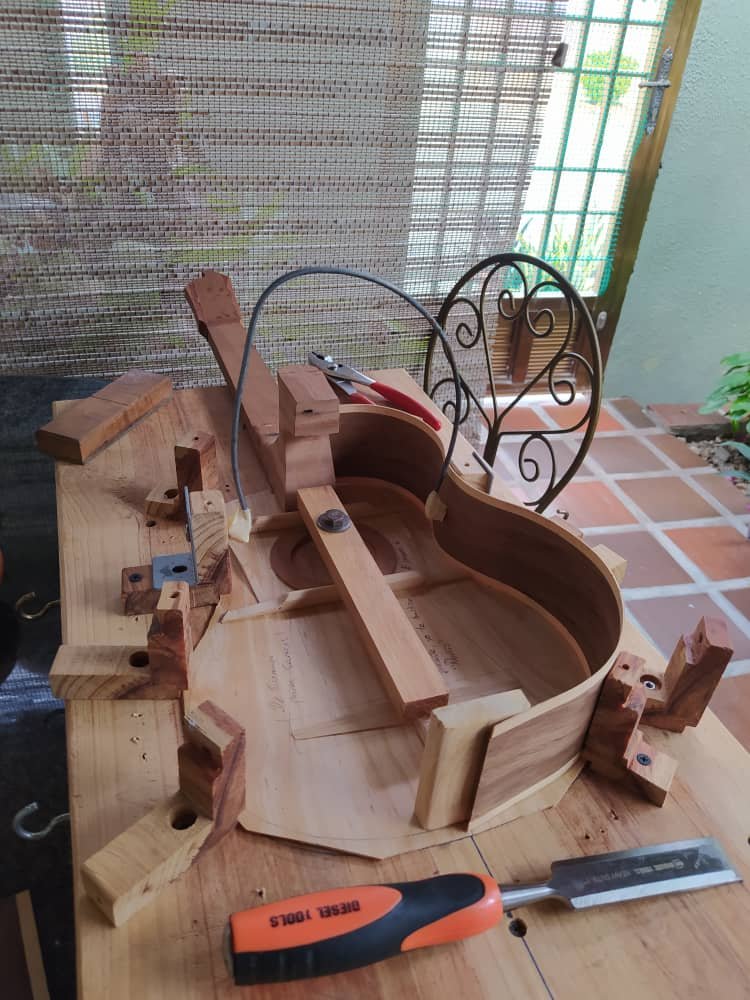
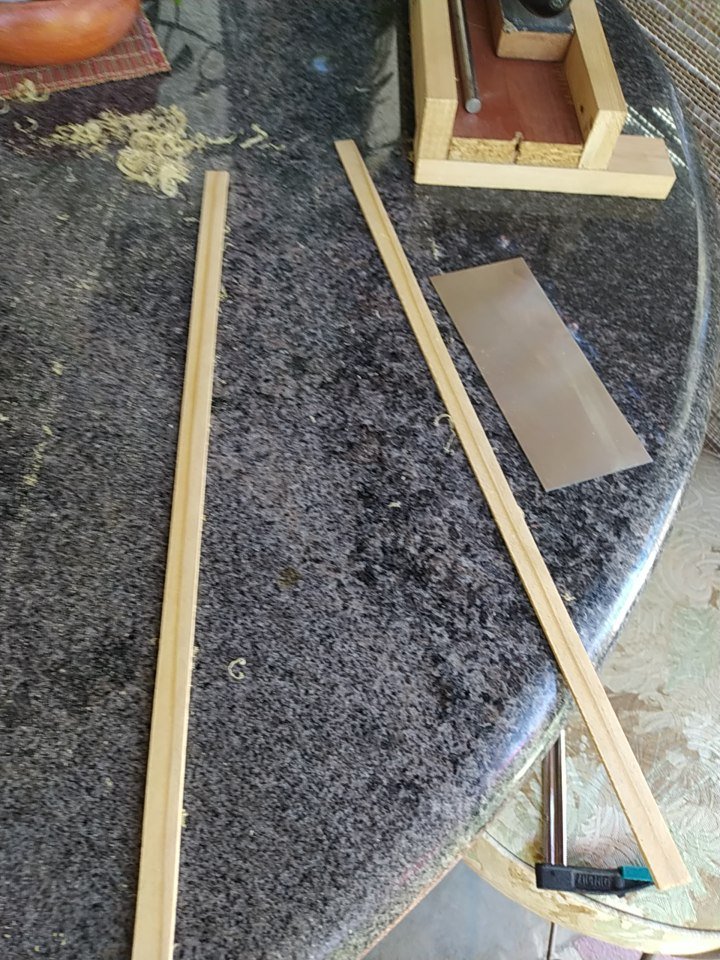
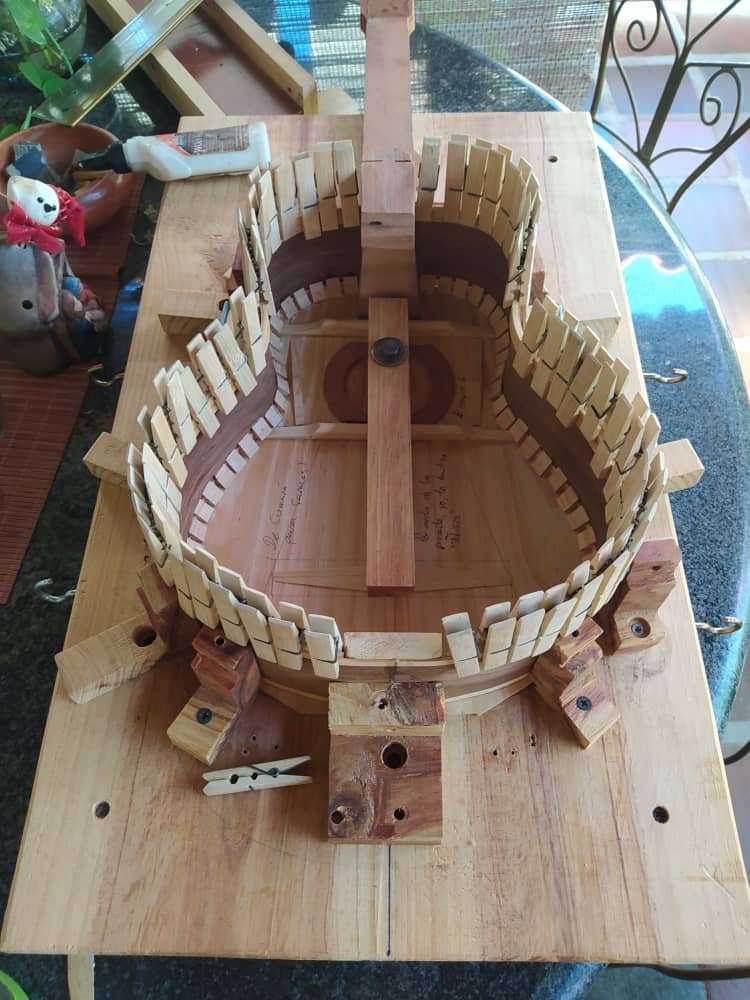
These are other pieces to widen contact surface. In this case, between the sides and the back of the instrument. Since it's a bit thick, it needs heat to get bent. We use our trusty wood bender and some water and we have these strips of wood on shape in no time. First, we let them rest with wooden pegs and attached to the sides. Once they have been there for at least an hour, we can remove them, give them a little sanding and then we can glue them to the sides.
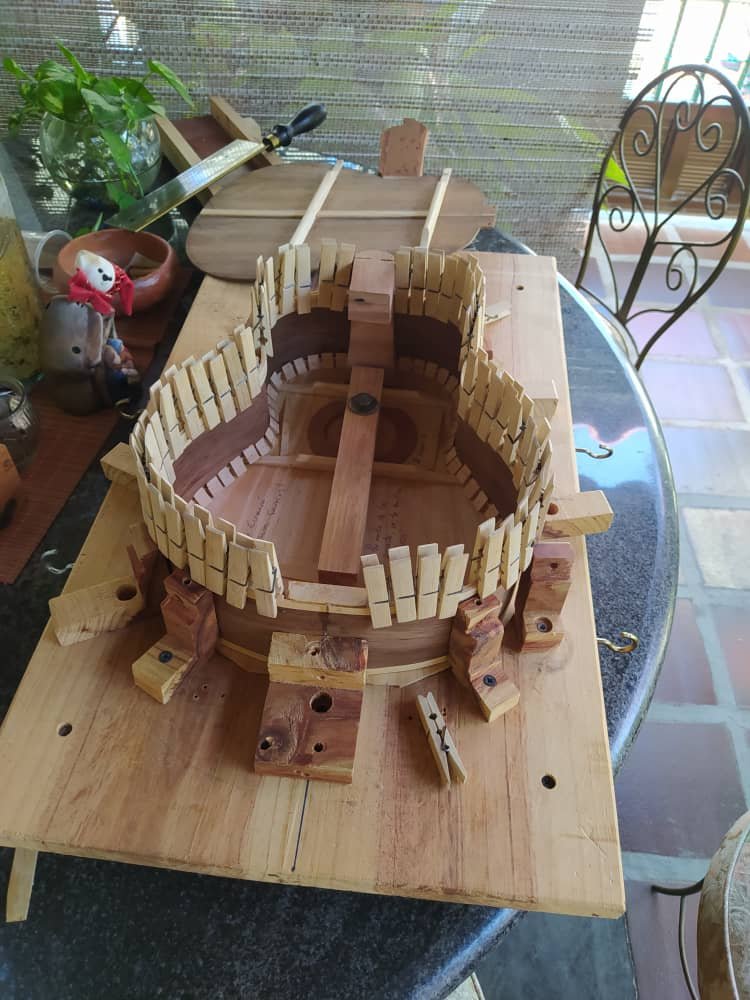
The last reinforcements go between the strips of wood and the kerfing. These are meant to strengthen the sides on critical areas. These are the places where the instrument is more likely to receive a hit, not on purpose, of course. Also, because of the thickness of the sides, we need to reinforce them anyways. So, we cut pieces of wood to fit between this spaces and them with the help of some clamps glue them to the sides.
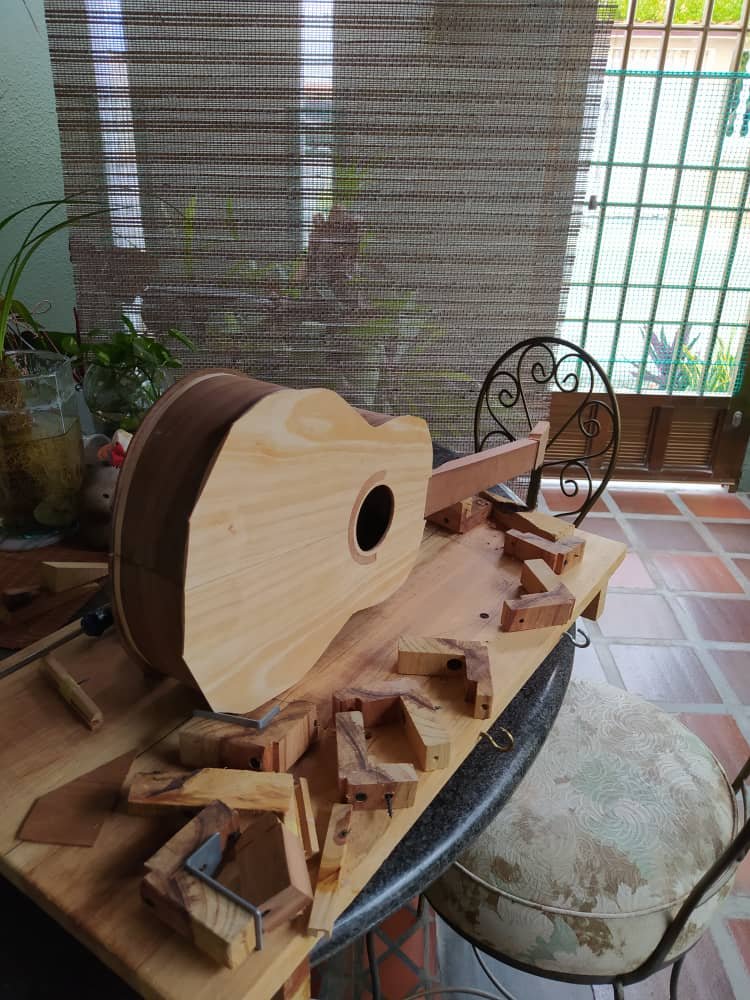
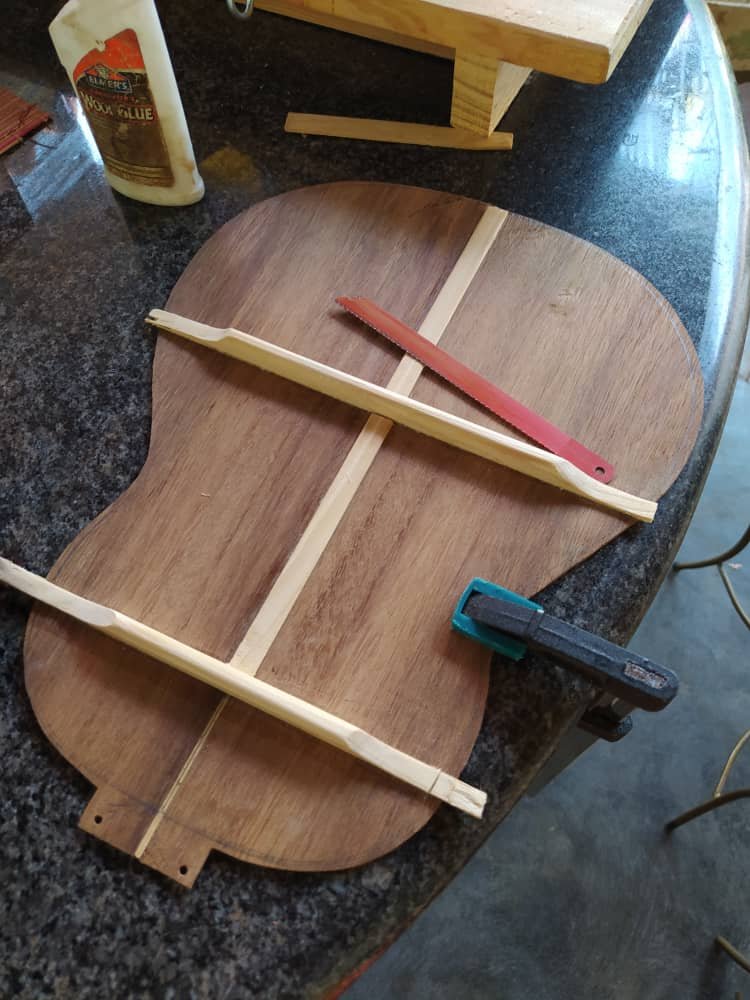
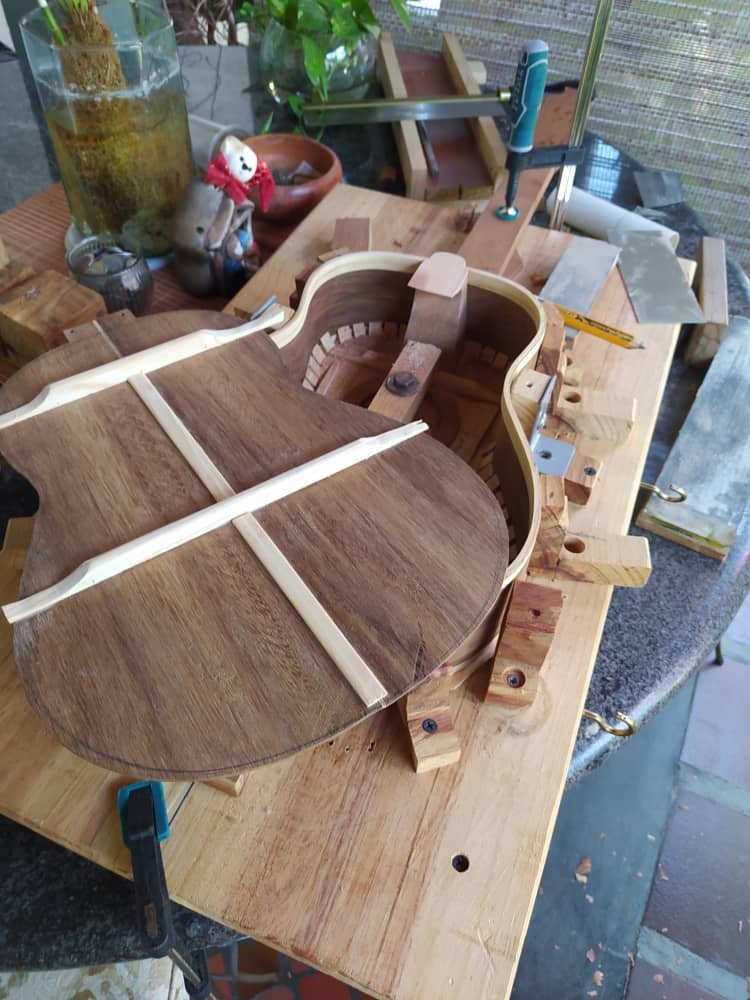
Back and label
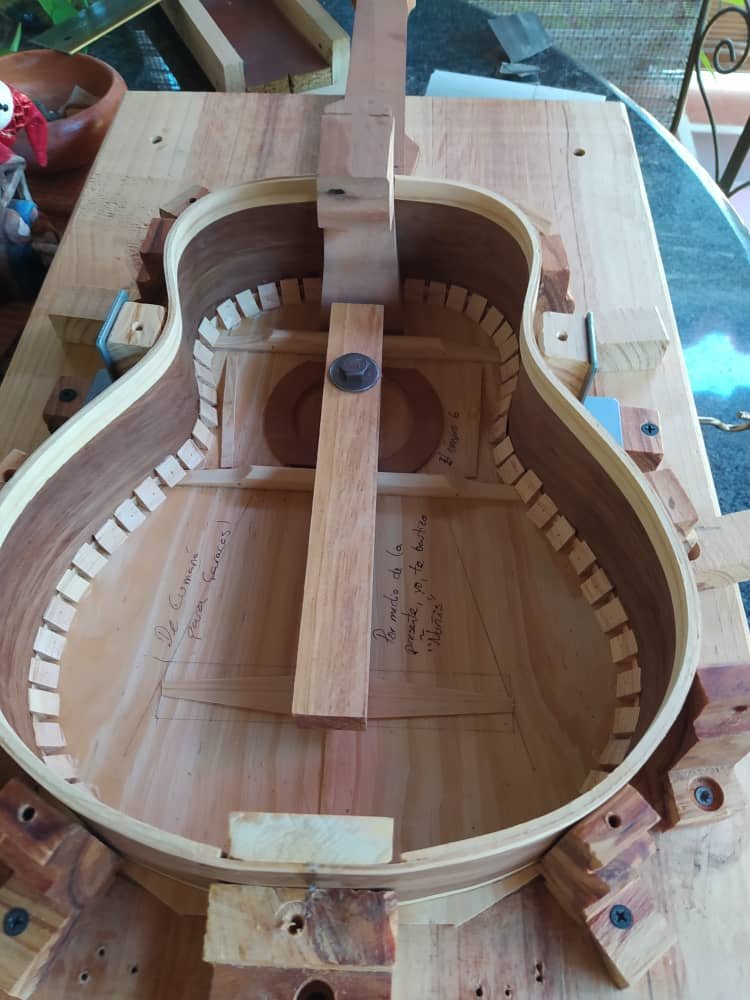
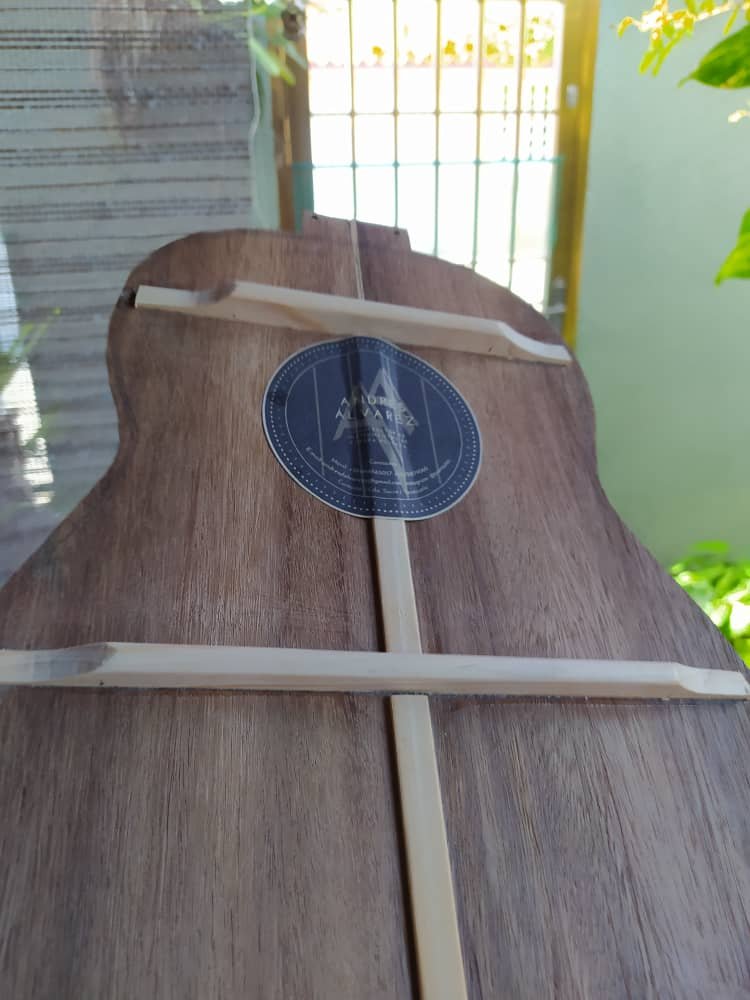
We haven't done much with the back since we put the reinforcements on. Now, it's time to cut the excess from these. First, we measure how much we need to cut against the instrument. Then, we go ahead and remove the part. By doing this, we assure to have a exact fit. The back of the instrument must close like a lid. Before having the whole instrument closed, we have to put our label. See there are additional details on it like the name of the owner, the year, city of destination, series. This makes me consider having a bigger label. For now, we are read to close this one up!
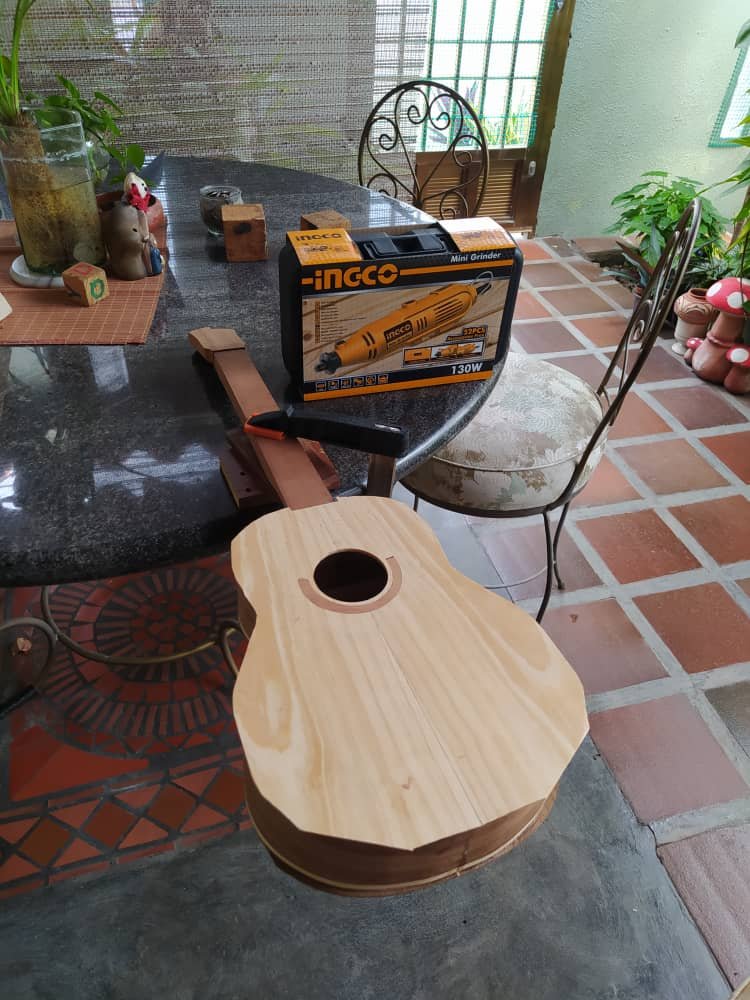
Out of the mould
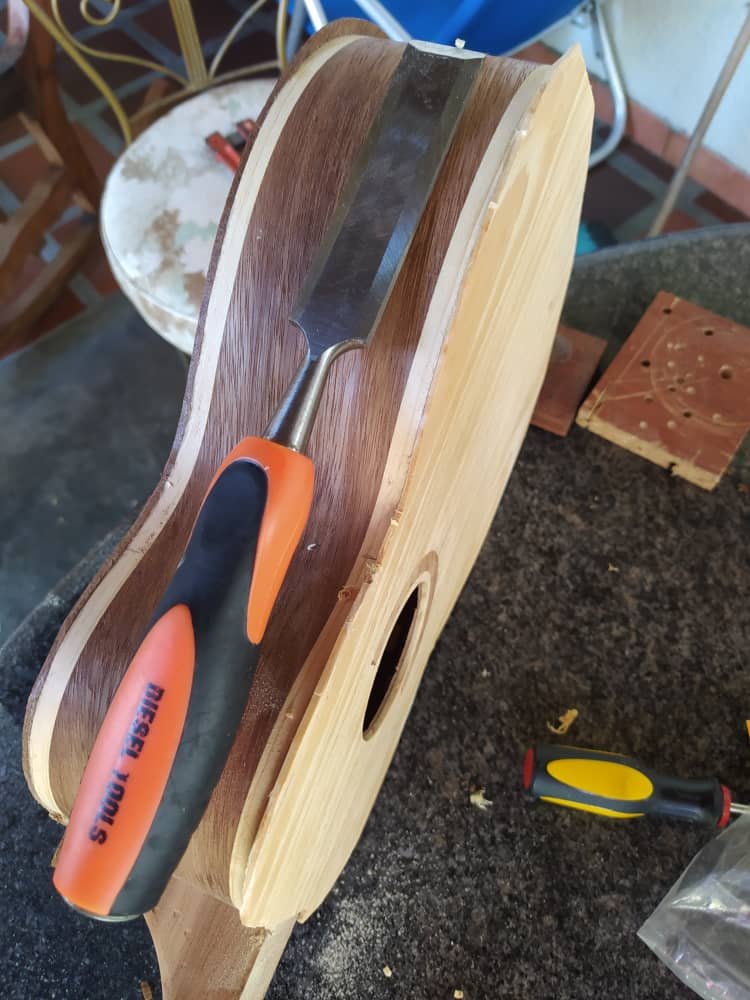
So this one is already closed and ready to come out of the mould. Once we get it off, we trim off the sharp edges and we have a round and handsome instrument. But the process is only half-way complete. Next time, you'll see the whole ornament and finishing process. Also, we are missing the gluing of the fretboard and bridge. Those will come later. Until next time!
Español
Intro
¡Ya saben de qué va esto! Estamos de vuelta para revisar el progreso de este proyecto. Si eres nuevo aquí, puedes revisar la primera entrega de este proyecto dando click aquí. Antes de pasar al proceso de ensamblado, aquí hay algo muy personal de cada luthier. Cada instrumento hecho a mano tiene dentro alguna firma y/o mensaje del fabricante. Este lleva 3: su número, palabra de aliento y el nombre del instrumento.
Tacón Interno
La última vez que vimos a este pequeño, ya estaba sobre la solera. Esto significa que todas las piezas necesarias para ensamblarlo estaban completas. Para comenzar, esta pieza conecta la tapa con los aros y el fondo. No hay mucho qué explicar aquí. Solo hay que matenerse al borde del dibujo y centrar la pieza. Aplicamos pegamento y utilizamos algo para aplicar presión. Esta pieza puede ser una tabla sobre el tacón externo al otro lado de la tapa.
Doblando los aros
Ahora, podemos doblar los aros. Recuerden que estos había sido trabajados previamente y se había revisado si cabían en el corte del mástil. Estos aros son especiales. Tienen estas tiras de pino en los bordes. Esto implica que no podemos ponerlos a remojar. Si lo hiciéramos, esta pieza se desprendería. Así que solo tenemos que usar un poco de agua sobre el samán. Como a está bastante delgado, el calor hará el resto del trabajo.
Colocación
Después de doblar los aros, estos se dejan descansar por un momento colocados sobre la tapa. Es necesario hacer presión desde adentro para mantenerlos contra las escuadras de la solera. Esto nos ayuda a revisar si hay curvas irregulares. Mientras hacemos esto, también podemos medir contra el tacón interno para hacer el corte y que los aros encajen bien. Al terminar todas estas tareas, podemos pegar los aros a la tapa.
Peones
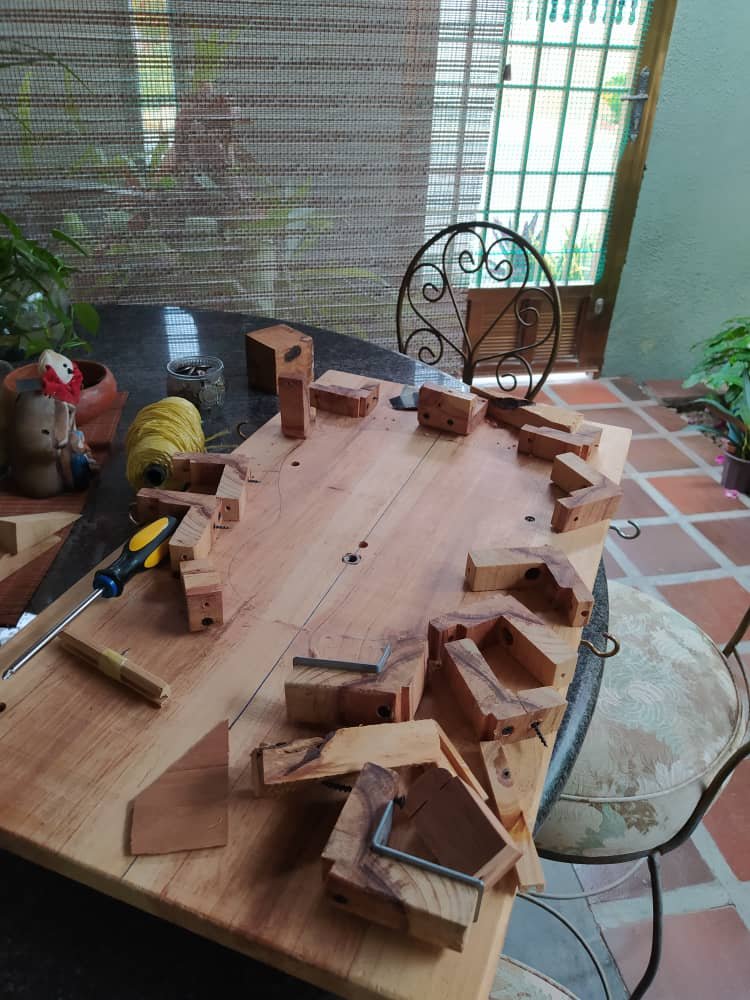
Ahora que los aros están pegados, se puede colocar los peones. Estos suelen ser corridos en los instrumentos de lujo. Este no es el caso. Además, hacer peones de ese tipo requiere más material. Así que utilicé los que sobraron del instrumento anterior. Para mi suerte, tenía suficientes para completar el trabajo. La función de estas piezas es aumentar la superficie de contacto entre los aros y la tapa.
Arillos y refuerzos
Los refuerzos que siguen son para los aros. Comenzamos por los arillos. Estas son tiras de madera que van alrdedor del borde de los aros y aumentan la superficie de contacto con el fondo del instrumento. Como son algo gruesos necesitan calor para doblarse. Con algo de agua y la ayuda del doblador esto es tarea fácil. Primero, los dejamos descansar sujetándolos con pinzas a los aros. Una vez que terminan de secar, podemos removerlos, lijarlos y finalmente pegarlos.
Los últimos refuerzos se colocan entre estas tiras y los peones. El propósitos de estas es reforzar el aro en sus puntos más frágiles. Estas son las áreas donde es más probable que el instrumento reciba un golpe. No a propósito, claro está. Además, debido al grosor de los aros, es necesario colocar alguna pieza para hacerlo más fuerte. Así que cortarmos unas piezas de una tira de madera y la colocamos en estos espacios. Nos ayudamos de prensas para sujetarlas.
Fondo y Etiqueta
No se ha hecho demasiado con el fondo desde que se colocaron los refuerzo. Ahora, hay que cortar los excesos de estos. Primero, lo medimos sobre el instrumento. Así, nos aseguramos que tengan el largo exacto. Luego, removemos esa parte. El fondo del instrumento debe cerrar como una la tapa de un frasco. Antes de cerrar el instrumento, colocamos nuestra etiqueta. Vean que hay detalles adicionales sobre esta como el nombre de su propietaria, el año, ciudad destino y serie. Esto me hace considerar hacer una etiqueta más grande.
Salido del molde
Así que este cuatro está sellado y listo para ser retirado del molde. Una vez que se hace esto, se retiran los bordes filosos y se le da su forma final. Pero el proceso solo está a medias. La próxima vez, verán todo el proceso de adornos y acabado. Además, todas falta colocar el puente y el diapasón. Todo eso vendrá en la próxima entrega. ¡Hasta entonces!
Congratulations @bertrayo! You have completed the following achievement on the Hive blockchain and have been rewarded with new badge(s):
Your next target is to reach 63000 upvotes.
You can view your badges on your board and compare yourself to others in the Ranking
If you no longer want to receive notifications, reply to this comment with the word
STOPCheck out the last post from @hivebuzz:
Support the HiveBuzz project. Vote for our proposal!
Dear @bertrayo,
Do you mind supporting the HiveBuzz proposal for 2022 so our team can continue its work next year?
You can do it on Peakd, ecency, or using HiveSigner.
https://peakd.com/me/proposals/199
We wish you a Happy New Year!
I'm enjoying the process of this build. There are certainly a lot of steps to building an acoustic instrument.
There's a ton of things to do. Off-camera steps are countless. Besides, I work a child with a toy chest. Take out stuff and then getting all this back into place. 😂