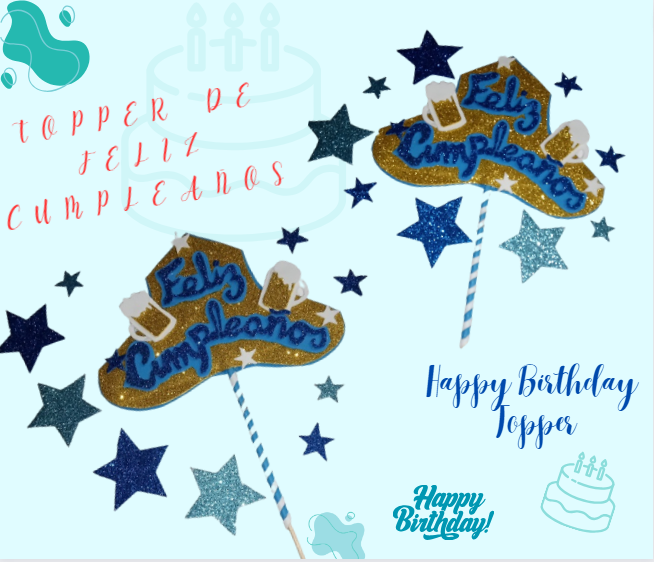
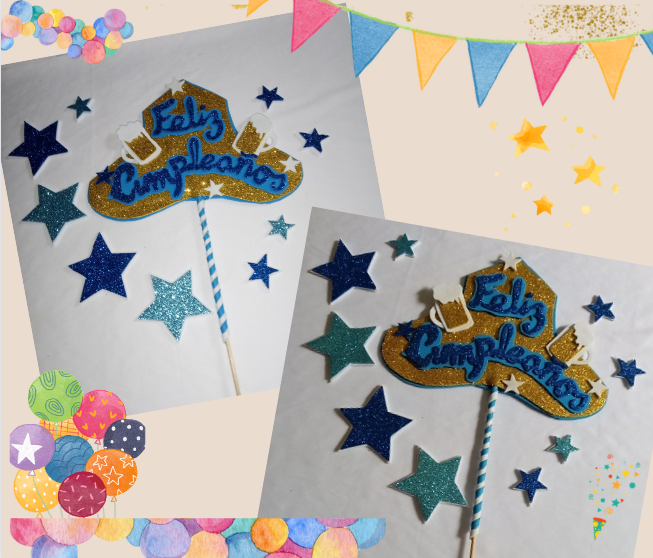

Greetings to this beautiful community of creations and ideas, I hope you are very healthy and enjoying your day. It's been months since I did a craft, but I want to show you how I made a birthday topper, very simple and easy to do. Today although in stores already sell those topper you need, it is not superfluous that can also be done, and we do it with our own design and desired color.

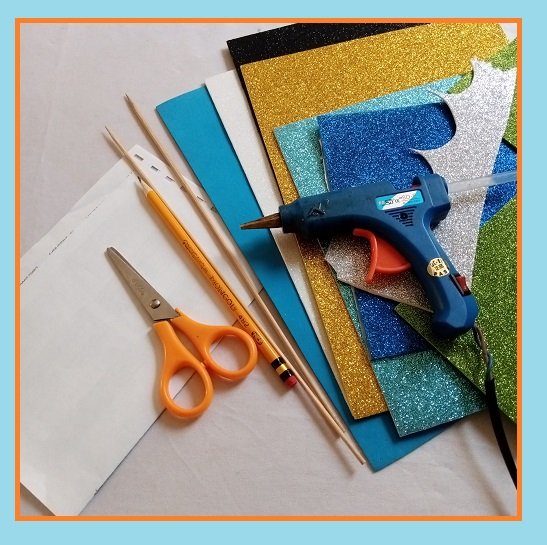
With the necessary material, either on cardboard or foami, it will look great. You only need that idea, that you want to capture in your design, since the topper is a decoration that very well you can place it for an arrangement of sweets, chocolates, or very well on the cake, in short there is so much variety of its use.
My materials:** **
Colored foami, frosted and unfrosted.
Graphite pencil.
Scissors.
Hot silicon.
Pattern or design.
Palito de altura.
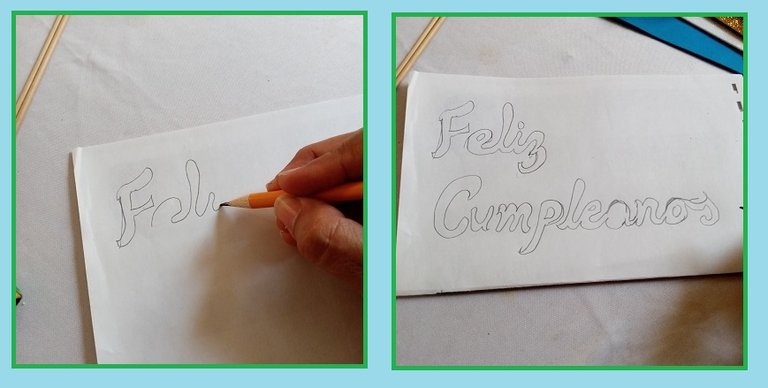
As the design says happy birthday, I made my letters in the desired size and shape.
Then I transfer them to the foami to be able to cut them. I took out the blue frosting foami, this foami has glue on the other side, which makes it easier to work with it, because this way, I remove the paper and glue the letters on the other lighter blue foami, this I glue it with the hot silicone.
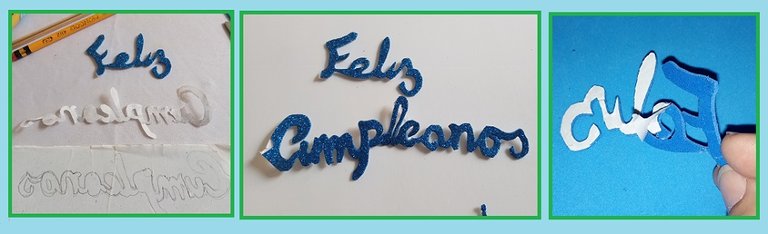
Then I glue these letters on the gold or yellow frosted foami, to make it look more eye-catching.
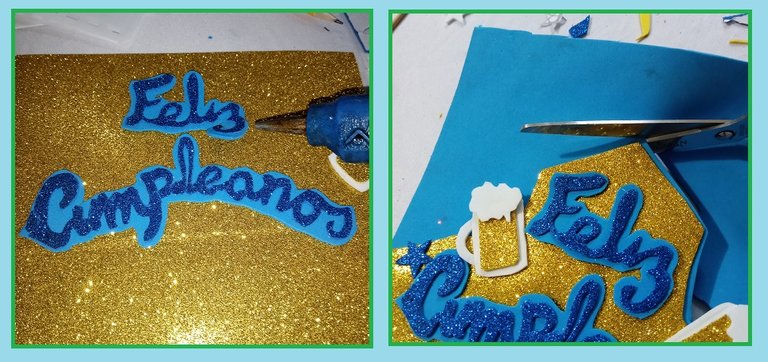
I also took out two drinks in the form of glasses, where first in white color, a golden square and on each one like a cloud, which will be the foam of the drink.

I glued them next to the words, and then cut them, giving shape to the topper.
To cover the topper, I cut two long strips in white and blue, and glued them around the topper so that it would be covered.
And on the back I put another blue foami, so that the work would be neat.
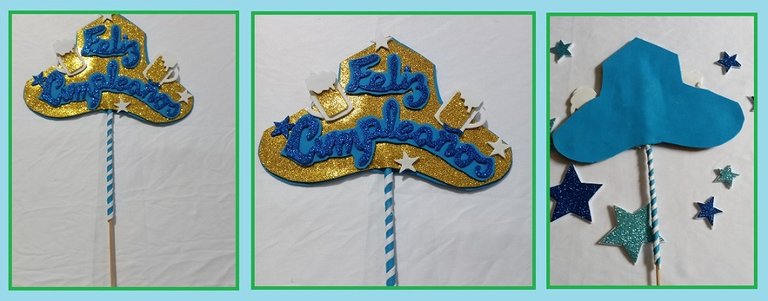
I wanted to complete by making several blue stars that I then glued onto the white foami and cut each one out.

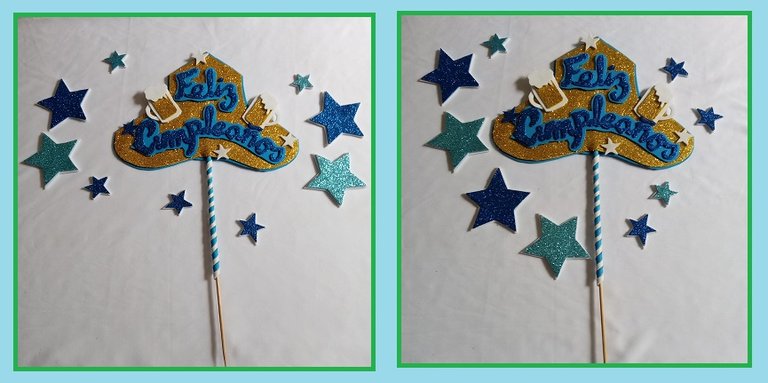
So was this beautiful happy birthday topper, I hope it was to your liking, hoping soon to continue sharing with you, enjoy your day.
All photos are my property and were taken with my Tecno Spark cell phone.
Translator deepl.
Canva designs.


Saludos a esta bella comunidad de creaciones, e ideas, esperando estén muy saludables disfrutando su día. Haces meses que no hacia manualidad, pero quiero mostrarles como hice un topper de cumpleaños, muy sencillo y fácil de hacer. Hoy en día aunque en las tiendas ya venden esos topper que necesitas, no esta de mas que también se pueda hacer, y lo hacemos con nuestro propio diseño y color deseado.
Con el material necesario, bien sea en cartulina o foami, se vera muy bien. Solamente necesitas esa idea, que quieres plasmar en tu diseño, ya que el topper es una decoracion que muy bien puedes colocarla para un arreglo de dulces, chocolates, o muy bien en la torta, en fin hay tanta variedad de su uso.
Mis materiales:
Foami de colores, escarchado y sin escarcha.
Lápiz de grafito.
Tijeras.
Silicon caliente.
Patron o diseño.
Palito de altura.
Como el diseño dice feliz cumpleaños, saque mis letras del tamaño y forma deseado.
Luego las paso al foami para poder cortarlas. Saque en foami de escarchado de color azul, este foami tiene pega por su otro lado, lo que facilita la manera de poder trabajarlo, porque asi, le quito su papel y pego las letras sobre el otro foami azul mas claro, esto lo pegue con el silicon caliente.
Luego estas letras las pego sobre el foami escarchado de color dorado o amarillo, para que se vea mas llamativo.
Tambien saque dos bebidas en forma de vasos, donde primero en color blanco, un cuadrito dorado y sobre cada uno como una nube, que sera la espuma de la bebida.
Las pegue junto a las palabras, para luego cortar, y dandole forma al topper.
Para forrar el palito de altura, corte dos tiras largas en color blanco y azul, estas las fui pegando al rededor del palito para que quedara forrado.
Y en la parte de atras le coloque otro foami azul, para uqe que prolija el trabajo.
Quise completar con hacer varias estrellas de color azul que luego pegue sobre el foami blanco y cortar cada una.
Asi quedo este bello topper de feliz cumpleaños, espero haya sido de su agrado, esperando pronto en seguir compartiendo con ustedes, disfruta tu dia.
Todas las fotos son de mi propiedad y fueron tomadas con mi celular Tecno Spark.
Traductor deepl.
Diseños Canva.
!DIY
!discovery 30
This post was shared and voted inside the discord by the curators team of discovery-it
Join our Community and follow our Curation Trail
Discovery-it is also a Witness, vote for us here
Delegate to us for passive income. Check our 80% fee-back Program
This is a nice birthday design. Bravo
You can query your personal balance by
!DIYSTATSCongratulations @eylis! You have completed the following achievement on the Hive blockchain And have been rewarded with New badge(s)
Your next target is to reach 150 posts.
You can view your badges on your board and compare yourself to others in the Ranking
If you no longer want to receive notifications, reply to this comment with the word
STOPTo support your work, I also upvoted your post!
Check out our last posts:
Birthday 🎂🎉 Blessings Dear Age Gracefully 🙏