English
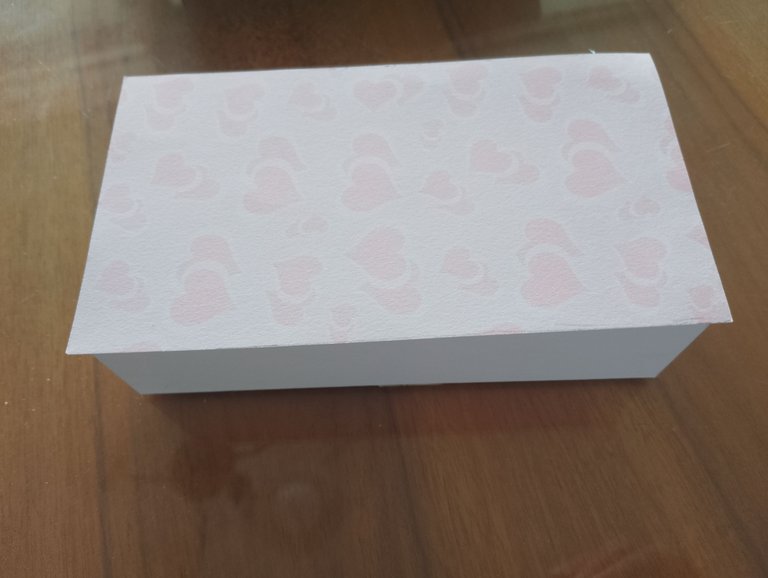
Object Organizer
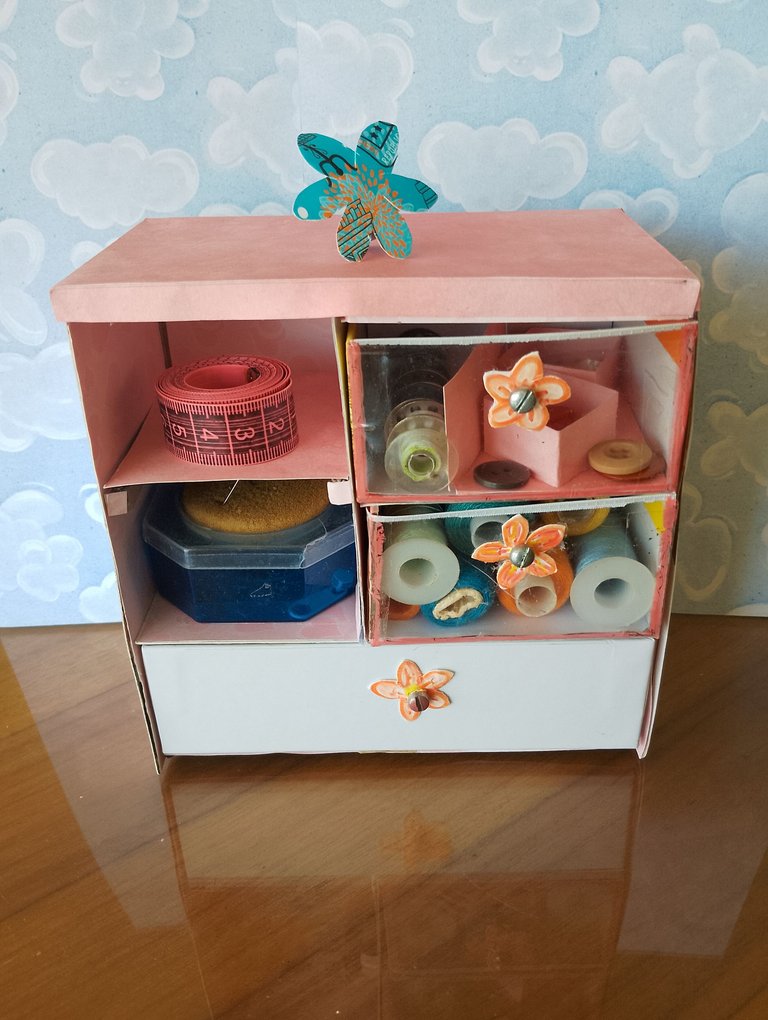
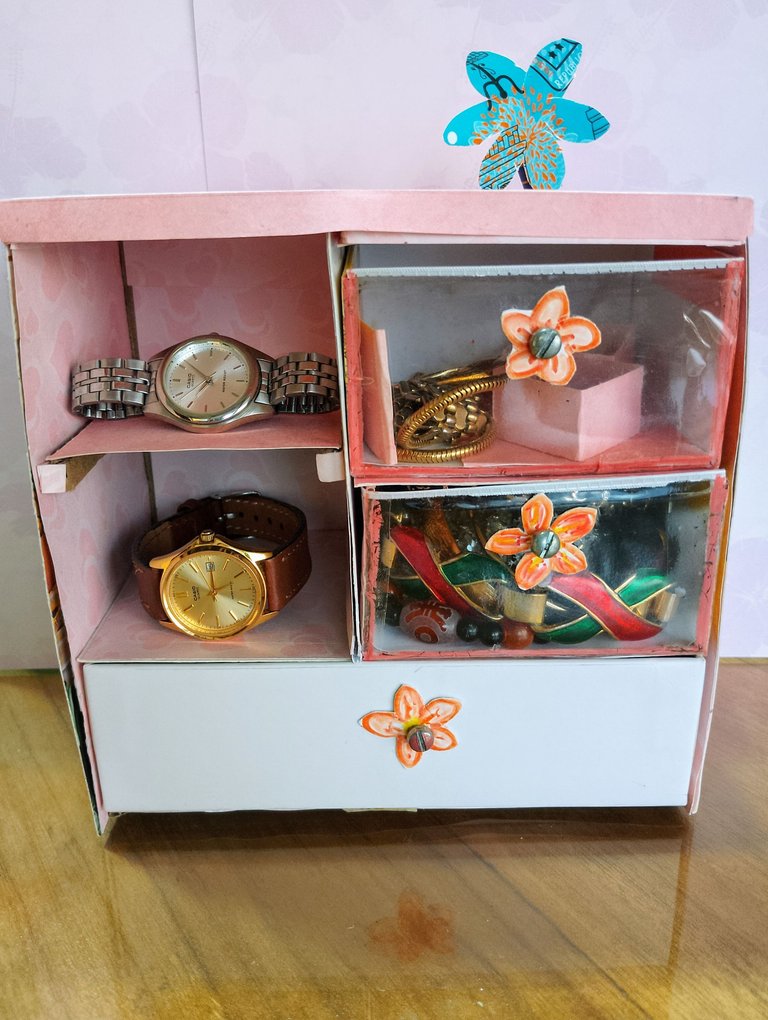
In advance, a warm greeting to the whole community. I bring you a small multipurpose closet, a great idea to organize small objects, to store our sewing tools, to store clothes or to store the dolls' clothes.
Español
Organizador De Objetos
De antemano, un saludo cordial a toda la comunidad. Les traigo un pequeño armario multiuso, una idea genial para organizar los objetos pequeños, para guardar nuestras herramientas de costura, para guardar prendas o para guardar la ropita de las muñecas.

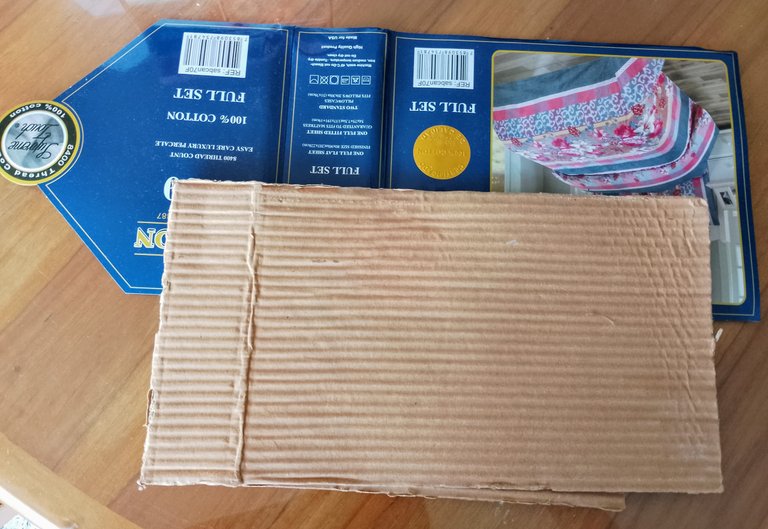
I wanted to put order in my sewing and I used some cartons that were already going to the trash, but I got this invention through social networks and I wanted to replicate it, for the utility it has and for how decorative it turned out to be, I took the opportunity to recycle the cardboard where the sheets come, a very strong cardboard to reuse it in many other things.
Quería poner orden en mi costura y utilicé unos cartones que iban ya a la basura, pero me llego por las redes sociales este invento y quise replicarlo, por la utilidad que tiene y por lo decorativo que resulto ser, aproveche de reciclar el cartón donde vienen las sábanas, un cartón muy fuerte para reutilizarlo en muchas otras cosas.
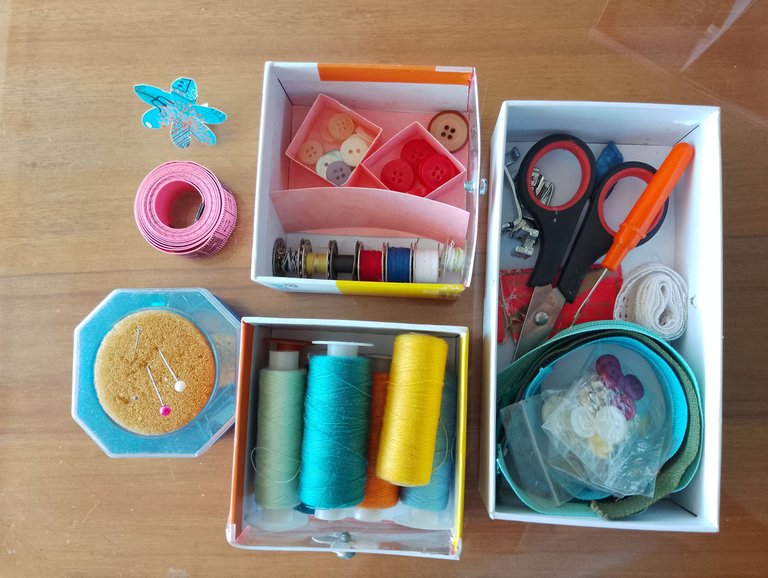
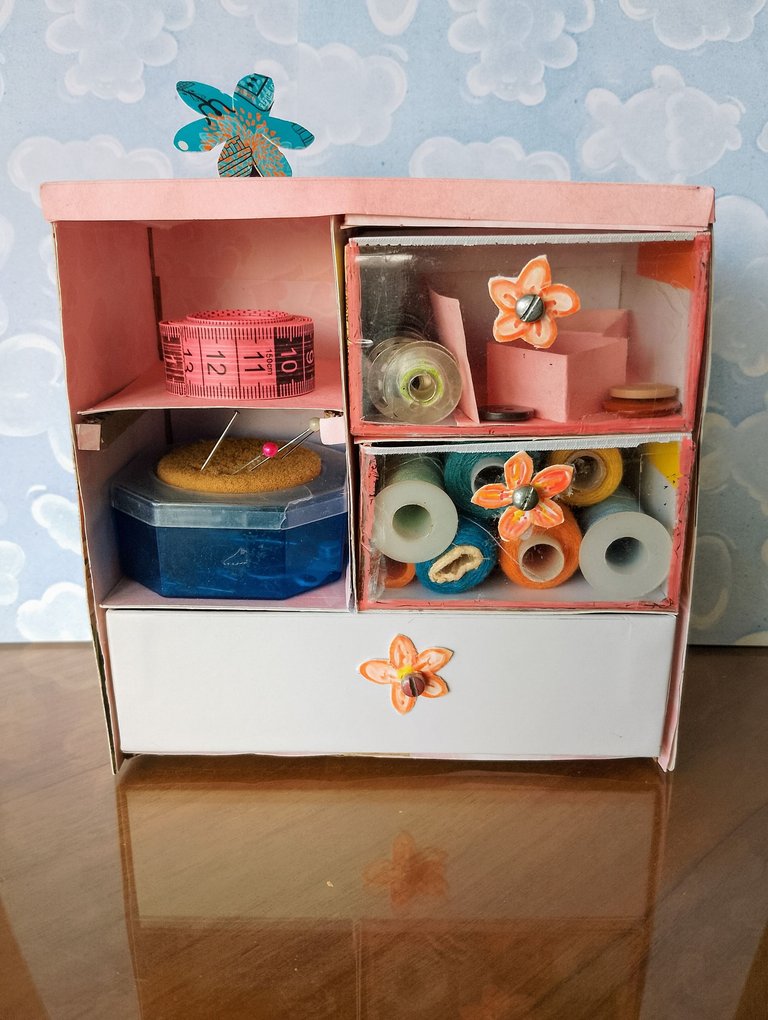
Although it is a laborious work, the result is very nice, I'm sure the girls will love it to keep their toys. I am going to use it to organize my threads, needles and some small sewing tools I use.
Aunque es un trabajo laborioso, el resultado es muy bonito, de seguro les va a encantar a las niñas para guardar sus juguetes. Yo lo voy a utilizar para ordenar mis hilos, agujas y algunas herramientas que utilizo en la costura que son pequeñas.
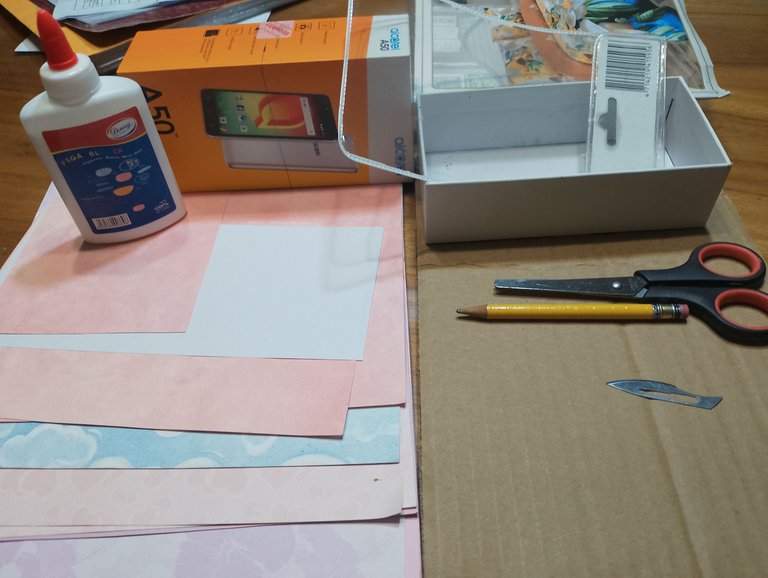
Materials:
- Cell phone box
- Recycled cardboard
- Cardboard or decorative paper
- Glue, scissors, pencil, ruler, ruler, etc.
- A small sheet of acetate or any transparent plastic.
Materiales:
- Caja de celular
- Cartón reciclado
- Cartulina o papel decorativo
- Pega, tijera, lápiz, regla
- Una lámina pequeña de acetato o cualquier plástico transparente.
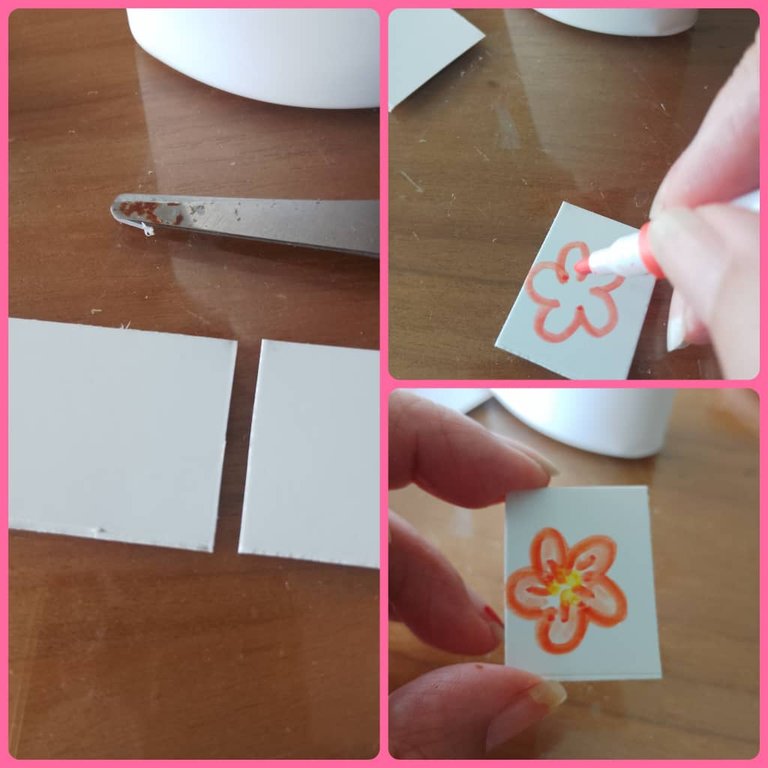
Procedure:
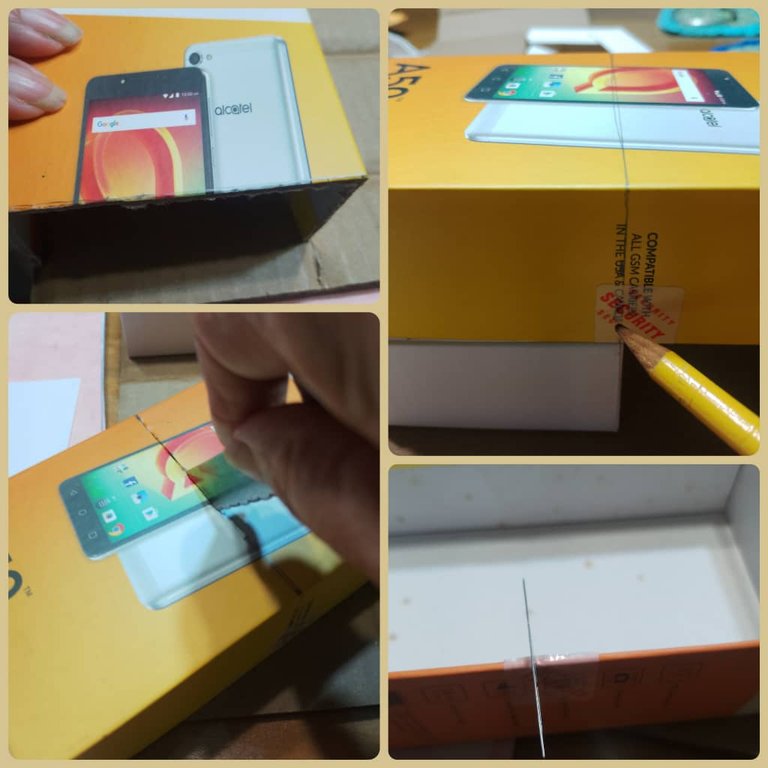
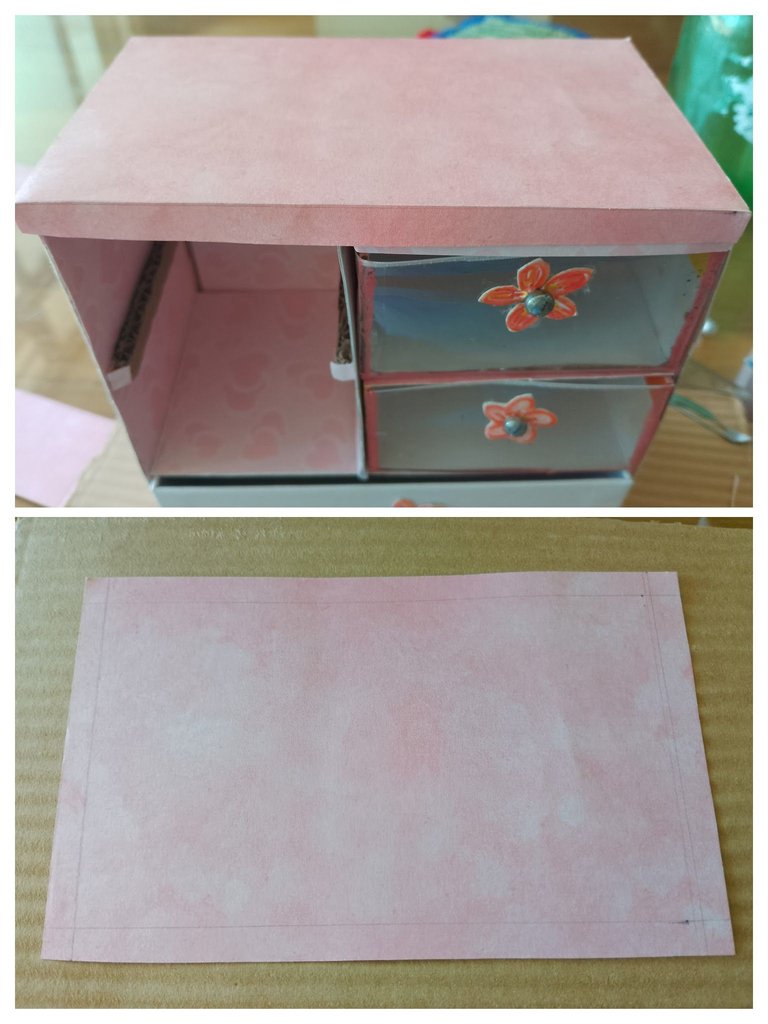
First: We take the lid of the box and chop it in half, cut a small sheet of the plastic and glue it to the front, imitating a drawer or a drawer. We also cut out two lids, with the same size of the small boxes.
Procedimiento:
Primero: Tomamos la tapa de la caja y la picamos por la mitad, cortamos una pequeña lámina del plástico y se la pegamos al frente, imitando una gaveta o un cajón. Recortamos también dos tapas, con la misma medida de las cajas pequeñas.
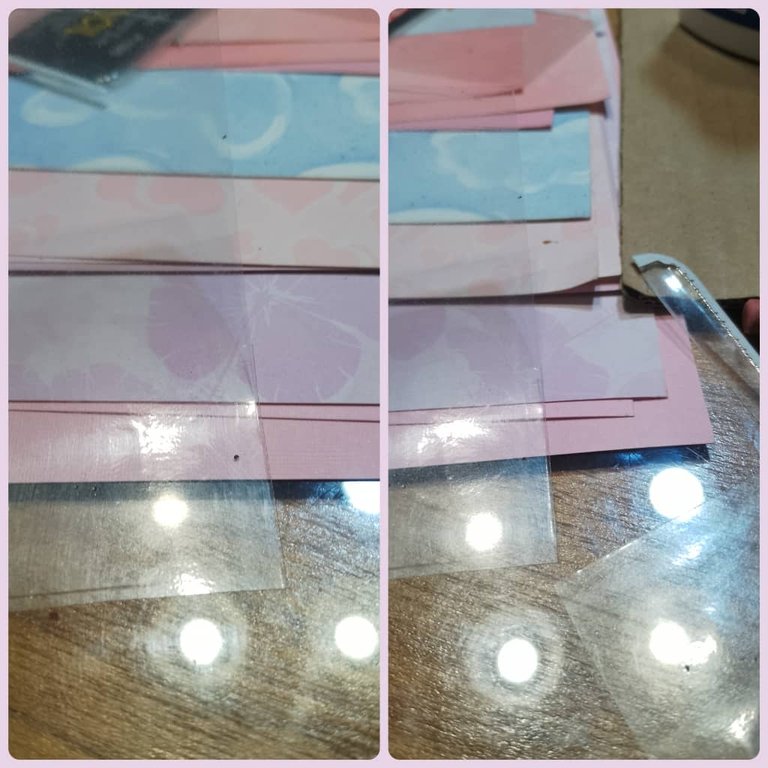
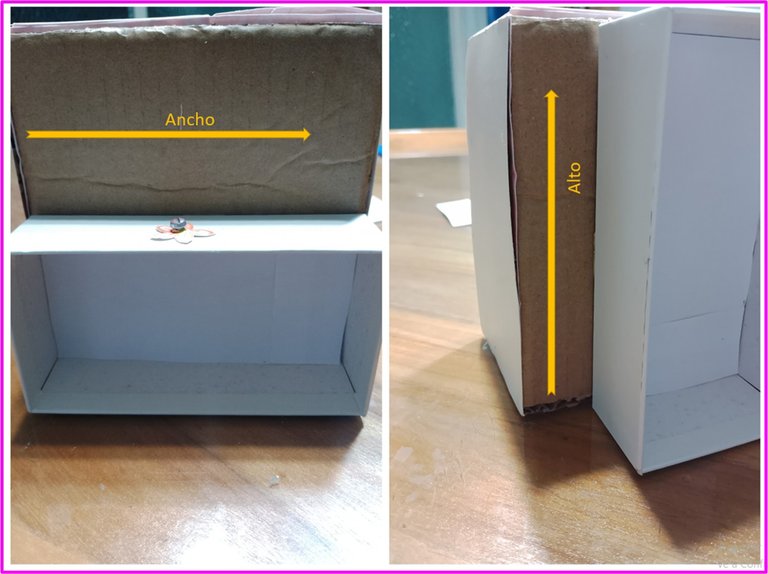
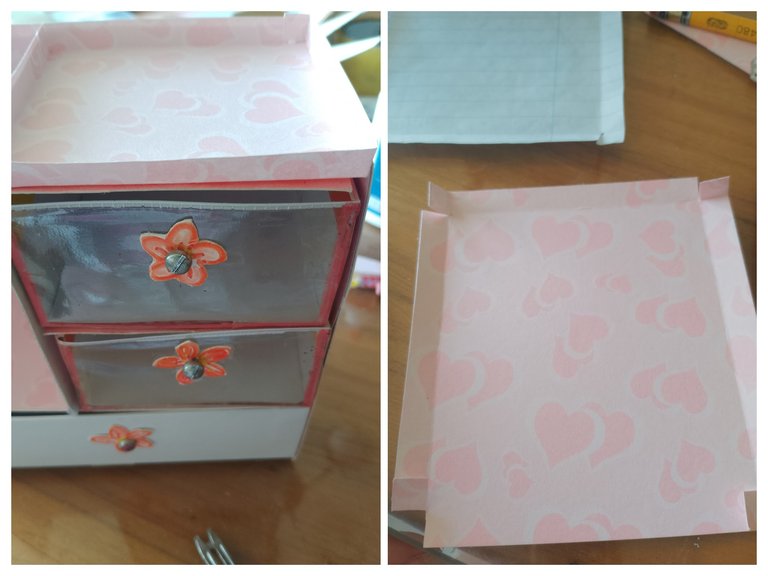
Second: we cut out four lids with the same measurements of the base box, taking into account its width and length.
Segundo: recortamos cuatro tapas con las mismas medidas de la caja base, tomando en cuenta su ancho y su largo.
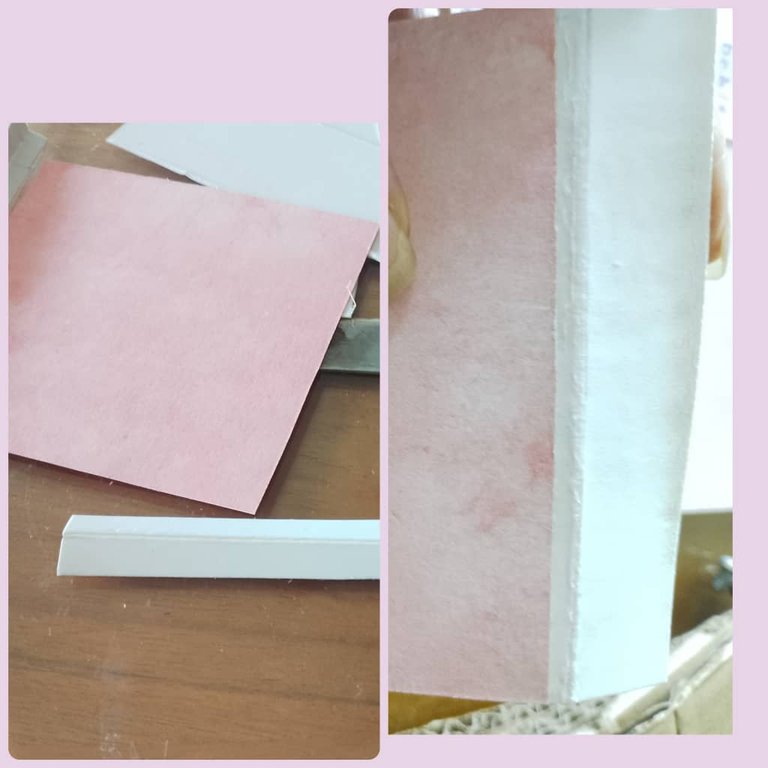
Third: Now, we take a bigger cardboard to make the back of the cabinet, always taking into account the width and length of the base box.
Tercero: Ahora, tomamos un cartón más grande para sacar la parte de atrás del armario, tomando en cuenta siempre la medida de ancho y largo, de la caja base.

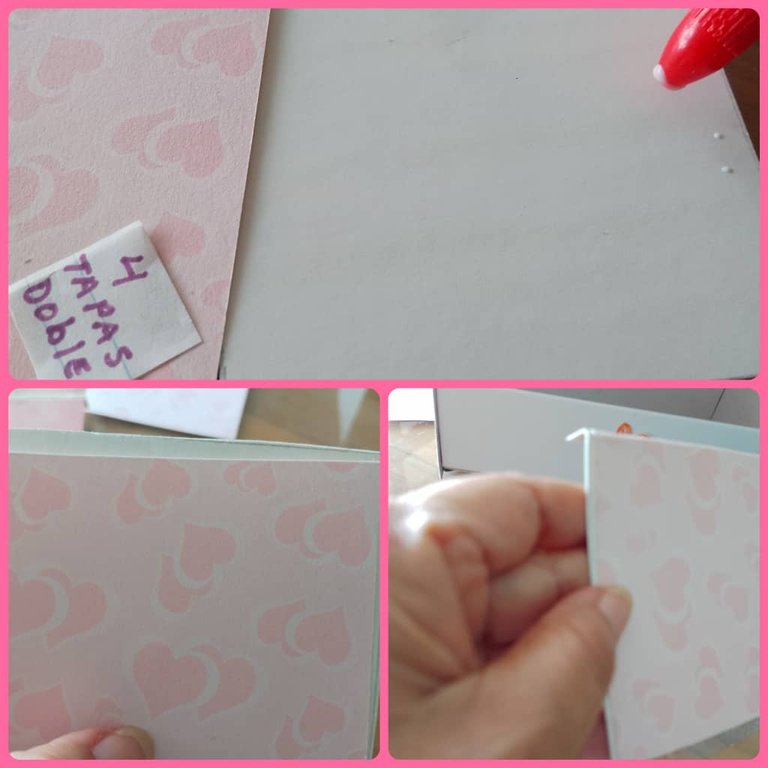
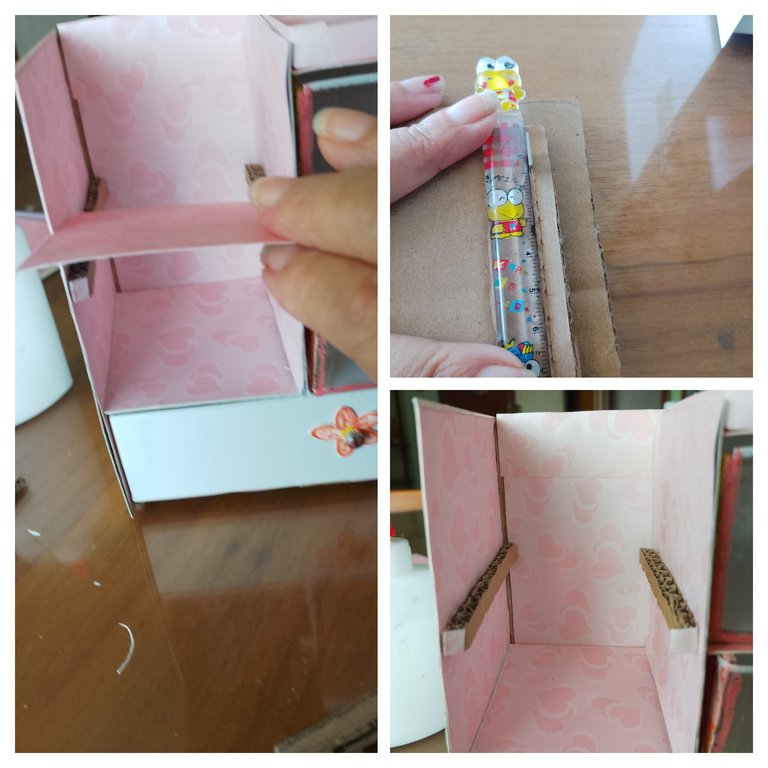
Fourth: We proceed to glue a reinforcement on the back of all the lids, to make them stronger, cutting them half a centimeter longer and we make a small flange that we fold.
Cuarto: Procedemos a pegarle a todas las tapas un refuerzo por detrás, para que queden más fuertes, cortándolas medio centímetro más largas y le hacemos una pequeña pestaña que doblamos.
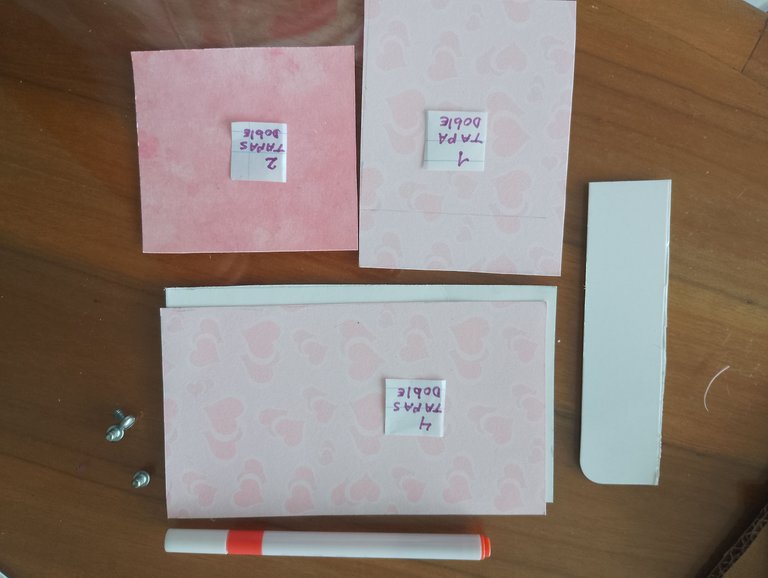
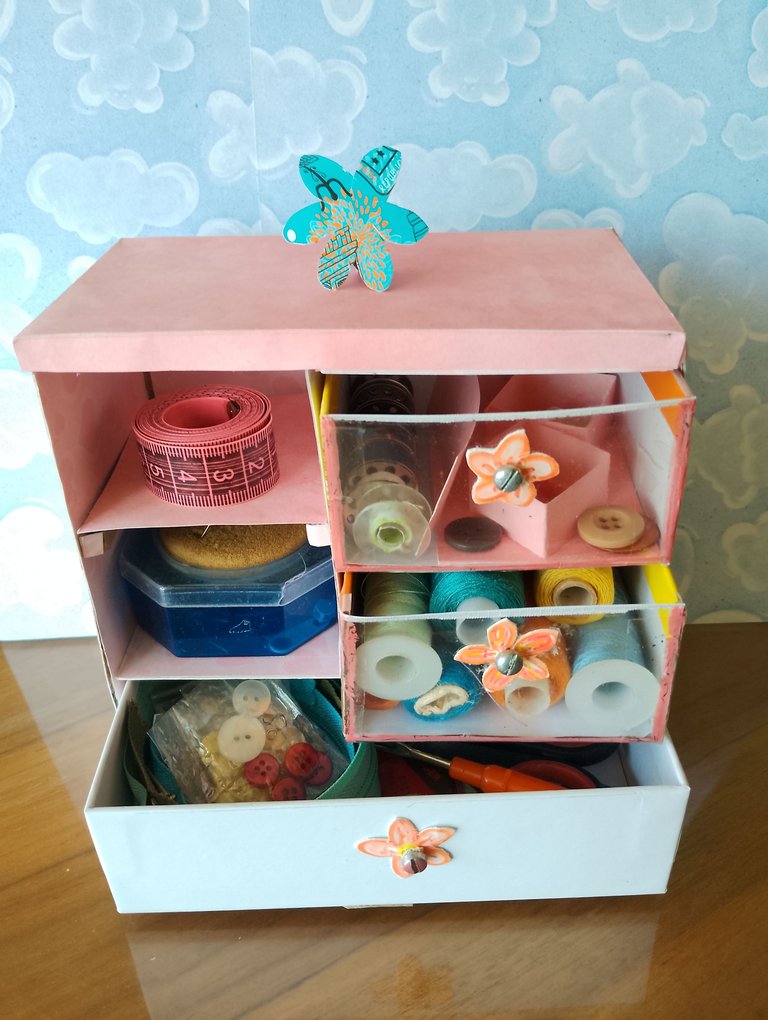
Fifth: We use the four lids: two for the side walls of the cabinet, one for the floor, and the other as the lid of the base box.
Quinto: Utilizamos las cuatro tapas: dos para las paredes laterales del armario, una para el piso, y la otra, la colocamos como tapa de la caja base.
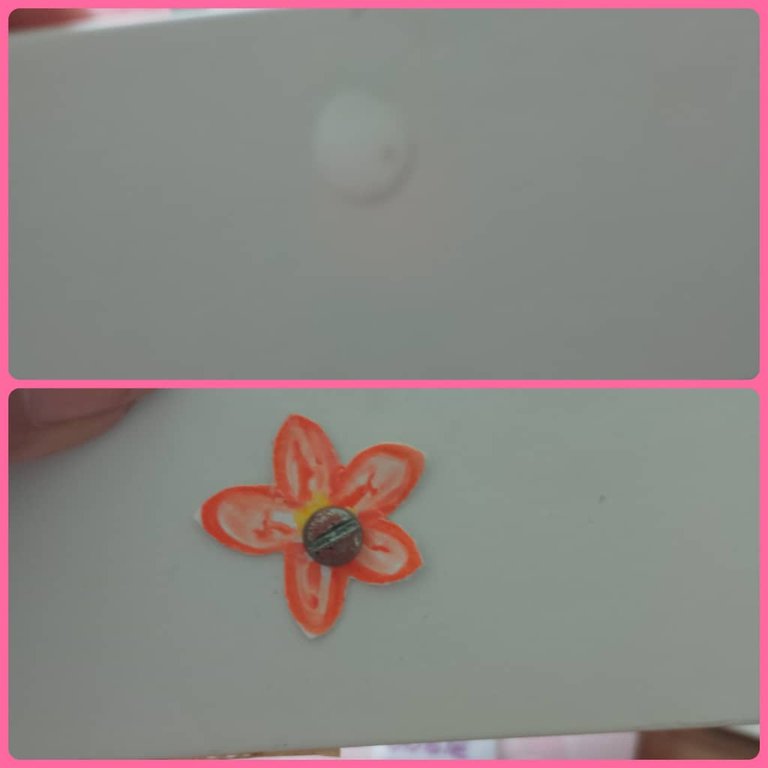
Sixth: We put an ornament and a handrail on the three boxes to make them look like drawers. I used three small screws.
Sexto: A las tres cajas le colocamos un adorno y un pasamano para que queden como gavetas. Yo utilicé tres tornillos pequeños.
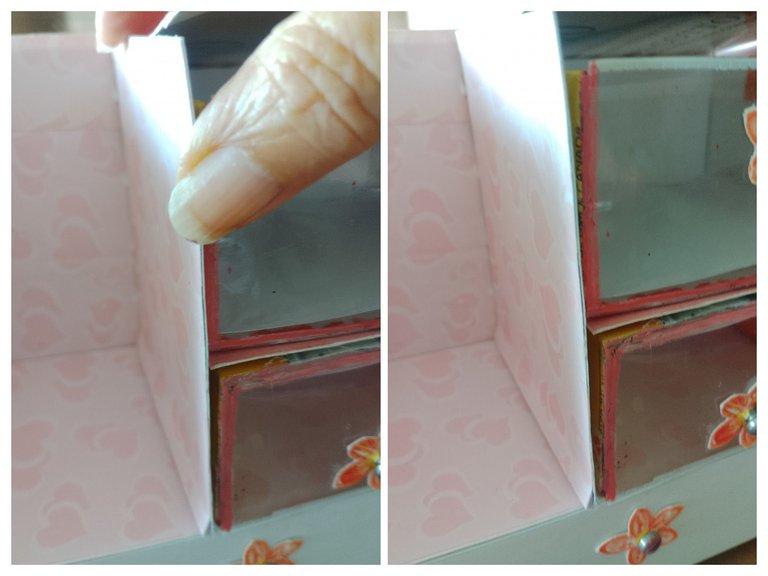
Seventh: Next, we put the drawers in their respective niches, placing the lids and gluing the flange on the wall of the cabinet.
Séptimo: Seguidamente, metemos las gavetas en sus respectivos nichos, colocando las tapas y pegando la pestaña en la pared del armario.
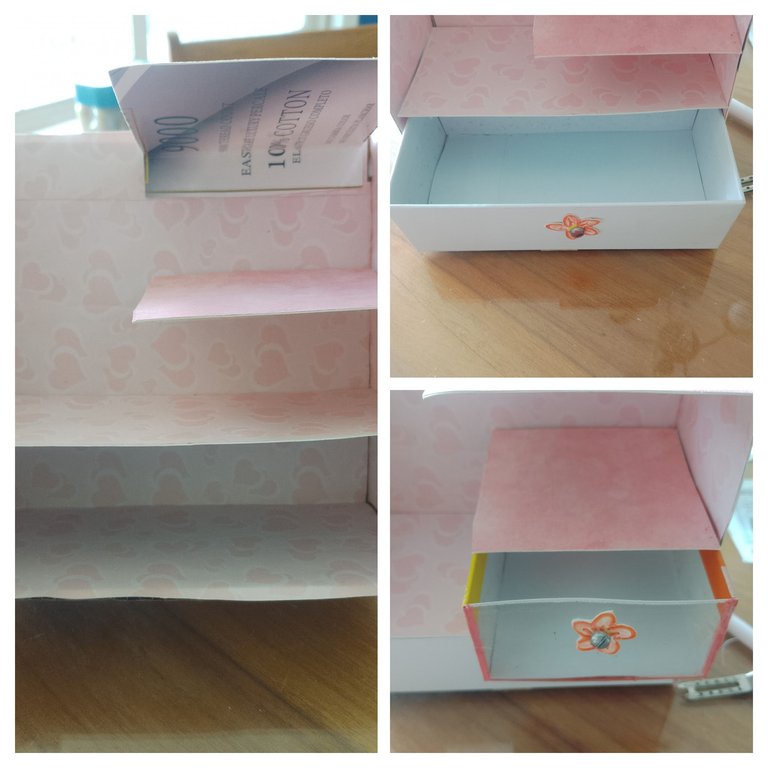
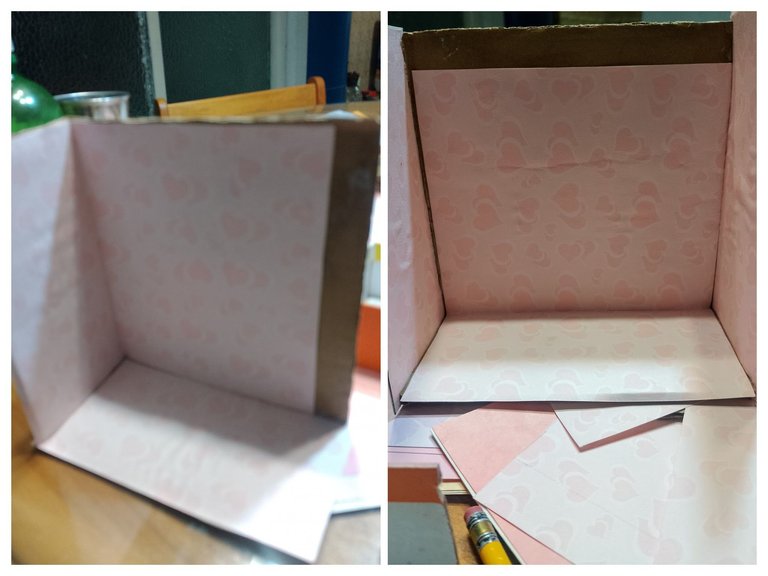
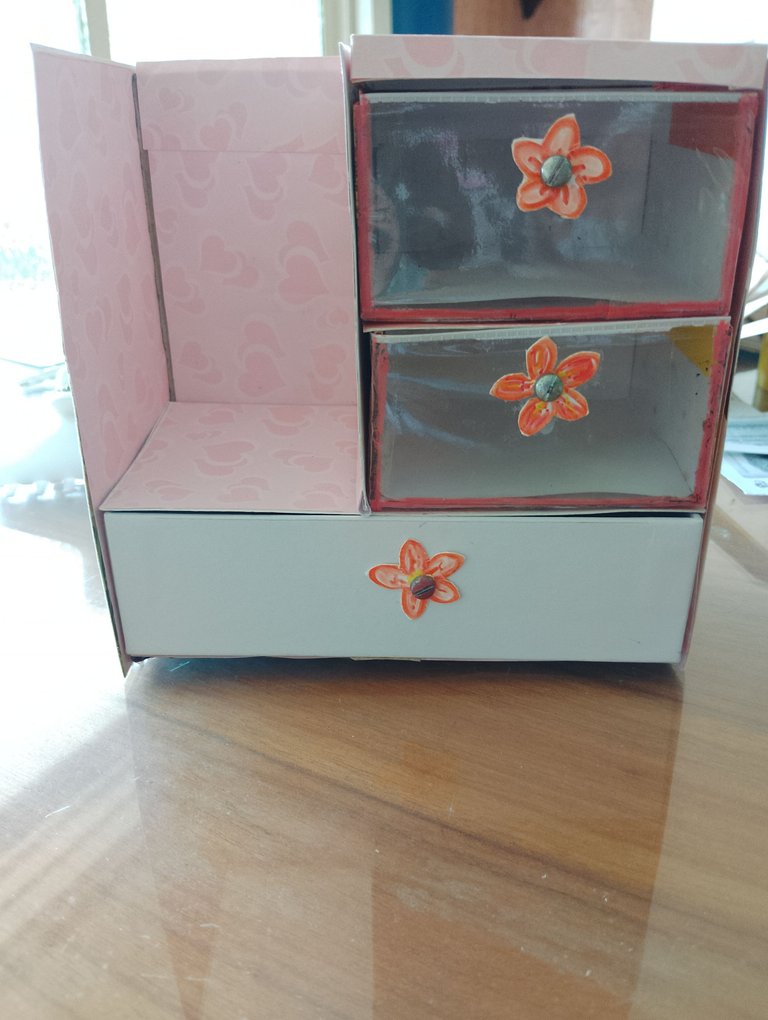
Eighth: We place a wall to separate, in the left space we divide it into two sections. At the top, we place a running lid, to give it a nice finish and it is ready for use.
Octavo: Colocamos una pared para separar, en el espacio izquierdo lo dividimos en dos tramos. A la parte superior, colocamos una tapa corrida, para darle un acabado bonito y está listo para utilizarlo.

It's amazing how you turned some old cardboard into a closet to keep your sewing tools organized. They say an organized workspace is more productive and now yours will be too. Greetings and blessings.
@edeyglezsosa Thank you very much, best regards
Wow, impressive DIY project! You've transformed cardboard into a functional and decorative organizer. Great job upcycling and repurposing materials!
@madilyn02 Thank you very much
Despite it being a stressful job you persevered. We applaud your hardwork, creativity, and resilience. Your organizer looks so good. Great job and thanks for walking us through the entire process.
selected by @ibbtammy
Sending Love and Ecency Curation Vote!
 Please Vote for our New Proposal! 🙏
@untilwelearn Thank you very much.
You're welcome! :)
Realmente eres muy ingeniosa,creativa me encantan tus trabajos manuales
@eberechi01 Thank you very much