
Un gran abrazo mi estimada familia de personas creativas, que la bendición de Dios los acompañe siempre en cada uno de sus objetivos, bienvenidos a una nueva idea de artesanía.
A big hug my dear family of creative people, may God's blessing be with you always in each of your goals, welcome to a new craft idea.
Y bien, hoy vengo muy feliz y entusiasmada de unirme por segunda vez al concurso propuesto en la comunidad donde cordialmente nos motivan a crear una tetera de la manera más innovadora posible, un tema que me gusto mucho ya que desde que trabajo con manualidades nunca había pasado por mi mente hacer una, así que pensé esta es la oportunidad para poner manos a la obra, en un experimento casero que había tenido la oportunidad de ver aquí y aunque me daba mucho miedo hacerlo, qué podía pasar, tenía que intentarlo.
Well, today I am very happy and excited to join for the second time the contest proposed in the community where they cordially motivate us to create a teapot in the most innovative way possible, a theme that I liked a lot since since I work with crafts, it had never crossed my mind to make one, so I thought this is the opportunity to get down to work, in a home experiment that I had the opportunity to see here and although I was very afraid to do it , what could happen, I had to try.
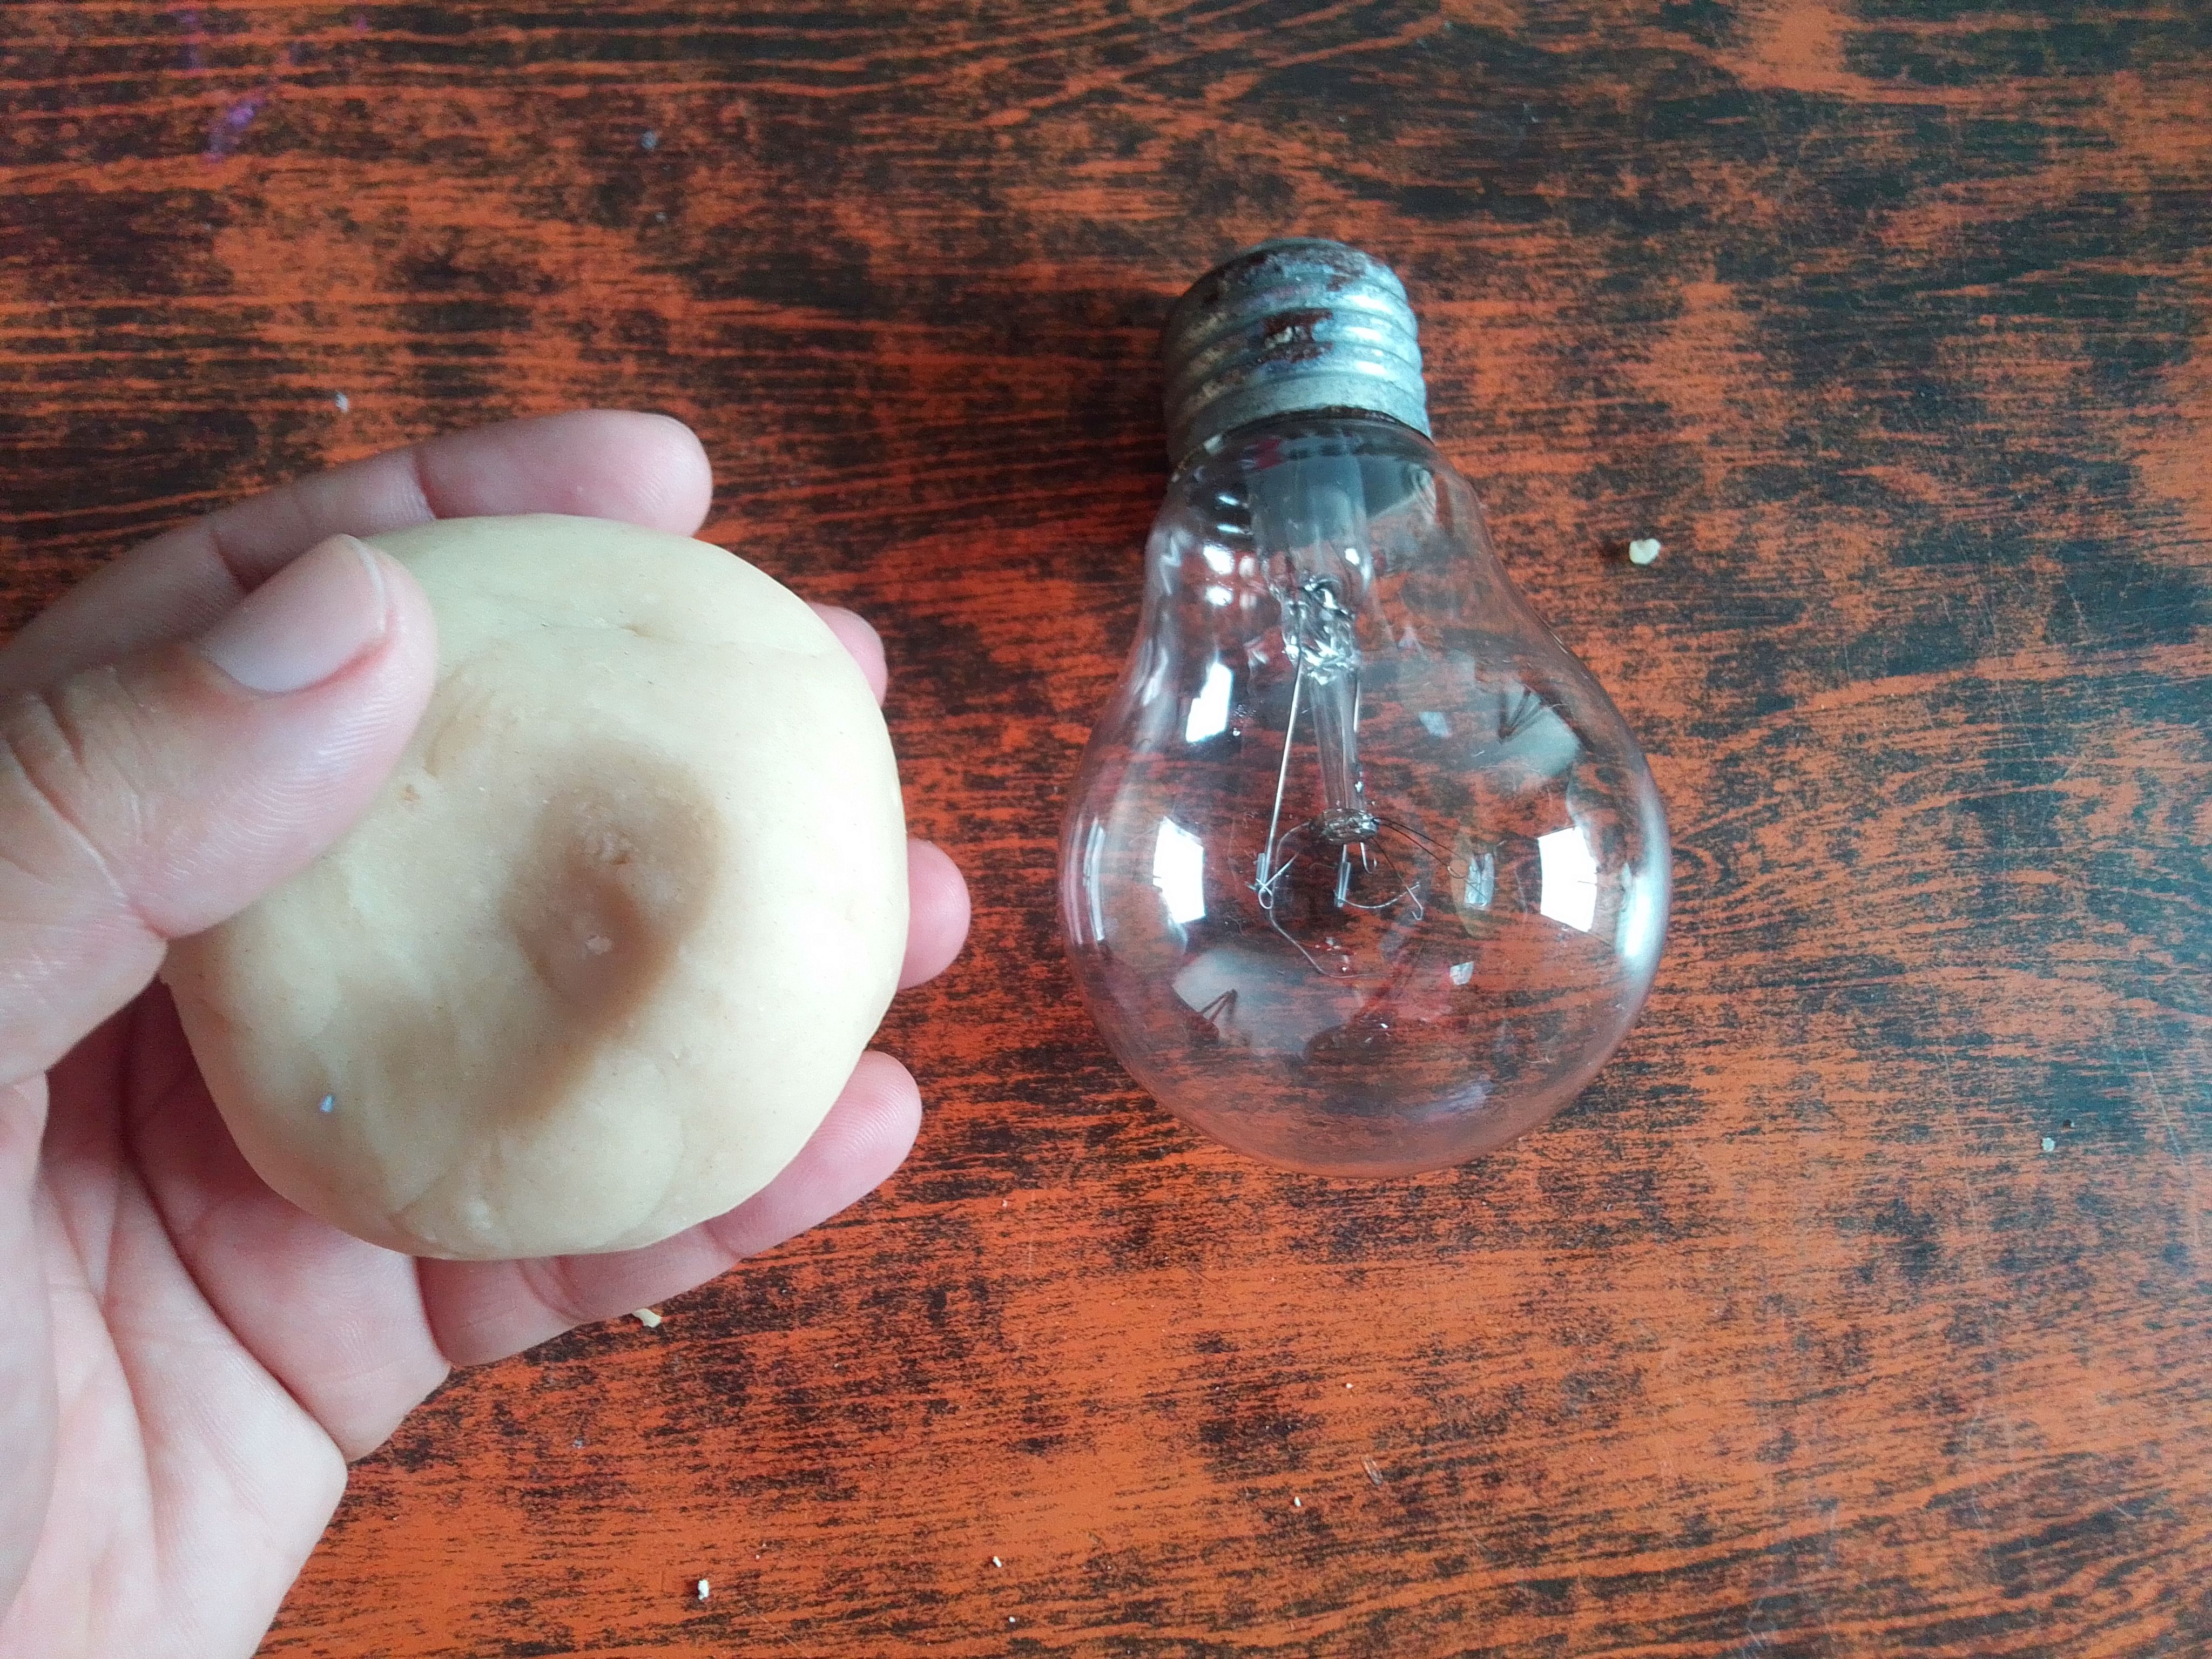
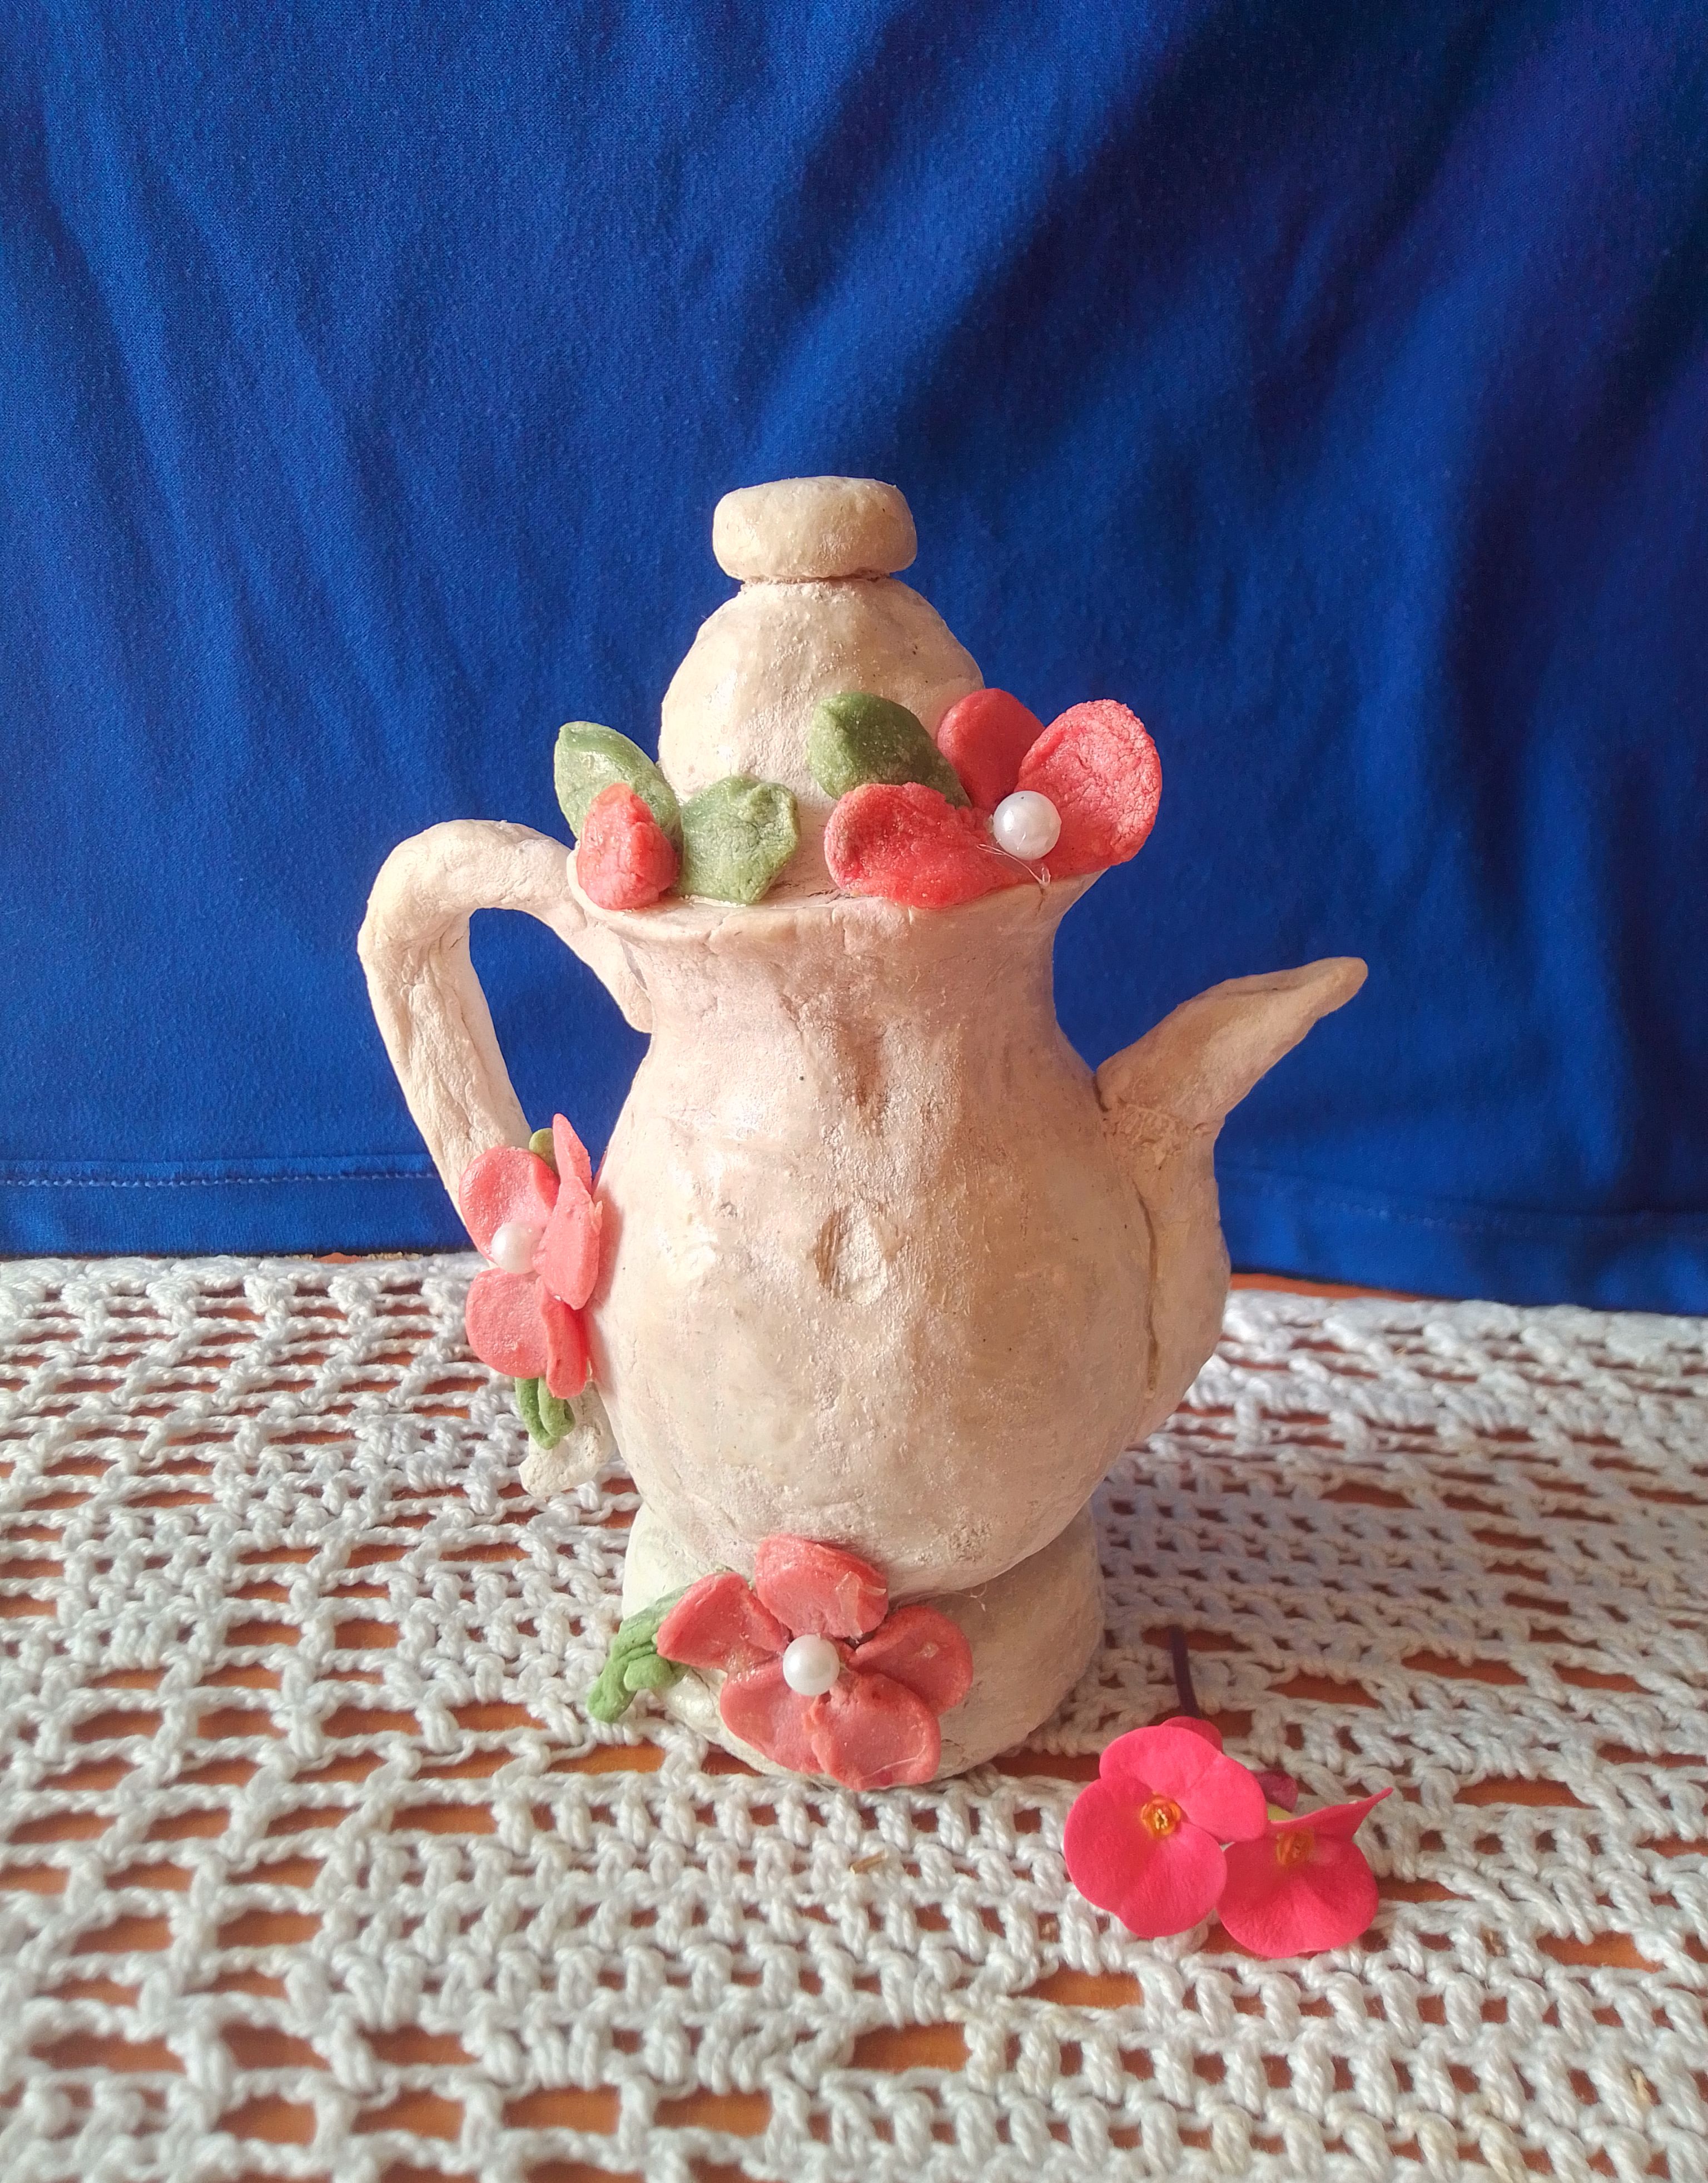
Para mi partición he elaborado una tetera decorativa, creando una masa flexible artesanal y reciclando una bombilla ya dañada. Está pieza puede ser útil para decorar un espacio del hogar y la ventaja que no sea de vidrio o porcelana es que puede resultar una buena opción para pisar algo que deseamos que el viento no vuele.Acompañame hasta el final de cada paso.
For my participation I have made a decorative teapot, creating a handmade flexible mass and recycling an already damaged light bulb. This piece can be useful to decorate a space in the home and the advantage that it is not made of glass or porcelain is that it can be a good option to step on something that we want the wind not to blow away. Come with me until the end of each step.
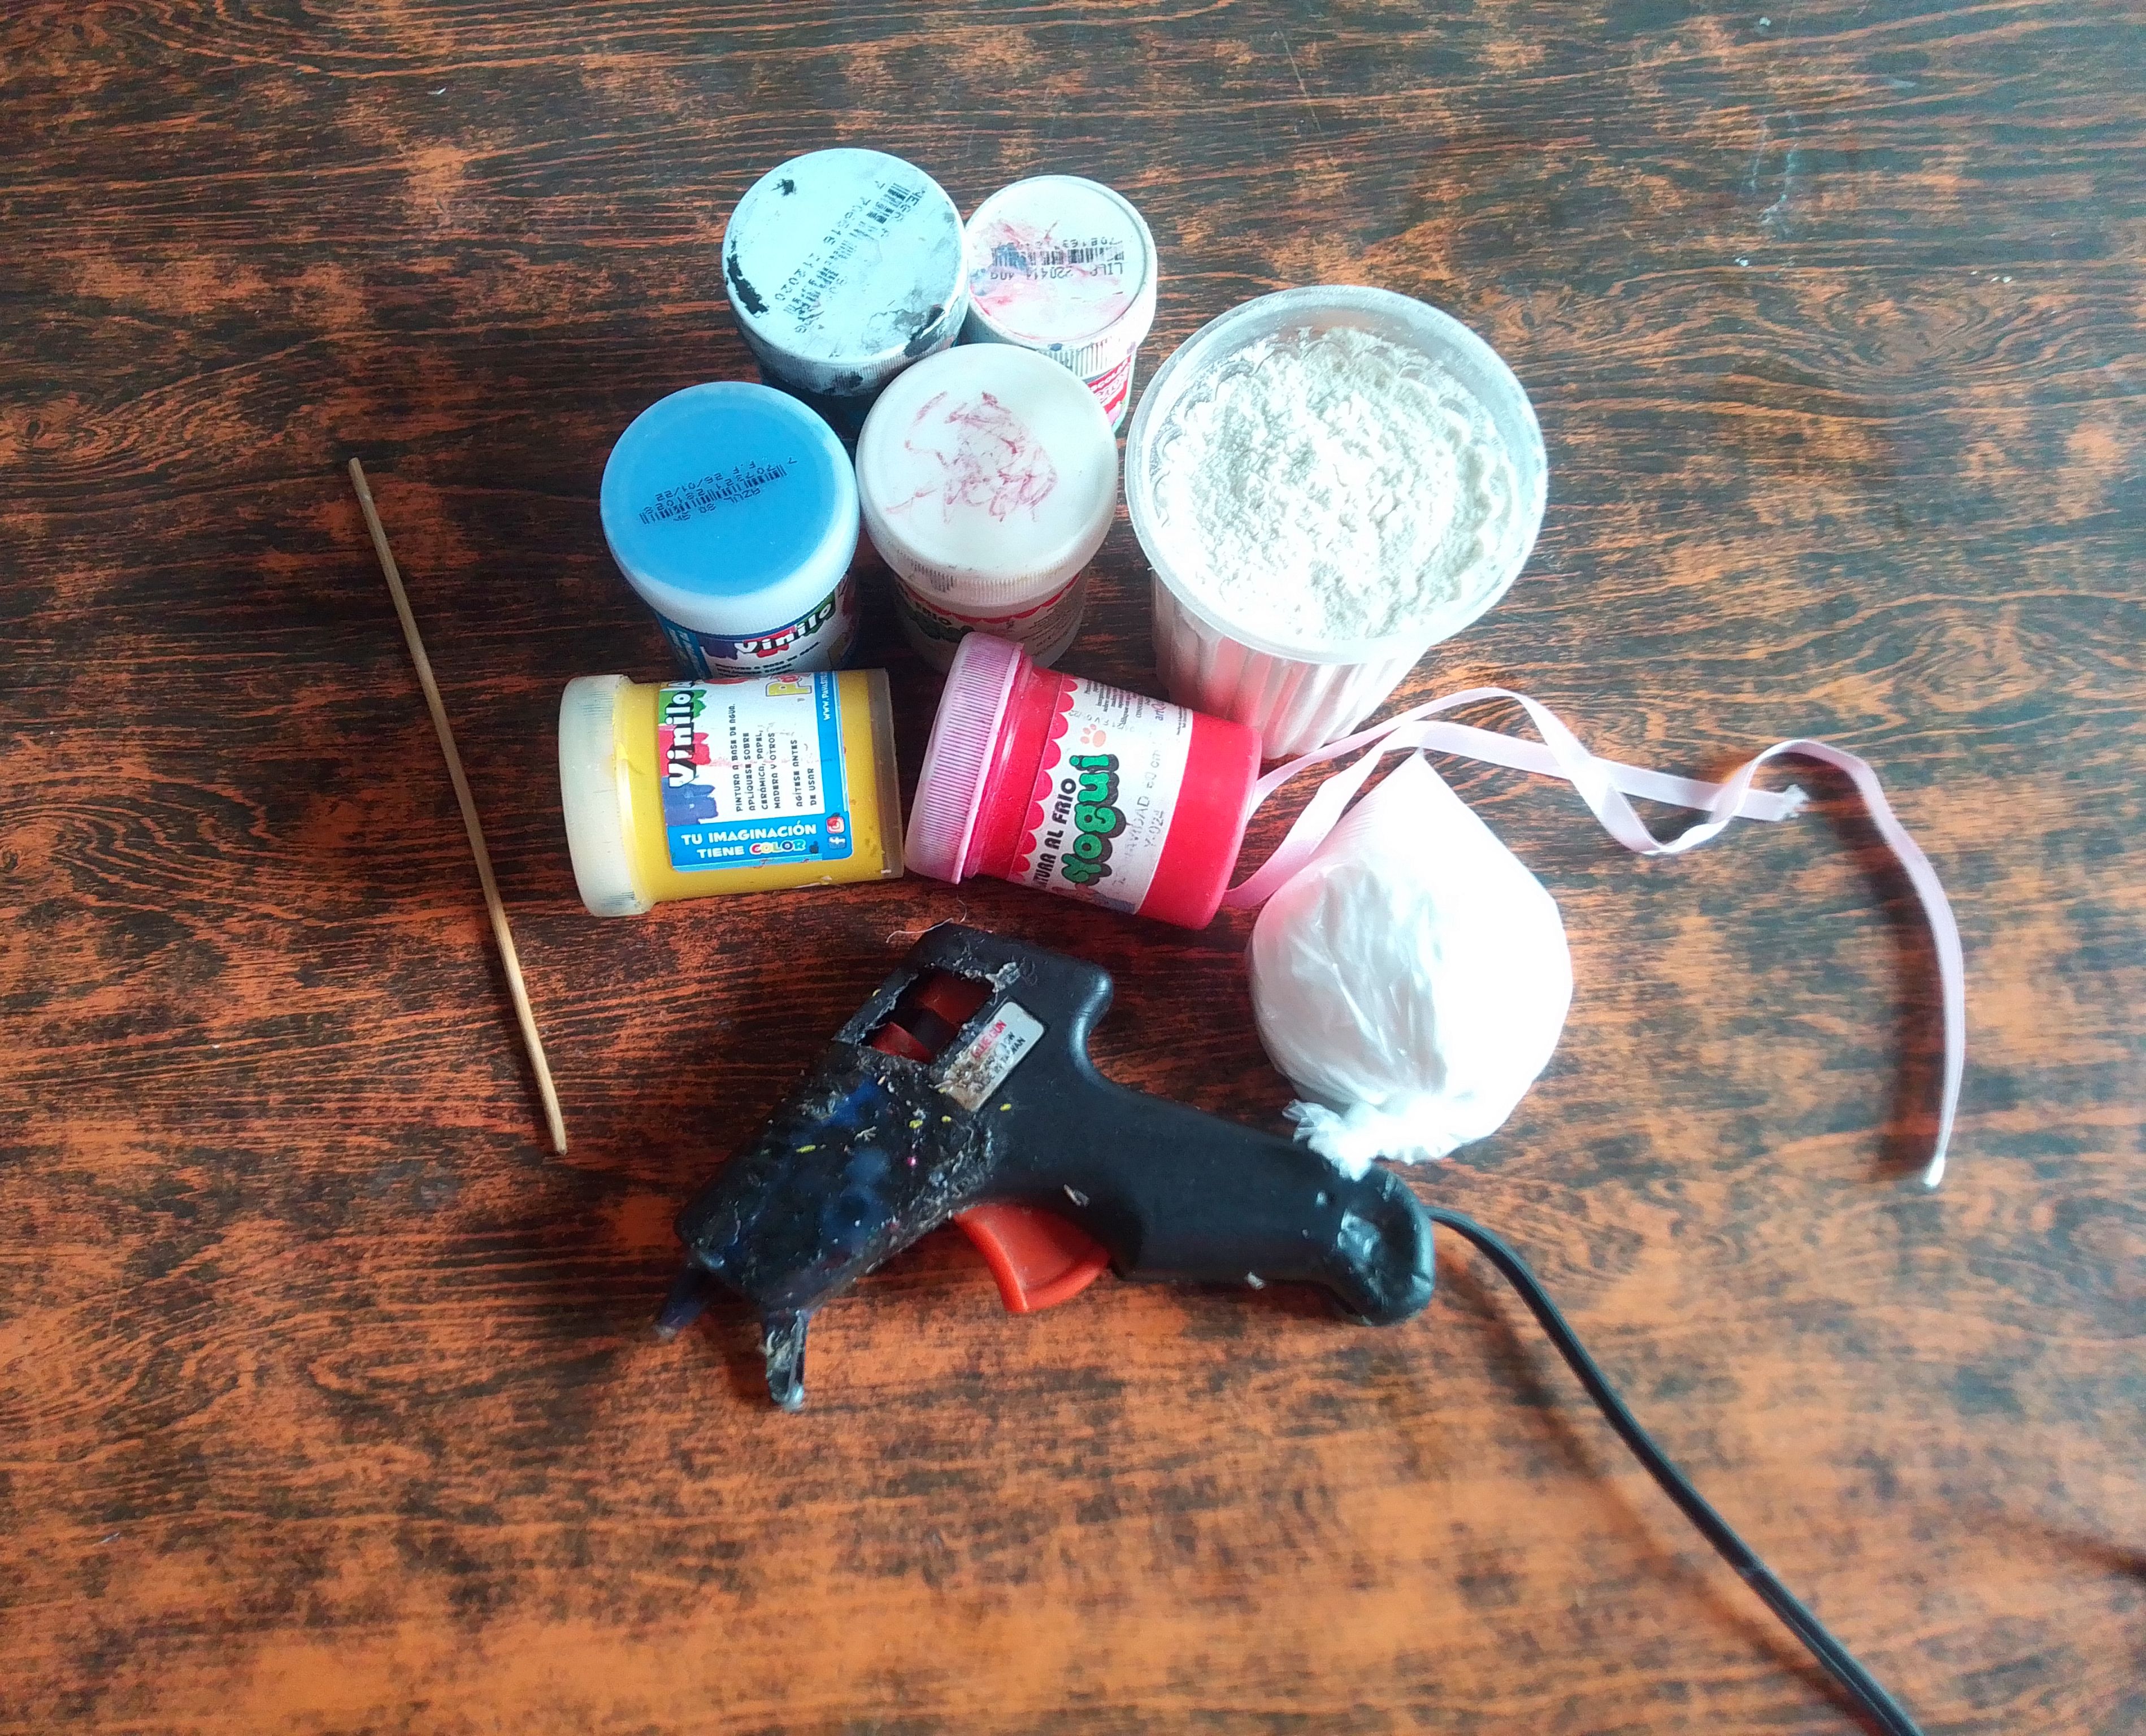
En esta fotografía faltan algunos materiales, ya que las ideas venian a mi mente a medida que iba haciendo está artesanía pero acá de tejo una lista d ellos materiales que necesitas:
In this photograph some materials are missing, since the ideas came to my mind as I was making this craft but here is a list of the materials you need:
- Una bombilla.
- Harina de trigo.
- Bicarbonato.
- Pinturas.
- Pincel.
- Alambre de cobre.
- Tapa pequeña.
- Barniz.
*Silicón.
- A light bulb.
- Wheat flour.
- Baking soda.
- Paintings.
- Brush.
- Copper wire.
- Small lid.
- Varnish.
- Silicón.
(PROCEDIMIENTO)
Paso 01
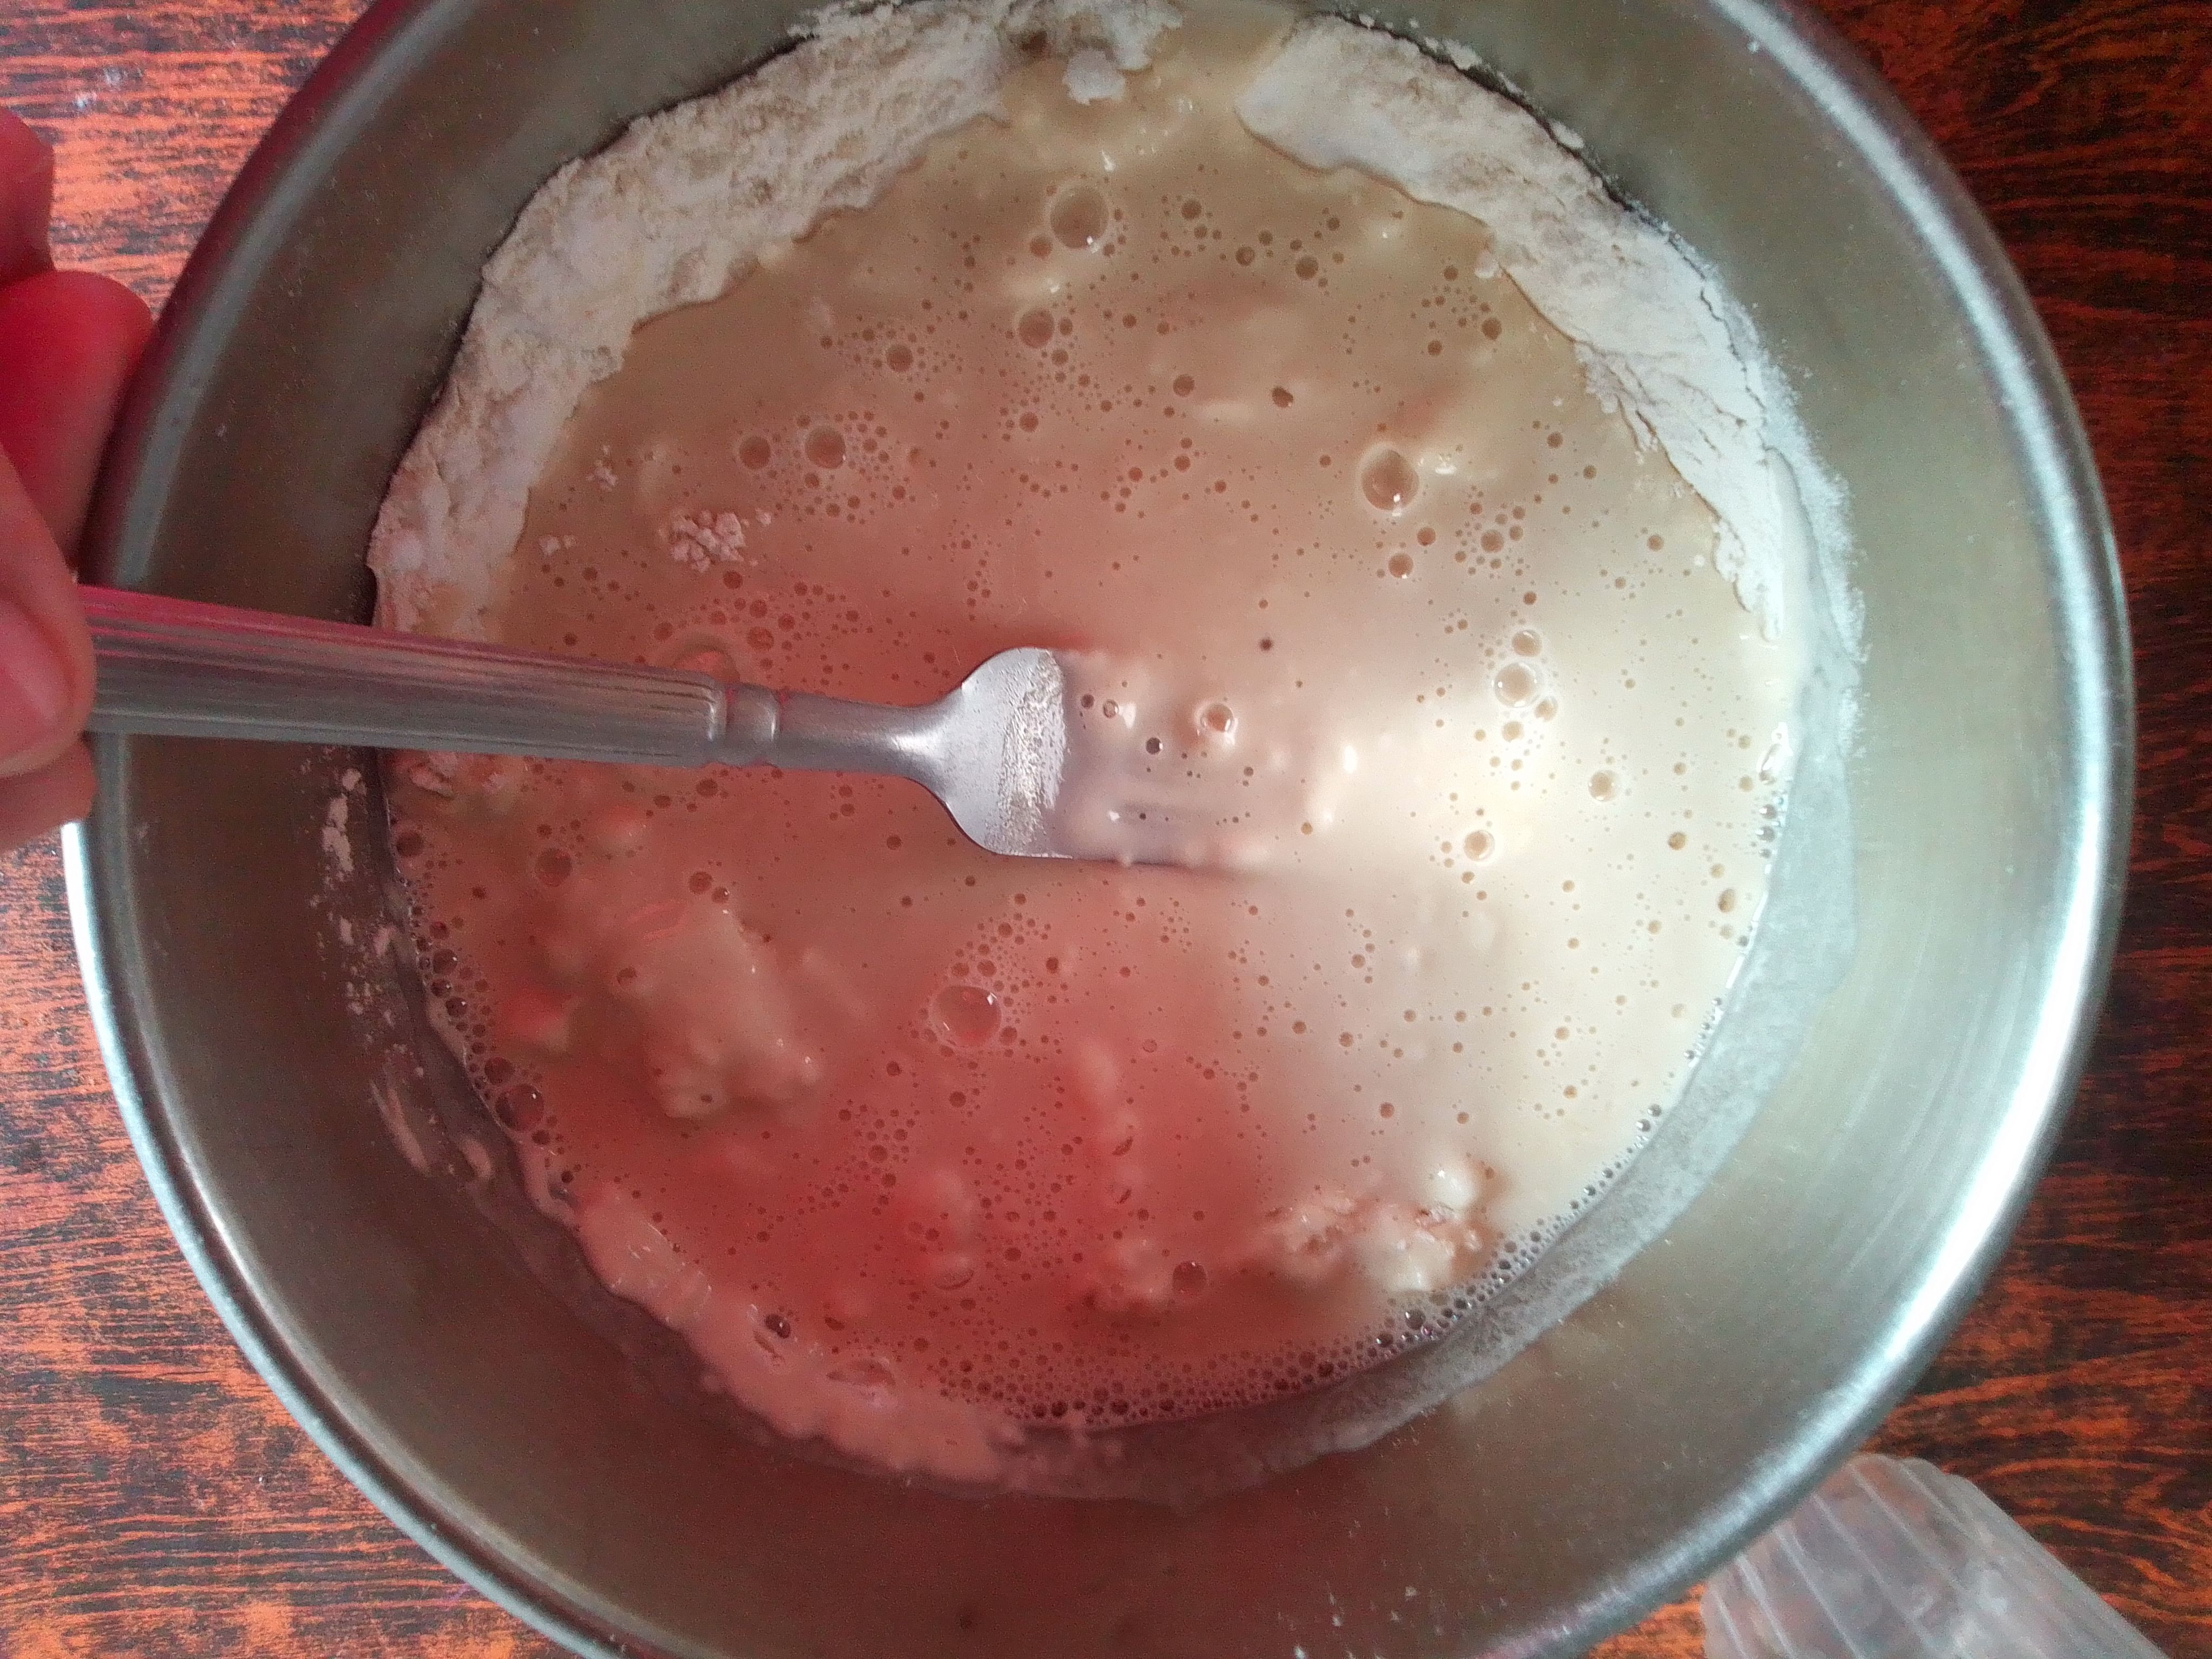
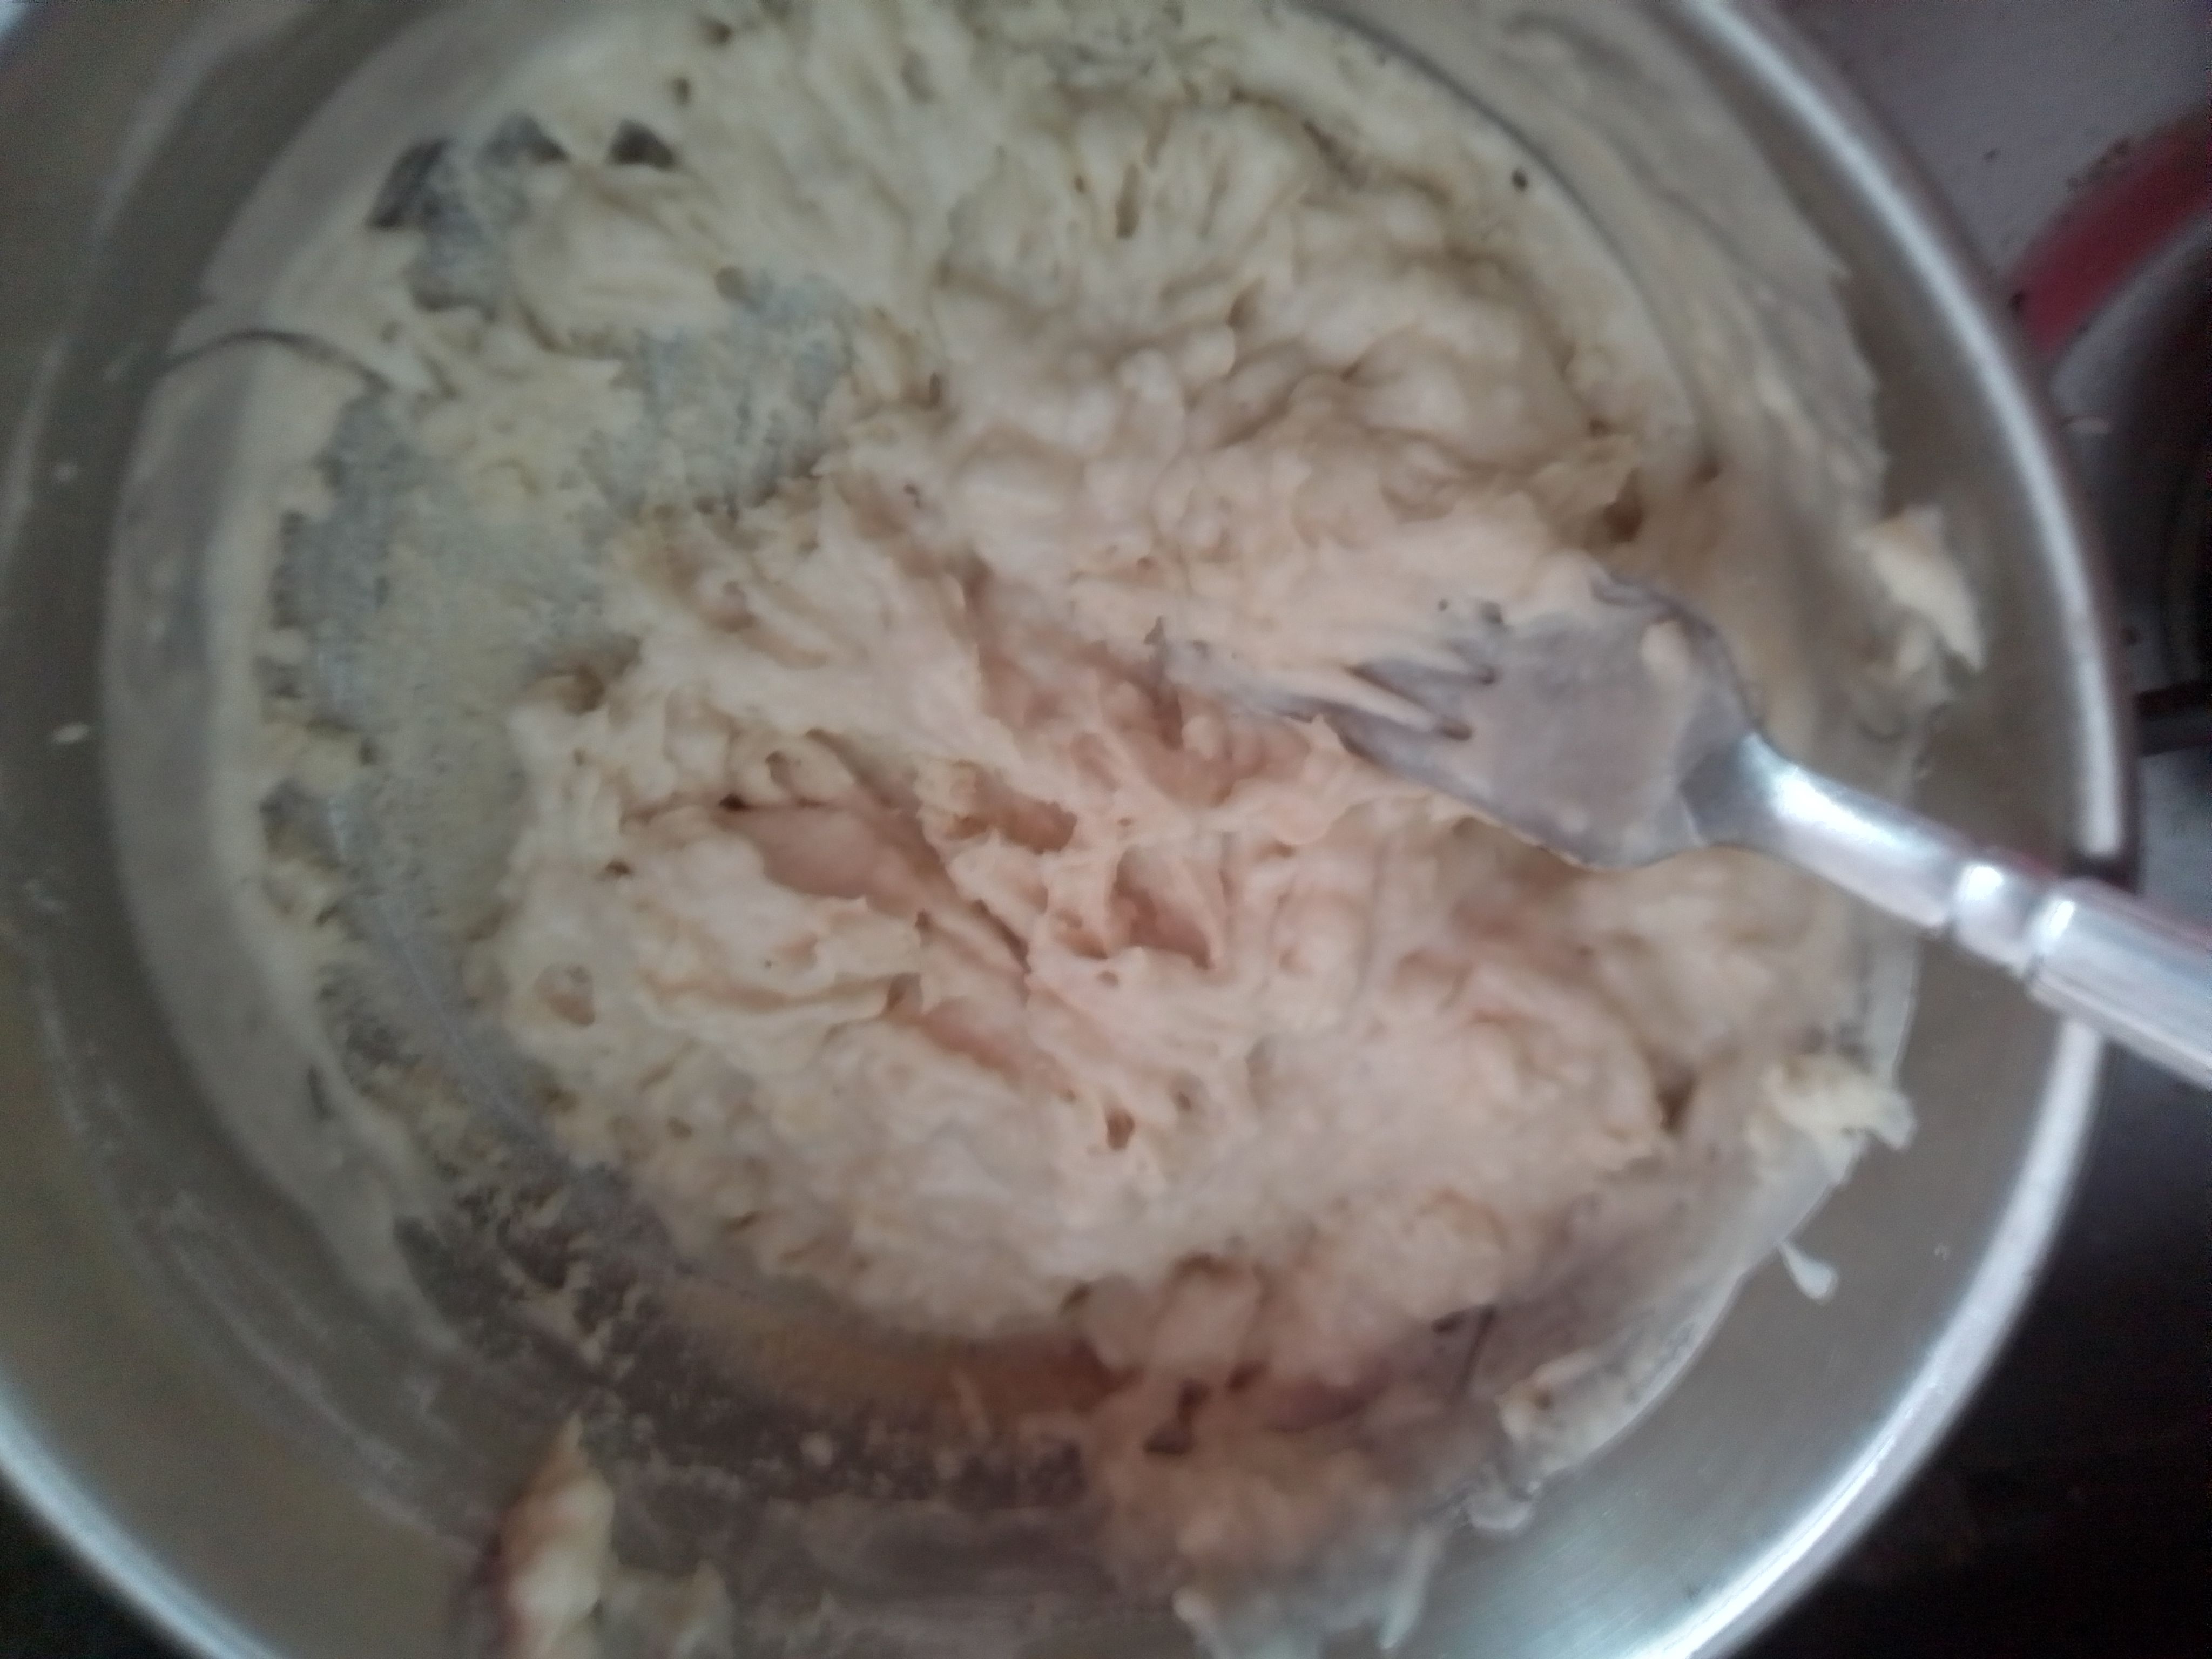
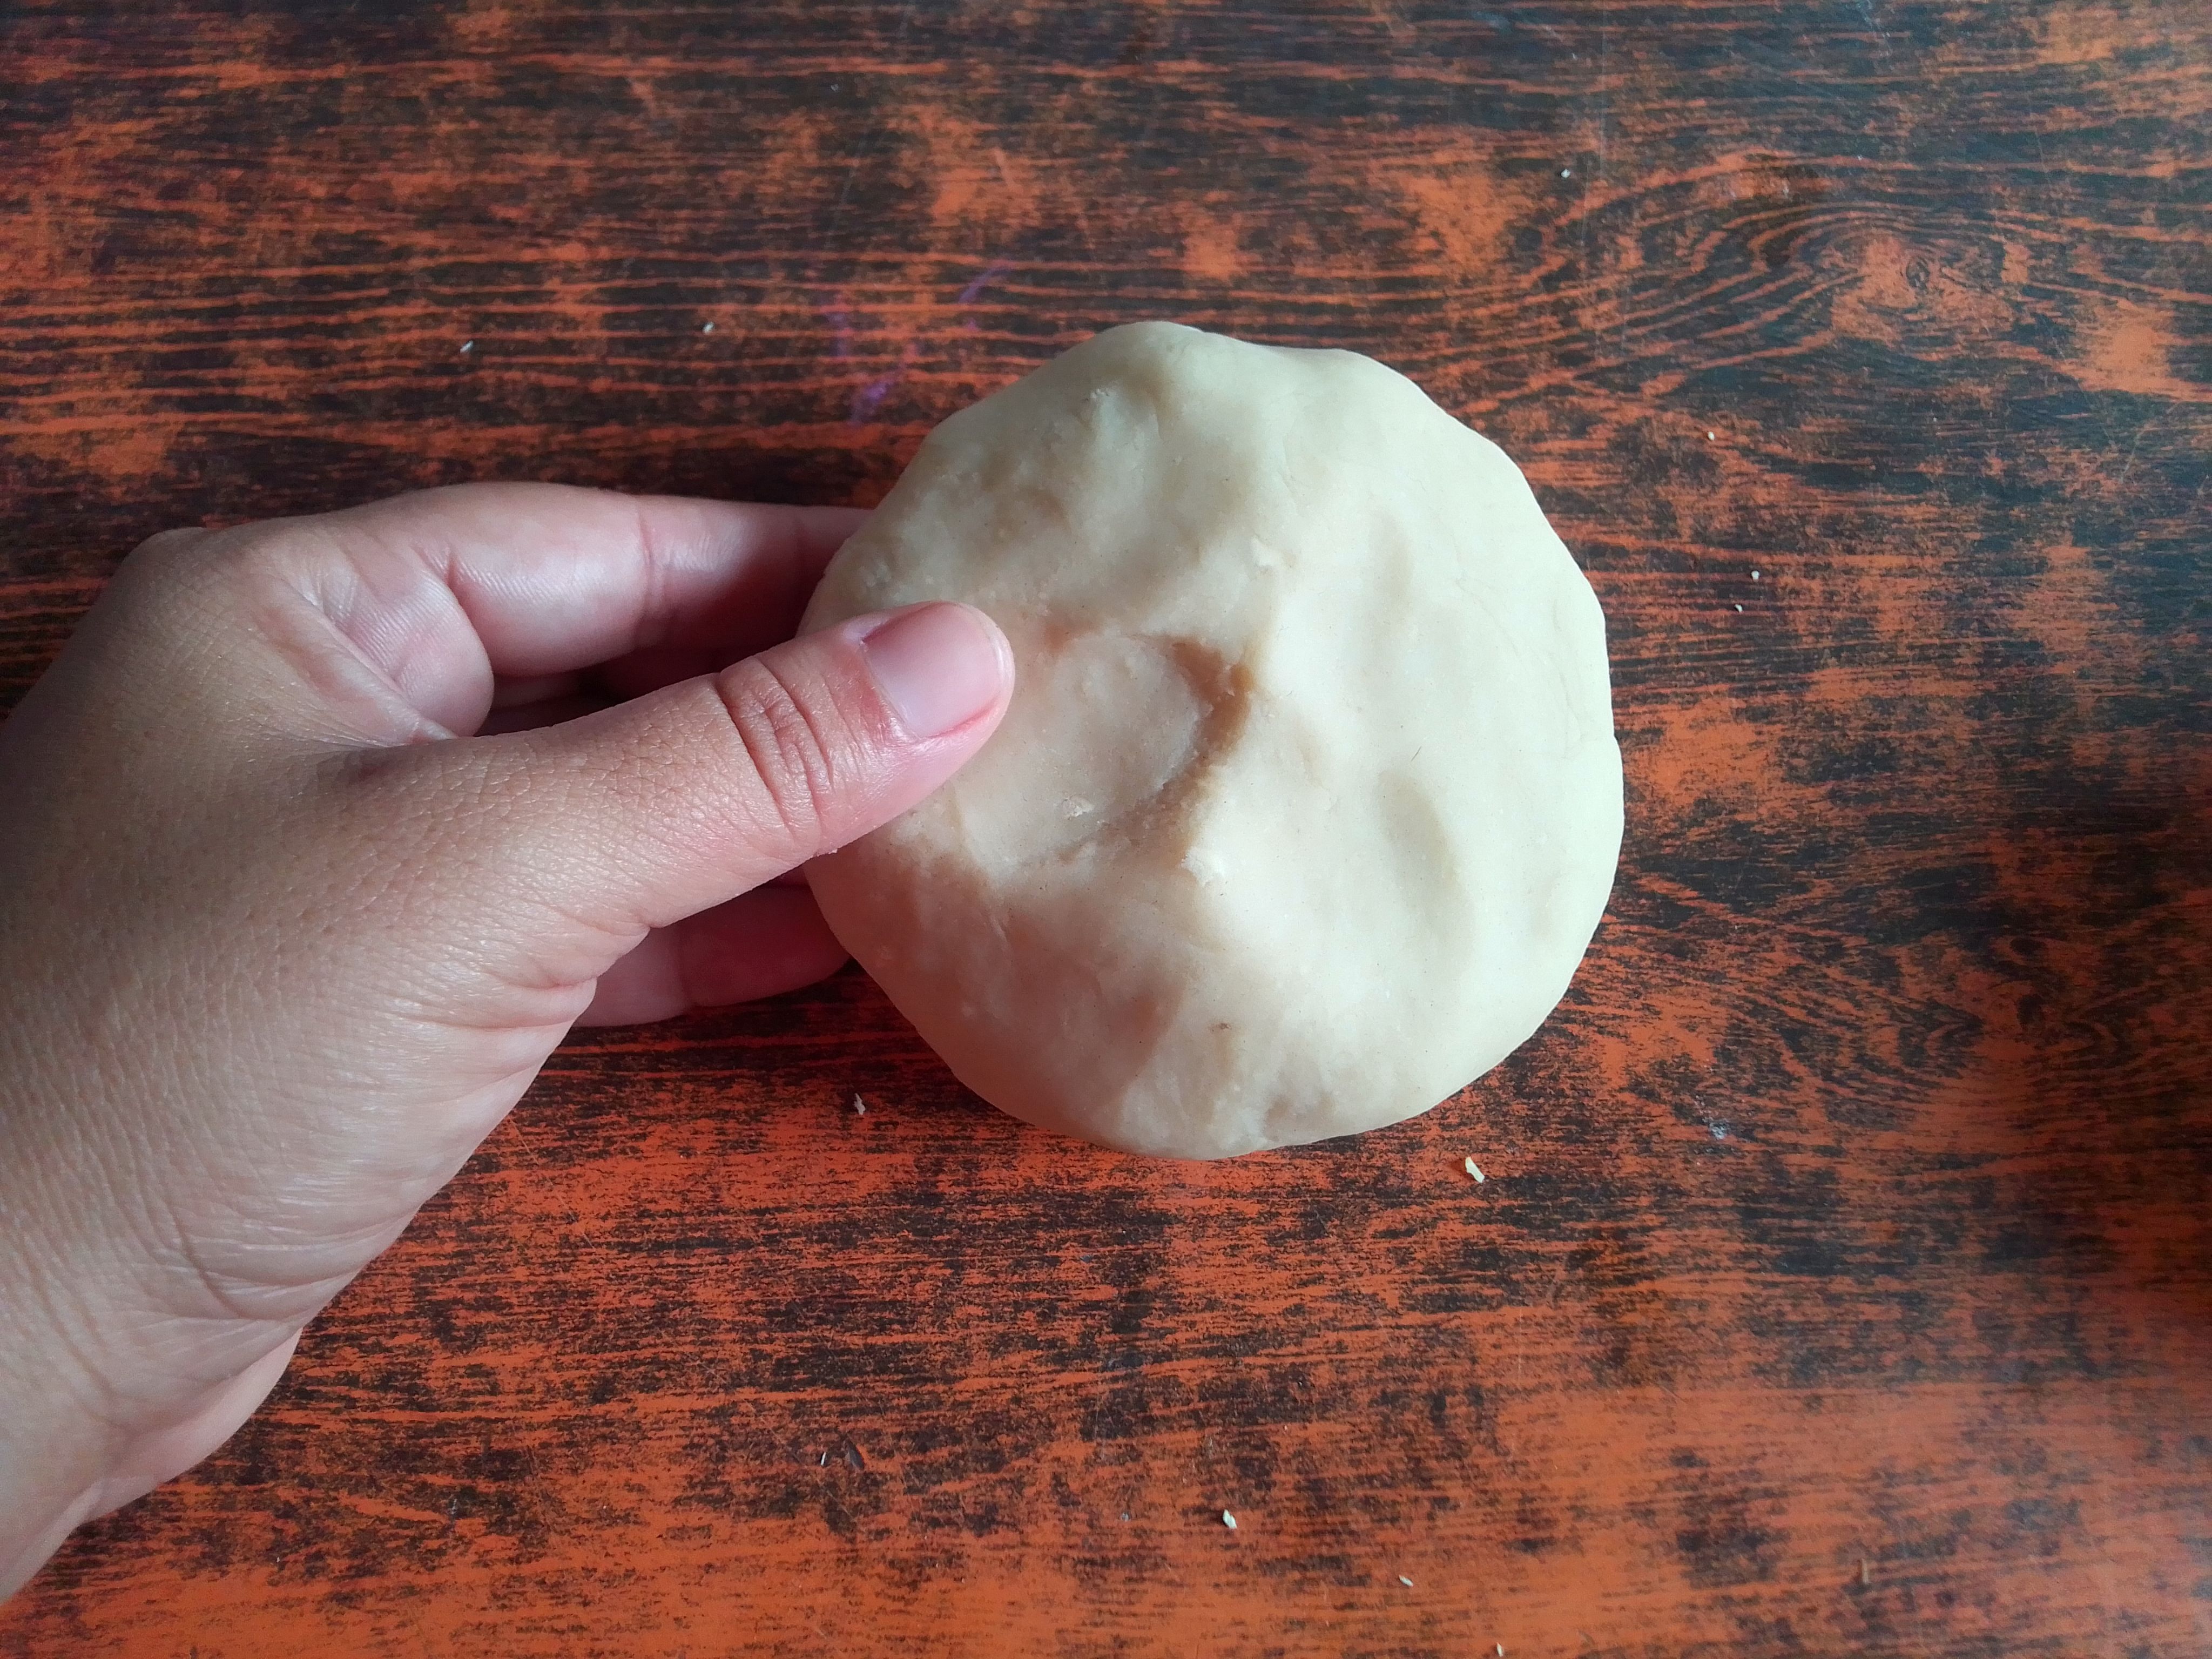
Bien amigos, iniciamos preparando la masa artesanal con harina de trigo. En una olla coloco un vaso pequeño de harina y utilizo la misma medida de bicarbonato, agrego también la misma cantidad de agua y mezclo poco a poco hasta disolver. La llevamos a la cocina a fuego lento y muevo hasta que la mezcla compacte, es normal que se hagan grumos pero no debes preocuparte, es parte del proceso. Dejamos enfriar y amasamos hasta que tener un punto suave en la masa.
Step 01
Well friends, we start by preparing the artisan dough with wheat flour. In a pot I place a small glass of flour and use the same measure of baking soda, I also add the same amount of water and mix little by little until dissolved. We take it to the kitchen over low heat and I move until the mixture compacts, it is normal for lumps to form but you should not worry, it is part of the process. Let cool and knead until you have a soft point in the dough.

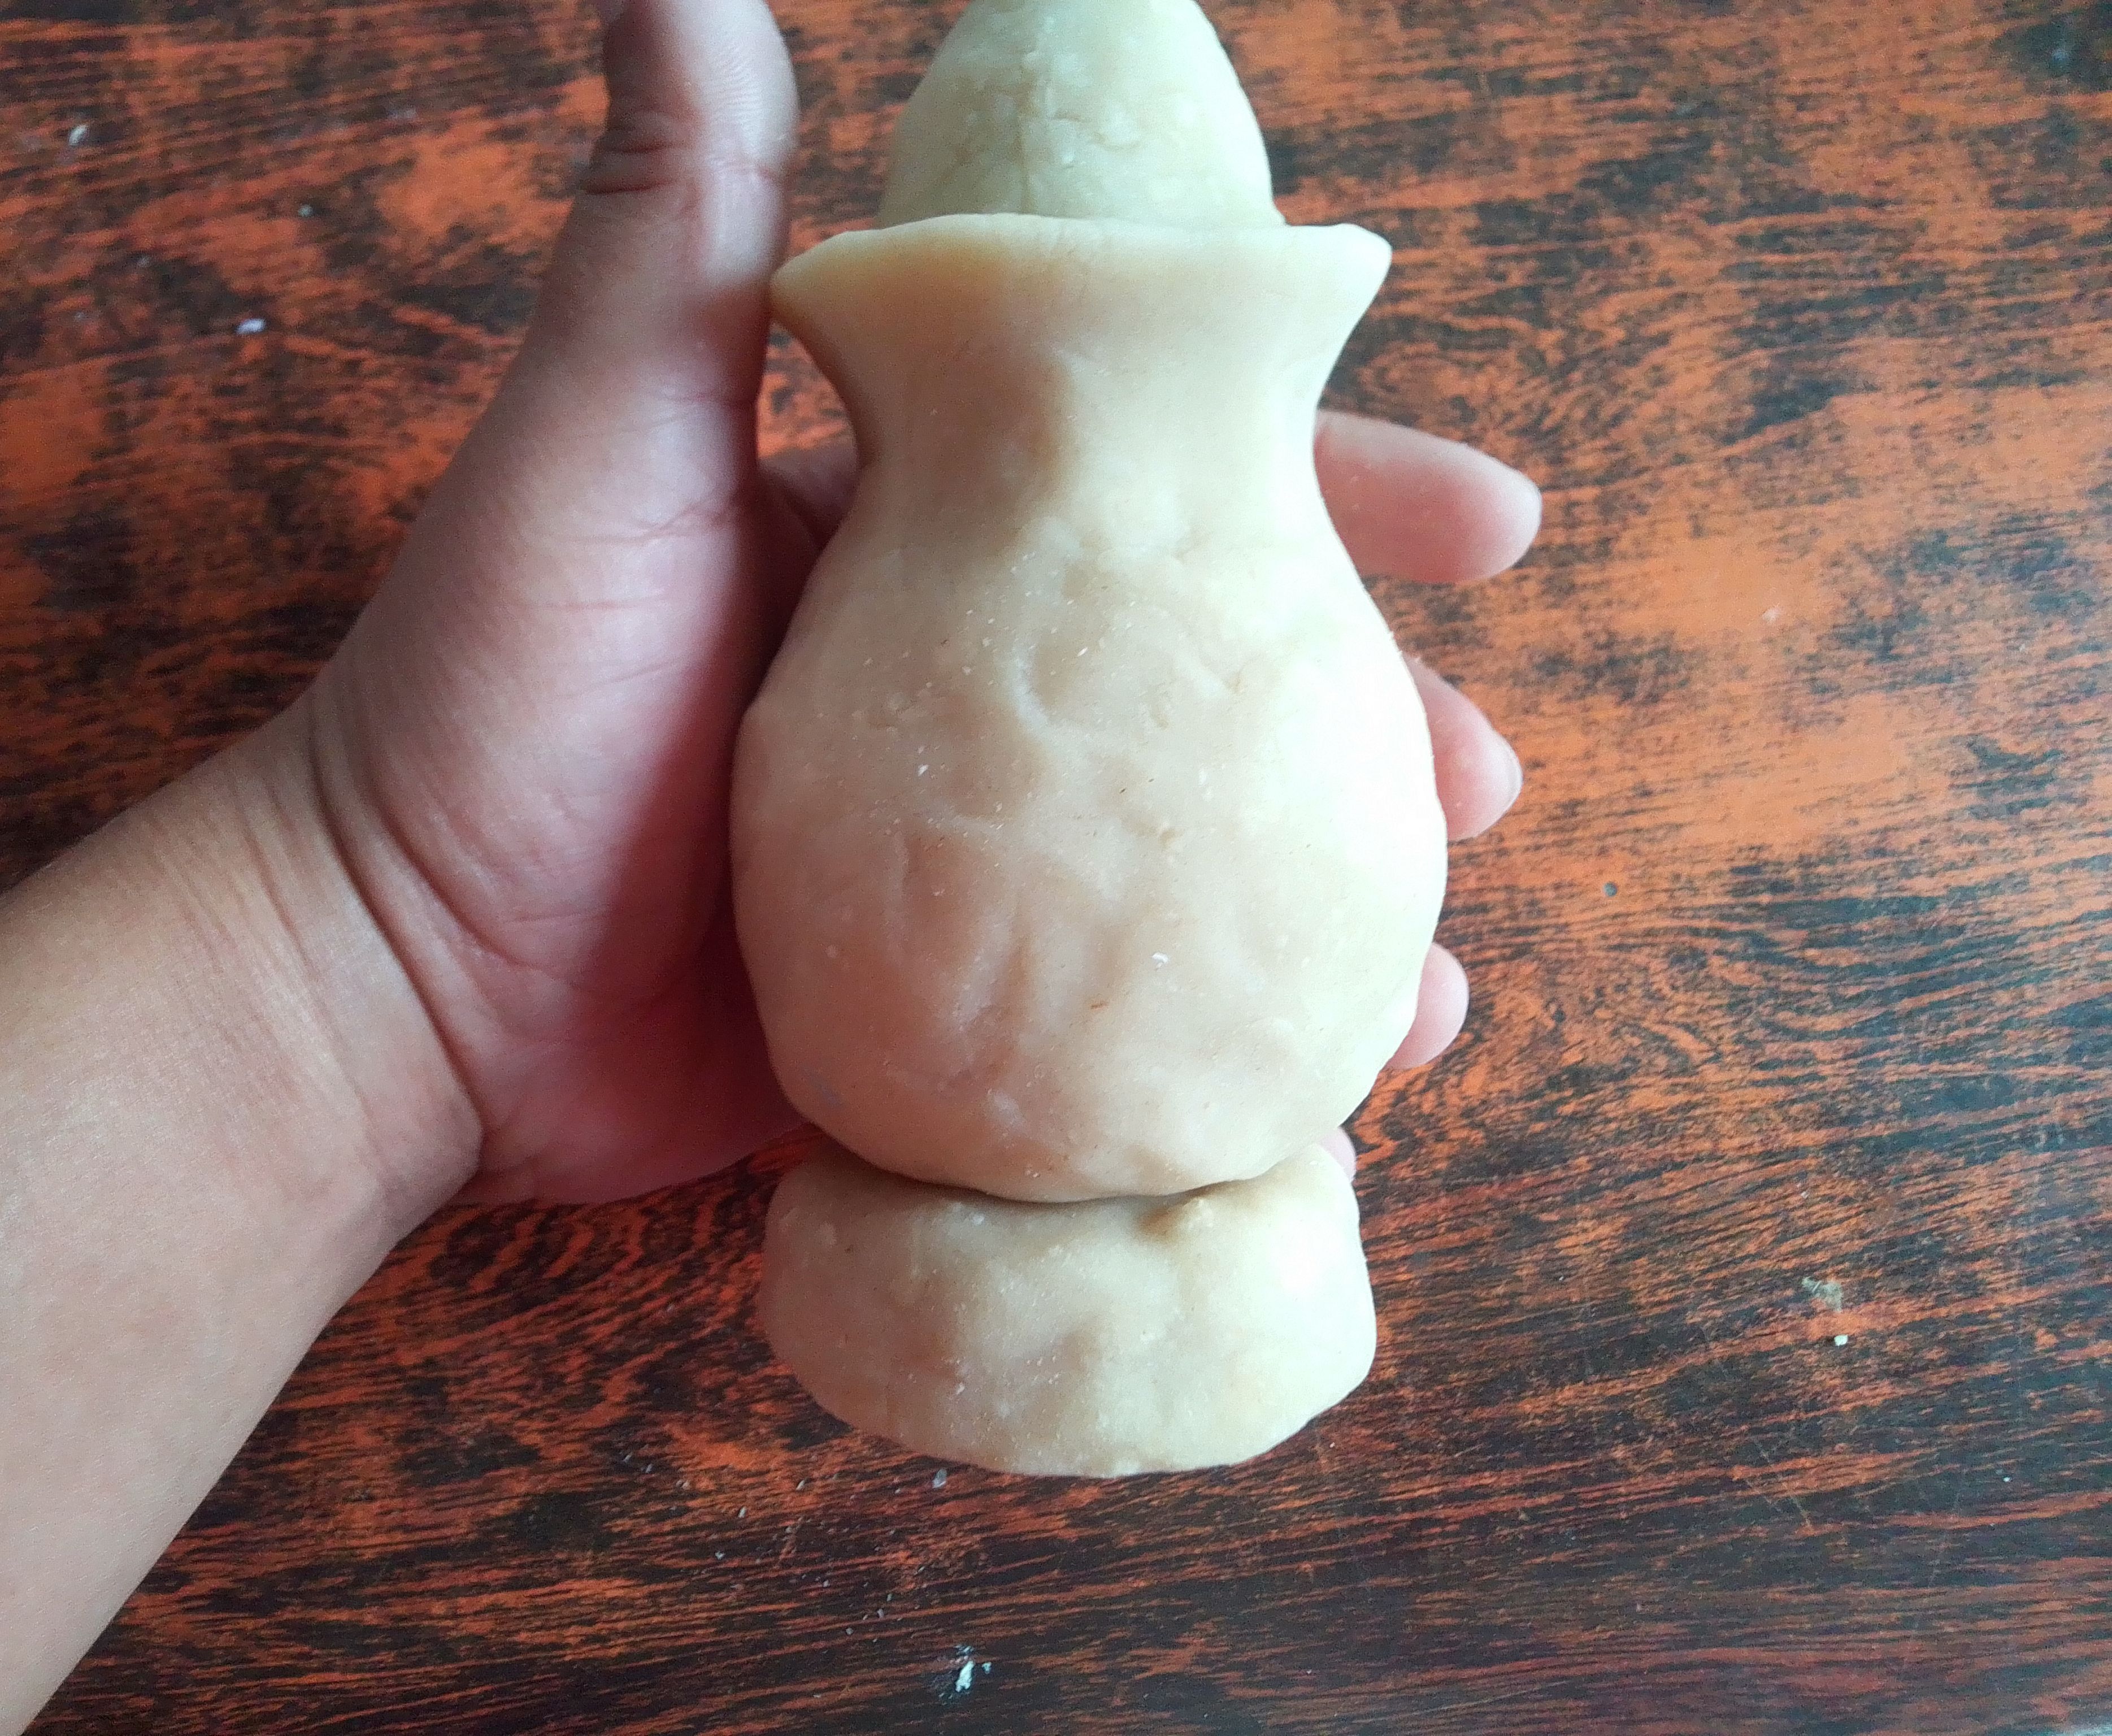
Paso 02
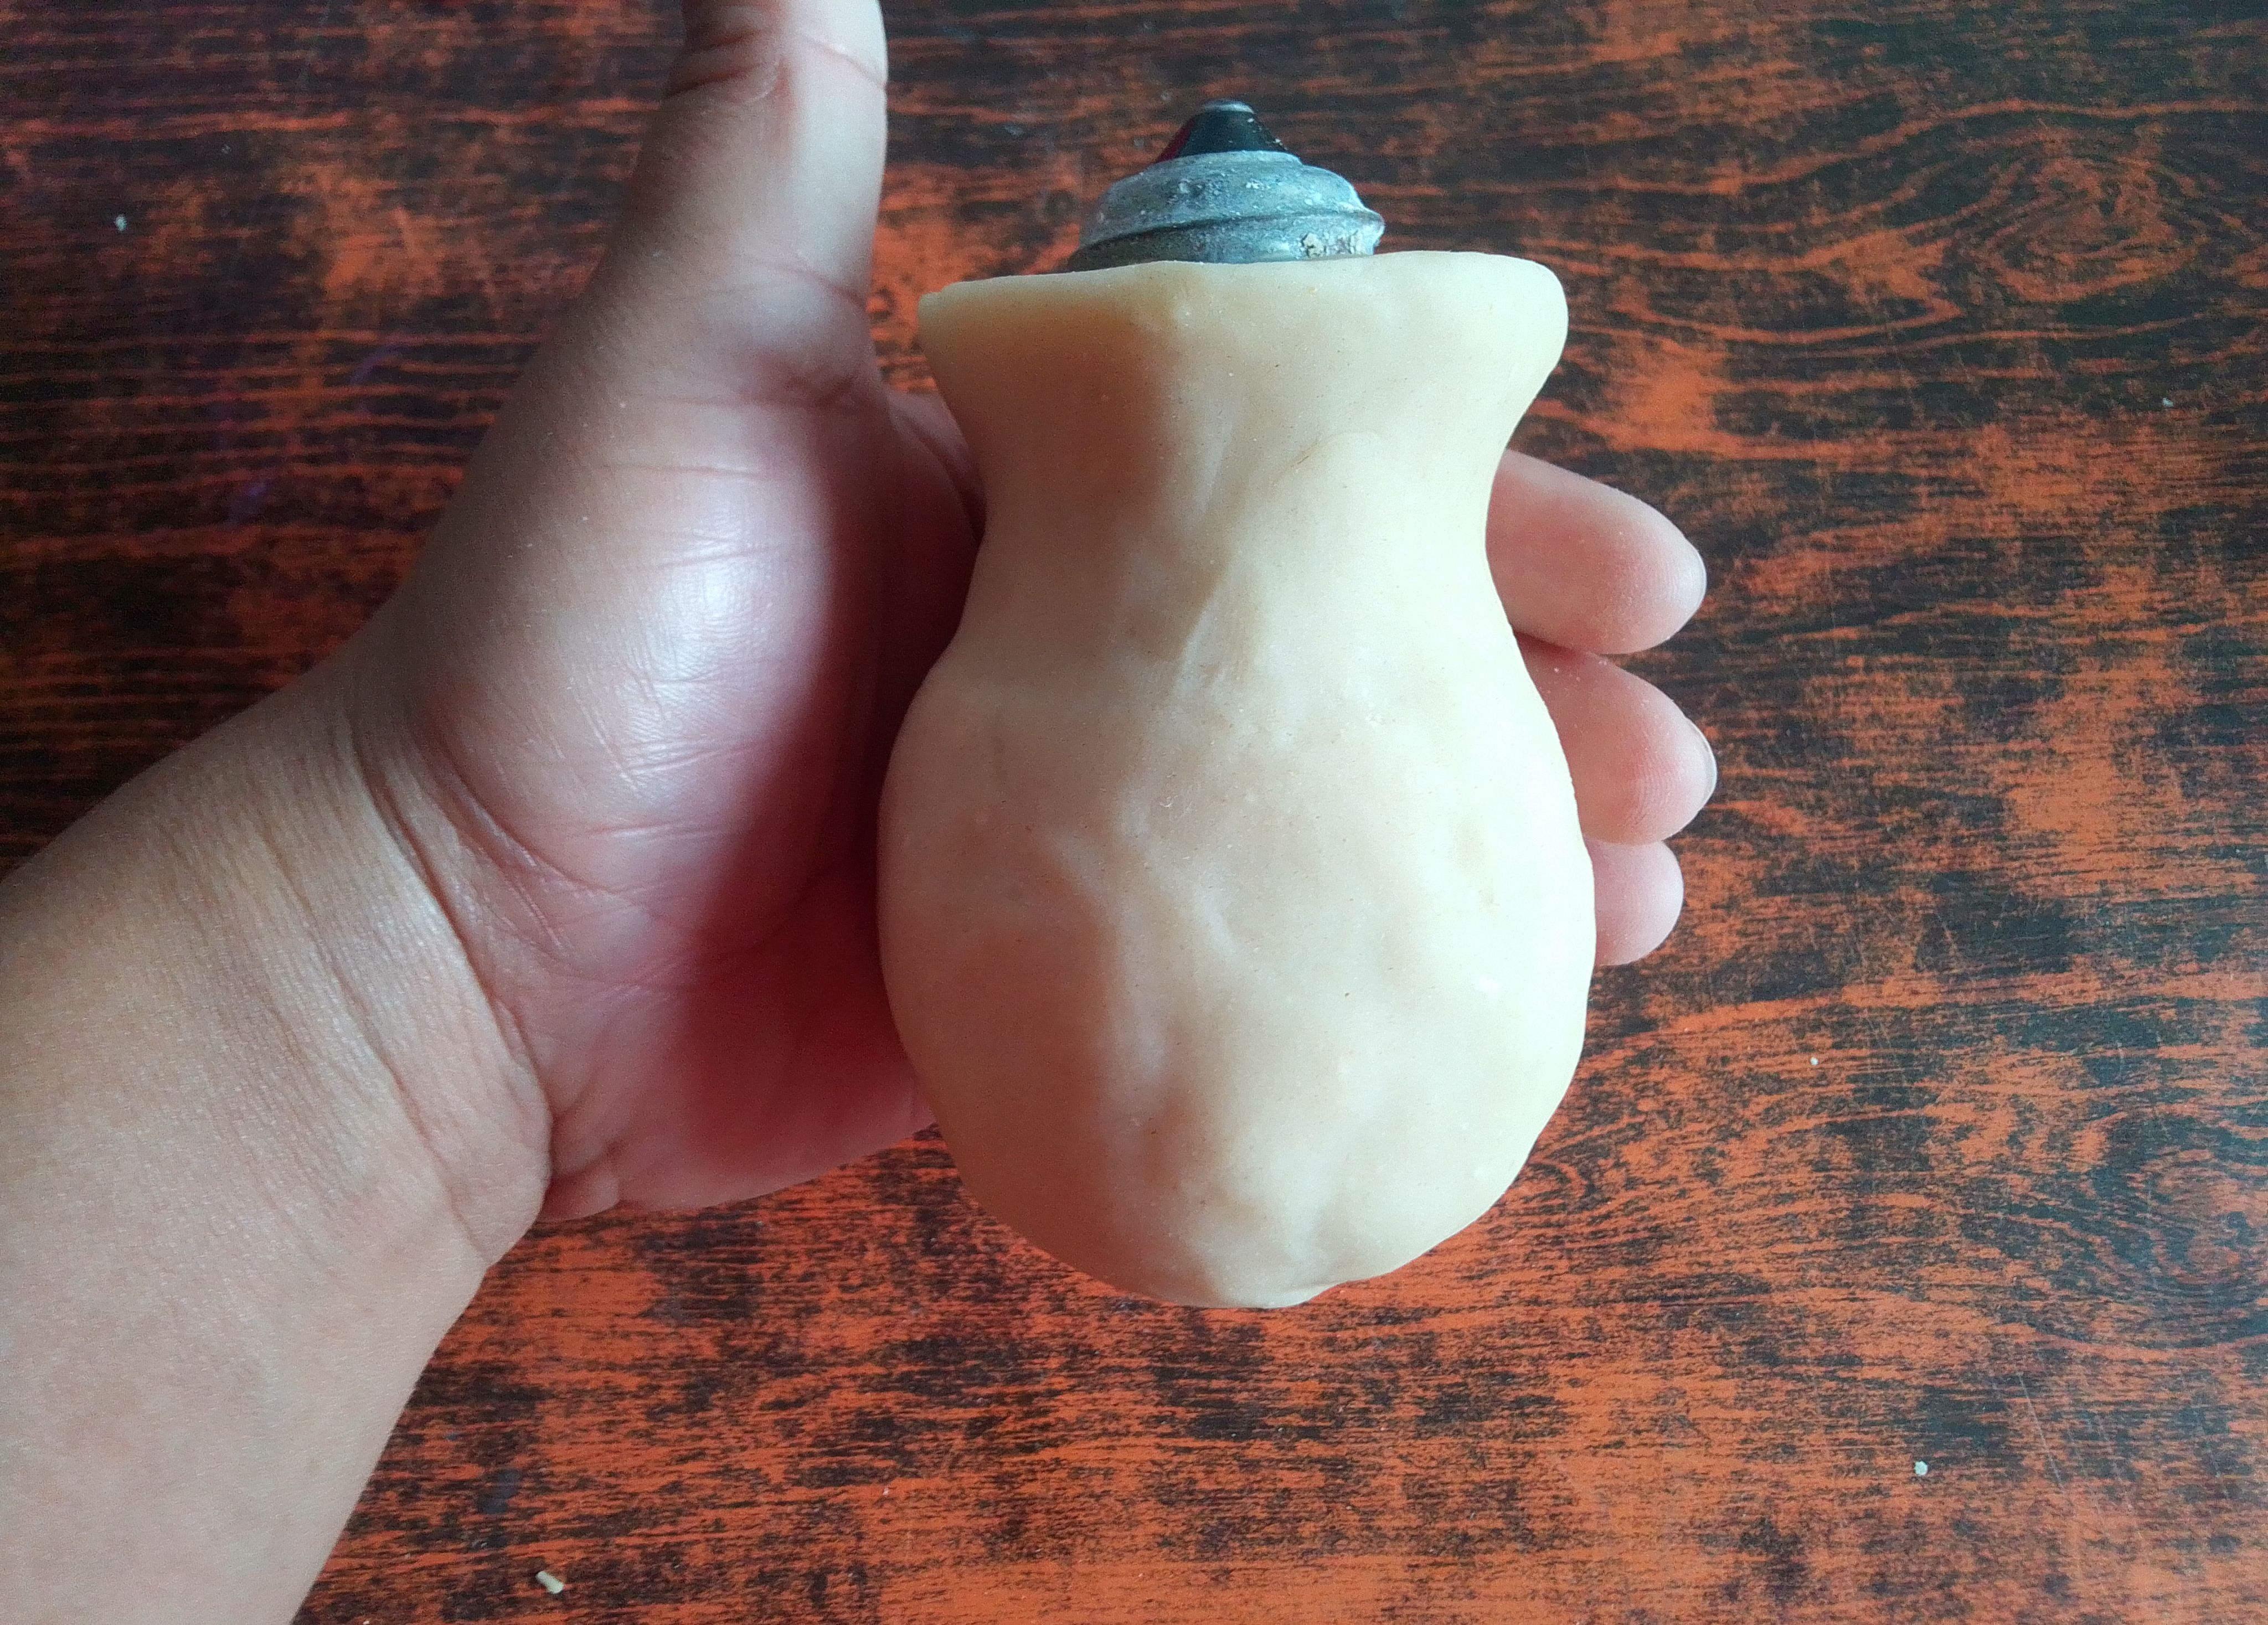
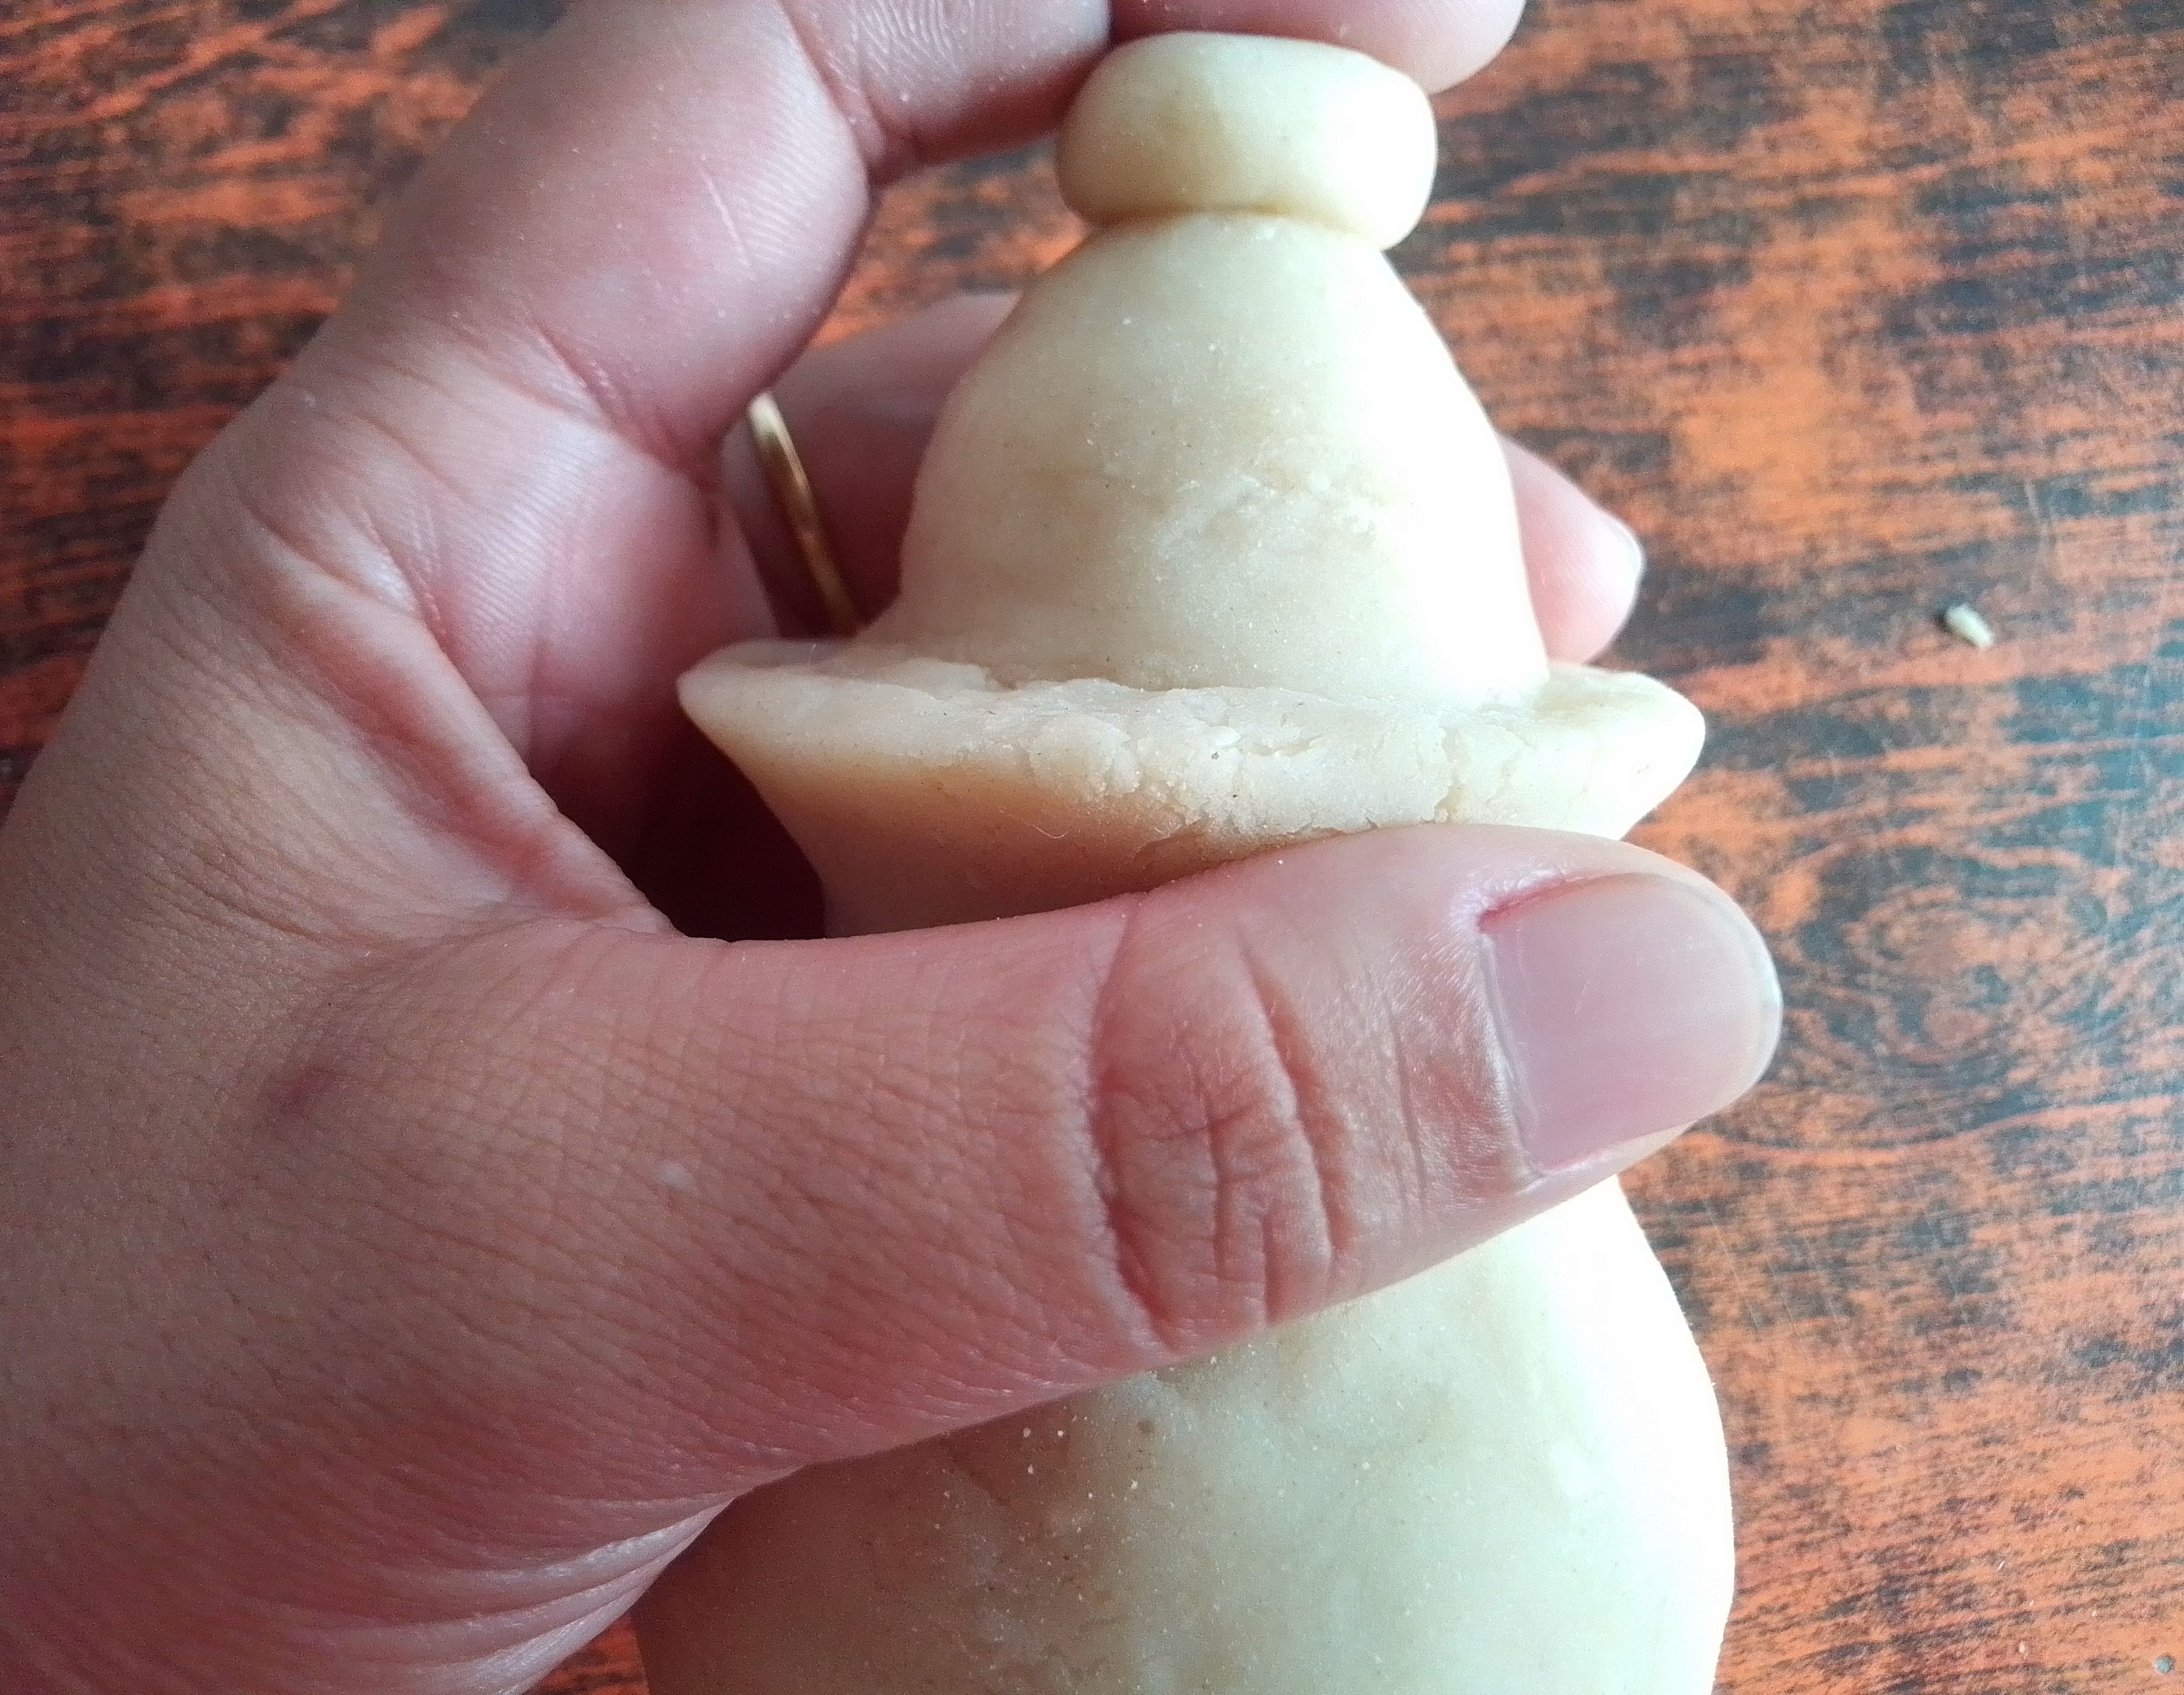
Ya con nuestro masa lista, tomo una porción y comienzo a darle la forma del bombillo sin cubrir la parte de aluminio. De la misma manera moldeamos la masa para darle la forma de tetera en la parte superior. Puedes ir humedeciendo tus manos para un mejor resultado. Moldeamos con otro poco de pasa la parte superior de bombillo siguiendo su forma dandole una forma de tapa, hacemos una bolita plana y la pegamos encima.
Step 02
With our dough ready, I take a portion and begin to give it the shape of a light bulb without covering the aluminum part. In the same way we mold the dough to give it the shape of a teapot on top. You can moisten your hands for a better result.We mold with another bit of raisin the upper part of the light bulb following its shape giving it a lid shape, we make a flat ball and we stick it on top.
Paso 03
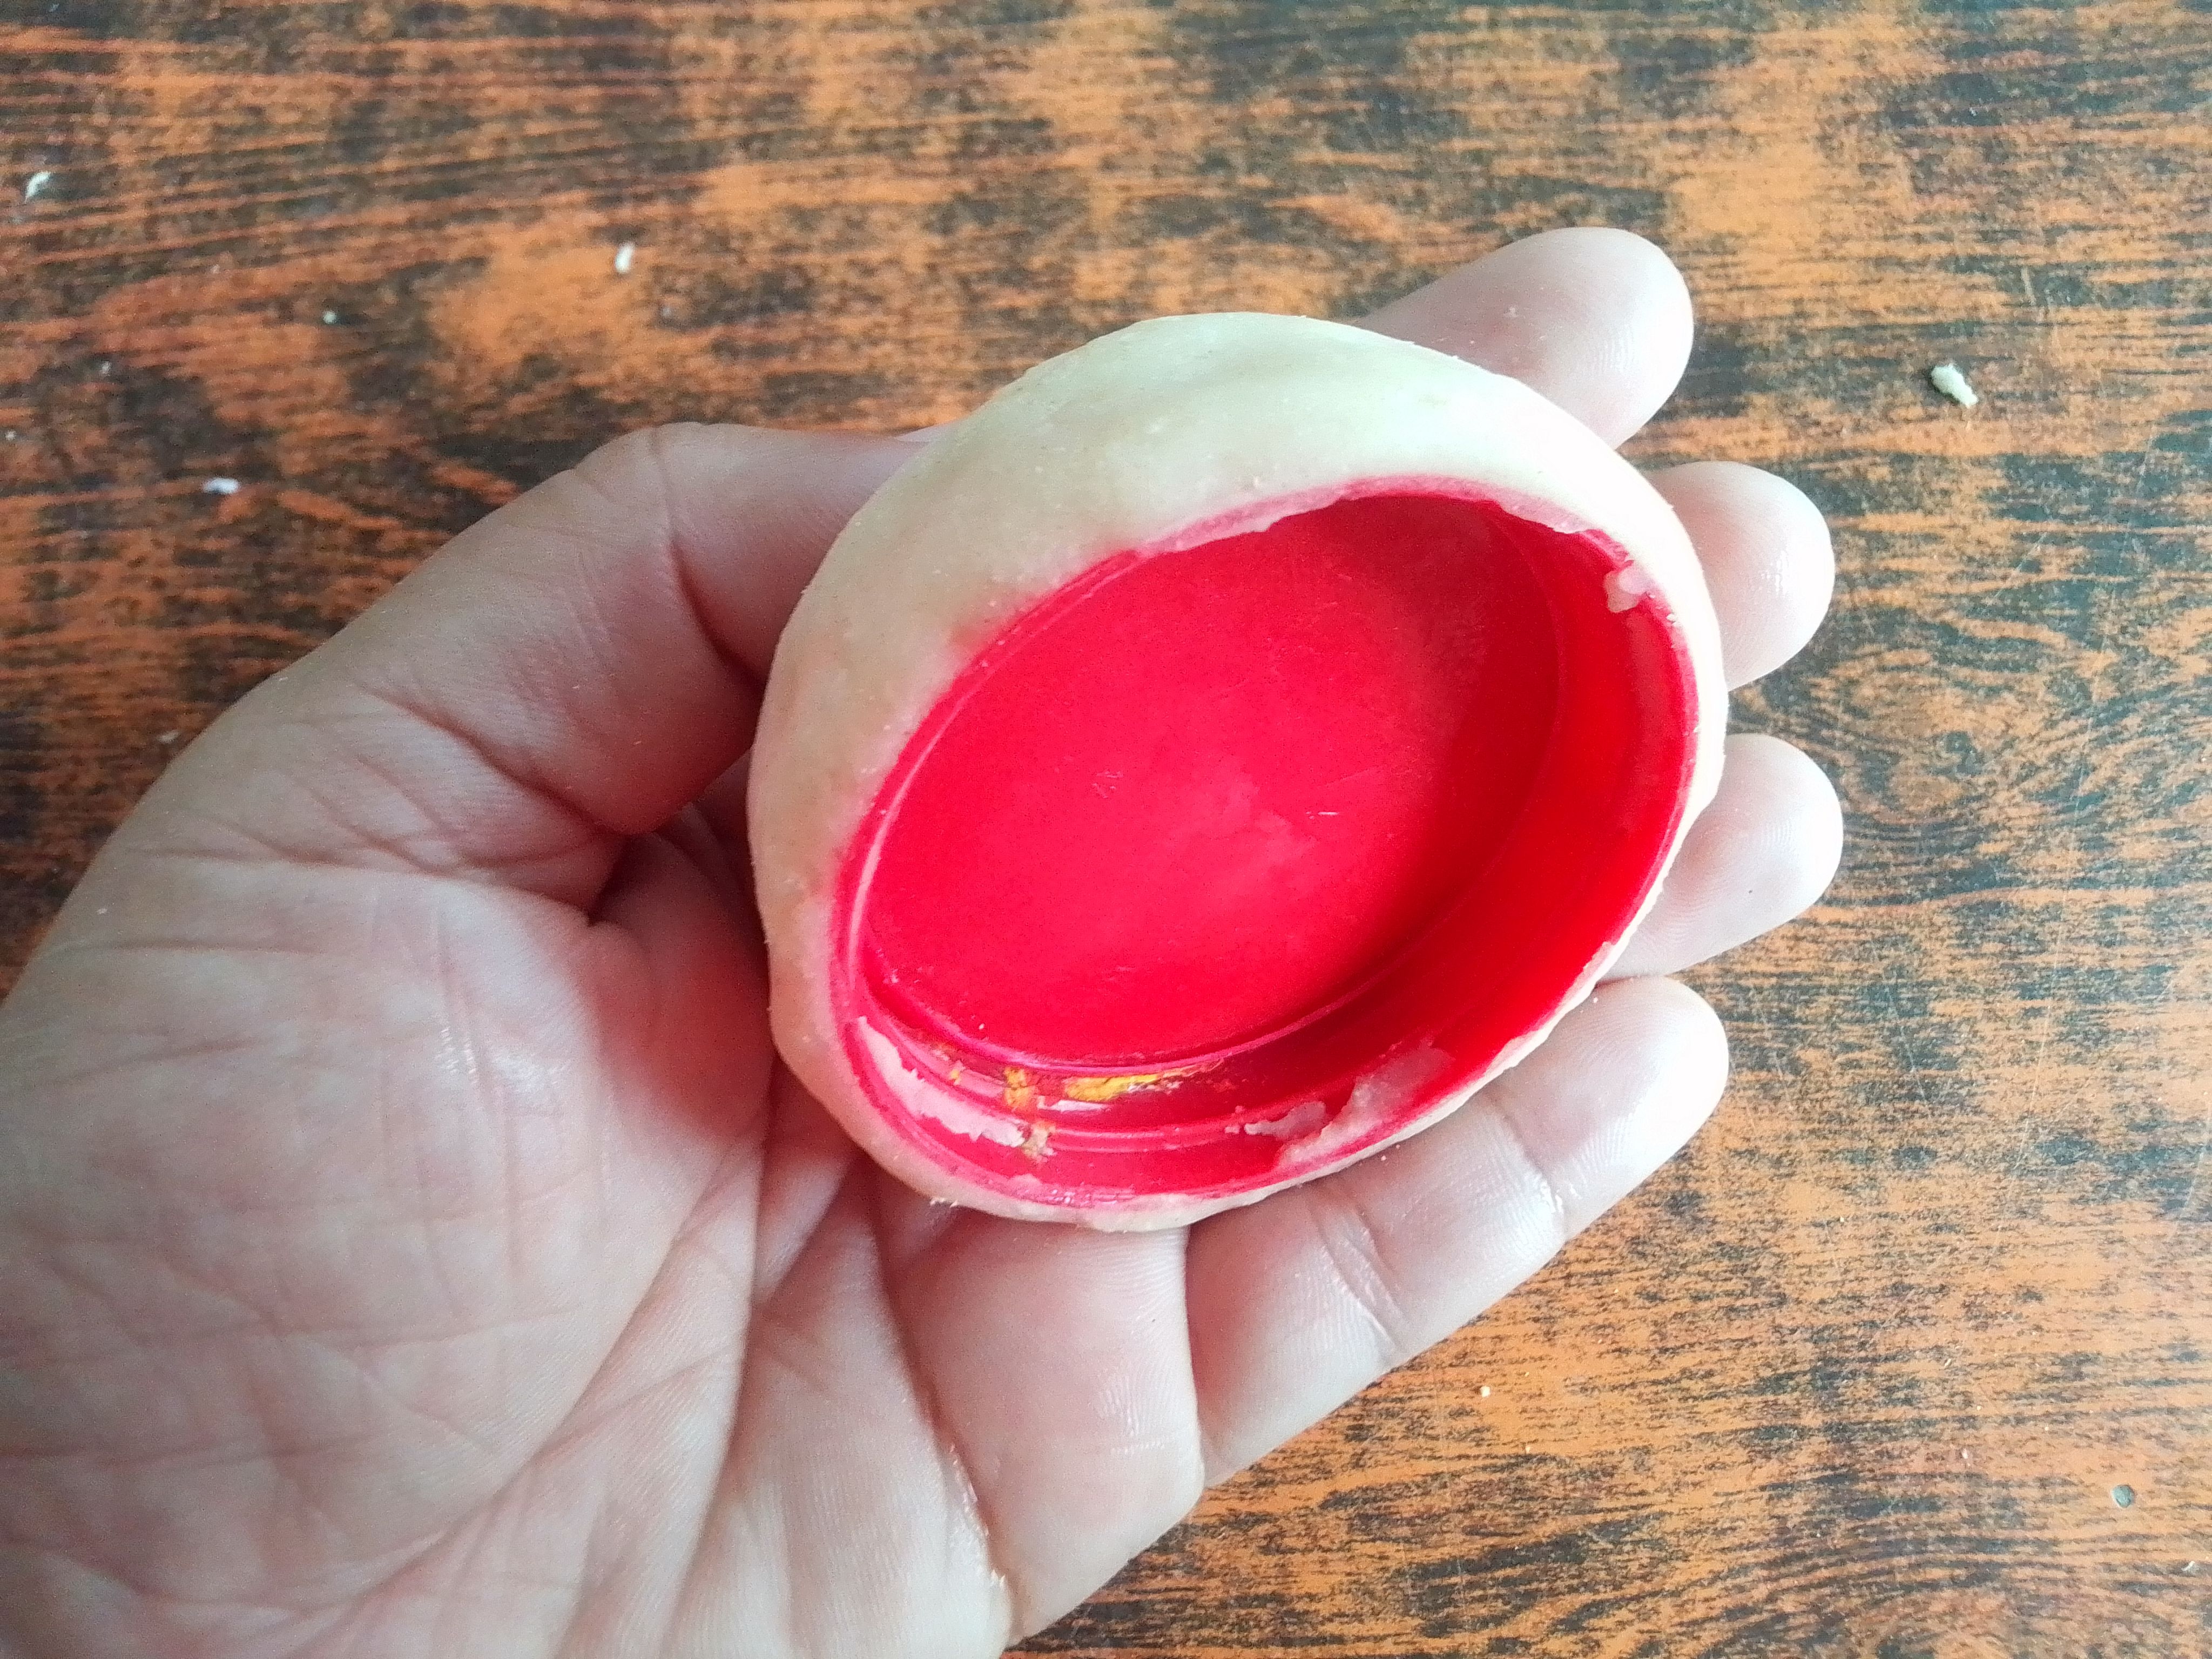
Utilizo una tapa mediana, dependiendo el tamaño de la bombilla para la base, esta la cubro por completo de la masa y pegamos la pieza anterior, esto le dara a este arreglo firmeza y estabilidad.
Step 03
I use a medium lid, depending on the size of the bulb for the base, I cover it completely with the dough and we glue the previous piece, this will give this arrangement firmness and stability.
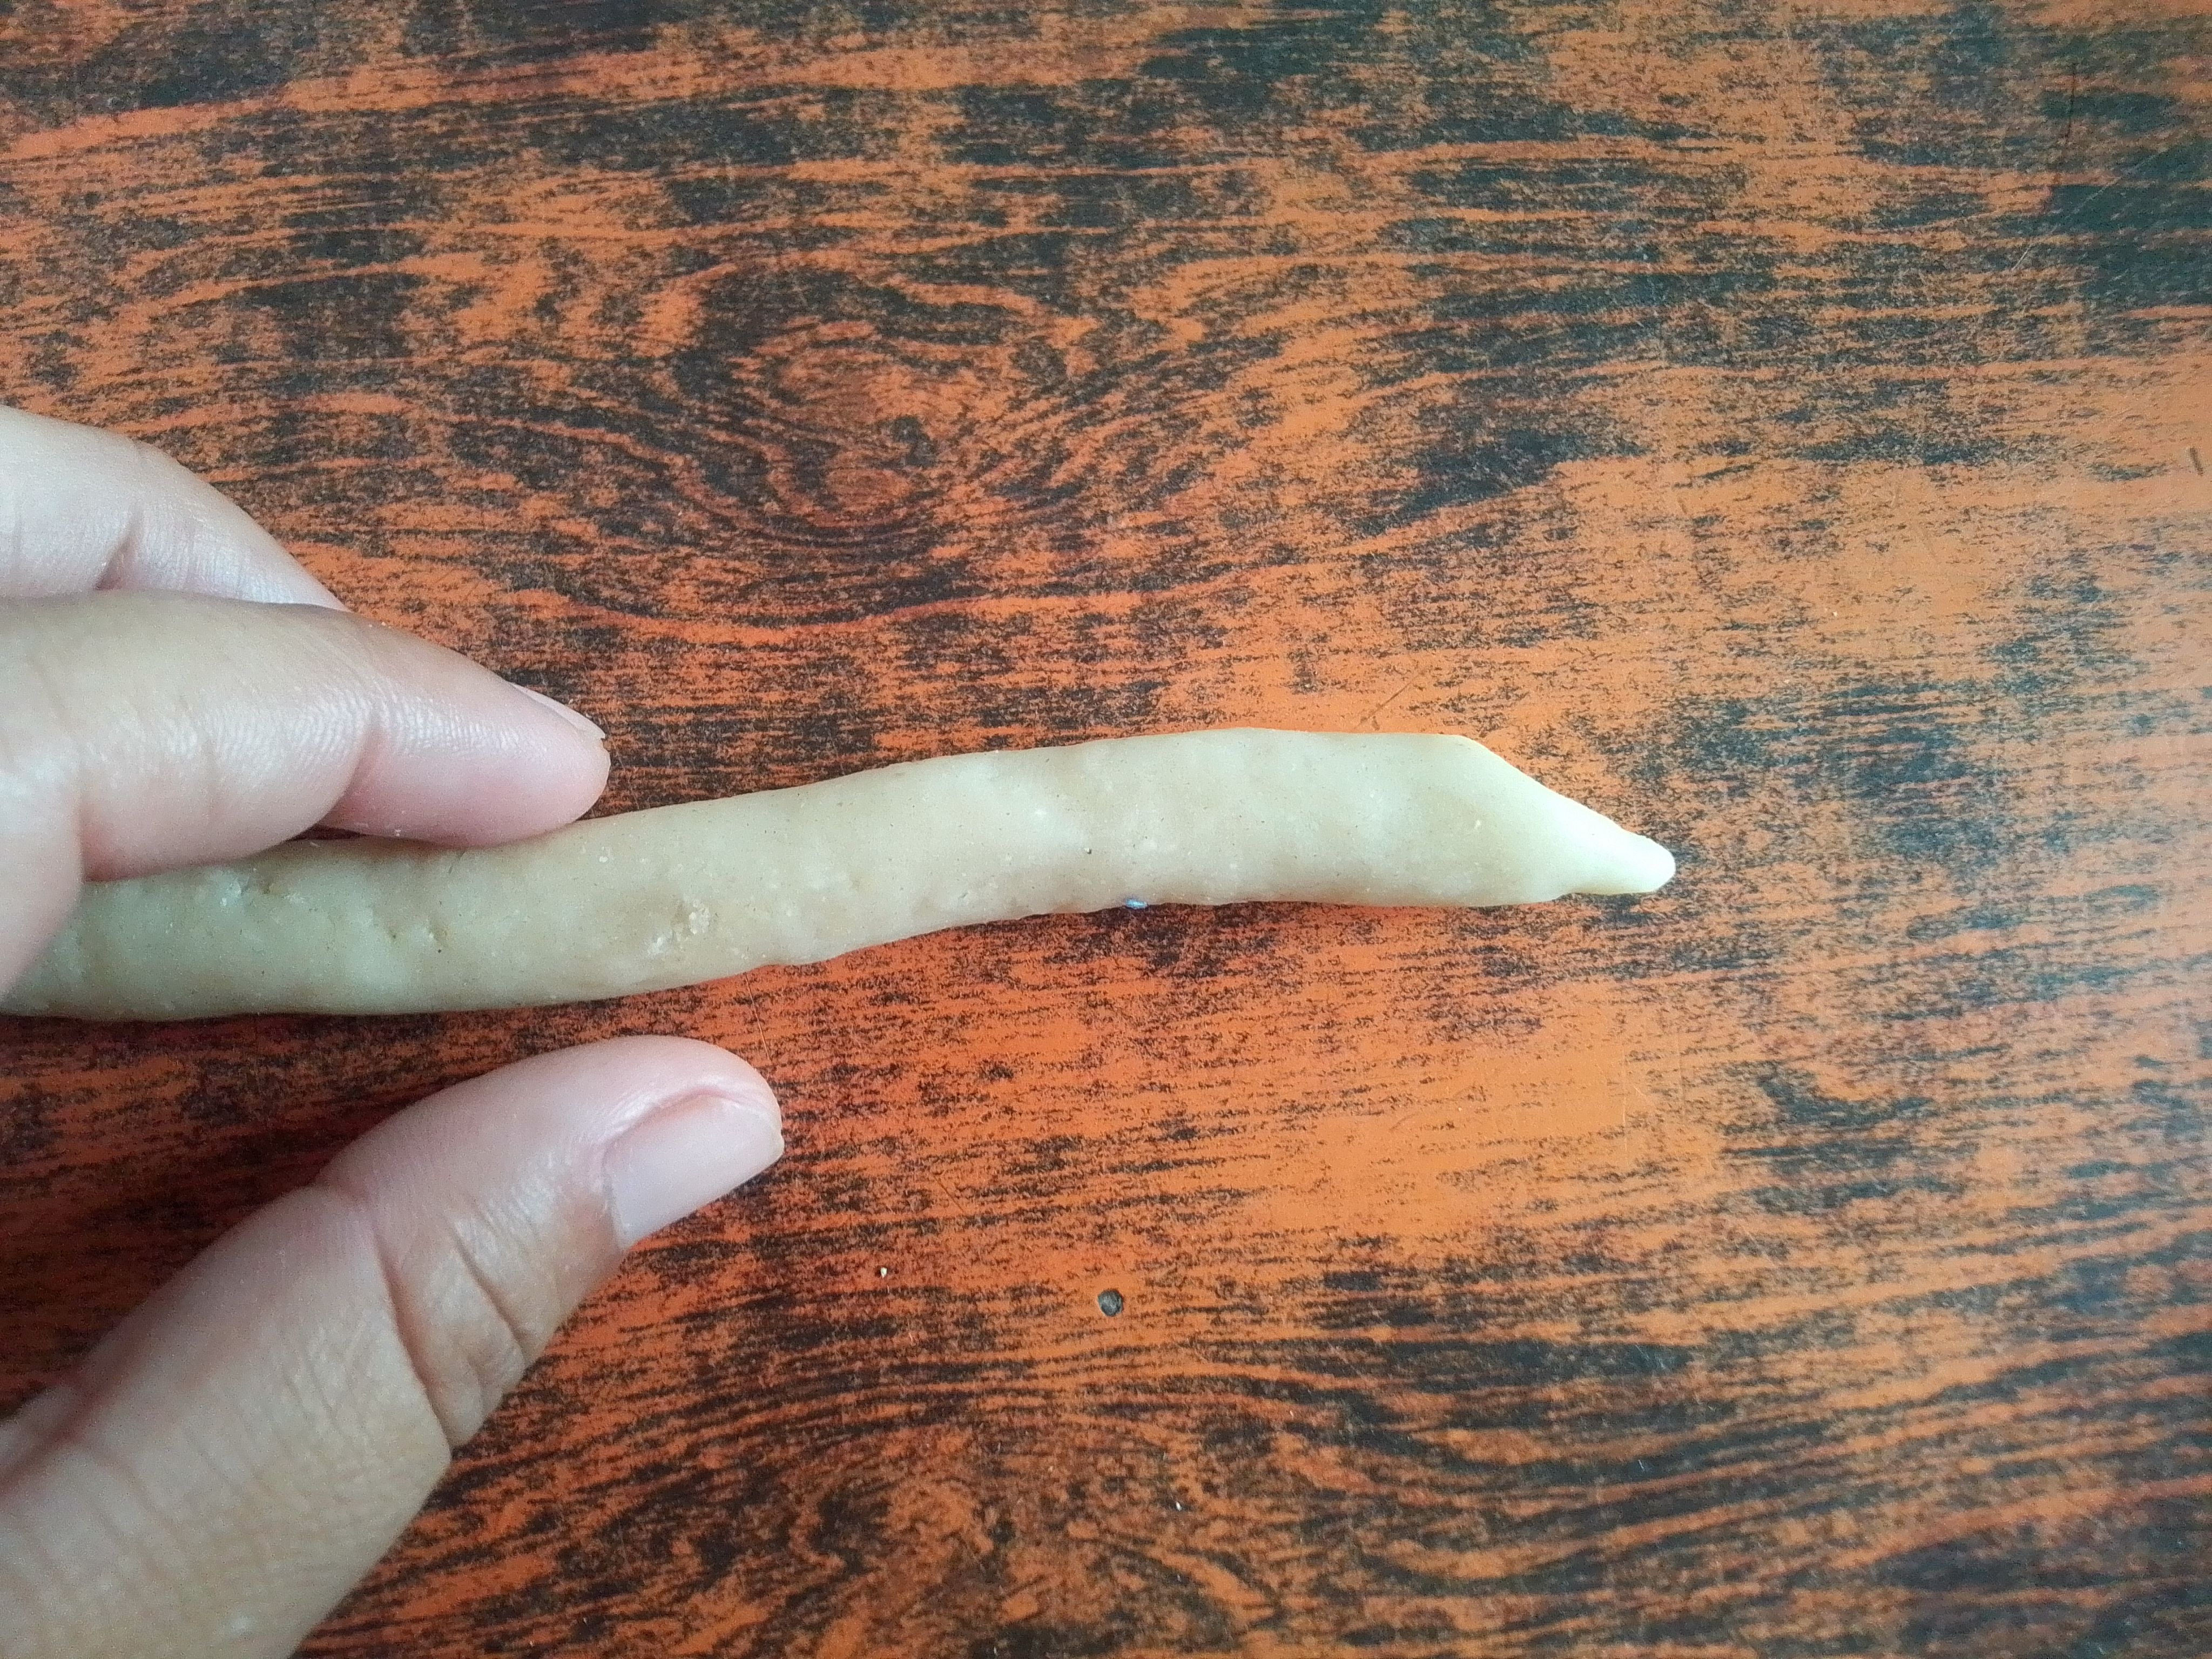
Paso 04
Procedo a realizar un tubito no muy grueso de masa y cortamos de forma diagonal un extremo y lo pegamos en un costado de la bombilla, fijamos con un palillo por dentro.
Step 04
I proceed to make a not very thick tube of dough and cut one end diagonally and glue it to the side of the bombilla, fixing it with a toothpick on the inside.
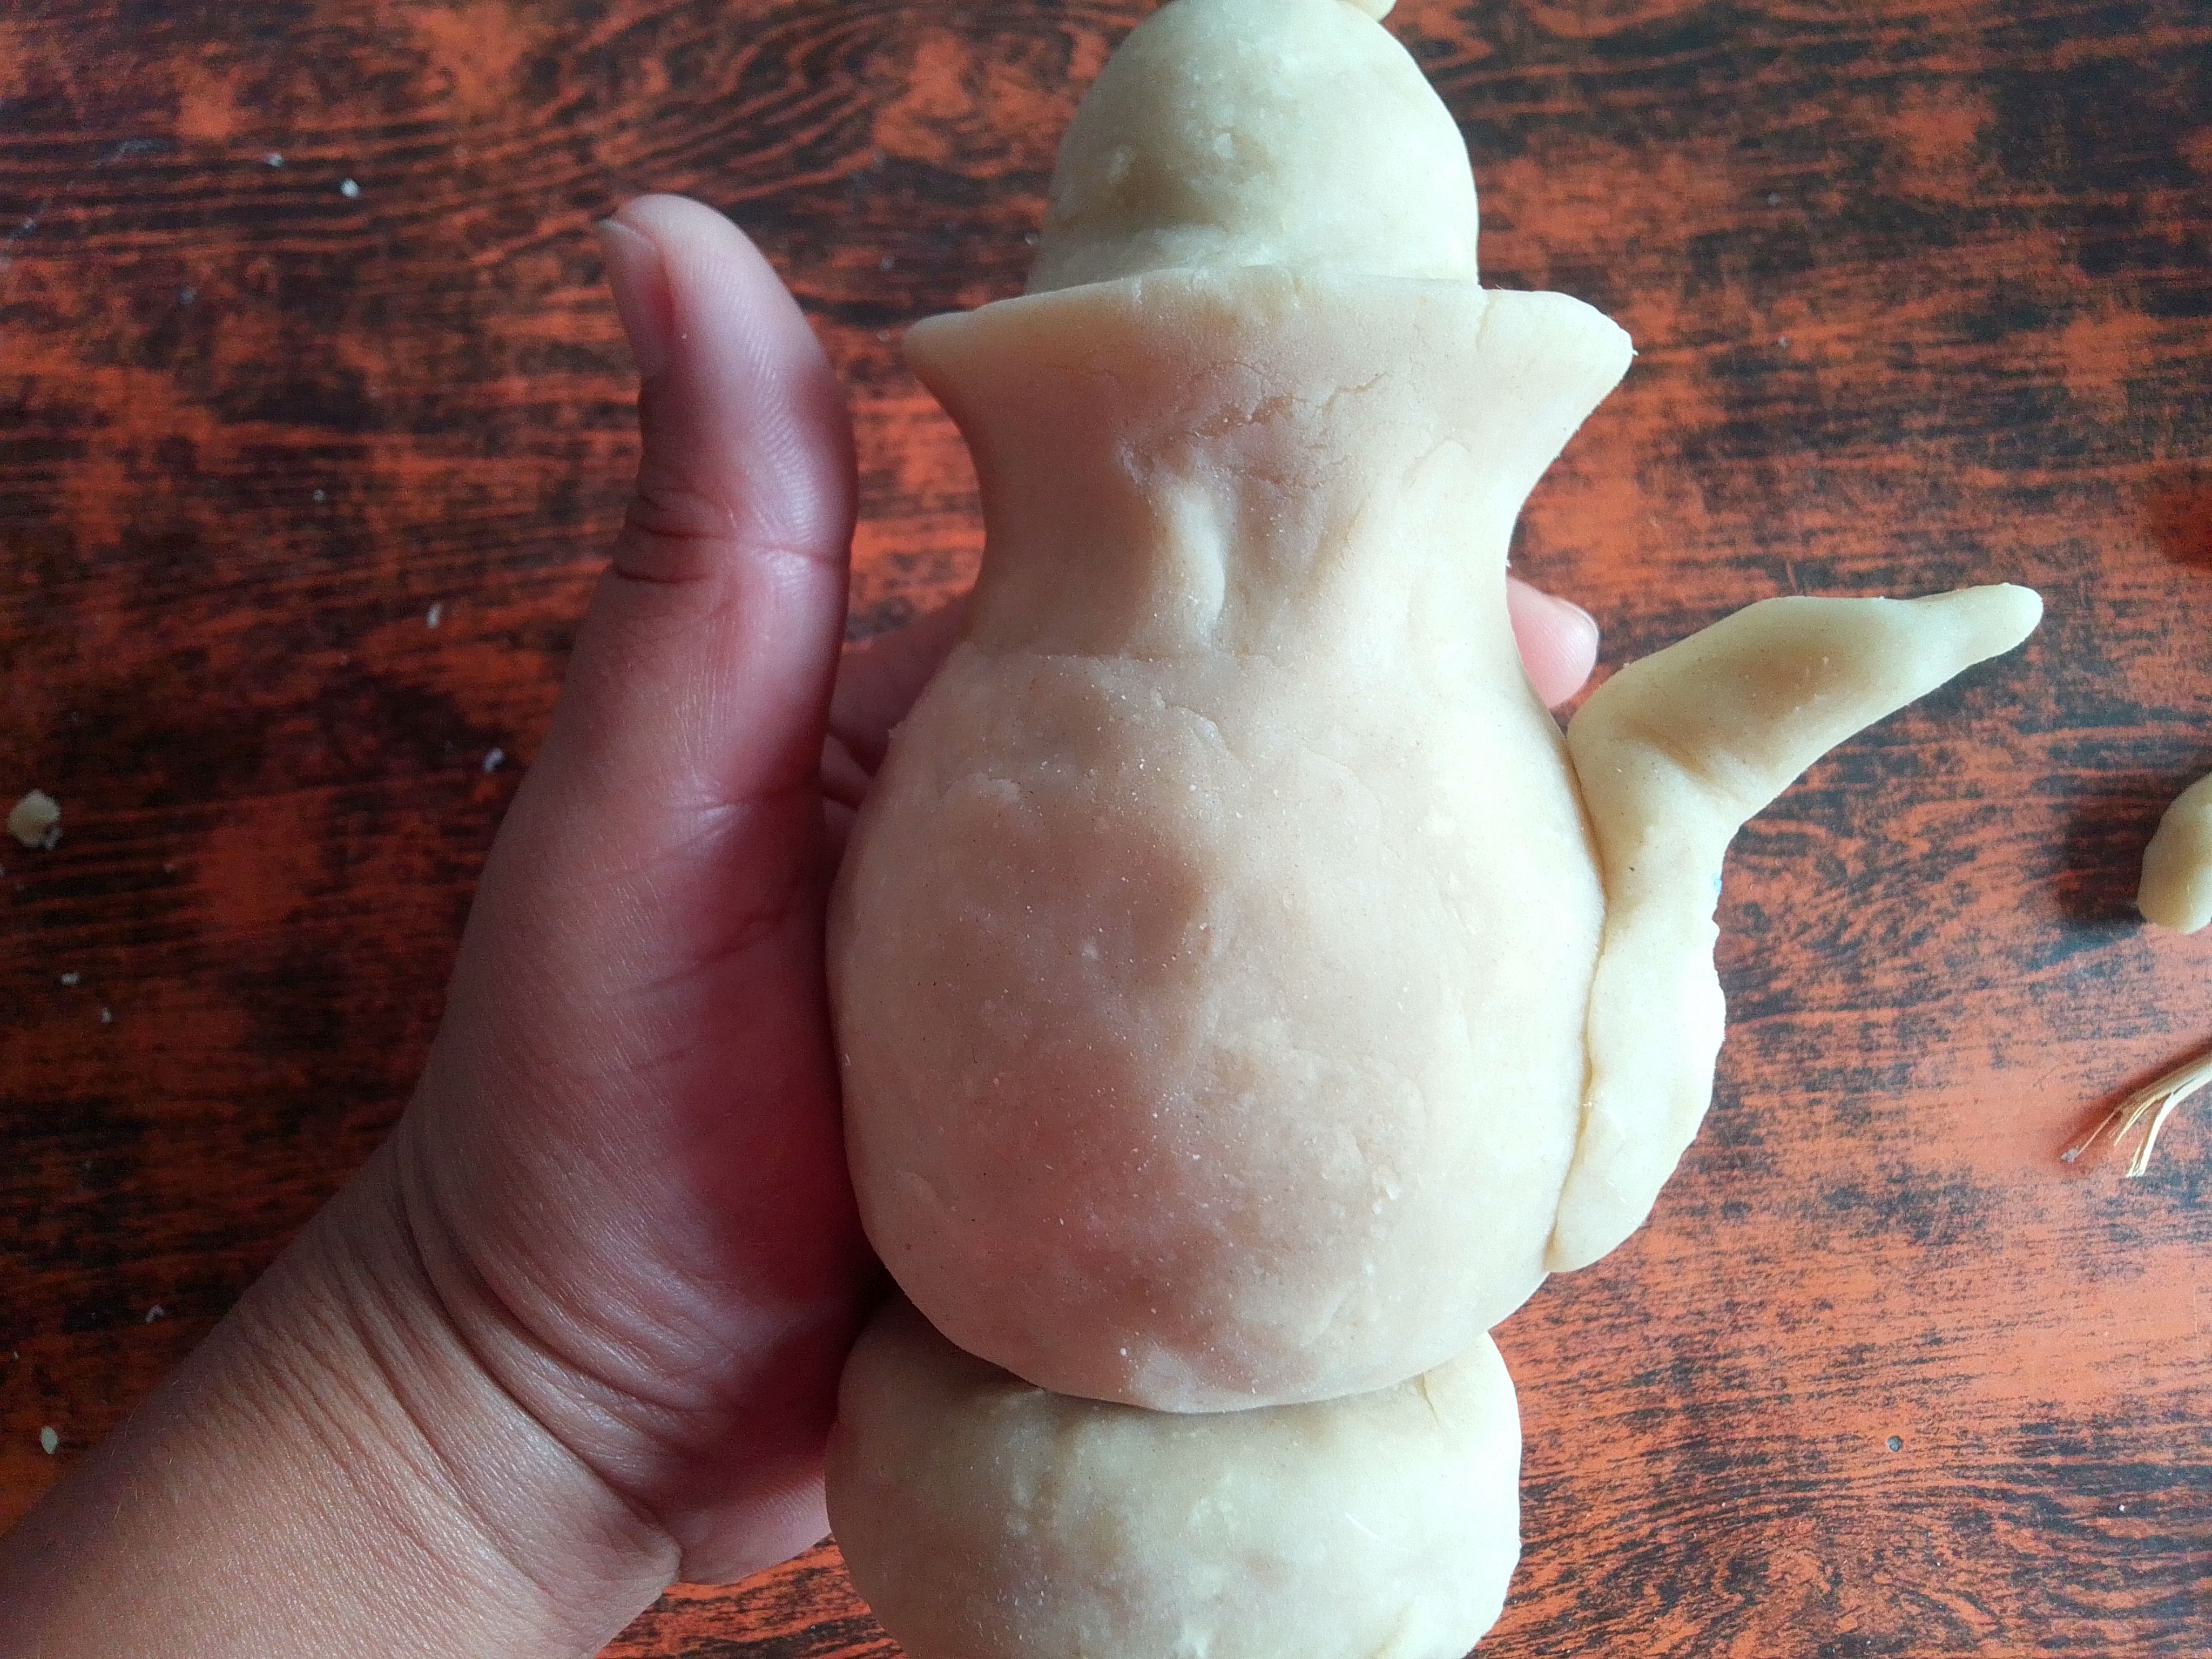
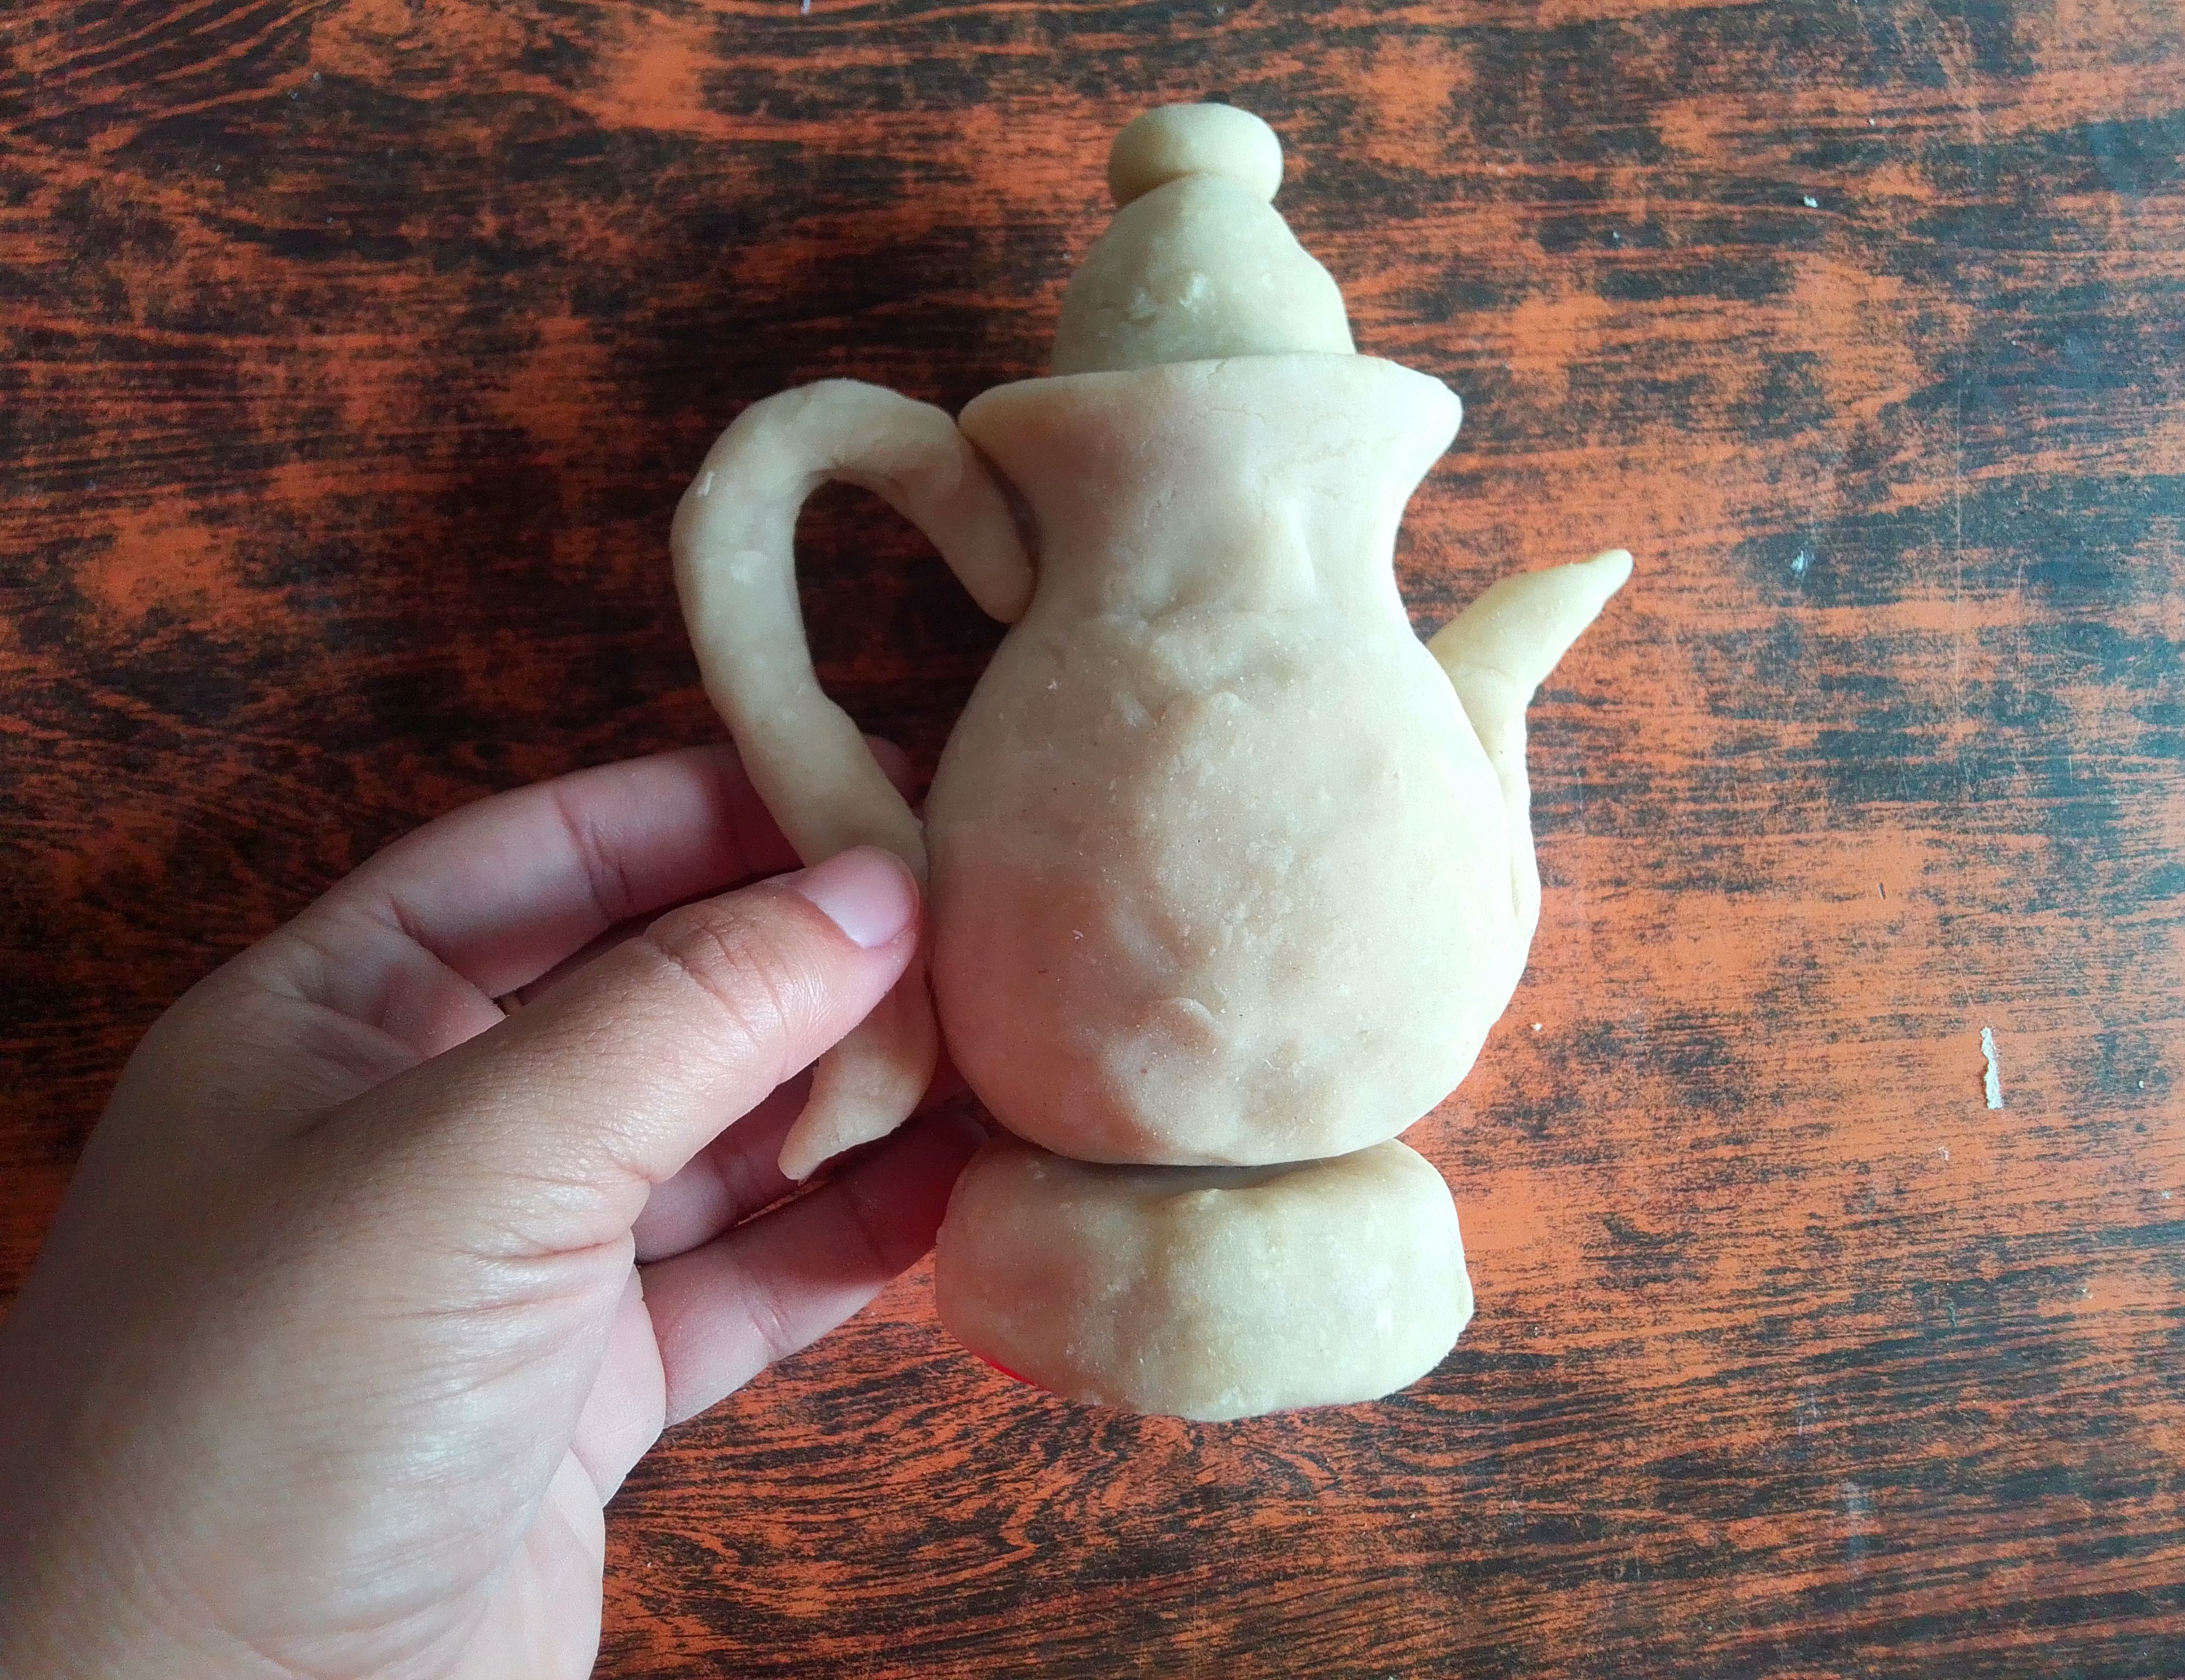
Paso 05
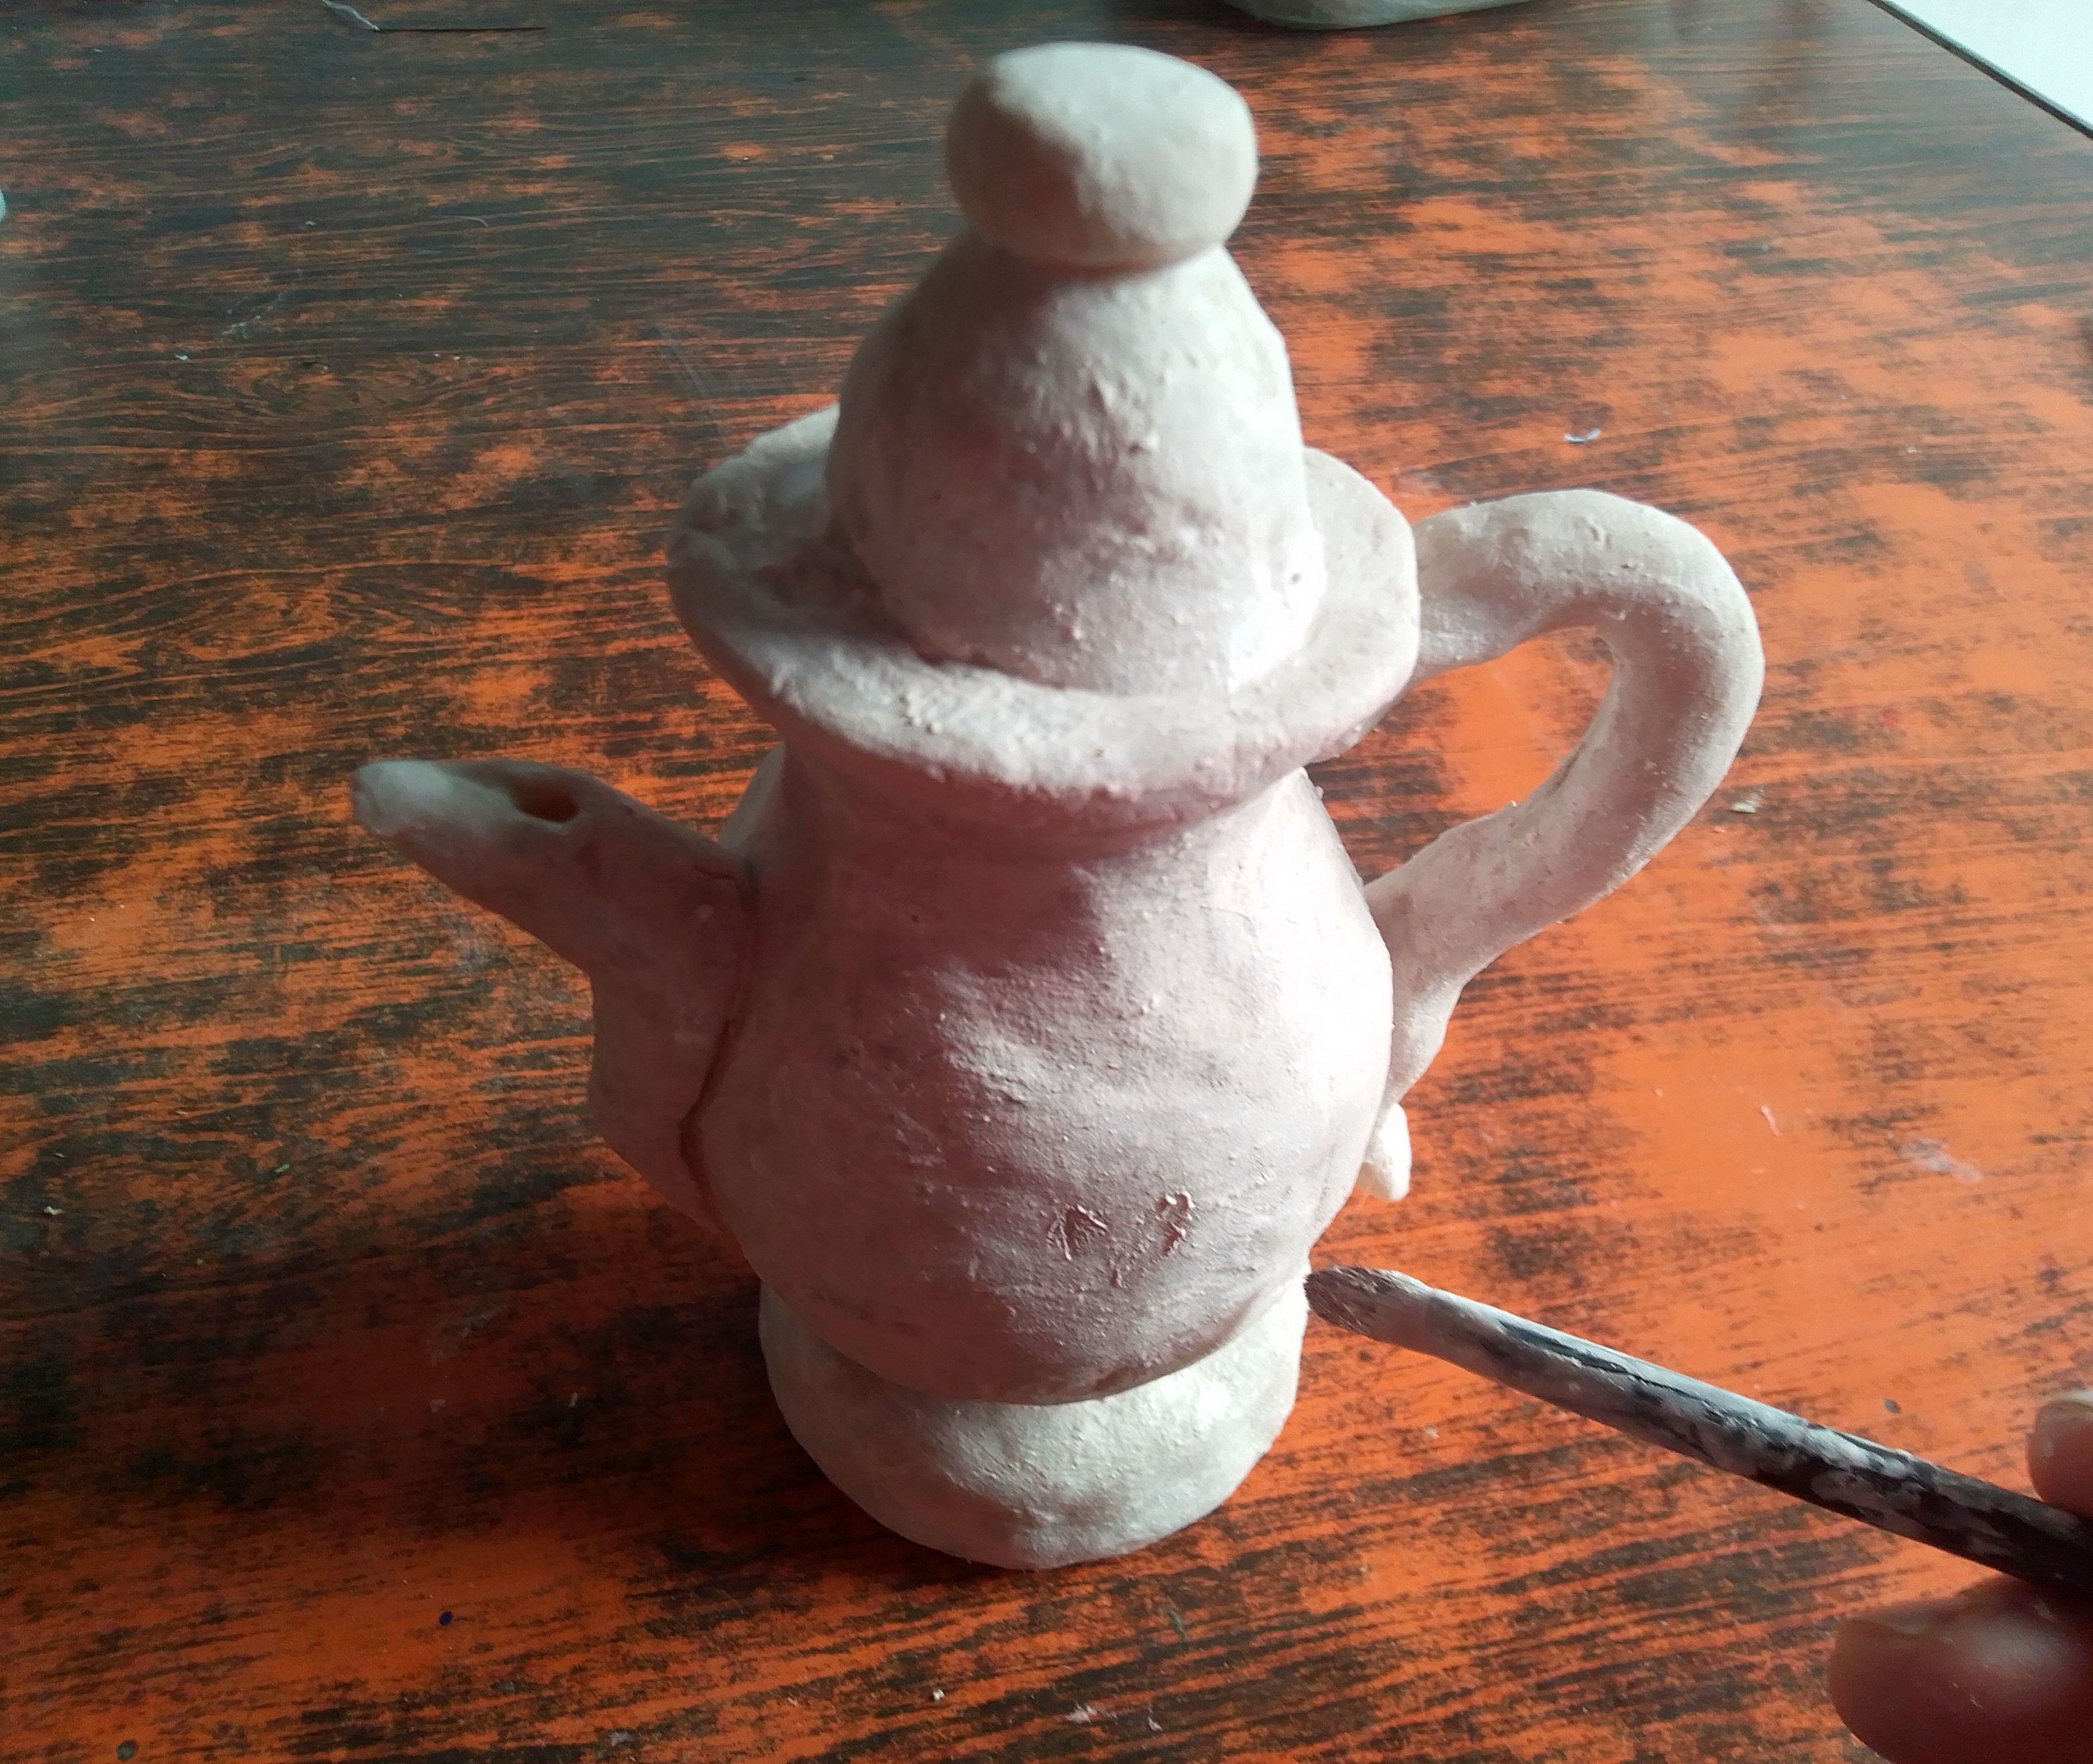
Con el trozo tubo que ha sobrado, inserto un alambre cobre con mucho cuidado por el centro y moldeo la forma de la asa de la tetera, parecida a una "S" y pegamos en el otro costado. Luego aplicó pintura color blanco y coloco al sol.
Step 05
With the piece of tube that is left over, I carefully insert a copper wire through the center and mold the shape of the teapot handle, similar to an "S" and glue on the other side stand. Then he applied white paint and placed it in the sun.

Paso 06
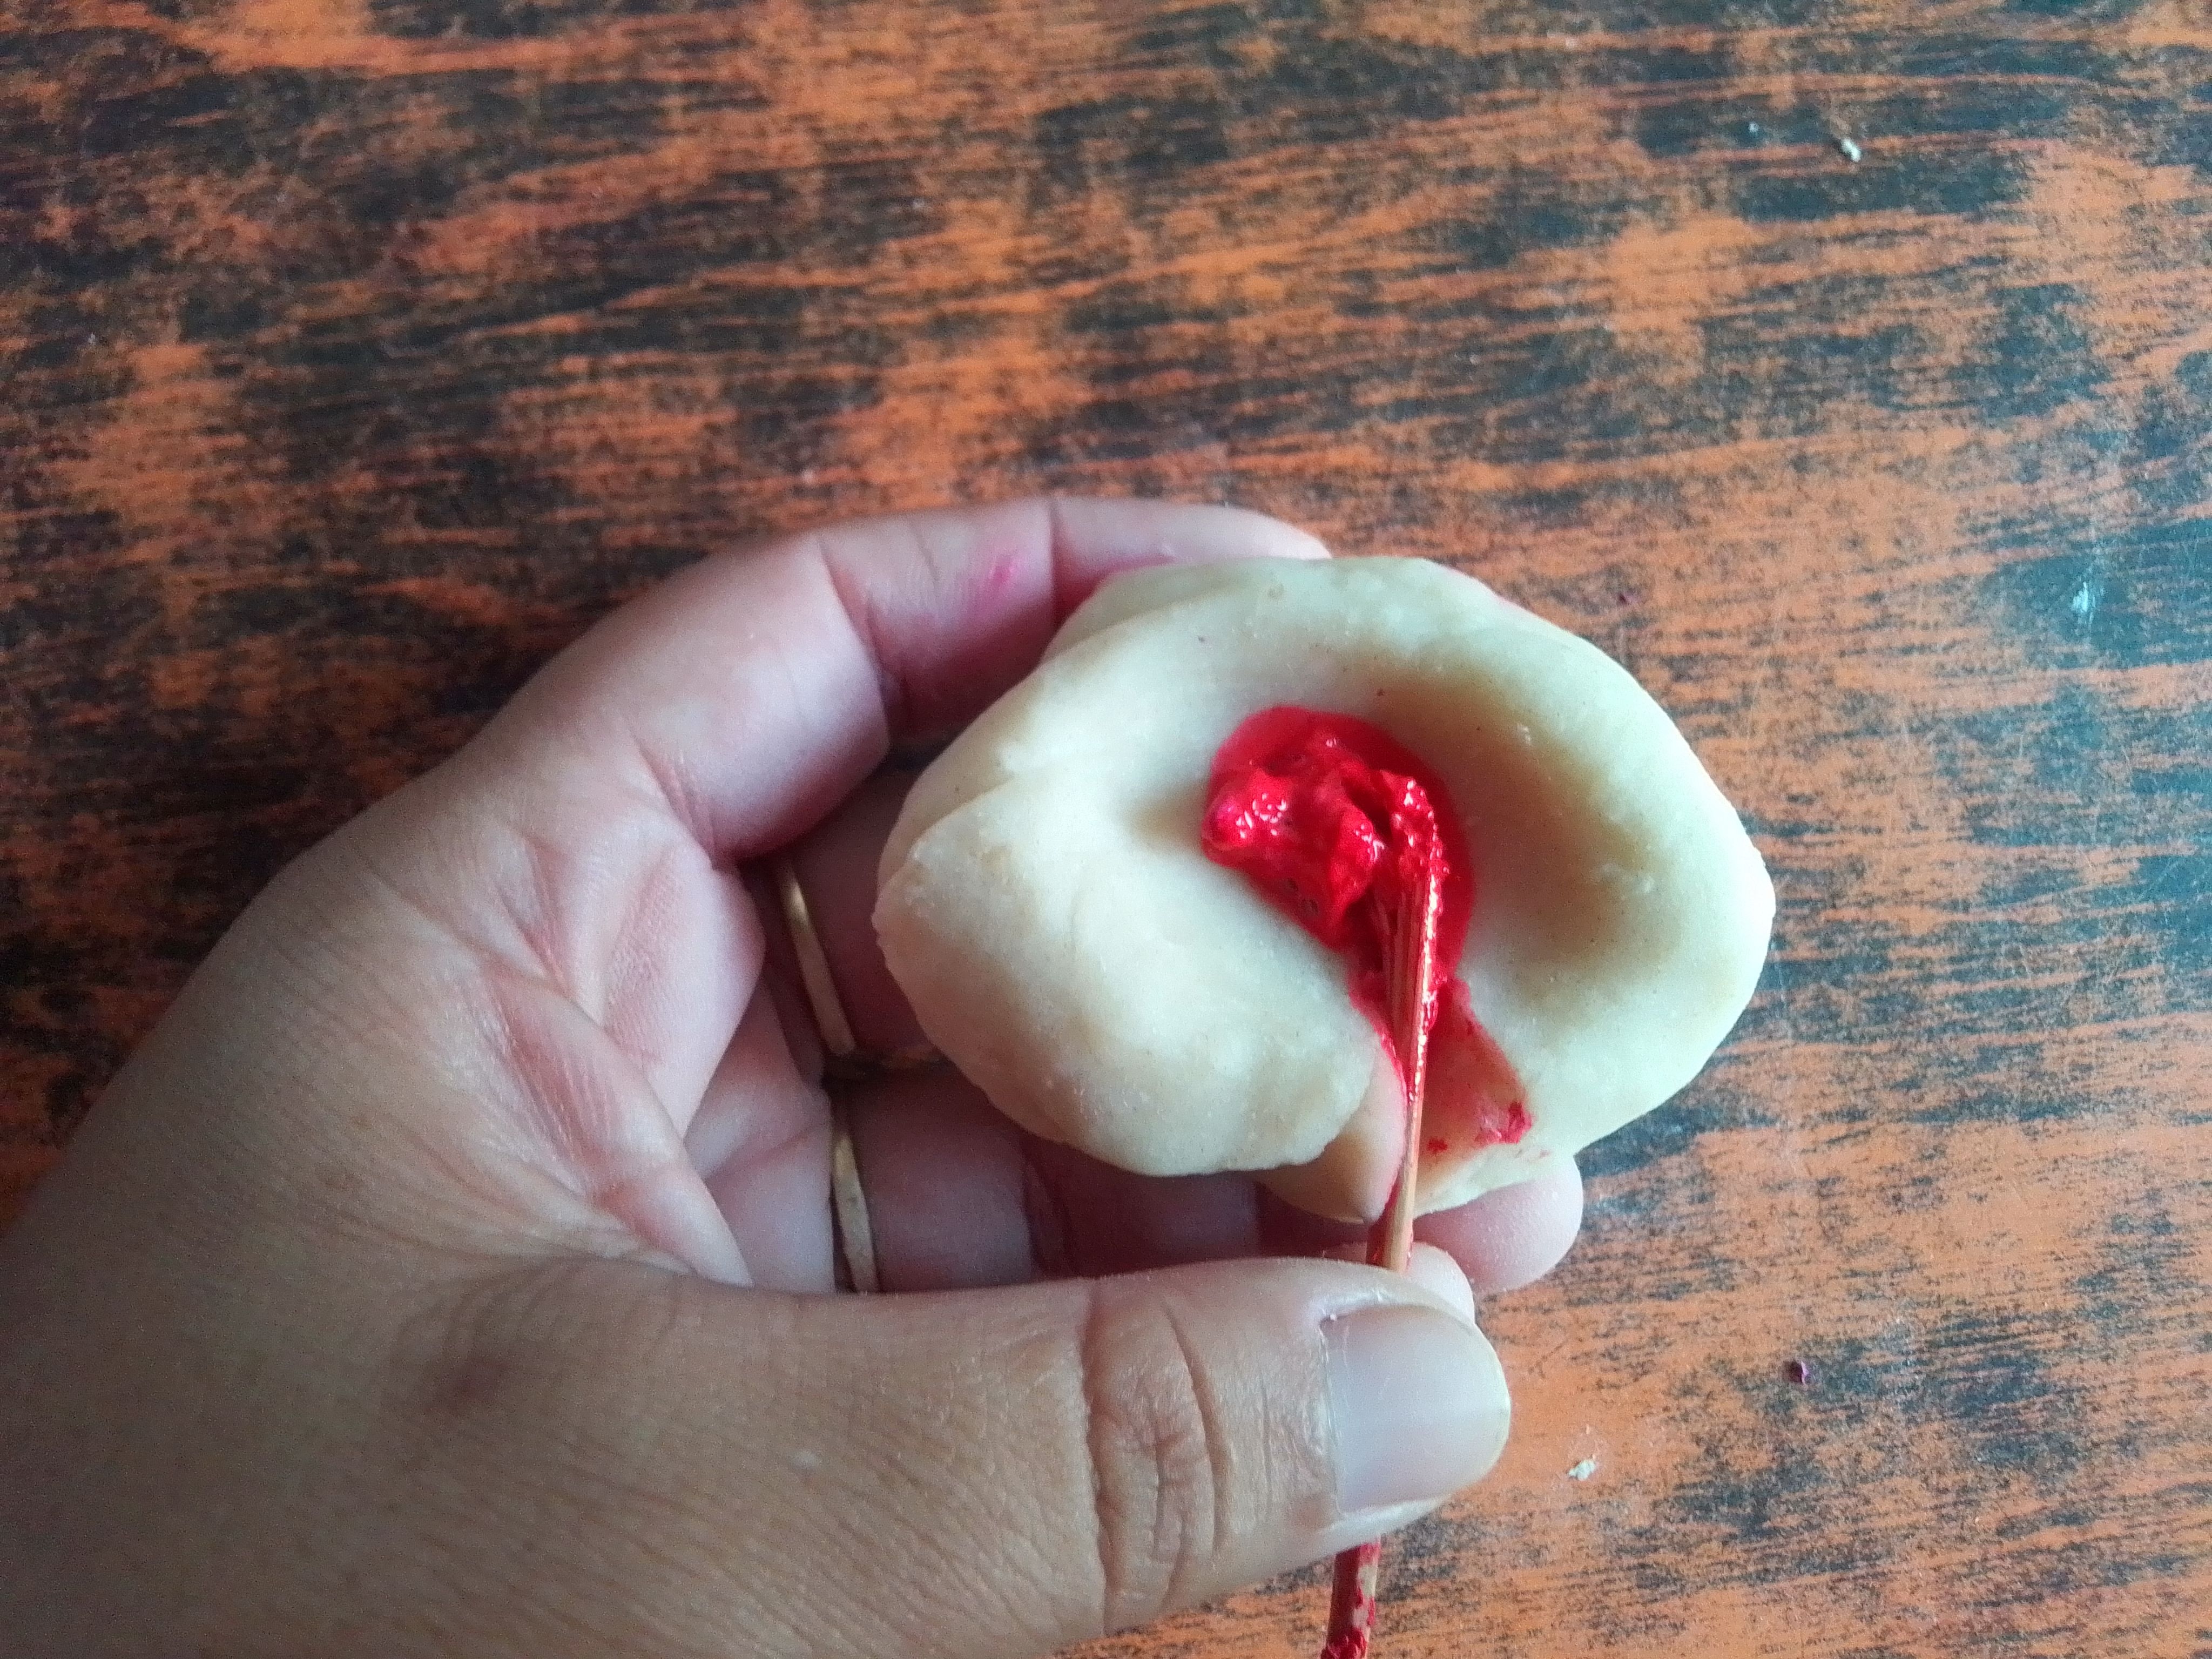
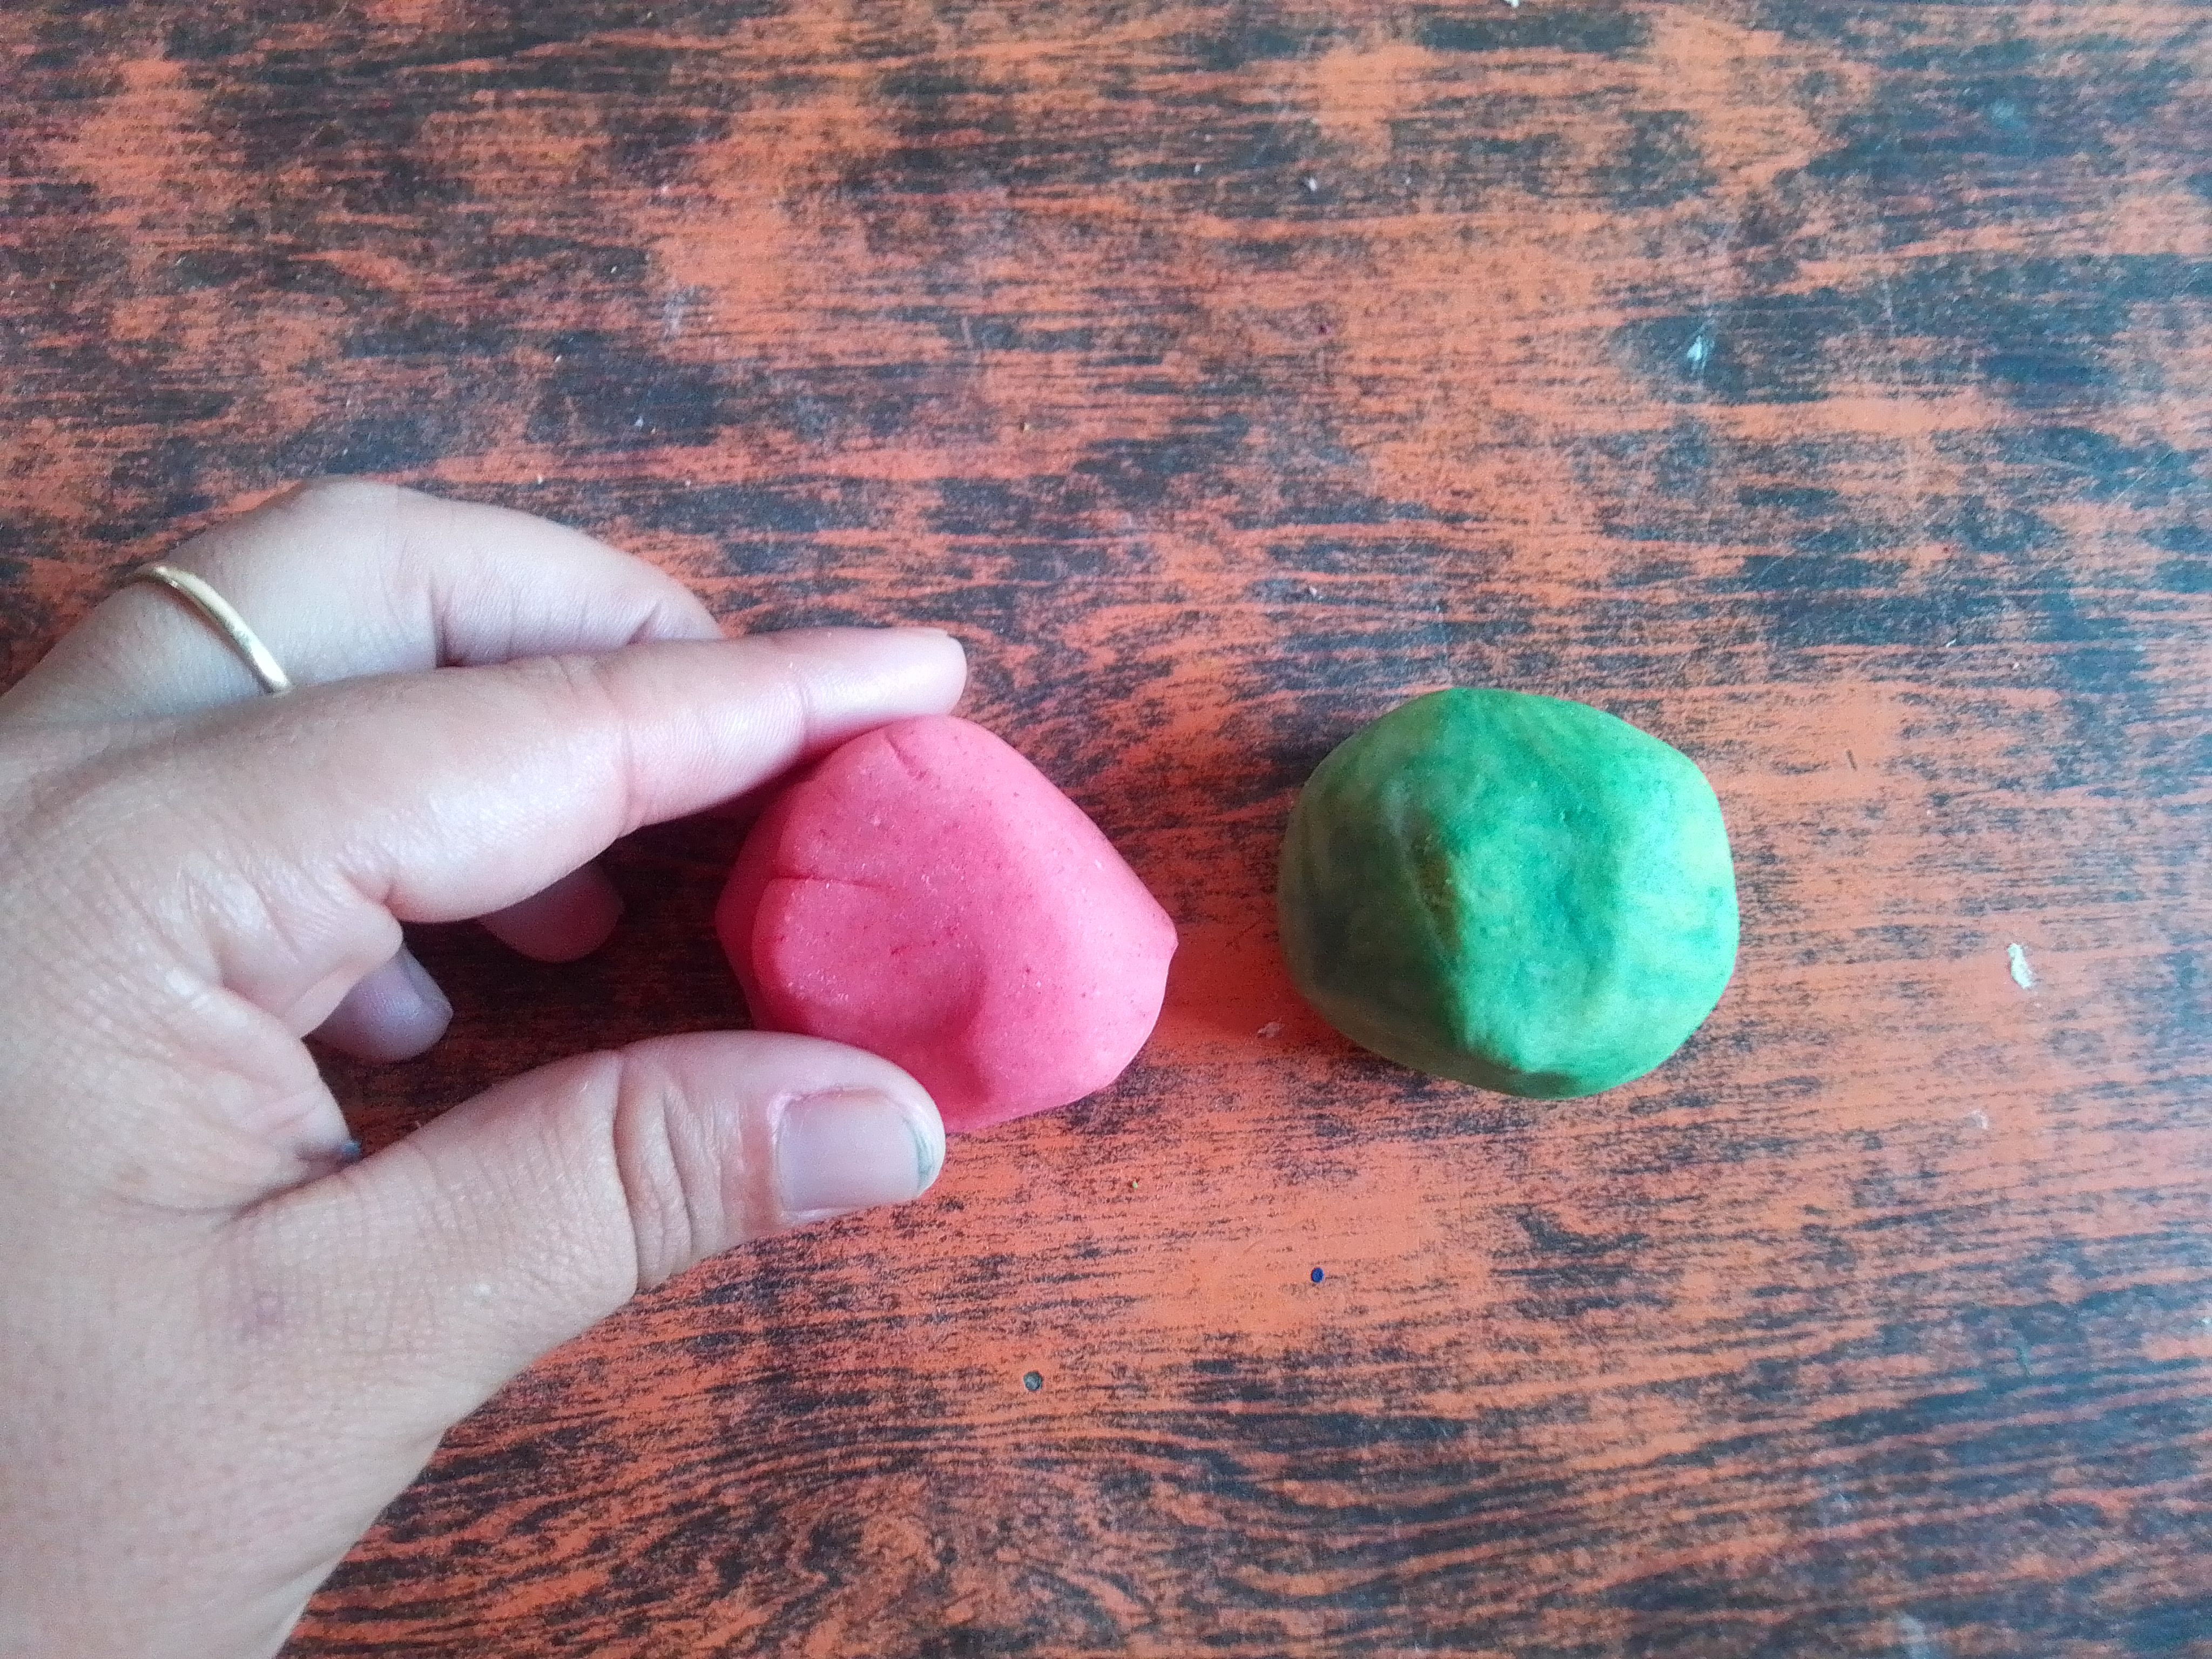
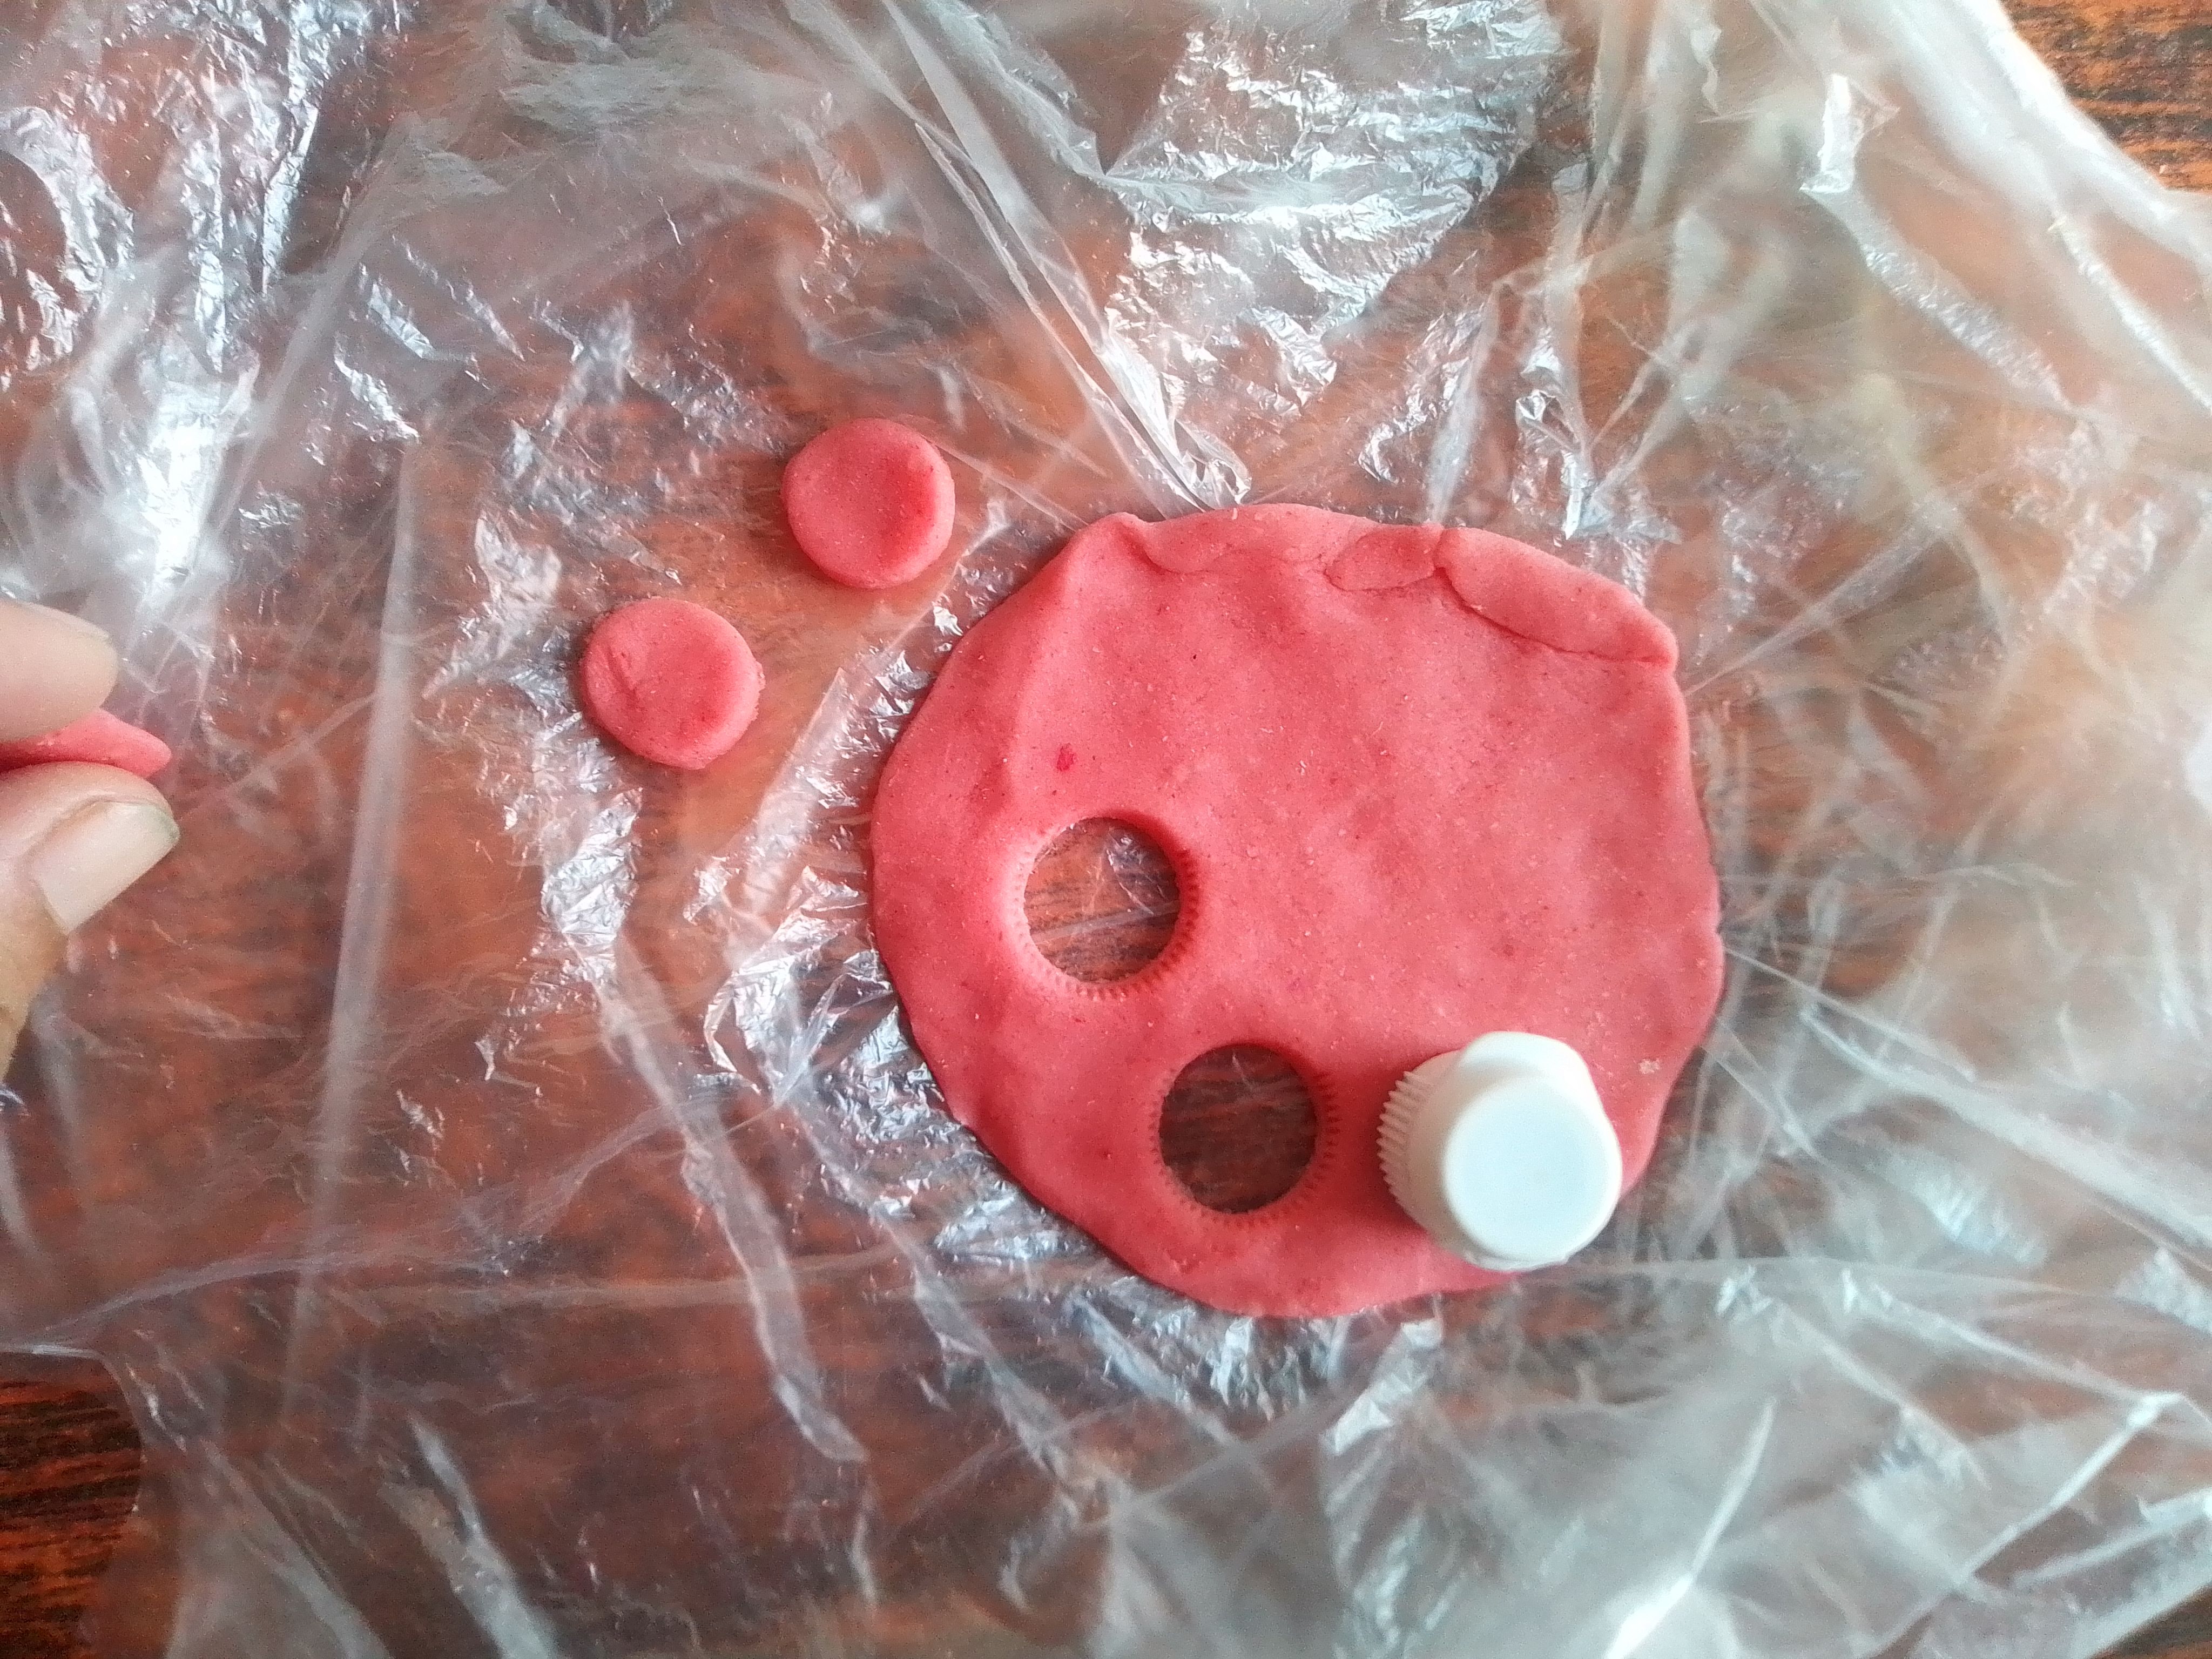
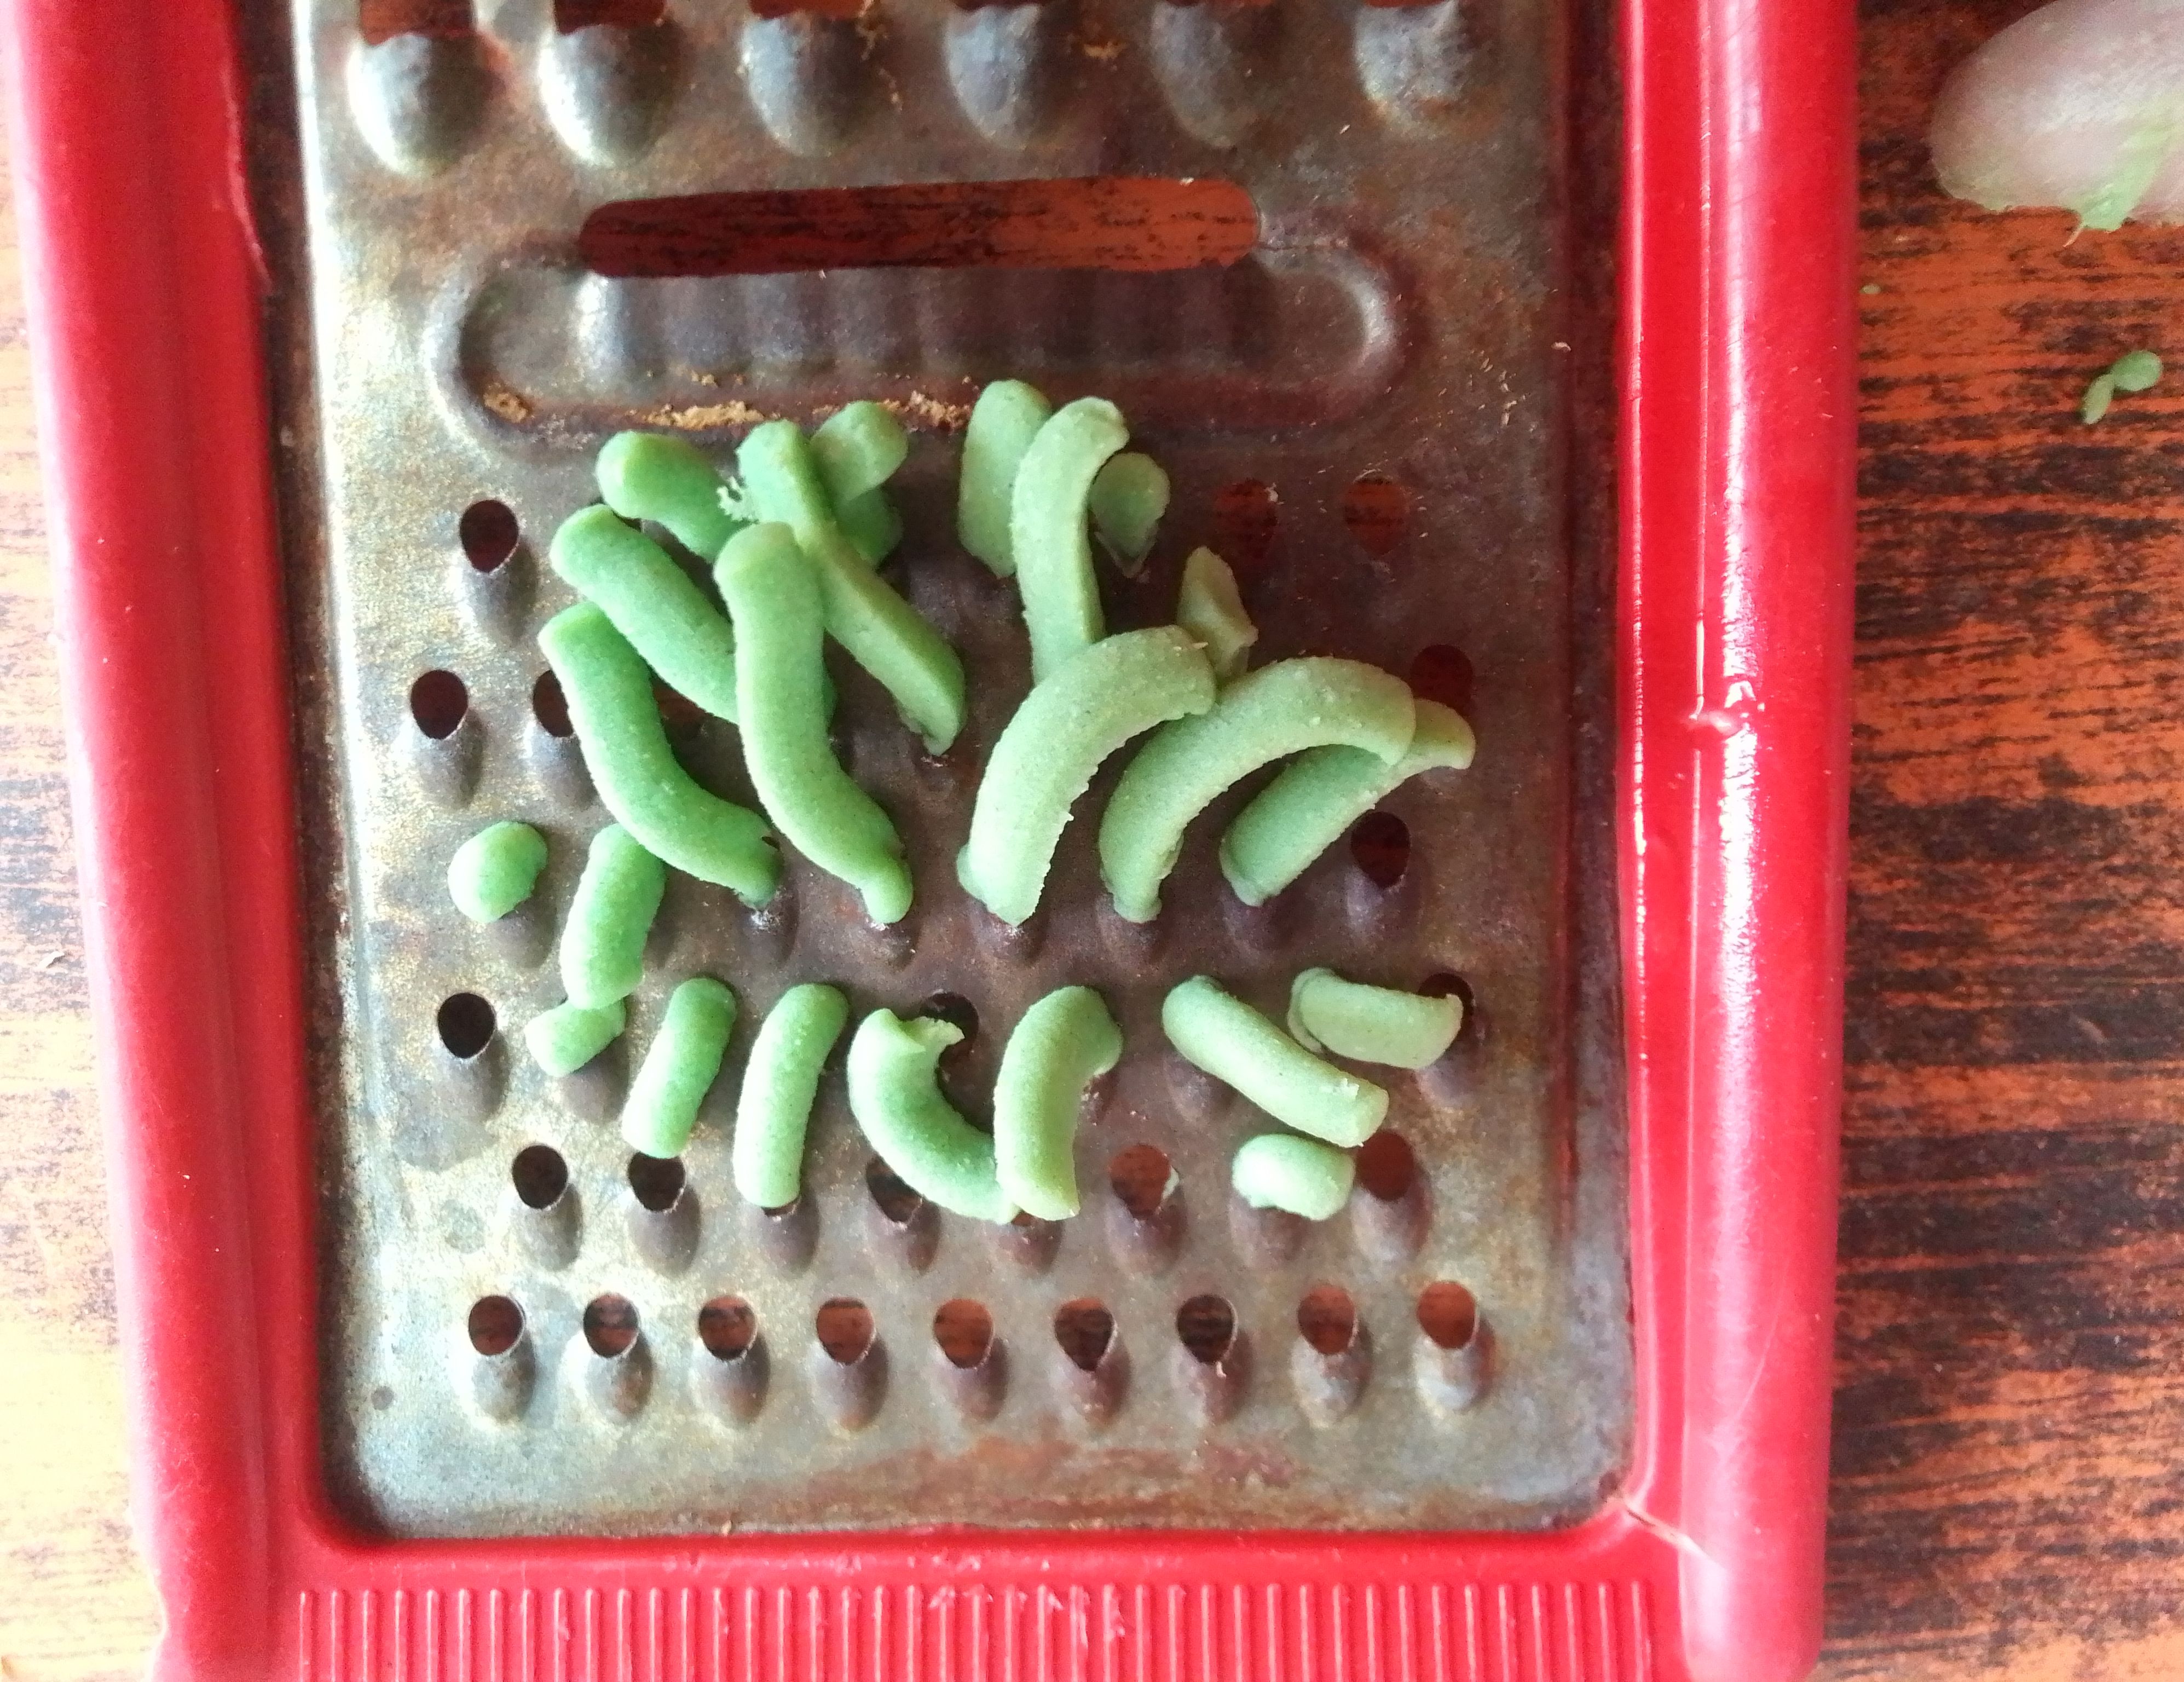
Mientras la tetera se seca, comenzaremos a hacer con la masa que ha sobrado un par de decoraciones. Para darle color a la masa, agregamos pintura al frío y amasamos mu bien. Luego estiramos sobre una bolsa d plsstico para que las piezas que saquemos no se peguen, utilizamos un tapita muy pequeñas para crear círculos y darle forma de pétalos. Hacemos una masa color verde y la pasamos por los agujeros de un rayo viejo para hacer algunas hojas en forma de espigas. Cuánto ya nuestra tetera esté seca le pegamos estás florecidas para decorar. Por último colocamos barniz para sella toda la pintura, en caso de tener barniz puedes usar pegamento blanco preparado con un poco de agua y deja secar.
Step 06
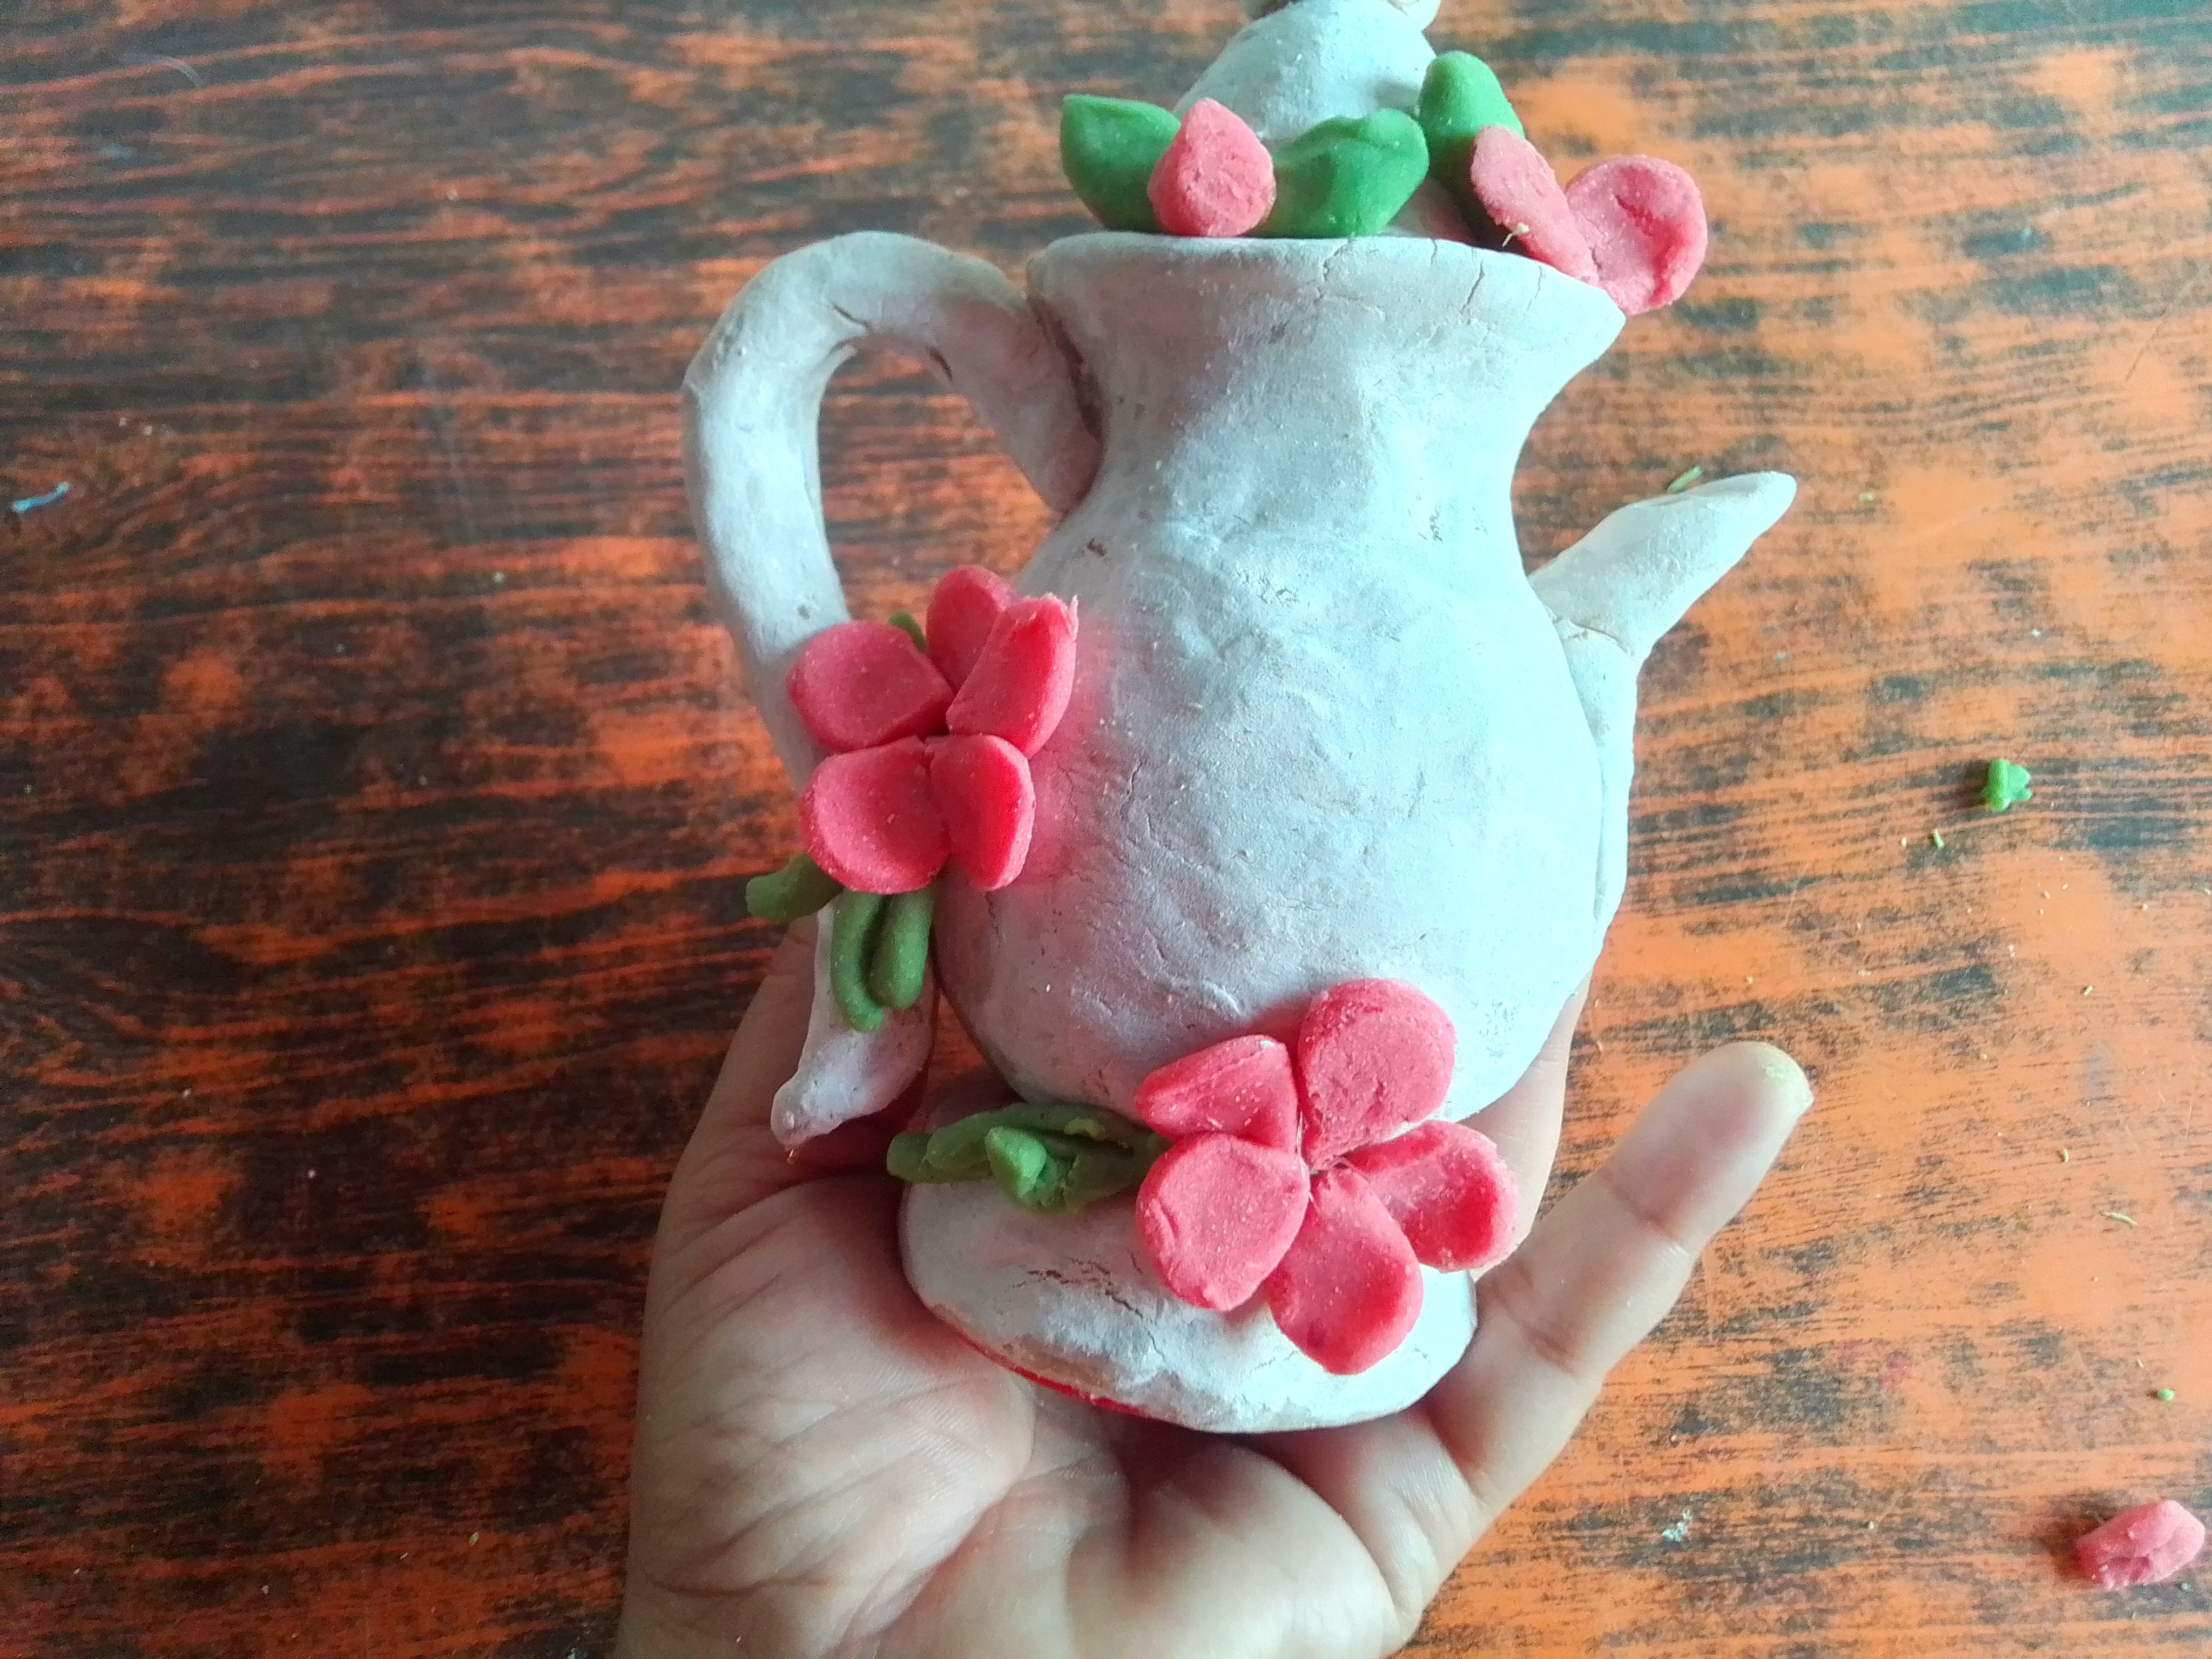
While the teapot dries, we will begin to make a couple of decorations with the leftover dough. To give color to the dough, we add cold paint and knead very well. Then we stretch over a plastic bag so that the pieces that we take out do not stick together, we use a very small cap to create circles and shape them into petals. We make a green mass and pass it through the holes of an old lightning bolt to make some spike-shaped leaves. When our teapot is dry, we stick these flowers to decorate it. Finally we put varnish to seal all the painting, if you have varnish you can use white glue prepared with a little water and let it dry.
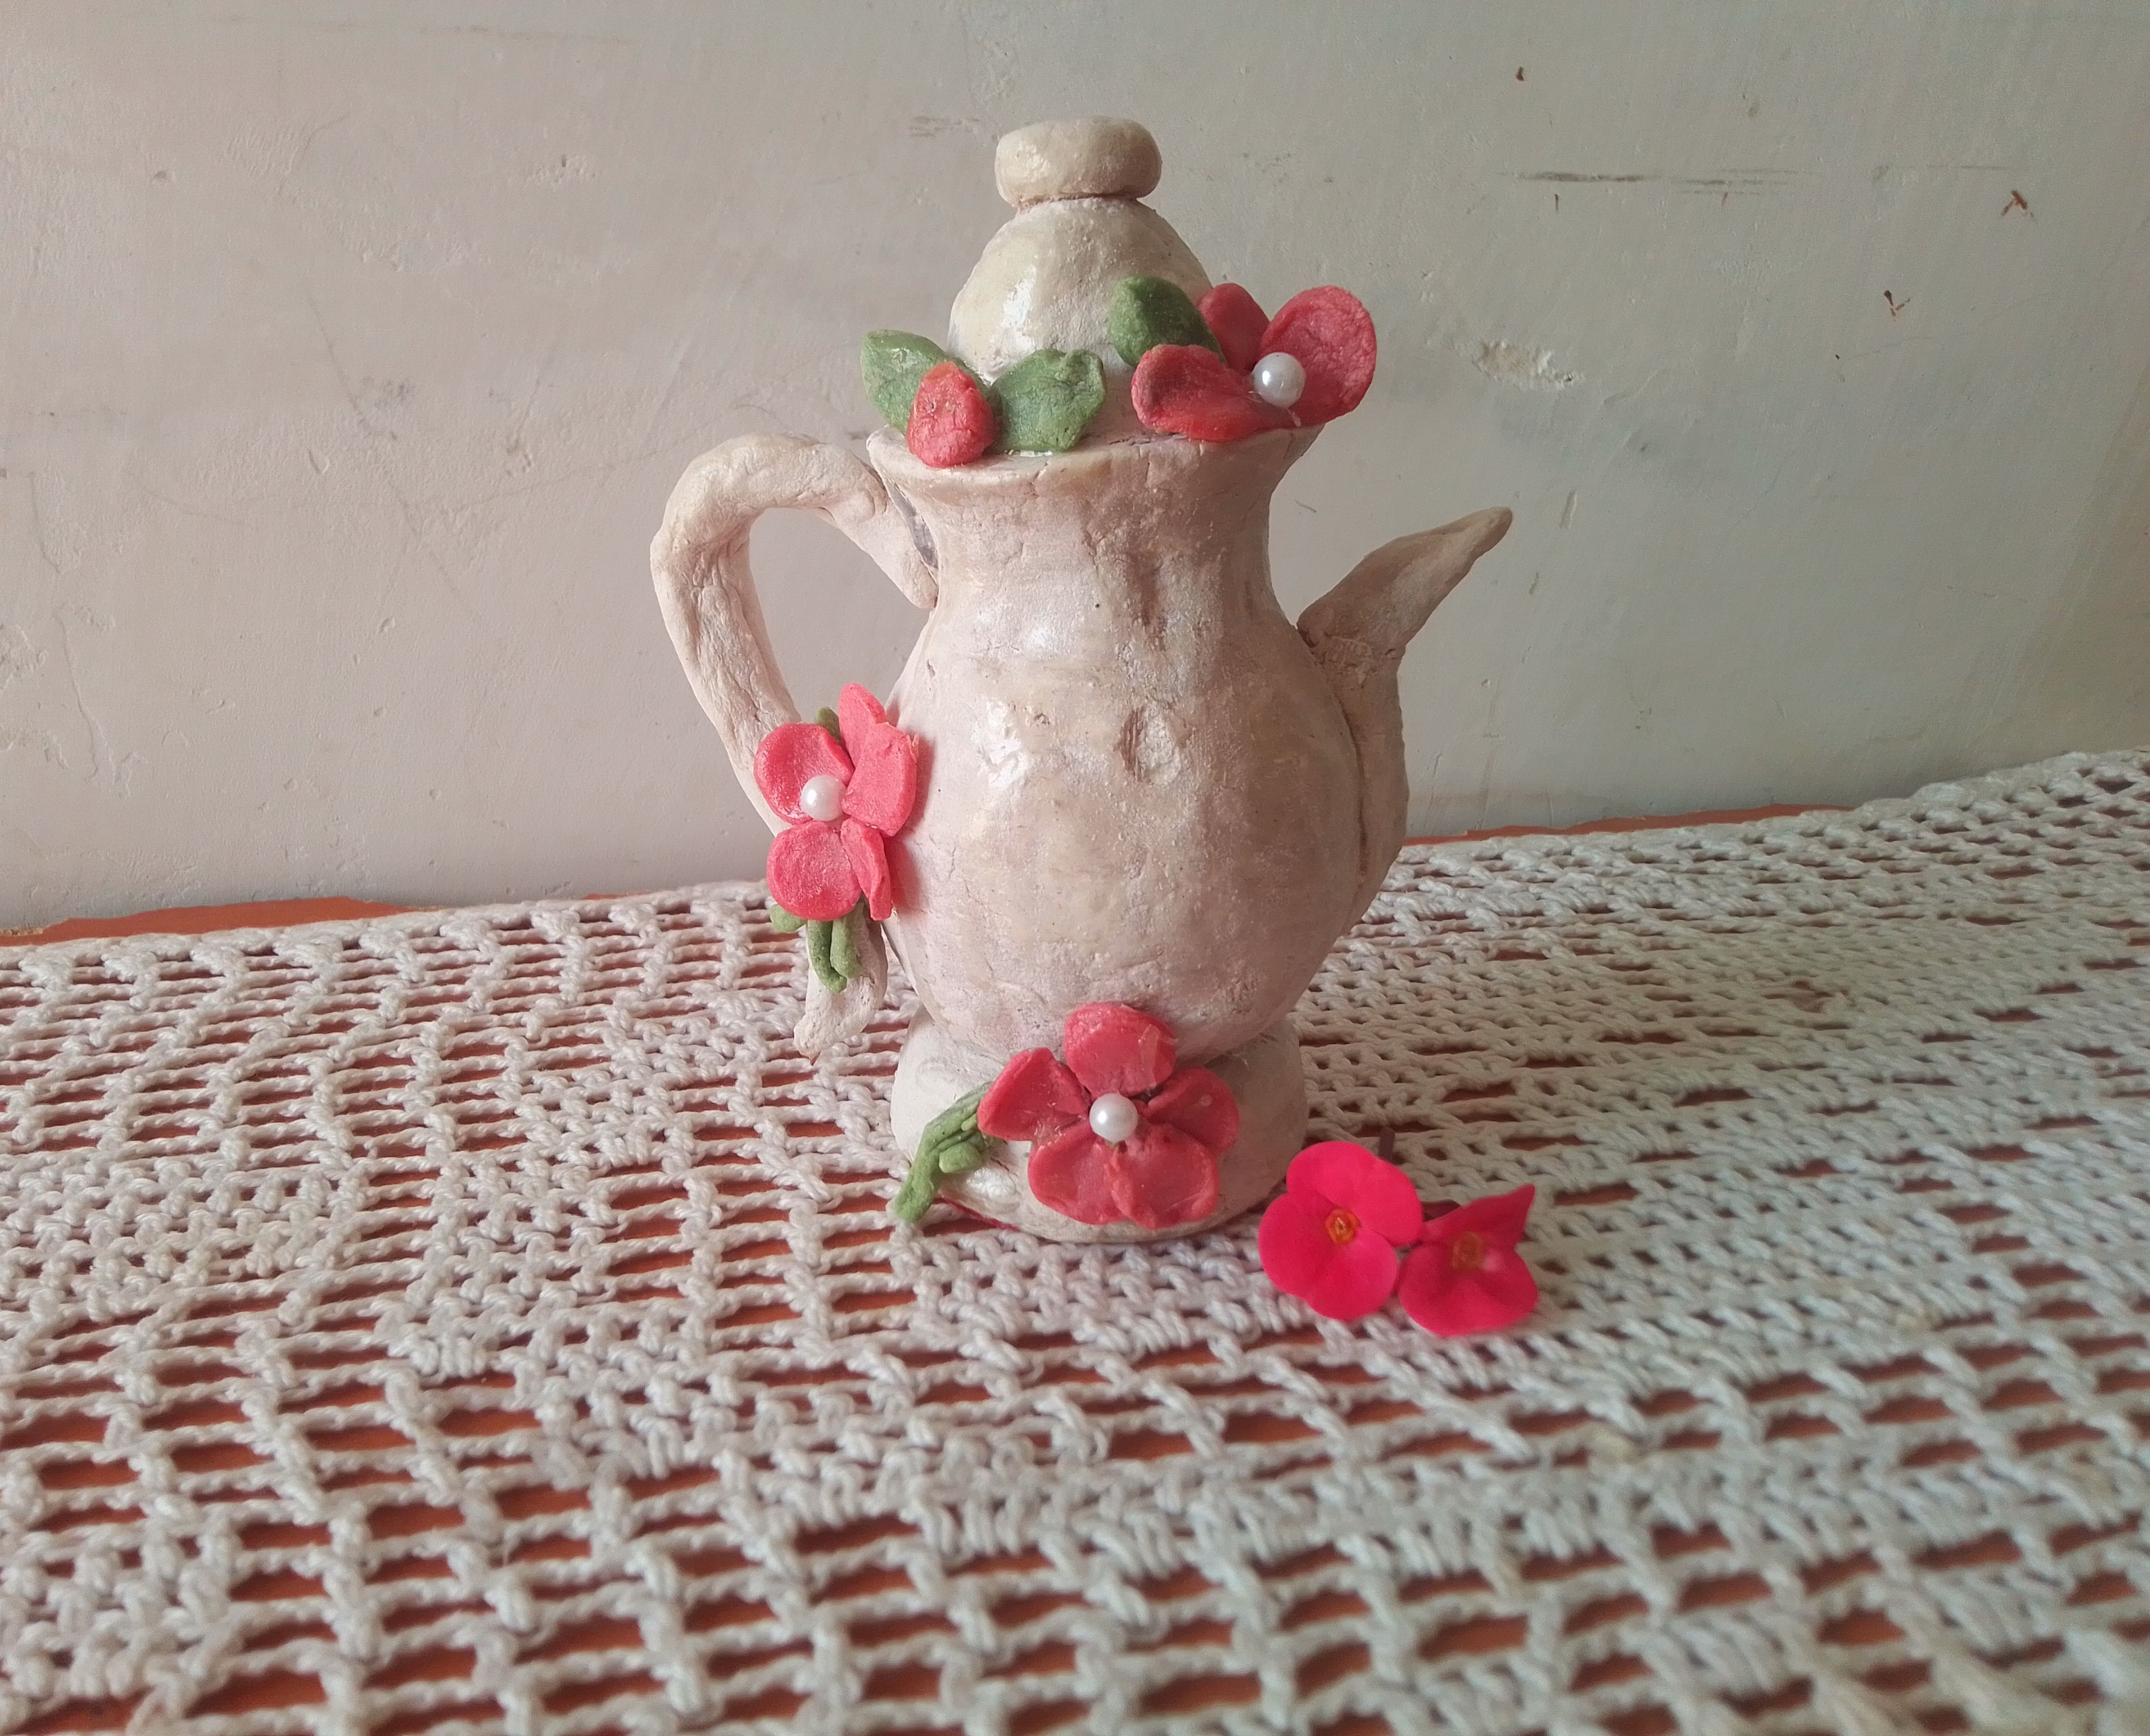
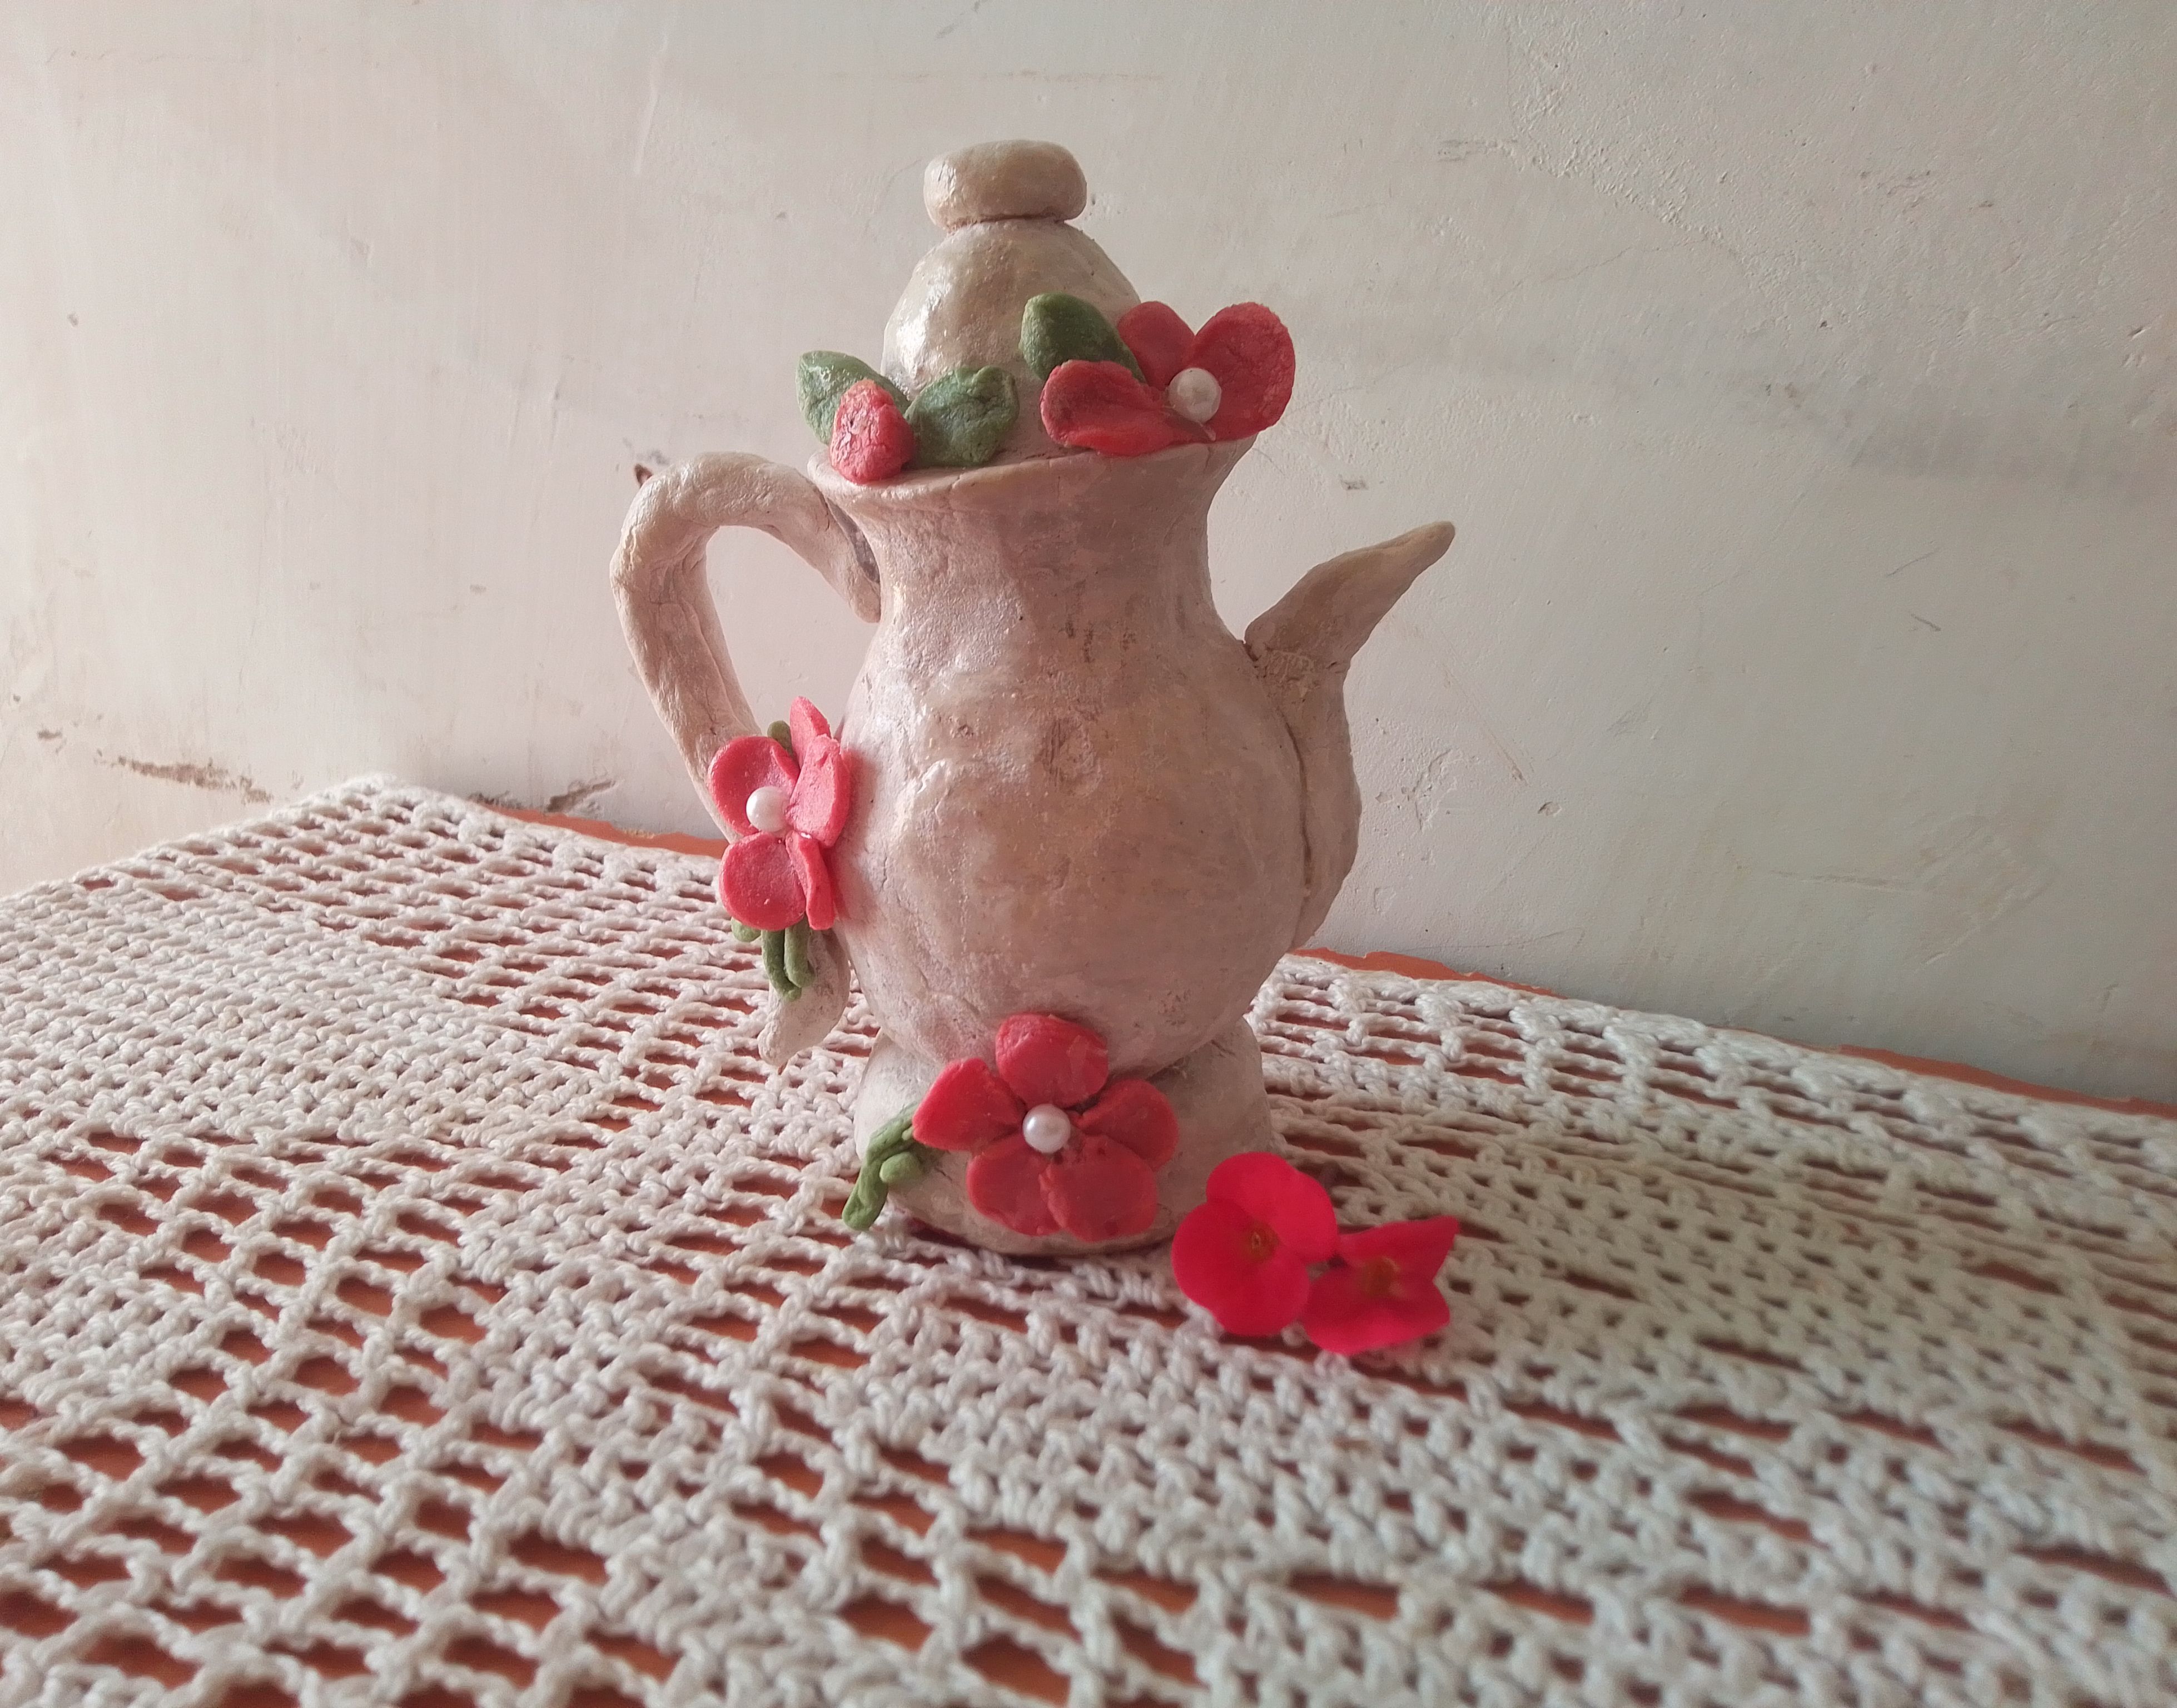
🌸Resultado! 🌸
Cuando cursaba el tercer año aprendí a moldear la arcilla, me alegra no haberlo olvidado, me hubiera encantado hacer podido usar este material, pero crear mi propia masa para este proyecto me ha gustado aún más. Estoy feliz con el resultado, al poco tiempo se puso muy dura, me encantaría hacer otros cosas ya que ahora sé que sí funciona. Con cariño te muestro el resultado final espero les guste.
When I was in my third year I learned how to mold clay, I'm glad I didn't forget it, I would have loved to have been able to use this material, but creating my own dough for this project I liked it even more. I am happy with the result, after a short time it became very hard, I would love to do other things since now I know that it works. With love I show you the final result I hope you like it.

Tengo el agrado de invitar a participar en este concurso a @cruzjimenez01, @anaarevale01 y @carolycesar15, estoy segura que tendrá algo bello que mostrar. A todos ustedes les doy las gracias por llegar hasta el final, y a la comunidad muchas gracias por la oportunidad y el gran apoyo. Me despido esperando saber que les parece esta idea a través d esus comentarios y deseándoles un preciosa noche y que Dios le bendiga grandemente, hasta pronto.
I am pleased to invite @cruzjimenez01, @anaarevale01 and @carolycesar15 to participate in this contest, I am sure they will have something beautiful to show. To all of you I thank you for going all the way, and to the community, thank you very much for the opportunity and the great support. I say goodbye hoping to know what you think of this idea through your comments and wishing you a beautiful night and may God bless you greatly, see you soon.
All images in this post are mine. Taken from my Smooth 6.5 device, first image edited in PicsArt | Text translated in Google translator.
~~~ embed:1639253049632800774 twitter metadata:MTQ4NDI4MTAxMzQxMzAyMzc1Nnx8aHR0cHM6Ly90d2l0dGVyLmNvbS8xNDg0MjgxMDEzNDEzMDIzNzU2L3N0YXR1cy8xNjM5MjUzMDQ5NjMyODAwNzc0fA== ~~~
The rewards earned on this comment will go directly to the people( @lileisabel, @dayadam ) sharing the post on Twitter as long as they are registered with @poshtoken. Sign up at https://hiveposh.com.
Muchísimas gracias por el apoyo chicas!!
Very nice work. You managed to take advantage of good reusable materials. Excellent result. I really liked the teapot. I love everything handmade, (as a good craftswoman) hahahaha. Best of luck in the contest. @razielmorales ✨
hi beautiful! I have also had the opportunity to see your creations and let me tell you that they are beautiful. Your words are very motivating and I thank you for them. Thank you for all the support. Greetings and a hug.
And she did a fantastic job taking the advantage. Thanks for your engagement, keep it up.
💕 @diyhub
excelente manualidad usando un bombilla verdad quedo espectacular las flores le sientan hermoso
Holaa.. muchas gracias.. verdaderamente las flores le dan mucha vida!
¡Felicitaciones!
1. Invierte en el PROYECTO ENTROPÍA y recibe ganancias semanalmente. Entra aquí para más información.
3. Suscríbete a nuestra COMUNIDAD, apoya al trail de @Entropia y así podrás ganar recompensas de curación de forma automática. Entra aquí para más información sobre nuestro trail.
4. Creación de cuentas nuevas de Hive aquí.
5. Visita nuestro canal de Youtube.
Atentamente
El equipo de curación del PROYECTO ENTROPÍA
Esto es tan hermoso chica. Me gusta que hayas utilizado masa para hacer una tetera. Eso es maravilloso. Tu tetera ha quedado muy bonita.
Gracias por compartirlo 🤗.
Hola corazon! Muchas gracias por sus palabras de aprecio..me hace feliz su comentario.. lo hice lo mejor que pude! Bendiciónes..
Que tenga un buen día✨
🤗🤗🤗🤗🥰🥰
https://leofinance.io/threads/@wongi/re-leothreads-3igp4e6y
https://leofinance.io/threads/@dayadam/re-leothreads-2shtspn5f
The rewards earned on this comment will go directly to the people ( wongi, dayadam ) sharing the post on LeoThreads,LikeTu,dBuzz.
I always use wood glue to make the airdry clay. How long does this project take to dry?
I like the final product, its very cute.
Hello gorgeous!!! the truth is that at first I thought that it wouldn't get hard because I didn't use glue, but honestly it dries very quickly, in fact you have to wet your hands while you shape it... but if we talk about time until it takes its normal hardness , this work takes about 24 hours... I'm glad to know that you also like to make your own dough... Thanks for commenting, it motivates me a lot that you like it... Blessings...
You molded your own tea cups, this is so cool, but I'm guessing it will used for decoration. Purpose alone instead of the actual tea hehe😂