ENGLISH CONTENT
Hello all craft lovers! For my anniversary with my boyfriend, I wanted to make him something special. After he mentioned to me that he wanted to have physical photographs of us, I looked for a way to do it, but in a compact way. That's how I found The Chinese Thread Book, a craft originally created to store sewing implements, such as needles. By making it with paper, you can add messages and in my case, small size photographs. I already explained previously how to make all the pieces that make it up, so today, I will show you how we can put the book together 😉

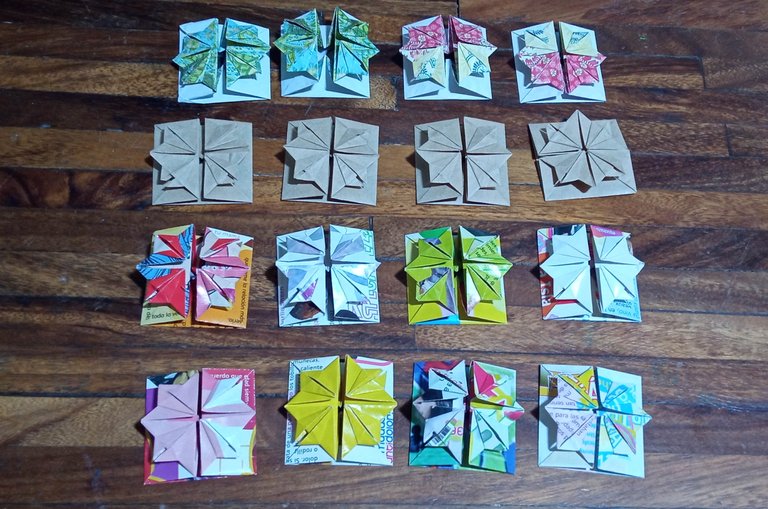
The pieces that we have to have ready are:

🌸 Recommendations before putting the book together 🌸
As I mentioned in previous posts, it is advisable to place the pieces on books or under heavy surfaces so that they are more compact when put together. Before gluing the pieces (this is done with a little white glue, to prevent the pieces from coming off), it is preferable that you check how the book is assembled first, so that you know where to place the glue, since you must verify that each compartment, open correctly.
🌸 Now let's put the book together! 🌸
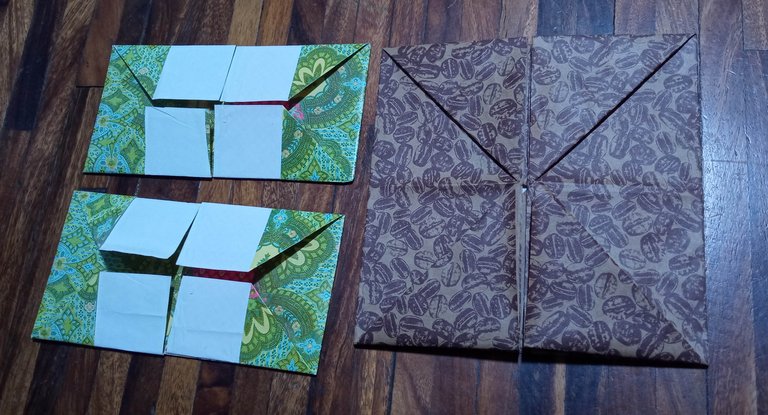
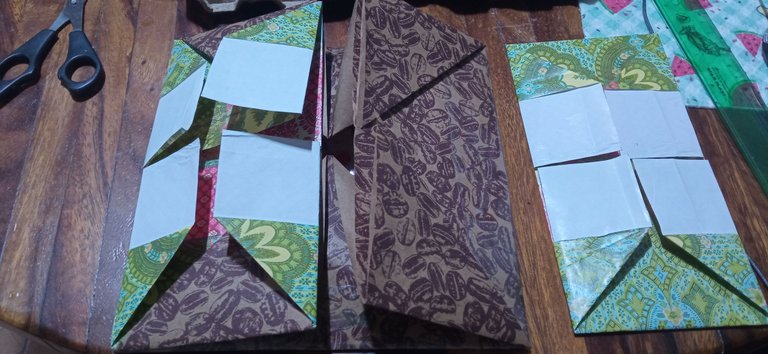
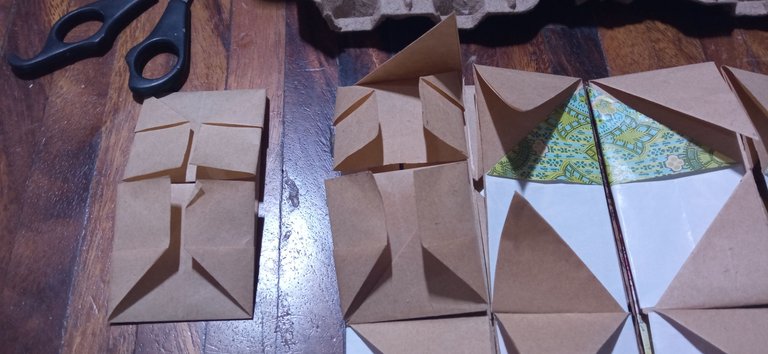
We take the base piece (the fifth) and place the 2 pieces corresponding to the fourth part on both tabs:
 |  |
|---|
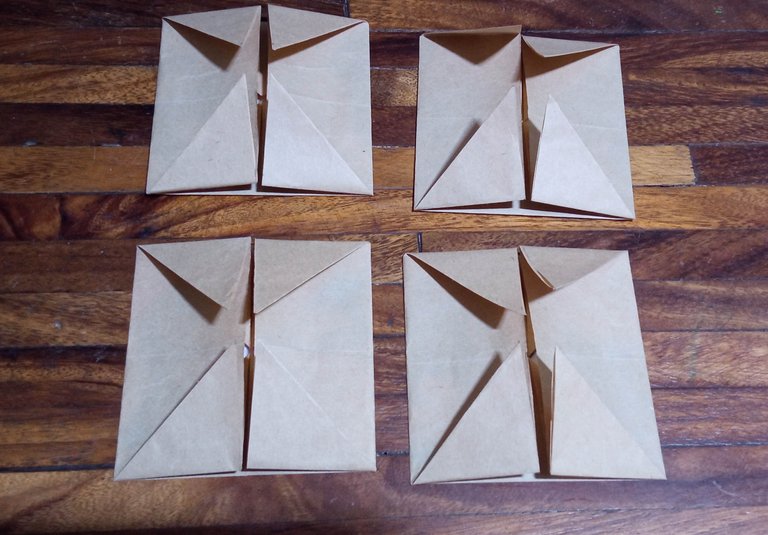
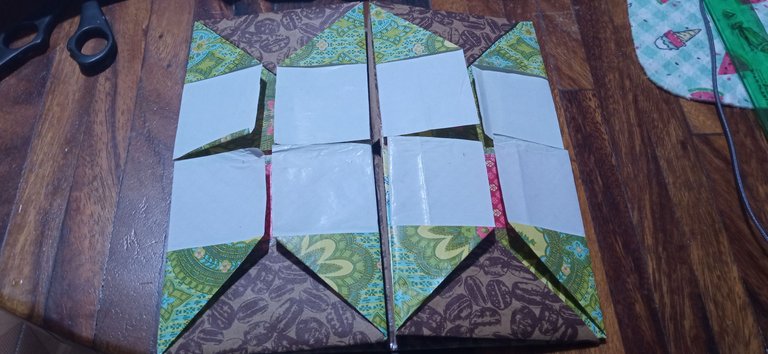
Above the pieces of the fourth part, we place the 4 pieces corresponding to the third part:
 |  |
|---|
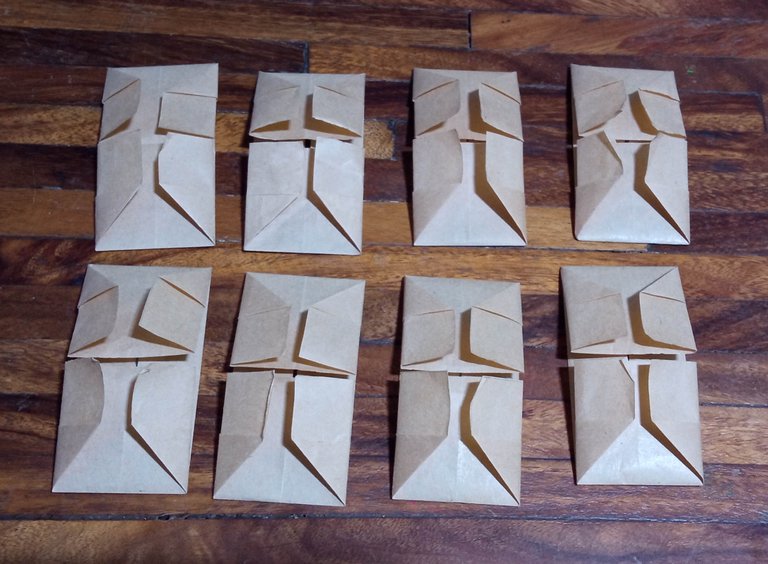
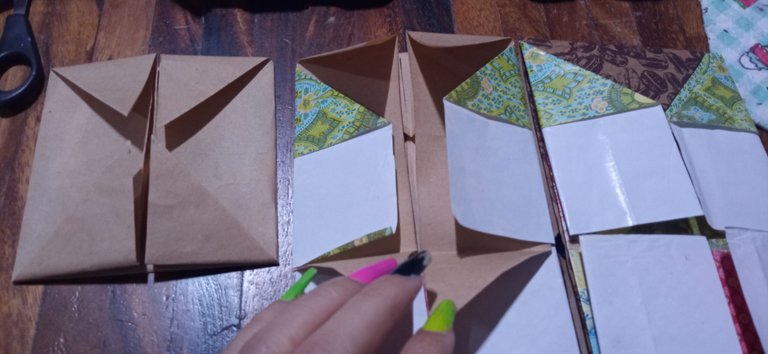
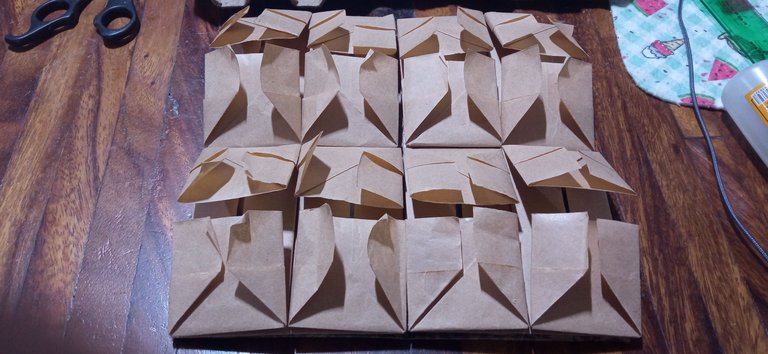
Above the third part, we place the 8 pieces corresponding to the second part:
 |  |
|---|
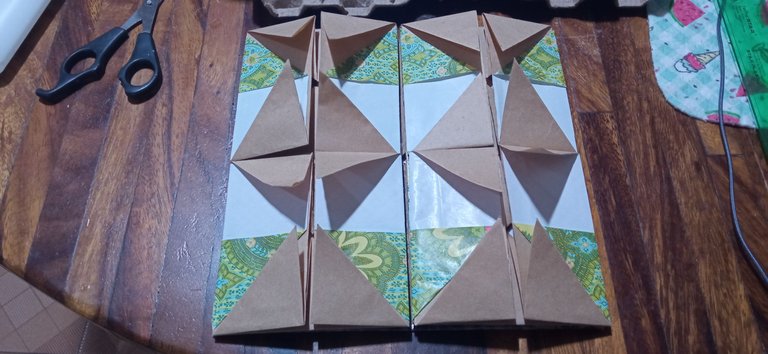
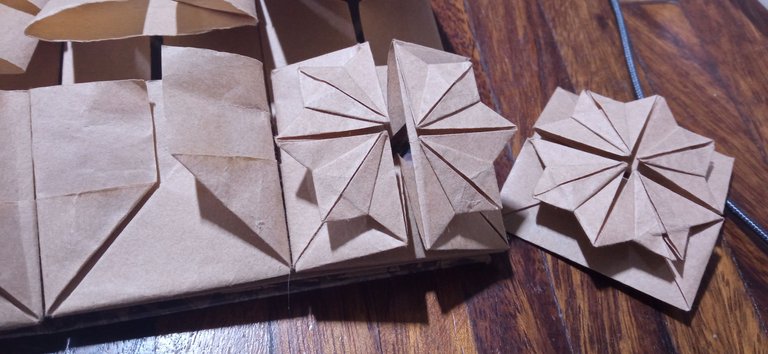
Finally, we place the 16 pieces corresponding to the first part, on the second:
 |  |
|---|
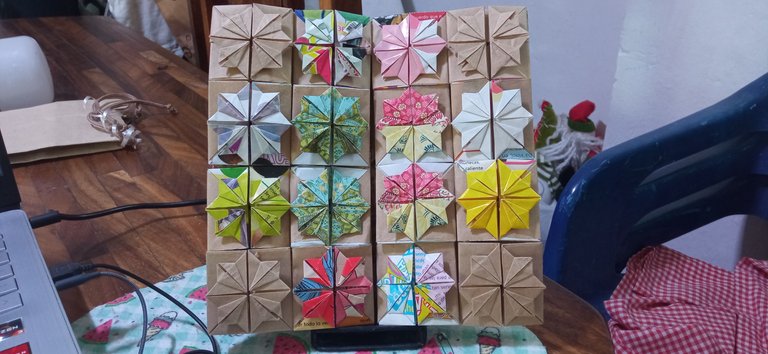
🌸 Decoration 🌸
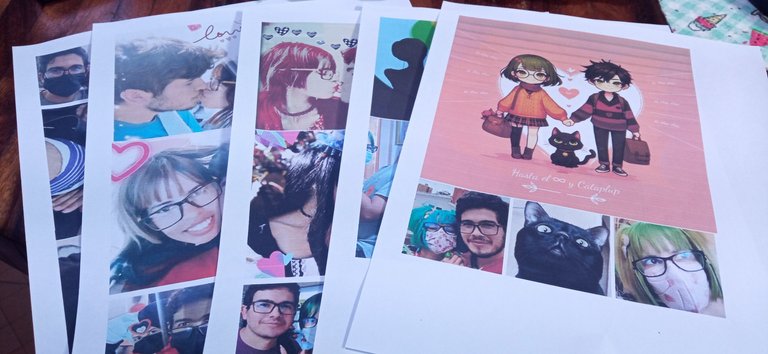
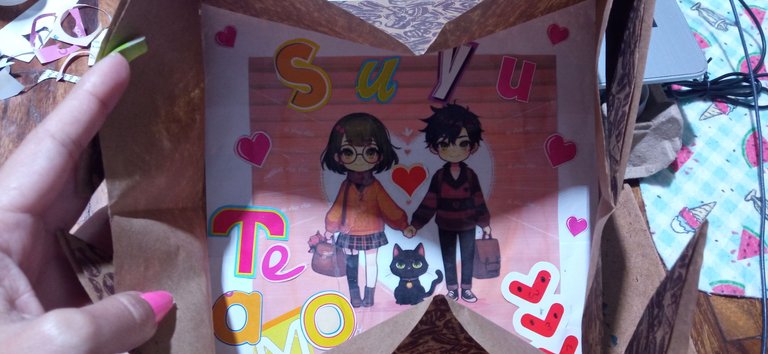
After we have verified where each piece goes and fixed them with glue, we can decide how to decorate our Chinese thread book. As I mentioned, the limit is your imagination. You can place everything from loving words and encouraging phrases, thin things like flower petals and leaves, or, as in my case, images and photographs inside each compartment. For the latter, it is necessary to print the images of the exact size of each compartment, with a ruler. I chose the photographs that I liked the most from these years with my boyfriend and placed them inside each compartment so that, when he opened them one by one, he would find a special moment.
 |  |
|---|
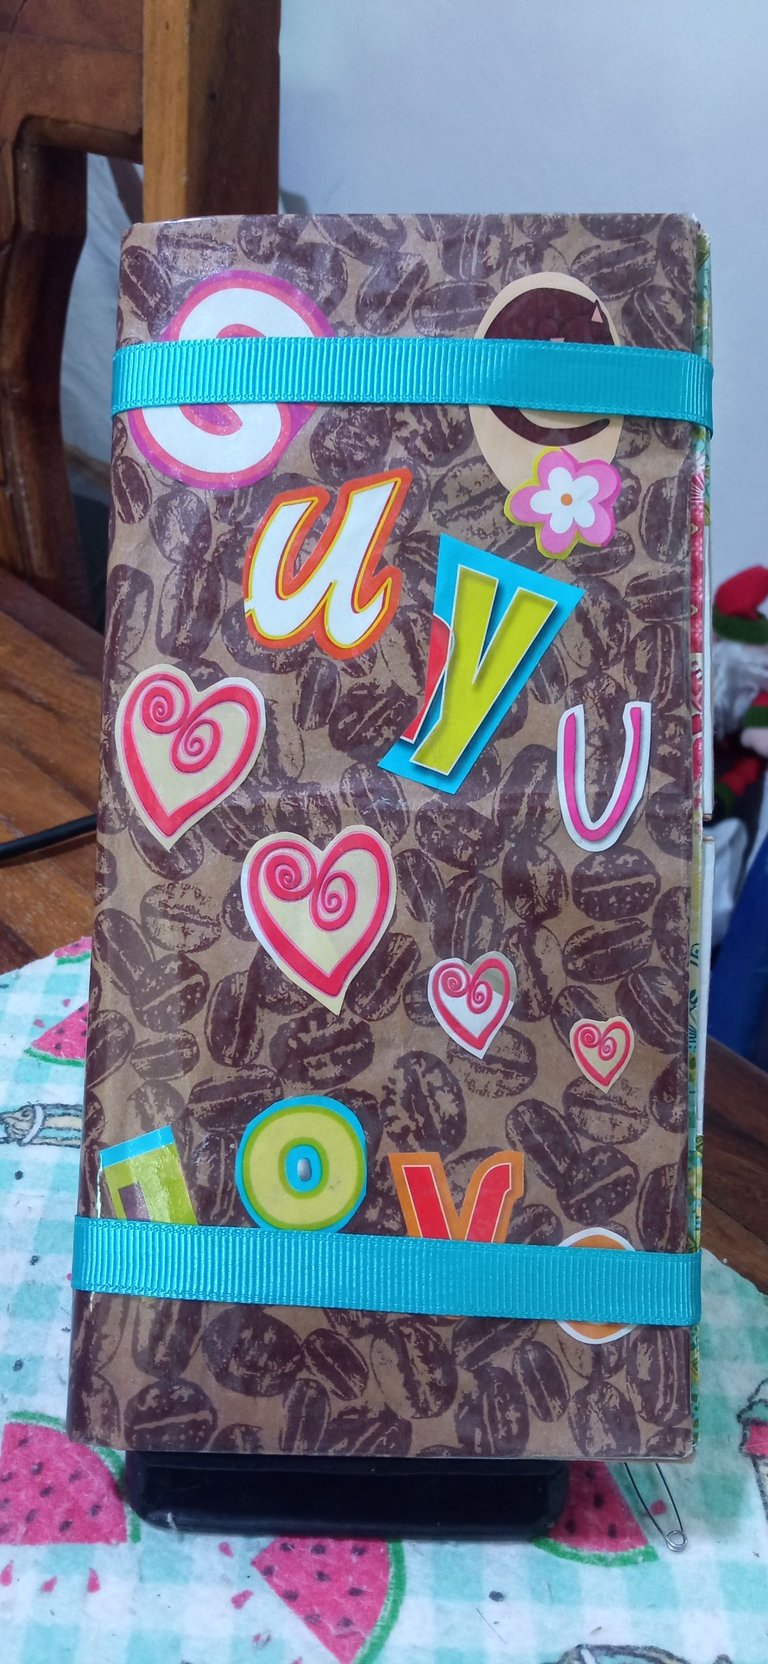
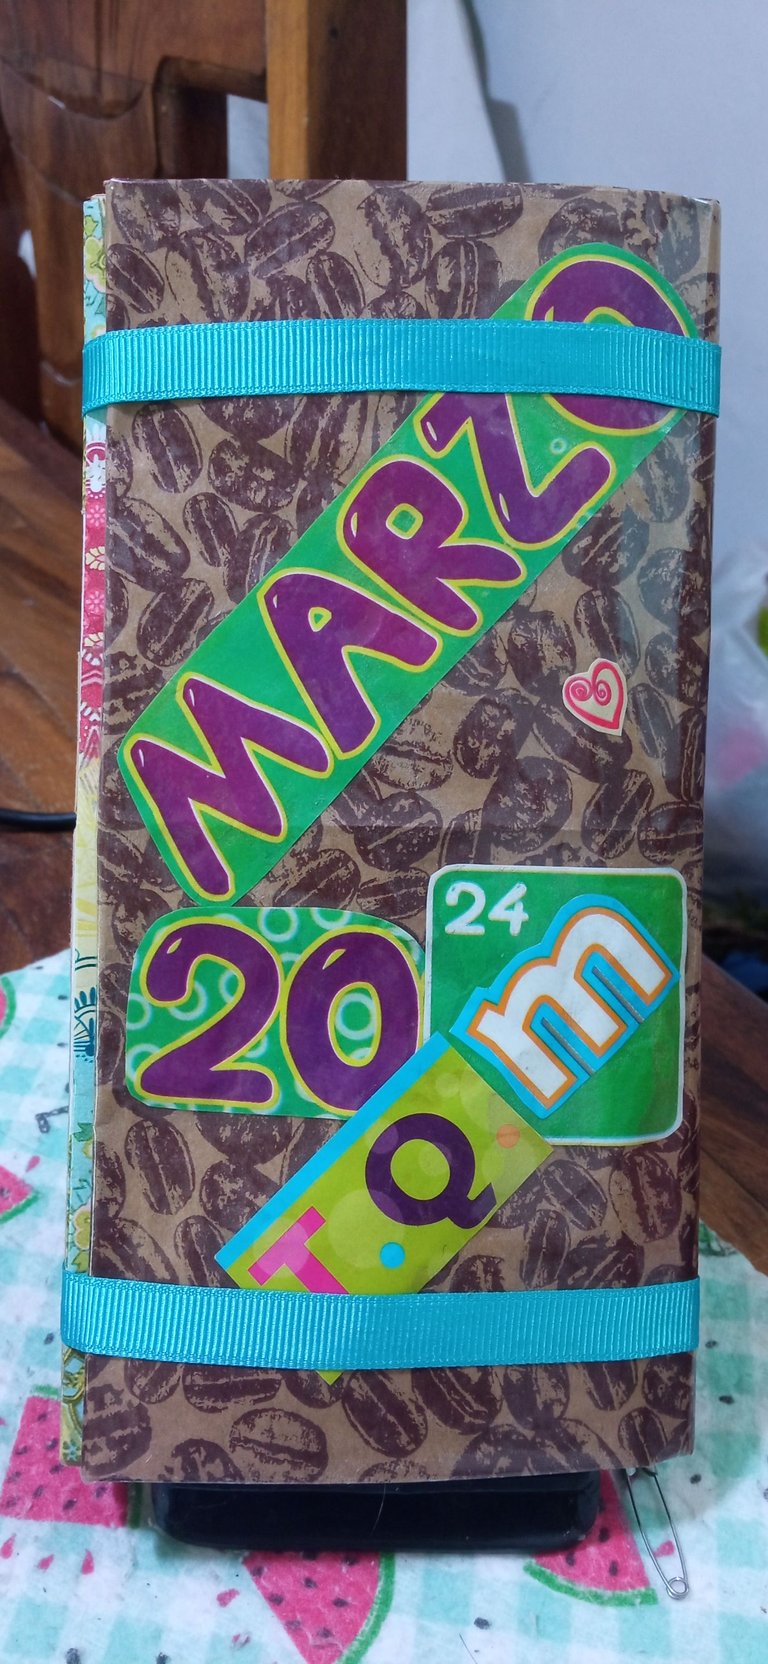
The size of the book is the same as a white sheet of bond paper, so when folded, it is quite compact and can easily be carried in a bag to remember those special moments when we need them most. To close it, I used a pair of ribbons that are easily removed. It is worth mentioning that my boyfriend was delighted with the gift. Not only is it a beautiful craft, but as I mentioned, it has the possibility of saving special details. I liked it so much, that I will make one again for my personal use ✨💚
 |  |
|---|
Thank you very much for visiting my publication. I hope you found it interesting.
Until next time!
CONTENIDO EN ESPAÑOL
¡Hola a todos los amantes de las manualidades! Para el aniversario con mi novio, quise elaborarle algo especial. Luego de que me mencionase que quería tener en físico fotografías de nosotros, busqué la forma de poder hacerlo, pero que fuese de forma compacta. Fue así como encontré El libro de hilos chinos, una manualidad originalmente creada para guardar implementos de costura, como agujas. Haciéndola con papel, se pueden agregar mensajes y en mi caso, fotografías en tamaño reducido. Ya expliqué anteriormente cómo hacer todas las piezas que lo componen, así que hoy, les mostraré cómo podemos armar el libro 😉
Las piezas que tenemos que tener listas, son:
🌸 Recomendaciones antes de armar el libro 🌸
Como mencioné en post anteriores, es recomendable colocar las piezas en libros o bajo superficies pesadas para que queden más compactas a la hora de juntarse. Antes de pegar las piezas (esto se hace con un poco de pegamento blanco, para evitar que las piezas se salgan), es preferible que verifiquen cómo se arma el libro primero, para que sepan dónde deben colocar el pegamento, pues deben verificar que cada compartimiento, abra correctamente.
🌸 Ahora si ¡Armemos el libro! 🌸
Tomamos la pieza base (la quinta) y colocamos en ambas pestañas las 2 piezas correspondientes a la cuarta parte:
| |
|---|
Arriba de las piezas de la cuarta parte, ubicamos las 4 piezas correspondientes a la tercera parte:
| |
|---|
Arriba de la tercera parte, colocamos las 8 piezas correspondientes a la segunda parte:
| |
|---|
Finalmente, ubicamos las 16 piezas correspondientes a la primera parte, sobre la segunda:
| |
|---|
🌸 Decoración 🌸
Luego de que hallemos verificado dónde va cada pieza y las fijemos con pegamento, podemos decidir cómo decorar nuestro libro de hilos chinos. Cómo les mencioné, el límite es la imaginación. Pueden colocarle adentro de cada compartimiento, desde palabras amorosas y frases de aliento, cosas delgadas como pétalos de flores y hojas o como en mi caso, imágenes y fotografías. Para esto último, es necesario imprimir las imágenes del tamaño exacto de cada compartimiento, con una regla. Escogí las fotografías que más me gustaron de estos años junto a mi novio y las coloqué dentro de cada compartimiento para que, cuando los abriera uno por uno, se encontrara con un momento especial.
| |
|---|
El tamaño del libro es del mismo que el de una hoja blanca de papel bond, así que al doblarlo, es bastante compacto y se puede llevar fácilmente en un bolso para recordar esos momentos especiales cuando más los necesitemos. Utilicé para cerrarlo, un par de cintas que se retiran de forma simple. Cabe mencionar que mi novio quedó encantado con el regalo. No sólo es una manualidad hermosa, sino que como comenté, tiene la posibilidad de poder guardar detalles especiales. Tanto me ha gustado, que volveré a hacer uno para mi uso personal ✨💚
| |
|---|
Muchas gracias por haber visitado mi publicación. Espero que les haya parecido interesante.
¡Hasta una próxima oportunidad!
¡Felicitaciones!
1. Invierte en el PROYECTO ENTROPÍA y recibe ganancias semanalmente. Entra aquí para más información.
3. Suscríbete a nuestra COMUNIDAD, apoya al trail de @Entropia y así podrás ganar recompensas de curación de forma automática. Entra aquí para más información sobre nuestro trail.
4. Creación de cuentas nuevas de Hive aquí.
5. Visita nuestro canal de Youtube.
Atentamente
El equipo de curación del PROYECTO ENTROPÍA