I finally got round to solving the main problem with my audio by doing some cost-effective acoustic treatment in my home office for under £100, and as you might have guessed, it's acoustic foam.
Today, I'm going to walk you through the exact same process step-by-step so you can achieve clearer vocals.
Estimated time: I used 68 acoustic tiles in total, this project took me 4 hours to complete (although, I ran out of equipment halfway through).
Before we get started I want to make this point perfectly clear, by installing acoustic foam in your home office/studio you are not soundproofing, only acoustically treating. To those who don't know acoustic foam is a great way to eliminate reverb or echo within a recording environment but it does not block sound!
The answer to soundproofing is MASS.
Now that I've got that out of the way, let's crack on!
STEP #1: Supplies
You're going to need several pieces of equipment which can all be purchased on Amazon.
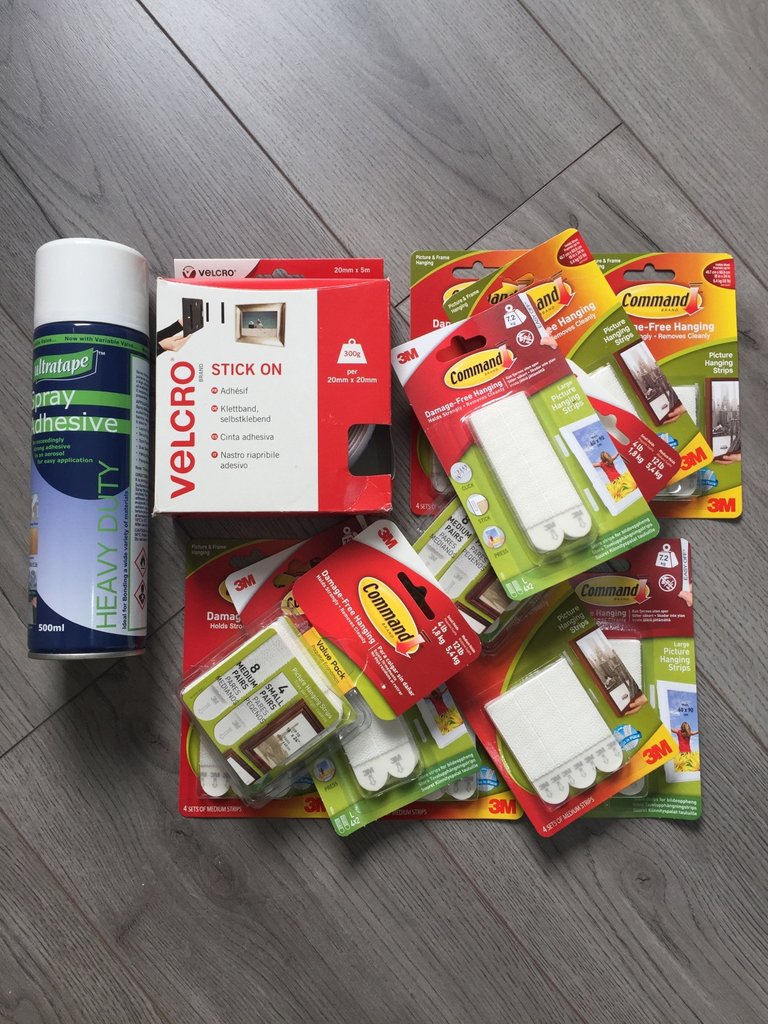
1. VELCRO Tape
2. Command Picture Hanging Strips
I highly recommend purchasing more than you need, I seriously underestimated how much I would need to finish one wall, I ended up purchasing extra VELCRO tape and adhesive spray as I ran out pretty quick.
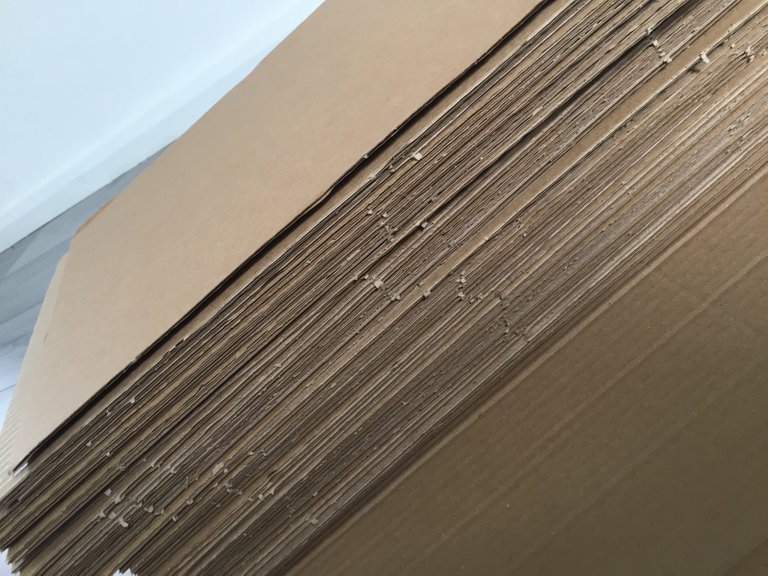
Now, I used cardboard as backing for the acoustic foam, this is optional but it will save you a lot of hassle further down the line when you want to remove the foam from your wall.
You can purchase 50 sheets below or get some cardboard for free at a local store which can be cut to size, I went for the easy option.
4. Cardboard Corrugated Sheets
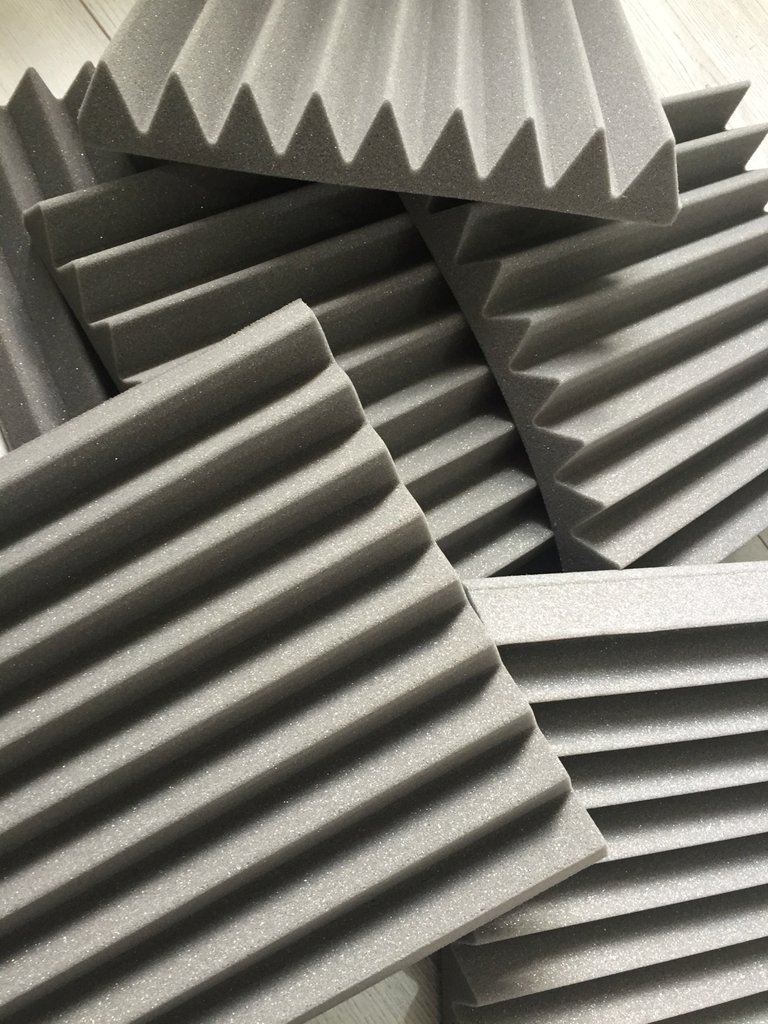
And the final supply you will need is acoustic foam... Obviously.
All of the foam I used was supplied by Pro Acoustics, it was cost effective and only cost £28.99 for 24 tiles.
STEP #2: Double-Up
Once you have all of your materials/supplies you will want to cut your cardboard to size, this can be done by laying it on top of your acoustic foam tile followed by drawing a straight line with a ruler and pen.
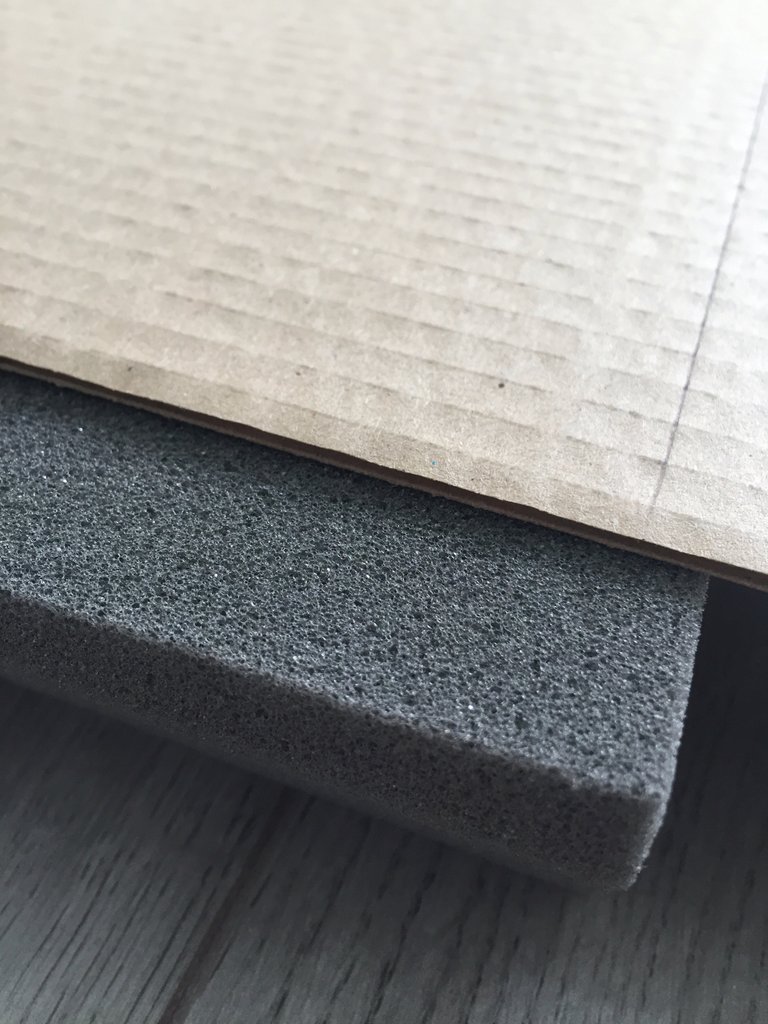
The cardboard I ordered are similar in size, therefore, I only had to cut one side. These cuts will come in handy later on when you have smaller spaces on your wall that need filled.

Now it's time to use your adhesive spray to bond the cardboard and acoustic foam tiles.
It's a messy job, I suggest doing this outside on a clear day (stating the obvious).
As you can see, it does not need to be perfect.
Once you have sprayed the back of your acoustic tile, leave it to set for around 30 seconds before pressing against the cardboard backing, make sure to apply pressure in all areas to achieve better results.

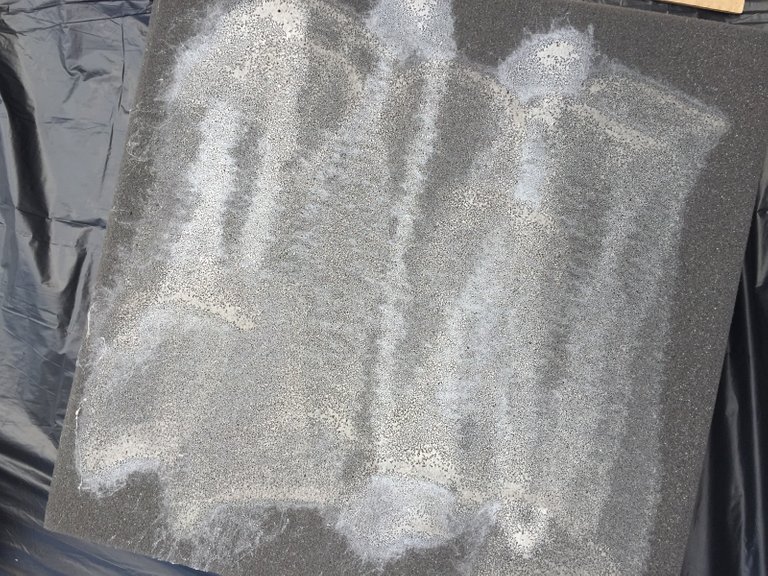
We're finally getting somewhere! This is what you should end up with, now just repeat this process 50x depending on how many tiles you are using.
STEP #3: Sticky Strips
Remember the VELCRO Tape and Command Strips you bought? You'll now be combining these to put your foam tiles in place on your wall.
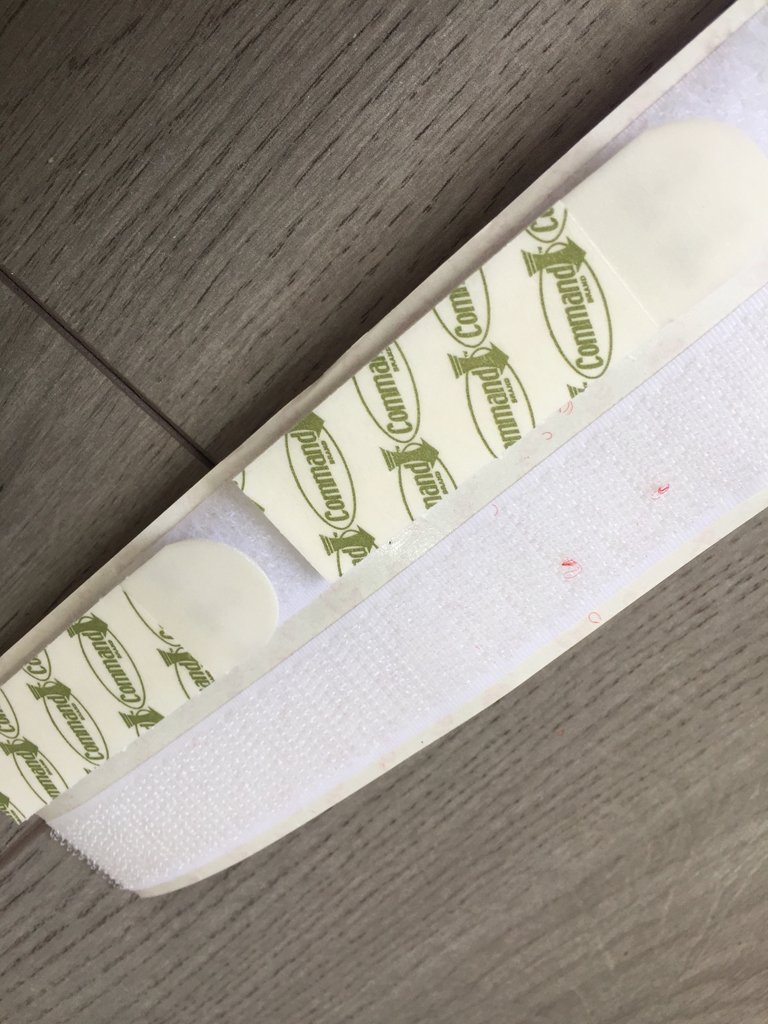
On your VELCRO Tape you will have a soft side and jagged side, to put in simple terms.
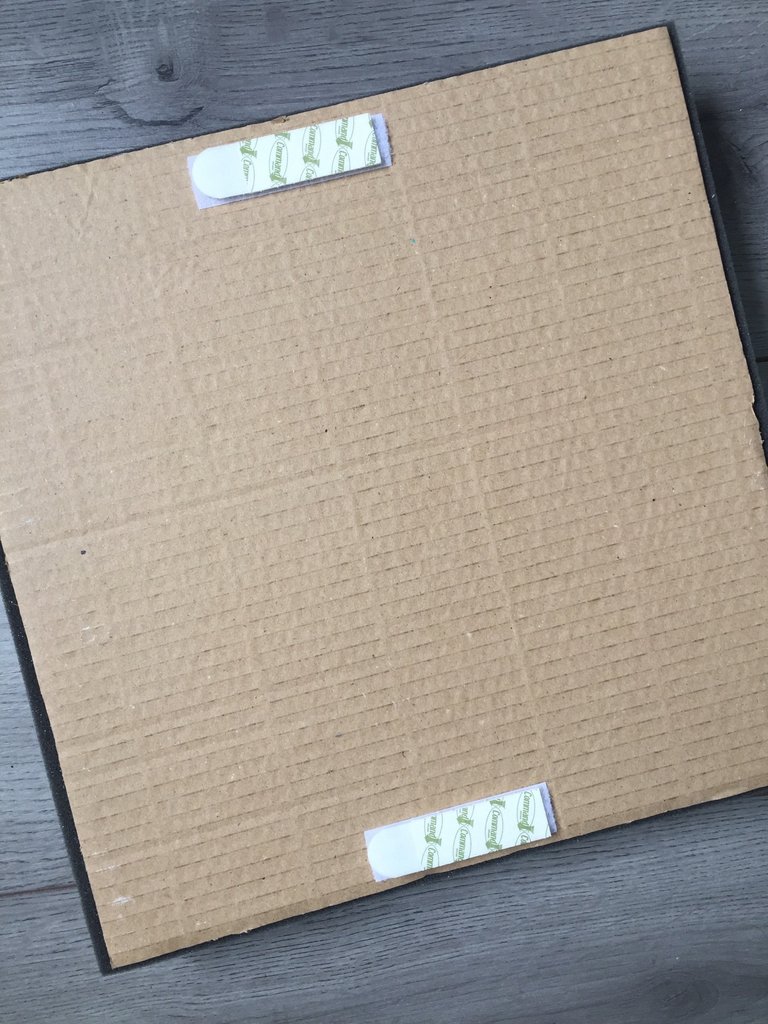
You want to stick your Command Picture Hanging Strips to the soft side and cut off the jagged side as shown below.

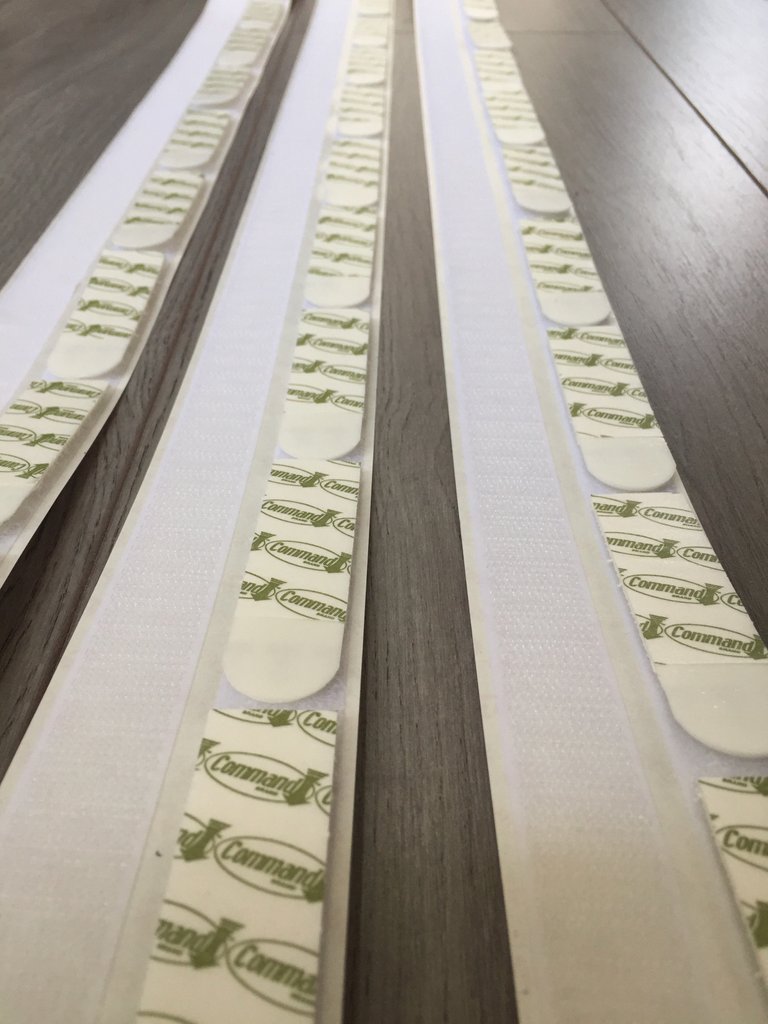
Rinse and repeat this process until you have enough strips for all of your foam tiles, just so you know I used two per tile.
What you will end up with is this before cutting off the jagged side of the VELCRO Tape.
Once you're all done fix the VELCRO Tape to your acoustic tile with the Command Strip facing up prior to placing them on the wall. I recommend doing it one by one as you fix your tiles to that wall as you may want to alternate each panel/tile to achieve a more attractive look.
STEP #4: Placement
As mentioned in the previous step you may want to alternate your tiles to achieve a more attractive look, well in my opinion it looks far better than having them all in the same direction.
Once you have added your sticky strips you want to start placing your tiles on the wall, ensuring you make a tight fit to the wall and in-between tiles.

This was just the start of a very looooong process! As I mentioned earlier as I was placing these on the wall, I ran out of supplies and had to wait on another Amazon order to finish my wall.

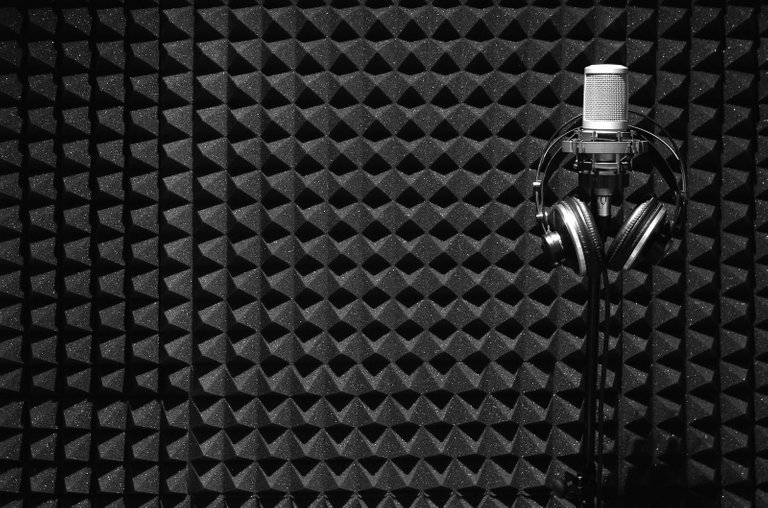
Above is the fully finished product, my audio already sounds 10x better by treating this problem wall and there is now minimal room echo when recording educational content.
I hope you all found this guide helpful, if you have any questions feel free to leave a comment below.
Don't forget to upvote, resteem and follow me for in-depth market analysis and investing education.
Great tutorial! I didn't have any velcro, but I had some super glue and it did the job nicely.
Thanks man! Velcro, super glue, sticky strips, they all get the job done I suppose. Couldn't get any coloured tiles over here in the UK though @corganmusic
@lewisglasgow got you a $2.8 @minnowbooster upgoat, nice! (Image: pixabay.com)
Want a boost? Click here to read more!
Wow... This is really a great work.. This is really gonna be a very hectic job for you when covering d whole walls but is really beautiful.
I appreciate that @sbamsoneu. If you're only covering one wall it's a relatively easy job, but to anyone who dares to treat a whole room... See ya next week lol!
Congratulations! This post has been upvoted from the communal account, @minnowsupport, by Lewis Glasgow from the Minnow Support Project. It's a witness project run by aggroed, ausbitbank, teamsteem, theprophet0, someguy123, neoxian, followbtcnews/crimsonclad, and netuoso. The goal is to help Steemit grow by supporting Minnows and creating a social network. Please find us in the Peace, Abundance, and Liberty Network (PALnet) Discord Channel. It's a completely public and open space to all members of the Steemit community who voluntarily choose to be there.
wow nice
Thank you @rahulmondal802 :)
This post was resteemed by @resteembot!
Good Luck!
Learn more about the @resteembot project in the introduction post.
Check out the other content resteemed by @resteembot.
Some of it is really cool!