The right hand technique.
Steemians friends, welcome back! In the previous lesson we saw how to use the left hand on the handle of the guitar, today we will see instead what the right hand must do. Obviously for left-handed people, the opposite is true.
Here we will deal only with the approach to the modern electric guitar, therefore purely with the use of a pick.
Knowing how to control the right hand means combining time and precision in the execution. By practicing it, you will be able to make it become a means of automatic communication of your sense of rhythm, focusing better on precision.
Initially it can be useful to find a support for the right hand directly on the guitar even if I advise you to get used to keeping it "free" immediately, it is not really a mistake to support it, but then it becomes a consolidated habit to do it and when we progress in playing it could give us some problems. I myself fell into this "trap" and it took me a long time to get out of it.
It is sufficient to place the forearm on the upper part of the guitar, leaving enough freedom and agility to the hand.
Later, for certain techniques, we will also see the support of the palm on the bridge, just behind the ropes.
Fundamental rule of the technique for the right hand is: * minimum movement with maximum effect. *
Speed, versatility and energy to hit the strings come with the alternating movement and rotation of the forearm and wrist.
The hand must move only to command the pick or fingers and choose the strings to be played.
The area where you play is normally the space between the bridge and the end of the handle towards the body of the guitar.
The sound varies according to the point of contact of the pick: bright and firm closer to the bridge, progressively soft and warm moving towards the handle.
As we proceed with these lessons, we will see exercises to begin coordinating the movements of the right hand and the left hand on the guitar.
The pick.
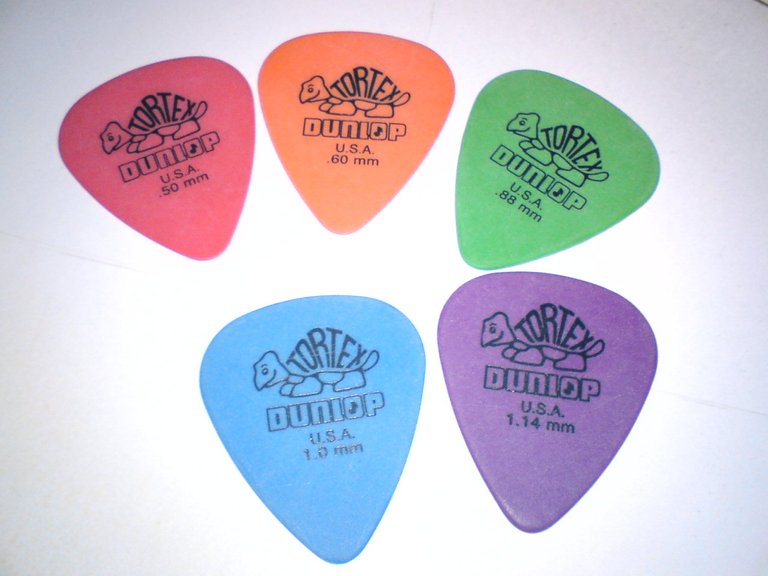
The choice of a pick is a purely personal matter. On the market there are various forms of plectrum, thin, thick, made of plastic, wood, composite fiber .... a myriad of combinations. Personally, after various and various uses of different picks, I found the ideal for me: the JAZZ III model produced by Jim Dunlop. Given the relatively low cost, it is possible to buy different sizes and shapes as long as we find the one that suits us best.
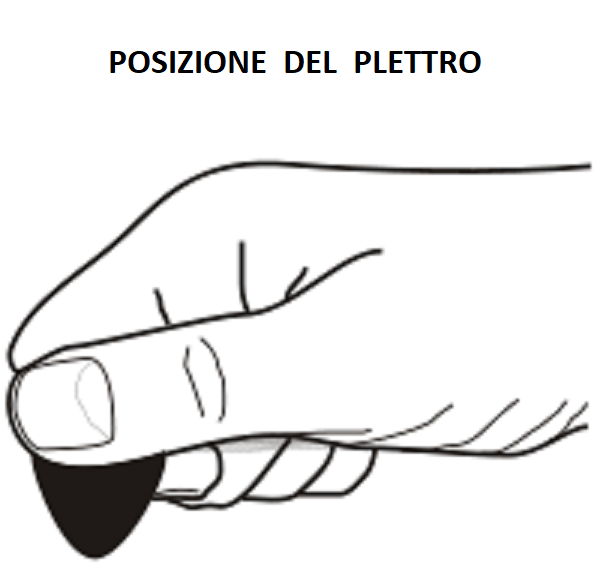
But how do you hold the pick? In general, academically speaking, it is advisable to keep it between the thumb and index finger of the right hand, with the fist closed, so that the tip is perpendicular to the strings. There is no absolute technique that applies to everyone, it depends on the physical characteristics of the guitarist and the style and sound they want to achieve. What matters is always the end result, but there are two basic approaches to consider in their pros and cons.
Like Joe Satriani, some guitarists prefer to place their fingers that don't hold the pick on the body of the guitar. In this way the control increases, you are more precise and you can play louder, but the resting fingers can be a constraint that limits the expressive possibilities of the right hand. Furthermore, having a part of the mobile and a fixed hand can produce stress that makes the movement of the pick on the strings less agile.
Pat Metheny, and others like him, instead use the right hand free of support to have a wider sound range, with greater freedom of movement of the hand, seeking different positions with respect to the strings. Playing with the free hand from supports also helps to better manage the dynamics, making the melodic phrasing more effective.
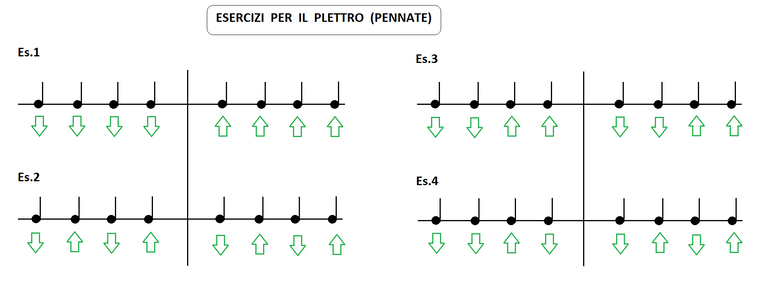
Here below, some simple exercises to begin with. The down arrow indicates a downward strumming, the up arrow picking upward. Perform the exercise on each individual rope moving over the entire handle.
And with this friends, the third lesson ends. Next appointment soon for another little guitar lesson.
Thank you for your support, a warm greeting! see you soon bye!
La tecnica della mano destra.
Amici Steemians, ben ritrovati ! Nella precedente lezione abbiamo visto come utilizzare la mano sinistra sul manico della chitarra, oggi vedremo invece cosa deve fare la mano destra. Ovviamente per i mancini, vale l'opposto.
Tratteremo qui solo l'approccio alla chitarra elettrica moderna, quindi prettamente con l'utilizzo del plettro.
Saper comandare la mano destra vuole dire combinare tempo e precisione nell'esecuzione. Esercitandovi, riuscirete a farla diventare un mezzo di comunicazione automatico del vostro senso del ritmo, concentrandovi meglio sulla precisione.
Inizialmente può essere utile trovare un appoggio per la mano destra direttamente sulla chitarra anche se consiglio di abituarvi fin da subito a tenerla "libera", non è proprio un errore appoggiarla, ma diventa poi un'abitudine consolidata farlo e quando progrediremo nel suonare potrebbe darci qualche problema. Io stesso sono caduto in questa "trappola" ed ho impiegato molto tempo a venirne fuori.
E' sufficiente appoggiare l'avambraccio sulla parte superiore della chitarra, lasciando sufficiente libertà ed agilità alla mano.
In seguito, per determinate tecniche, vedremo anche l'appoggio del palmo della mano sul ponte, appena dietro le corde.
Regola fondamentale della tecnica per la mano destra è: minimo movimento con massimo effetto.
Velocità, versatilità ed energia per colpire le corde vengono con il movimento alternato e rotazione dell'avambraccio e del polso.
La mano deve muoversi solo per comandare il plettro o le dita e scegliere le corde da suonare.
La zona in cui si suona, normalmente è lo spazio tra il ponte e la fine del manico verso il corpo della chitarra.
Il suono varia a seconda del punto di contatto del plettro: brillante e deciso più vicino al ponte, progressivamente morbido e caldo spostandosi verso il manico.
Man mano che procederemo con queste lezioni, vedremo degli esercizi per cominciare a coordinare i movimenti della mano destra e della mano sinistra sulla chitarra.
Il plettro.
La scelta del plettro è una questione prettamente personale. In commercio esistono svariate forme di plettro, sottili, spessi, in plastica, in legno, in fibra composita.... una miriade di combinazioni. Personalmente dopo vari e vari utilizzi di plettri diversi, ho trovato l'ideale per me: il modello JAZZ III prodotto da Jim Dunlop. Dato il costo relativamente contenuto, è possibile acquistarne diversi per dimensione e forma finché troviamo quello più adatto a noi.
Ma come si tiene il plettro? In generale, accademicamente parlando, si consiglia di tenerlo tra pollice e indice della mano destra, con il pugno chiuso, in modo che la punta si trovi perpendicolare alle corde. Non esiste una tecnica assoluta che valga per tutti, dipende dalle caratteristiche fisiche del chitarrista e dallo stile e sonorità che si vogliono ottenere. Quello che conta è sempre il risultato finale, ma vi sono due approcci di base da considerare nei loro pro e contro.
Come Joe Satriani, alcuni chitarristi preferiscono appoggiare le dita che non stringono il plettro sul corpo della chitarra. In questo modo il controllo aumenta, si è più precisi e si può suonare più forte, ma le dita appoggiate possono essere un vincolo che limita le possibilità espressive della mano destra. Inoltre avere una parte della mano mobile ed una fissa può produrre stress che rende meno agile il movimento del plettro sulle corde.
Pat Metheny, e altri come lui, utilizzano invece la mano destra libera da appoggi per avere una gamma sonora più ampia, con maggior libertà di movimento della mano, ricercando differenti posizioni rispetto alle corde. Suonare con la mano libera da appoggi inoltre, aiuta a gestire meglio le dinamiche, rendendo più efficace il fraseggio melodico.
Ecco qui sotto, dei semplici esercizi per cominciare. La freccia in basso indica una pennata verso il basso, la freccia in alto una pennata verso l'alto. Eseguire l'esercizio su ogni singola corda spostandosi su tutto il manico.
E con questo amici, finisce la terza lezione. Prossimo appuntamento a breve per un'altra piccola lezione di chitarra.
Grazie per il vostro supporto, un caloroso saluto! a presto, ciao!
Hello,
Your post has been manually curated by a @stem.curate curator.
We are dedicated to supporting great content, like yours on the STEMGeeks tribe.
If you like what we are doing, please show your support as well by following our Steem Auto curation trail.
Please join us on discord.
Questo post è stato condiviso e votato all'interno del discord del team curatori di discovery-it.
This post was shared and voted inside the discord by the curators team of discovery-it
Manually curated by the Qurator
Keep up the good work! Team in partnership with @discovery-blog.
sei bravo...abbastanza semplice da capire ma occorrerà esercitarsi!!!