Photography 101 - #3 - The Basics (ISO, Metering and ‘Stops’)
Welcome back Steemians, this is the 3rd part in my Photography 101 series and in this part we’ll be looking at ISO and 'stops'. If you’ve not already ready parts one and two they are available here - Photography 101 -Aperture, Shutter Speed
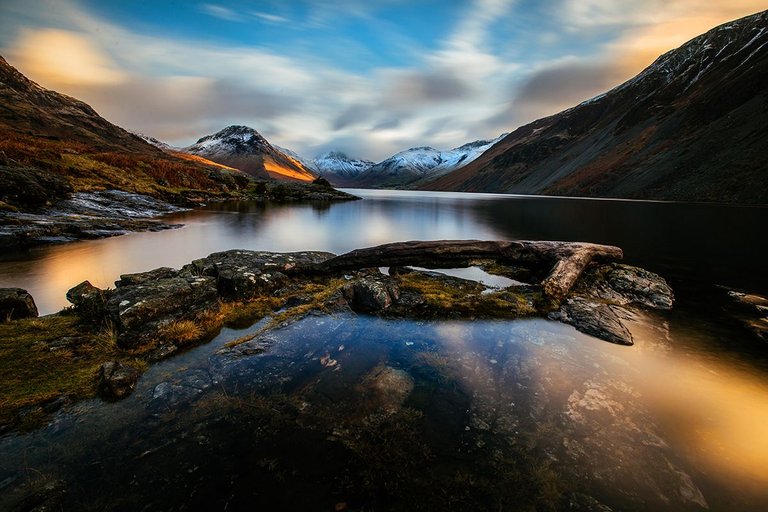
(I've used this photo a couple of times but only just got around to giving it a proper edit!)
ISO
By now hopefully the beginners among you are starting to get to grips with Aperture and Shutter Speed. Not just using them to expose a scene, but starting to use them creatively to get the shot you want. ISO is the final piece in the exposure puzzle and the third part of the trinity of settings that determine how your image will look. Unlike Shutter Speed and Aperture ISO isn’t really used for creative effect. When I say ‘Isn’t really’ I’m really just covering myself for the occasional photographer who will use high ISO deliberately. I’ve never seen it used to particularly great effect and it’s something that is usually better done in editing.
The Wonder of Silver Halides
To understand how ISO works it’s easiest to look at how film photography used to work. Film was available in different ASA’s (Think of ASA as ISO) and this was most commonly referred to as the films ‘speed’. The photosensitive part of celluloid film was tiny Silver Halide particles. The number of halides in a 35mm frame of film was converted into the ASA number. A low ASA, such as 50 would contain far less Silver Halide particles than 6400 ASA film. As such the 6400 ASA film would be far more sensitive to light than the 50 ASA film.
The downside to higher ASA film was that the concentration of Silver Halides became so dense that it was increasingly visible in the images as ‘grain’. In digital photography we refer to this interference as ‘noise’ and instead of Silver Halides we have photosites acting as our photosensitive part of the sensor.
High/Low = Light/Dark
Low ASA/ISO = Clean images with less sensitivity. Low ISO is typically used for brighter environments, outdoors and often shots with the assistance of flash lighting. High ISO/ASA = more image interference but more sensitivity. High ISO is typically used for darker scenes, evenings and night time photography.
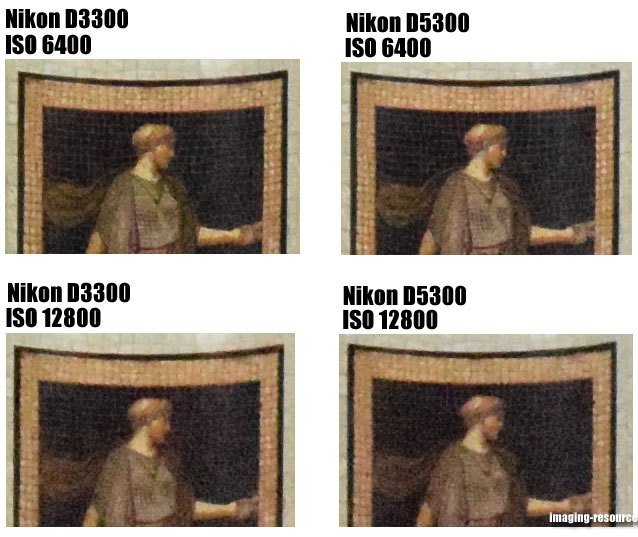
To illustrate how the ISO of an image affects the quality I found the shot below from Imaging Resource on an ISO comparison they did. You’ll notice that both shots are fairly high ISO, observe the lack of detail in the edges, the whole thing goes kind of ‘fuzzy’.
Using ISO
In many ways ISO is the simplest of the controls to master. Each camera will have a different point at which the ISO becomes unusable, and each photographer has a different measure of what they consider to be acceptable. For use on something like Steemit, where I usually resize my images to 1200 pixels, a noisy image is a lot less noticeable. If I’m sending full resolution images to clients I’ll usually stick to a slightly lower ISO. For professional work I’ll never shoot over 6400, most camera’s nowadays are more than capable of shooting at 3200 ISO without any problems.
The trick to ISO is really just keeping the number as low as possible without compromising your Aperture or Shutter Speed settings. There’s no point in going down to ISO 100 if that means shooting at f/1.4 and 1/12.5th of a second shutter speed. In this situation we could shoot at ISO 3200, f/1.4 and 1/60th of a second for a far more useable shot without having too much motion blur in our image.
'Stops'
One of the terms you’ve probably heard in the world of photography is ‘stops’. In the paragraph above I mentioned alternative settings with a different ISO, I didn’t use a calculator for those, I worked them out in my head using Stops. Getting to grips with exposure through Aperture, Shutter Speed and ISO is all well and good, but understanding stops really helps you to be able to predict settings a bit more and use all three settings in harmony without having a meltdown.
A ‘Stop’ isn’t a specific amount of light, it’s a measure of relevance when it comes to light. In simple terms a ‘Stop’ is either Half or Double the amount of light. So if I expose a shot, and go ‘up a stop’, I’m DOUBLING the amount of light that reaches the sensor. If I ‘Go DOWN a Stop’ I’m HALVING the amount of light that reaches the sensor.
Keeping it simple (stupid!)
Fortunately you don’t have to work too hard to figure out how to move your exposure up or down a stop. ISO is pretty simple, one stop is just double or half the ISO number, so ISO 200 is one stop down from ISO 400 and one stop up from ISO 100. Simple enough?
Shutter speed works in the same way, so ½ a second is one stop up from ¼ a second and one stop down from 1 second. The good news is that your camera is always configured to go in increments of one stop. Usually adjustable from either one whole stop, ½ a stop or 1/3 of a stop with 1/3 being the most commonly used setting. If we look right back to old film camera’s we would normally expect to see increments of one full stop being used.
Aperture is a little more complicated as the numbers don’t add up in the same way as we would with Shutter Speed or ISO, take a look at the chart below to see what I mean.

You’ll notice that f/1.4 is one stop brighter than f/2 with the 1/3 of a stop increments coming in at f/1.6 and f/1.8 whereas the one stop difference between f/11 and f/16 is denoted by 1/3rds of f/13 and f/14. It’s important to note that we ARE still doubling or halving the amount of light reaching the sensor, the numbers just come out a bit strange because it’s a circular opening.
Honestly, when it comes to aperture it’s easier just to count the number of clicks on your scroll wheel (or your chosen ‘aperture control’ part of your camera), over time you’ll start to learn what the stops are just through repetition.
The Maths
So back to that calculation earlier, remember the blurry ISO 100, f/1.4, 1/12.5 a second shutter speed shot? In this situation we’re most likely trying to bring the shutter speed up to freeze the action. f/1.4 will probably be the best option as it’s a low light situation. As such we’ll start to increase our ISO to allow us to also increase our shutter speed until we find a nice balance.
To take that ISO up we’re going to double it to 200 (one stop), double it again (400 – two stops), and again (800 – 3 stops), then once more for good measure, taking our final ISO to 1600, and allowing 4 stops more light to reach the sensor. Now that we’ve done this we can shift our shutter speed 4 stops as well. That goes a little something like this – 1/12.5 --> 1/25 --> 1/50 --> 1/100 --> 1/200 – with each change denoting one stop. In doing so we’ve kept our ISO within the useable range, and we’ve upped our shutter speed high enough to capture most moving subjects.
You Understand Exposure!
And with that, you understand exposure. Provided you’ve read (and re-read if necessary) the first and second parts in this series you should have a good knowledge of Shutter Speed, Aperture, ISO and exposure its-self. My intention wasn’t to give you a brief run-through of the three, it was to fully educate you in what each of the three key settings does and how it affects your image. Otherwise I could really just have said – Aperture; lower number = brighter image, Shutter Speed; lower number = brighter image, ISO; Higher number = brighter image. But would that have really helped you evolve and improve as a photographer?
As a photographer you can spend hours taking photos, or learning about which camera to buy, but the truth is our artform comes down to your choices with these three settings. The more you can understand them, the more you’ll be able to create the image you see in your head.
Putting it into practice
So you understand the basics and, if you’ve read my articles, you’ll know that my last heading is always Get Out and Shoot! But where to start? Well I’m afraid if we’re talking about literally where to go I have no idea, anywhere, the garden, the park, a shopping center, a homeless shelter, a bus shelter. Anywhere you like, but ideally somewhere that interests you! But for a little more practical advice how about we finish up with a simple step by step guide to exposing your photograph now that you understand Aperture, ISO and Shutter Speed.
Step-By-Step (I wish ASI made a better acronym!)
1 – Find the shot
– Simple enough; find something you want to take a picture of!2- Check the light
– I don’t mean a light meter, just evaluate your scene. Is it bright or dark?3- Aperture
– How much depth do we want in the shot? If we’re hoping for LOTS of depth think about whether this is going to be possible (Is it a bright enough scene). Adjust the aperture to an appropriate setting. Wide apertures for very shallow Depth of Field, Narrow apertures for WIDE depth of field.4 – Shutter Speed
– Is there action we need to freeze? Are we above the minimum number according to our effective focal length? I like to go about one stop up from my minimum shutter speed just to give myself a little wiggle room.5 – ISO
– You don’t even need to look at the exposure meter, just take a shot and decide if it needs more light. Keep going until the shot looks right. Double check that ISO number, have you shot this high before? As you get experience you’ll learn what the maximum ISO you’re happy using is. If you can’t get the shot exposed within your maximum ISO we’re going to need to revisit and adjust Aperture and Shutter Speed accordingly.
Look Ma’; No Hands!
Well, probably not no hands, but no exposure meters at least. Using the step by step guide above you don’t even need to worry about your exposure meter yet! Never fear, I’ll be covering that in my next guide, but for now I’d encourage you all to just shoot without it for a bit. Good old trial and error.
I’ll be the first to admit that this way of shooting WON’T be the fastest, it’s not supposed to. Just like this whole series we’re talking about going above and beyond to increase our skills and technical ability. Taking the light meter out of the equation means that you’ll look at each shot and take note of the exposure. You’ll start to see light in terms of settings.
One of my favourite things to do (Well, maybe that’s a bit extreme – if it was one of my FAVOURITE things I’d live a bloody depressing life!) is to walk into a room and take a shot without looking through the viewfinder or at the exposure meter. Just having a look around and trying to guess the settings. I started doing it years ago and now I can take a shot that is totally useable 90% of the time. It’s experience like this that makes using your camera less of a chore and more an extension of your own eyes. You’re not relying on automatic modes or hoping the camera sees what you do, you’re looking at a scene and exposing it how YOU want to.
It may seem like overkill but the truth is, just like every other skill in the world, the more you put in; the more you get out. I’m not saying you have to learn all of this, or do all of the activities but since you’ve invested the time in reading this article you might just as well 😉
Get Out and Shoot!
So there it is, the end of the first – and most crucial – part in the Photography 101 series. Aperture, Shutter Speed and ISO, aka – Exposure. I hope you’ve all learned a thing or two, I’d love to answer any questions you might have and I hope you’ll all head out with a mind to thinking a little longer about Aperture, Shutter Speed and maybe even ISO!
Weekly News Round up and Past Articles
Here's a quick list of the most recent Steemit Articles that you might be interested in:
How ANYONE Can Make Money From Photography (From Home!)
Long Exposure Photography 101 - #1, #2, #3, #4
So You Want To Be A Professional Photographer? #1, #2
How To Make Money From Photography
Photography Industry 2017 Year In Review
How To Use Flash Like A Pro
Guide To The Best DSLR/Mirrorless Camera's To Buy (Jan 2018)
5 Exercises To Improve Your Photography
What Does It Mean To Be 'Great'?
How To Get The Best Shot

All Images are mine and copyright belongs to me.
Please RESTEEM if you like my work.
Please Upvote my work to help support my content on Steemit
Nice photography ❤❤❤
Thanks!
@originalworks
Great effort in this guide!
Thanks @drakmin! Glad it comes across :) I always spend hours writing these things!
my friend this is a perfect landscape. bright clean positioning. extraordinary estrantane! I would stand there and look at that view. The mirrors and the clarity of the water are fascinating. I am happy to know you and your wife. you two are very successful!
Thank you! I think this is probably my favourite Landscape photo that I've taken so I was really happy with the re-edit :)
ah yes ! others are nice but the scenery is perfect!
This is a really great intro to the technical aspects of photography. I like the clear examples and it is easy to consume. I also like that you use the D3300 and D5300 for example cameras, they are great and low cost introductory cameras.
Cheers,
@kellyjanderson
Thanks! I'm really glad it was easy to read, I know there's a lot of information in there! Yes, cameras like the Nikon and Canon entry series are great starting points and probably most relevant for the most people!
These posts are so great!
I can't even get over how much information is in here and how spectacular the photos are.
That photo with the girl and her ladybug friend is incredible! I love it so much!
The idea of taking a shot in the room without the viewfinder is interesting... I've never really thought of doing that. All my shots were carefully crafted, whereas I guess you're capturing the action already happenin'. It's definitely something I'd want to try...
As a guy capturing all the action, how much time would you spent on your settings versus using the Auto function on your camera? I never used Auto until I shot a couple of weddings, and it was hectic as, but my shots were more documentative, yours are artistic.
Thanks man, I'm glad you enjoyed it :) The whole taking a shot without using the viewfinder isn't for the shot its-self, it's more just a little test of how well you can gauge exposure, although being able to 'shoot from the hip' is quite a handy skill. Mind you, since every new camera seems to have an articulated screen it's a bit of a defunct skill!
Honestly I literally never use any auto functions, I reckon it's probably been a good 5-6 years since I even played with an auto function, most of the time I'll just set my ISO to something that gives me a range in terms of Shutter/Aperture then stick with that, only changing if I go outdoors or indoors. Then it's really quick, literally just the spin of a wheel! I can honestly say the speed of changing settings has never been an issue. I think it just forces you to think not only about exposing the shot, but which element of the shot you're exposing for!
Love that long exposure in the first one. Like buttah.
Thanks! I am particularly proud of that one!
Dude- I love your work. I don't know how it took me so long to find & follow you! Cheers!
Thanks @caitycat! Always appreciate a follow! Hope you enjoy my future articles/images!!
This is a great post! And I love your photography, you clearly know your stuff, but most importantly you have a great eye!
Thank you! It's great to be able to share stuff like this on Steemit, it gives me a real motivation to write and contribute more!
You got a 6.97% upvote from @postpromoter courtesy of @skiesandsports! Want to promote your posts too? Check out the Steem Bot Tracker website for more info. If you would like to support development of @postpromoter and the bot tracker please vote for @yabapmatt for witness!
This post has received a 8.47 % upvote from @booster thanks to: @skiesandsports.
Thank you, this is a good knowledge for photography.