[ENGLISH VERSION]
Hi Steemian, at this time I will make tutorial to make my own blog website using laravel. If usually in college or school you create a website using PHP Native, then this time we will try to make the website using framework. What is a framework? You can check google or the future time I explain in more detail. The point is to make a website with a framework easier, easier for a programmer who is more advanced than a programmer who uses php, meaning that many things are needed in the creation of websites that have been included into the framework so that makes the programmer easier to create a website.
At this stage is the introductory stage to create a blog website. The things that are required in making this blog website are:
1. Web Server such as XAMPP, MAMP PRO (OSX)
2. Editor (Atom & Sublime)
3. Composer, Git, Laravel
For the function of the above components is obvious you know, if still do not know can be asked.
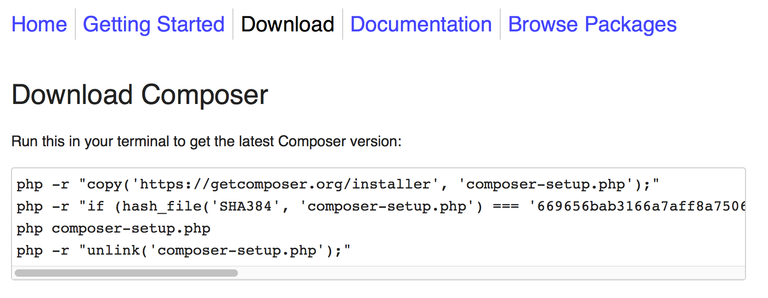
For composer you can download and install by way of this address https://getcomposer.org/download/
So after the composer is available on your computer, you can just install Laravel. To install the laravel there are several ways, see the picture below or see at https://laravel.com/docs/5.4
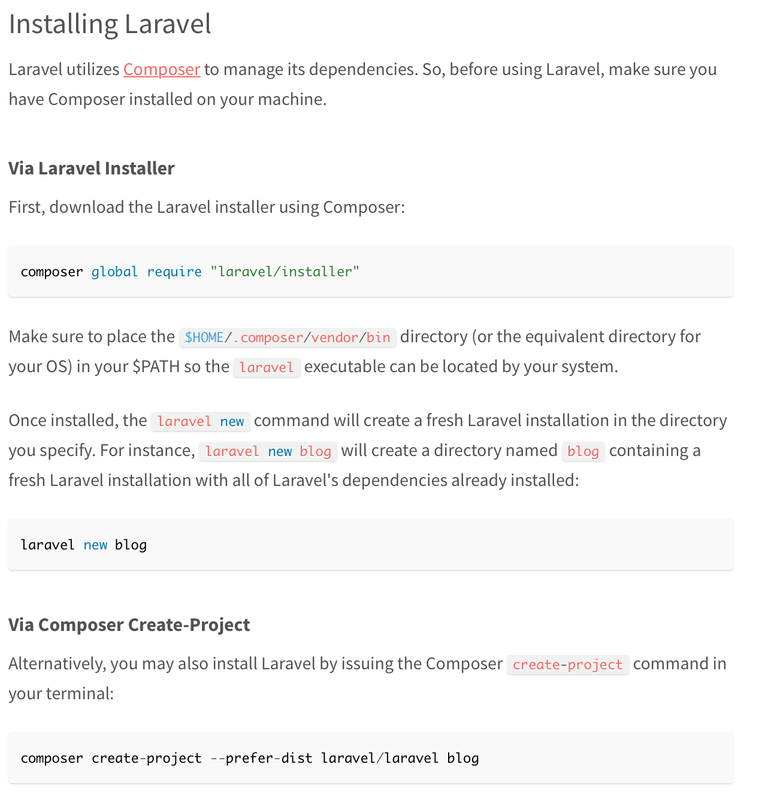
I use a second way, for settings to use like me, I'll tell you in the next post. For those who do not want complicated can use the way composer create-project --prefer-dist laravel/laravel blog
Start creating a Blog Website
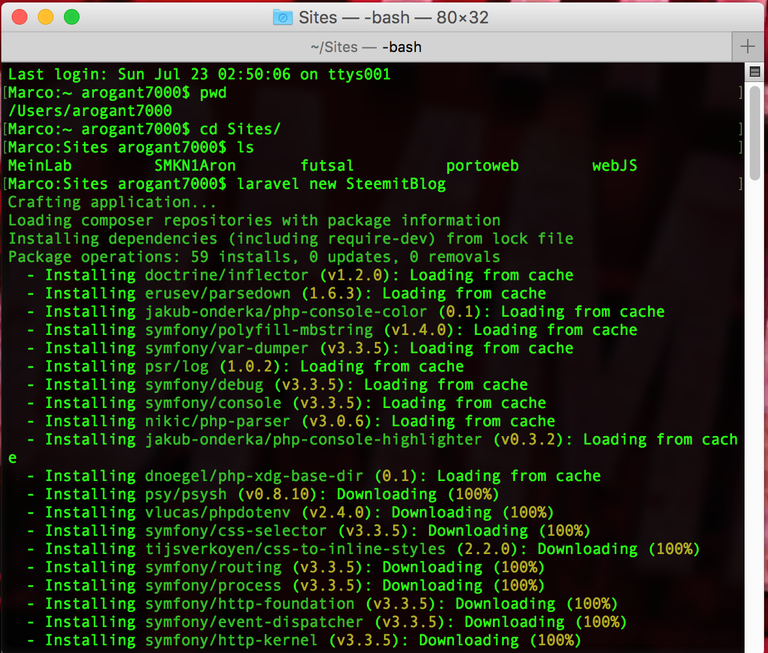
1. Prepare the project folder for the document root web folder. Then install laravel through terminal. See as picture below:
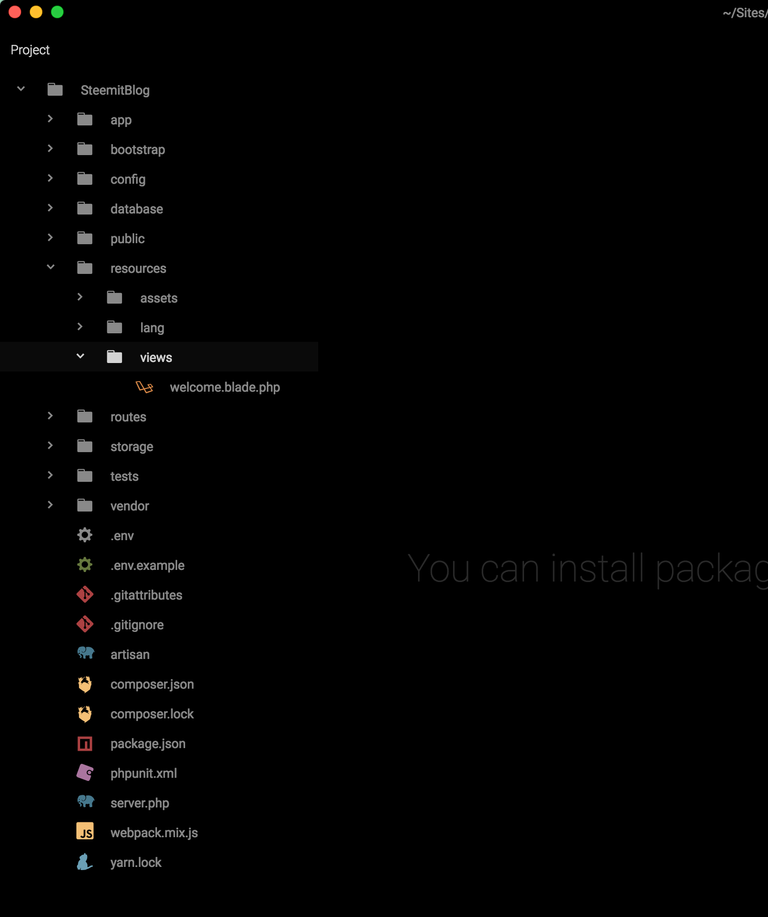
2. Insert the website document folder into the editor

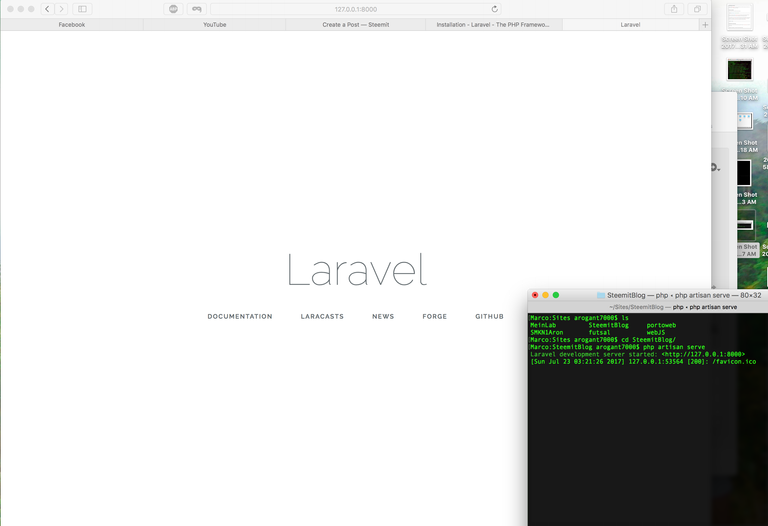
3. Starting a Development Server
Open XAMPP or MAMP Pro and enable the server. Then open a terminal and type: php artisan serve

Then open the browser and go to http://127.0.0.1:8000. This is the proof that our website is ready to start in the make.
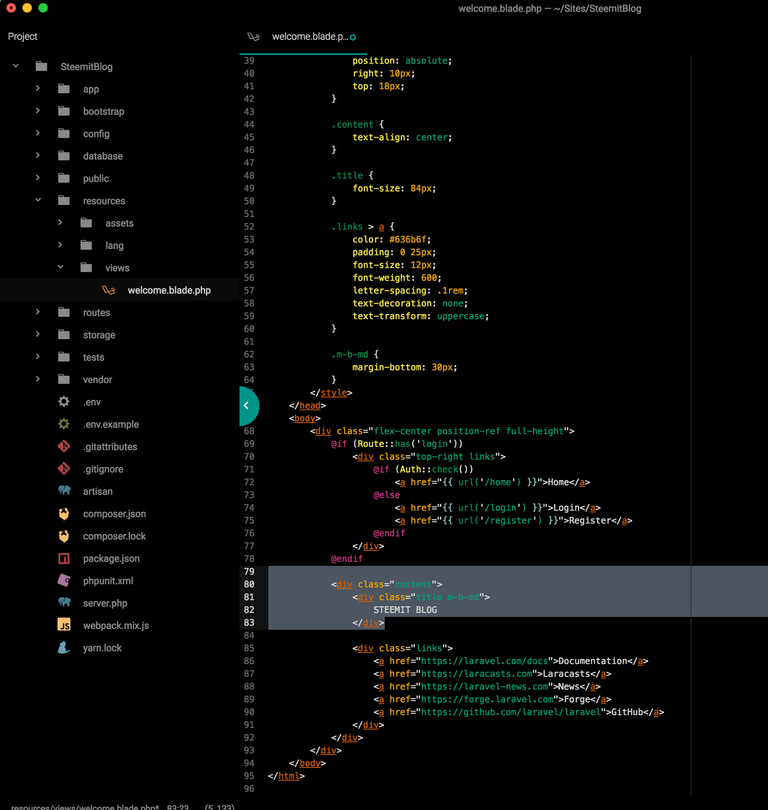
We can try to change a bit to prove that his Laravel website works on the welcome.blade.php file
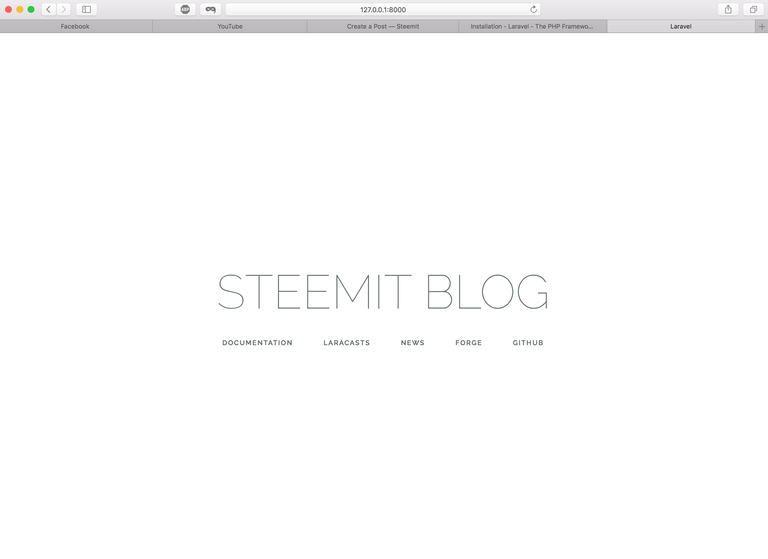
And the result will be like the picture below :
Quite so long as the beginning stage or introduction, for the future we will start a connection with the database. So do not forget to stay Steem Stay. And do not forget to follow @ arogant7000.
[INDONESIA VERSION]
Hai Steemian, pada kali ini saya akan membuat tutorial membuat website blog sendiri menggunakan laravel. Jika biasanya di kuliah atau sekolah anda membuat website menggunakan PHP Native, maka kali ini kita akan mencoba membuat website tersebut menggunakan framework. Apa itu framework? anda bisa googling atau waktu depan saya jelaskan lebih rinci. Intinya membuat website dengan framework lebih mudah, lebih mudah bagi seorang programmer yang lebih advanced dari seorang programmer yang menggunakan php, maksudnya adalah banyak hal yang dibutuhkan dalam pembuatan website yang sudah include kedalam framework tersebut sehingga membuat programmer lebih mudah membuat sebuah website.
Pada tahap ini adalah tahap perkenalan untuk membuat sebuah website blog. Adapun hal yang diperlukan dalam pembuatan website blog ini adalah :
1. Web Server seperti XAMMP, MAMP PRO(OSX)
2. Editor (Atom & Sublime)
3. Composer, Git, Laravel
Untuk fungsi dari komponen diatas sudah jelas anda tahu, jika masih tidak tahu boleh ditanyakan.
Untuk composer anda dapat mendownload serta di install menggunakan cara dari alamat ini https://getcomposer.org/download/
Maka setelah composer tersedia di komputer anda, anda baru dapat menginstall Laravel. Untuk menginstall laravel tersebut ada beberapa cara, lihat gambar di bawah atau lihat di https://laravel.com/docs/5.4
Saya menggunakan cara seperti cara kedua, untuk setting agar dapat menggunakan seperti saya, akan saya kasih tahu pada post kedepan. Untuk yang tidak mau ribet dapat menggunakan cara
composer create-project --prefer-dist laravel/laravel blog
Memulai membuat Website Blog
1. Siapkan folder project untuk document root folder web. Kemudian install laravel melalui terminal. Lihat seperti gambar dibawah :
2. Memasukkan folder document website ke editor
3. Memulai Development Server
Buka XAMPP atau MAMP Pro dan aktifkan server. Kemudian buka terminal dan ketik : php artisan serve
Kemudian buka browser dan menuju ke http://127.0.0.1:8000. Ini buktinya bahwa website kita sudah siap untuk mulai di buat.
Kita bisa mencoba merubah sedikit dulu untuk membuktikan bahwa website Laravel nya berfungsi pada file welcome.blade.php
dan hasilnya akan seperti gambar dibawah ini.
Cukup sekian dulu sebagai tahap permulaan atau perkenalan, untuk sambungan kedepan kita akan memulai koneksi dengan database. Jadi jangan lupa untuk tetap Steem Stay. Dan jangan lupa untuk follow @arogant7000.
Salam Komunitas Steemit Indonesia

Congratulations @arogant7000! You have completed some achievement on Steemit and have been rewarded with new badge(s) :
Click on any badge to view your own Board of Honor on SteemitBoard.
For more information about SteemitBoard, click here
If you no longer want to receive notifications, reply to this comment with the word
STOPwhats up ? @tuehanh