Learn how to code the steemit website in HTML, CSS and JS and post blog articles using your own website

Coding time
Today I want to show you how you can build your own steemit interface to post articles to your blog. You don't have to use steemit.com to post. You can build your own personalized blogging website and connect to the blockchain to post your article. With the help of the steem-js library there is an easy way to implement this.
If you are familiar with HTML, CSS and Javascript you should be able to follow along. If not, you can still use the play around code by downloading my code files.
Building the Website (HTML)
To start of let's rebuild the steemit.com posting interface in HTML.
<html>
<head>
<title>My Steemit Interface</title>
</head>
<body>
<h1>My Personal Steemit Interface</h1>
<div class="text-info">
Title of article:<br><input cols="110" id="title" type="text" ><br/>
Article text:<br><textarea id="article"></textarea><br/>
</div>
<div class="credentials">
Username: <input id="username" type="text" ><br/>
Private Posting Key: <input id="postingKey" type="password" size="65" ><br/>
<input id="postIt" type="button" value="Post it!" onClick=postArticle()>
</div>
</body>
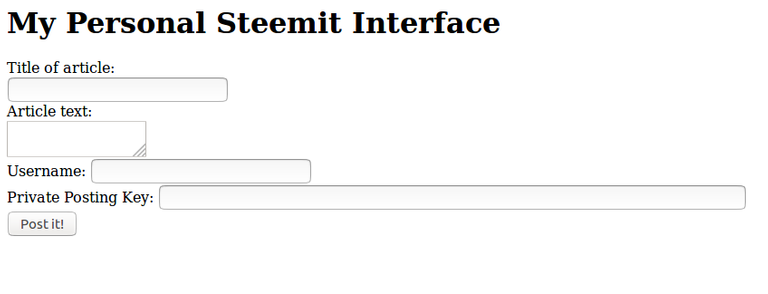
</html>I think it's pretty readable. We have named out website with a title element in the head. Then we created a two components: The "text-info" and the "credentials" components. We placed them inside <div> tags and marked them with classes. The "text-info" component contains 2 input fields, one for the article title and one for the article text. The second component is for the login data, holding input fields for your username and password.
The Result:
Let's clean it up a little by changing field sizes and adding placeholders.
Article text:</br></textarea rows="20" cols="90" id="article"><//textarea></br/>
Username: </input id="username" type="text" placeholder="Steemit username without '@'"></br/>
Private Posting Key: </input id="postingKey" type="password" size="65" placeholder="Your secret postingkey"></br/>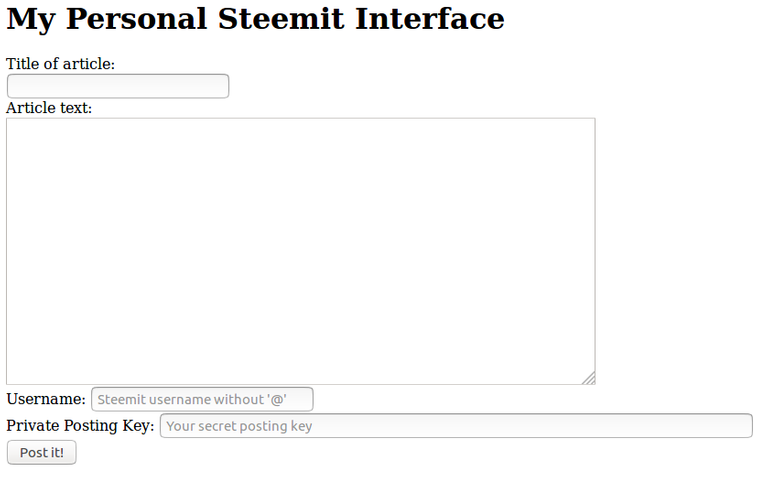
Looks better already.
Write this file in your favorite code editor and save it with a *.html extension.
Giving it Style (CSS)
Now let's apply some CSS. This language expands HTML and is purely designed to transform raw HTML pages into something beautiful. Our HTML tags let us grab each element and give it some stying. I feel like blue and green colors today, so I will use those.
Create a new file and save it as styling.css
body {
background-color: #ccf2ff; /*Interface color: Lightblue*/
}
#title{
  margin: 10 0 10 0px;
}
h1 {
    color: #006622; /*Title color: Darkgreen*/
    padding: 20px 0 0 160px;
    margin-top: 40px;
    margin: auto;
    width: 50%;
    margin-bottom: 40px;
}
input {
  width: 98%;
  padding: 1%;
}
.text-info{
  margin: auto;
  width: 50%;
  border: 3px solid green; /*Bottom box color: Green*/
  padding: 10px;
  margin-bottom: 40px;
}
.credentials{
  margin: auto;
  width: 50%;
  border: 3px solid green; /*Bottom box color: Green*/
  padding: 10px;
}
#postingKey{
margin-bottom: 15px;
}
#postIt{
    background-color: #00802b; /*Button color: Green*/
    border: none;
    color: white;
    padding: 15px 32px;
    text-align: center;
    text-decoration: none;
    display: inline-block;
    font-size: 20px;
}
Good time to referesh some CSS:
h1 //to target a tag
.some-class //to target a class
#my-id //to target an id
The *margin: auto; width: 50%;* a neat way to align elements. The rest is coloring in and giving the elements some padding and margin so it doesn't get too cluttered. The border on the two components gives a neat look.
Place the css-file in the same directory and point the HTML file to it.
<link rel="stylesheet" href="styling.css"><Let's have a look at the result:
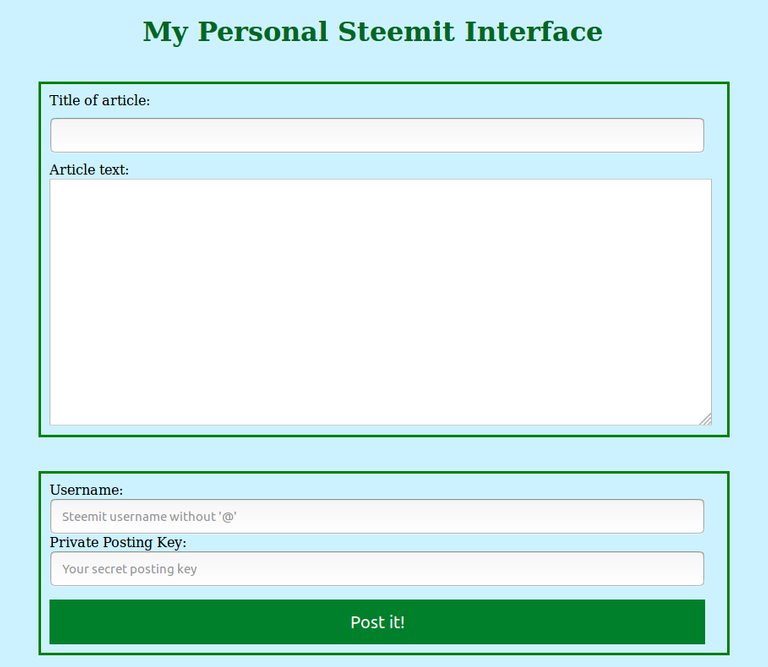
Do you like it? Feel free to download my scripts and play around with the format and colors until you get your own personalized interface that you are happy with :)
Adding Javascript magic (JS)
We have an interface, but it's not able to post to the blockchain yet. Now we add some javascript magic to enable a connection to a public STEEM node.
We can use the steem.broadcast.comment() from the steem-js library to post our article. The blockchain does not discriminate between an article an a comment. Therefore, both are implemented via the same function.
To grab the libray from the cloud (Content Delivery Network) we can use this:
<script src="https://cdn.steemjs.com/lib/latest/steem.min.js"></script>The script:
<script language="JavaScript"<
function postArticle()
 {
  steem.broadcast.comment(
    document.getElementById('postingKey').value, // posting wif
    '', // author, leave blank for new post
    'steemtest', // first tag
    document.getElementById('username').value, // username
    'name-of-my-test-article-post', // permlink
    document.getElementById('title').value, // Title
    document.getElementById('article').value, // Body of post
    // json metadata (additional tags, app name, etc)
    { tags: ['test'], app: 'steemjs-test!' },
    function (err, result) {
      if (err)
        alert('Failure! ' + err);
      else
        alert('Success!');
    } );
}
</script>
We use the document.getElementById() function to extract the values out of out HTML form. These are the arguments we need for the steem-js steem.broadcast.comment() function. The first and second tags are set manually. Lastly we catch an error function and notify successful post to the blockchain.
We can insert the javascript directly into the HTML file.
Let's fire up this bad boy
Fill out the Title, Article with the text you want to post. Then enter your username without the '@' with your private posting key. Hit 'post' and let the magic work!
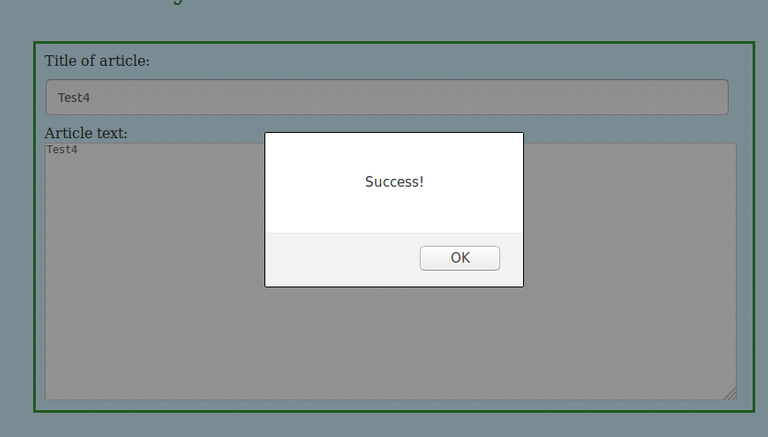
I tested it out and successfully submitted a post using this interface. We have a working Steemit interface now that looks even better than the steemit.com one.
Private Posting key? Is this how I'm going to loose my account?
Fear not, dear reader. The Javascript is executed client-side on your machine. The code used here can be read upon here and in my github repo. There is no proprietary Javascript. The Steem-js library can be inspected on github here. Besides, the posting key grants permission to post via ones account but not do any transfers or claim ownership of it.
Want to try this out? Here are useful links!
Check out the steem-js library: https://github.com/steemit/steem-js
If you want to try these scripts out, the easiest way would be to clone my github repo: Steemit-Interface on github
Feel free to try this at home and if you get stuck you can always ping me.
I've had some trouble posting HTML and Javascipt in markdown on steemit in this article, therefore there maybe format errors in the code. Please use the github version instead.
Images: All images used are screenshots made by me.
- Niko ( @cryptonik ) -

Great post and easy to understand 100% useful......Thank you.
Glad you like it
I have a little idea about Html, Java, Css etc but now I am understanding Html, Css and Java. Your post was very clear and simple. So everybody will understand, Thanks a lot for your nice post.
Thank you for your feedback. Feel free to download the code files and try it out yourself!
Thank you for your feedback. Feel free to download the code files and try it out yourself!
Cooler Beitrag! Ich habe in 2 Posts ebenfalls Bezug auf die Steemit API für JavaScript genommen. Da ging es allerdings bisher nur um das Auslesen und verarbeiten von Daten.
Es lässt ich der Gedanke nicht los, meine eigene Steemit-Webseite zu bauen 😁 Sollte ich irgendwann mal dazu kommen, wird dein Code da sicherlich auch einen Platz finden 😉
Steem on!
Thank you, great post and tutorial to follow.
oh this is great post....thank you
You are welcome
You lost me at build your own interface, but its interesting to see what can be done with lines of code.
Haha, shook you off at the start eh? It's some javascript brew with some steem salt on top of it - recipe for a delicious blockchain interface.
This looks like it would be well worth taking the time to master. I will bookmark the page and put it on my to-do list. thumbs up Thank you for sharing this. :D
And a lot of fun along the way aswell :)
Great post and easy to understand even if you don't have any knowledge of programming like me. I will give it a try because I'm very interested in the programming of Steemit. Do you also have a guidance on how to build a Voting Bot??? Up&Re
Clone the github repo linked in the post and you'll be good to go :) Open the index.html file in you browser. I am building a bot and might share a tutorial on that too in the future :) Thank you
Very cool! Thanks for sharing the code!
Sure thing!
very nice post , gonna try it some day
Go ahead ;)
So cool @cryptonik, hopefully I'll try this one day. Thank you for this handy post.
All the best,
Klaudia
You are welcome! :)
It's very interesting. I have little knowledge in HTML and Javascript i will be following your examples. Thank you for this post.
@cryptonik
Awesome, glad you liked it!
Resteemed :-)
Servus, Jochen. Vielen Dank und liebe Gruesse aus Neuseeland.
Hey
good job i like it
are you available for a freelance hire
about steemit api can i get your skype id to talk
thanks ..
Thank you! Are you on discord? You can contact me there: cryptonik#4892
thank you
i just add you waiting your acceptation
.
Brilliant @cryptonik. 🙏🏿