
18 June was Father's day and my husband went that day to a construction shop. After paying, the cashier handed him an ad flyer. I thought it was a nice idea to make a Steemit 3D tie. It is not just an ordinary 3D tie, but a 3D tie with jointed sections!


I added diamonds for the lower section. I wanted to add diamonds for the whole tie, but it took a lot of time to attach them.
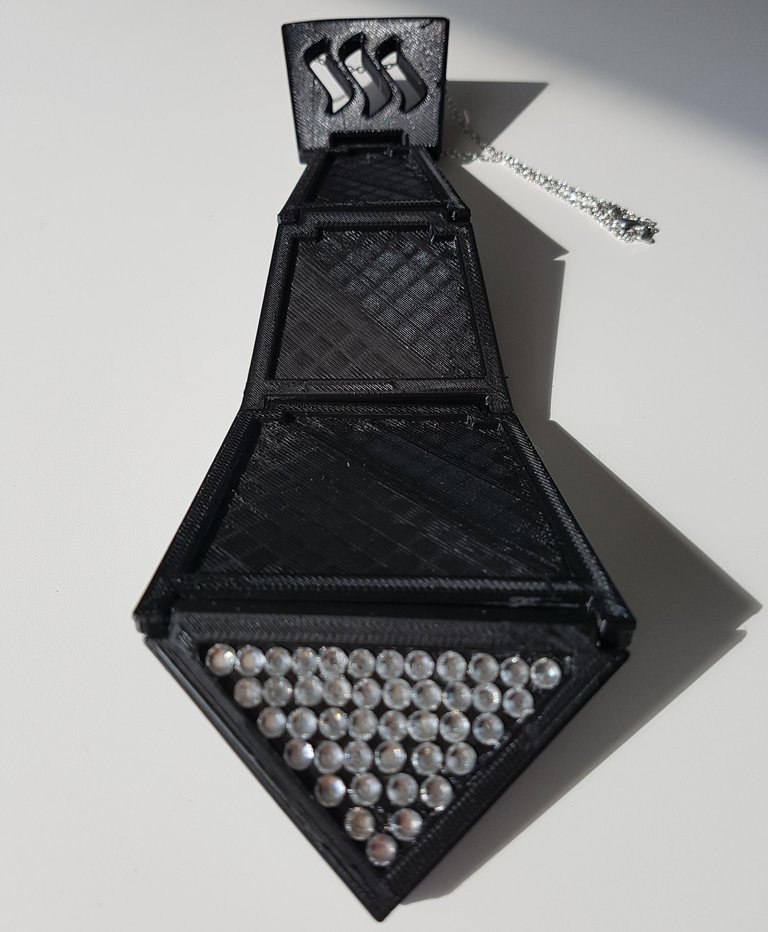
At the back I made 2 half circles so a chain necklace can go through the holes.

Below the tutorial:
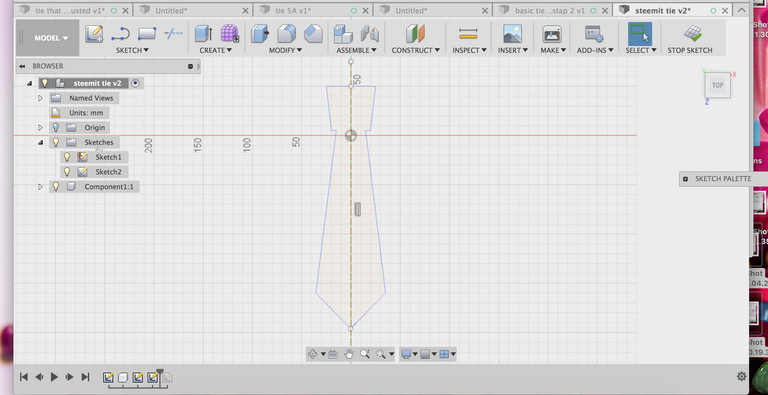
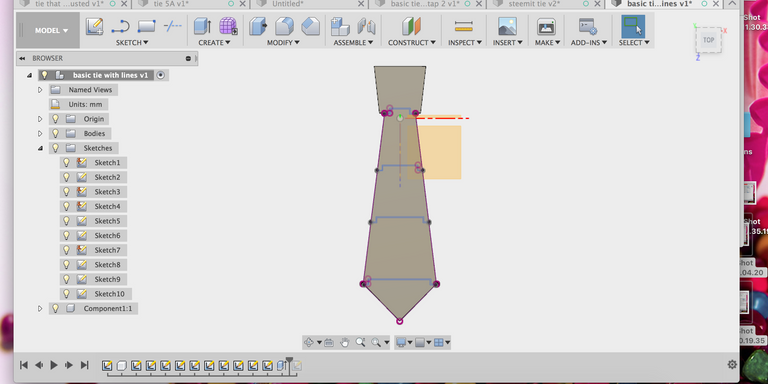
Go to Sketch and choose Line. Draw lines for the half of the tie. Make another line vertical, click the line and click X. Now the line is broken. This line we use for mirroring the left side of the tie.
Now we make lines for the sections.
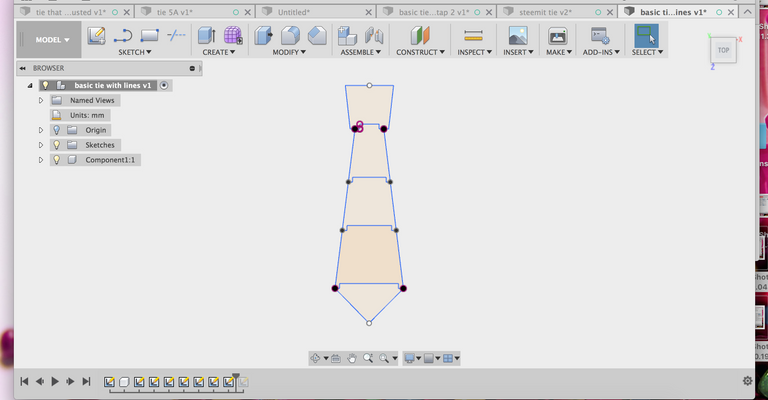
Here we make the same lines below with small space because the sections need to be able to move.

Here you see all the lines prepared.
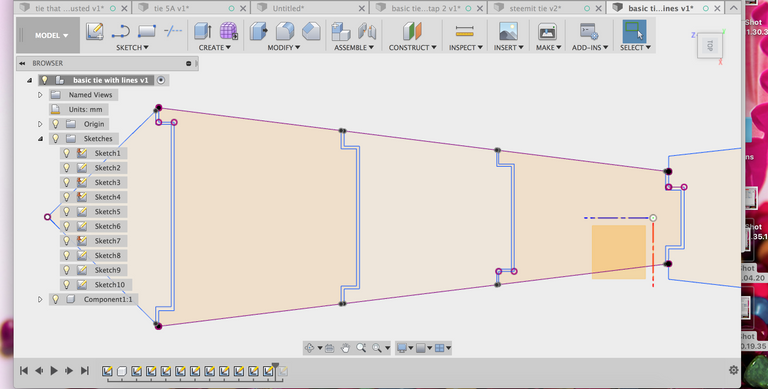
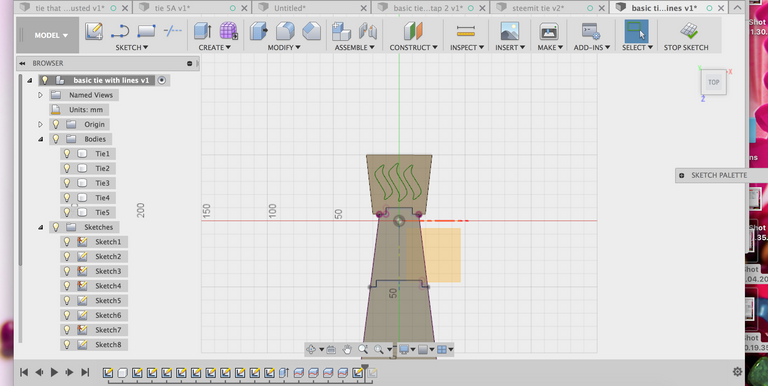
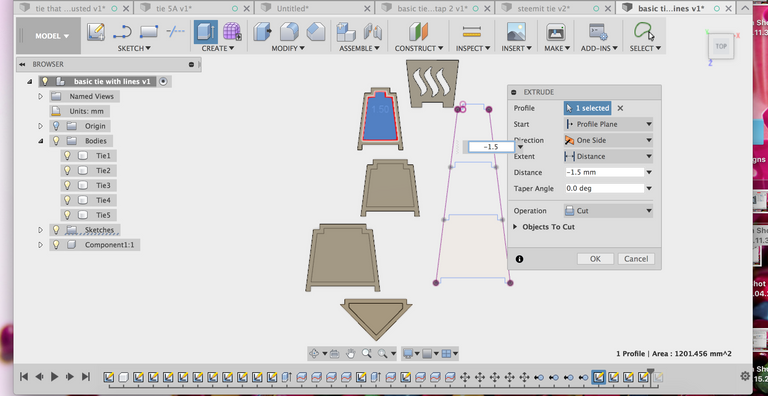
We are going to extrude the tie. Click Create and choose Extrude. This is extruded 6mm. The thickness of the tie.
Now we split the tie/body into 5 bodies. We click Modify and choose Split Body. As Body to split we click on the tie. Splitting tool will be the lines we were drawing. We do first the upper lines. Do this with all the sections.

For the logo, we go to Insert, Select Svg, select the steemit logo. We place it on the upper section.
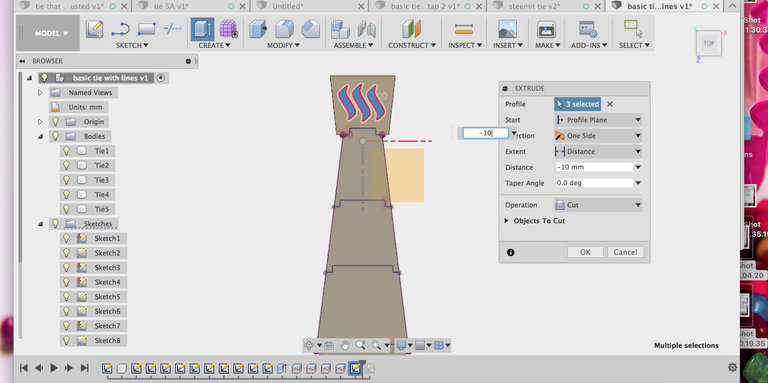
We will extrude the 3 S. Don't forget to use - at Distance and Operation: Cut.

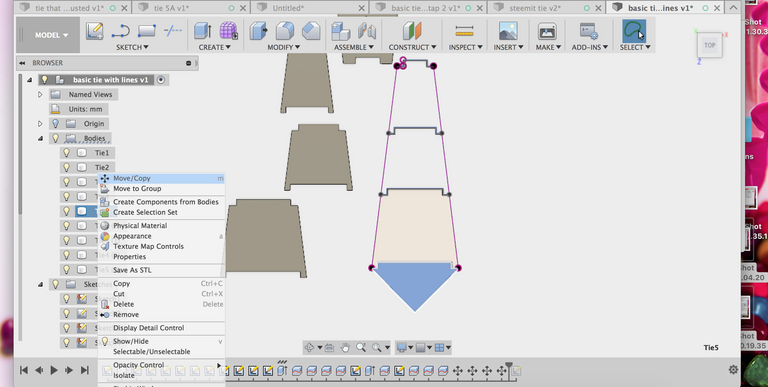
Now we will split the bodies again and use the lower lines as splitting tool.

Move the bodies so we can remove the leftovers we don't need.


Go to Sketch and choose Offset. We want to make a sort of frame. I chose -4mm because I want the frame inside the sections.
Go to Create and choose Extrude. We want fo extrude the inner parts. Now we make small holes for the sections to join. Here the holes are 3mm diameter and 1mm deep.

The other sides we make small cilinders, they need to be smaller then the holes to fit.

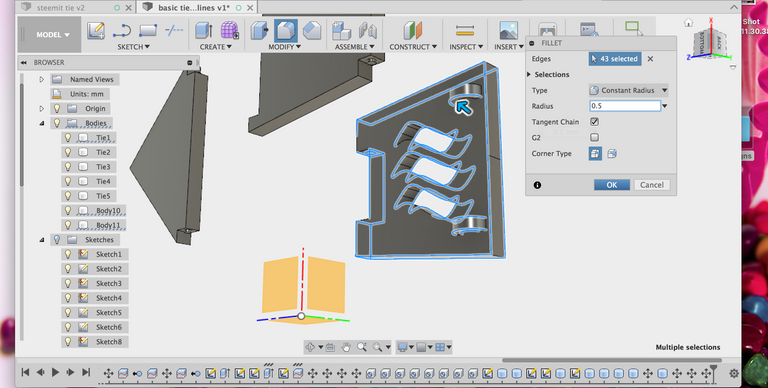
The sides with the holes and cilinders need to have round edges in order to be able to move them up and down. Go to Modify and choose Fillet. Radius: 2mm.


I also added at the back of the first section 2 half circles. After that I smoothen all edges of the sections with 0.5mm using Fillet at Modify.
When making the pictures, my kids said: That's Mr.Mama :-D.

It took me a few days to think how I am going to make jointed sections for this tie. But I am quite happy with the result. :-).
Too much work for me, i just go to the 99cent store buy a tie there and cut some line to make it look like steem line, im done.
@dang007 that's indeed the easiest way :-D
Like this tie! Maybe I should buy one for coming to work! Regards from Spain!
Happy you like it. Wondering how your colleagues would respond :-). Regards from Holland!
I follow you now. Have a nice day!
Great work!!! I so likes this decoration!
impressed your wit and skills
Definitely 100% upvote! Follow you...
Thank you very much. Follow you too :-)
That's very cool and interesting, good luck!
Thank you @blackamine!
Def! I dig your page, just followed you! looking forward to more posts.
Will follow you too!
Wow that looks really badass, you are really creative!
Thank you @paultradingcrpto
Great tutorial. well done!
Thanks @lazzelazer
Very fucking impressive! I like that you chose this material
Hahaha Thanks! This is the only material you can use for 3D printing. :-)
Great post!!!
Thanks @steemspoker
Nice moustache haha
Haha, true!
That's awesome! Technology is taking us places we never thought possible 20 years ago!
Thanks @cryptomania1. It is indeed amazing what technology can do! I was never into computers, and now I am suddenly interested in 3D.
I like dat tie ...and girl too
Happy you like it @arorapuneet
Welcome man
wauw, ik bewonder je creativiteit en je prachtige verschijning. Steem on..
Dank je wel @hendrikdegrote voor je upvote en lieve comment! :-). Ik viel net van mijn stoel van verbazing! Ik dacht dat er een storing was met de app. Dank je wel nogmaals en fijne dag verder! :-)
heel graag gedaan fathin, ik hoop dat je je creatieve geest nog vaak zult delen met de steemit community,
heel veel success
He je bent ook Nederlands.. Man wat heb je een steemit power.. hoe ben je zover gekomen, heb je geinvesteerd in steem. Ik ben pas net 11 dagen bezig, het is fantastisch maar wel moeilijk om gezien te worden.. thx voor je antwoord
Je hebt het tegen @hendrikdegrote neem ik aan?
ja sorry..
is niet erg hoor :-).
Ik zal mijn best doen. Dank je :-)
He je bent ook Nederlands.. Man wat heb je een steemit power.. hoe ben je zover gekomen, heb je geinvesteerd in steem. Ik ben pas net 11 dagen bezig, het is fantastisch maar wel moeilijk om gezien te worden.. thx voor je antwoord
this is awesome
Thanks @kingscrown
So where is the interesting part? The making? The machine running and printing the parts?
Thanks for your feedback. Next time I will add pictures of the printer while its printing it.
Wow!! That's pretty cool. Thanks for sharing :)
Thanks @cheeto.blue. you're welcome
What an awesome tie!
Thank you @crossfires
Wow!!! Nice innovation
Thanks @globearn. :-)
follow me please
Waar de Gamma wel niet goed voor is!
Hahaha! Inderdaad!
Very funny use case of 3d printing ! we're waiting for the DIY 3D steemit bow tie now :)
It is funny yeah what you can do with 3D. I was afraid that somebody would ask to make a steemit bow tie :-).
Nice design @fathin-shihab 😍
Very good post, i vote you and followed
Thank you @quincy87
You're welcome 😊
Finally a tie easy to put on.
@stdndb it is indeed much easier! :-)
Hi @fathin-shihab, the tie looks great, i'm not sure about that moustache though :)
Thanks @nickdavison. A moustache goes along with the tie :-D
Nice tie and well explained process.
Thank you @shalin
That looks Fire! I like it! Great Work! Definitely Followed you!
I am happy you like it @russmanuniver... thanks for following!
Wow! That is really cool! Great tutorial.
Thanks @theshiftkey
Great job ....100% upvote! Follow you...
Thanks @syahhiran
You welcome @fathin-shihab
Nicely done! Send it off to a manufacture and list this on Amazon.
Thank you @thriftquests! Nice idea of you :-). Im just not sure how everything works and if there is demand enough. But I appreciate your idea and i will check it out.
Super interesting
Amazing
Thanks @rizaldamti
Wow this is really neat! I never would have thought to make that!
Thanks @verorii. It took me many hours to make this tie.
@fathin-shihab Amazing post! Please share more posts like this! Your very helpful for me! Thank you !!!
Thank you @dream.pro . I will do my best
GOOD WORK and WELLDONE @fathin-shihab
thank you @jodipamungkas!
I am happy if you be me as your friend
To much, intresting