Hey everyone. Today I want to continue my posts on my last van conversion. As mentioned before, this van featured in these posts had to be sold in the end as it needed more mechanical work than I was capable, rich enough for. But it was a really nice home for a couple of years and taught me a lot about converting vehicles
So here's this weeks update. It includes
- Cladding the walls and ceiling
- Fitting the wood burner
- Electrics & Lights
- Rust treatment and bumper repairs
Cladding/Lining the walls & ceiling
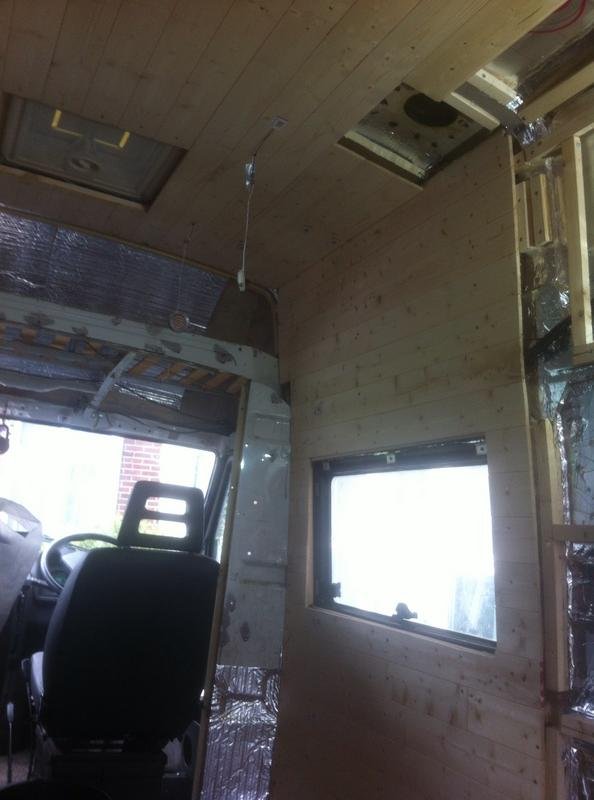
So, first thing when cladding my van was to add wood battens to the existing metal ribs. This is so that all the cladding can be screwed to wood and not directly to the van skin. This will help to prevent cold bridges from the outside, resulting in rust and damp wood.
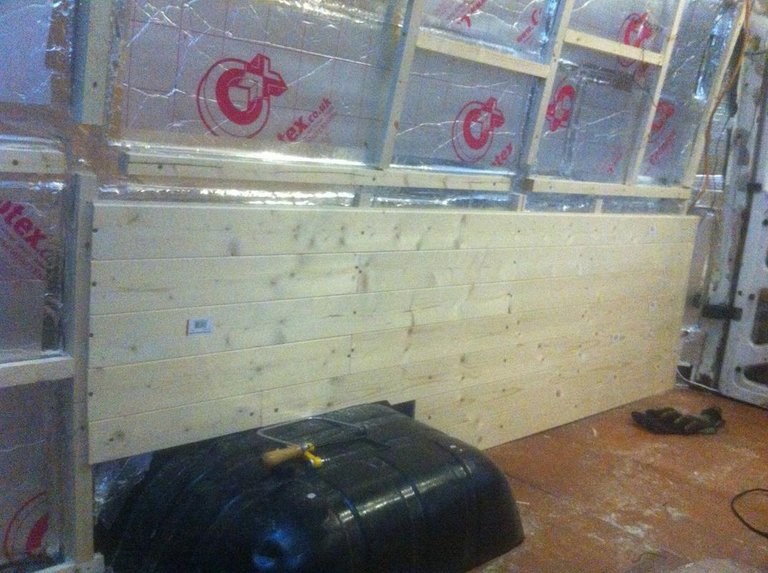
The actual cladding process is pretty easy, and very satisfying as the planks slot together nicely and you get results relatively quickly.
I'm going to be boxing in the wheel arches later so I wasn't too fussed about a tidy edge around them.
One very annoying thing about this brand of van is the bowed walls, they look great from the outside but lining them is a bit difficult, as you can see below the wall kinda bows out then in again near the top, not the end of the world but a bit irritating for measuring things and later mounting cupboards.
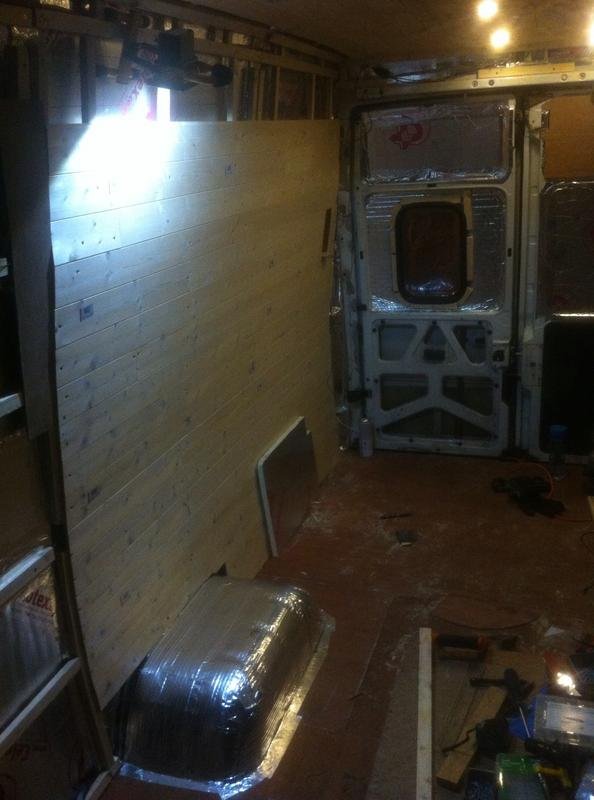
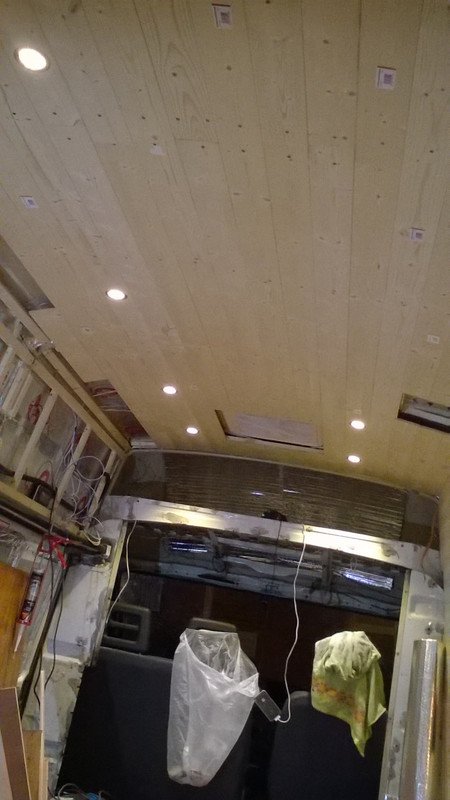
I marked the centre line on the ceiling so the edges would be even and begin adding planks from there. Cladding with single planks is a whole lot easier than trying to hold and secure massive sheets of ply when you're working alone.
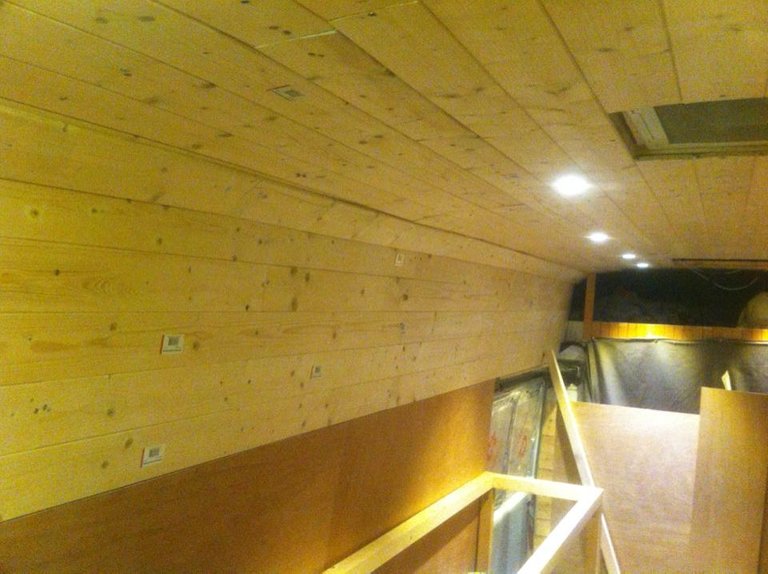
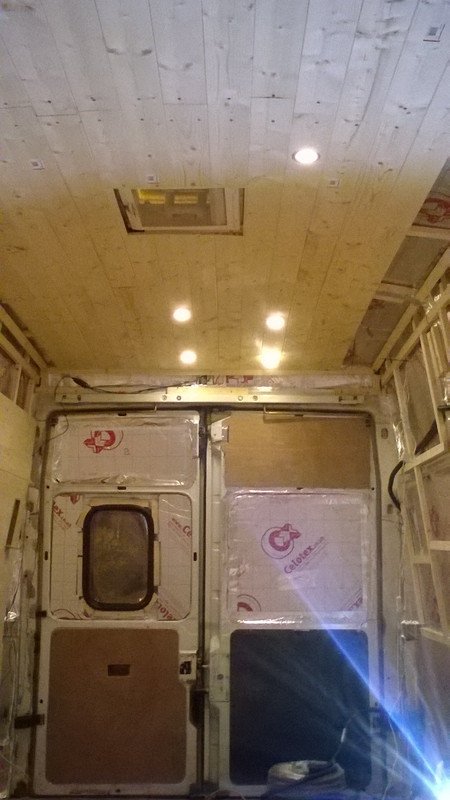
Pretty quickly the walls and ceiling take shape.
I decided to ply line some parts of the walls as they would be hidden behind cabinets and the bed, this saved me some money and time.
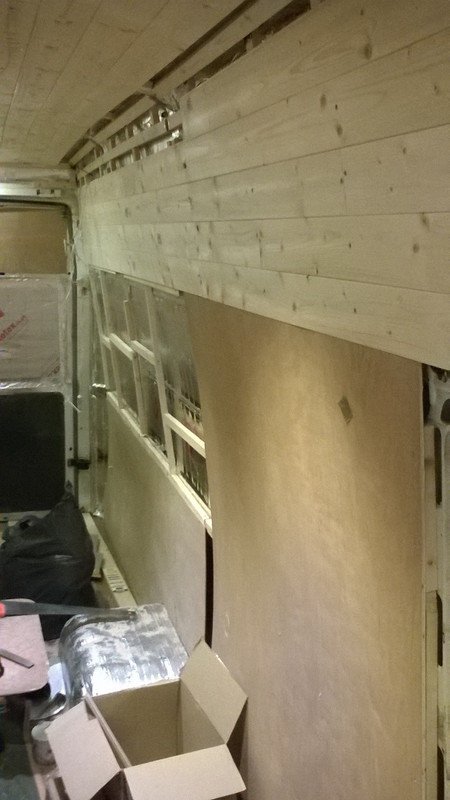
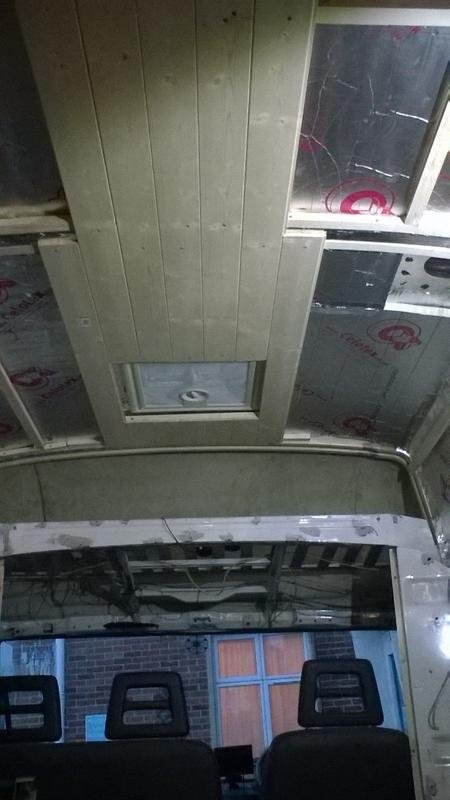
Finishing the join between wall and ceiling was a bit of a challenge with my limited woodworking skills! In the end, I added an angled strip of cladding attached to a batten. It looks tidy in this picture but in real life, it was a bit shabby, I wasn't too happy with it.
Overall to line the full van took about a week of evenings after work so it wasn't too time-consuming and made a nice change from glueing insulation boards in.
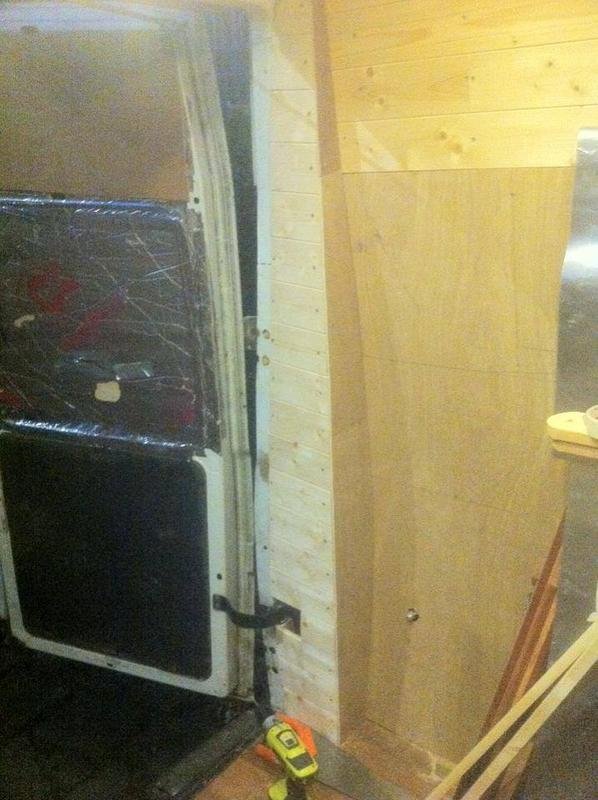
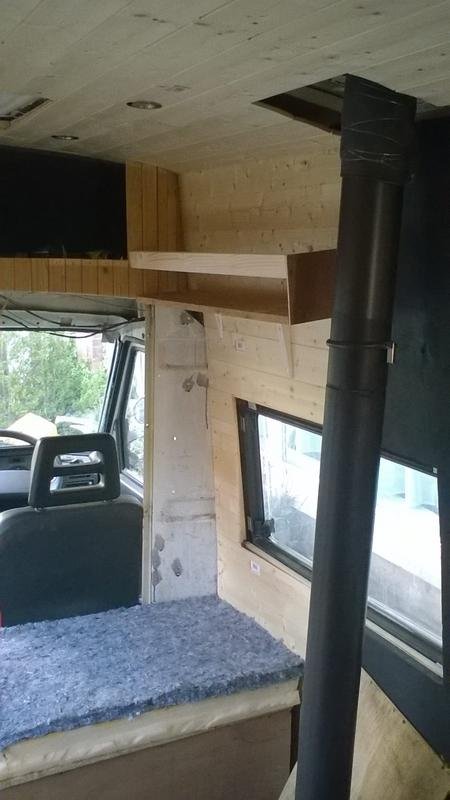
I was very pleased with these boxed in sections I did myself. It had to be done as the corner of the van has an odd shape that couldn't be lined in one go.
Getting the ply to sit flush like that against the wall was difficult for me but I did some research and made a makeshift scribe to get the curve right and it came out looking good!
One thing I forgot to include in my previous post was my SketchUp design for the build. If you haven't heard of it before and your virtual modelling skills aren't the best I highly recommend SketchUp, it's really easy to get the hang of and useful for this sort of project to visualise how the space will work. I believe you can still get a free trial download since I last checked.
I created this after striping the back out as I had no idea where everything was going to go. I was slightly limited with where certain things would go due to the existing hole for the burner, a window and the skylights.
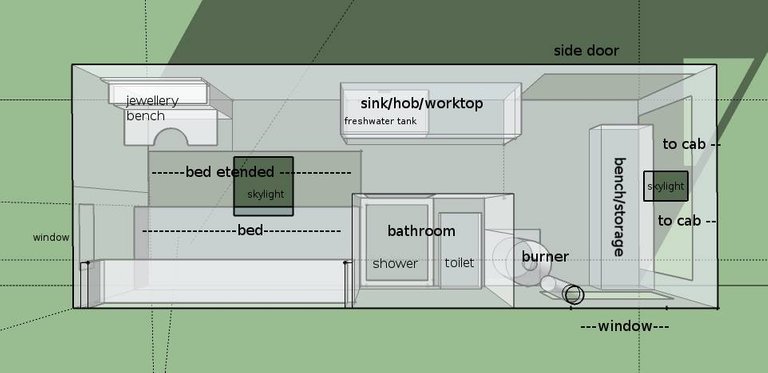
Fitting the Wood Burner
Everything up until this job had seemed very much a trial and error affair. If I messed something up it wasn't the end of the world.
Fitting the burner wrong, however, could literally be a life or death situation, carbon monoxide ain't no joke!
So I joined a few facebook advice groups, did a lot of reading, asked plenty of questions. When I got round to fitting it I felt confident I knew what I was doing.
Heres the one I took out the old owner had been using. full of rusty holes and the bricks inside were really cracked, seriously dangerous thing to be using in a small space. I sold this on cheap to a guy who rebuilt it I think.
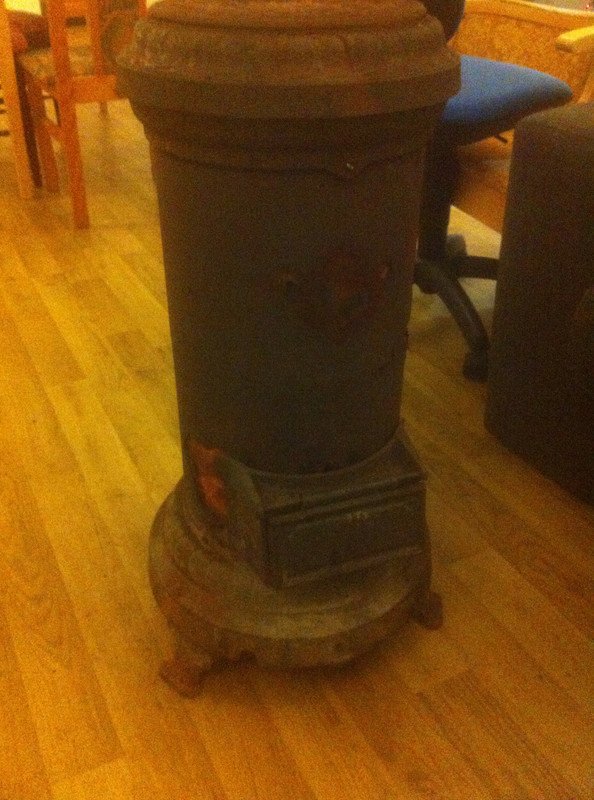
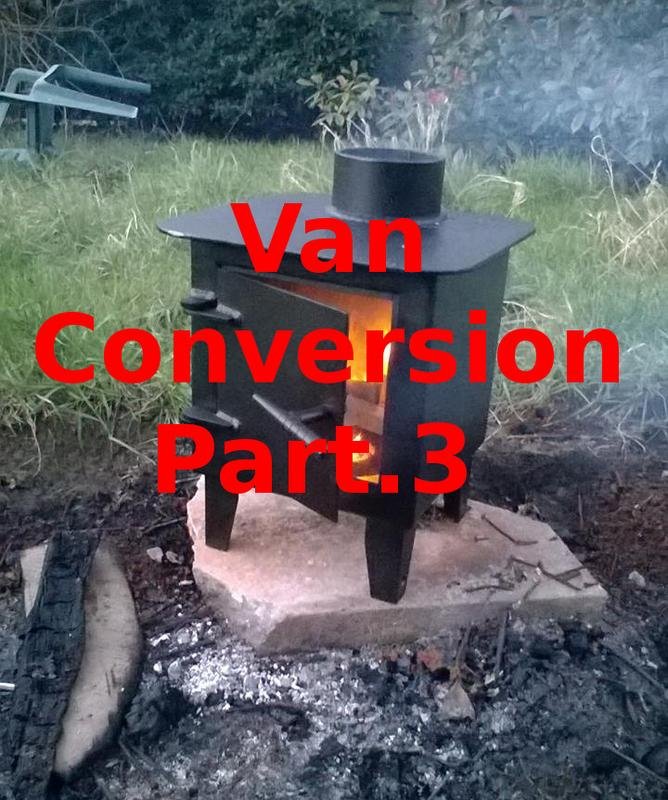
This is the one I ended up buying, a toasty 2kw of heat and nice and compact. big enough to fit a kettle on top and easy to fit.
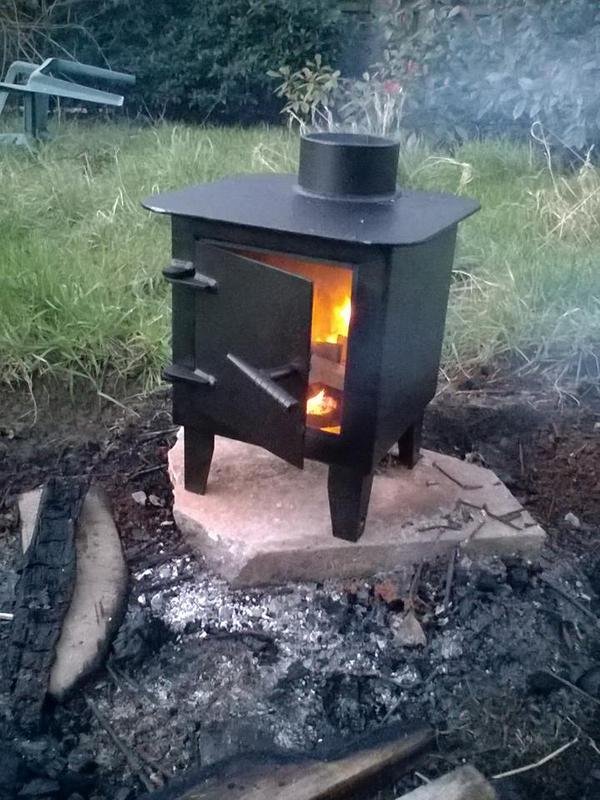
The fitting consisted of lining up the flue with the existing hole in the roof as this was already cut from the previous one. then positioning the hearth plate underneath and drilling holes through both the plate and the van floor. These holes are where I bolted the burner to the floor from. I added a couple of spreader plates (massive washers) underneath the van for extra safety. The burner won't be going anywhere!
I used some flexible fire cement between the flue joins to seal everything properly
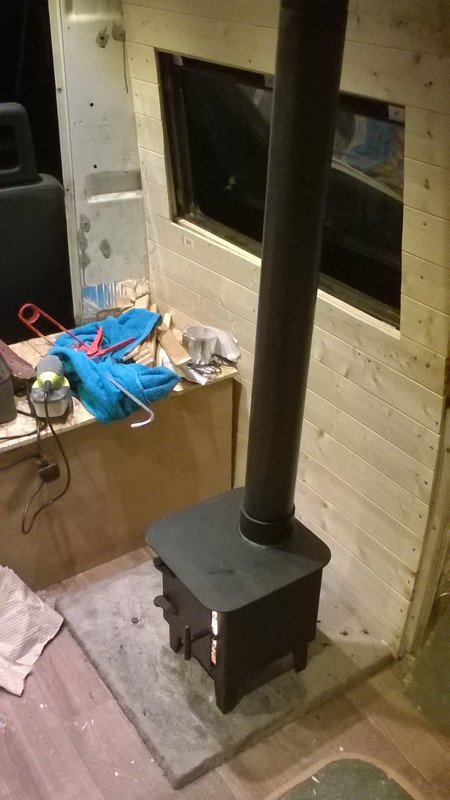
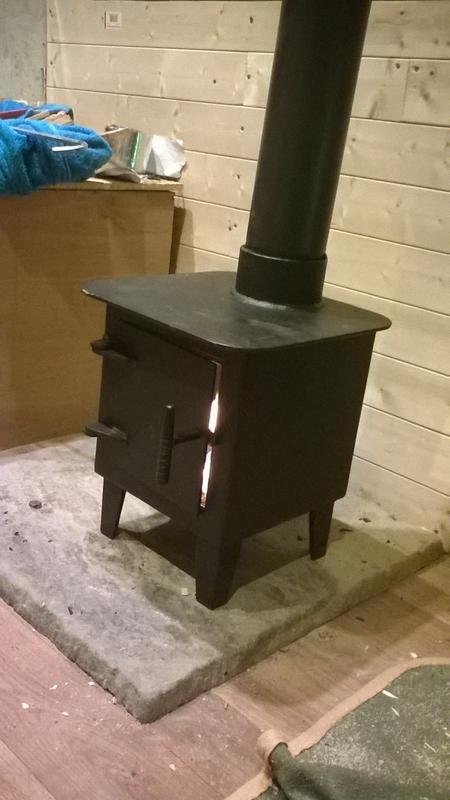
It's difficult to see in this last picture but I added some fire board behind the burner and flue to protect the wood from heat. It gets super hot when this is on, I was quite surprised with how much heat it kicks out for such a small unit.
Electrics & Lights
I've had to jump around a bit with this step by step from the order I actually did things so it would make more sense but around this point, I added the basic electrics and lights so I could keep working into the winter evenings.
It was a daunting aspect of the build and I put it off for several weeks as I didn't think I had the skills. However, like most things, once I broke it down into smaller steps it wasn't as scary.
12 Volt electrics is a lot less dangerous than household mains. I won't pretend I know enough to explain it all but its basically positive and negative for everything, with fuses in the right places. The most important thing I found was using thick enough wires for everything to account for voltage drop and overheating. I didn't fancy an unexpected fire in the walls.
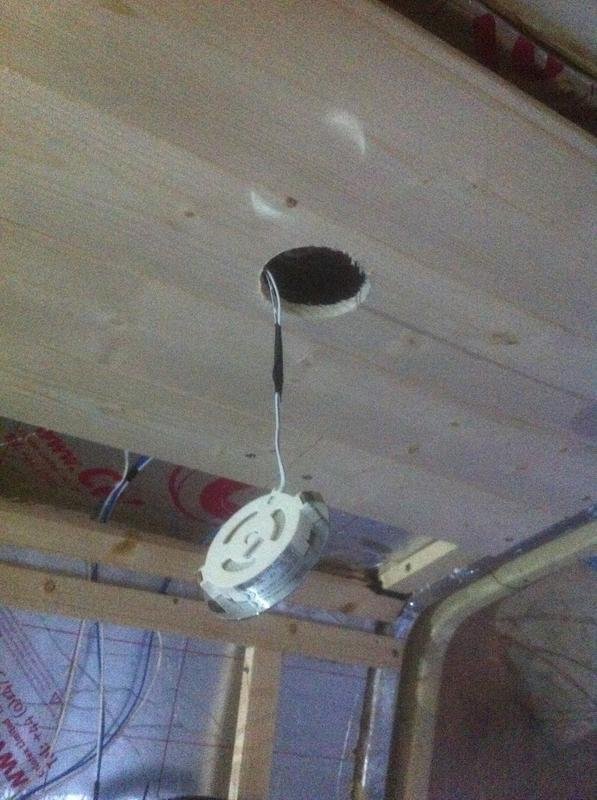
Fitting the lights was just a case of cutting using a hole saw and popping them in after feeding the wires back to the battery box
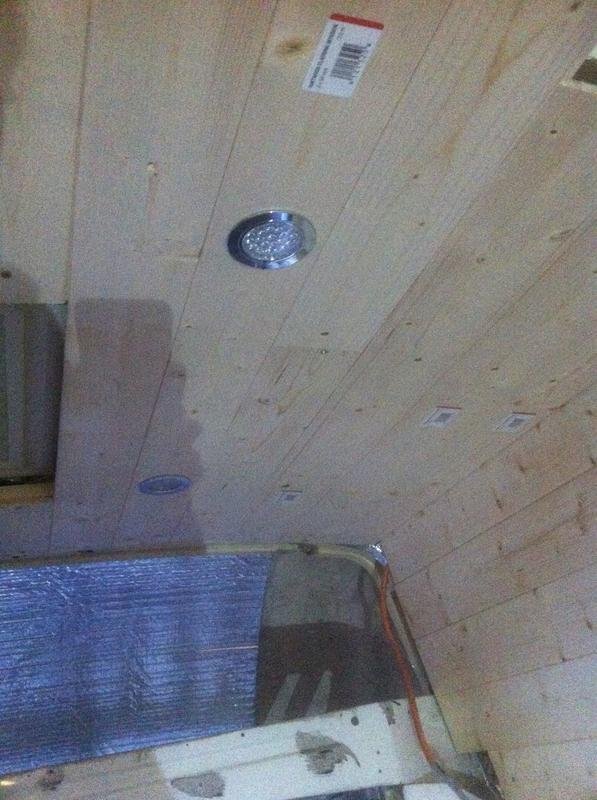
One thing I'm glad I did with the lights was fitting two separate circuits for the front set and the back, with their own switches. This saved getting out of bed on cold nights to turn the lights off at the other end!
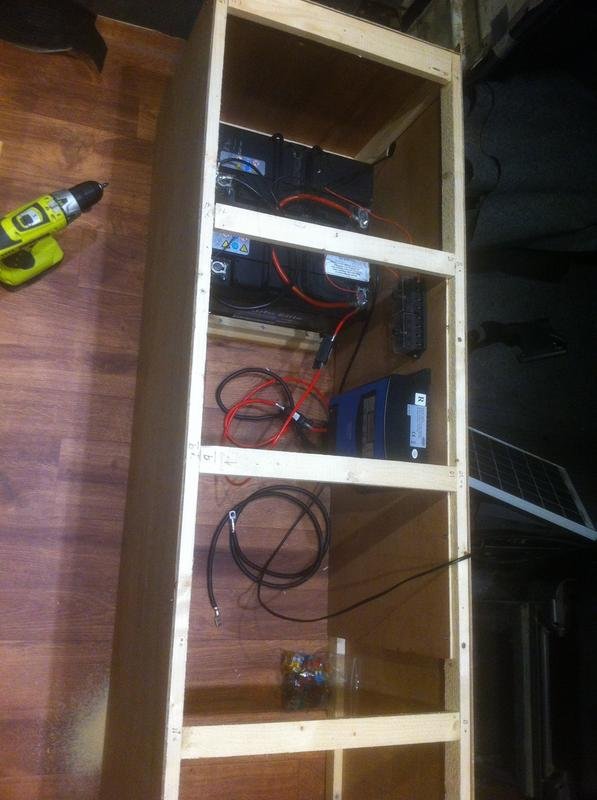
For a basic 12v setup I used a charge controller which takes an input feed from the vehicle battery and another from the solar panel I mounted on the roof. It then regulates the charge that goes into the leisure batteries, which I mounted in parallel to give 220ah at 12 volts. I added a fuse box between the leisure batteries and all the appliances for safety.
I won't go any further into details of electrics as its probably not the most exciting thing to read about unless you really need to know, then I'd hope this blog isn't your only guide!
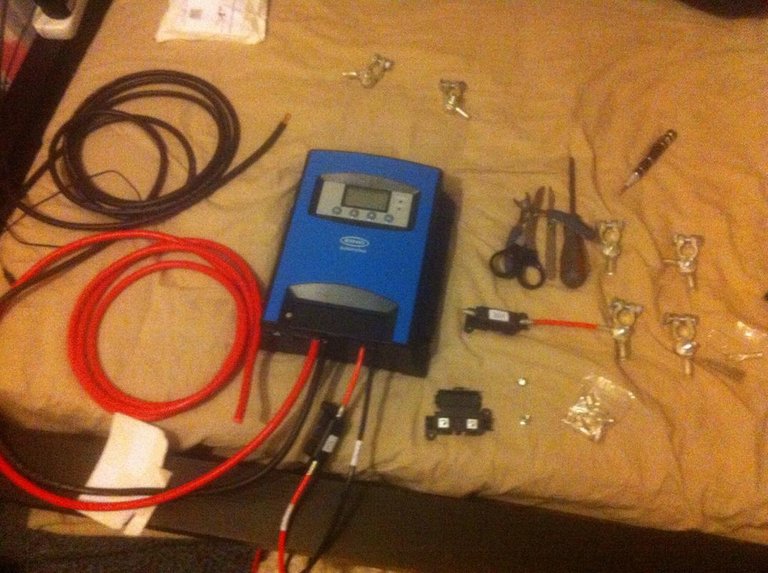
I mounted them all in a bench box I built up front behind the cab.
Repairing the rear bumpers
I knew when I bought this van there would be a lot of things wrong with it I couldn't fix with my limited skills and the major rust was one of them. So I could only do patch ups and slow the process till I could afford the welding.
These vans, being so long, seem to be prone to getting the back corner panels and bumpers smashed up. I've seen lots about and they all have these same war wounds! Mine was no exception.
I didn't get a before photo but the bumpers were really saggy and cracked and had some really dodgy wiring job for the tail lights so I decided to take it all off.
Heres a shot after grinding back all the rust and putting a couple of coats of anti-rust primer down. I wasn't under any illusion this would stop it coming back but at least for now I'd done something.
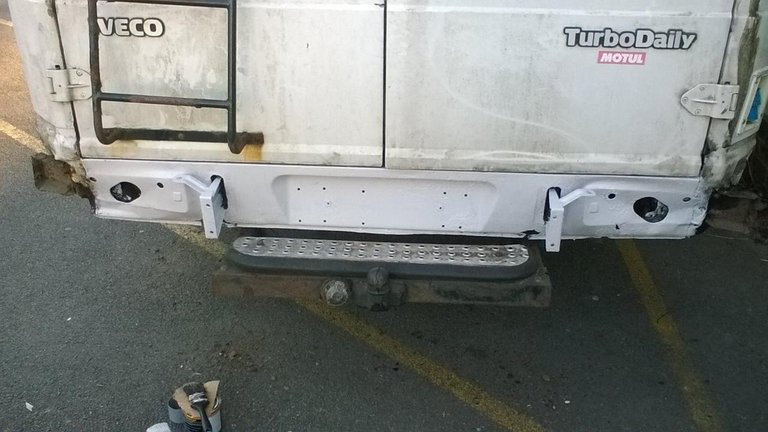
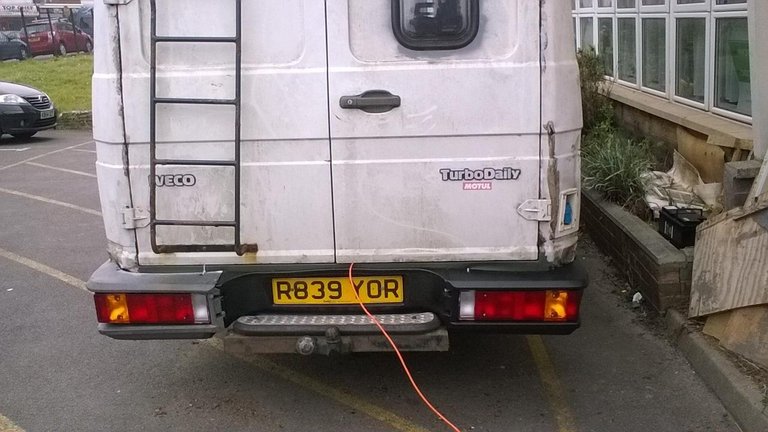
I managed to get hold of a replacement bumper for one side and the middle, which I painted up in black and bolted back on, with the help of some cable ties :P
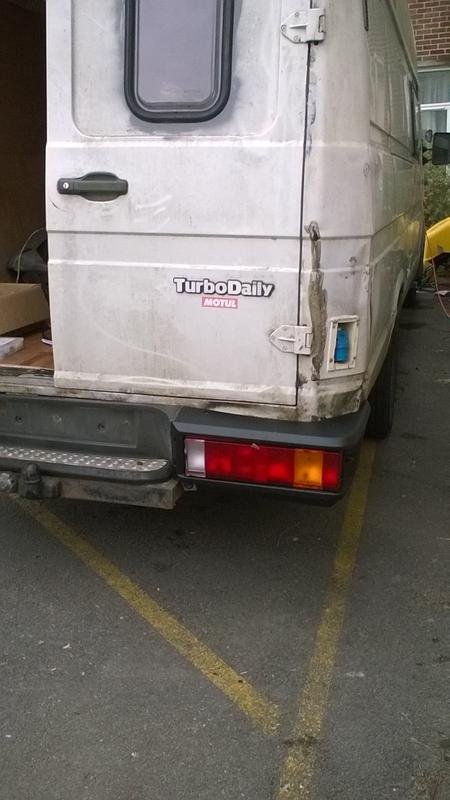
Heres the updated result with new tail lights too.
So that's all for this weeks van post. hope you liked it! More to come soon.
Previous Post - https://steemit.com/jewelry/@robali123/chrysocolla-pendant-how-to-wire-wrap-a-cabochon-how-to-weekly-contest-by-robali123

Join our Discord Channel to connect with us and nominate your own or somebody else's posts in our review channel.
Help us to reward you for making it ! Join our voting trail or delegate steem power to the community account.
Your post is also presented on the community website www.steemmakers.com where you can find other selected content.
If you like our work, please consider upvoting this comment to support the growth of our community. Thank you.
Huhuhu! I'm so fascinated with this. I'm been browsing photos and videos about van life and I'm just so sooo jealous. 😭
Its good fun but its not anything like the instagram tags of vanlife where its all sunshine and beautiful people surfing and parking in idealic spots.Its a bit of an ongoing joke amoungst my van friends to use #vanlife when something awful or unglamorous happens. One of my favourites"Had to shit in a bag today #vanlife!!" Hahaha
Hahahahahaha! #vanlife!! But its what makes it more exciting and fun right? Haha. I wanna try it, but I don't know how to drive yet. I've been watching Youtube vids on how people transform their vehicles and it looks like a lot of work. Haha. I don't even know how to use a hammer. LOL. I hope some islands will offer these kind of accommodation so we could taste a bit of #vanlife. Hehe. 😂
It'll be toasty with that little stove... You made room on your roof for coal and wood? Or is it going to be reserved for Solar?
Those Flag-Stones are a great easy option too... I bet it was a right pain in the ass securing the stove to the floor! And i bet you blunted a few drill bits?
Yeh im not one for feeling the cold until its freezing so a lot of the time i had to have the windows open whilst it was on! I never thought about roof storage actually, theres a big 180W panel up there and 2 skylights so not much space left really.
Yep flagstone was a friends suggestion, got it from a builders skip one day on my way home so it was free. Ergh drilling stone is a nightmare! im used to metal and wood but yes it was really long drilling through the flagstone. and another thing not mentioned here was the panic when i thought id drilled into my fuel tank like an idiot. thankfully i was just being paranoid
CONGRATULATIONS!!
Your post was featured in my Friday DIY Day Curation post!
thanks so much! I only just realised 2nd time reading your post that you are splitting the rewards as well, really generous :)
You're welcome on both accounts!
My dad used to buy panel vans and customize them. He'd have a bed, storage, a table with a bench... we'd go camping every year. Seeing your plans reminded me of those times.
aw yeh the simplicity is what i love about it. and the completely customised setup. no landlord to complain if i fancy drilling holes in the walls or rewiring the place!
lol- yeah
We would go camping for two to three weeks straight in the month of August. Go to one campground or state park for a few days, pack up and head off to the next one for a few days... every year we would stay at about 6 different places. Always an adventure!
Beep bop, this is @pushbot.
I just received a signal from the Mother Ship that you may require a push.
You just got a 8.99% upvote courtesy of @howtoweekly!
Message from the Mother Ship:
You can earn daily profit by delegating SP to make @pushbot stronger. Delegators receive a share in 95% of the earnings.
10 SP • 20 SP • 50 SP
100 SP • 200 SP • 500 SP
1000 SP • 2000 SP • 5000 SP
Any Other Amount