
Anyone who has used WordPress prior to the latest version 5 is well versed in using the 'classic editor' for writing posts and creating pages. With the new version came a new editor called Gutenberg. It hasn't been well received - one only has to search for the Gutenberg plugin, which was introduced prior to being bundled with WordPress 5, to see the overwhelmingly negative reception.

Nearly two thirds of ratings are for one star - the lowest possible score. I must admit that like many others, I too rejected the new editor without looking at it too closely. It seemed to me as though Automatic, the team behind WordPress, had attempted to fix something that wasn't broken.
Once I updated to version 5, I quickly installed the classic editor plugin to return to my previous posting ways. Gutenberg felt alien and too clunky for real use. This feeling was reflected in many of the reviews. It was described as slow, over-complicated, dumbed down and useless, with many people berating Automatic for forcing it upon users by default. Sure, you could return to using the classic editor by installing a plugin, but why should you?
Nonetheless, my last post was written with Gutenberg. This one too actually. Is it perfect? No. Is there a learning curve? Sure, like most things. But I have tried to stick with it. Keep an open mind: perhaps it's not the demon editor we all think it is.
Let's Dive In
With Gutenberg enabled, as in the classic editor plugin is disabled, when you click to add a new post you are presented with the following page, prompting you to give it a title. Top left you have several icons and to the right you have a sidebar. Let's go ahead and give the post a title.
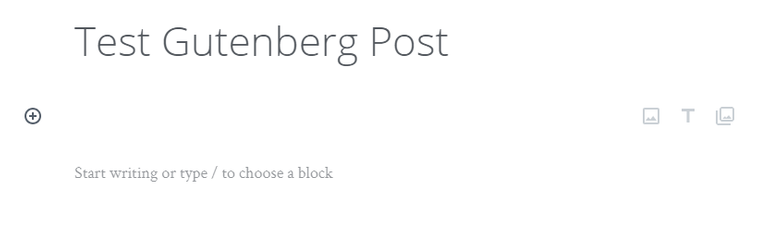
As soon as we hit enter, a new section - or block - is created below. By default this is the paragraph block. Let's type some text in there.

Above the text we typed, we have some icons. First we have the opportunity to change the block type. Next we have formatting options. Finally we have block options, which include the ability to delete the block, duplicate it or edit as HTML. If you don't like these icons appearing directly above your block, it's possible to have them appear in the top toolbar like in this picture.

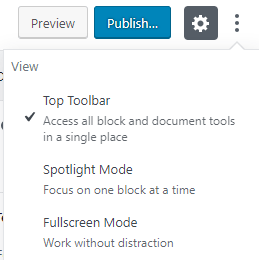
How do you do it? If you click on the three dots at the top right of the window you will see the following options. There are a further two options in there: spotlight mode focuses your attention on the current block you have selected: all other blocks will appear washed out. You can also work distraction free in a full screen mode. This hides the usual left hand WordPress admin sidebar, enabling you to concentrate on writing.
To close full screen mode or switch off spotlight, you can return to the same menu and untick the relevant options.
Let's add a different block type
Next up we're going to add an image. There are two ways of adding a block: either hover your cursor below your previous block and click the plus button that appears, or simply click the plus button at the top left of the Gutenberg window. This opens up the block selector.
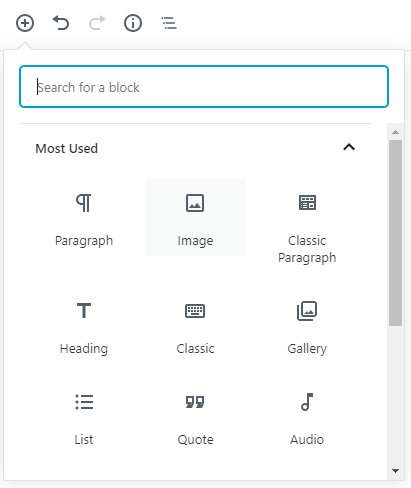
The first blocks it presents are the most used. Scroll down and you can dig down into various other categories. If you know the name of the particular block you want, you can also search for it. In our case we are just going to click on the image block.
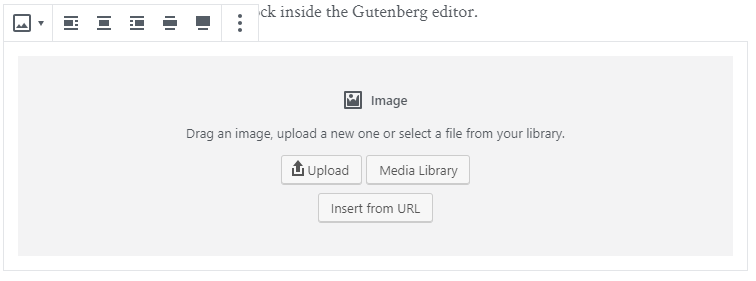
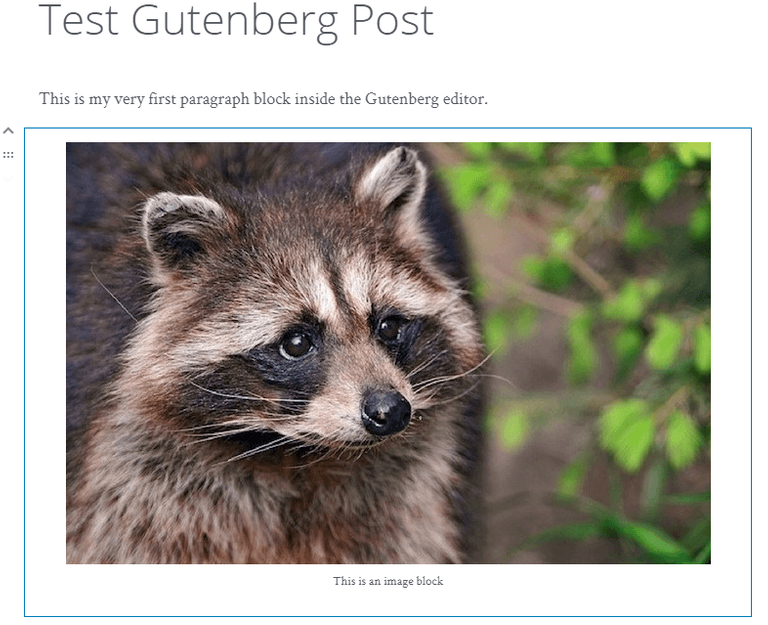
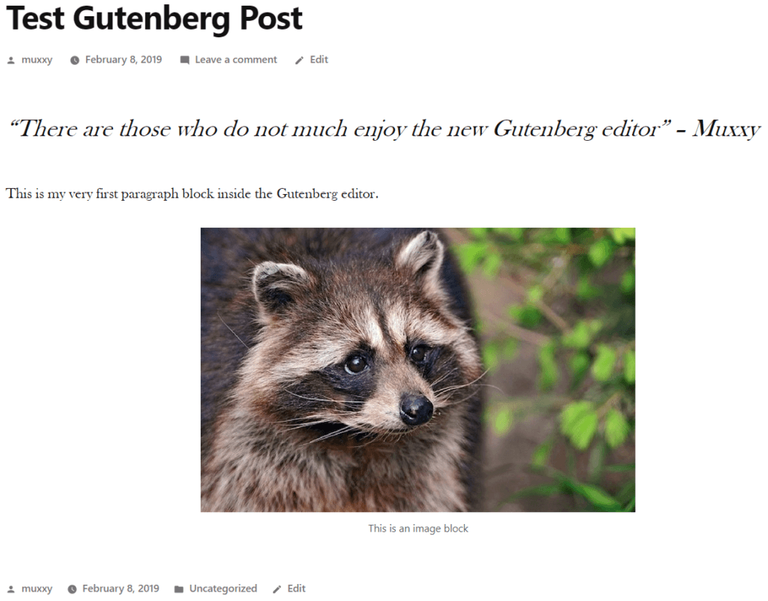
We can upload an image, select one already in our media library or link to an image URL. I'm going to select a raccoon picture from my library and then click the icon to centre it. I am also going to add a caption below. It's also possible to make the caption into a hyperlink, for example if you want to cite the source of the image.
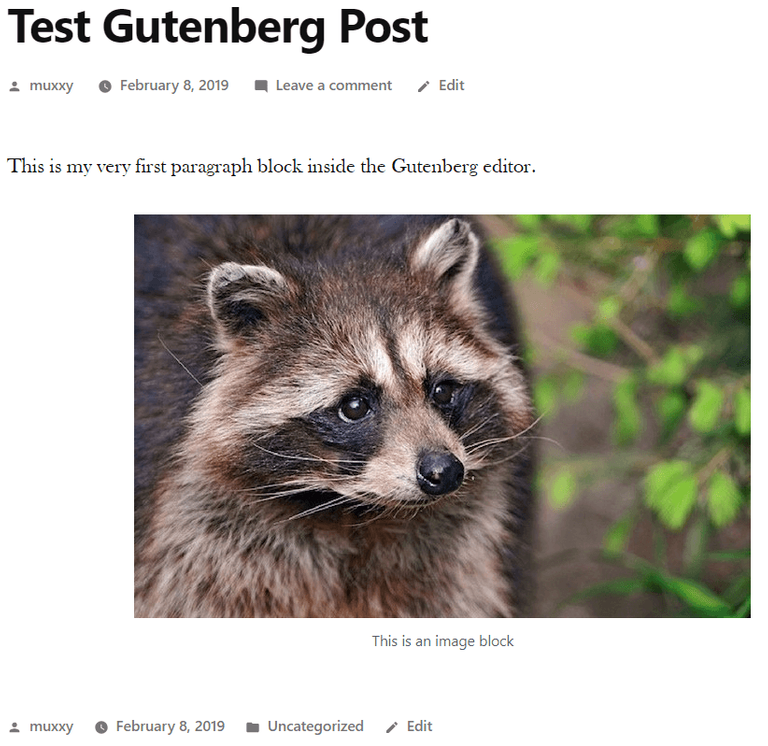
Next I am going to go to the top right of the Gutenberg editor, save the draft and click on preview.
Let's add a quote block
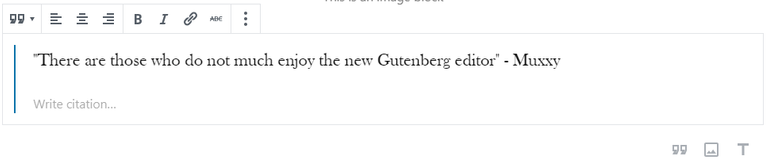
Beneath the image block I am now going to add another type - a quote box. Again I click the plus button top left, search quote and click on it.
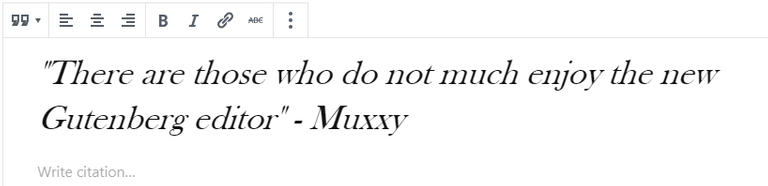
Next, I go over to the right-hand sidebar, under the block tab, and change the style of the quote to large. This is what it looks like.
Once more I will click save draft and then preview the post so far.

As you have no doubt now gathered, Gutenberg creates posts and pages with the use of blocks, much like Lego bricks. What is you now wanted to move the quote block to the top of the post? With Gutenberg, it's very easy. If you hover your mouse towards the left hand side of a block, some new icons appear.
Depending where in the stack your block currently is, you may have an up arrow, a down arrow or both, with and icon in the middle with six dots. Clicking on one of the arrows moves the block up or down in order, and clicking and holding on the center icon will allow you to drag the block to a new position. In my case I am going to click on the up arrow twice on the quote block to move it to the top.
If you take a look at the top left of the Gutenberg editor, you will also see the following icons:
The plus button I have already covered. The next two buttons are the undo and redo buttons. Next we have the content structure button: click on this and a pop up gives you information on the post so far.
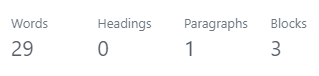
Here you can see we have a total of 29 words. We have no headings yet, one paragraph and a total of three blocks: the paragraph block, the image and finally the quote block.
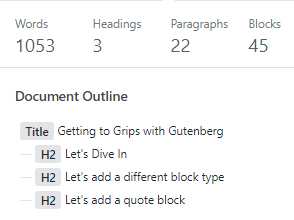
To give you a better idea, this is the content structure of this particular post I am now writing. Covering 22 paragraphs I have typed just over one thousand words. I have three headings - listed below in the document outline. If I want to jump to any of the headings I just click on it. In total I have used 45 blocks, many of them images.
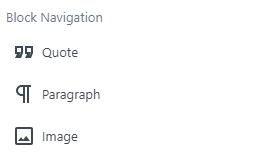
The final button reveals the block navigation. This is helpful when you have a much larger collection of blocks in your post. For example, if you have a heading halfway down your page that you want to edit, simply click on that block in the block navigation and the editor will take you to that place in your post.
The right hand sidebar
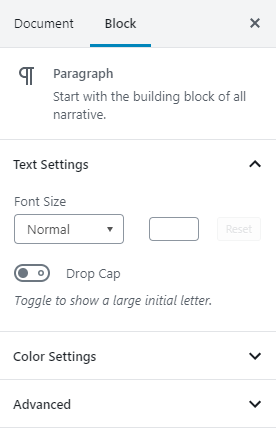
If you click on a block, the right hand sidebar will show you any options for that block. For example, with the quote block I just added it gave me the option between two styles. Image blocks will let you change the size, add a link if you want and set alt text. Paragraph blocks allow you to change the text size and colour and to use a drop-cap if you so wish.
However, if you click on the document tab, you get the same post or page options that you would have in the classic editor. For example you are able to set tags and categories, change the permalink, set a featured image etc. here.

Conclusion
I hope that this brief tutorial has helped to demystify the widely hated and scorned Gutenberg editor. It's really not as scary or as bad as you might have thought. Spend some time playing around and get a feel for it. Who knows, you may come to enjoy it. If not, there's always the classic editor to fall back on.
Posted from my blog with SteemPress : https://www.muxxy.co.uk/getting-to-grips-with-gutenberg/
ǝɹǝɥ sɐʍ ɹoʇɐɹnƆ pɐW ǝɥ┴
it looks like some of the elements in Gutenberg are similar to creating posts on Medium, Trybe and Narrative. Seems it is going to be a trend of sorts.
I think Automatic picked up on the popularity of various third party page builders, which also use blocks.
possibly ... I've not actually used it yet but I may give it a try. I am rather fond of the classic editor but that might be familiarity too.
Reading your post, I realised we can always test it and play with it before we create an article. Nothing stops from doing so! 👍
Very true. You can always save it as a draft and preview it without actually publishing.