When studying for NSR1, NSR2 or SRA choosing the right network simulator can be a tough decision. And there’s no best way to go about making your selection. After all, you’ve got an exam coming up. Our opinion and advice is to use eve-ng for all Nokia labs because of its simplicity and powerful. This article How to simulate Nokia Service RouterSROS) will discuss about this.
What is EVE-NG?
EVE-NG (Emulated Virtual Environment Next Generation) is a multi-vendor virtual network simulator that, similar to VIRL Personal Edition, was developed for individuals and smaller businesses. They offer a free Community Edition as well as a Professional Edition for $110.75 per year.
You can download Eve-ng Free Community Editon on this link: https://www.eve-ng.net/index.php/download/. Choose OVF version for the next-step.
What is VMware Workstation
VMware Workstation is a line of Desktop Hypervisor products which lets users run virtual machines. For our lab, we use VMware to build Eve-ng for simulation. We recommend to download and use VMware Workstation Pro version. There are many user guide and how to download, setup VMware in the internet so we don’t focus in here.
How to emulate Nokia Service Router (TiMOS SROS) with Eve-ng
Setup Eve-ng
You can refer to how to install eve-ng on vmware on the official page of eve-ng.
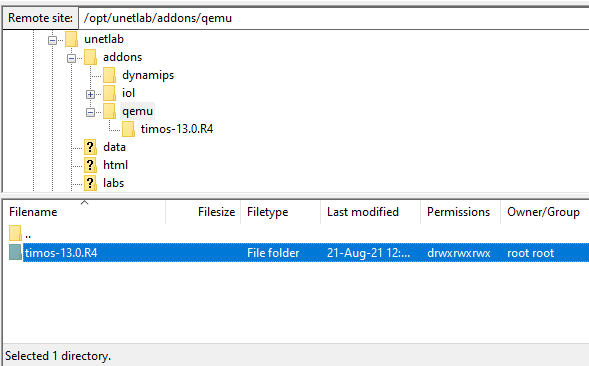
Download SROS timos-13.0.R4 or timos-15.0.R3. Link update in the comment page.
Let’s start setup:
Step 1: Start up the Eve in the VMWare and get ip to FTP:
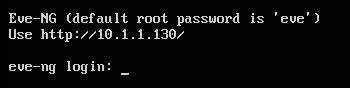
Step 2: Use FileZilla upload the SROS to the EVE, default username/password is root/eve

Upload timos-13.0R4 folder (include hda.qcow2 inside) to /opt/unetlab/addons/qemu
Setup Node
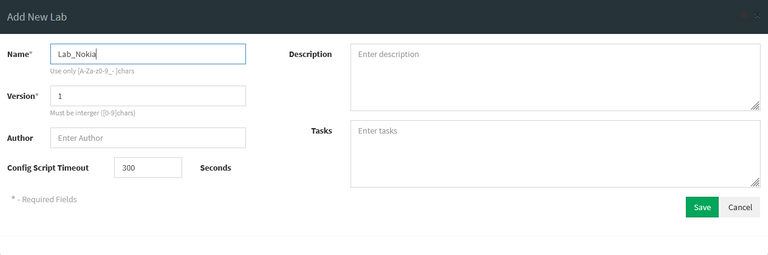
Step 1: Login to the eve by browser and create a new lab
You can login to the guide with username/password default is admin/eve. For this exam is http://10.1.1.130
Choose icon Add new lab, write down the Name and Save.
Step 2: Create nodes and optimize
Add an object -> Node and choose some option bellow:
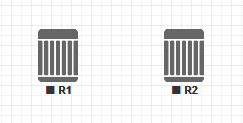
- Template: Nokia 7750 VSR
- Number of nodes to add: For example is 2
- Name/prefix: you can write R. After finish it will appear R1 and R2 for this example.
- Icon: What eve you want, but Nokia should use SROS.png

After all, you scroll down and click Save
Right click to each node choose Edit and change QEMU custom options as follows and Save:
-nographic -enable-kvm -uuid 00000000-0000-0000-0000-000000000000 -rtc base=2015-03-10
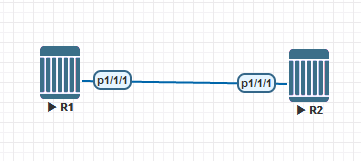
In this example, you can connect 2 routers together with Port 1/1/1 in router R1 and Port 1/1/1 in router R2
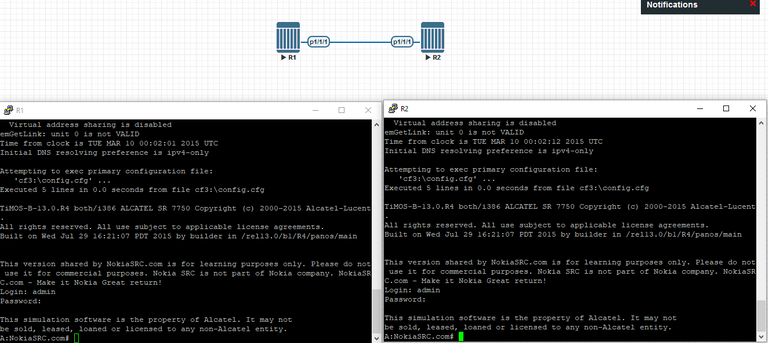
Turn it on, telnet by SecureCRT or PuTTY and login with user/pass is admin/admin.
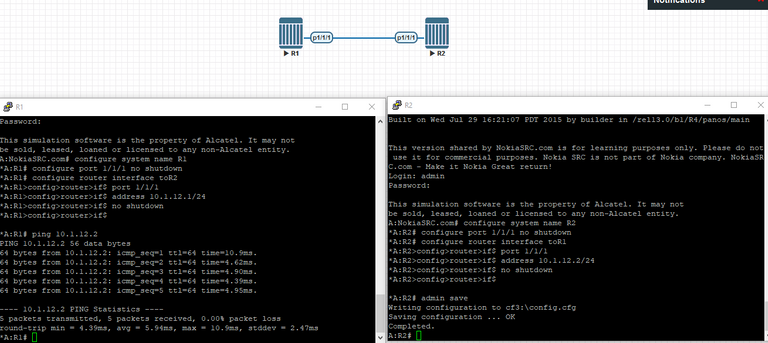
Let's try ping test!!!
This is just the base of setup node for learning only. If you have any questions, you can ask for help in here.
Hope you enjoy it and Good luck!
Congratulations @registers! You have completed the following achievement on the Hive blockchain and have been rewarded with new badge(s):
Your next target is to reach 50 comments.
You can view your badges on your board and compare yourself to others in the Ranking
If you no longer want to receive notifications, reply to this comment with the word
STOPTo support your work, I also upvoted your post!
Check out the last post from @hivebuzz: