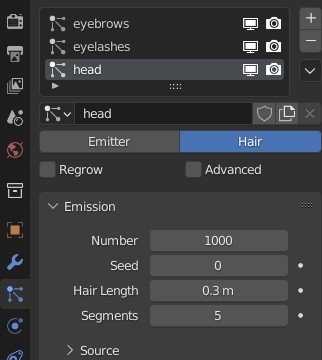
First, set up the hair particle system with enough to see what you're doing.
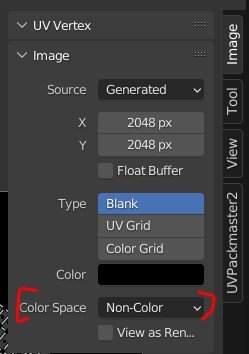
In the UV Editing tab, create a new image and change the Colour Space to Non-Colour.
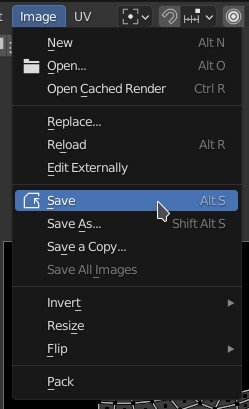
Save the image either with Alt+S or using the Image menu.
In the particles tab, select the particle system you want to use the texture for, then scroll down to Textures. Create a new texture in one of the slots.

Click on the thing that looks like capsules (I think they're meant to be settings switches) which teleports to the Texture tab.
Under the Preview section where it says Settings, click on the image button and select the image created at the beginning. The Type should be on Image or Movie by default but if it's not, that's what it should be.
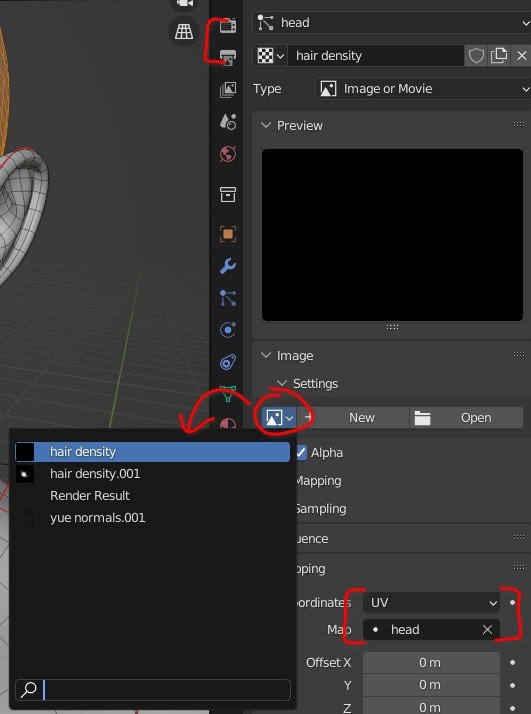
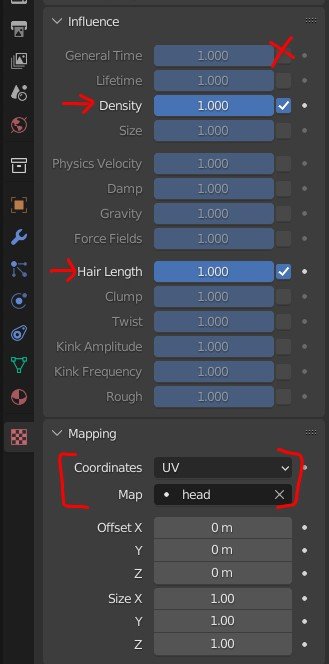
Also indicated in the above image is the Mapping section. Make sure the Coordinates are set to UV and the Map is whatever uv map you're using (I was experimenting with just having a uv map for the head but I broke something so just dropped back to my default udim map and was too lazy to update the screenies so ignore my inconsistent uv settings and just make sure they're right for your current project).
In the Influence section which should be directly above the Mapping section, untick the default option of General Time and tick Density and Hair Length (or just one or the other if you prefer, why yes it does look like there's quite a lot that can be done with this doesn't there).
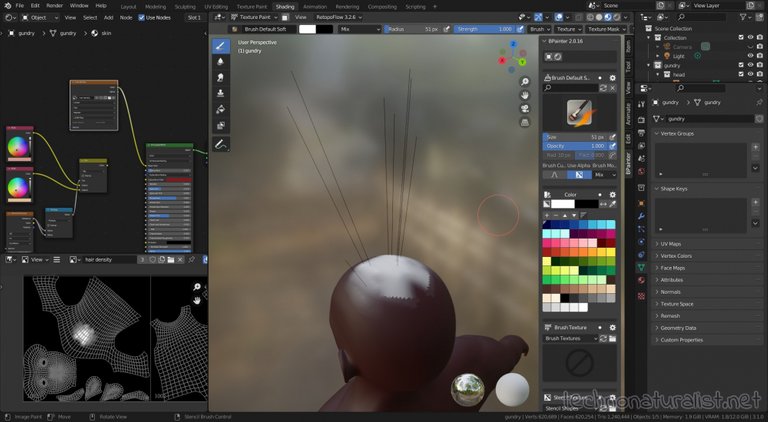
Hop over to the Shading tab and temporarily hijack a material (skin in my case). Drop in an Image node, select the hair density texture map, start painting (I'm using BPainter which works on top of Texture Paint so I assume you can just use the Texture Paint tab) and watch the magic happen.
Because it's non-colour data, use white to paint and black to erase (eraser won't do anything).
This is definitely something I should have tried to figure out sooner.

This post also appears on my blog.
peakd appears to be auto-centering images at least in the preview O_O If they stay centred on post that will save me some typing XD
Want a cameo character? If you interact frequently with me here (either on my posts or your posts or better yet both!) or on one of the linked Discord channels, all you have to do is let me know and tell me what you'd like :) Everything you need to know is (probably) here and if it isn't just ask (sorry the link goes offsite to my blog where the layout is how I want rather than the one here which is only here because the original one was).
Thanks for looking! ^_^
Wow all that just to do a bit of the hair, this really is a detailed programme, you can decide the density of the hair?! Looks like fun anyway @ryivhnn
It is fun XD (when I actually get to do things that isn't rework x_x) Yep this is one of the finer grained ways of doing things, need to be able to do it for when you have full body fur (for dogs and cats and werewolves and stuff) or full heads of luscious locks or worn out teddies or velvet :)
I guess the tricky part itself is learning the route and settings, as there are so many options and listings!
Yep pretty much :) and then even after that some things are still hard to do well XD
This doesn't seem complicated at all... :0)
It wasn't, probably the hardest thing was firstly knowing what it is you need to do (which is always the hardest bit) and after that everything is kind of non-obvious unless you know where it is (in which case it's...still not that obvious but at least you know where it is XD).
Ahem, yes. Yes indeed!! I know what you mean, I am trying to show my daughter an art program and knowing what you need to do is the hardest obstacle for her
It can be easy to forget just how much of a learning cliff it was at the outset XD
That's what I notice when I try to teach the kids guitar as well!