Hello friends...
☺☺☺
Welcome to my blog, I hope you are having a great Wednesday; Today I will share a new kawaii art and it is a chicken or we can also call it a rooster, as you prefer. I made this drawing to teach a person to draw a farm bird in a quick way; I tell you apparently the person had to do a test or something like that and for that he had to draw one of these birds; so for me it was very nice to help and I proceeded to explain step by step, of course at the end I added an environment for my own taste for my publication.
Next I mention the materials used: white paper, graphite pencil 2, 0.5 marker, eraser and colors (Variety of brands).
Before continuing I remind you that at the end I will leave you the link I used in this occasion.
Let's start with the step by step drawing:
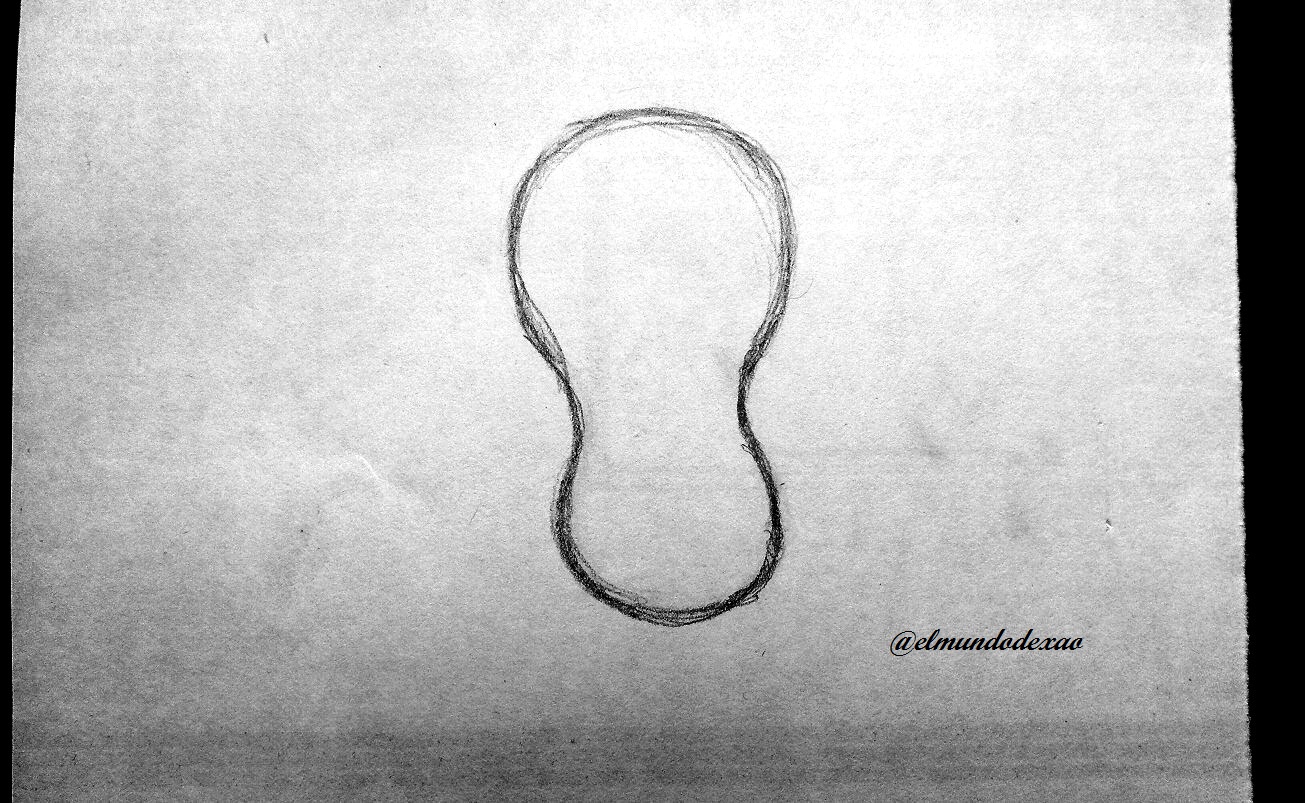
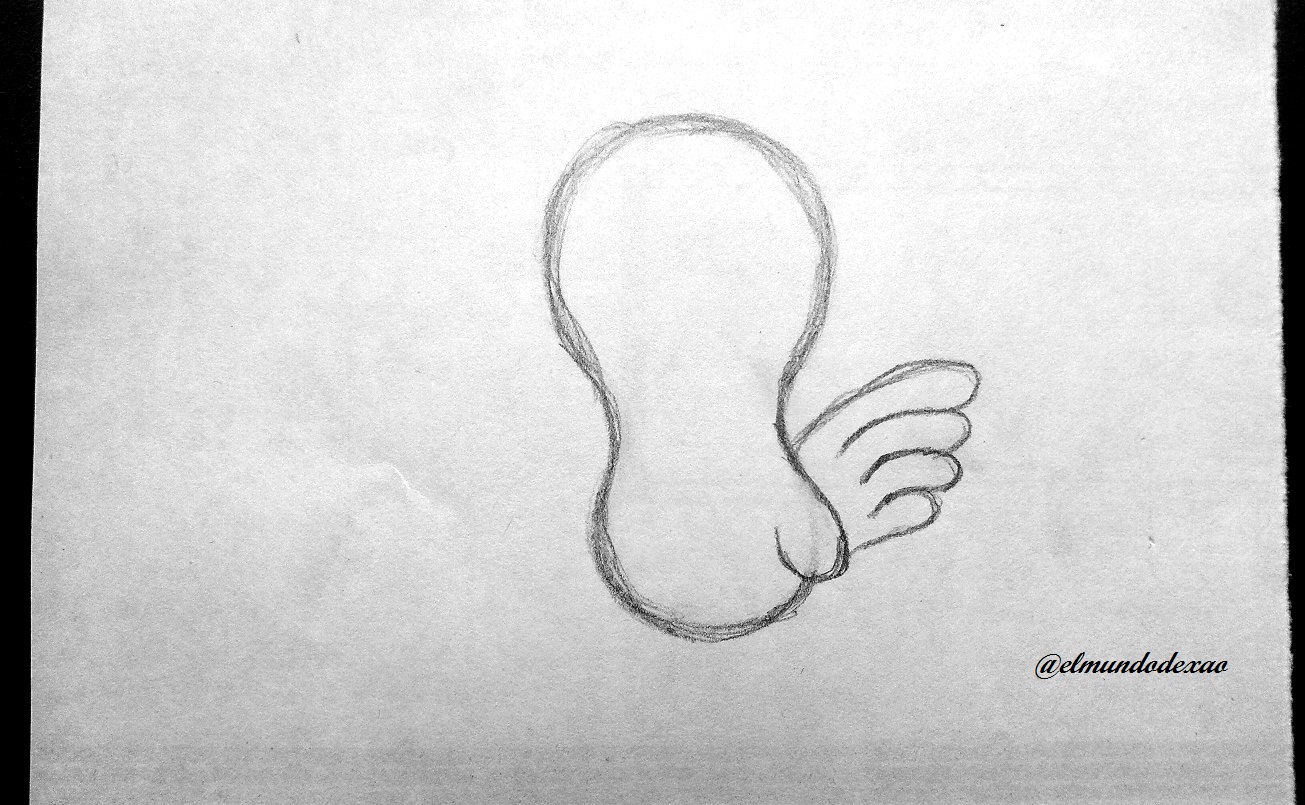
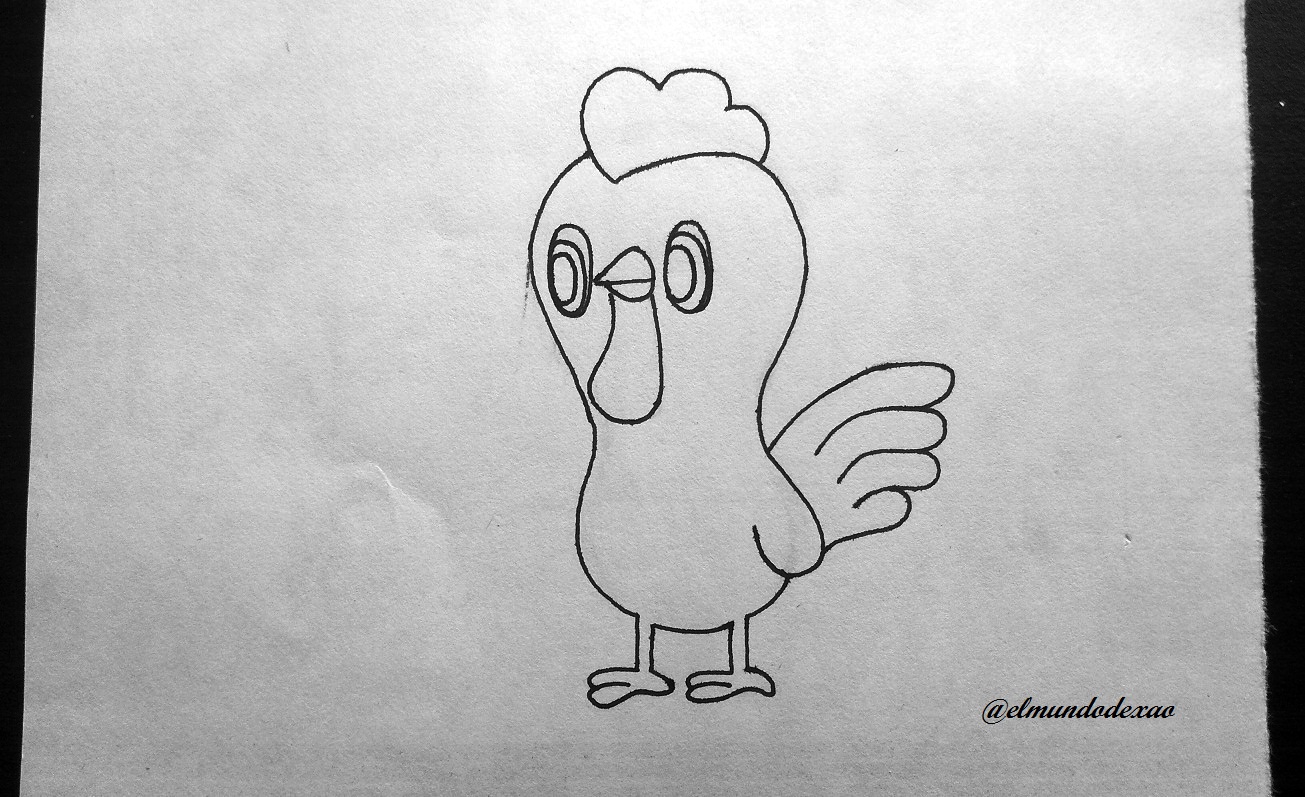
Step # 01: The first thing is to make a silhouette similar to a peanut with shell making the top part a little bigger since it is for the head, then on the right side I make something like a drop of water, taking into account that approximately half of this drop should go on the outside side and then I define the tail, making something like four fingers of a hand, well that was the easiest way I found to explain to you how to make the tail.
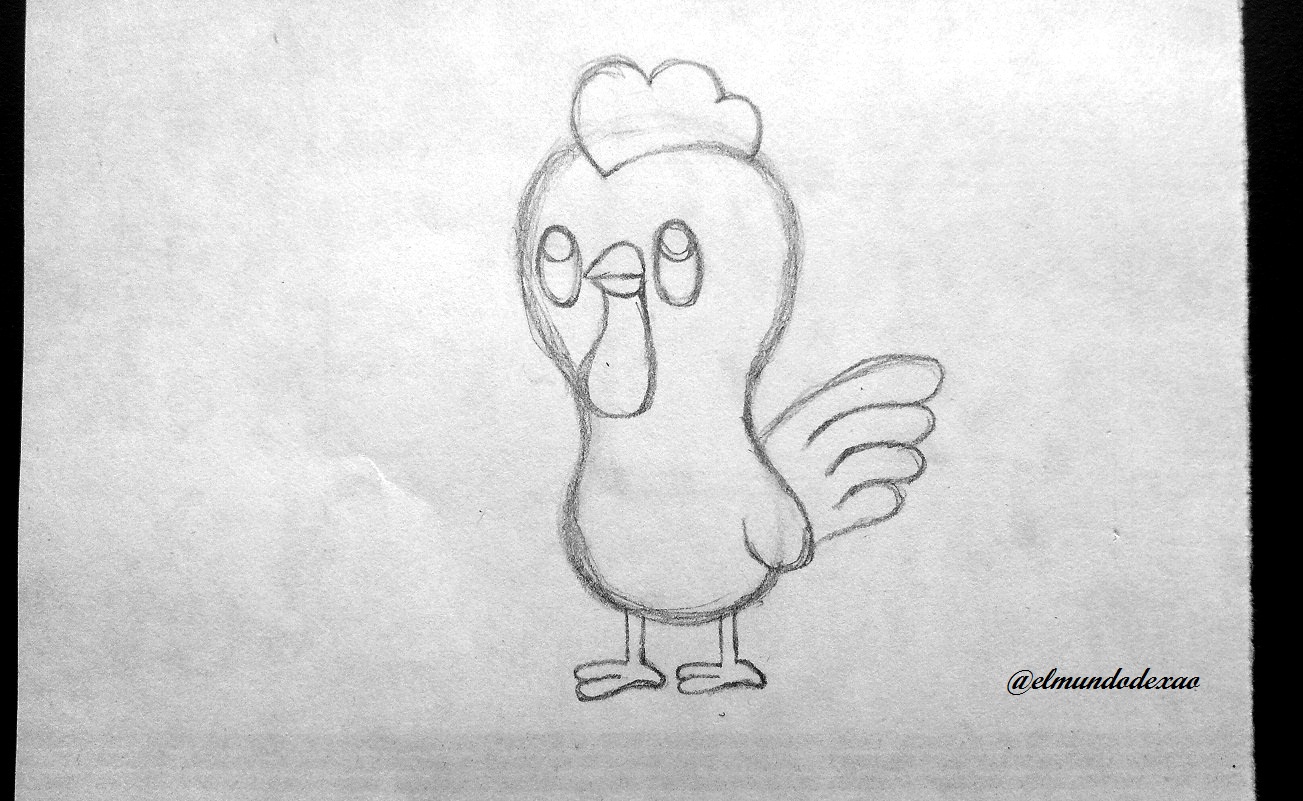
 Step # 02: For the beak I first draw the middle stripe then I made an arched line upwards and then another one a little smaller downwards, below this beak I must draw something like a drop of water which should extend to the neck, for the eyes a couple of ovals will be enough and for the crest of the head I will make a kind of cloud with the bottom arched; finally I make the legs.
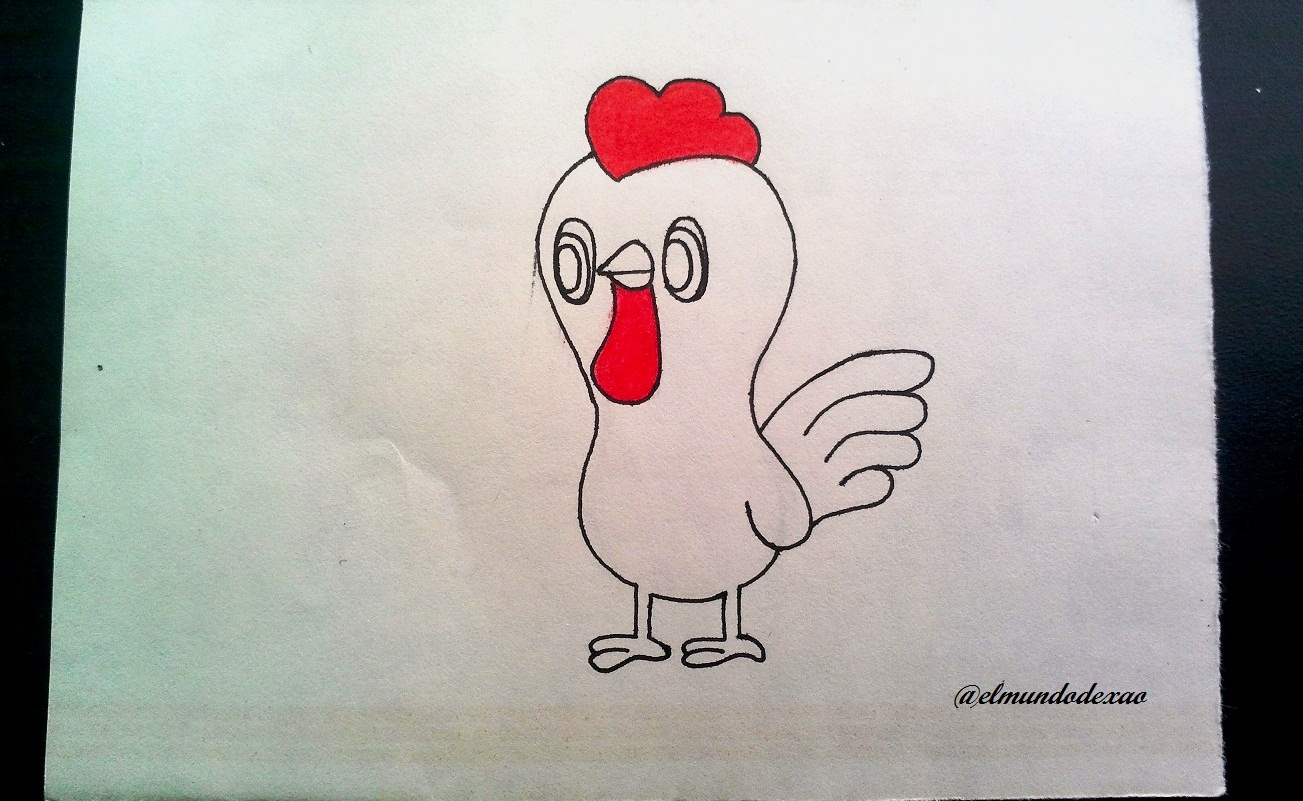
 Step # 03: Now I am going to ink it to improve it and check if any detail is missing; if everything goes well I erase the graphite, clean and ready the chicken is finished as I promised, fast and easy. Up to this point I already fulfilled with the person to whom I was explaining the rest is to complete my publication.

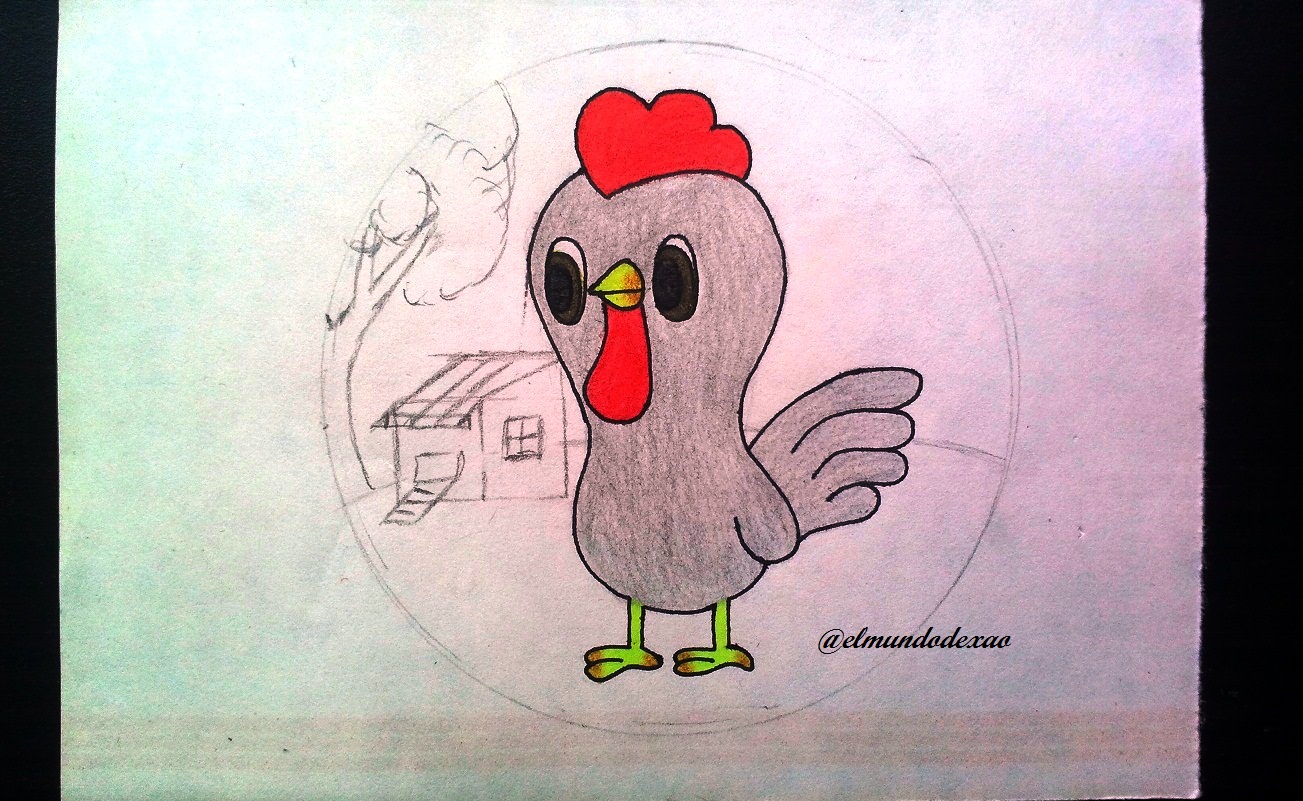
 Step # 04: To start coloring I will use a red color for the crest, then I will paint the beak with yellow and a light shade of brown for the legs; for the rest of the body and the head I will use a gray color that will serve as a background and then give a few touches of shadow.
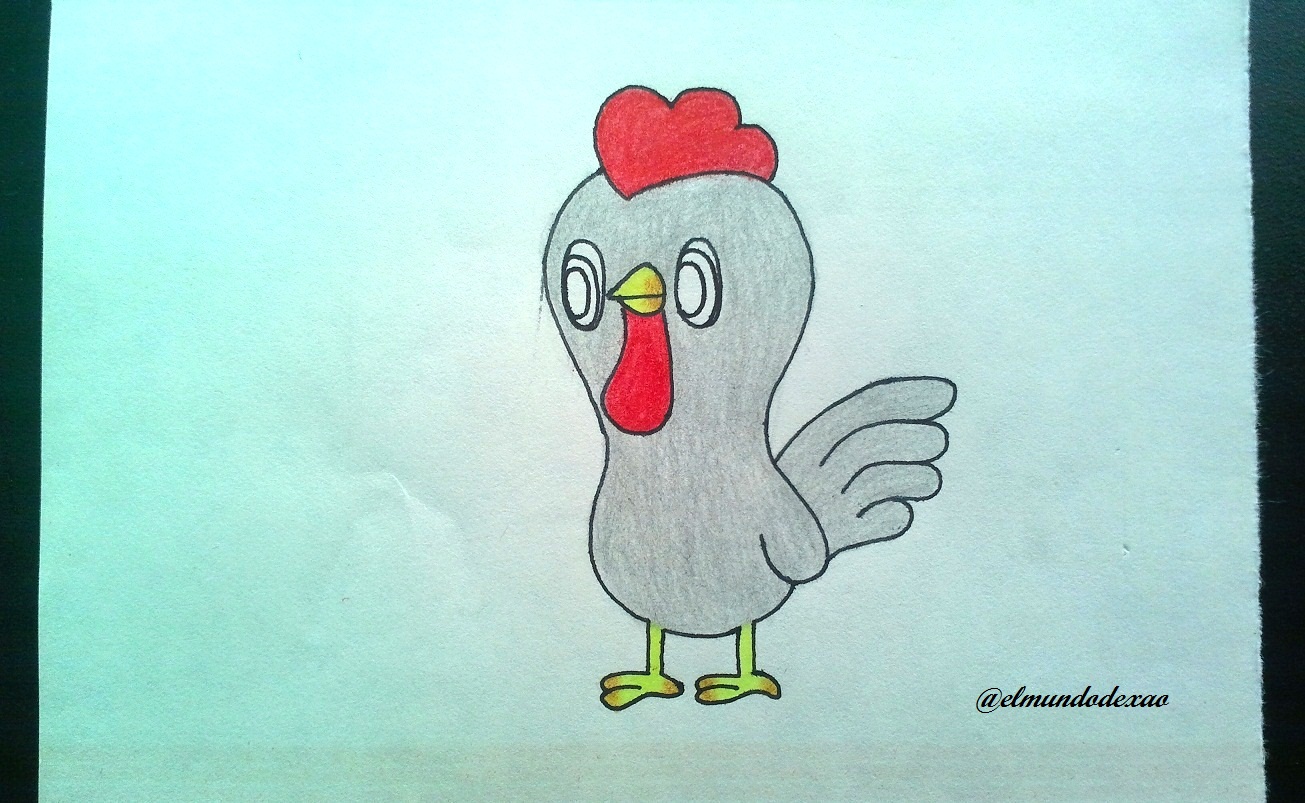 Step # 05: The eyes will have a brown color with black pupils; for the environment I have thought of a small chicken coop next to a tree.
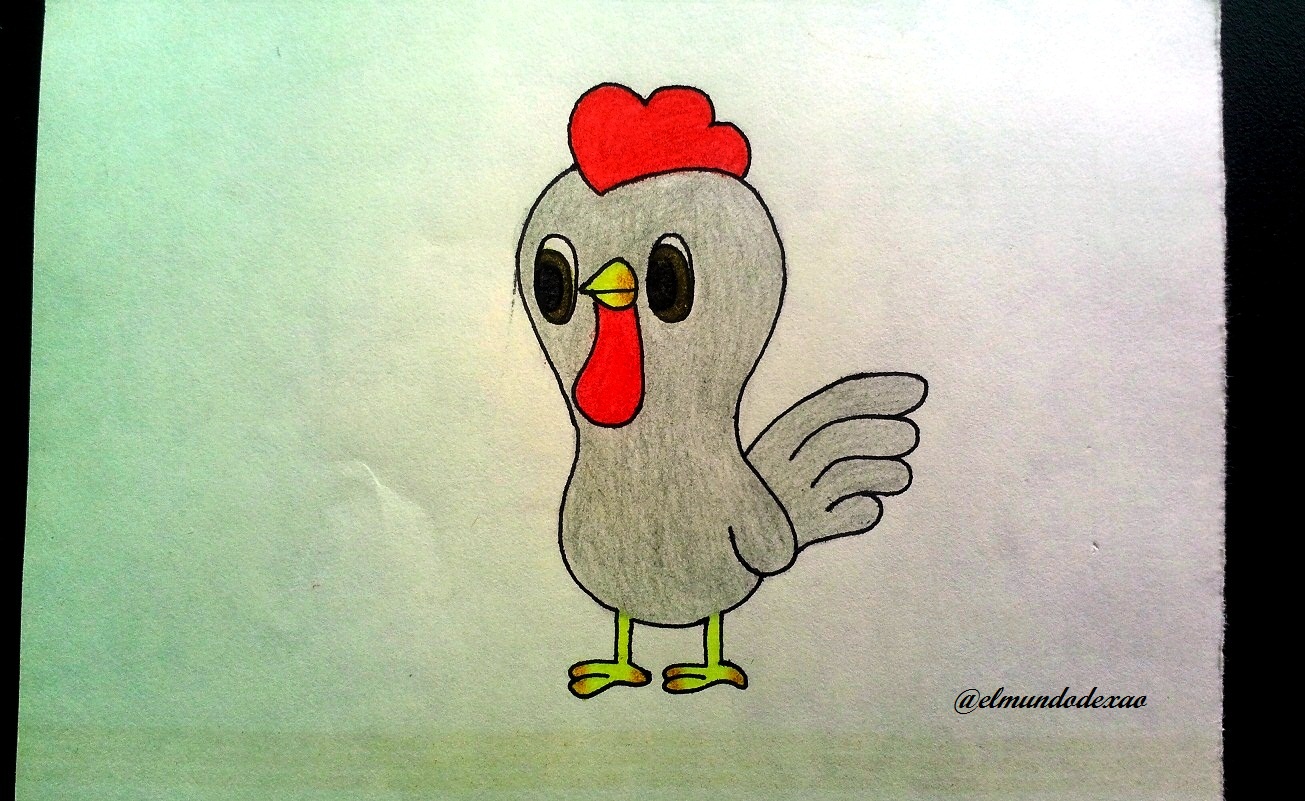
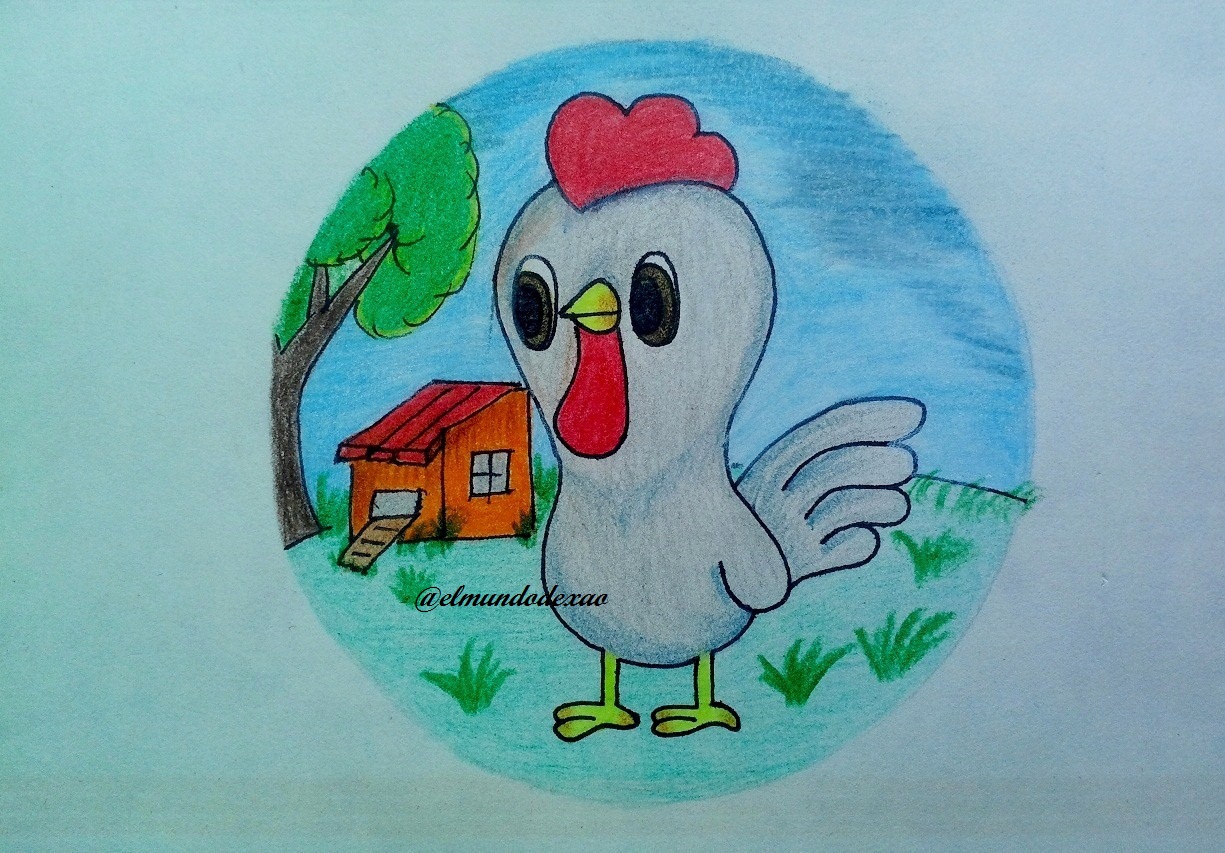
 Step # 06: For the tree I chose the usual colors but the chicken coop I wanted to give it some striking colors, the rest would be the sky and the greenery of the ground; to finish I draw some herbs and with a dark gray color I give a shading to the rooster and darken some parts of the sky and that's it for today.
I say goodbye wishing you a happy day, afternoon or evening depending on your location.
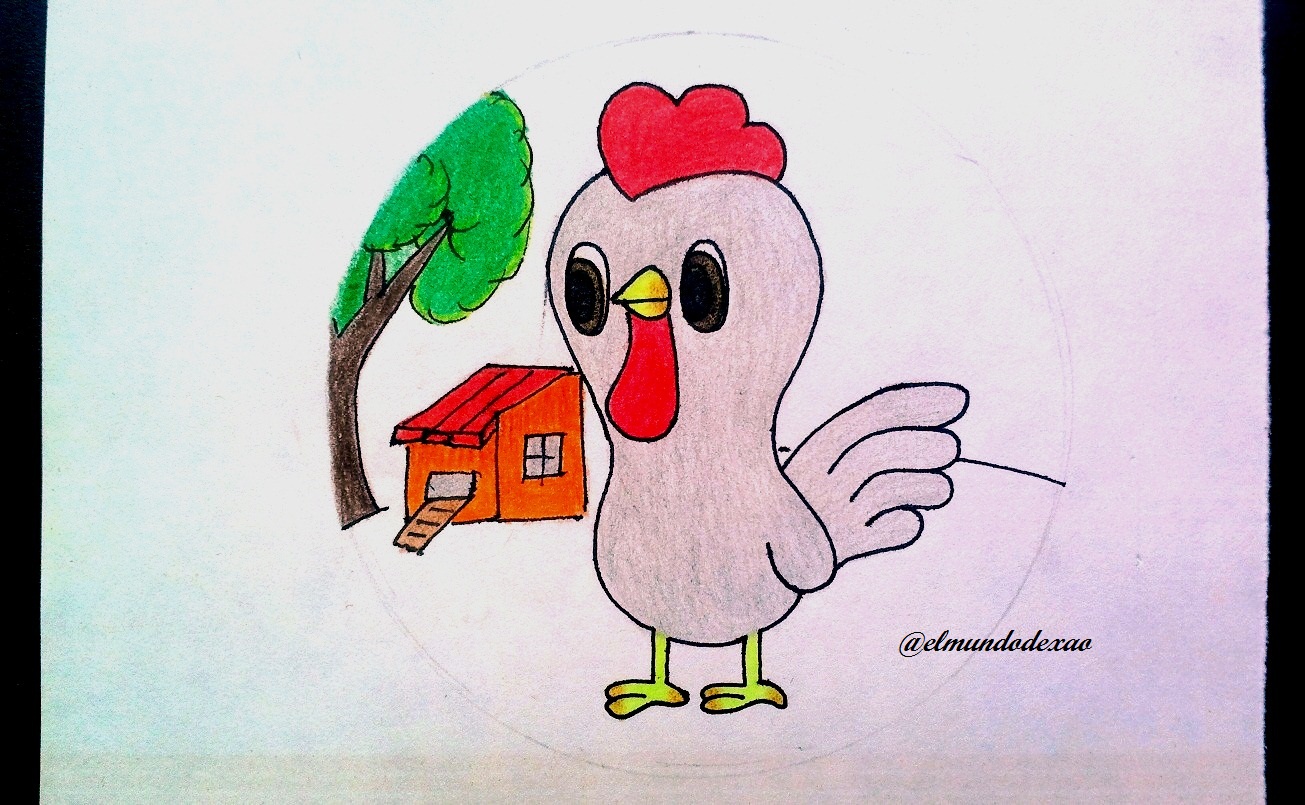

Photo Source: Own photos captured with a Síragon camera.
Modified size: With the Paint Program.
Thanks for visiting my Blog… AH! Don't forget to vote, reblogear, and comment.
Translated with:

www.DeepL.com/Translator (free version)

Arte Kawaii “Dibujando Un Pollo”.
Hola amigos…
☺☺☺
Bienvenidos a mi blog, espero estén pasando un miércoles genial; Hoy compartiré un nuevo arte kawaii y se trata de un pollo o también podemos decirle gallo, como prefieran. Este dibujo lo hice para enseñarle a una persona a dibujar un ave de granja de una forma rápida; les cuento al parecer la persona debía hacer un test o algo por el estilo y para ello debía dibujar un ave de estas; por lo que para mí fue muy grato ayudar y procedí a explicarle paso por paso, por supuesto que al final agregué un entorno por gusto propio para mi publicación.
A continuación menciono los materiales utilizados: Papel blanco, lápiz de grafito 2, rotulador de 0.5, borrador y colores (Variedad de marcas).
Antes de continuar les recuerdo que al final les dejare el enlace que use en esta ocasión.
Comencemos con el paso a paso del dibujo:
Paso # 01: Lo primero es hacer una silueta semejante a un maní con cascara haciendo la parte de arriba un poco más grande ya que es para la cabeza, luego del lado derecho hago algo como una gota de agua, tomando en cuenta que aproximadamente la mitad de esta gota debe ir del lado de afuera y después defino la cola, haciendo algo como cuatro dedos de una mano, bueno esa fue la forma más fácil que encontré para explicarle como hacer la cola.
Paso # 02: Para el pico trace primero la raya del medio luego hice una línea arqueada hacia arriba y después otra un poco más pequeña hacia abajo, debajo de este pico debo trazar algo como una gota de agua la cual debe extenderse hasta el cuello, para los ojos bastara con un par de óvalos y para la cresta de la cabeza haré como una especie de nube con la parte de abajo arqueada; por ultimo le hago las patas.
Paso # 03: Ahora voy a entintarlo para mejorarlo y revisar si falta algún detalle; en vista de que todo va bien borro el grafito, limpio y listo el pollo está terminado tal cual como lo prometí, rápido y fácil. Hasta este punto ya cumplí con la persona a la que le estaba explicando el resto es para completar mi publicación.
Paso # 04: Para comenzar a colorear utilizare un color rojo para la cresta, luego pinto el pico con amarillo y una leve sombra marrón al igual para las patas; para el resto de cuerpo y la cabeza un color gris que me servirá como fondo para luego darle unos toques de sombra.
Paso # 05: Los ojos tendrán un color marrón con las pupilas negras; para el entorno he pensado en un pequeño gallinero al lado de un árbol.
Paso # 06: Para el árbol escogí los colores habituales pero el gallinero quise darle unos colores llamativos, el resto sería el cielo y el verdor del suelo; para terminar dibujo algunas hierbas y con un color gris oscuro le doy un sombreado al gallo y oscurezco algunas partes del cielo y así termino por hoy.
Me despido deseándoles un feliz día, tarde o noche según sea su ubicación.
Fuente de Fotos: Propias capturadas con una cámara Síragon.
Modificado el tamaño: Con el Programa Paint.
Gracias por visitar mi Blog… ¡AH! No se olvide de votar, rebloguear y comentar.
Una cuchitura tierna es este pollito lindo y travieso, que me hace evocar los garabatos amarillos que trazaba yo en mi infancia.
Hola @lecumberre, me alegra mucho que mis dibujos le traigan recuerdos agradables de su infancia; espero tenga una feliz noche.
¡Enhorabuena!
✅ Has hecho un buen trabajo, por lo cual tu publicación ha sido valorada y ha recibido el apoyo de parte de CHESS BROTHERS ♔ 💪
♟ Te invitamos a usar nuestra etiqueta #chessbrothers y a que aprendas más sobre nosotros.
♟♟ También puedes contactarnos en nuestro servidor de Discord y promocionar allí tus publicaciones.
♟♟♟ Considera unirte a nuestro trail de curación para que trabajemos en equipo y recibas recompensas automáticamente.
♞♟ Echa un vistazo a nuestra cuenta @chessbrotherspro para que te informes sobre el proceso de curación llevado a diario por nuestro equipo.
Cordialmente
El equipo de CHESS BROTHERS
Hola @chessbrotherspro, gracias por leerme y apoyarme en su trabajo de curación.

Les deseo un gran día.
Thank you for sharing this amazing post on HIVE!
Your content got selected by our fellow curator @stevenson7 & you just received a little thank you via an upvote from our non-profit curation initiative!
You will be featured in one of our recurring curation compilations and on our pinterest boards! Both are aiming to offer you a stage to widen your audience within and outside of the DIY scene of hive.
Join the official DIYHub community on HIVE and show us more of your amazing work and feel free to connect with us and other DIYers via our discord server: https://discord.gg/mY5uCfQ !
If you want to support our goal to motivate other DIY/art/music/homesteading/... creators just delegate to us and earn 100% of your curation rewards!
Stay creative & hive on!
Hi @diyhub and @stevenson7, I am very grateful for the support you have given to my publication.

¡Felicitaciones!
Estás participando para optar a la mención especial que se efectuará el domingo 25 de septiembre del 2022 a las 8:00 pm (hora de Venezuela), gracias a la cual el autor del artículo seleccionado recibirá la cantidad de 1 HIVE transferida a su cuenta.
¡También has recibido 1 ENTROKEN! El token del PROYECTO ENTROPÍA impulsado por la plataforma Steem-Engine.
1. Invierte en el PROYECTO ENTROPÍA y recibe ganancias semanalmente. Entra aquí para más información.
2. Contáctanos en Discord: https://discord.gg/hkCjFeb
3. Suscríbete a nuestra COMUNIDAD y apoya al trail de @Entropia y así podrás ganar recompensas de curación de forma automática. Entra aquí para más información sobre nuestro trail.
4. Visita nuestro canal de Youtube.
Atentamente
El equipo de curación del PROYECTO ENTROPÍA
Hola @entropia, gracias por tomar en cuenta mi publicación y apoyarla.

Les deseo un gran día.