Hello Everyone,
I've been on a mission to get this Ender 3 V2 3D printer working optimally.
I've replaced so many stock components since getting this printer, that I would hardly call it a stock Ender 3 V2 anymore. It's very unique now, and even has a motherboard holder that is my own design.
It's a rather rudimentary mobo holder, and I intend to design a better one in the future, but there have been more pressing issues to tend to.
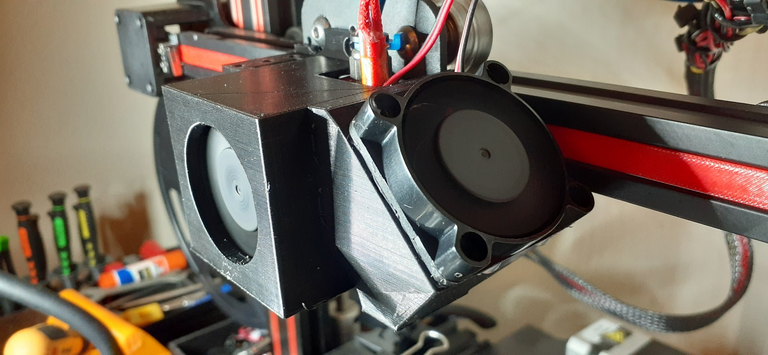
Ender 3 dual 40mm fan hot end cooling shroud with BLTouch mount
by neo2478 May 08, 2020 Remixed from ORIGINAL PRINT Ender 3 Hot End Cooling Enclousure for Noctua 40x20 Fan /w BL-Touch Mount
by Horvat208 February 10, 2020
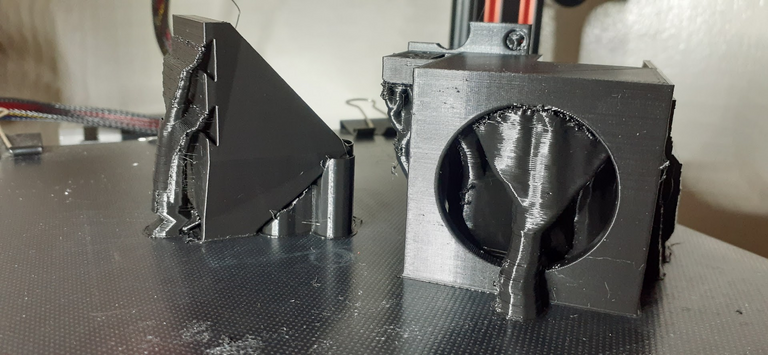
This hot end fixture is amazing. It is my favorite that I've used so far, no question about it. Designed for the Ender 3, I ran into some issues with the Ender 3 V2.
I thought the hot end mounting bracket would be the same, but apparently this is not the case, and so one of the mounting points doesn't fit, but it's not an issue, as the housing fits just fine, and needed a slight modification.
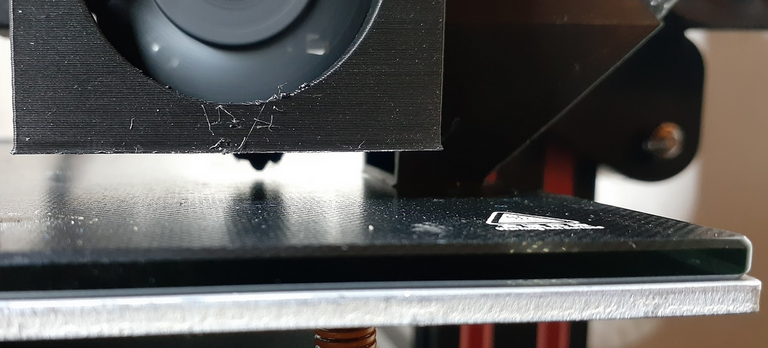
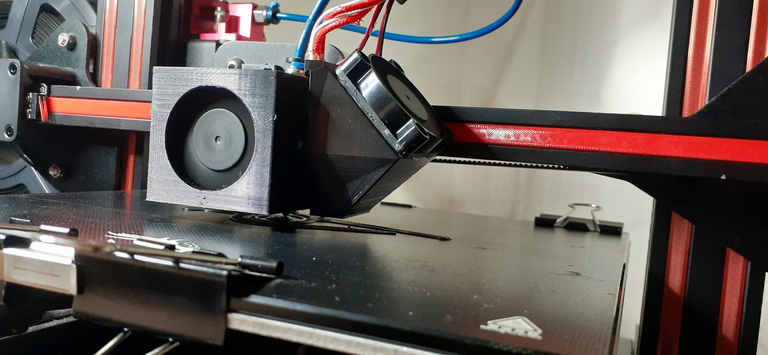
The nozzle should be touching the bed in this photo, but there is clearly a major problem.
This problem is because the Ender 3 V2 bracket is just not fitting 100% correctly.
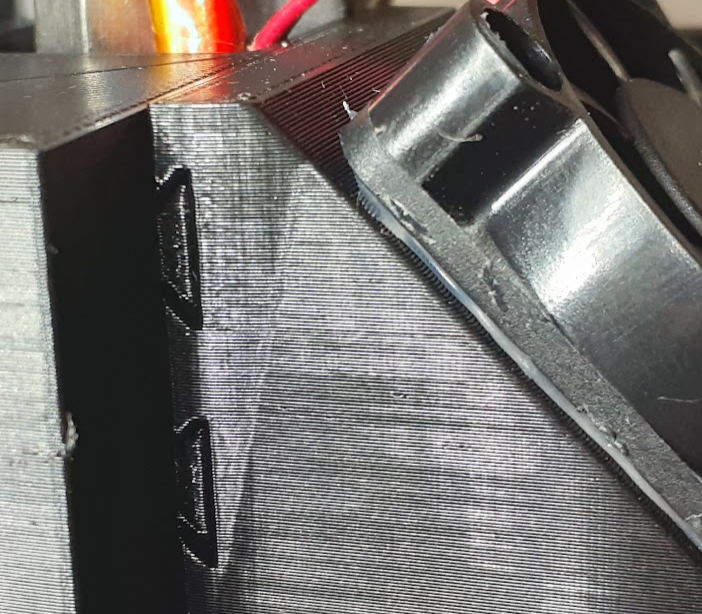
The parts fan addition was in the remixed design, and was my reason for choosing this model. I thought it was super cool looking and efficient.
We can see how it fits together so nicely with these beautiful little dovetail connections.
I was thinking hard....
"How can I fix this?"
"This print is just too nice to throw away and waste all that filament, I must solve this."
Then it became clear to me.
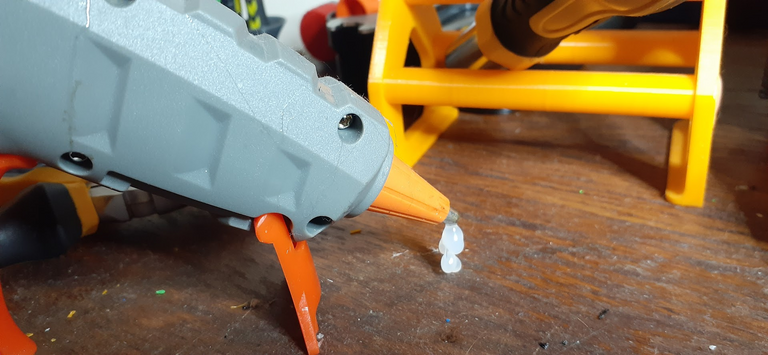
This glue gun is one of the best purchases I have ever made in my life. Without it, I wouldn't have been able to make emergency temporary fixes on the machine, (even held a tension belt with hot glue once) and would not have been able to use certain parts without ordering screws, etc.
I've become quite good at utilizing hot glue for all kinds of things. It especially comes in handy with PCB boards and wires.
There is a bit of hot glue used to hold the fans in place, but on this hot end fixture, it's barely visible, unlike the last one.. which was starting to bug me a little. I just didn't want big globs of glue all over my nice print, and didn't think it looked great in posts either. This hot end fixture however, is lovely and looks fantastic, to me. :)
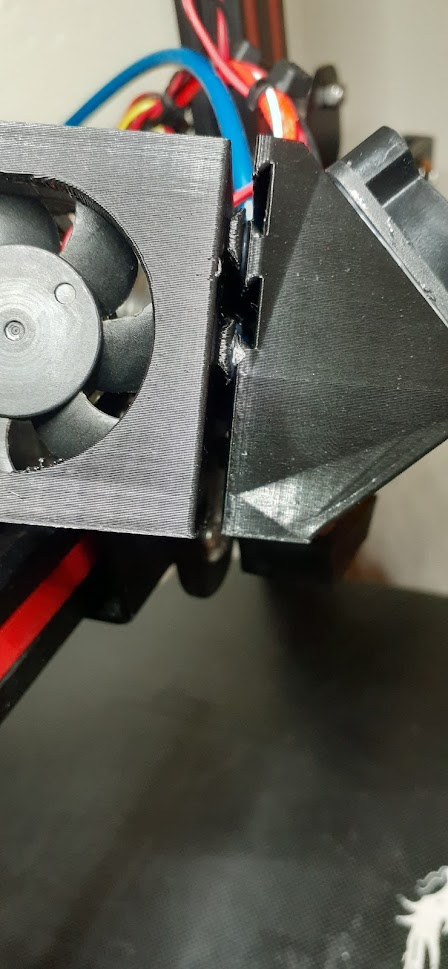
Now it is in the proper place. It looks flush in this photo, but it's actually a little lower than the main housing. This is intentional so that the parts fan airflow is not inhibited. This would defeat the entire purpose of this part.
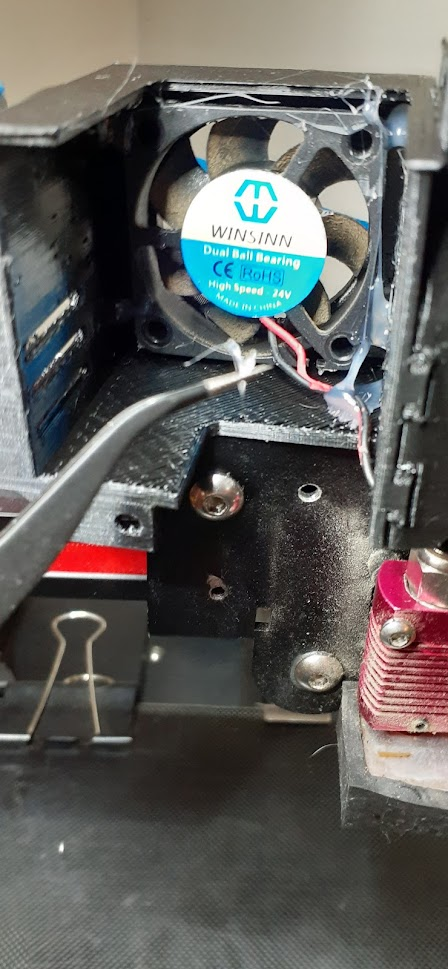
Me in there performing surgery and getting everything glued in place. Since this is designed for the larger 40 mm fans, I have all kind of extra room that I'm loving.
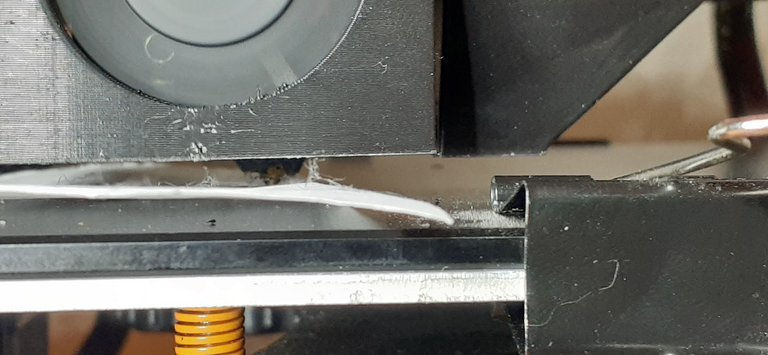
Here we see the difference. I'm now able to easily touch the nozzle to the build plate, utilizing a piece of paper to level the bed. Since the parts fan is slightly lower, the idea is that we should still get pretty adequate parts cooling.
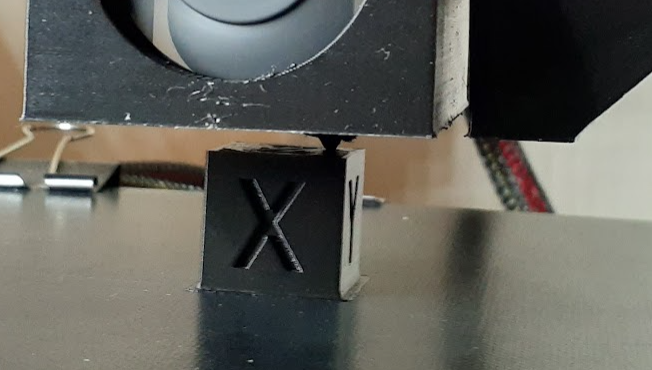
In action with a test cube from thingiverse, the parts fan works fine, and the printer is producing lovely prints.
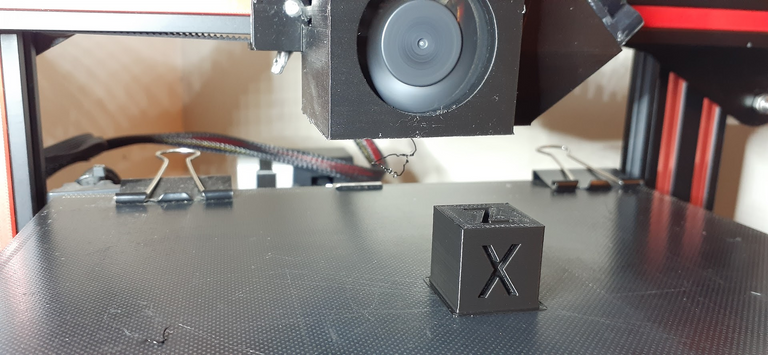
I couldn't be happier about this hot end fixture turning out as a success. I suppose I gambled a bit by printing something intended for a different model printer, and has a BLTouch mount that isn't even needed, (could be an upgrade in the future) but it still worked, and that is what is important. Sometimes life is calculated risks, and 3D printing is no exception when it comes to printing parts upgrades designed by someone else. This risk being, a complete waste of filament, in this case about 100 grams of it.
I printed everything at 0.2 mm layer height, with 35% infill, a good combination of strength, while keeping weight lower and material costs lower. The filament used is black Tecbears. In total it was about 12 hours of printing between the main fixture and the parts fan fixture.
The fastest speed on the printer currently is 50 mm/s, which is quite slow for 3D printing, but the prints are very nice, no blobbing, minimal stringing, great layer consistency and adhesion.
There are both benefits to printing slower, and drawbacks. The major drawbacks are time efficiency, and issues with retraction settings. The major benefits are crisper looking prints with better layer adhesion and shinier surface. Another benefit is the velocity for print moves is slower, and overall printer wobble/shake is reduced. This is good because it reduces wear on belts and roller wheels, reduces wear and strain on stepper motors, and reduces strain on printed parts like this fixture as well as glued parts on the fixture.
I also printed a cool cable clip today too:
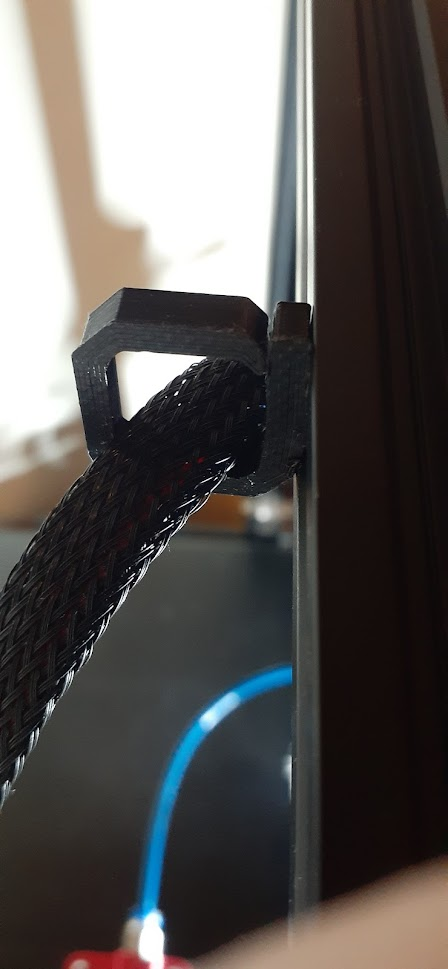
Twist In Cable Clamp [2020 Aluminium Profile]
by Z123456789 October 29, 2017
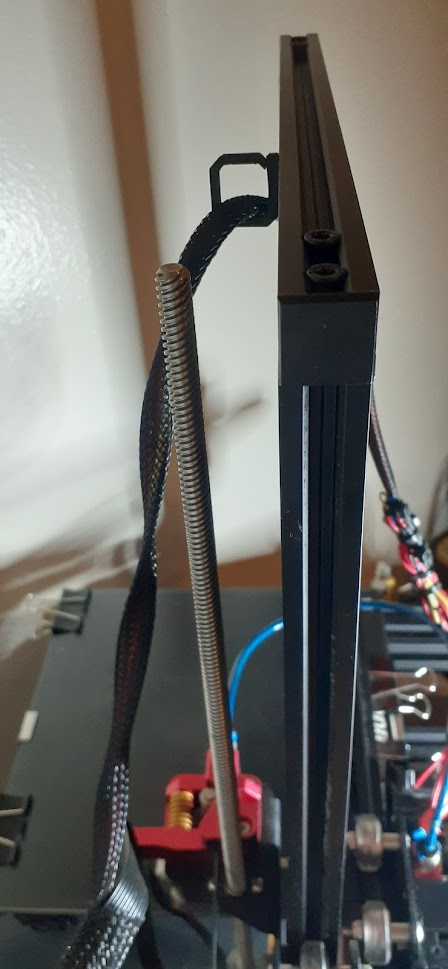
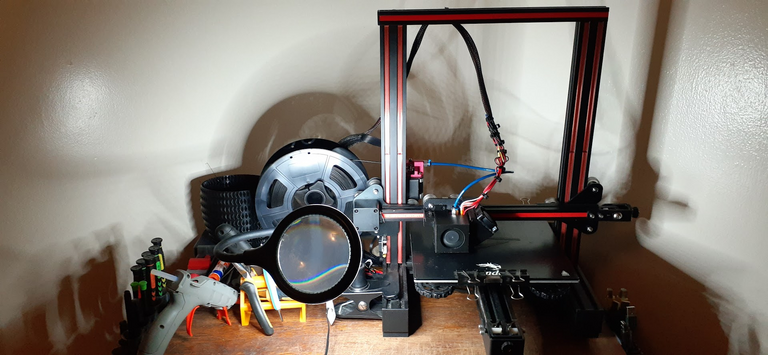
The printer cables were hanging up on the rear stepper motor and bed plate clips.
This has been a minimal problem for a long time now, minimal because it wasn't serious hang ups, but just something I didn't want to have to mess around with every print, making sure the cables were free.. Now I don't have to worry about it a bit!
I intend to clean up the wires and make them more appealing in the future. For now it is no hurry, because aesthetics have nothing to do with functionality, and these wires are all properly soldered and carrying electrical current just fine. Cleaning it up will be for my own peace of mind, and so that my printer looks a little better.
The amount of work a person puts into their hobby usually shows in the long run, and people who 3D print know when someone is serious about the trade. I'm certainly serious about 3D printing, and believe I am just getting started out still. I hope to be a mentor to others who are interested in it, and hope to become a good designer. I have very little experience in that department, but one step at a time.
As I type this, I'm printing a guitar capo, and feeling like I'm a little bit closer to being a 3D printing pro! :)
That will do it for today!
Thank you all for stopping by, your comments and support are always appreciated!
Have a great day! ~~@print3dpro
The Ender 3 V2 3D Printer Hot End Upgrade offers enhanced printing capabilities. With improved heat dissipation and temperature control, it ensures precise and consistent prints. This upgrade is a game-changer for enthusiasts and professionals alike. Moreover, its compatibility with a thermal label printer makes it even more versatile, enabling seamless printing of labels for organization and personal use. Experience next-level 3D printing with this cutting-edge hot end upgrade.
If you're looking to enhance your 3D printing experience and achieve better results, consider a printer hot end upgrade. Upgrading the hot end of your 3D printer can significantly improve printing precision and expand the range of compatible materials. To explore the latest advancements and find the perfect upgrade for your printer, visit now to discover the options available in the market.
GREAT WORK
Thank you!