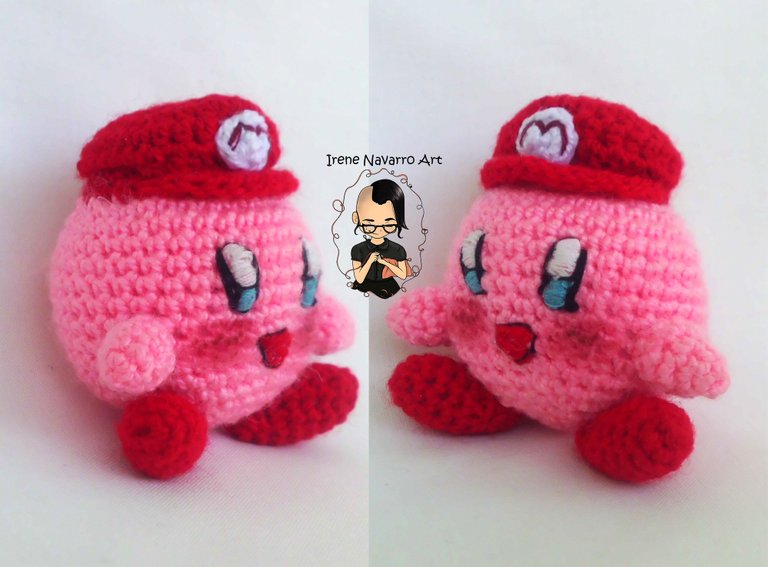
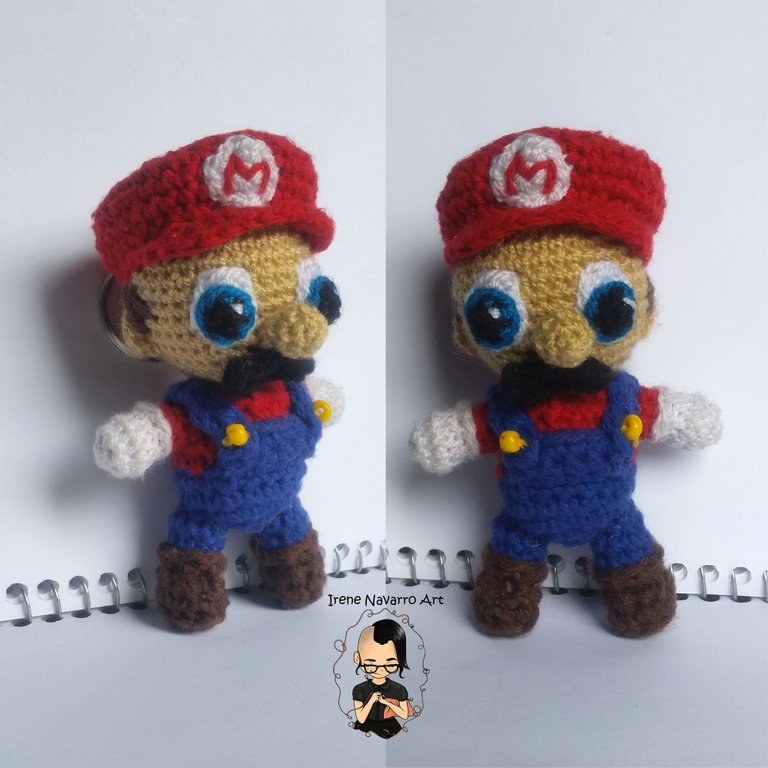
Greetings, a few days ago I made the Mario Bros star at the request of my son, I was thinking that I have previously made Mario and the Carnivorous Plant, so I had the idea to make Kirby and share the tutorial with you, because this is a cute character and does not have many parts which makes it a good tutorial to motivate people who are new to crochet. I hope you like it.
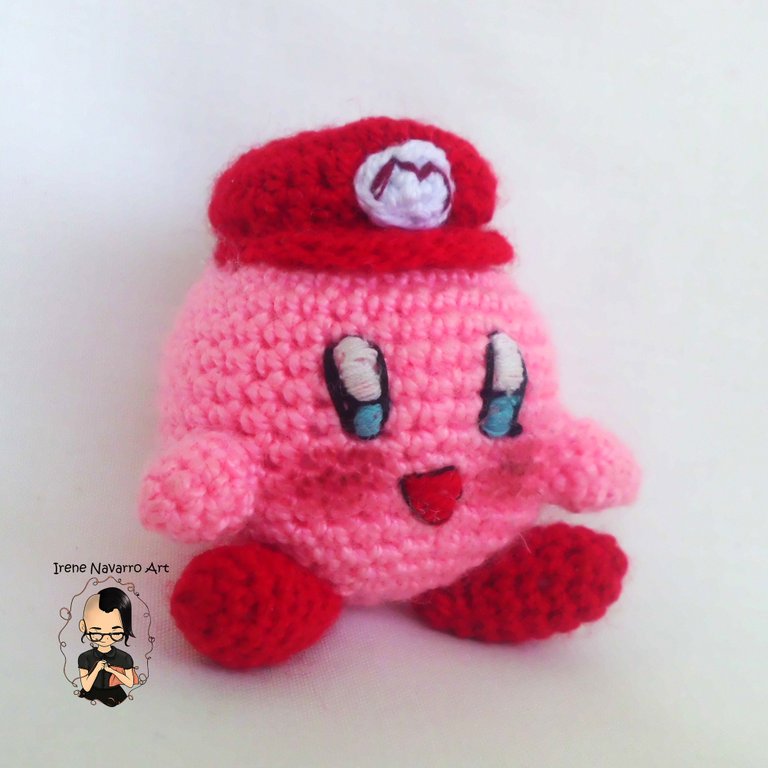

Imagen de referencia
Materiales / Materials
Hilo acrílico de color rosado, rojo y blanco
Fibra sintética o cualquier relleno.
Aguja de ojal grande
Aguja e hilo para coser de color azul, blanco y negro.
Ganchillo # 4 (1,25mm)
Pink, red and white acrylic yarn
Synthetic fiber or any other material to fill.
Large buttonhole needle
Needle and thread for sewing in blue, white and black.
Crochet # 4 (1.25mm)
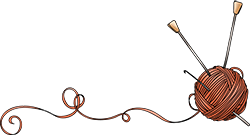
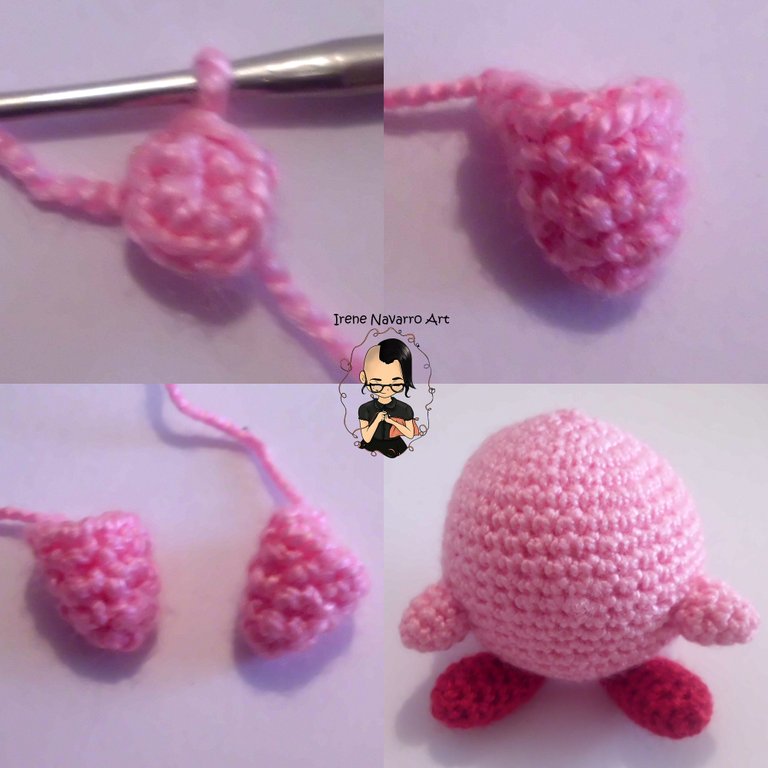
Cuerpo / Body
Knit 6 single crochets in a ring1 Round: knit 6 increases. Total stitches: 122 Row: 1 Single crochet, 1 increase, repeat. Total points: 183 Round: 2 Single crochets, 1 increase, repeat. Total stitches: 244 Row: 3 Single crochets, 1 increase, repeat. Total stitches: 305 Round: 4 Single crochets, 1 increase, repeat. Total stitches: 366- 14 Round: knit 36 single crochets15 Round: 4 single crochets, 1 decrease, repeat. Total stitches: 3016 Round: 3 single crochets, 1 decrease, repeat. Total stitches: 2417 Round: 2 single crochets, 1 decrease, repeat. Total stitches: 1818 Round: 1 Single crochet, 1 decrease, repeat. Total stitches: 1219 Round: Fill with fiber. Knit 6 decreases and hide the strand inside the fabric.
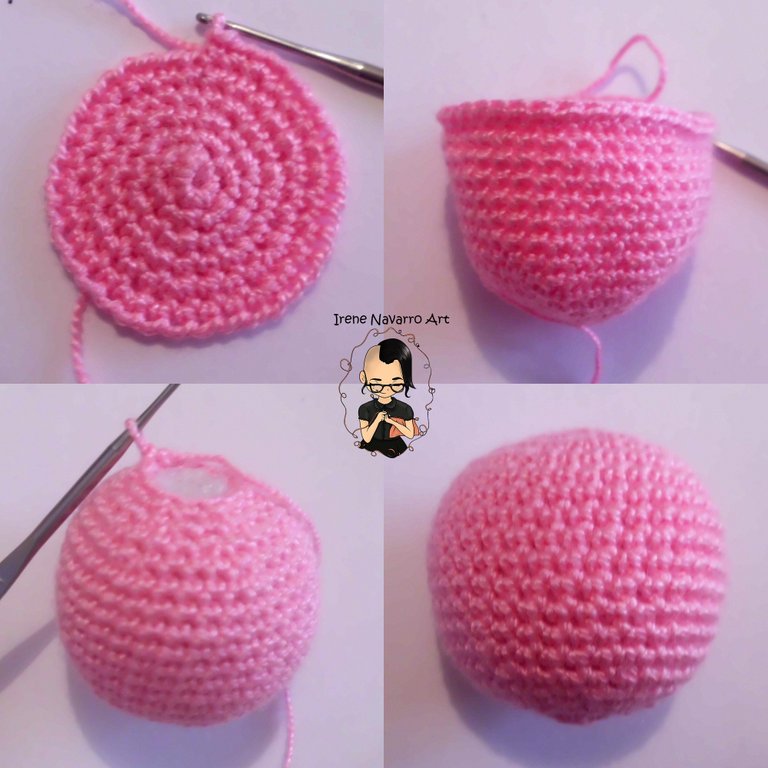
Pies/ Foot
Knit 6 single crochets in a ring1 Round: 1 Single crochet, 1 increase, repeat. Total stitches: 92-5 Round: 9 single points6 Round: 1 Single crochet, 1 decrease, repeat. Total stitches: 67 Round: knit 6 single crochets8 Round: Fill with fiber. Knit 1 single crochet, 1 decrease, repeat. Leave a long thread to sew.Make two the same and sew them to the body.
Brazos / Arms
Knit 4 single crochets in a ring1 Round: 1 Single crochet, 1 increase, repeat. Total stitches: 62 Round: 2 Single crochet, 1 increase, repeat. Total stitches: 83 Round: knit 8 single crochetsFinish with 1 slip stitch and leave a long strand to sew. Make two the same. Fill with fiber and sew the arms to the body.
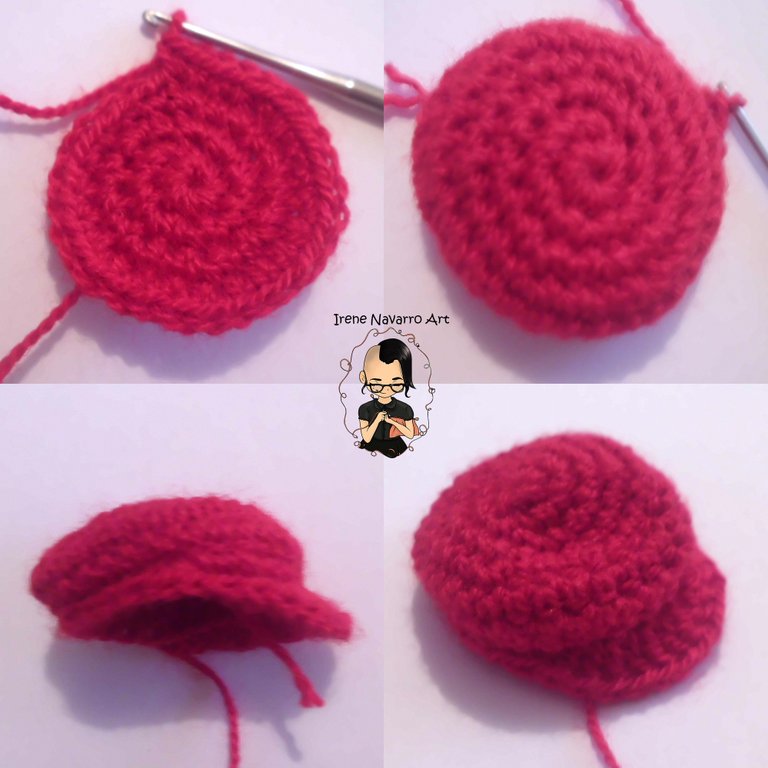
Gorro / Hat
Knit 8 single crochets in a ring1 Round: 8x. Total stitches: 162 Round: 1 Single crochet, 1 increase, repeat. Total stitches: 243 Round: 3 Single crochet, 1 increase, repeat. Total stitches: 304-5 Round: 15 double crochets and 15 double crochets.6 Round: 15 double crochets and 15 slip stitches.7 Round: 3 single crochets, 1 decrease, repeat. Total stitches: 248 Round: Taking only the front side of the stitches, work 1 slip stitch, 1 single crochet, 1 half double crochet, 6 increases of double crochets, 1half double crochet, 1 single crochet and 1 slip stitch. Leave a long strand to sew. Fill and sew the hat to the body.
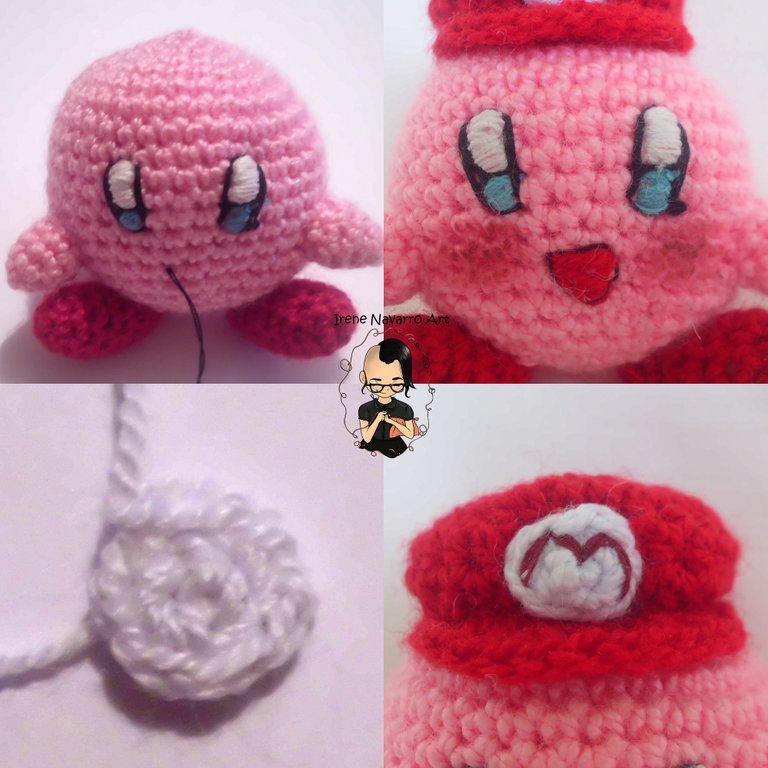
Detalles / Details
For the Mario Bros logo, with white yarn work 4 single crochets in a ring, then work 1 single crochet, 1 double increase and repeat. Close with 1 slip stitch and leave a long strand to sew onto the hat. Embroider the letter M with red thread, the eyes with white, blue and black thread, the mouth with red and black thread and finally paint the cheeks, the latter is optional.
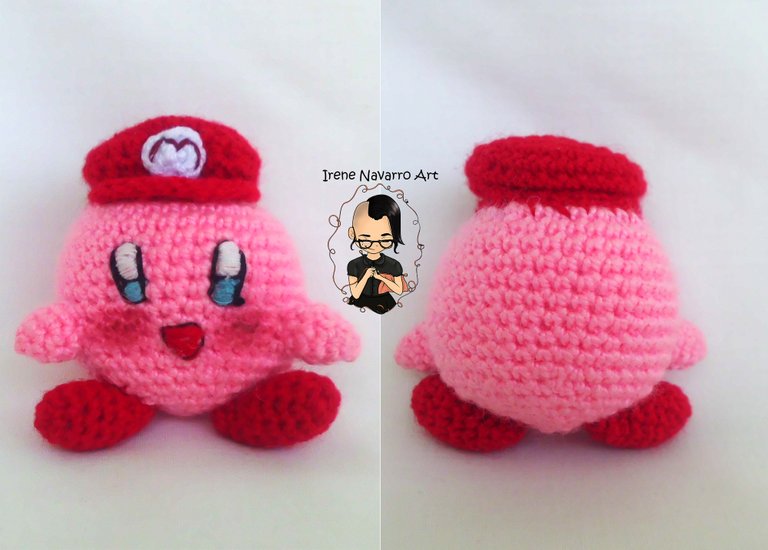
Resultado / Result
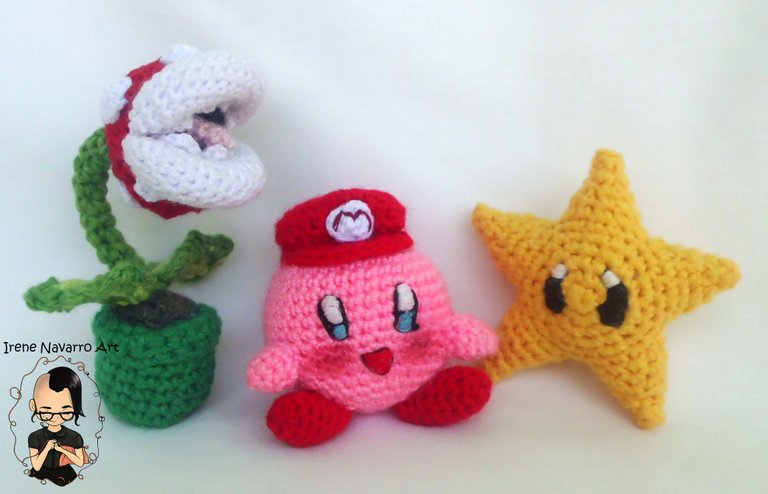
Trabajos Previos / Previous works


Imágenes tomadas con cámara Casio QV-R100 y editadas en Adobe Photoshop Cs6
Images taken with Casio QV-R100 camera and edited in Adobe Photoshop Cs6
Invítenme un Café/Support Me on Ko-Fi
Si te gusta mi contenido y quieres apoyarme a seguir dibujando, pintando, escribiendo y tejiendo puedes invitarme un Ko-fi en el enlace que les dejo aquí abajo, les recuerdo que es fácil, se usa Paypal y Tarjeta. ¡Muchas gracias a todos!
If you want to support my art you can also make donations for the value of a coffee (Ko-Fi) this uses Paypal, it is simple and with it I will be able to continue knitting and buying materials to create and share my publications

https://ko-fi.com/irenenavarroart
Espero les haya gustado. Les invito a leer mis próximas publicaciones y siempre estaré dispuesta a responder sus preguntas y comentarios, también pueden seguirme y contactarme en cualquiera de mis redes sociales. ¡Muchas gracias!
I hope you liked it. I invite you to read my next publications and I will always be willing to answer your questions and comments, you can also follow me and contact me on any of my social networks. Thank you!
Congratulations, your post has been upvoted by @dsc-r2cornell, which is the curating account for @R2cornell's Discord Community.
Enhorabuena, su "post" ha sido "up-voted" por @dsc-r2cornell, que es la "cuenta curating" de la Comunidad de la Discordia de @R2cornell.
Muchas gracias por el apoyo :D
hermosoo como siempre.
Muchas gracias :)
Muchas gracias por el apoyo a mi publicación :D
Me encanta como te quedó el personajes super adorable. :3
Muchas gracias <3
¡Hola!
Tejes muy bonito.
Me gusta cuando se detallan las puntadas.
Elegiste un proyecto bello. Muy colorido. A los niños les fascina Mario.
¡Saludos!
Muchas gracias, me gusta dar los detalles para que se entienda lo que hice, gracias por apreciarlo :D Saludos!