Last year, I knit a sweater for the first time in years and I explained as I completed it that we had a custom/history in our family of our mothers doing the "finishing." So even though I had been knitting since I was a teenager and I have probably done between 12-20 sweaters/coats/vests, I am new to "finishing." I didn't even try to convince her this time -- lol. And now that I know what is involved, I think it was smart of my mother to do that for me because I have learned it can make a huge difference and she might have been rescuing me. (Thanks Mom!)
What is finishing?
So what am I talking about? It's blocking, sewing the seams, picking up stitches and adding the neckbands, that kind of thing. And she would pick up the neckband stitches for me but I would still knit the band.
Blocking
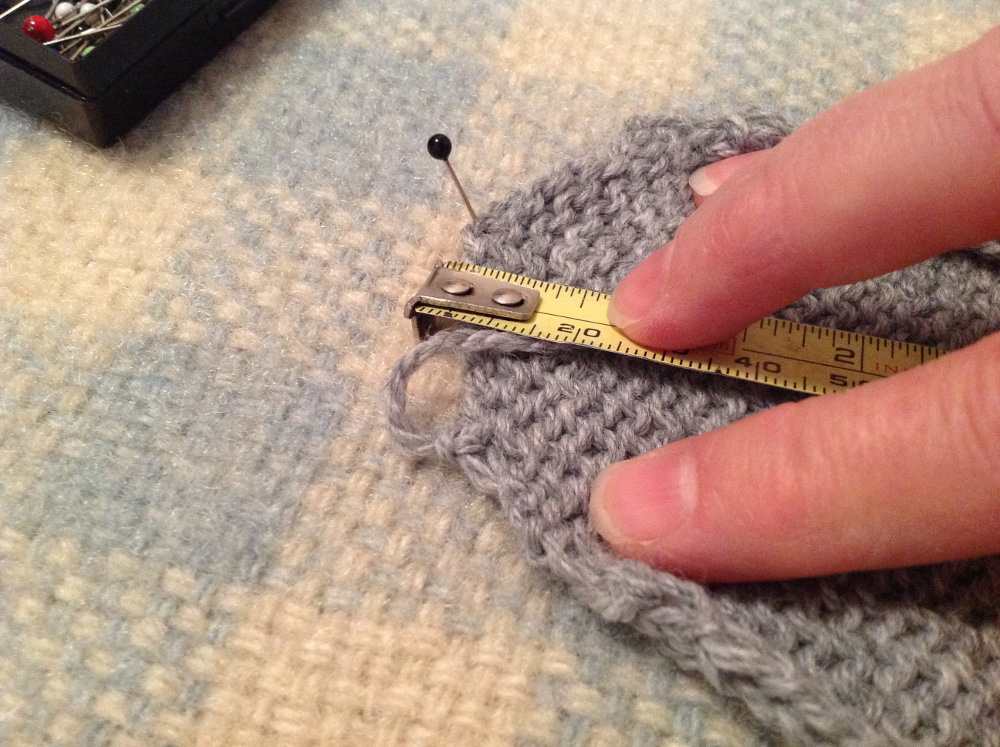
So I was finished knitting and here I am measuring the sleeve from cuff to cap. It varies with different types of yarn that some stretch out of shape and can become much longer so we measure, pin and wet. If I were using a different type of yarn, like linen, I might wash the pieces first and then pin. We only want to flatten it, not squish it or we would use an iron. This makes the stitches more regular, the pieces easier to handle, in the right shape, and ready to sew.
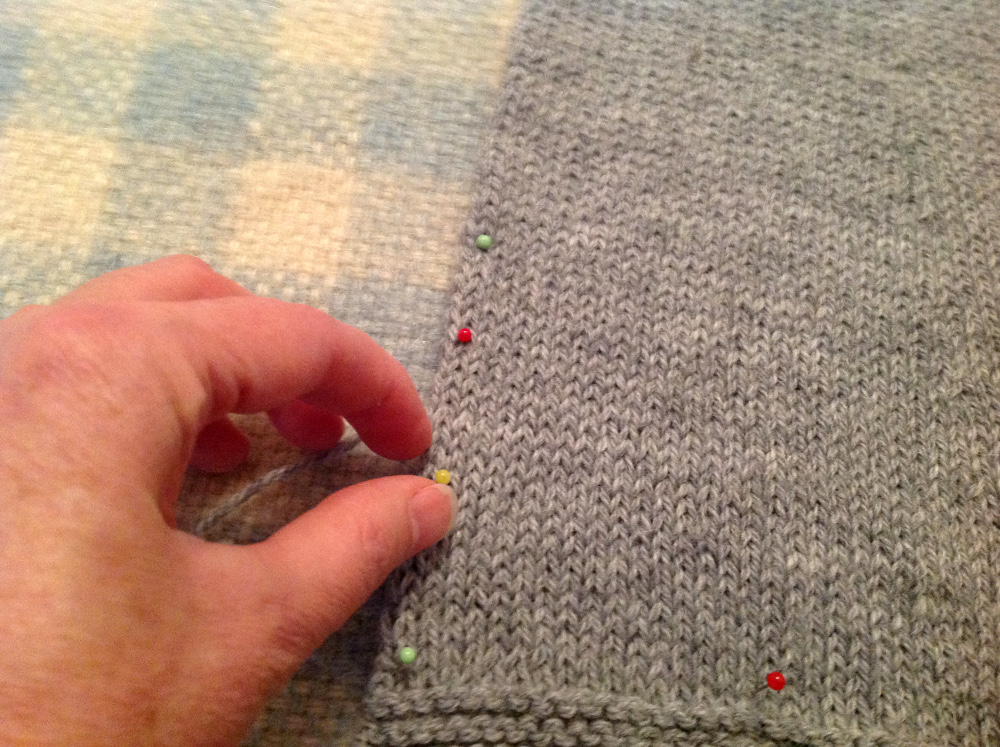
They sell fancy boards to do this but I had figured out if I just put down a blanket on my carpet, I could put the pins in and they would stick into the carpet's underpad. For whatever reason, I chose to do this one, above, with the knitting face up. Note to self: Next time, put it face down.
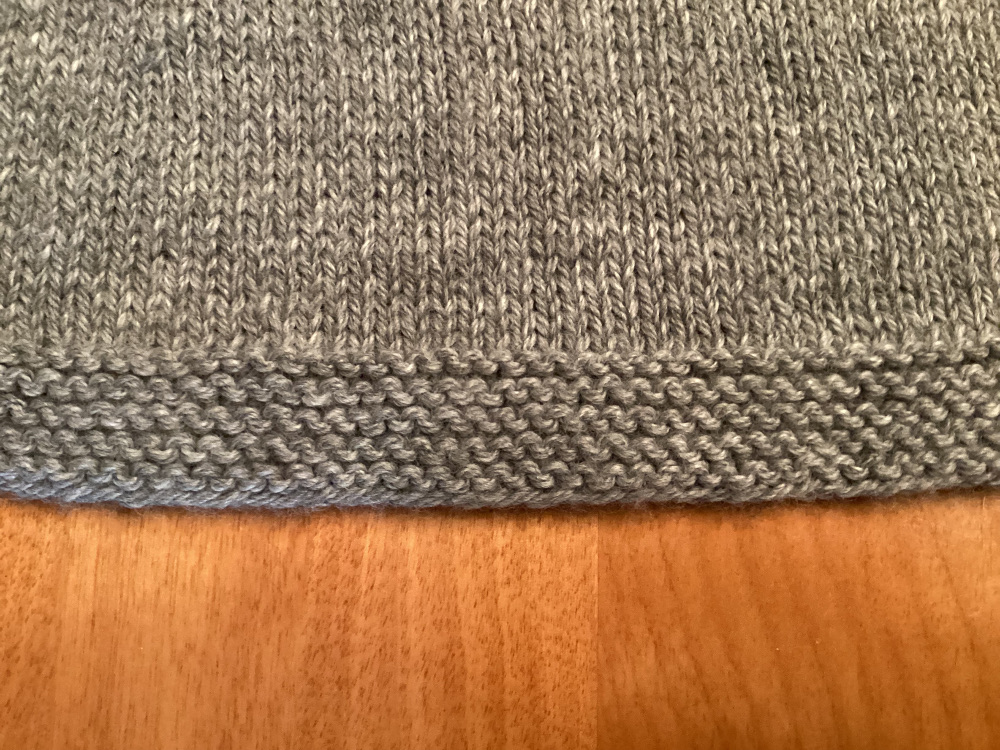
It's not a big deal but when I turn it over, you can see why I say that -- the piece curls a little. If I were to put it face down, I could pin it closer to the edge. Something else here, look at the garter stitch trim on the cuff. The edge isn't as even as it is in the stockinette stitch above. Once again, note to self: put one stitch of stockinette along the edge for a neater seam later.
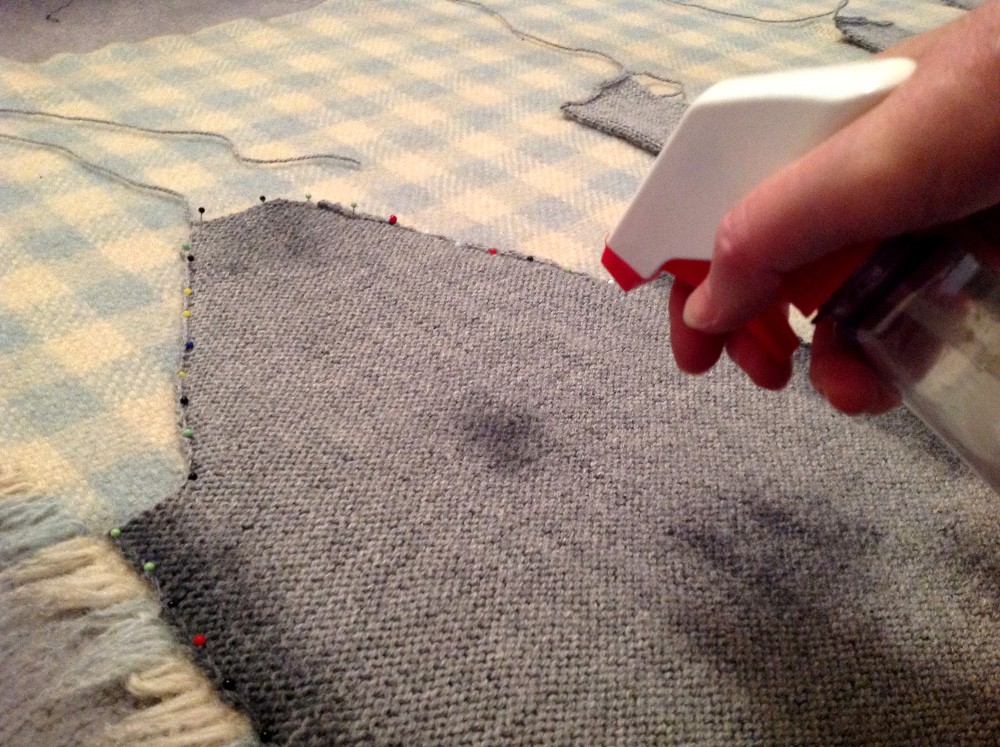
Once pinned, I wet it. Now I had lots of space to do this but those pins with the coloured balls work best and I didn't have a lot of those so I blocked a few pieces at a time. I also put the sleeves on top of each other so I don't have to measure them twice. It just takes a little longer to dry that way.
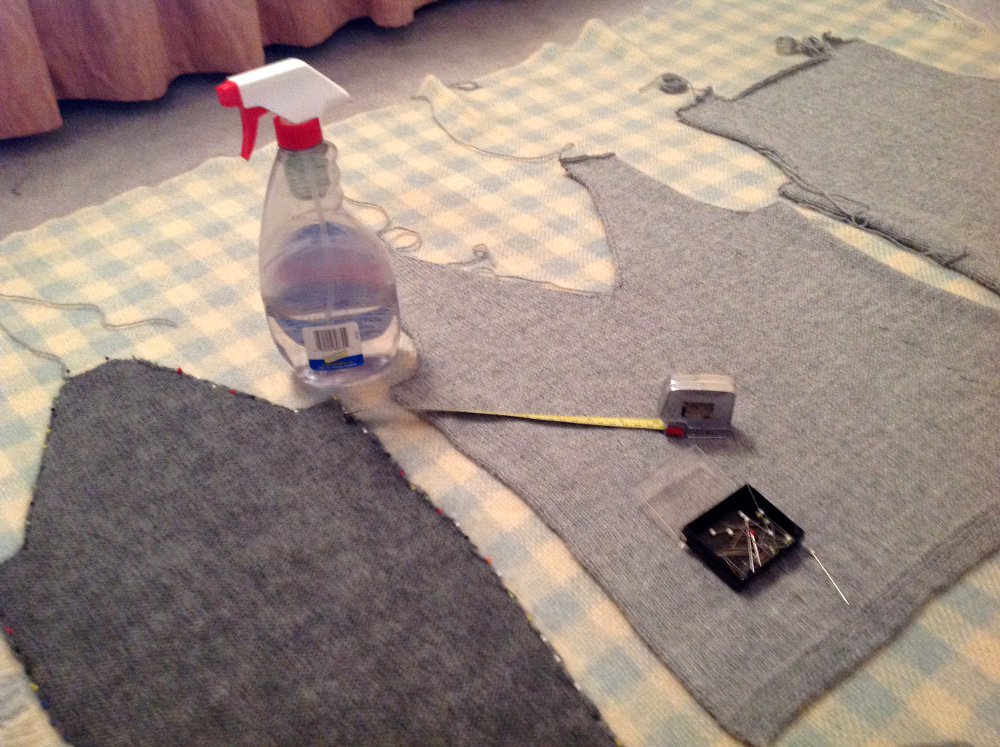
That's just water in an old window cleaner bottle. I should mention that the pattern gave me the measurements for each piece.
Seams
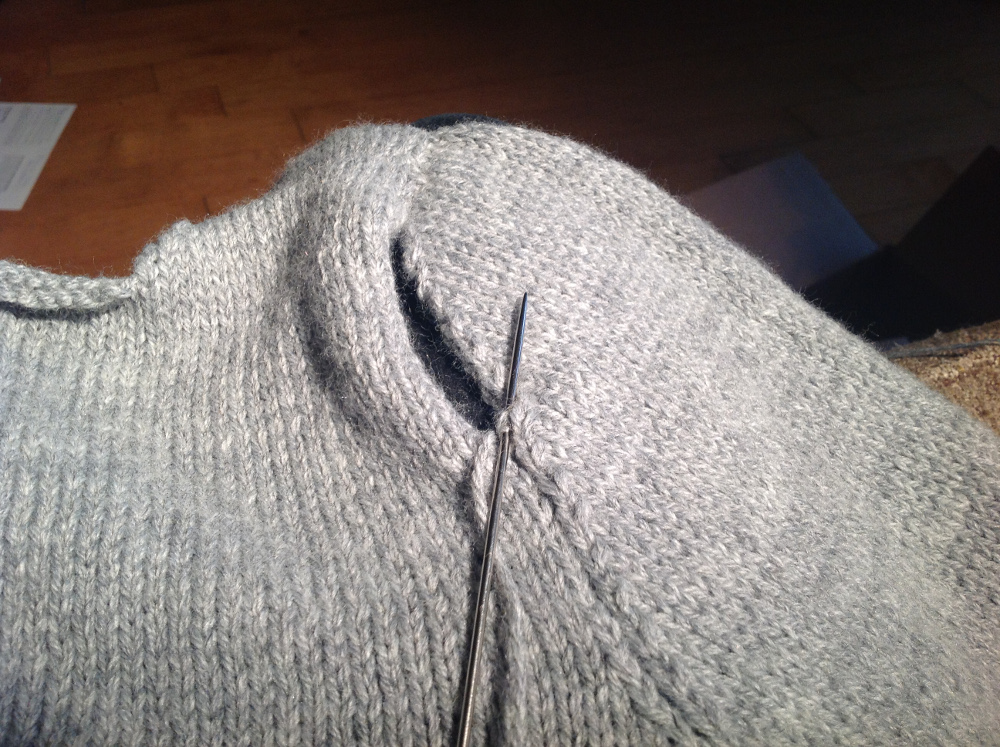
First, I joined the shoulder seams, back to front. Then I started putting the sleeves in by joining the top of the sleeve to the shoulder. As I was sewing all of the ends in later, I wondered why I didn't just pin it in place to give myself fewer ends to sew in.
I think my technique is improving.
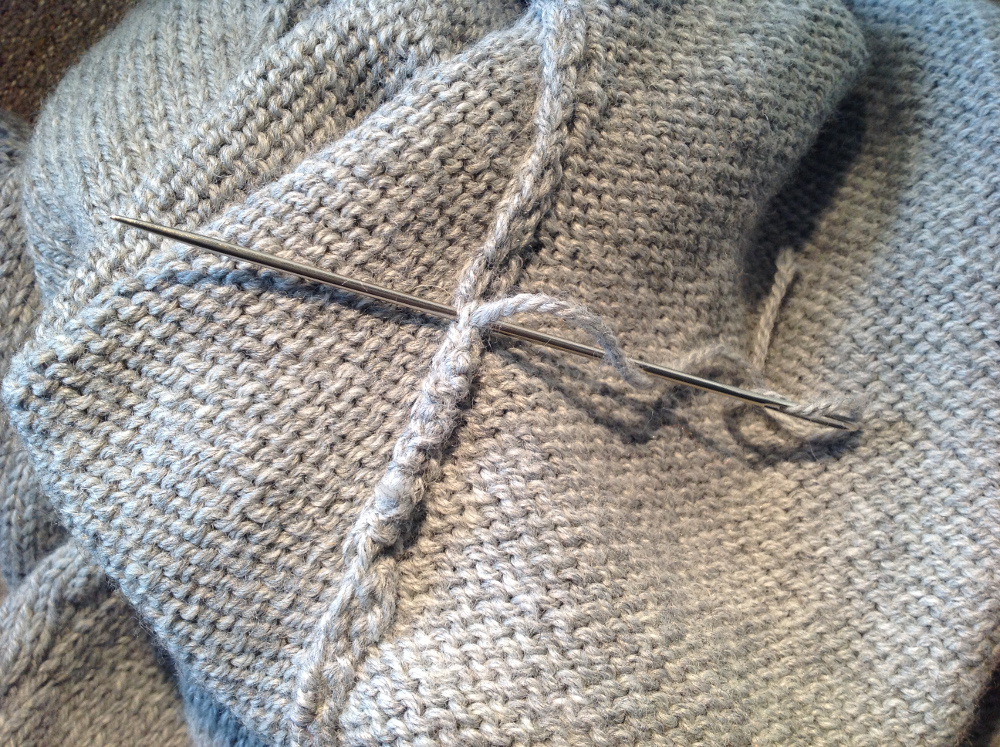
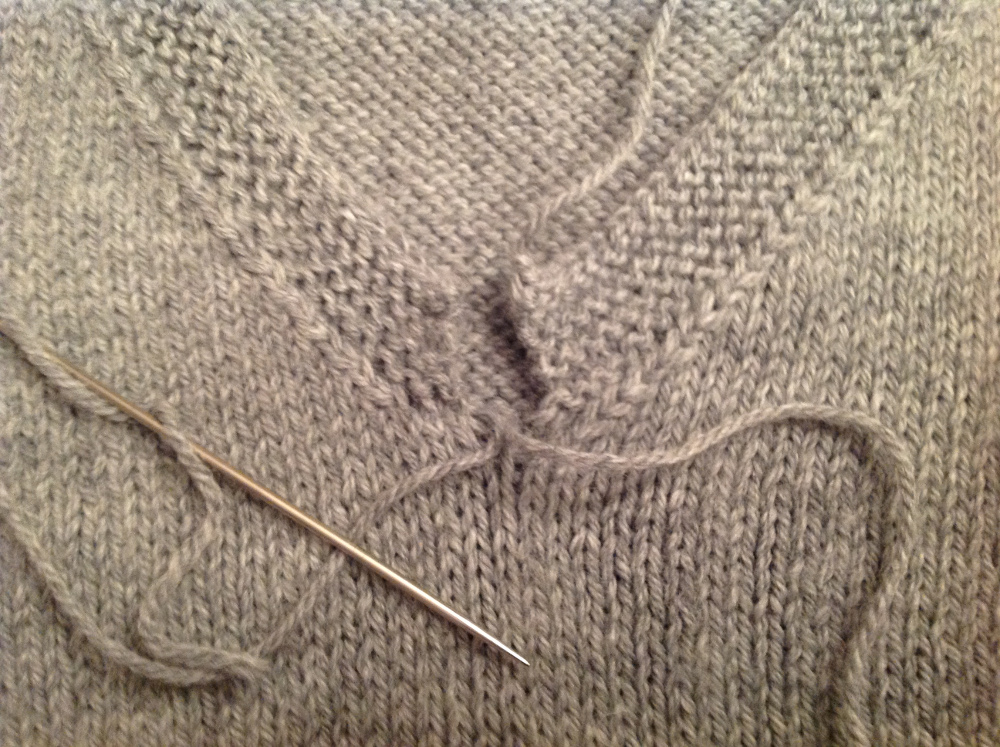
Here is the reverse side after sewing in an end. I plan to get better at this. That big needle is actually a tapestry needle and it's a little long but I don't lose it!
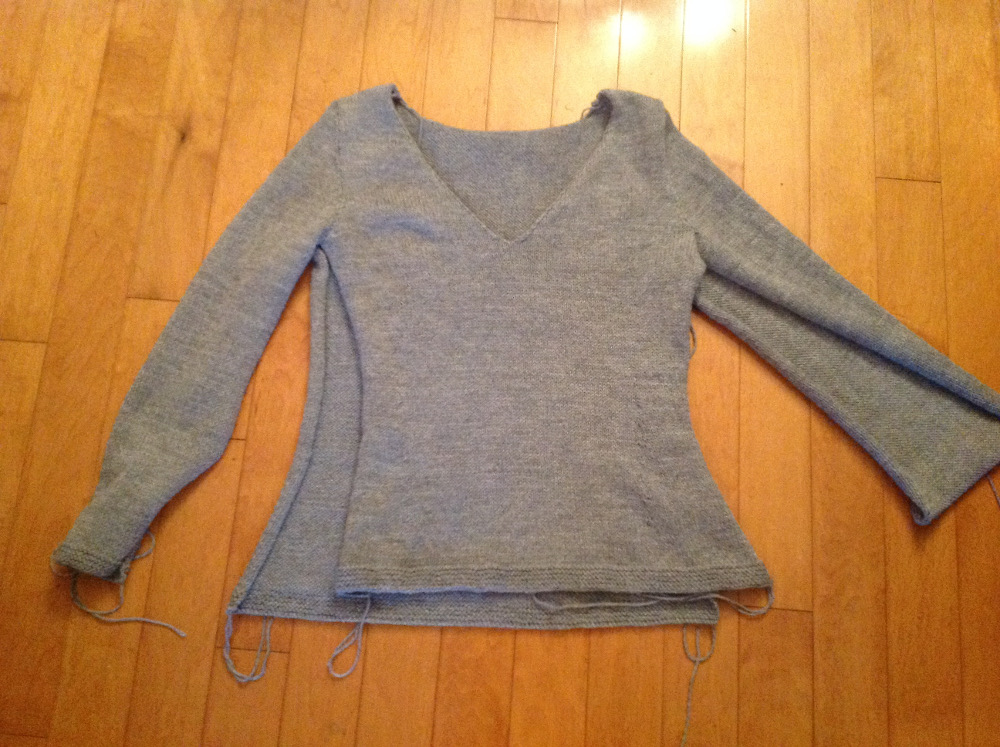
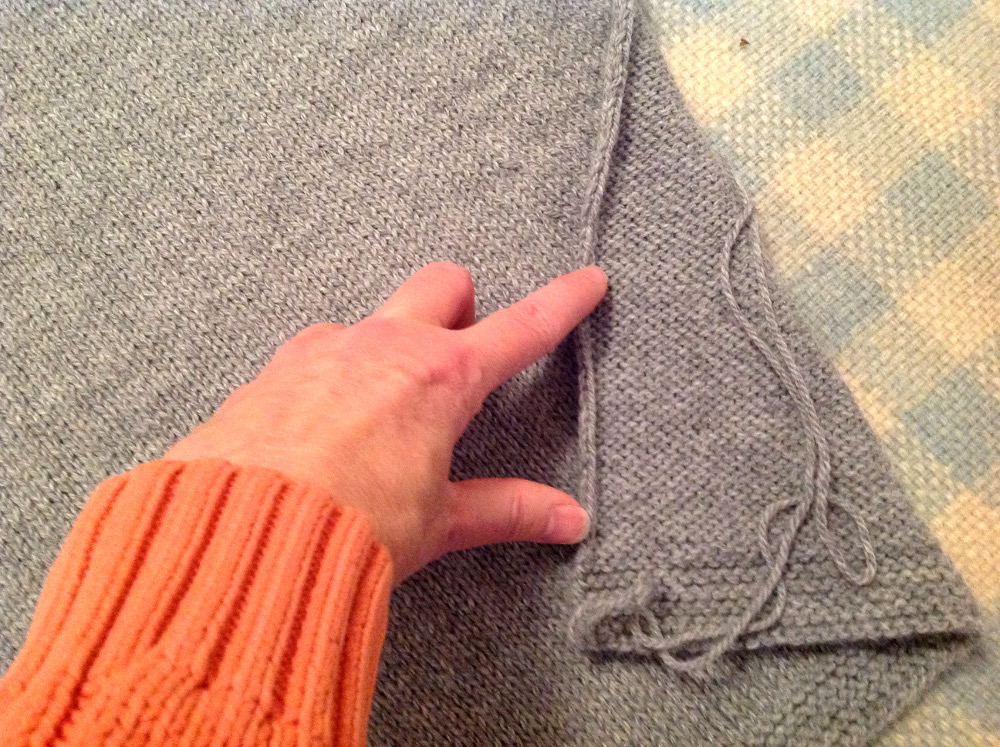
At this point, the underarm and side seams are left to do but now I can try it on! I couldn't help wondering if the cold shoulder look, open sleeves, or open tunics were invented by people who got tired of doing the seams. Next I pinned it at the armpits, cuff and hem. Then I sewed up the sleeves and down the sides.
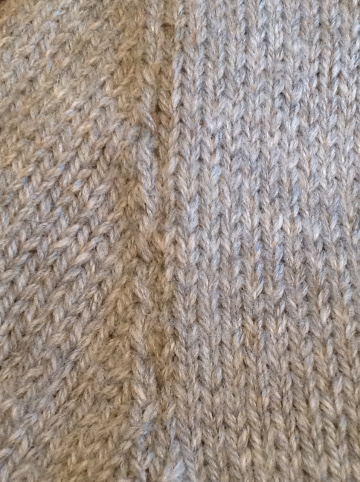
Before I go onto the neck band, I wanted to show you this. We didn't have the internet when I first started knitting. When the pattern suggested I use a long tail cast on, I went to YouTube to learn how to do that and I like the results, above. It took me 3 attempts to get a nice smooth edge like this.
Likewise, I was also doing matching decreases and increases and learned slightly better methods.
Neckband
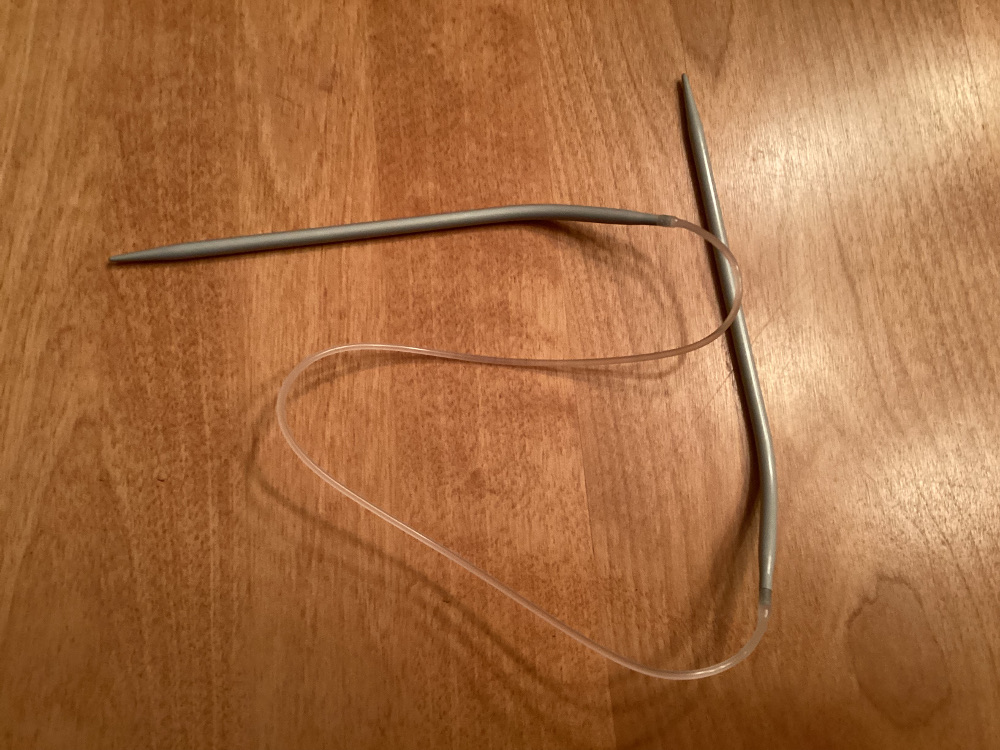
This is the part I was dreading; picking up stitches for the neckband. I had the instructions that said, "pick up 1 stitch for every bound off stitch, 3 out of every 4 along the diagonal, and 2 out of every 3 along the vertical sections." This is done using a round needle, above.
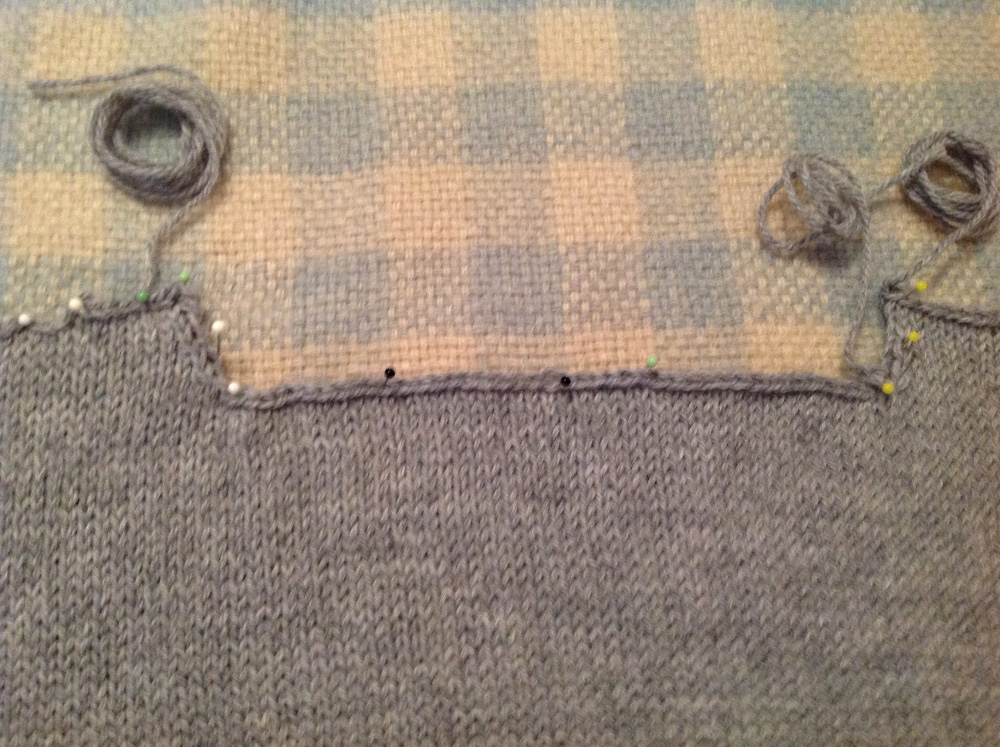
I started in the middle at the front going up one side of the neck, then across this back area and down the other side. When I didn't get anywhere near the number of stitches I was supposed to have, I put it away overnight and tried again the next day. On the next attempt, I picked up every stitch I saw and was still short but it was good enough.
The back of the neck, above, was a place where I made a mental note to make sure the stitches stayed tight on either side of the cast off stitches. By the way I'm not beating up on myself. Every sweater we make is another opportunity to learn and the next will be even better!
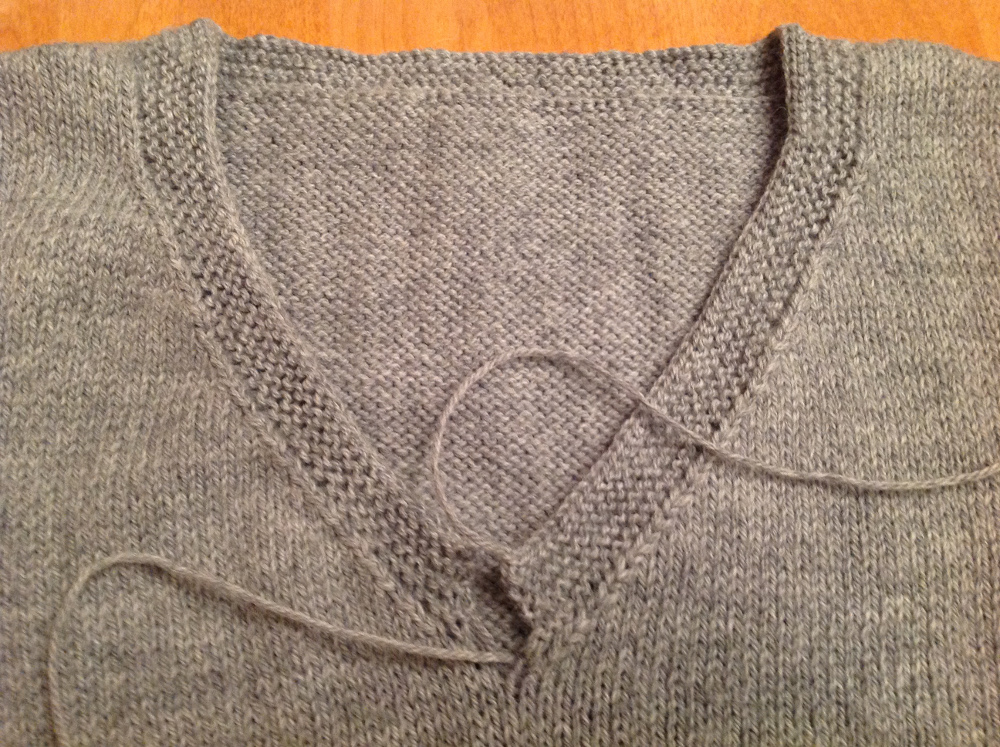
That looks nice! When knitting the front, the decreases on either side of the neck are done one stitch in to leave that nice column on either side of the band. I was very careful when picking up the stitches not to wreck that! At the very tip of the v-neck and the start of the band, I had a few more loose stitches which I think I managed to hide fairly well.
Light grey thread instead of the wool made the overlap less bulky.
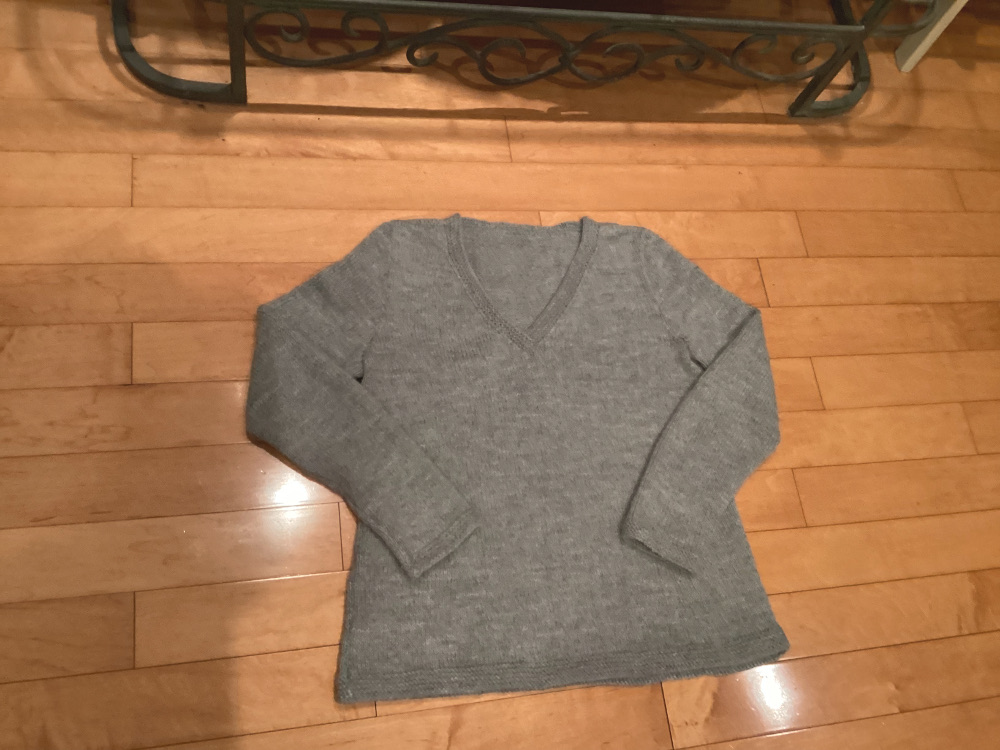

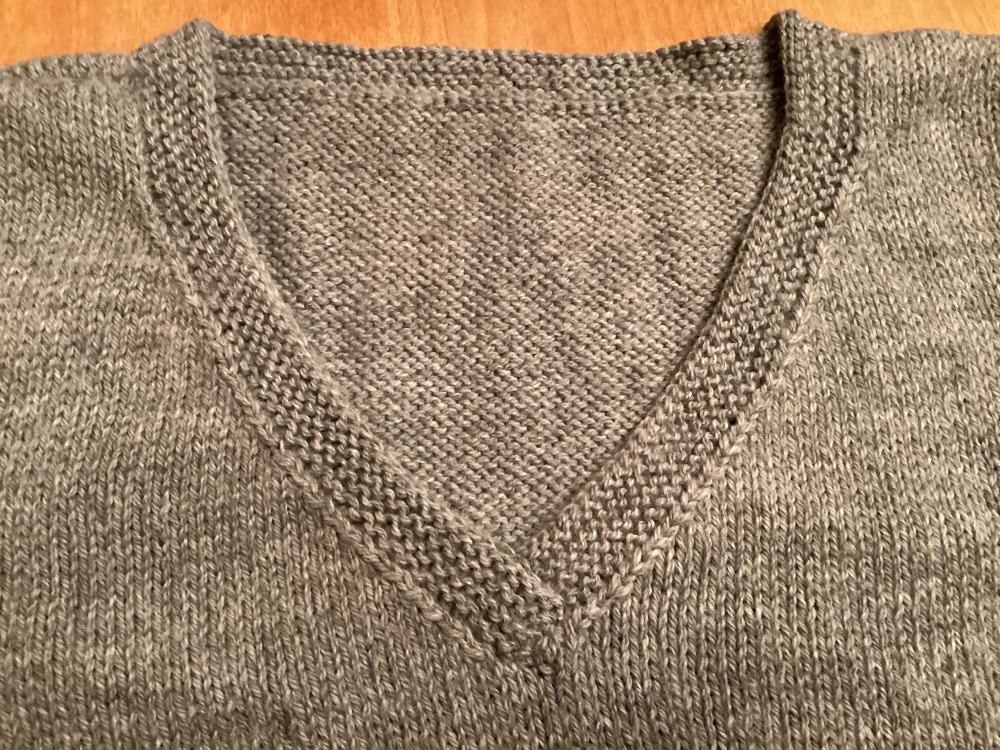
This is the second custom fitted pattern I have followed and it was designed to be a loose fitting hourglass shape. Success!
References
Finally Finished!
Amy Herzog Designs
Images

Enjoy!
Photos from the iPad(s) of @kansuze in Kanata (Ottawa), Canada. @kansuze
Fine!
You can open a store and take orders :-)
Hi @ludmila.kyriakou! OMG it takes me so long, I don't think I could do it for a living.
@kansuze ❤️ Hi !
Because this is such an awesome post, here is a BBH Tip for you. . Keep up the fantastic work
Thank you!
Congratulations @kansuze! You have completed the following achievement on the Hive blockchain and have been rewarded with new badge(s):
Your next target is to reach 16000 upvotes.
You can view your badges on your board and compare yourself to others in the Ranking
If you no longer want to receive notifications, reply to this comment with the word
STOPCheck out the last post from @hivebuzz:
Support the HiveBuzz project. Vote for our proposal!
" I couldn't help wondering if the cold shoulder look, open sleeves, or open tunics were invented by people who got tired of doing the seams" You have a point! When I do sweaters, I try to do them in the round whenever I can to minimize seams. However, I am now knitting a cardigan in flat pieces from a vintage pattern so there will be lots of finishing to do soon. My first sweater was a cardigan done in flat pieces and knit on the train during my commutes when I was a young woman in a big city. Now it is deja vu as I make this new sweater, in pink cotton, just like my fist sweater. !BBH
I haven't done a sweater in the round yet and I don't really like using my round needles but it might be because they are old/stiff. I had typically done bottom up raglans and these set in sleeves are new for me.
These finishes were really flawless. That edge dampening technique is really clever, it surely made all the work easier. I think that sometimes we are concerned about finishing our projects quickly and we leave out neatness a bit, but you should never lose sight of this.
Now that your sweater is finished you can look great in it. Greetings ❤️.
Thanks @lauramica! I used to think the sweater was done when I finished knitting it and it has taken some time to figure out there is still much work to be done.
Definitely!
Hi @nikv! Nice to see you. Happy New Year!
Wow! Very complicated work! I wish I could learn this skill one day! Making my own sweater without going to the shop to buy one ‘made in China’! 🙀😂
You can do it @kaminchan. All you have to do is start then persevere.
Thank you very much. Perhaps that’s my future project when I could have more spare time.
Cheers.
Wow this looks amazing thanks for sharing very beautiful beautiful
Thank you!
Wow! So many things to do. It seems like knitting is more complicated than crocheting. And it looks so good you good. Well done @kansuze.
Thank you!
You’re welcome.