Welcome DIYers And Other Thrillseekers!
This is my first time posting in the Build-it community. I hope it's okay. I'm not so much building in this post, or really doing a how-to, as much as I'm sharing my experience with doing something myself, which I would normally allow someone with more installs under their belt and therefore more knowledge than me, do in my stead.
Plus, if they screw it up, I don't get blamed. That's very important, I've found, when it comes to these kinds of setups.
However, in this case, I kind of ran into a problem with the whole professional install approach with the new dishwasher. After what I thought was pretty thorough research (I've been at it off and on for the better part of six months), I bought the dishwasher online through Home Depot. It's not our first replacement of a large appliance. After 15 years of living in the same house, we've been one by one getting something newer and little more uptown than what was initially put in when the house was built.
So, since we've had the other appliances 'professionally' installed before (albeit through Lowe's) such as a new LG oven, as well as a Maytag washer and dryer—all at no additional cost—I figured, hey, let's do it again with the dishwasher.
Nope.
Dishwashers, I discovered, aren't free to install. They come with a fairly hefty $140 fee. Oh, and of course, you need to buy a new hose, a new electrical hook up, and assorted other items, which tacked on an additional $27.
When I saw that at checkout, I said, "Forget this!, I'll do it myself," since in my ignorance and indignation, I really didn't know what I was getting myself into.
I mean, how hard could it be?
I've hooked up hoses before on washing machines. I've plugged in so many electrical cords over the course of my lifetime, I've literally lost track of the hundreds of times I've done it. The only two things I hadn't really done before, I figured, was level a dishwasher and then secure it to the bottom of the counter top. I could use a level and a hand drill, so I figured I had those two covered, too.
So Far, So Good
When the time came for the dishwasher to be delivered, I was there to greet the delivery guys. Apparently, they were at the end of their shift, tired, and more than ready to go home. So much so, they left behind their dolly and our old dishwasher I was paying them to haul off. The daughter-in-law had to go flag them down before they completely drove off.
I at least got them to take the new dishwasher out of the box and bring it into the kitchen. After they left, I told my younger son that I was glad, as much as I could sympathize with their situation, that they weren't the ones installing the dishwasher.
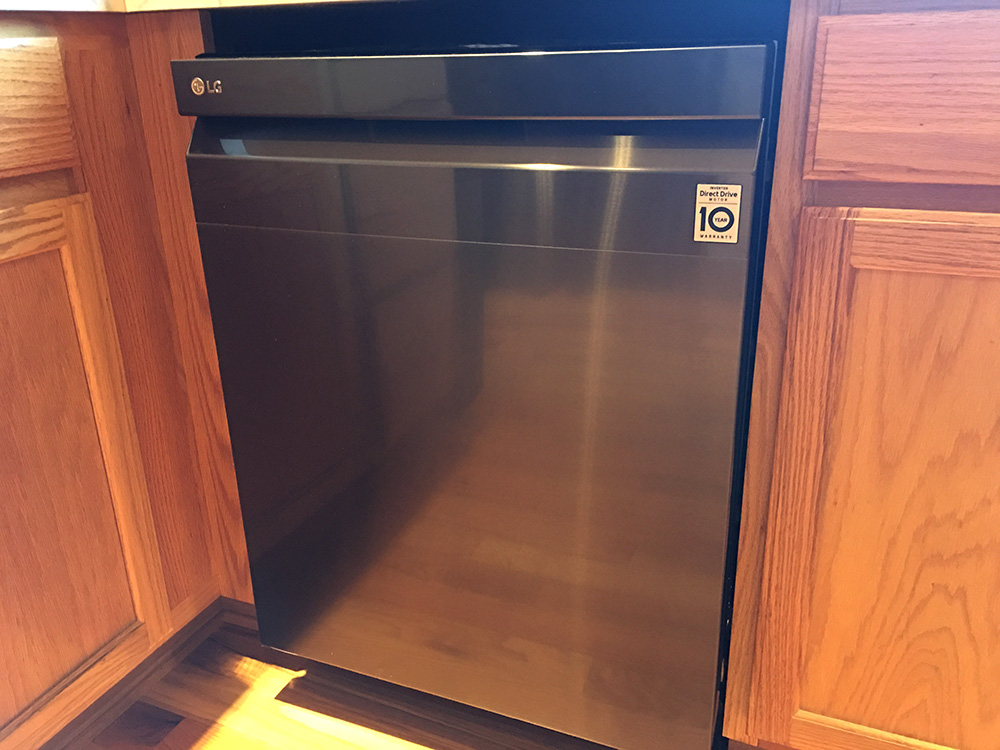
I was pretty sure I had the dimensions right as far as the size of the machine was concerned. I figured there must be some sort of standard for these kinds of appliances. I also figured there must be some way to adjust for height in the event we needed it. When I pushed it into its place next to the sink, it fit pretty well. Width and depth were both good, but there was a good three or so inch gap between the top of the dishwasher and the bottom of the counter.
I wasn't too worried about that. I actually kind of liked the look as is. And since the controls would now be at the top of the machine rather than on the front outside, I figured a gap might actually be good for it.
First Bump In The Road
The electric cord was a standard plug on one end, and three bare wires on the other. Okay. I don't know what I was expecting, but this wasn't it. My son needed to wire up his dryer this way, and he nearly shocked himself doing it.
In this case, the dishwasher installation guide specifically stated I should shut off the dishwasher outlet at the circuit breaker. It actually had its own. Who knew?
I was starting to see why this installation might be a little more complicated. But the dryer the Lowe's people installed a while back had to be wired, so I still didn't understand the additional cost.
When my wife came home from work and found that I still hadn't installed the dishwasher, she wanted to know why. I showed her the cord. That kind of freaked her out. Without even thinking I could do it, she wanted me to get in contact with Home Depot right away. She didn't want the dishwasher (and presumably me—I didn't ask) blowing up.
I reminded her how much it cost and that I could figure out how to do it. She insisted I talk to Home Depot. So, I called up the service number on the confirmation of purchase page. It turns out, after delivery, you need to call the local store. Thanks to COVID-19, our store closes at 6 PM, and it was already later. So, I got a reprieve until the following morning.
The next day, I called the service number to the local Home Depot. After waiting about five minutes and being bounced around different departments, I finally got the installation coordinator, who proceeded to tell me that it would take a week to schedule and that the price was now a whopping $180. When I asked, she didn't know why the difference in cost. She was just reading off what the computer told her.
I thanked her and hung up. No way I was paying that much.
Realizing this was getting worse, I called up a repairman we had come over to fix our washer last month. He was reasonably priced and very knowledgeable, so I figured if anyone could help me out, it was him.
Nope.
He didn't install dishwashers. Too much liability, he said. He blamed it on the plumbing part. Water leakage causing damage.
Great. Back to square one.
At that point, I decided. We were stuck with me getting this installed.
Step One—The Hoses
I waited until later in the day, when the grandkids were taking their nap, to start the project. I also spend the intervening time talking myself up. You need to go in mentally prepared and ready to meet all challenges.
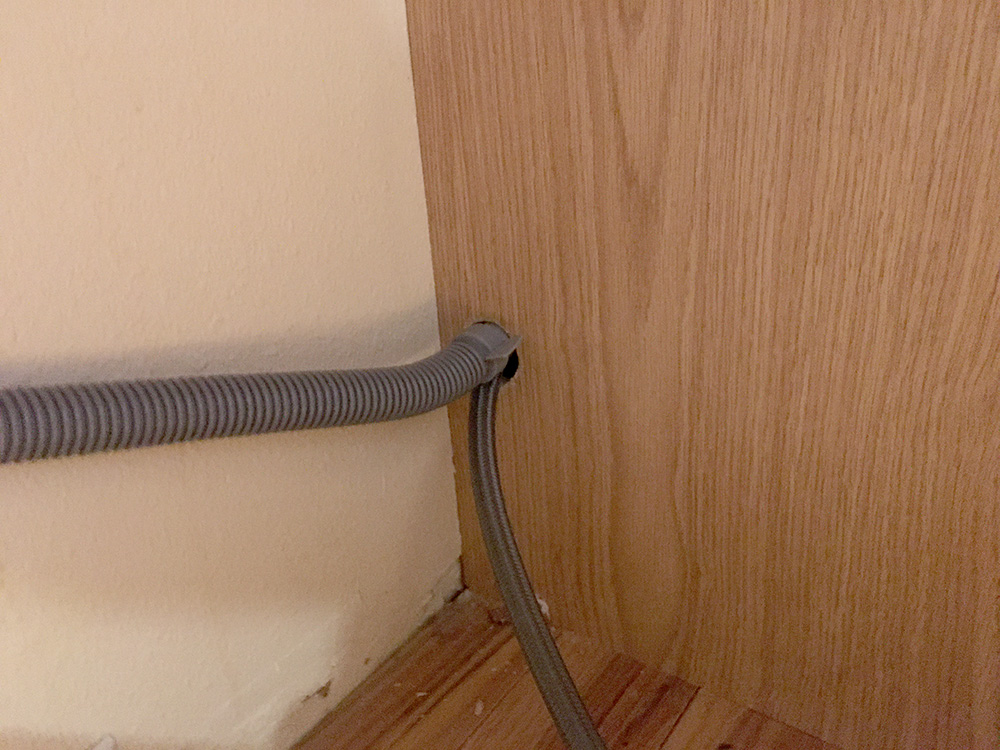
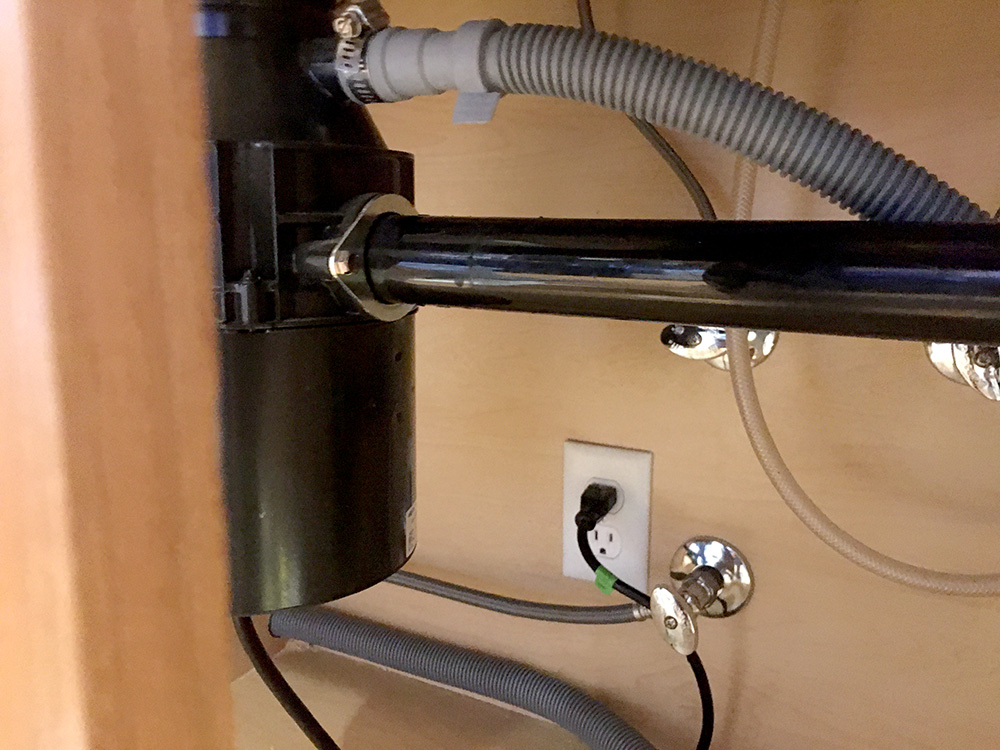
At around 2 pm, I pulled the dishwasher out and took a look at the hole I had to cram both the drain and water hoses. They needed to go through the wall between where the machine went and where the water and drain hookups were under the sink. Since the machine would need to go into its space and stay there because the hoses were only so long, that's where the install manual said to start. Somehow, the previous hoses had fit through one hole, but it didn't seem to matter if I pushed, pulled or wedged, these new hoses didn't want to go through.
I guess I could have tried longer, found something else to help squeeze them in, but my brain eventually went in a totally different direction.
If one hole isn't big enough, how about two?
I wondered if I might be breaking some kind of appliance installation rule here. There was only one hole for two hoses, after all. Was that for convenience sake? Did it look more professional?
Well, I readily admitted I wasn't a professional, dang it, so I went for two holes.
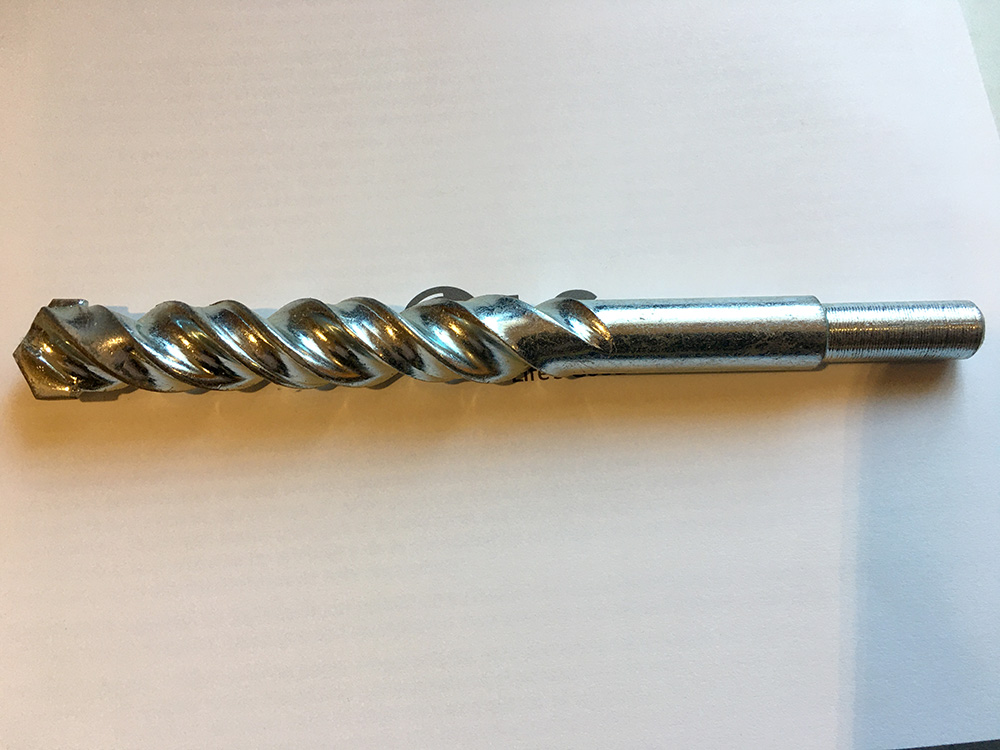
The question was, though, did I have a bit big enough to make a proper sized hole? If I did, I'd never used it before. When I went rummaging through the drill bit case, I came across the one above. Somehow, I could tell that it wouldn't be big enough. The hose might fit, but not the coupling. Not sure what else to do, I went ahead and drilled the hole
Just as I suspected, the hole was just not big enough. I figured I could probably make it larger by running along the inside of the hole with the drill bit, you know, bore it out a bit. Within short order, that did the trick. Now with each hose having it's own hole, there was no need to mess with only one hole anymore.
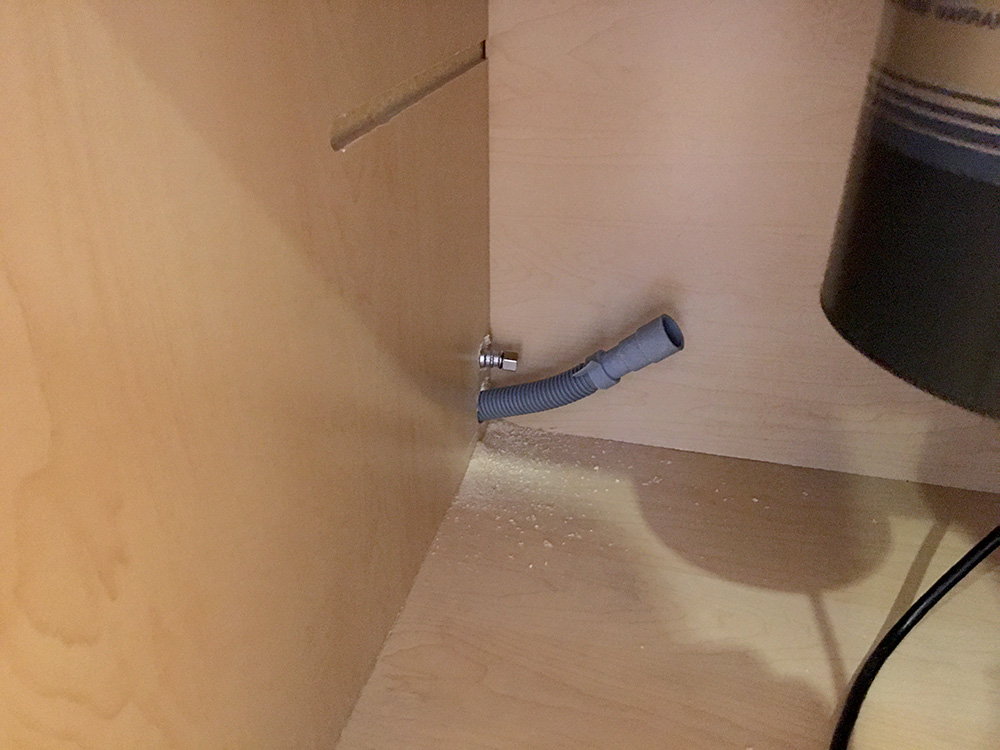
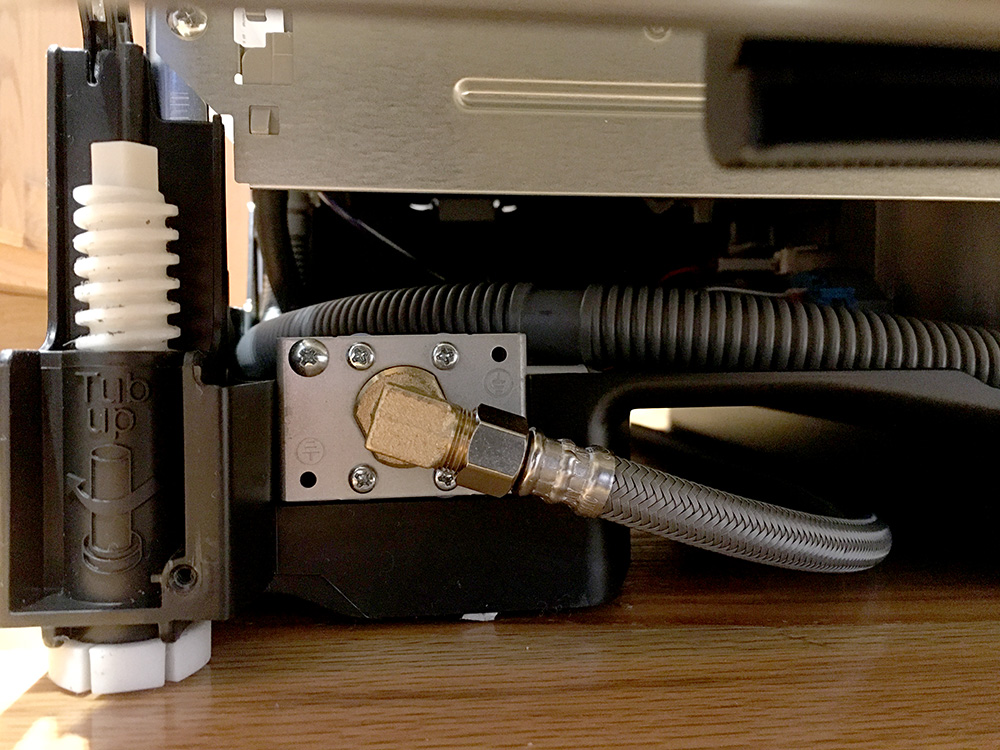
The drain hose was already attached on the machine end, so the next step for me was to screw on the water hose. That wasn't too difficult. It's just underneath the machine and thanks to the plate it goes into, using a wrench once hand turning is no longer possible is a pain. Still, after several quarter turns, I got the coupling to a point where it seemed like it wouldn't leak.
Step Two—The Wiring
On to the job I was dreading most. One crossed or loose wire and who knows what might happen.
Now, I wasn't a complete novice to wiring. I've installed light switches and other minor electrical things like that, so I decided this would be no different. If the power was turned off to the outlet, I couldn't get shocked by merely plugging it in, and when I did flip the breaker, I figured I know if something was wrong.
Then, of course, I could just do the job right and everything be okay. That would actually be the best option.
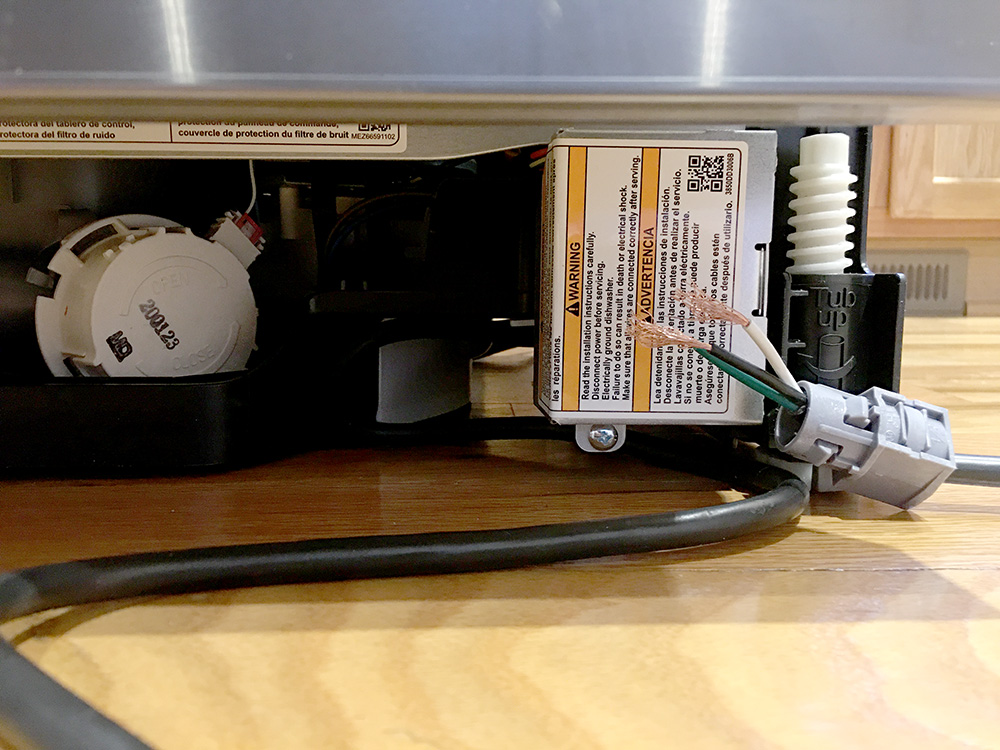
In addition to having the water hoses in place before the dishwasher was pushed in, so, too, the plug end of the cord needed to go in. So, with the circuit breaker off and the plug end in, I went back to the front in of the machine and down on the floor. This is one of those jobs where you basically have to lie flat on your stomach.
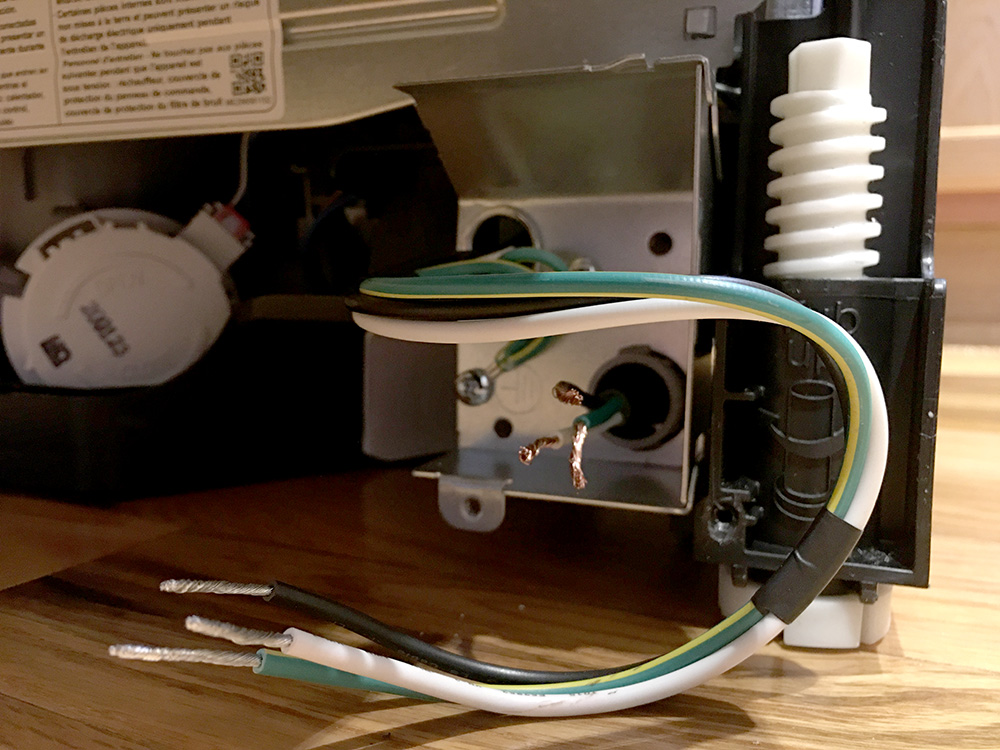
First, the three wires had to be fed through a hole in the junction box. You got to the junction box by removing the front plate. Inside were three more wires, which I would be matching up with the ones on the cord. Thankfully, they were color coded to match.

I proceeded to take the ends of each colored wire and then stuck them inside a provided end cap, twisting them on as far as they would go. This way, no exposed wiring and more of an assurance of wire end contact. The main problem with trying to do that was I only had so much length on the cord end to work with, and the angle I had from the floor didn't give me a whole lot of space to maneuver.
I decided I needed something to raise the front end. It didn't need to be too high off the ground. Just enough for a few inches. The granddaughters step stool to reach the sink in the downstairs half bath was the only thing I could think of to do the trick, so I snagged it. Worked like a charm, and soon, the rest of the wiring was capped.
Step Three—Raise, Level and Plumb
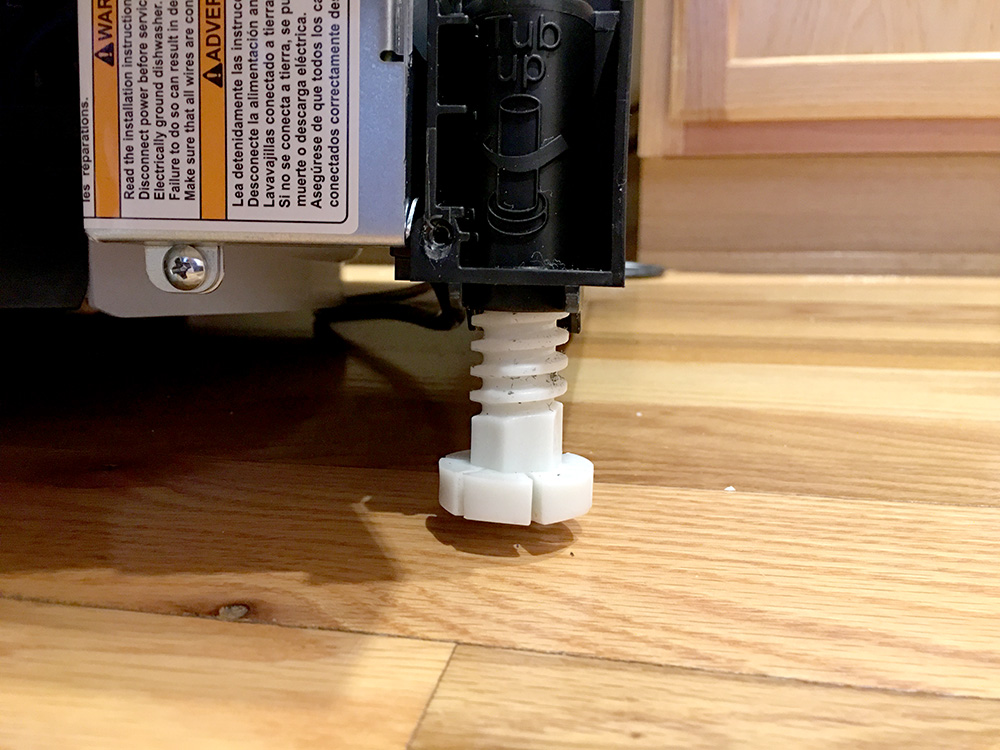
With the wire box plate reattached, I took on the next task of raising, leveling and making plumb the dishwasher. The manual said this was very important for the dishwasher and the door to function properly. Things might not work right if the dishwasher wasn't exactly the same height all the way around. Unfortunately, outside of a level, there wasn't much of a way to determine that while I was twisting the feet down.
I tried keeping track of the turns of each foot on the front side. Then I checked to make sure it was level. I wasn't quite there but with a couple more twists on the left side, I was perfect. Now I had to raise the back end up to match. That proved to be more of a difficult task because as I turned the wheel with a Philips screwdriver from the front side, it wasn't easy to tell without looking from the top down if I was actually accomplishing anything.
Finally, after a little bit of exercise, I could see I was making progress. Eventually, I was able to verify with the level that indeed the back matched the front.
Back To The Hoses
I still needed to connect the water and drain hoses to their ends under the sink. Doing that presented its own challenges thanks to where things were located, but resigning myself to the fact that any position I took was going to hurt, I just gutted it out and got the job done. Soon, both hoses were securely fastened and I was ready for a test run of my handiwork.
We Have Ignition!
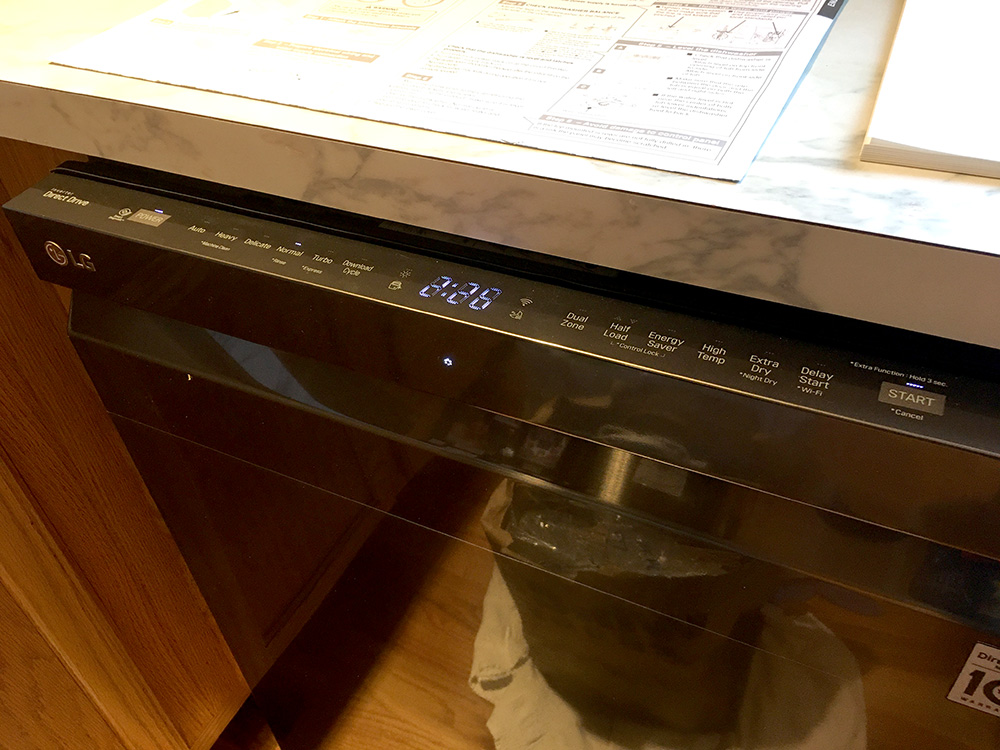
On went the circuit breaker. Nothing happened, so I took that as an encouraging sign and returned to the kitchen. I touched the power button. A few lights blinked at me, along with the digital timer display. Yes! The electrical worked!
Emboldened, I followed the instructions for a 'dry run' of the dishwasher. Basically, you choose the shortest settings and start the cycle. When I did, the machine whirred very quietly to life, and then it began to fill with water.
Repeatedly, I checked both ends of the water line. No leaks. No drips. Success! I let it run a couple of minutes, ping ponging back and forth between under the dishwasher and under the sink. Still good. I figured I would have seen something by then, so I went ahead and cancelled the cycle. That caused the water in the machine to drain out.
No leaks on the drainage side, either. All the water was flowing exactly where it was supposed to go.
Victory!
That meant there was only one step left.
Secure The Machine
At this point, I'd spent two hours installing the dishwasher. I was pretty sure a professional could have done what I did in less than 30 minutes. That's why they get paid the big bucks ($130-$180 USD for a half an hour worth of work—not bad).
I was tempted to skip this last step, but after trying to open and close the door a couple of times, I realized that wasn't going to fly. The door didn't open without the machine wanting to slide forward.
That meant I still needed to raise it another quarter of an inch from where I thought it was good. It also meant I needed to make sure that I could still get to the top side controls. We'd chosen that option over the front side controls since the little ones now roaming the house were getting tall enough (if not on tippy-toes), to push the buttons on things.
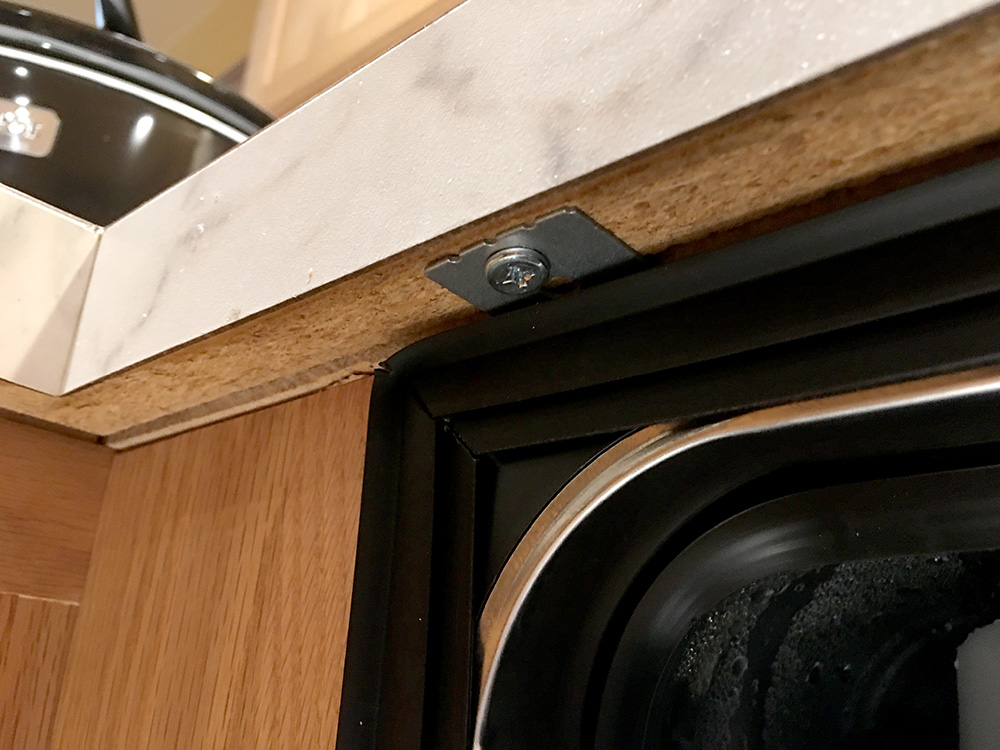
So, the machine needed to be just high enough, and just in enough—on both sides—to screw in the brackets.
At first, I wasn't sure how the brackets were supposed to fit into the the top part of the machine. After that, though, it was pretty much smooth sailing. I had to watch to make sure the right side didn't move out as I screwed in the left side, and then ended up moving the right out just a twinge anyway. I think I finally got them square.
Mission Accomplished. Mostly.
We've ran the dishwasher now two or three times, and so far, no issues. No leaks, no electrocutions or explosions, and the dishwasher is performing up to expectations. No more spots on the dishes and no more messing around with the racks.
There was one thing that didn't work as advertised, though. And I had nothing to do with it, other than selecting the make and model of the dishwasher. I bought this particular LG because it said it worked with Alexa, the Amazon voice assistant. Well, it does, just not in any way I find useful.
First of all, the LG app you download needs to be synched with the Alexa app, and then, you have to go in and get the LG skill for the dishwasher and connect it with your Amazon account. After that, it all works.
You get to ask Alexa the status of the dishwasher.
That's it.
You can't turn it on. You can't do anything with the settings.
The LG app is fairly limited, too. I was so disappointed with the Alexa bit that I haven't tried it, but I believe, based on the options I've seen, that you can do something remotely with the settings. That is, if the dishwasher is on. However, it's set up to turn off after a few minutes as an energy saving measure if washing and drying settings are not chosen.
The dishwasher is connected to the WiFi, though. That's cool, right?
Thanks LG. For nothing.
Regardless, the dishwasher is installed. It works, and I saved a bunch of money on installation fees.
My wife was so happy, and surprised, that I was able to do it on my own, she's decided there's more things around the house I can fix.
Yay, me, right?
Riiiiiiiggght.
Until then...
...DIY. Just don't die.
Okay, I'll work on the tagline.
All images courtesy of Glen Anthony Albrethsen
All comments, as always, are welcome. Have you ever installed a dishwasher before? Any tips? Based on my description, anything glaring I should go and fix before it blows up?
Well done, grandpa! I am not a handy man - not mechanically inclined at all. I would have called the company to send someone to fix it. And then I won't be asked to fix anything else. haha...
Hey, Vincent.
Well, I tried. But the price tag for their install was just too high. If it had been more like the fee to haul off the old dishwasher—$25, or even double that, we probably would have tacked it on to the cost of the dishwasher. It's okay, though. I got some practical experience in getting the dishwasher ready to go, and now that I know what's involved, I can either do it faster the next time (the one we had lasted over 15 years, so I figure, unless we move before then, that I might not have to do another one for a while), or we'll just factor the install into the overall cost of the new unit. Which means we go that much more cheaper.
I have been trying to follow your philosophy, and have done so for most of my recent life to a tee. However, when the spouse says do this, the options start to shrink as to how to get out of it as time and patience pass. :)
Hi Glen,
Oh well, a man's got to do what a man's got to do - to make a spouse happy. I am sure the skill you picked up in this episode will come in handy at some point.
Well, it might be sooner than later. We're supposed to go looking for a new faucet for the kitchen sink, either Friday or Saturday, after which, I will be installing. Without looking at the existing faucet, I think my main concern is going to be making sure we cover up whatever holes there are underneath it with the new one. After that, I think as long as I turn the water off before I go detaching things, I'll be good. :)
It'll still take me twice the time to get it done, if I'm lucky.
Ah, a job waiting for you over the weekend. Looking forward to hearing all about it. :-)
Oh, yeah. Woohoo!
We tried this a couple of other times and didn't get very far. There may have been something to do with what needed to be covered, too—holes, rust stain from the current faucet, something. She has one picked out that doesn't have such a wide base, but that basically rises out of the counter behind the sink. Not sure if that will actually work. I might have to tear things down before I'll know for sure.
Good luck. Have fun! 😊
Why are these things never simple? 😅
@tipu curate
Upvoted 👌 (Mana: 12/18)
Hey, @minismallholding.
Very good question.
I guess when I look up whatever it is we're looking to replace, I probably should also look up what it takes to install, and then figure out what to do from there. Unfortunately, when you go to buy something like that online, they don't tell you what the installation is until you're basically checking out. It's not an upfront disclosure. For some people it might not be a deal breaker at that price. It was for me. :)
that dishwasher must be a difficult one then to spend two hours installing it
Hey, @rockor.
Difficult probably wasn't it, really. It was the first time for me, and I basically took more time than I probably needed, solving some initial problems, like the hole for the water hose, and then fumbling around connecting wires.
That's usually the way it is with me. The first time generally has some unforeseen (to me) problems to overcome because I wasn't knowledgeable enough to avoid or overcome them to begin with.
I do have to say, though, there was a level of satisfaction to this. Having my wife think I can do stuff—that's a double-edged sword. :)
I hope you like it, it looks like a very high quality product
Hey, @equeqtra.
It's been good so far. Haven't needed to use it too much yet, so time will tell if I made a good purchase or not. For a while I had only LG TVs because of the quality, and so I've been checking out the other devices they sell. My wife, though, was the one that suggested we get a dishwasher to match the oven we bought a while back. Unfortunately, I couldn't convince her the washer and dryer needed to be LG, too. She insisted we buy Maytag instead. As I mentioned, the washer already needed fixing. Apparently it broke a bolt somewhere inside (maybe holding the drum?) that the repair guy said he's never seen happen in 30 years of repair work.
Now he has seen everything. :)
This post was shared in the Curation Collective Discord community
community witness. Please consider using one of your witness votes on us here for curators, and upvoted and reblogged by the @c-squared community account after manual review.@c-squared runs a
Hey, @ocd.
Thanks for this initiative. Here's the #posh