🇺🇸
Hello friends of HIVE, for the fourth publication I have prepared an original material so you can learn how to make a gift bag, especially for Valentine's Day. This bag will be very useful for any special date, in addition to save costs, and well as you know everything that is made with our own hands always has more sentimental value. I hope you can join me and enjoy my content of the day.
🇪🇸
Hola amigos de HIVE, para cuarta publicación he preparado un material original para que puedan aprender como hacer una bolsa de regalo, especial para el día de San Valentín. Dicha bolsa será muy útil para cualquier fecha especial, además de ahorrarnos gastos, y bueno como saben todo lo que es hecho con nuestras propias manos siempre tiene mas valor sentimental. Espero que puedan acompañarme y disfrutar de mi contenido del día.
-- Materials --
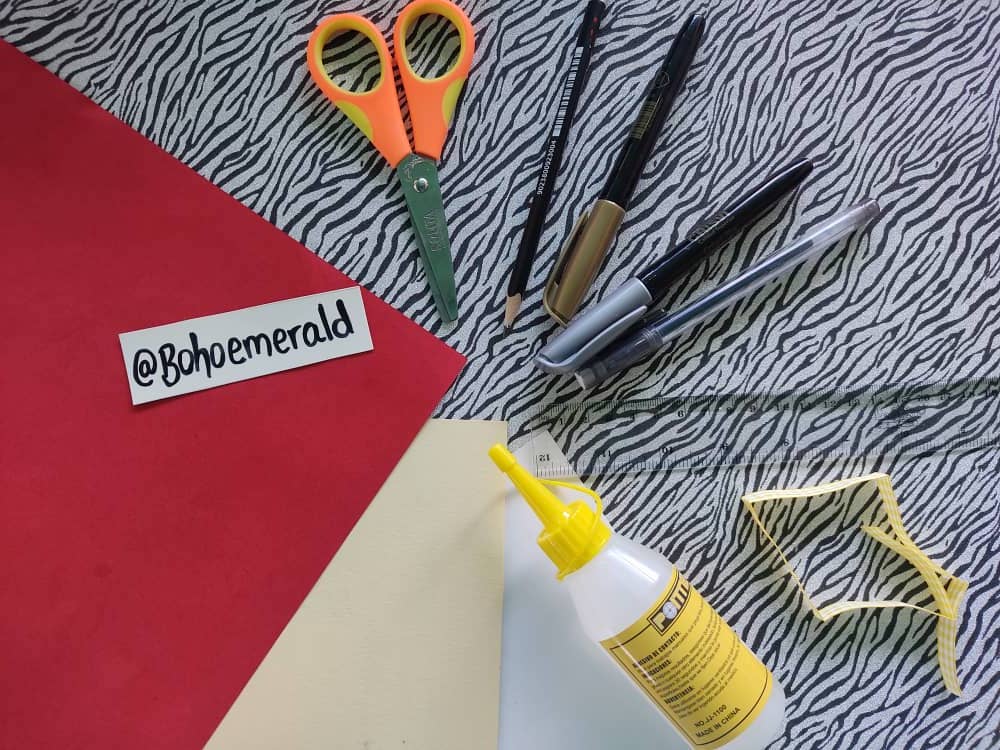
To make this original and creative Valentine's Day gift bag, we will use a graphite pencil, cardboard sheets (red and white), graduated ruler, black and gray fine tip marker, yellow decorative tape, pen, scissors, and lots of love.
-- Materiales --
Para realizar esta original y creativa bolsa de regalo para San Valentín, usaremos un lápiz de grafito, láminas de cartón (rojo y blanco), regla graduada, marcador negro y gris punta fina, cinta decorativa amarilla, lapicera, tijeras, y mucho amor.
-- Step by step --
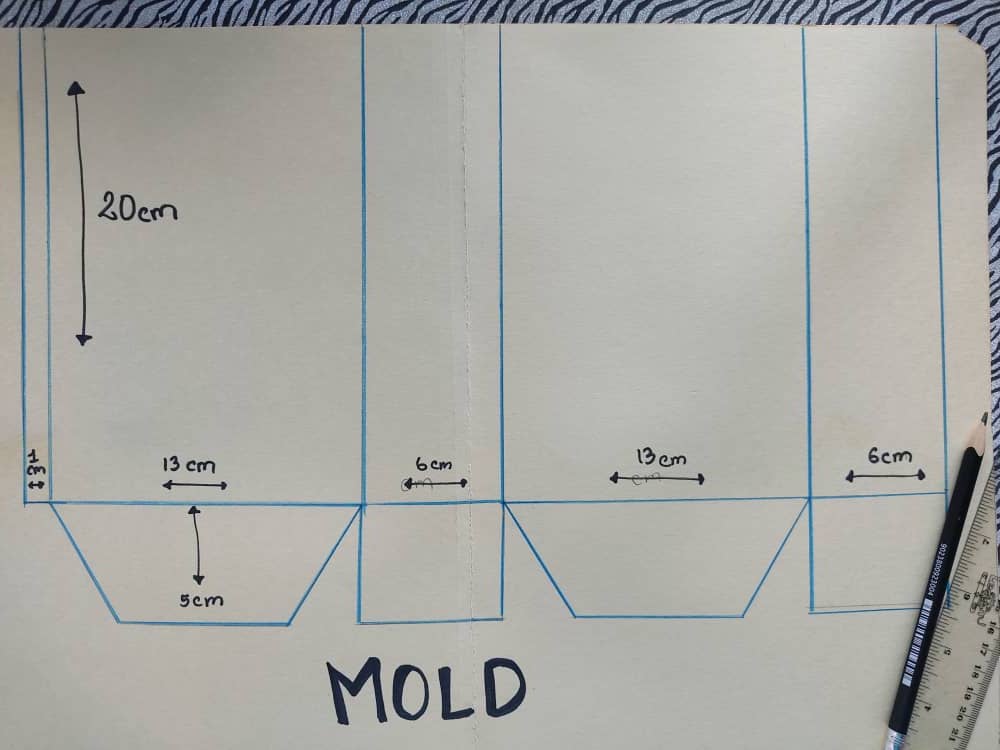
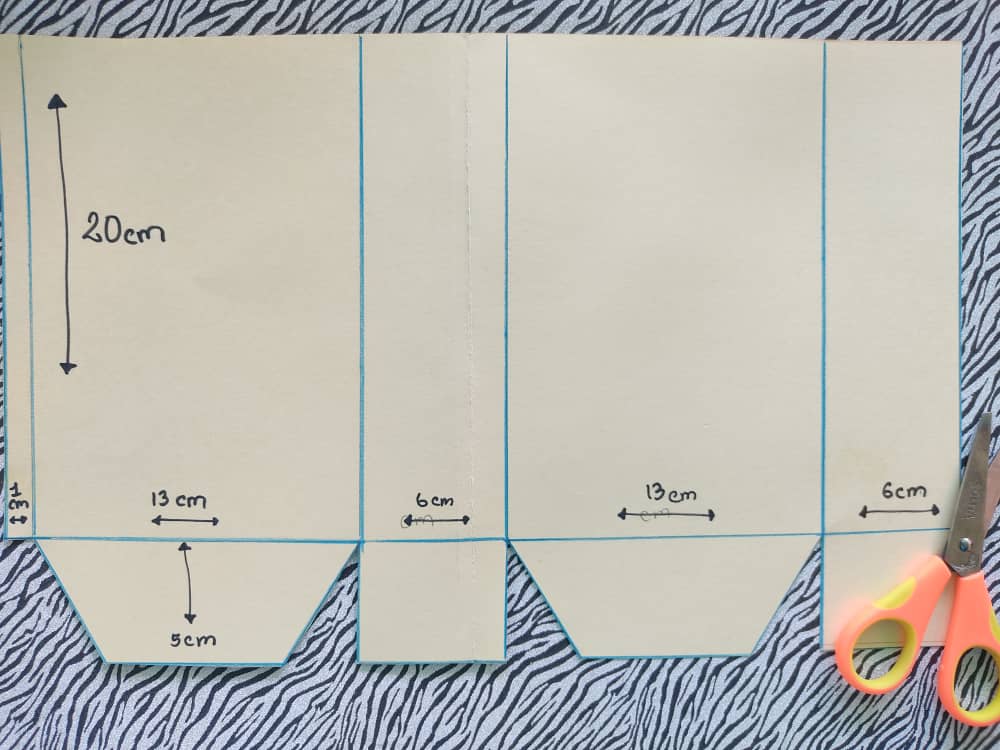
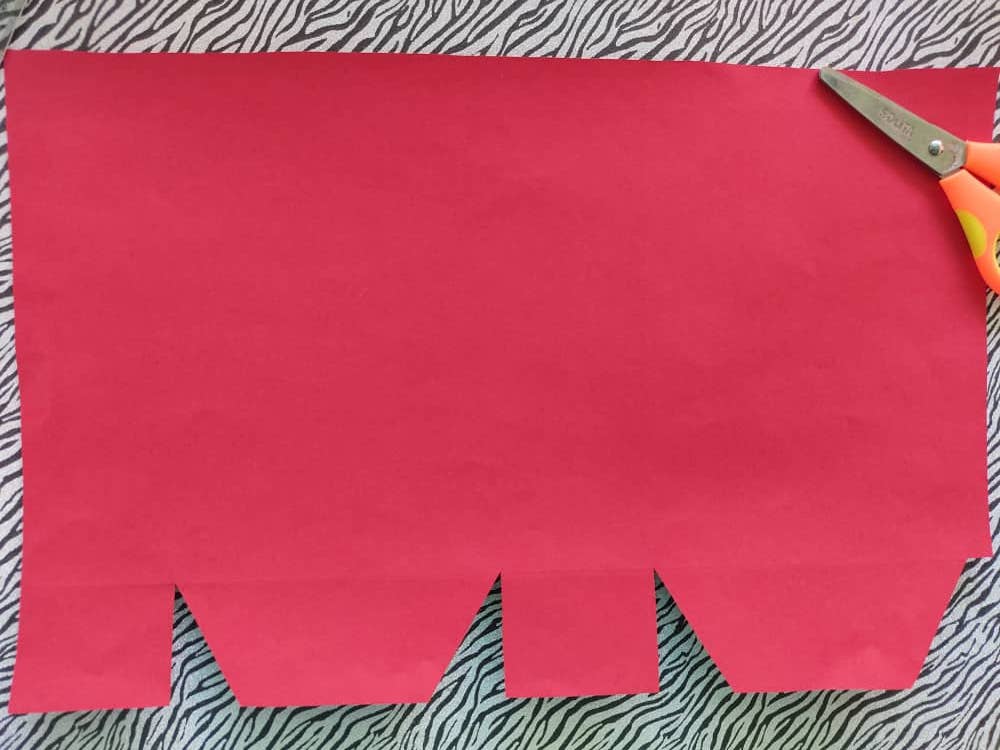
We drew a bag mold in a rectangular shape, very easy to make. The secret for the bag to be assembled in a perfect way, is to respect each of the measures. Once the mold is ready, we cut it out to make it easier to use.
-- Paso a paso --
Dibujamos un molde de bolsa en forma rectangular, muy fácil de hacer. El secreto para que la bolsa quedé armada de una manera perfecta, está en respetar cada una de las medidas. Al tener listo el molde lo recortamos para que sea mas fácil de usar.
We transfer the mold to a red cardboard cardboard "color of love" respecting all the measures and following the mold. Then we cut out carefully so that everything is perfect.
Transferimos el molde a una cartulina de cartón de color rojo “color del amor” respetando todas las medidas y guiándonos del molde. Después recortamos con cuidado para que todo que muy perfecto.
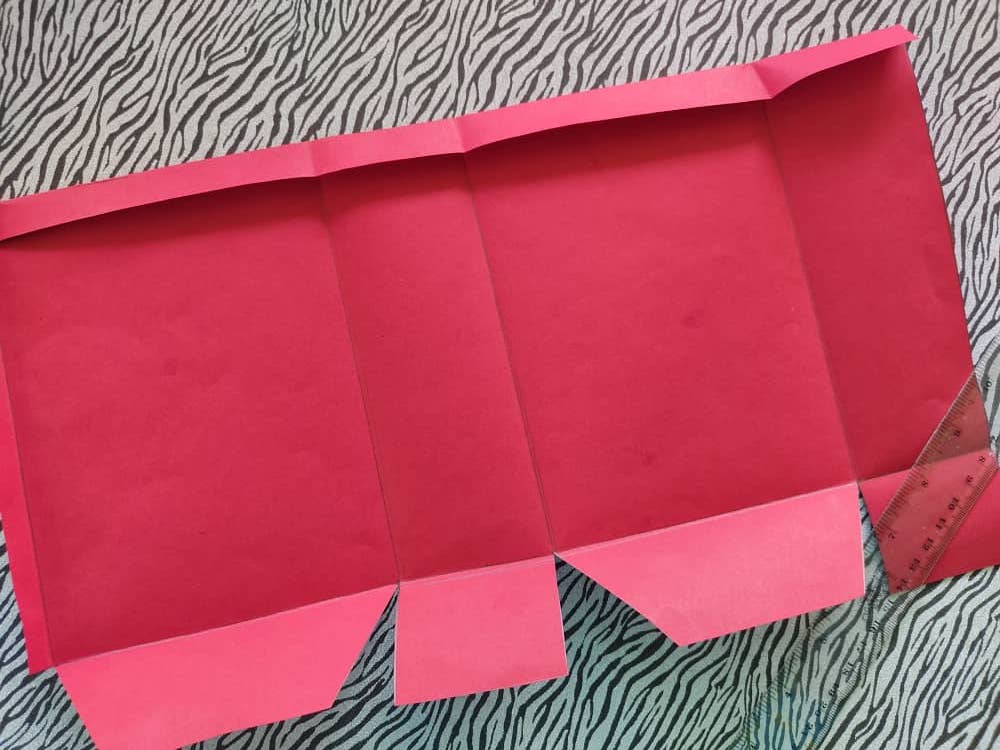
We use the tip or edge of the graduated ruler to mark the places where the folds of the mold are. This procedure will completely facilitate the assembly of our gift bag.
Utilizamos la punta o filo de la regla graduada para marcar los lugares donde se encuentran los dobleces del molde. Este procedimiento facilitará completamente el armado de nuestra bolsa de regalo.
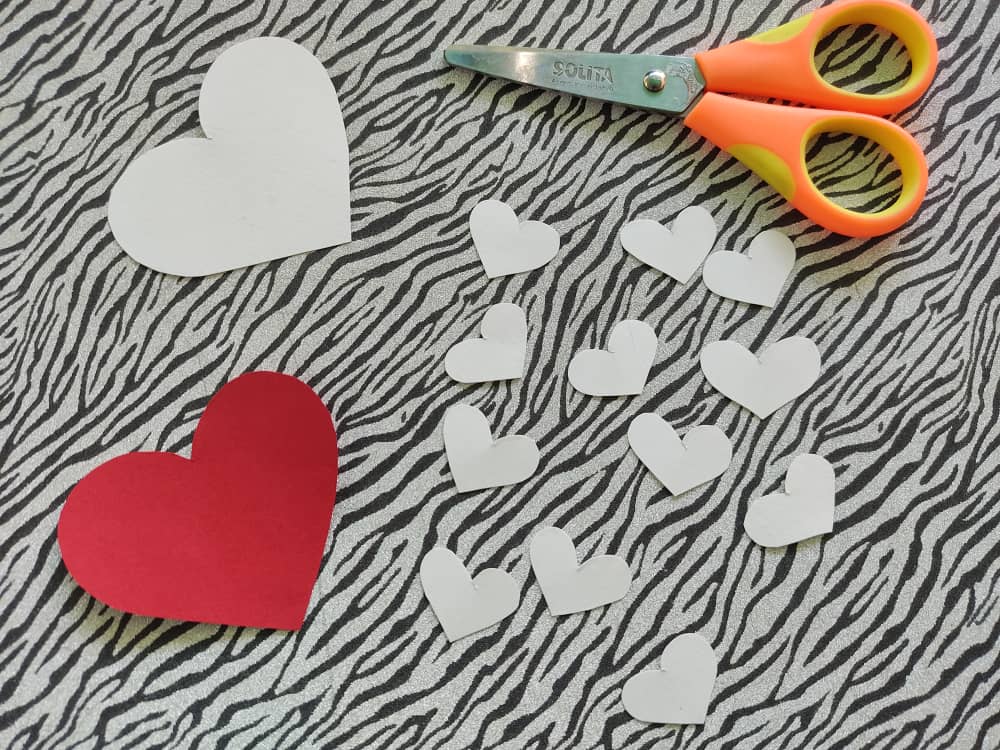
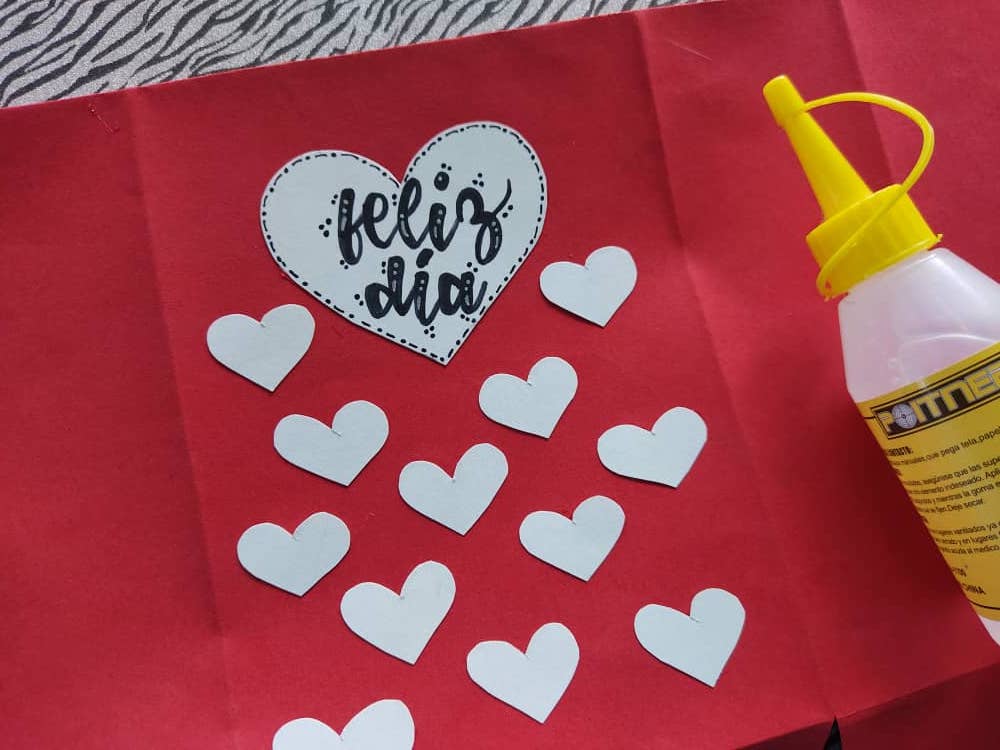
Practically, we have the bag almost ready and we only have to assemble it, so, in this step we will begin to elaborate some little things for the decoration. To give it my own touch of originality, I decided to make some cute hearts of different sizes and white cardboard.
Prácticamente, ya tenemos casi lista la bolsa y solo tendríamos que armarla, así que, en este paso comenzaremos a elaborar algunas cositas para la decoración. Para darle mi propio toque de originalidad, decidí hacer unos lindos corazones de diferentes tamaños y de cartulina blanca.
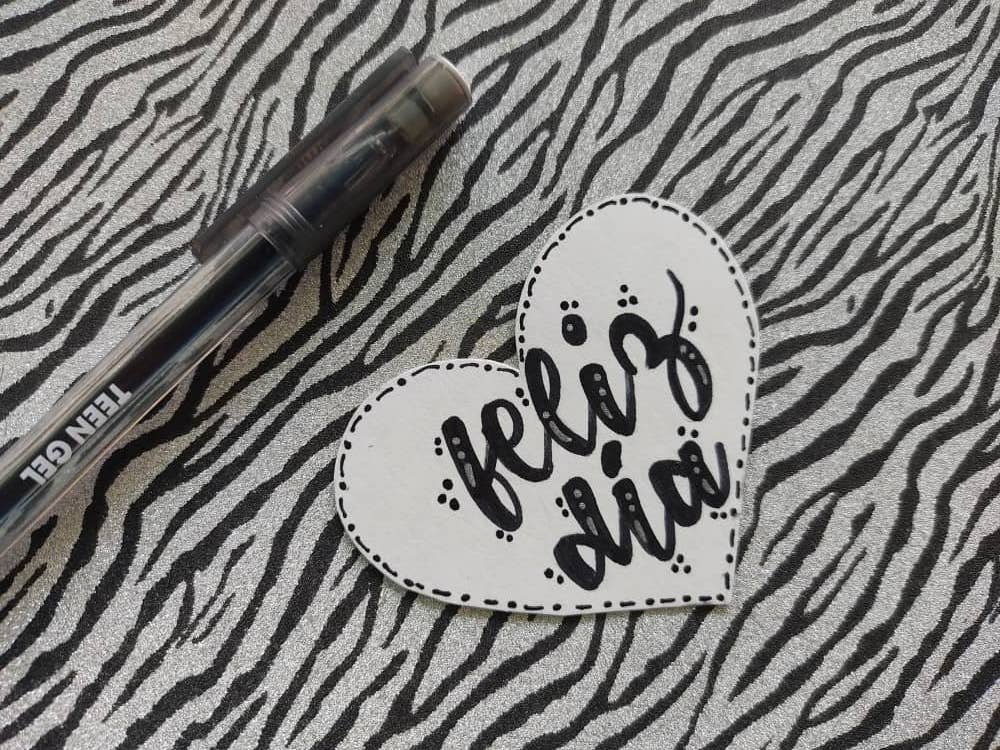
We applied some lettering and wrote a beautiful "happy day" on the big heart, with a very nice and eye-catching handwriting. Undoubtedly this will be one of the special touches to give elegance and originality to this work.
Aplicamos un poco de lettering y escribimos un hermoso "feliz día" en el corazón grande, con una letra muy bonita y llamativa. Sin duda este será uno de los toques especiales para darle elegancia y originalidad a este trabajo.
Once the hearts and the decorated big heart are ready, we glue them on the front side of our bag, placing them in the best way and pressing them so that they are perfectly glued.
Al tener listos los corazones y el corazón grande decorado, los pegamos en la que será la parte frontal o cara del frente de nuestra bolsa, ubicándolos de la mejor manera y haciendo presión para que queden perfectamente pegados.
We finish, assembling our bag by fitting each part according to the mold, and we make a closure by opening 2 holes on each side and with a yellow ribbon we produce a nice decorative bow to keep this Valentine's Day gift bag safe and ready. What did you think?
Terminamos, armando nuestra bolsa encajando cada parte según el molde y hacemos un cierre abriendo 2 agujeros en cada cara y con una cinta amarilla producimos un lindo lazo decorativo para que mantenga segura esta bolsa de regalo para San Valentín y listo. ¿Qué les pareció?

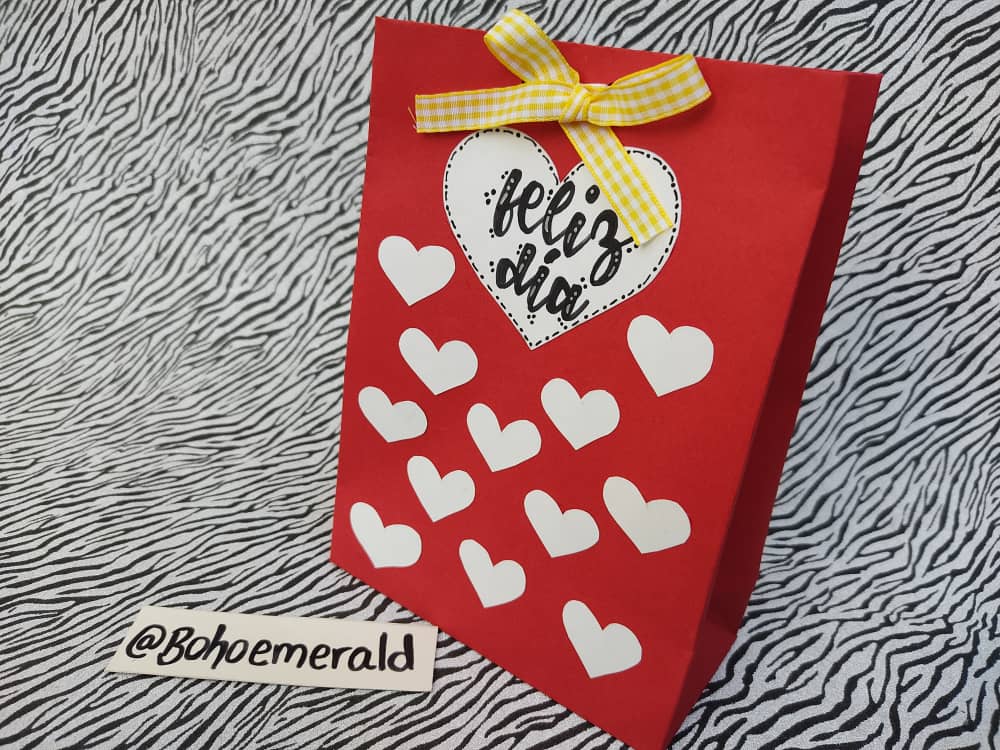
Making crafts like this is a lot of fun, especially to see the final result of what we put so much effort and love into. And even better if they are done in the company of the little ones of the house and even in pairs. I hope you liked this Valentine's Day gift bag.
Hacer manualidades como esta es algo muy divertido, sobre todo ver el resultado final de aquello a que le pusimos tanto esfuerzo y amor. Y mejor aún si se hacen en compañía de los mas pequeños de la casa e incluso en parejas. Espero que les haya gustado esta Bolsa de regalo para San Valentín.
Thank you very much for coming to join me in this new adventure, I hope you can get to know me a little more, and that you invite me to be part of your groups of friends.
Muchas gracias por venir a acompañarme en esta nueva aventura, espero que puedan conocerme un poco mas, y que me inviten a formar parte de sus grupos de amigos.
The rewards earned on this comment will go directly to the person sharing the post on Twitter as long as they are registered with @poshtoken. Sign up at https://hiveposh.com.
Wow, queda super linda, voy a intentar hacerla, excelente publicación y bastante práctica.
muchas gracias por la visita y el comentario de apoyo. Que bueno que te parece agradable, es muy facil y seguro lograras hacerla. Saludos y exitos
Me encanta, gracias por compartirnos su paso a paso.
Gracias por la visita, bella!
Todo regalo hecho por uno mismo tiene más valor que algo que simplemente se paga y ya, sobre todo cuando es hecho con amor. Esa bolsita quedó preciosa y pienso que si se aumentan las medidas, se puede incrementar el tamaño de la misma para adaptarla a cualquier regalo, y desde luego se puede decorar de acuerdo a la ocasión. ¡Está hermosa!
Muchas gracias por compartir este valioso post con todos nosotros pues a muchos los sacará de apuros. ¡Bendiciones!
Que bonito!
Está demasiado linda esta bolsa, es una gran idea para dar un regalo a alguien que quieras mucho porque te tomaste el tiempo para hacerlo y se vuelve algo mucho más especial. Compartiré esto para mantenerlo guardado y hacerlo para el día de San Valentín. Muchas gracias por compartir!
Congratulations @bohoemerald! You have completed the following achievement on the Hive blockchain and have been rewarded with new badge(s):
Your next target is to reach 800 upvotes.
You can view your badges on your board and compare yourself to others in the Ranking
If you no longer want to receive notifications, reply to this comment with the word
STOPCheck out the last post from @hivebuzz:
Support the HiveBuzz project. Vote for our proposal!
¡Felicitaciones!
1. Invierte en el PROYECTO ENTROPÍA y recibe ganancias semanalmente. Entra aquí para más información.
3. Suscríbete a nuestra COMUNIDAD, apoya al trail de @Entropia y así podrás ganar recompensas de curación de forma automática. Entra aquí para más información sobre nuestro trail.
4. Creación de cuentas nuevas de Hive aquí.
5. Visita nuestro canal de Youtube.
Atentamente
El equipo de curación del PROYECTO ENTROPÍA