Español
Hola Amigos en Hive, espero estén muy bien, con salud que es lo importante.
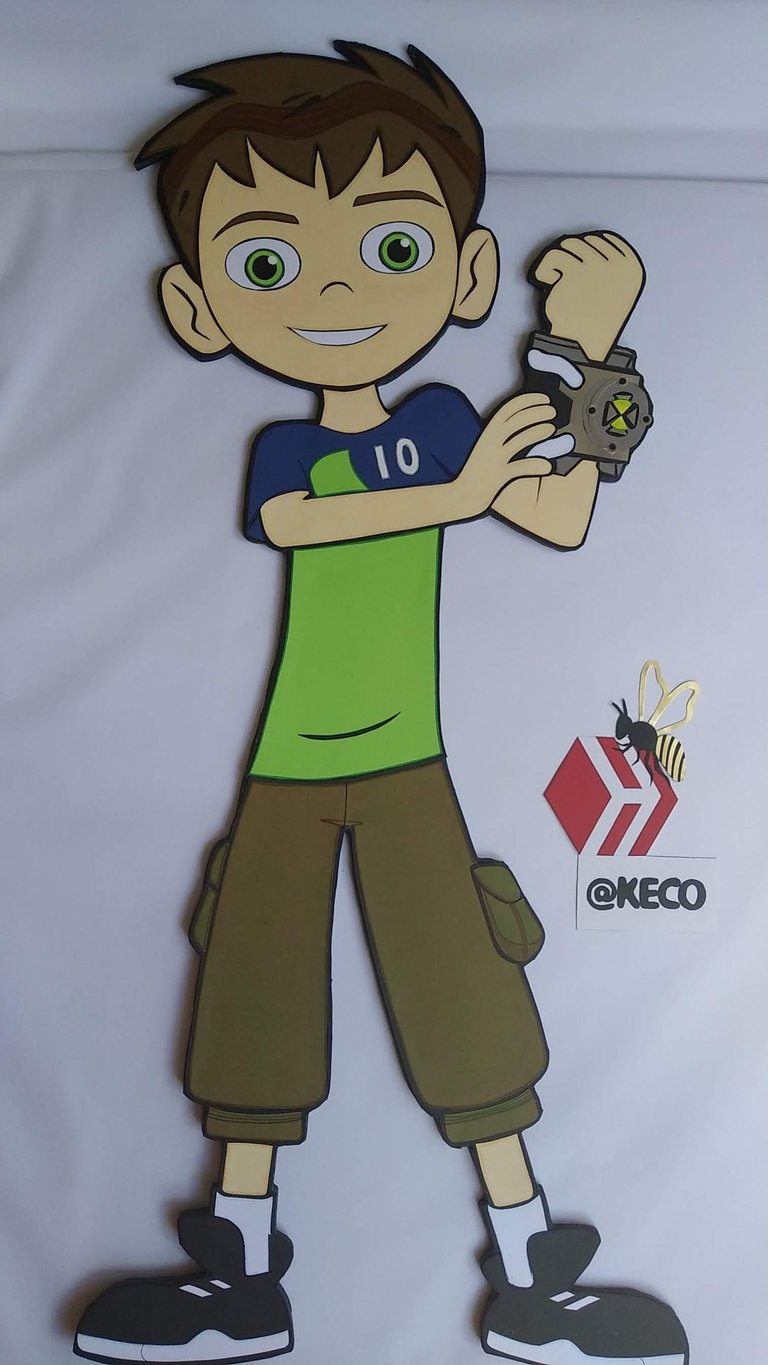
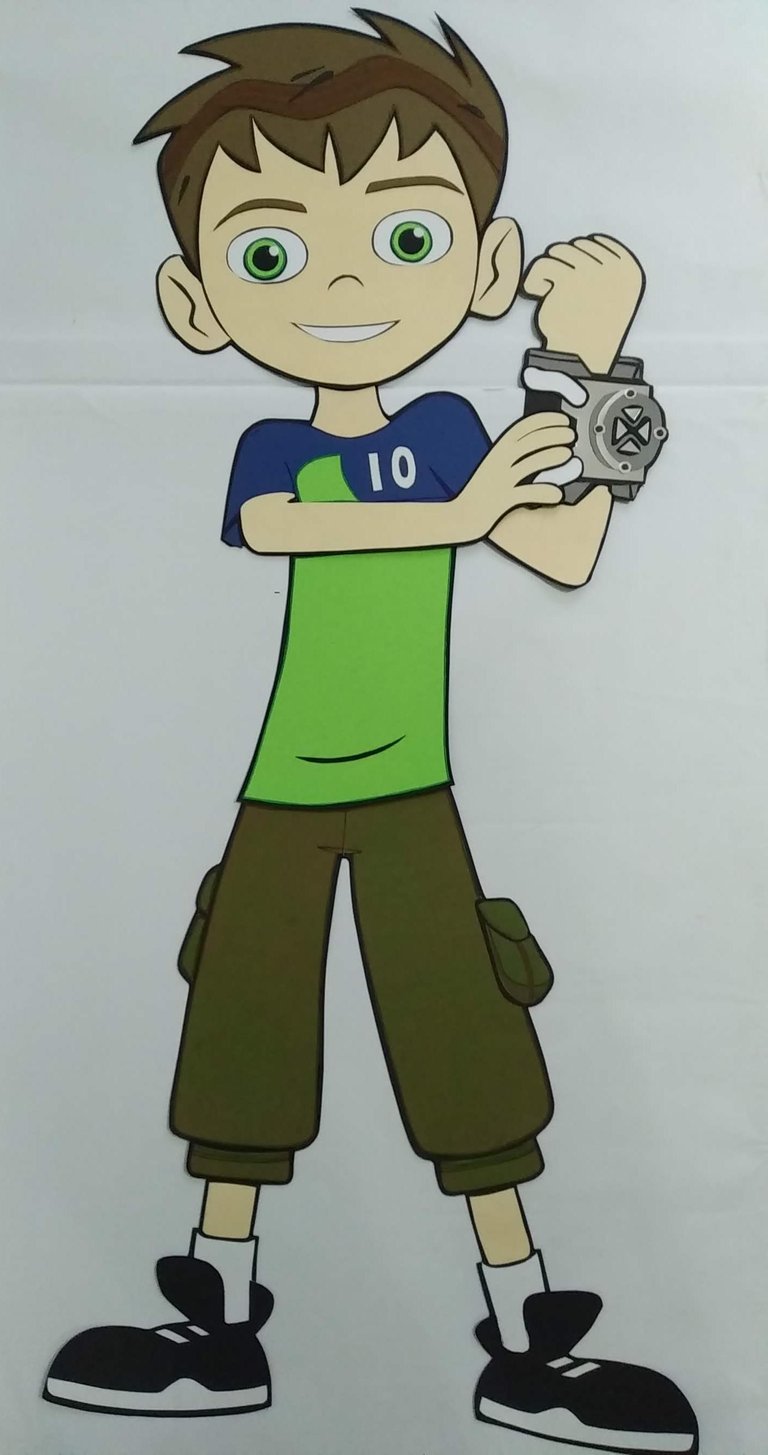
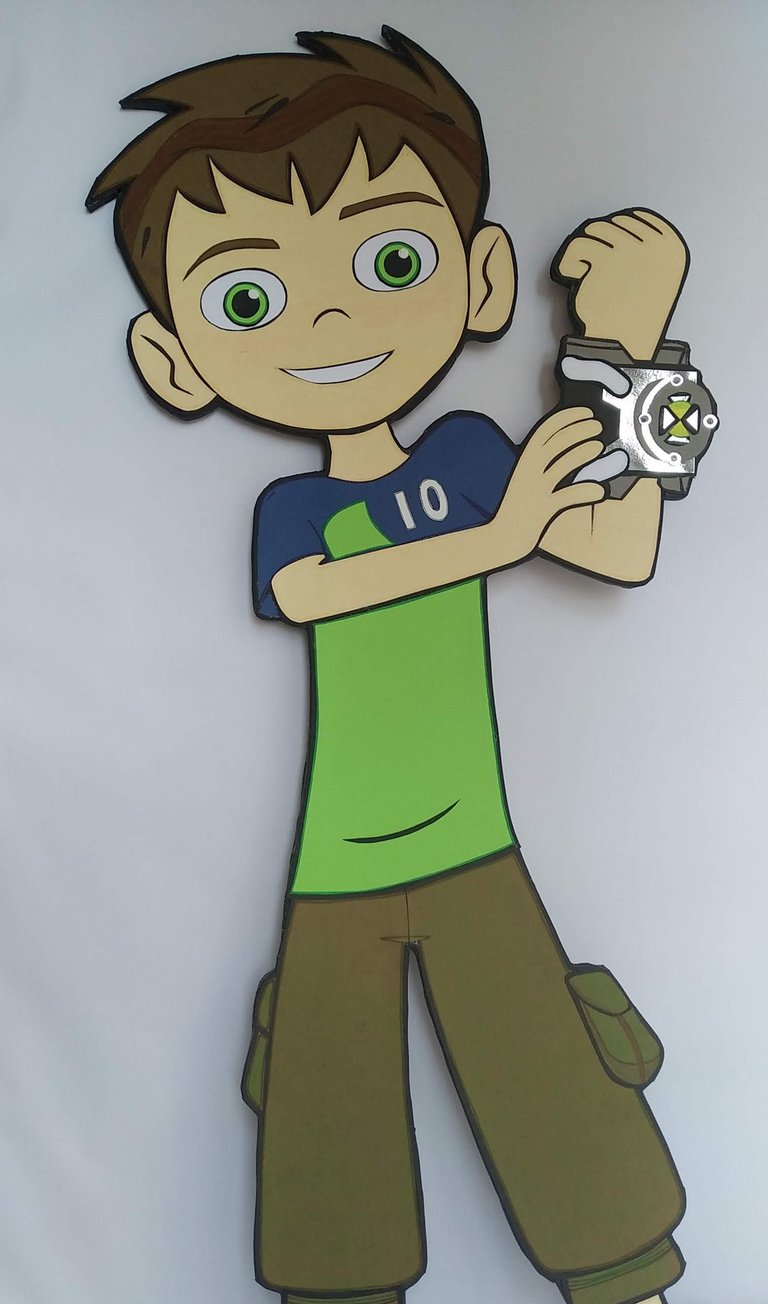
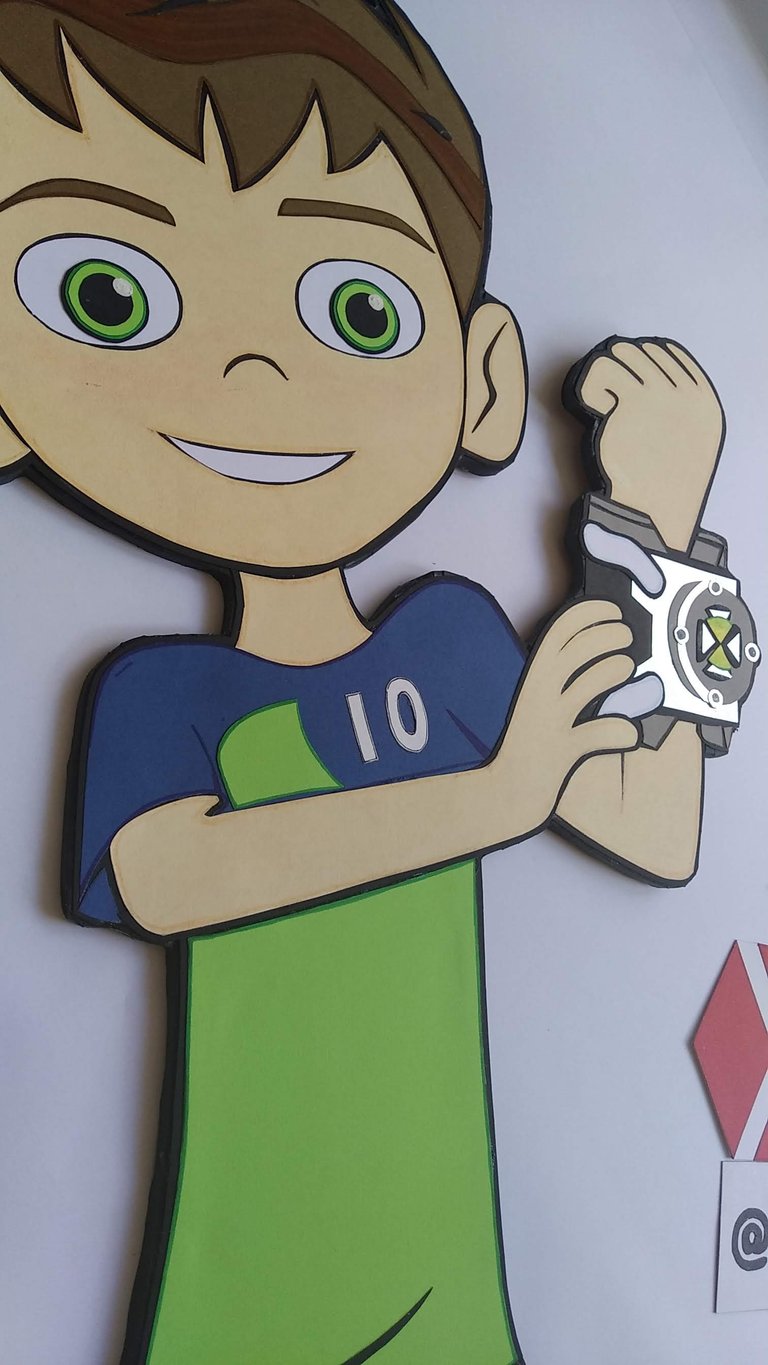
En esta publicación quiero mostrarles un muñeco que no solo decoraría el cumpleaños de mi amiguito Noel, sino que ademas posterior a eso decoraría su cuarto. Noel es un niño súper bello y tierno, fanático del dibujo animado “Ben 10”, por eso su madre decidió complacerlo y celebrar sus mágicos cinco (5) años con una reunión al mejor estilo BEN10.
Para ésta celebración, realicé el BEN10, el topper del pastel y un muñeco para la mesa. Hoy les mostraré el BEN10 y en las siguientes publicaciones les muestro lo otro; lo separo así para que la publicación no sea tan pesada con tantas fotos del paso a paso.
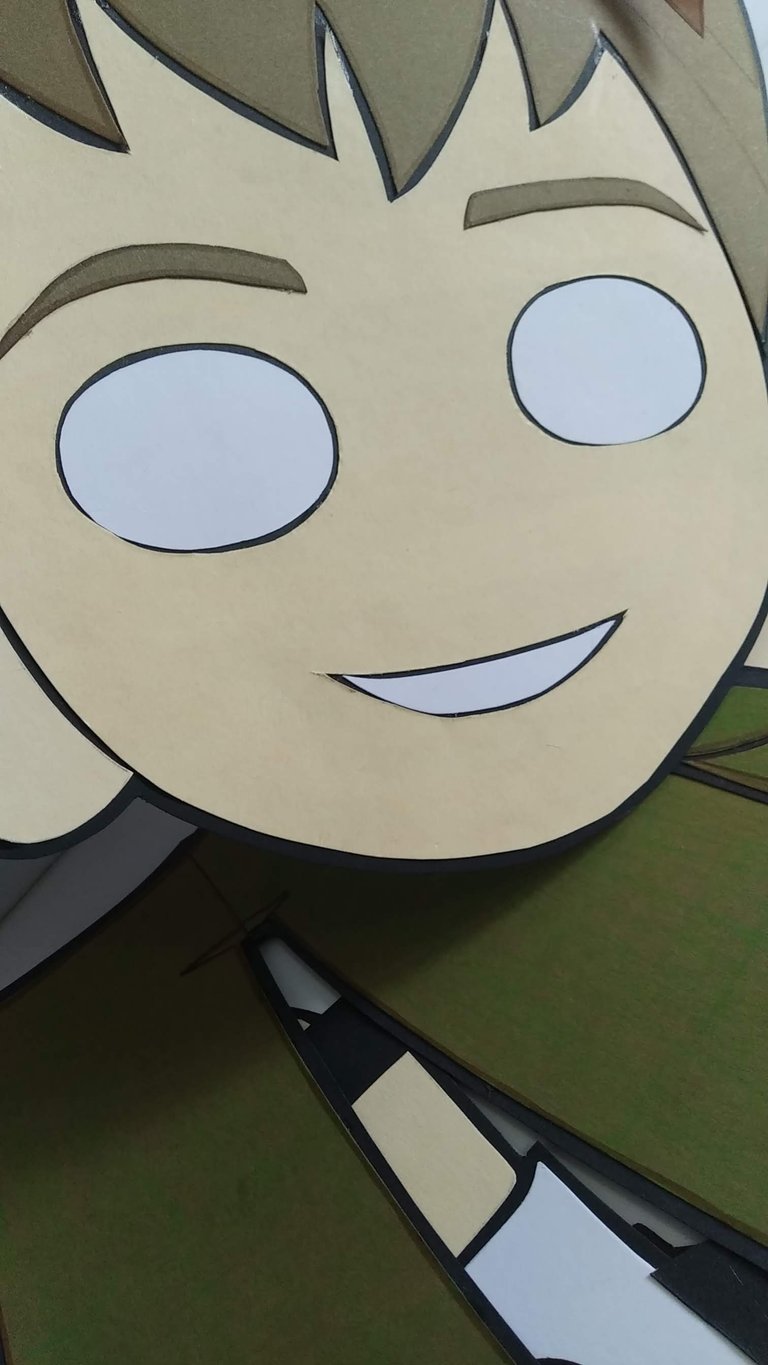
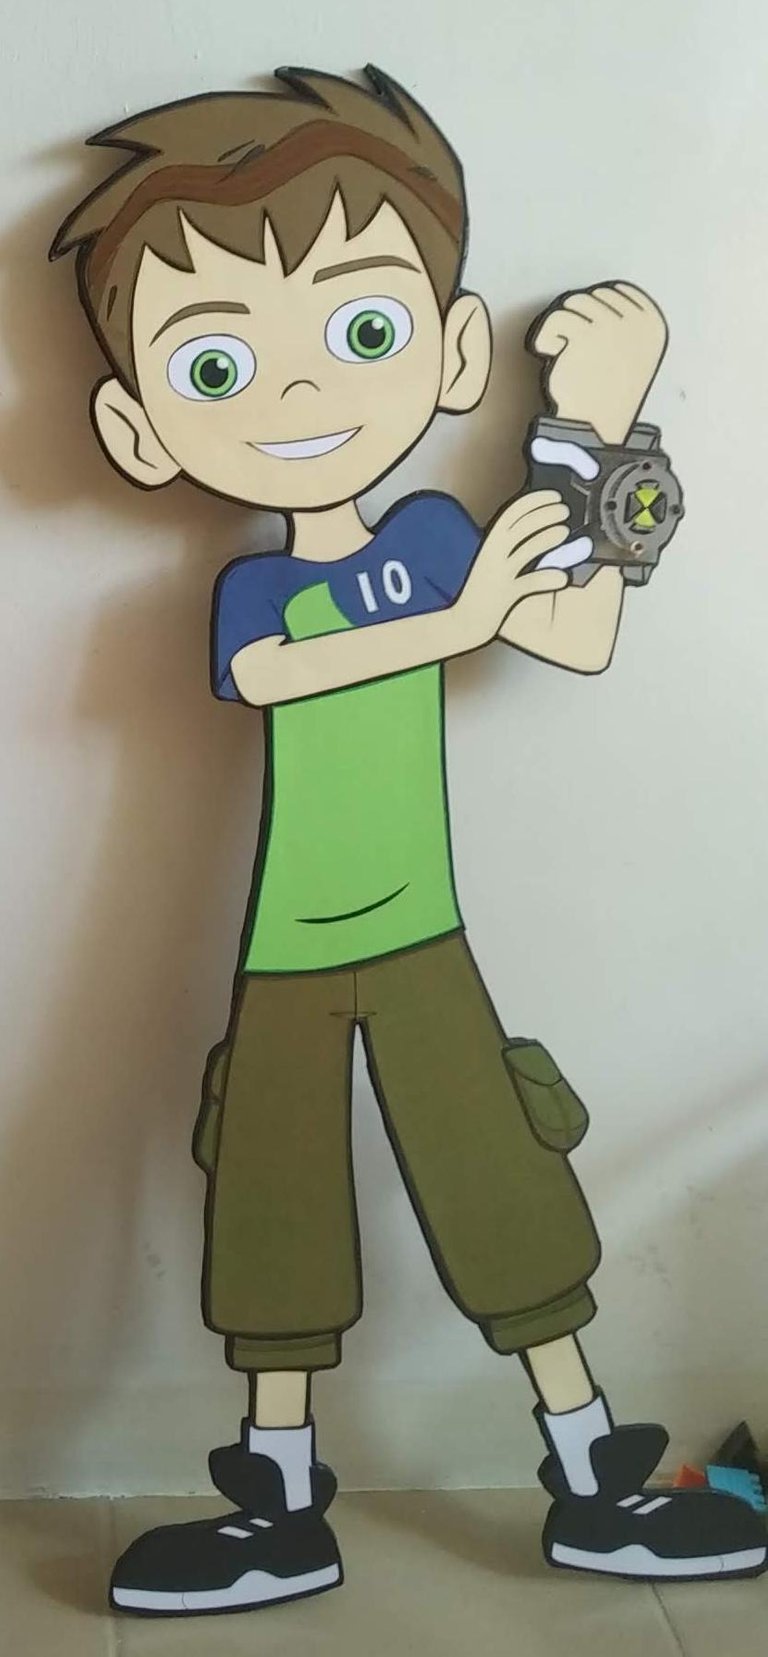
Éste Ben 10 mide más de un metro de largo y está realizado con cartón grueso y cartulina de colores. Trabajar en cartulina de colores es maravilloso porque ofrece a cualquier creación una calidad que se distingue de aquella que se pinta o imprime, yo amo las cartulinas.
Sin más y esperando disfruten del trabajo realizado con amor , les dejo los materiales utilizados, el proceso y las imágenes del trabajo.
- Diseño o plantilla de Ben 10
- Cartón Grueso (de preferencia doble canal)
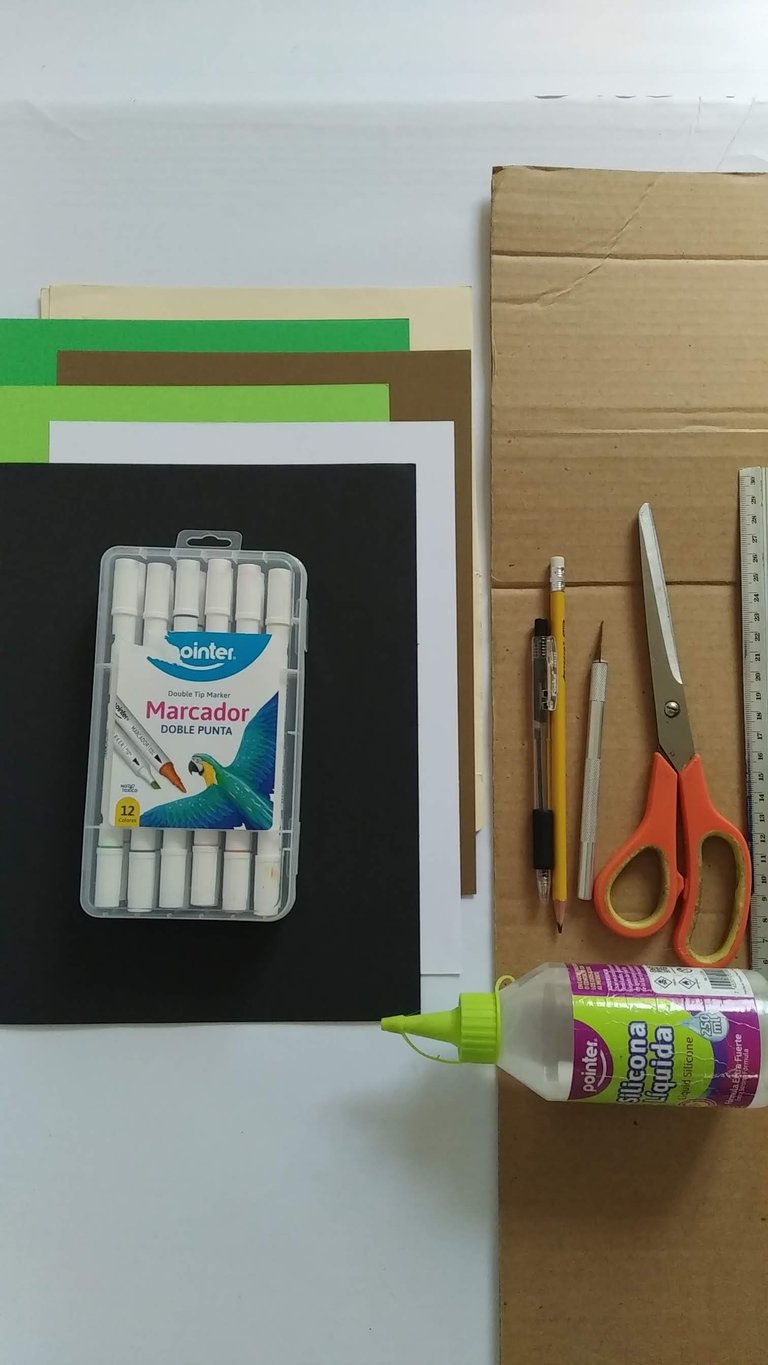
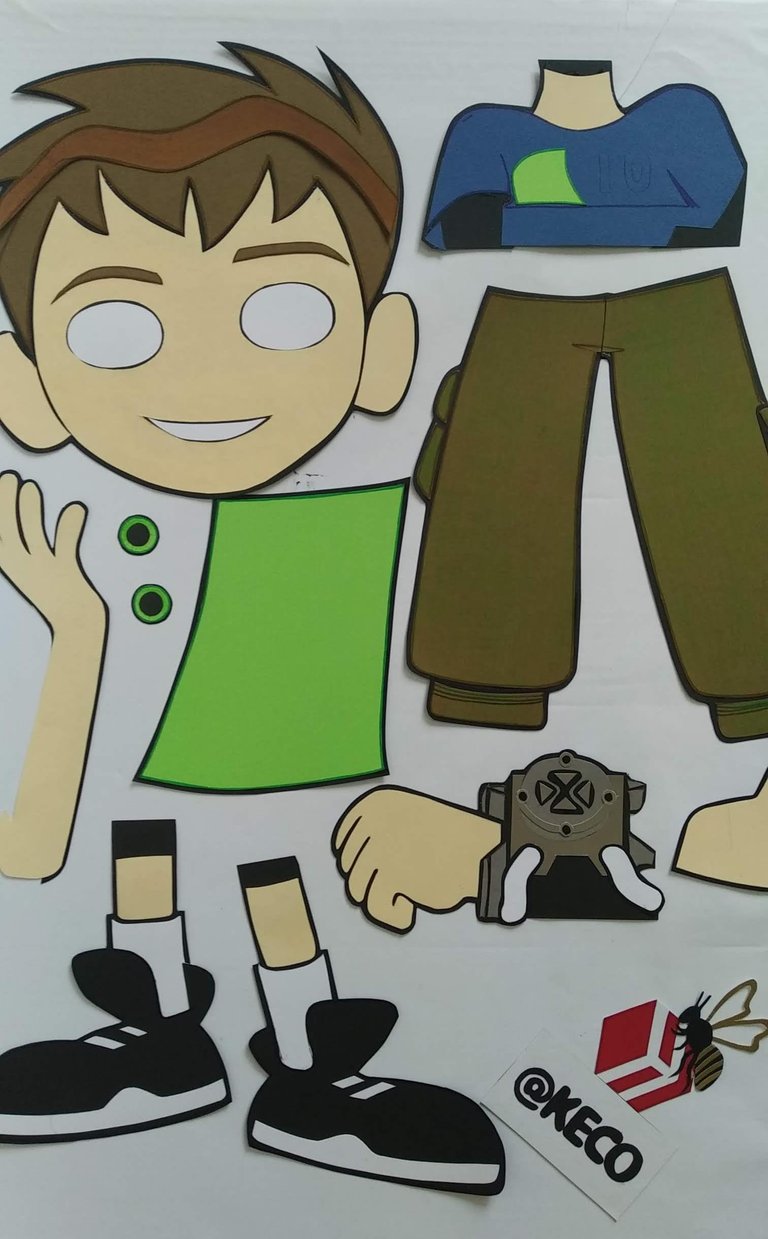
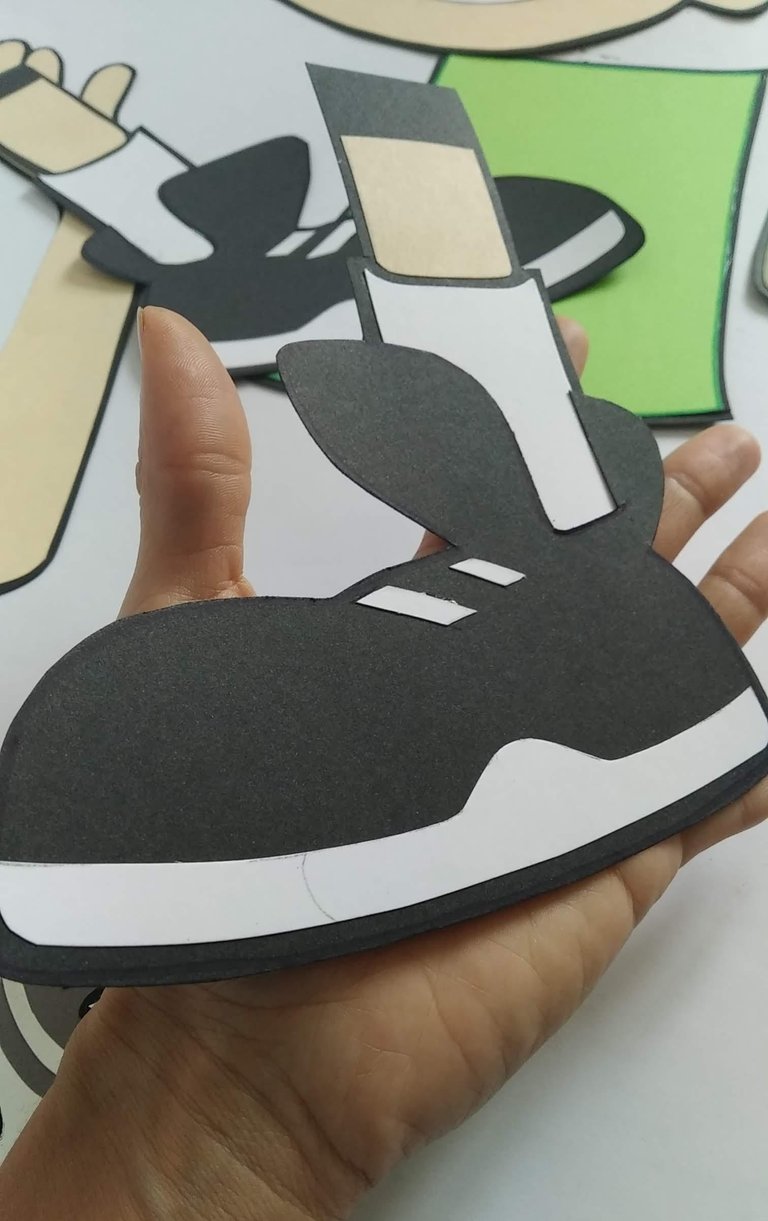
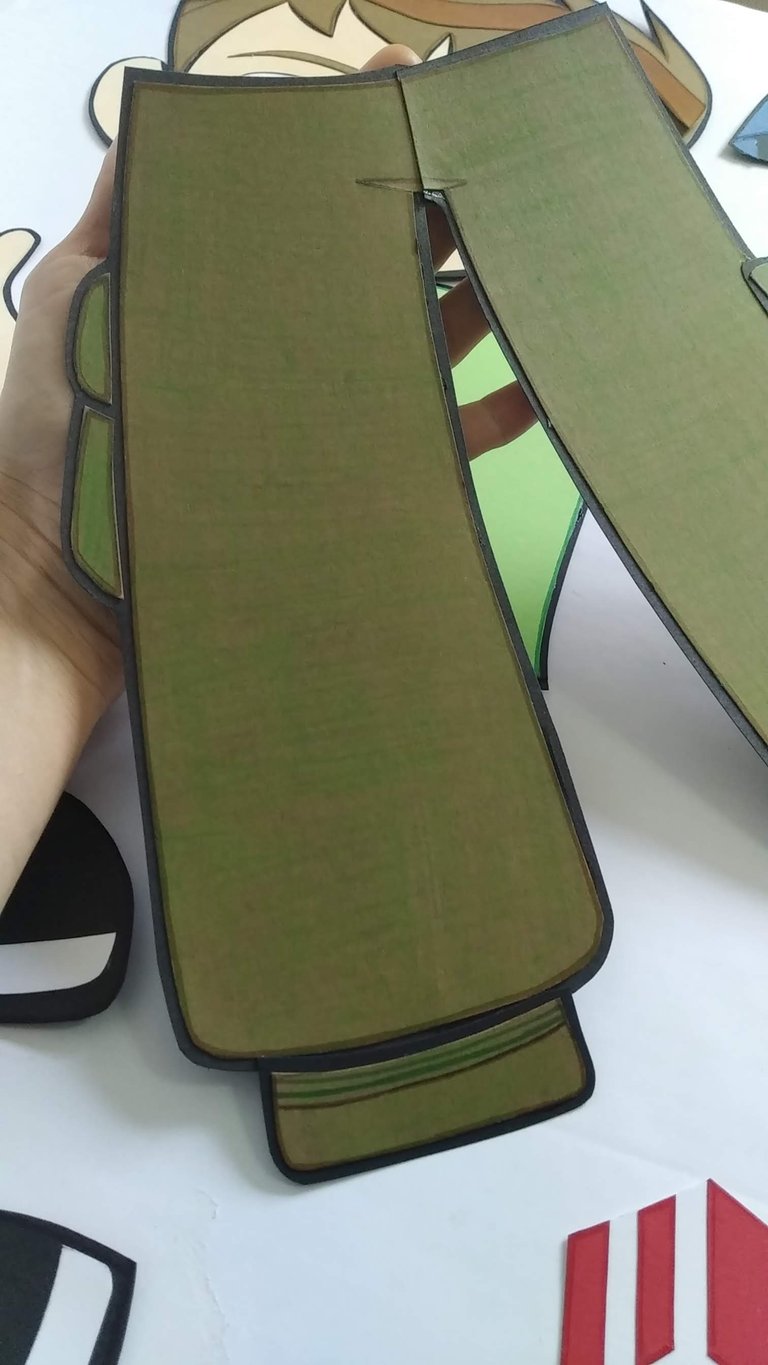
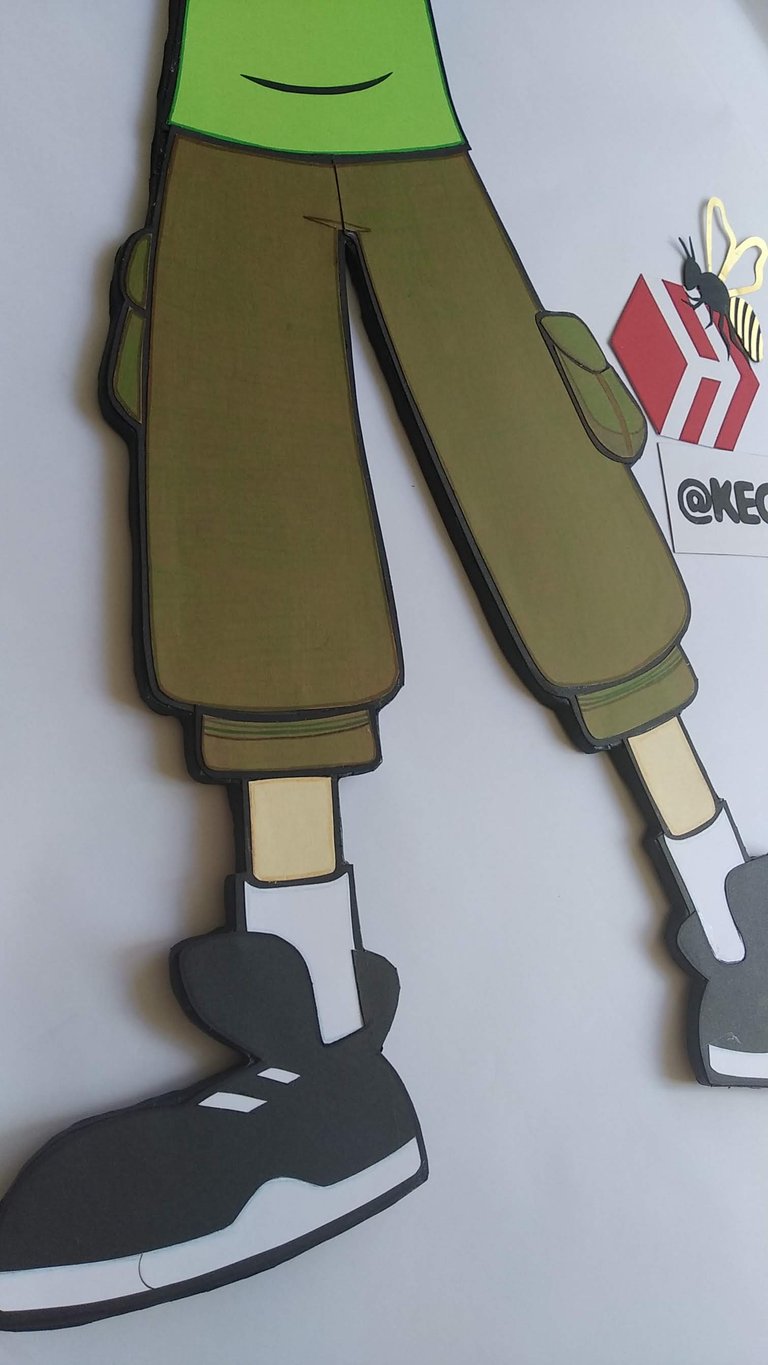
- Cartulinas de colores de acuerdo al diseño del personaje, para este muñeco se usó: azul, piel, marrón, verde manzana, blanco, negro.
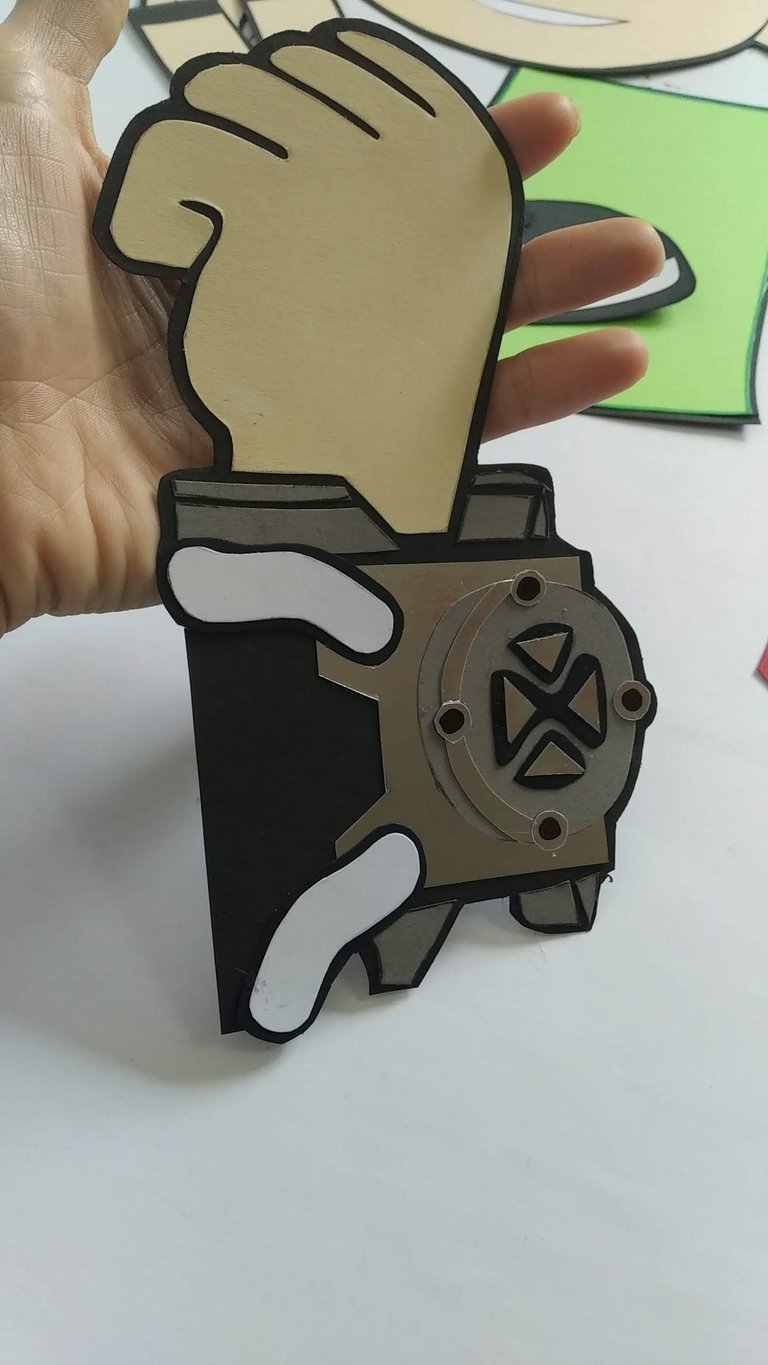
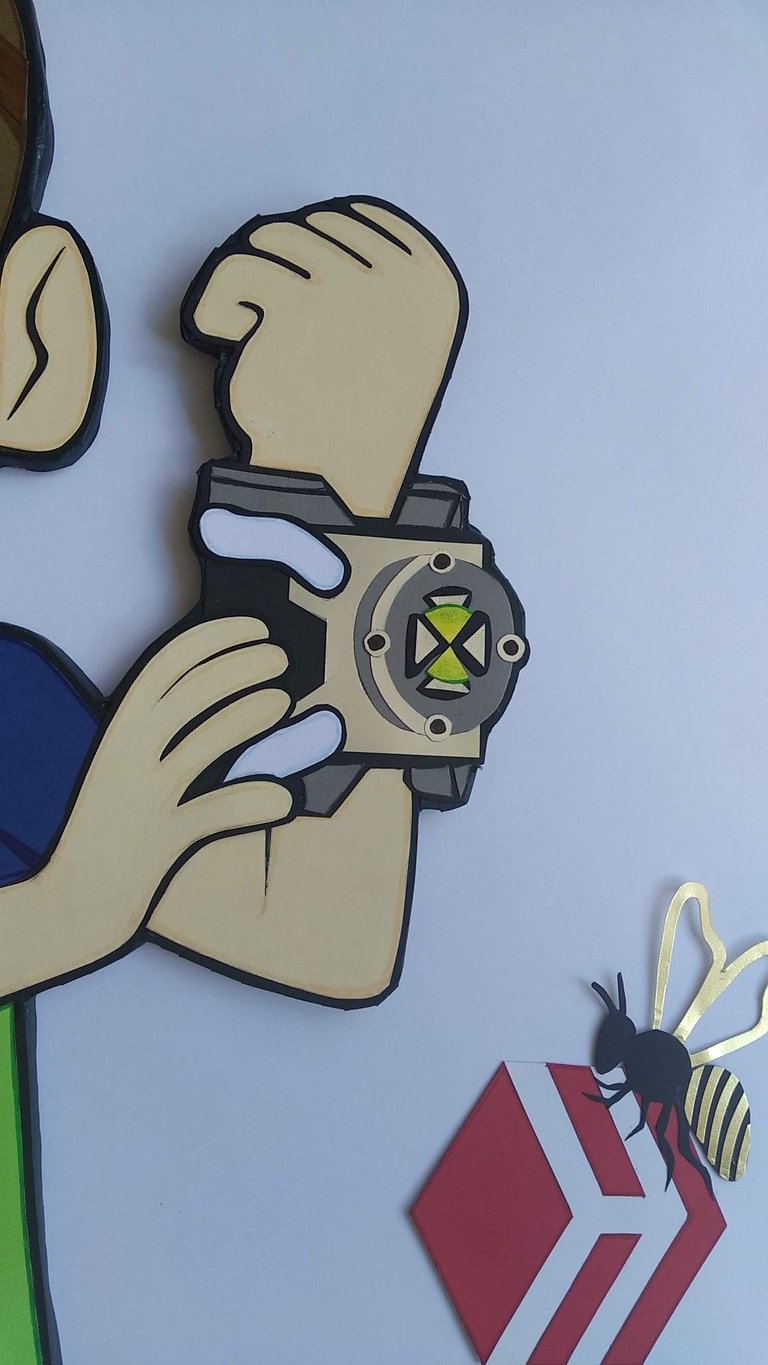
- Cartulina metalizada plateada (para el brazalete)
- Marcadores de colores
- Silicón frío
- Cutter
- Tijera
- Alfileres de cabeza
- Regla
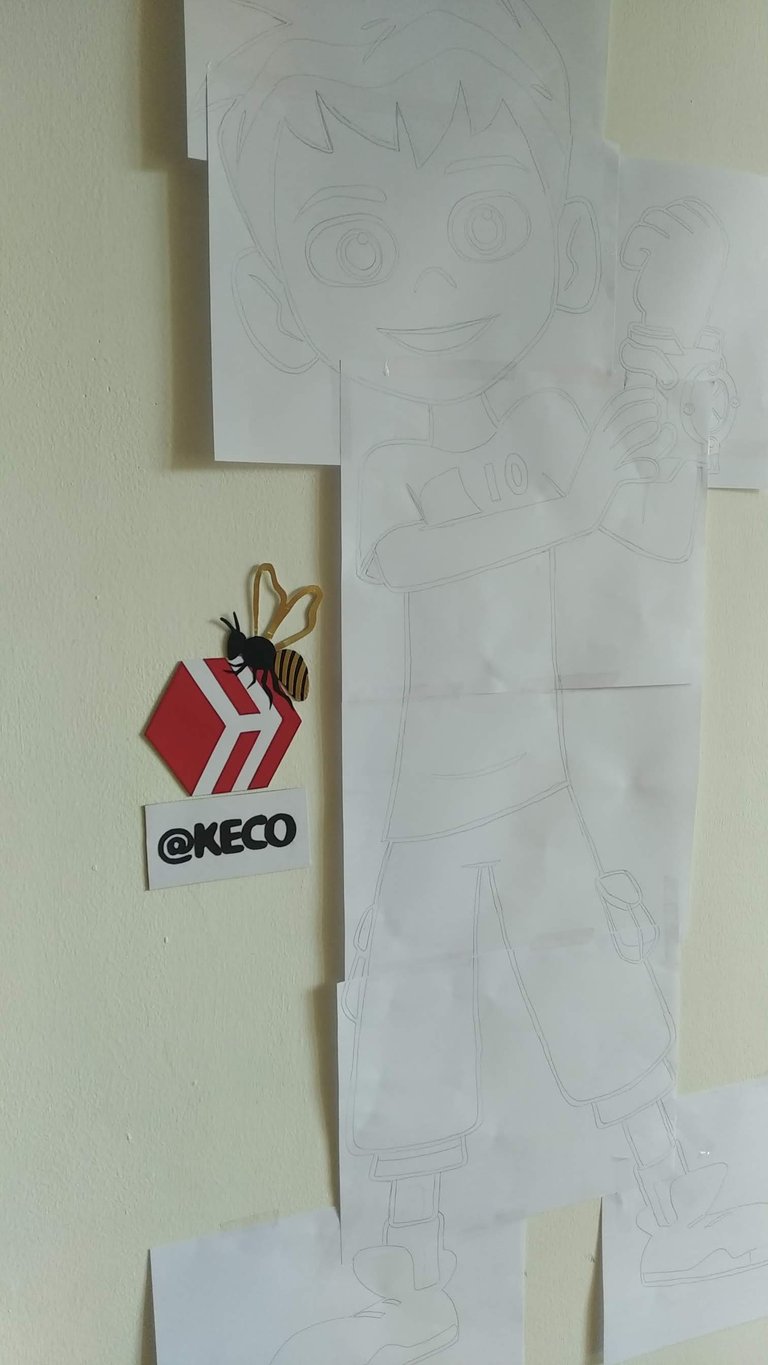
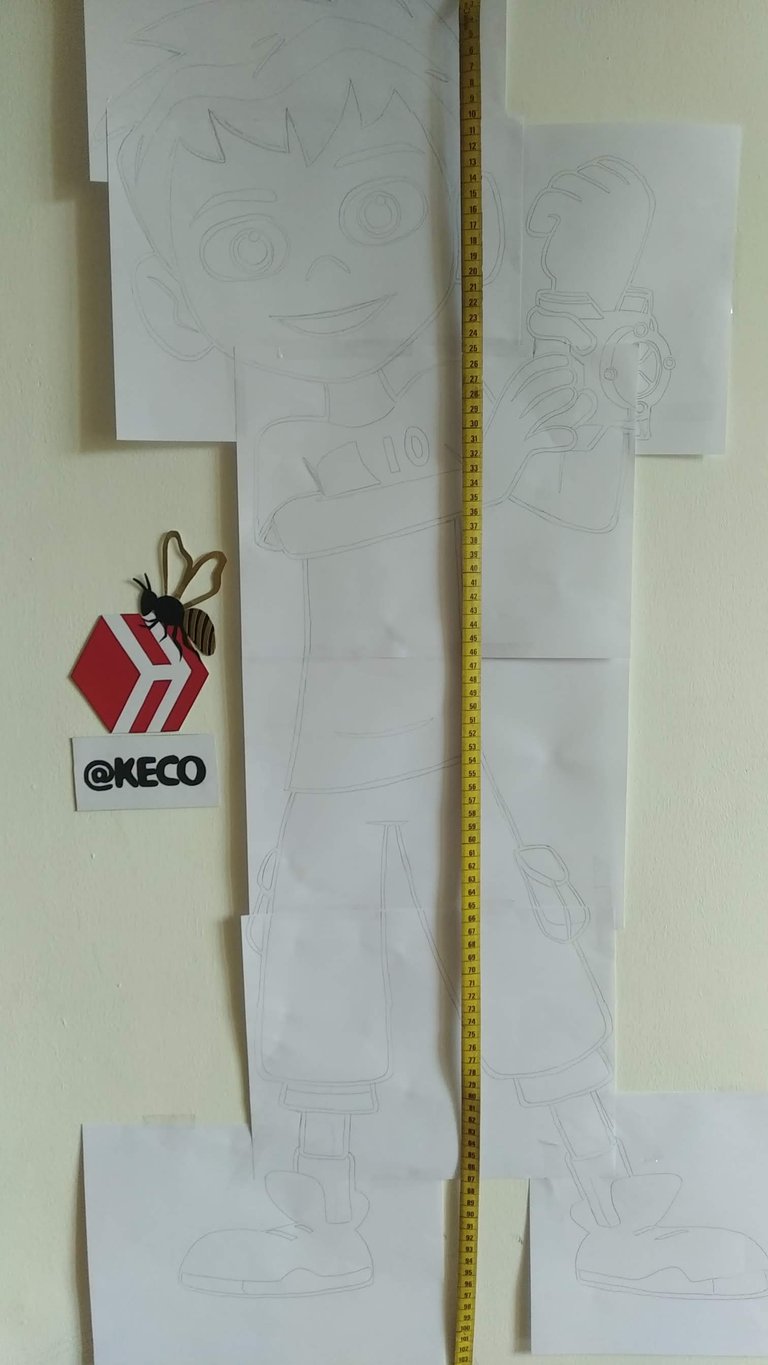
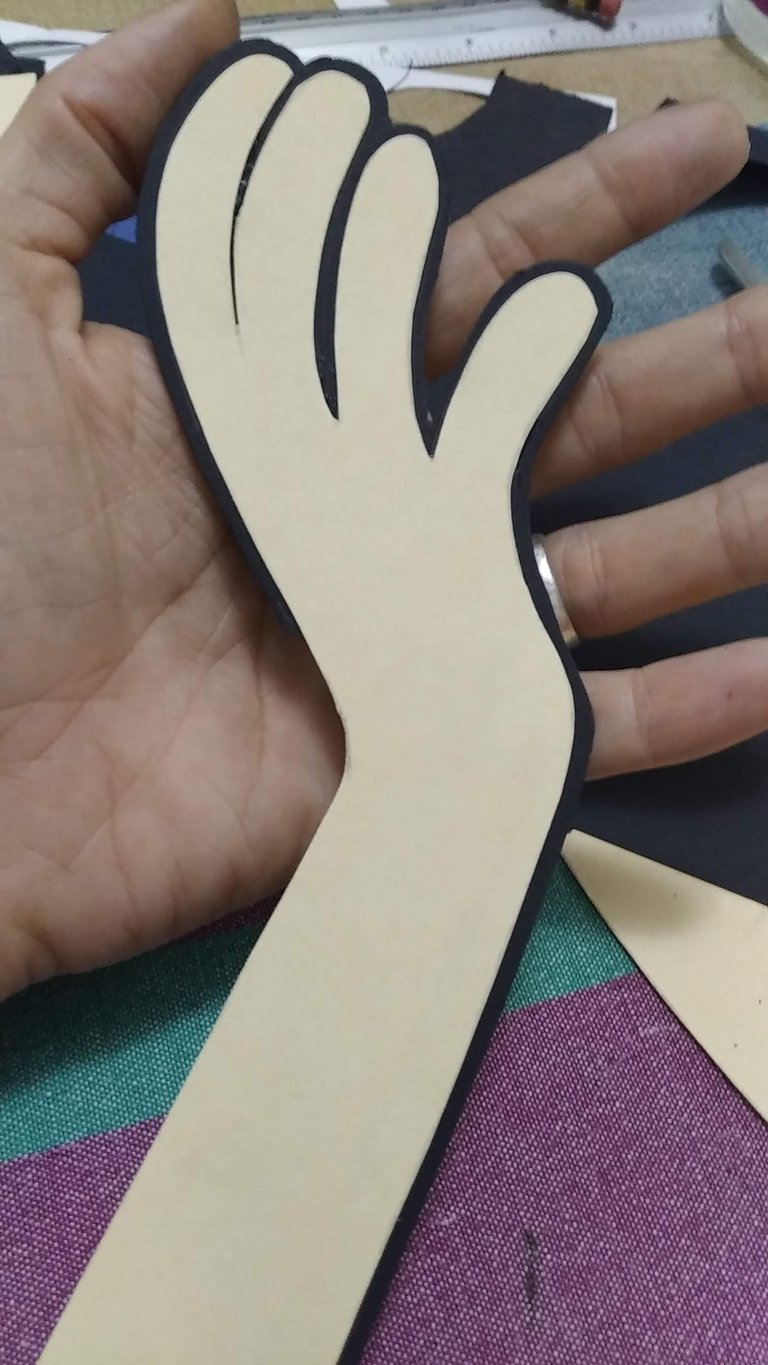
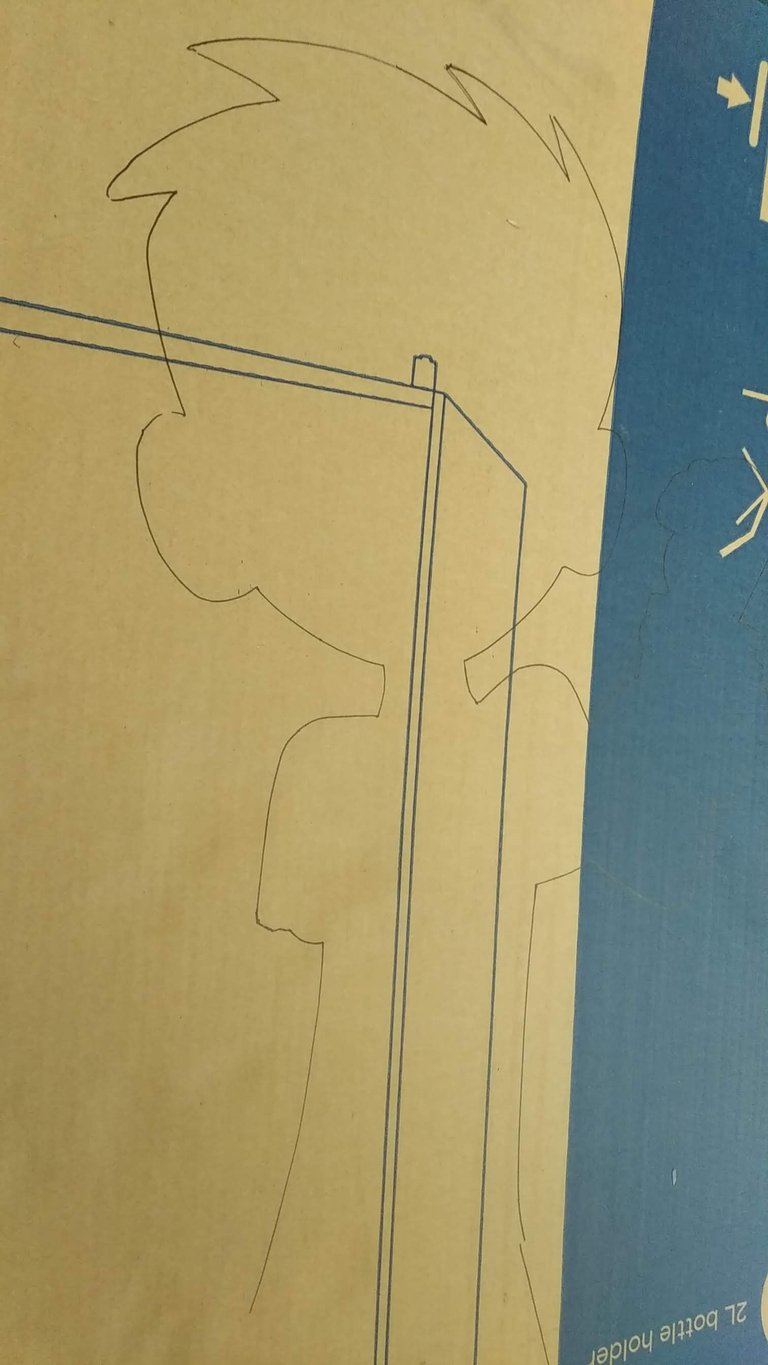
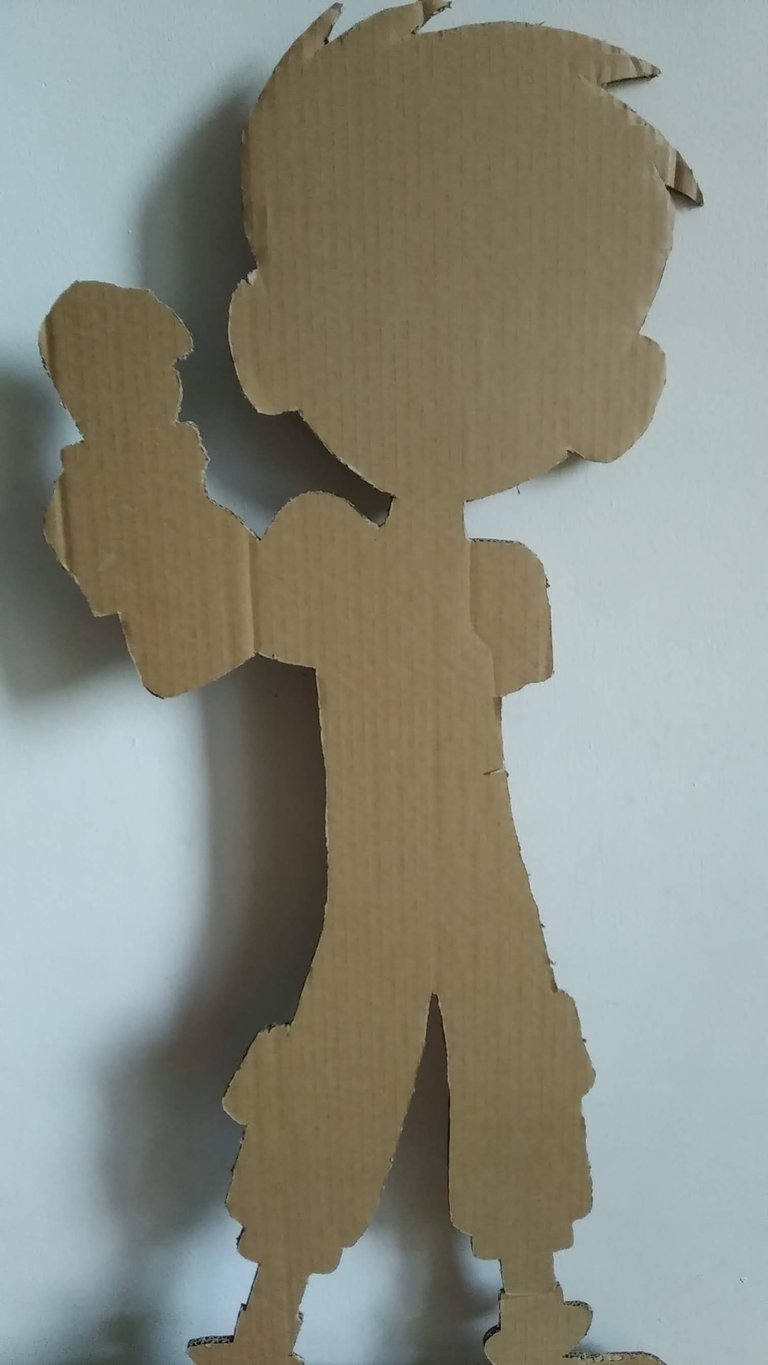
- Hacer en hojas blancas el diseño del muñeco, esto en las medidas que se desee, éste se pensó para que tuviese más de un metro de largo.
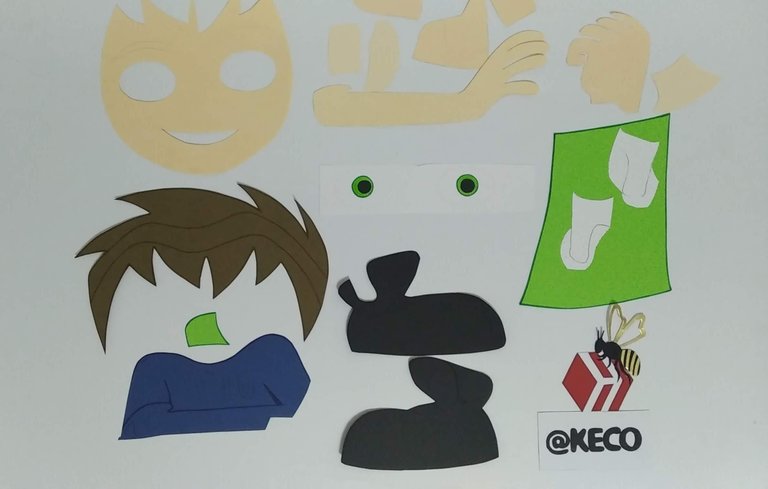
- Cada pieza que conforma el diseño, marcarla y cortarla en la cartulina que corresponda.
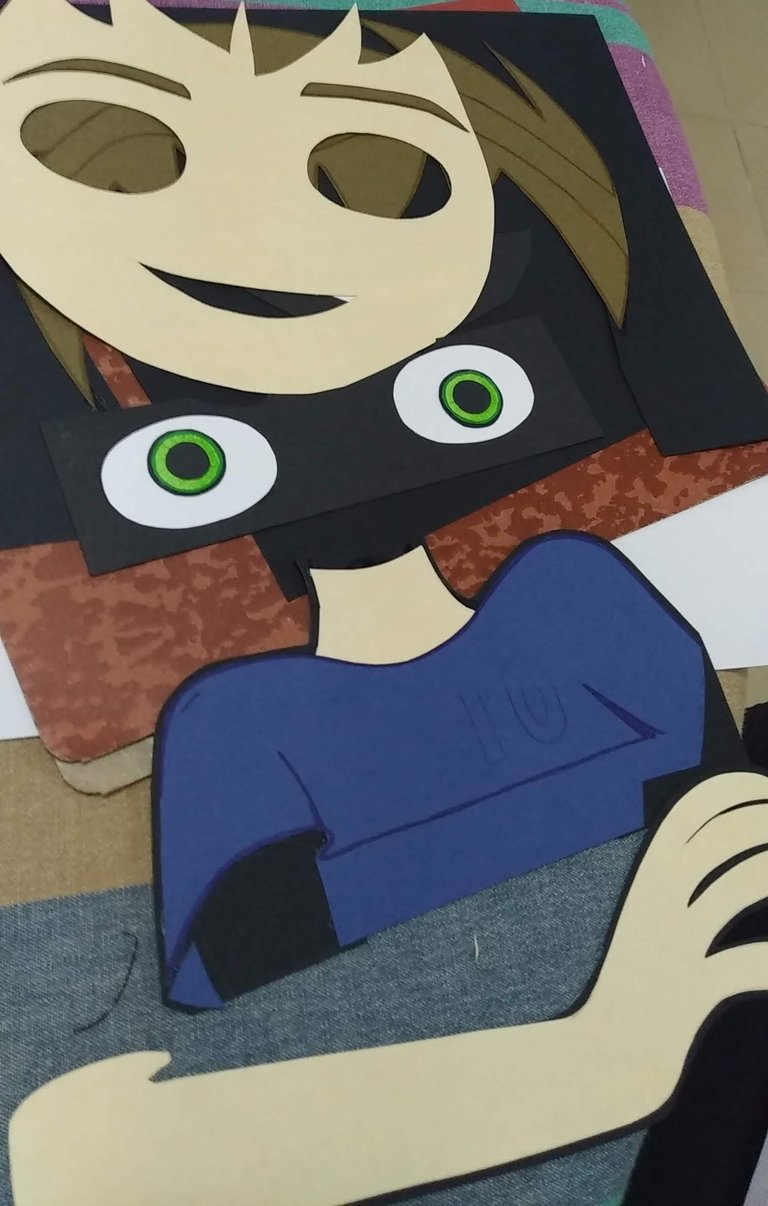
- Cada pieza, resaltar los bordes con marcadores de colores para darle más vistosidad.
- Como BEN tiene mucho borde negro, cada pieza deberá pegarse sobre cartulina negra y al recortar se deberá dejar un pequeño borde que sobresalga.
- Una vez listas todas las piezas con su borde negro, ensamblar las piezas siguiendo el patrón de las hojas blancas para pegar correctamente.
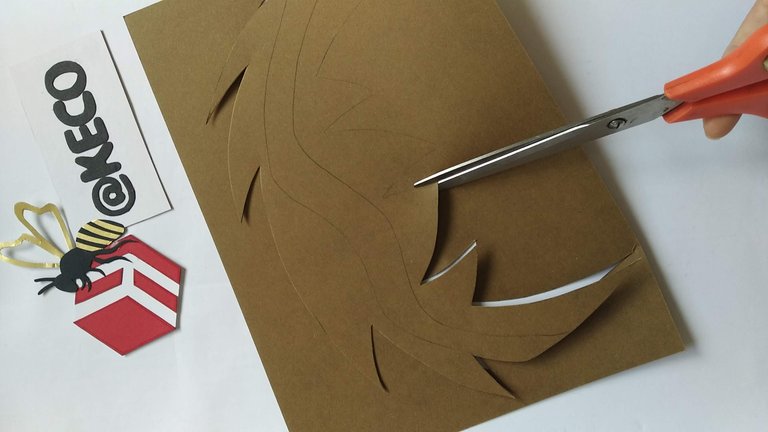
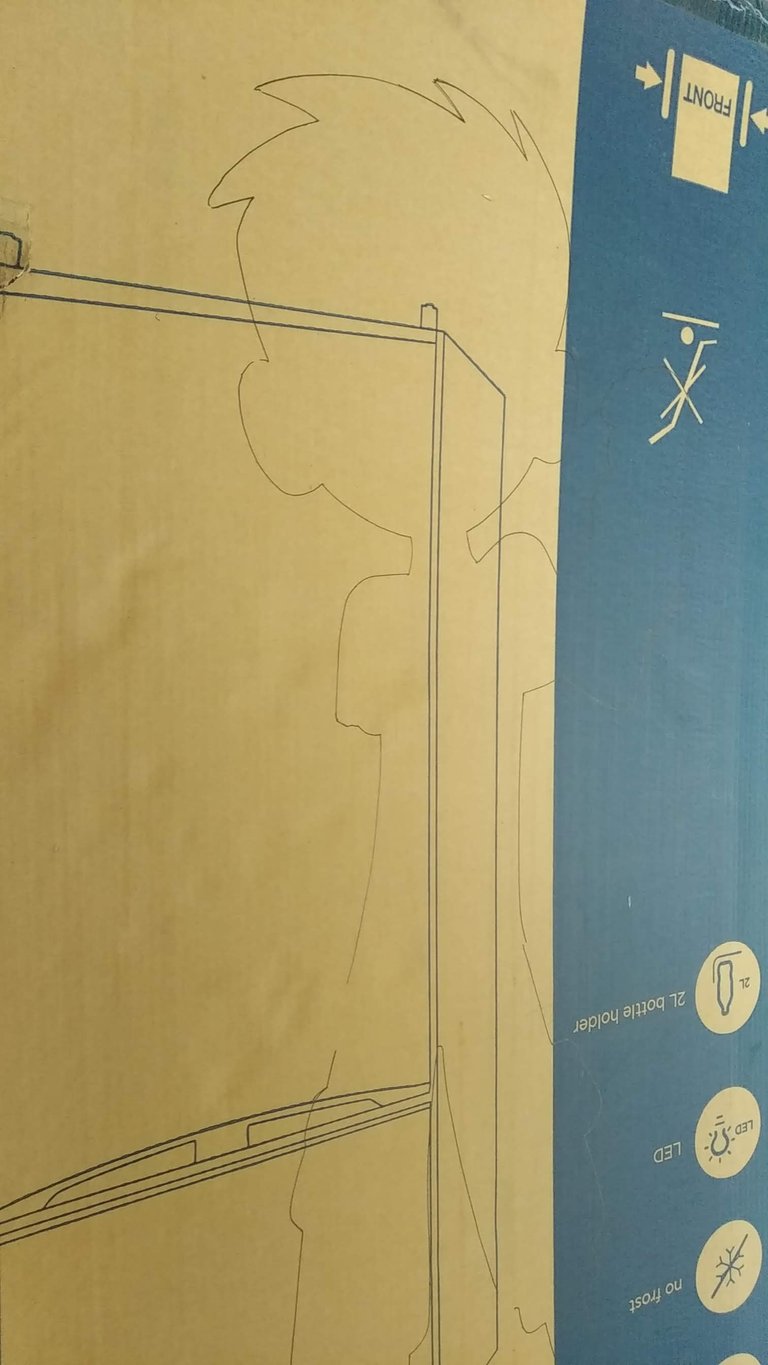
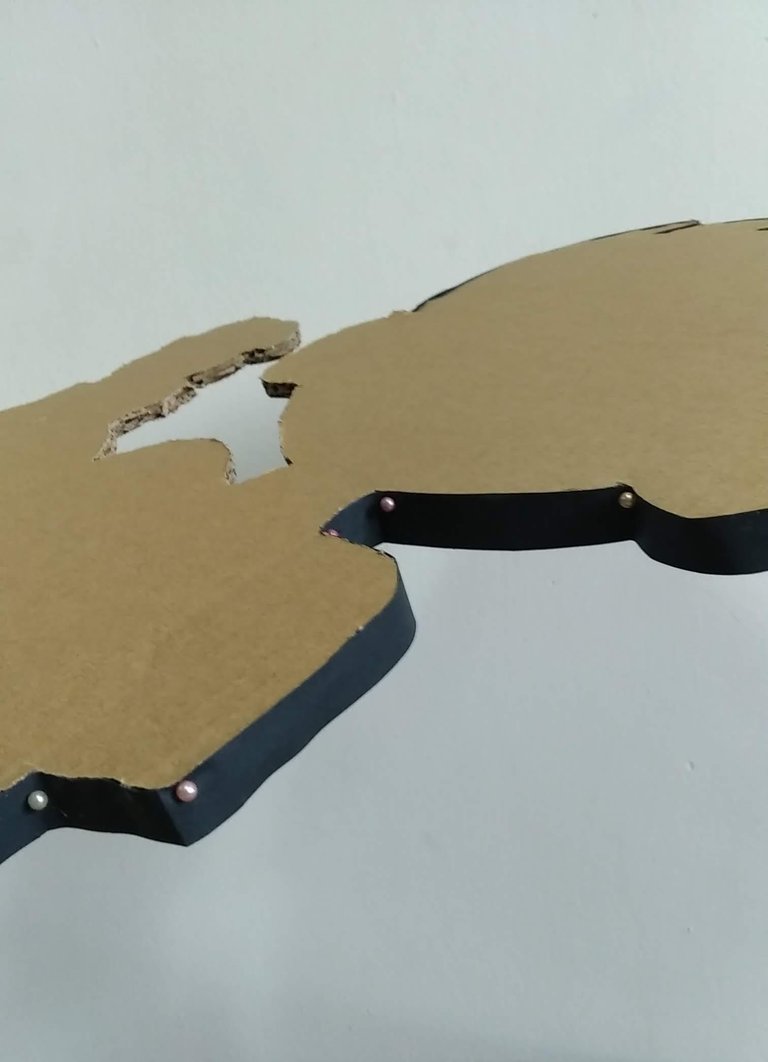
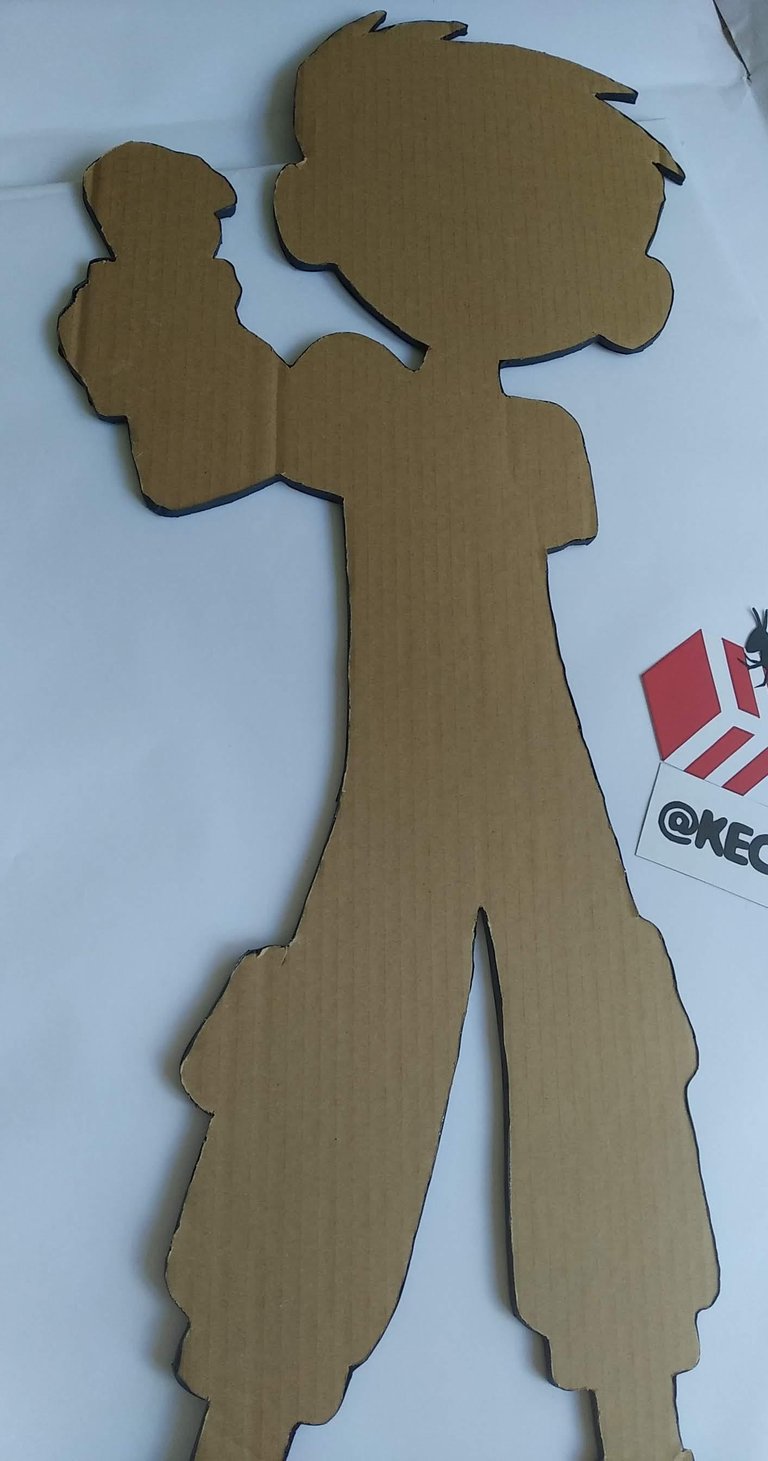
- Cuando se tenga el muñeco ensamblado, colocar encima del cartón grueso y marcar la silueta del muñeco con un lapicero. Se deberá marcar posterior al ensamblado para que quede del mismo tamaño, sin que sobresalga nada.
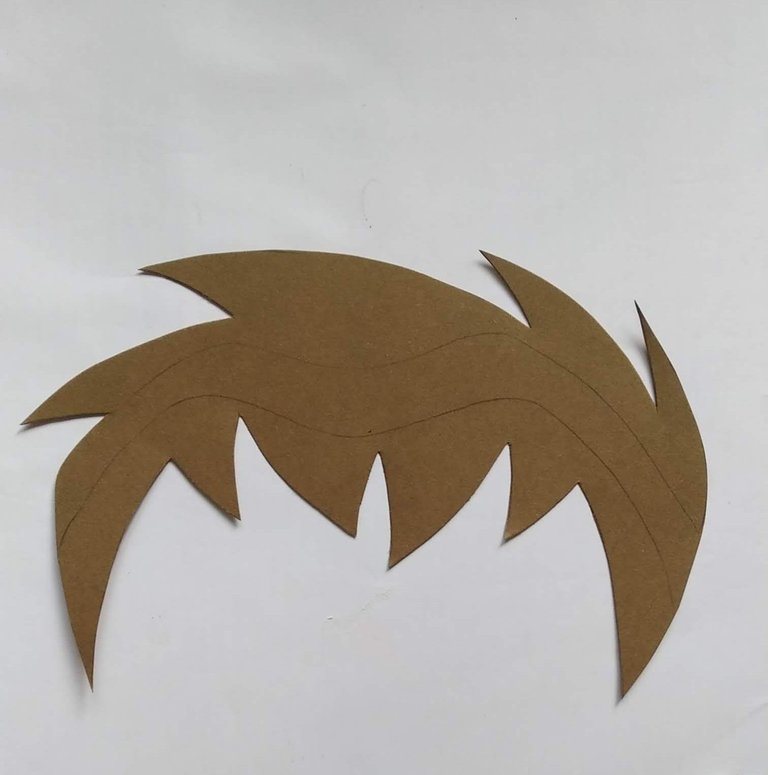
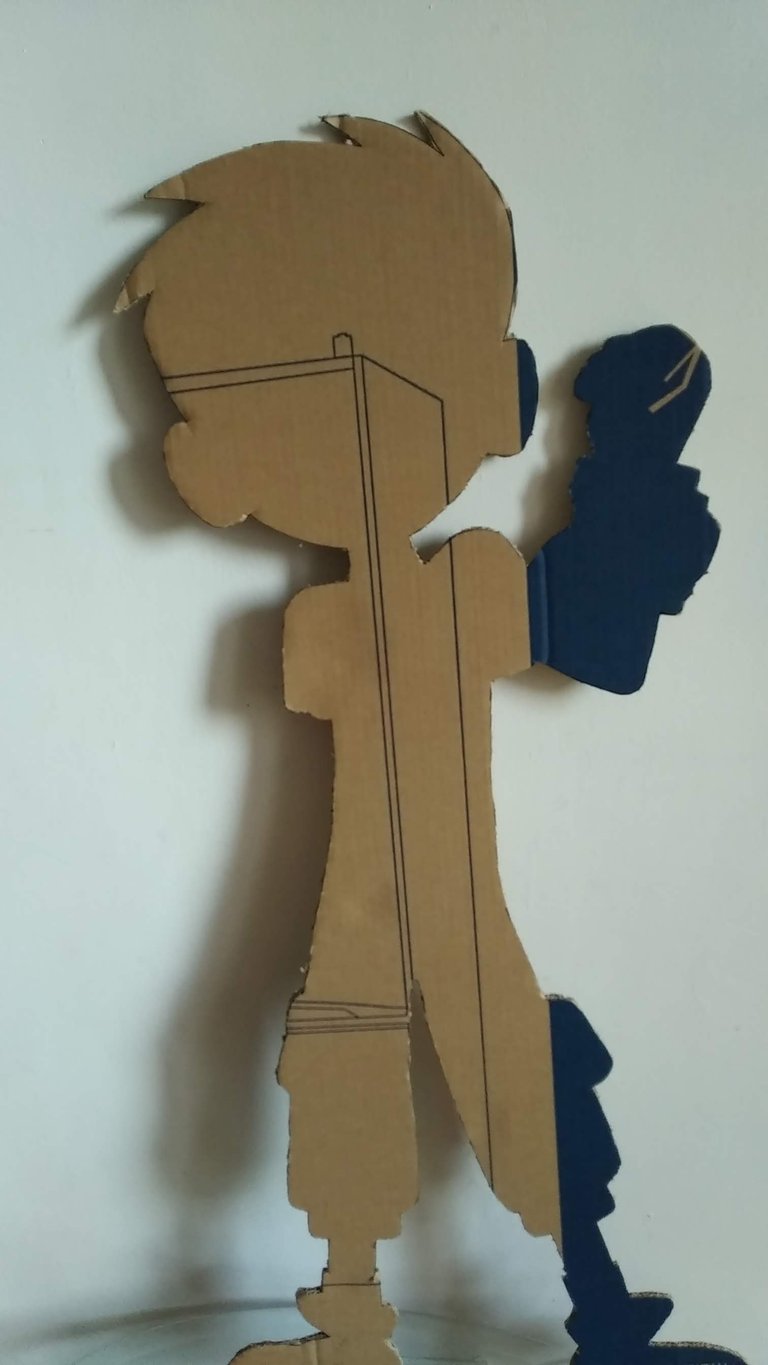
- Cortar poco a poco la silueta del muñeco con la ayuda de un exacto.
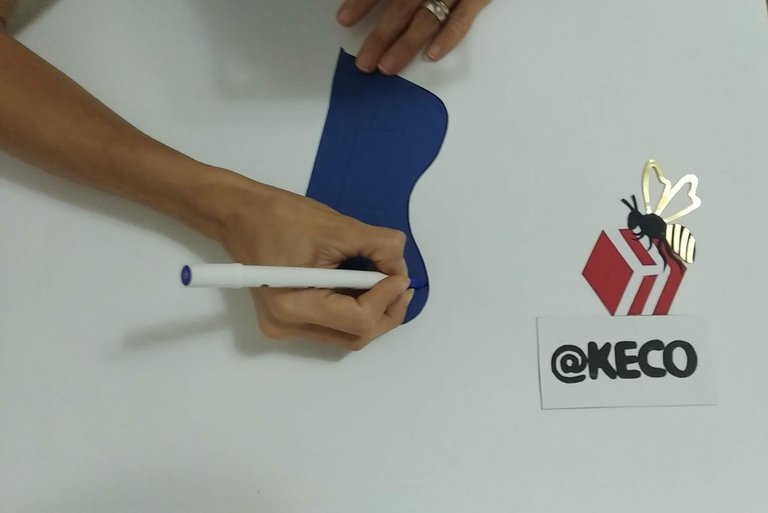
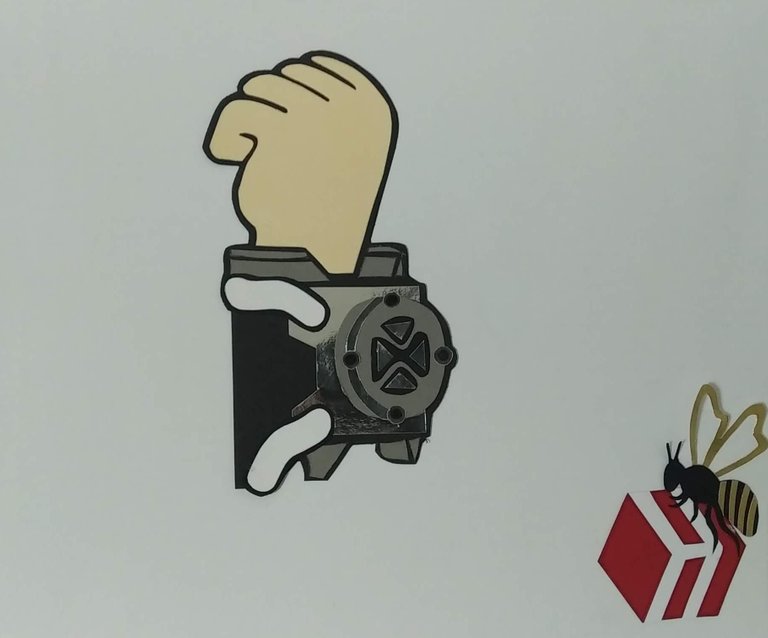
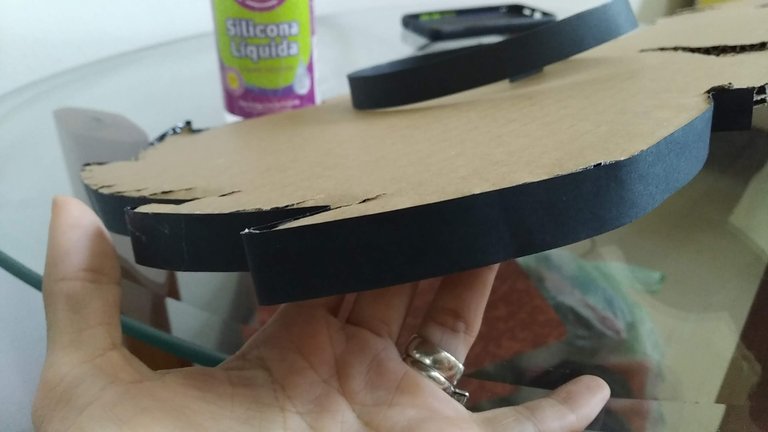
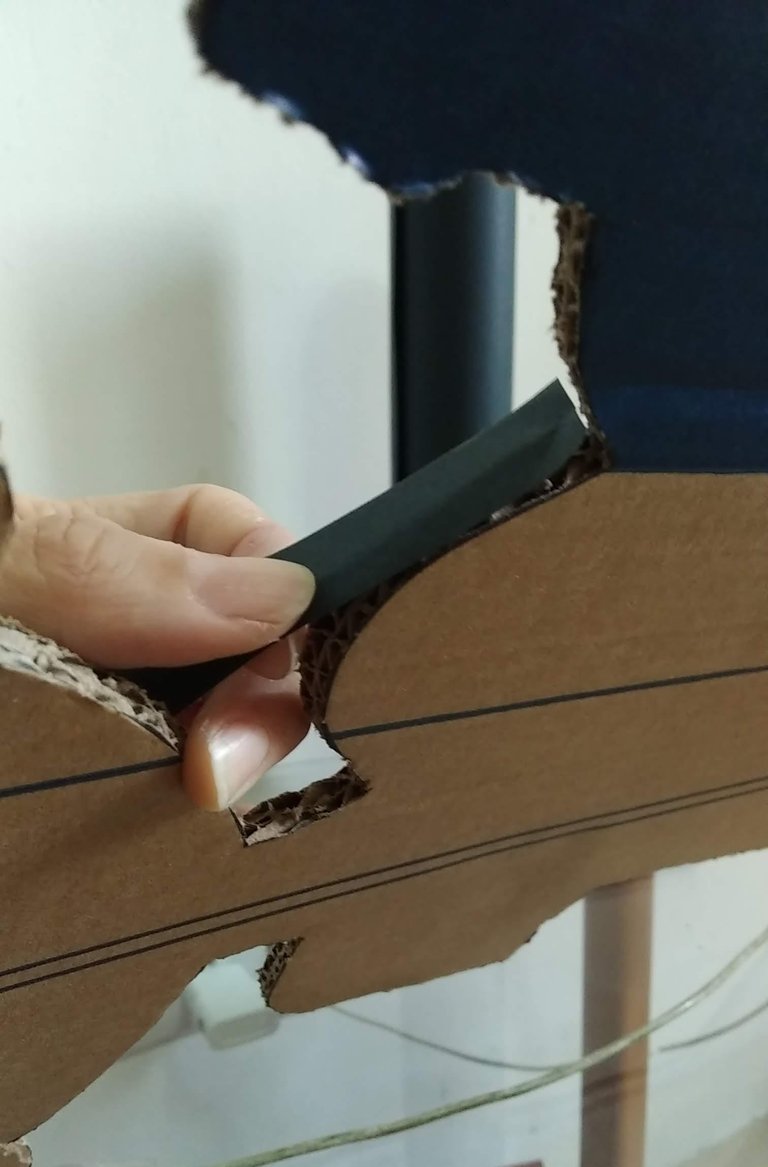
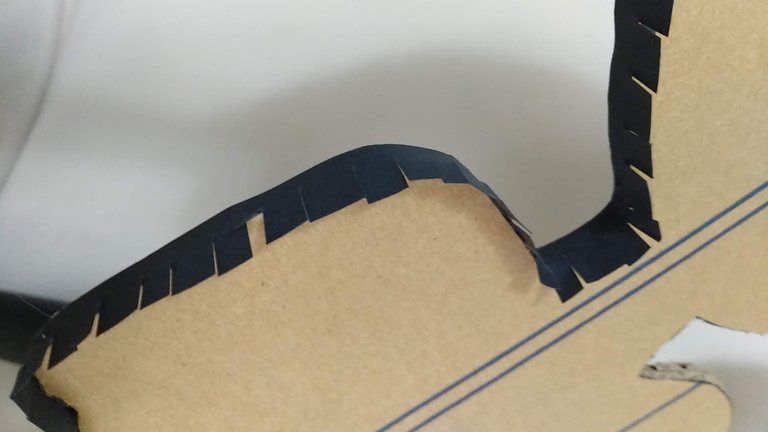
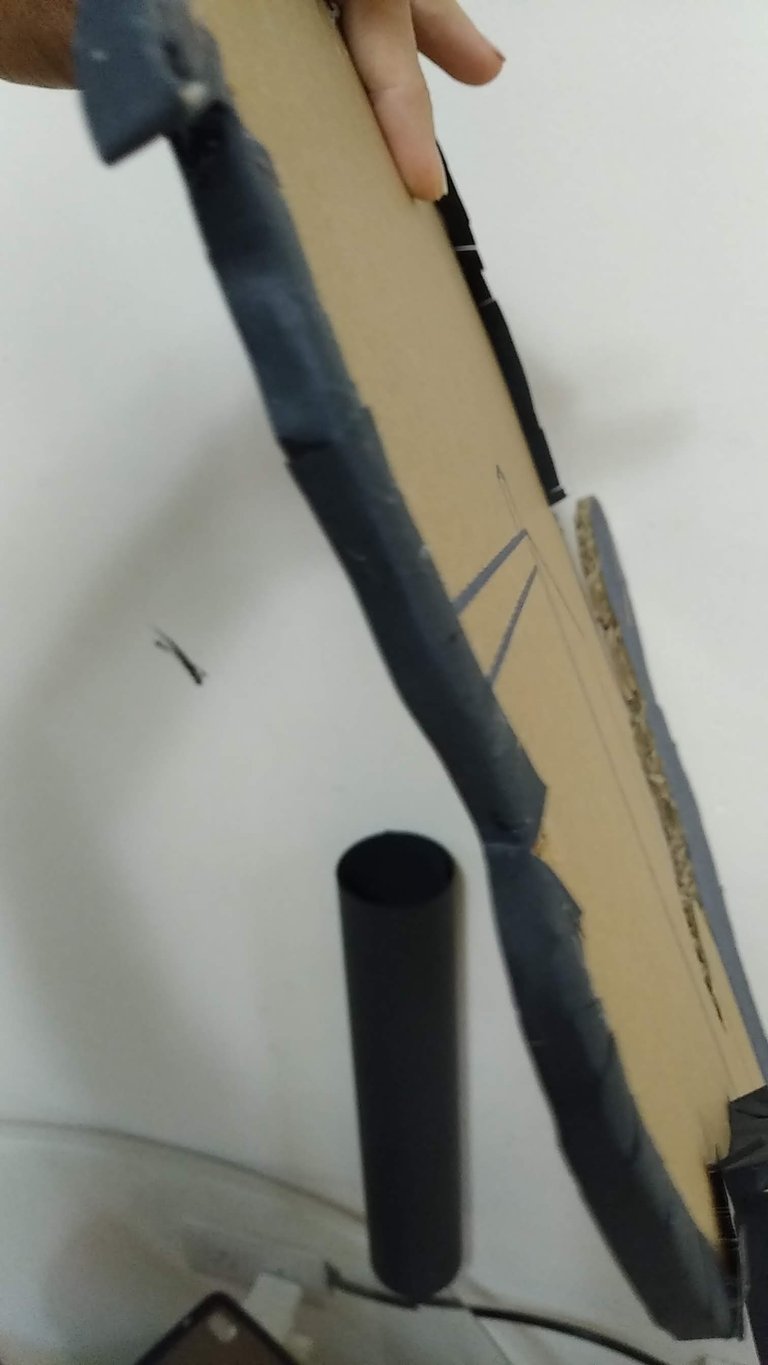
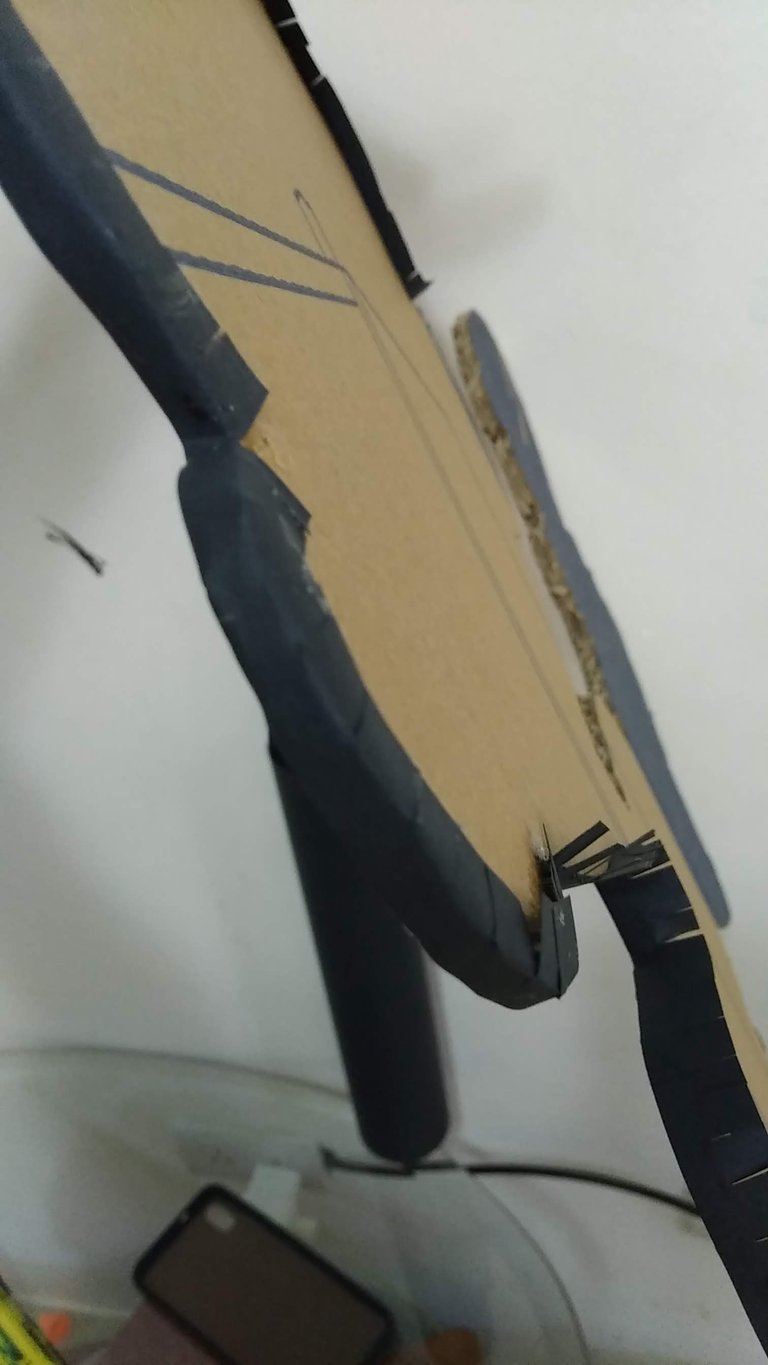
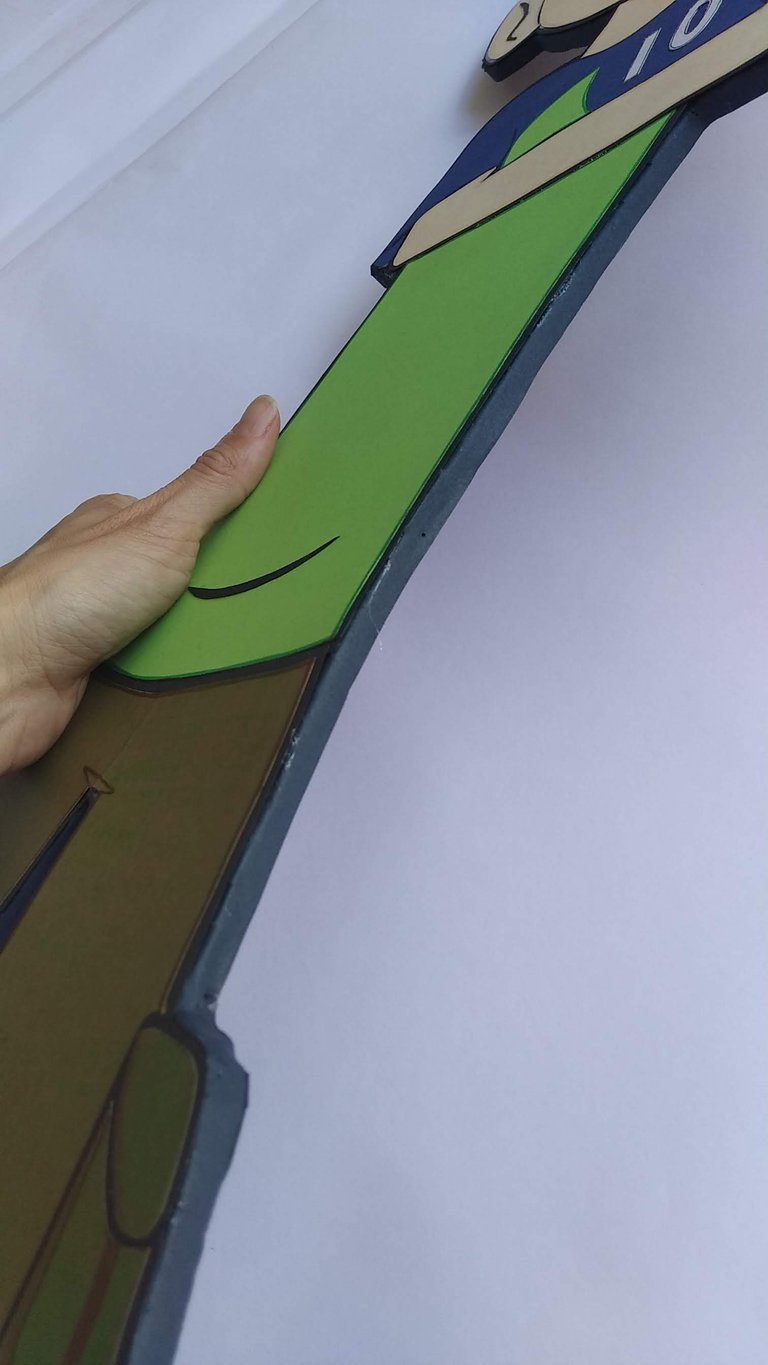
- Para garantizar la estética y evitar el borde del cartón se vea, se deberá cortar tiras de cartulina negra (el ancho dependerá del grueso del cartón) y pegar de tal manera que solo sobresalga hacia el lado donde se pegará el muñeco. De esta manera el borde se cubrirá, y la parte posterior quedará al natural con el cartón expuesto.
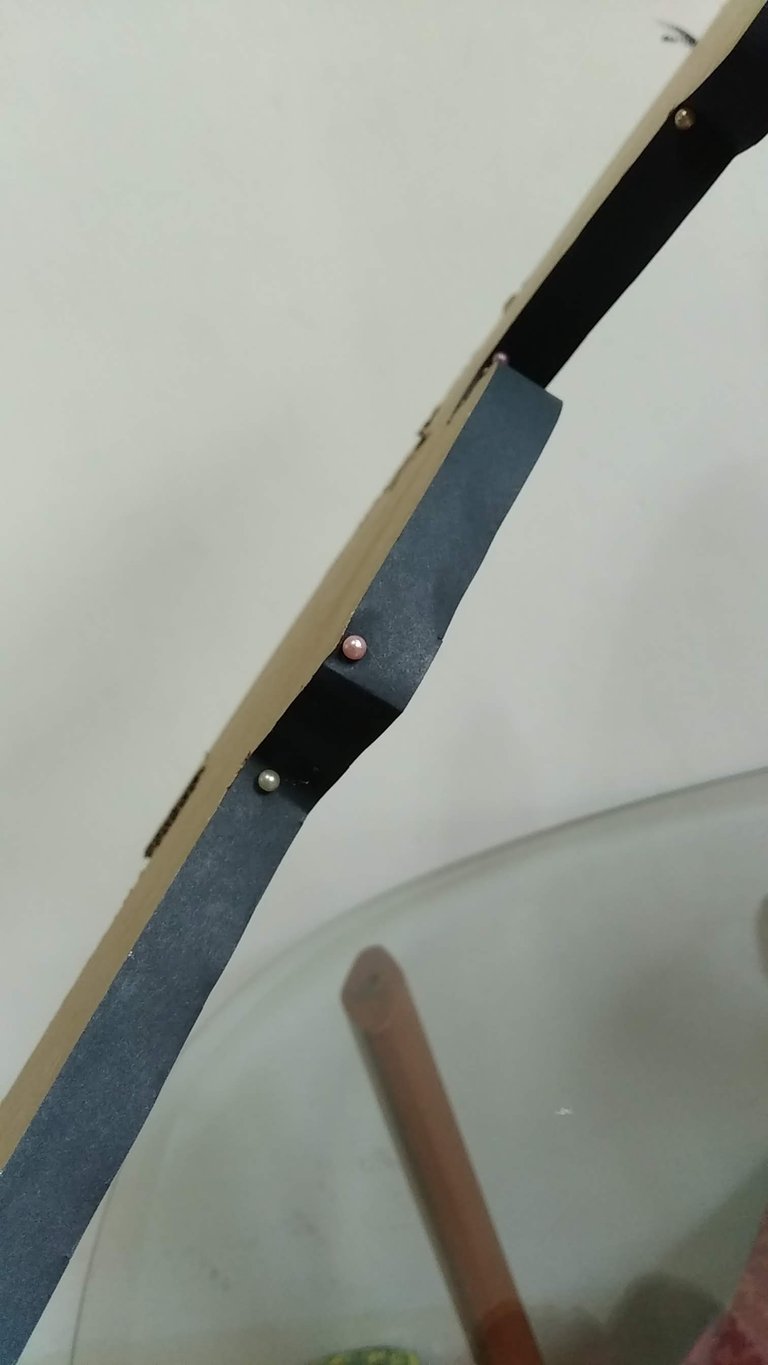
- A medida que se vaya pegando la cinta negra con la ayuda del silicón frio, ir colocando alfileres de cabeza para evitar se mueva la cinta mientras se seca. El lado que sobresalga hacia el área donde se pegará BEN, hacerle cortes y pegar también con silicón frío.
- Con la silueta lista, con el borde negro, pegar el muñeco previamente ensamblado con la ayuda del silicón frio.
- ¡Listo a disfrutar de la magia de crear en casa! (para colgar en la pared puede usarse cinta doble pega)
English
Hello friends at Hive, I hope you are very well, in good health, which is the most important thing.
In this post I want to show you a doll that would not only decorate the birthday of my little friend Noel, but also after that would decorate his room. Noel is a super cute and cuddly boy, a fan of the cartoon "Ben 10", so his mother decided to please him and celebrate his magical five (5) years with a meeting in the best BEN10 style.
For this celebration, I made the BEN10, the cake topper and a doll for the table. Today I'll show you the BEN10 and in the following posts I'll show you the rest; I'm separating it like this so the post won't be so heavy with so many step by step photos.
This Ben 10 is more than a meter long and is made with thick cardboard and colored cardboard. Working with colored cardboard is wonderful because it gives any creation a quality that distinguishes itself from that which is painted or printed, I love cardboard.
Without further ado and hoping you enjoy the work done with love , I leave you the materials used, the process and the images of the work.
- Ben 10 design or template
- Thick cardboard (preferably double channel).
- Color cardstock according to the design of the character, for this doll we used: blue, skin, brown, apple green, white, black.
- Silver metallic cardboard (for the bracelet).
- Color markers
- Cold silicone
- Cutter
- Scissors
- Head pins
- Ruler
- Make in white sheets the design of the doll, this in the measures that you want, this one was thought to be more than one meter long.
- Each piece that makes up the design, mark it and cut it in the corresponding cardboard.
- Highlight the edges of each piece with colored markers to make it more colorful.
- Since BEN has a lot of black border, each piece should be glued on black cardboard and when cutting out a small border should be left sticking out.
- Once all the pieces are ready with their black border, assemble the pieces following the pattern of the white sheets to glue them correctly.
- Once the doll is assembled, place it on top of the thick cardboard and mark the silhouette of the doll with a pencil. It should be marked after assembly so that it is the same size, without anything sticking out.
- Cut little by little the silhouette of the doll with the help of an exacto.
- To ensure aesthetics and avoid the edge of the cardboard to be seen, cut strips of black cardboard (the width will depend on the thickness of the cardboard) and glue in such a way that it only protrudes to the side where the doll will be glued. In this way the edge will be covered, and the back will be left natural with the cardboard exposed.
- As you glue the black tape with the help of the cold silicone, place pins on the head to prevent the tape from moving while it dries. The side that sticks out towards the area where BEN will be glued, make cuts and also glue with cold silicone.
- With the silhouette ready, with the black border, glue the previously assembled doll with the help of cold silicone.
- Ready to enjoy the magic of creating at home! (NOTE: double-stick tape can be used to hang on the wall).
Translated with www.DeepL.com/Translator (free version)
IMÁGENES / IMAGES
SALUDOS / REGARDS
Todas las Fotos fueron tomadas con mi teléfono Redmi 7A.
Contenido original de @keco (fotos y texto) - Todos los derechos reservados Publicado en HIVE así como en mi instagram : http://instagram.com/carton_pintura_algo_mas
All Photos were taken with my Redmi 7A phone.
Original content from @keco (photos and text) - All rights reserved Posted on HIVE as well as on my instagram: http://instagram.com/carton_pintura_algo_mas
Congratulations @keco! You have completed the following achievement on the Hive blockchain and have been rewarded with new badge(s) :
Your next target is to reach 90 posts.
You can view your badges on your board and compare yourself to others in the Ranking
If you no longer want to receive notifications, reply to this comment with the word
STOP¡Síiiii! hacia allá vamos @hivebuzz, hacia los 90 post y más... gracias por estar atentos a este tipo de reportes que nos hacen reflexionar lo mucho que hemos recorrido y los logros que hemos alcanzado, sus reportes me motivan e impulsar a seguir creando contenido de calidad para todos ustedes.
Saludos, bendiciones y éxitos.
Yesssssssss! that's where we're headed @hivebuzz, towards 90 posts and more.... thanks for being attentive to this kind of reports that make us reflect how far we have come and the achievements we have reached, your reports motivate me and encourage me to continue creating quality content for all of you.
Greetings, blessings and success.
De nada @keco, es un placer 😊🌹
Apóyenos también y vote por nuestro testigo.
Recibirá una insignia adicional y un voto más fuerte de nuestra parte cuando le notifiquemos.
Te deseamos un buen fin de semana 😄🌹
Gracias @qurator por el apoyo, un fuerte abrazo.
Saludos, bendiciones y éxitos.
I love the creativity you used and the fact that you added the Hive logo with your name, I really like it!
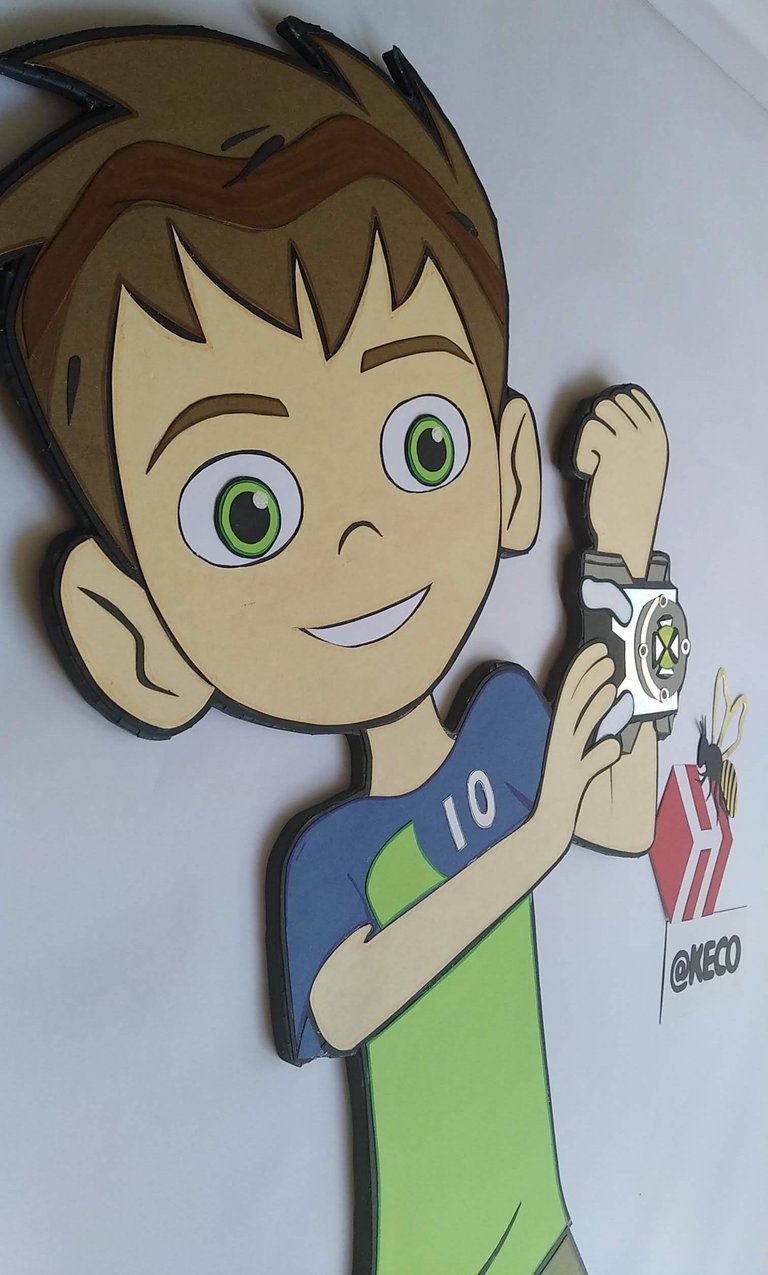
Hola @roadstories, Gracias por visitar y comentar. Este Ben10 es un bebé consentido. El logo de Hive y mi nombre de usurario fue un proyecto creado especialmente para identificar esa imagen miniatura que acompañará mis publicaciones acá en Hive, me alegra te guste. (Puedes ver el paso a paso del logo en mis publicaciones anteriores)
Saludos, bendiciones y éxitos.
Hi @roadstories, Thanks for visiting and commenting. This Ben10 is a spoiled baby. The Hive logo and my username was a project created especially to identify that thumbnail image that will accompany my posts here on Hive, I'm glad you like it. (You can see the step by step of the logo in my previous posts)
Greetings, blessings and success.
Esta super bonito, de verdad. Te quedo espectacular! Saludos!
Gracias mi estimada @gisland, me alegra te guste. Un fuerte abrazo.
Saludos, bendiciones y éxitos
Guao! qué genial! gracias por compartirnos tu hermosa publicación. Tiene su nivel de dificultad, te ha quedado super impecable y vendible, podrías emprender fácilmente.
Nos ofreces muchas ideas aquí a través de tu paso a paso, estoy segura que muchos lo intentaremos.
Hola @equipodelta gracias por visitar y comentar. Me alegra mucho la valoración realizada a la publicación. Parece difícil pero no lo es, de hecho se hace súper rápido de hacer. Siempre me ha encantado hacer manualidades y aunque no me dedico por completo a esto, forma parte de mi vida y de vez en cuando he realizado encargos especiales.
Gracias nuevamente.
Saludos, bendiciones y éxitos.
Saludos! ha sido una gran manualidad. Eres toda una especialista para esas decoraciones. Tienes una calidad de detalle muy bueno y un trabajo muy limpio. Se nota que le dedicas tiempo y obviamente tienes práctica en eso.
Hola @suzaku8, gracias por tener un buen comentario, de esos que sacan sonrisas. Me encanta hacer manualidades, es algo que disfruto hacer porque me relaja mucho, y cuando el trabajo lo acompaño de una buena música, de esas que me gusta cantar en voz súper alta, todo fluye mejor jejeje. No creas que soy experta en manualidades, estoy muy lejos de serlo, pero a las cosas que hago me gusta hacerlas con exagerado amor, mirando los detalles y cuidando se vea prolijo, me encanta crear cosas sencillas parezcan lujosas jejeje. Este Ben por ejemplo es el primero que hago de este tamaño, pero antes de hacerlo me tomé el tiempo de reflexionar como saldría mejor, y creo el resultado quedó chévere.
Gracias nuevamente.
Saludos, bendiciones y éxitos.
Trabajar manualidades con música es de lo mejor jajaja también aplico esa cuando hago origamis.
Que te digo, cuando hay dedicación y esfuerzo, los resultados se notan. Éxito para ti también.
No tengo palabras para decir lo hermoso que ha quedado!! Está increíble y es enorme 😍 es un trabajo fabuloso, felicidades.
Hola @dojeda, gracias por el apoyo. Si, es una pieza grande y me enorgullece lo que hice. Me alegra te guste, un fuerte abrazo.
Saludos, bendiciones y éxitos.
Gracias @mayvileros por el apoyo.
Saludos, bendiciones y éxitos.
A su orden, saludos.