Español
Hola mis estimados lectores, gusto en saludarles nuevamente.
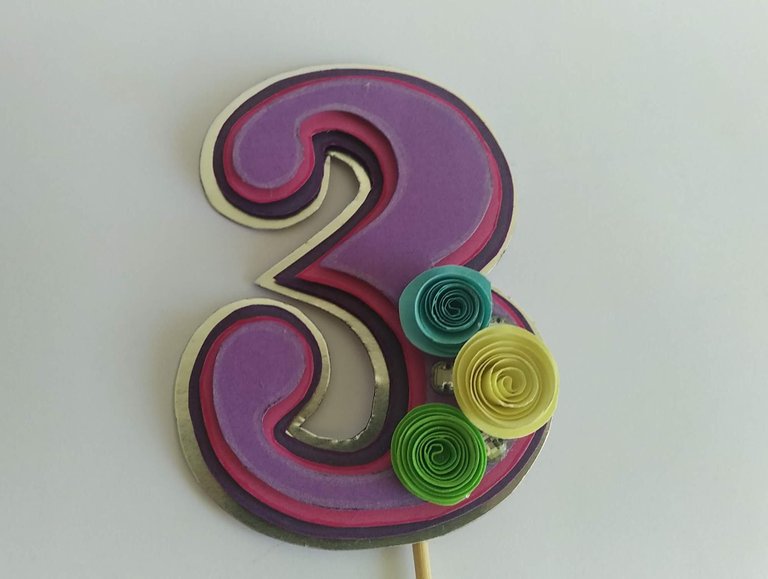
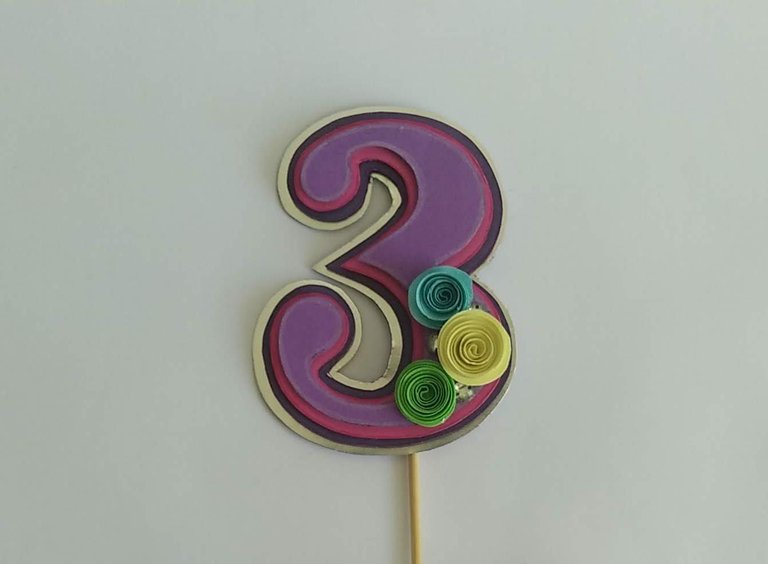
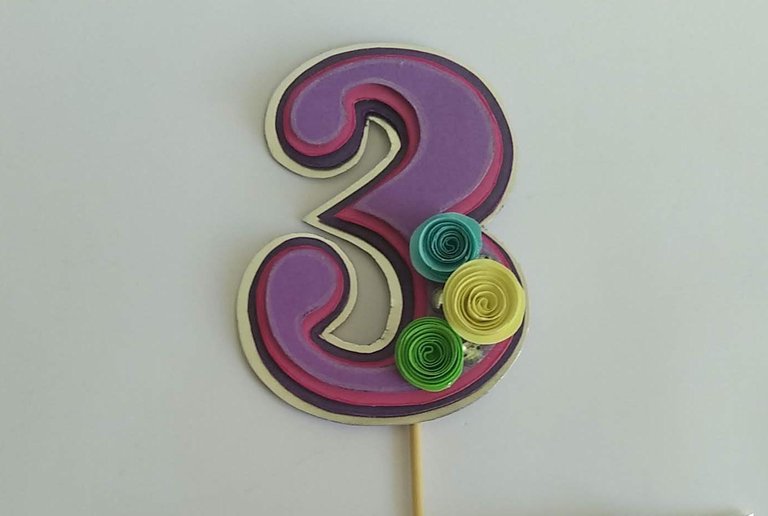
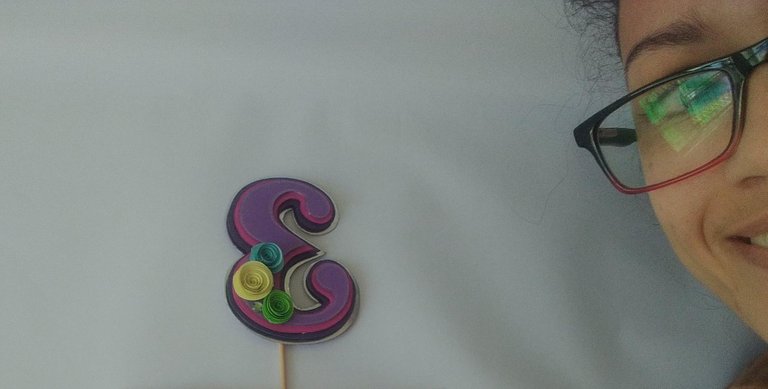
El trabajo que hoy les muestro es una de los más fáciles, rápidos y económicos que he realizado, es un número tres (3) creado para colocar en el pastel de Giuliana, una niña que adora a Rapunzel y los colores de este número está inspirado ese dibujo animado.
Sin más, y esperando disfruten del trabajo realizado les dejo los materiales utilizados, el proceso y las imágenes del trabajo.
- Cartulina color lila.
- Cartulina color rosada.
- Cartulina color morado.
- Cartulina plateada tipo espejo.
- Cartulina color verde claro.
- Cartulina color azul claro.
- Cartulina color rosa vieja.
- Foami plano de color blanco o lila claro.
- Lápiz de color blanco.
- Marcador rosado.
- Silicón frio.
- Silicón caliente.
- Palito de madera.
- tijera.
English
Hello my dear readers, nice to greet you again.
The work I show you today is one of the easiest, fastest and cheapest I have done, is a number three (3) created to place on the cake of Giuliana, a girl who loves Rapunzel and the colors of this number is inspired by that cartoon.
Without further ado, and hoping you enjoy the work I leave you the materials used, the process and the images of the work.
- Lilac color cardboard.
- Pink cardboard.
- Cardboard purple color.
- Silver mirror cardboard.
- Cardboard light green color.
- Cardboard light blue color.
- Old pink cardboard.
- Flat white or light lilac colored Foami.
- White pencil.
- Pink marker.
- Cold silicone.
- Hot glue.
- Wooden stick.
- Scissors.
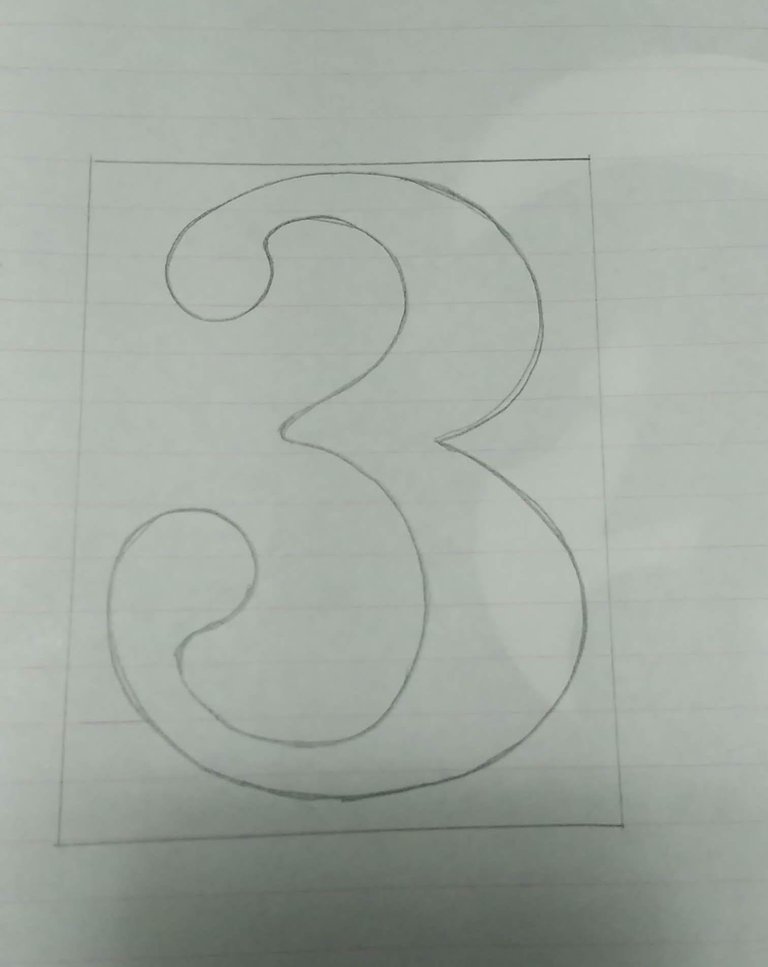
1.- Se diseña el número a elaborar en una hoja de reciclaje, de acuerdo al ancho y alto deseado. En este caso como era un pastel pequeño el numero tuvo una medida de 10*7 cm.
1.- The number to be made is designed on a recycled sheet, according to the desired width and height. In this case, as it was a small cake, the number had a measure of 10*7 cm.
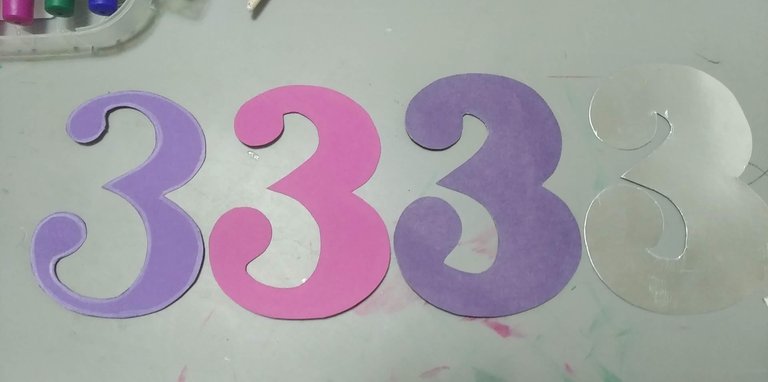
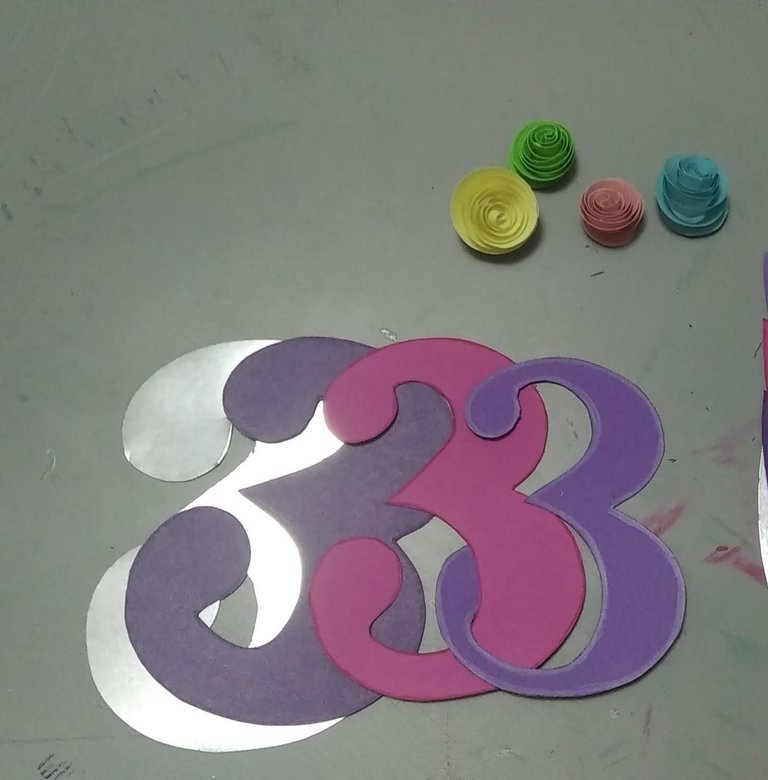
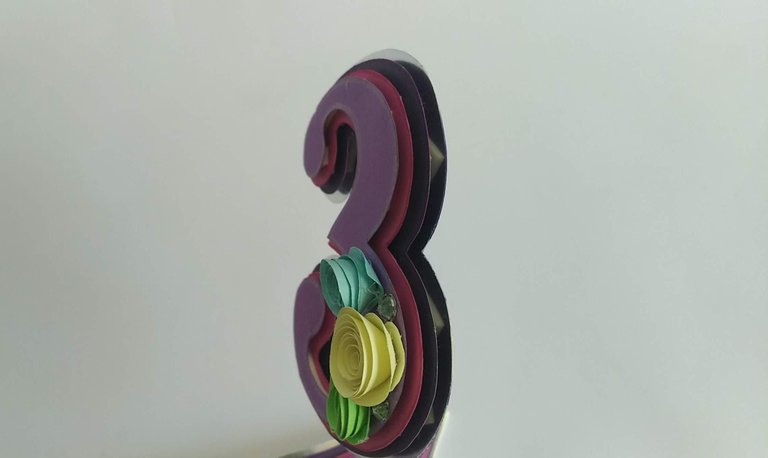
2.- Con la plantilla creada, se marca y recorta sobre la cartulina lila. Luego este número lila, sirve de plantilla para recortar el número rosado, sin embargo, este no puede ser del mismo ancho, debe ser más grande para poder lograr el efecto en capas que se desea. Luego el rosado sirve de plantilla para cortar sobre la cartulina morada y luego esta sirve de guía para marcar y cortar la cartulina plateada. Recuerden, al cortar dejar las capas siguientes a la primera mas ancha que la original, sino no se logrará el efecto en capas.
2.- With the template created, it is marked and cut out on the purple cardboard. Then this purple number serves as a template to cut out the pink number, however, this cannot be the same width, it must be larger to achieve the desired layered effect. Then the pink number serves as a template to cut on the purple cardboard and then this serves as a guide to mark and cut the silver cardboard. Remember, when cutting, leave the layers following the first one wider than the original one, otherwise the layered effect will not be achieved.
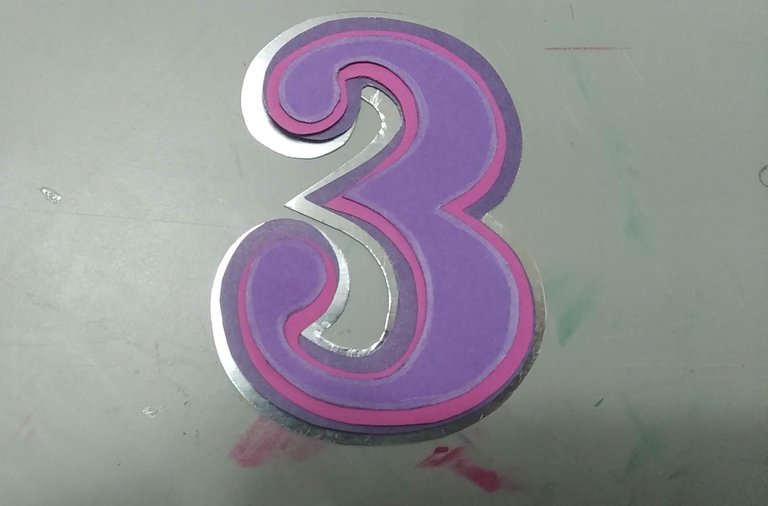
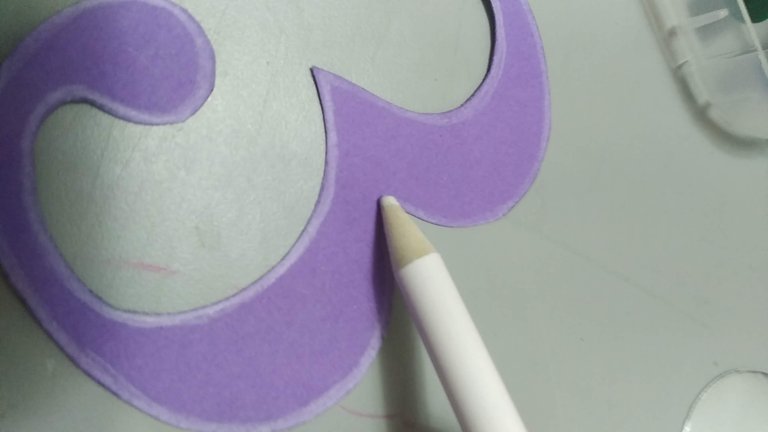
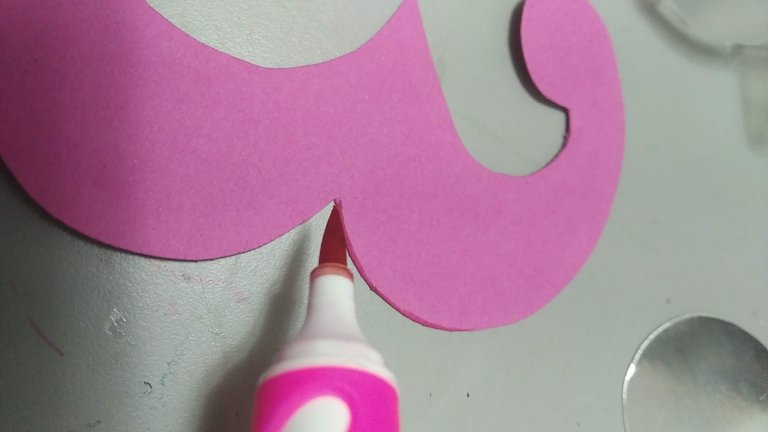
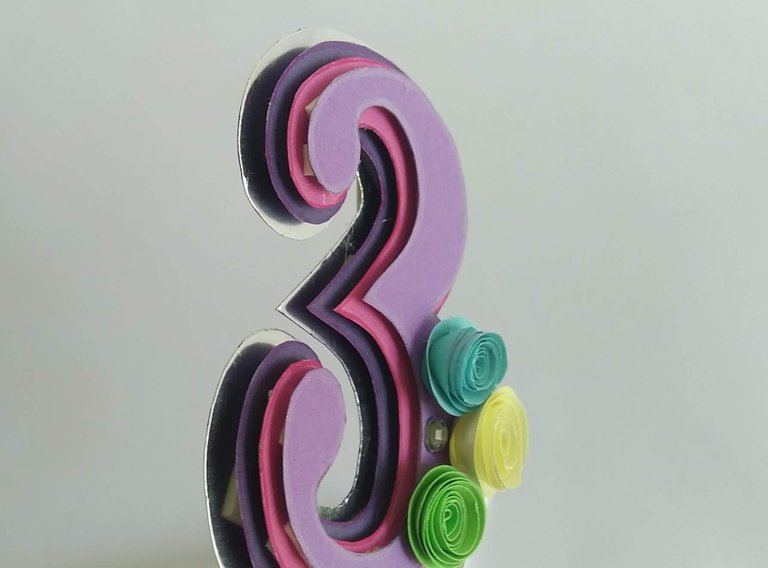
3.- A las distintas capas, aplicarles por los bordes un destello de color que les haga resaltar, al lila se le apliqué color blanco para darle más ternura al número.
3.- To the different layers, apply a flash of color around the edges to make them stand out. White was applied to the lilac to give more tenderness to the number.
4.- Para hacer las pequeñas flores que irán en el número, deberán cortar pequeños espirales en las cartulinas de colores correspondientes y luego enrollar hasta formar las flores. Es importante recordar que esta técnica de flores de papel es sencilla, más sin embargo deben apretar bien al enrollar para evitar queden muy anchas.
4.- To make the small flowers that will go in the number, you will have to cut small spirals in the corresponding colored cardboard and then roll them up to form the flowers. It is important to remember that this paper flower technique is simple, but nevertheless they must be tightened well when rolling to avoid being too wide.
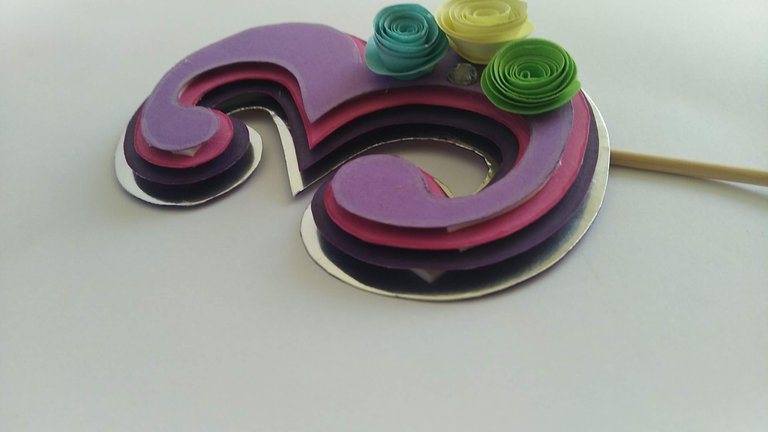
5.- Pegar con silicón frío las capas entre si, utilizando pequeños trozos de foami plano (blanco o lila) y luego pegar las flores de acuerdo al gusto, en este caso decidí pegarlas en la parte inferior del número donde la parte es más ancha.
5.- Glue with cold silicone the layers together, using small pieces of flat foami (white or lilac) and then glue the flowers according to taste, in this case I decided to glue them at the bottom of the number where the part is wider.
6.- Pegar con silicón caliente el palito de madera por la parte posterior del número y listo, ya esta listo el número 3, ideal para completar la decoración de cualquier pastel de cumpleaños.
6.- Glue with hot silicone the wooden stick on the back of the number and ready, the number 3 is ready, ideal to complete the decoration of any birthday cake.
Espero les haya gustado y sobre todo se entusiasmen a crear algo parecido para sorprender a familiares y amigos.
I hope you liked it and, above all, I hope you get excited to create something similar to surprise your family and friends.
SALUDOS / REGARDS
Todas las Fotos fueron tomadas con mi teléfono Redmi 7A.
Contenido original de @keco (fotos y texto) - Todos los derechos reservados Publicado en HIVE así como en mi instagram : http://instagram.com/carton_pintura_algo_mas
All Photos were taken with my Redmi 7A phone.
Original content from @keco (photos and text) - All rights reserved Posted on HIVE as well as on my instagram: http://instagram.com/carton_pintura_algo_mas
Que lindo te quedó amiga
Kecoo saludos 🤗 por cierto se ve muy bien el uso de color y la profundidad...
Abrazos 🤗
MALOMI TV 💜
Que hermoso!!! me encanta amiga!! sigue asi... saludos
Congratulations @keco! You have completed the following achievement on the Hive blockchain and have been rewarded with new badge(s):
Your next target is to reach 12000 upvotes.
You can view your badges on your board and compare yourself to others in the Ranking
If you no longer want to receive notifications, reply to this comment with the word
STOPCheck out the last post from @hivebuzz:
Greetings, very nice. These types of decorations are being used very often, they stand out a lot.