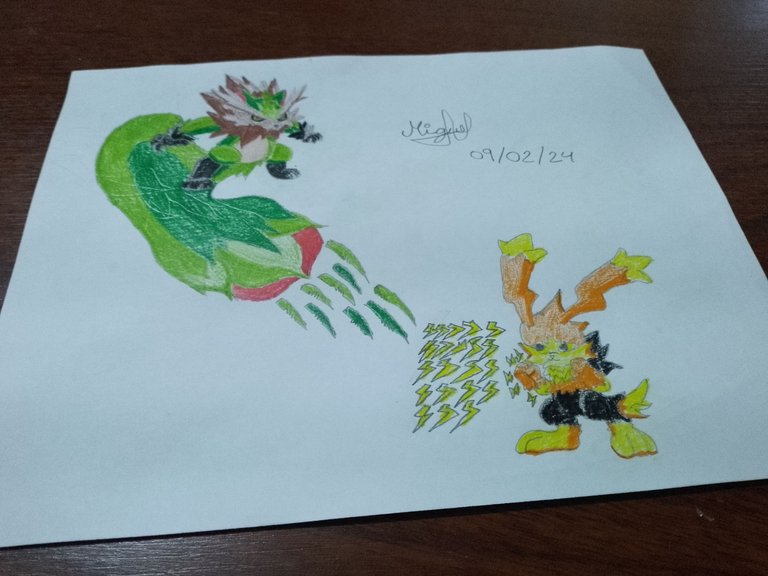
Hey, my dear @holozing community, I'm here to bring you a new drawing, as you know our beloved holozing creatures have official names and evolutions so in this little opportunity we will draw two of these evolved creatures and which ones are they, you ask? Well my friends these are "Wrackdoom" and "Zappity" and now my friends let's see how we do in this drawing and how is the final result.
Hey! Que tal mi querida comunidad de @holozing. Me encuentro por aquí para traer un nuevo dibujo, como ya saben nuestras queridas criaturas de holozing tienen nombres oficiales y evoluciones por lo tanto en esta pequeña oportunidad dibujaremos a dos de estas criaturas evolucionadas y ¿cuáles son se preguntan? Bueno mis amigos estas son “Wrackdoom” y “Zappity” y ahora mis amigos veamos que tal nos va en este dibujo y que tal nos queda el resultado final.
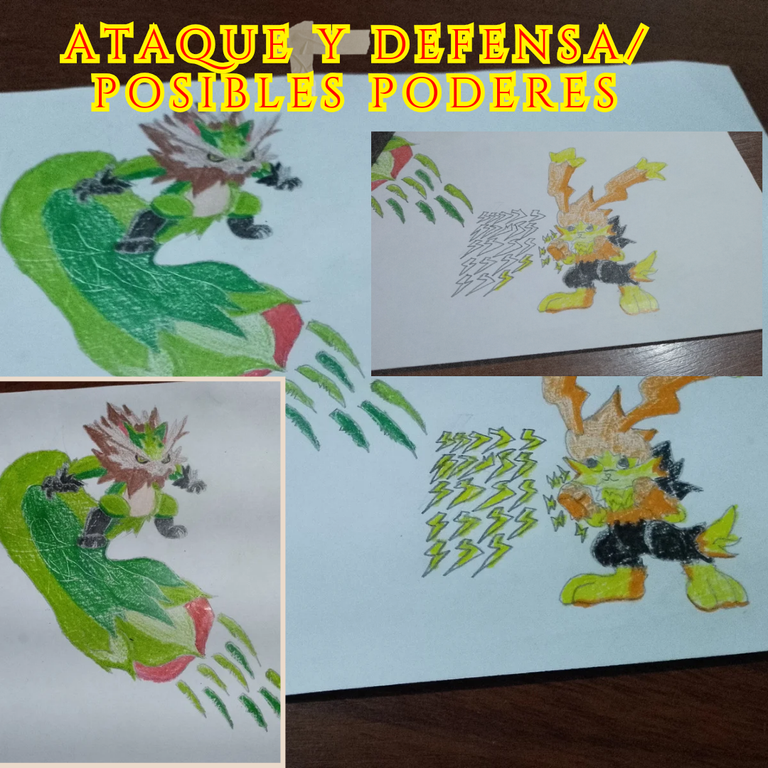
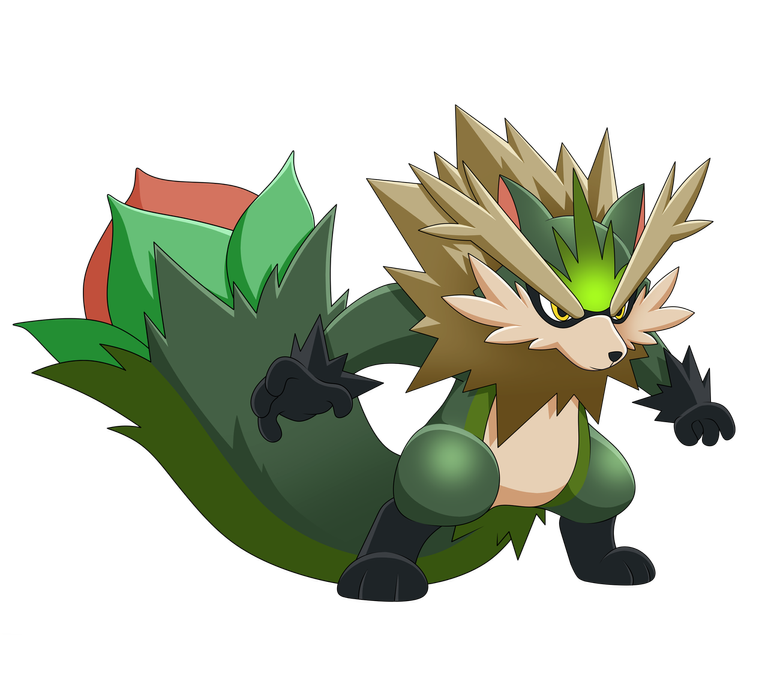
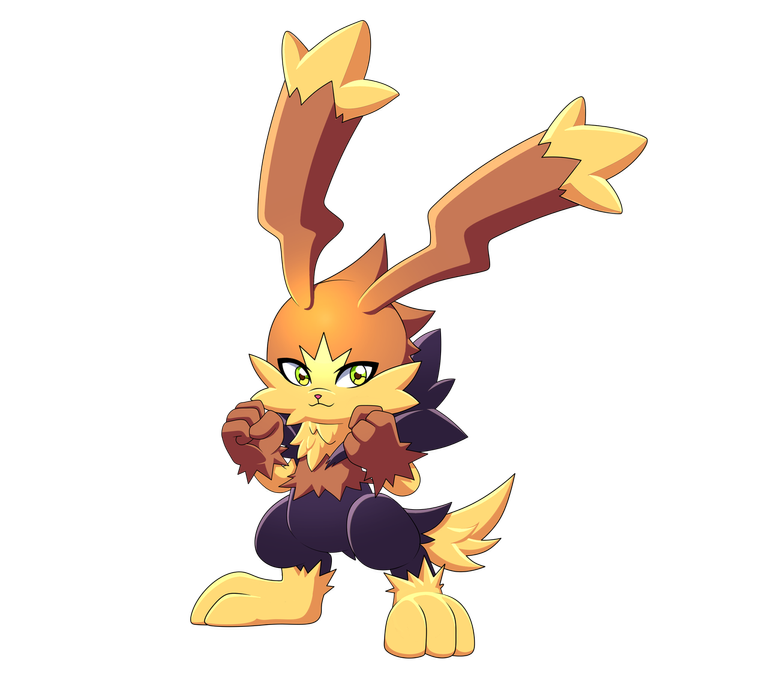
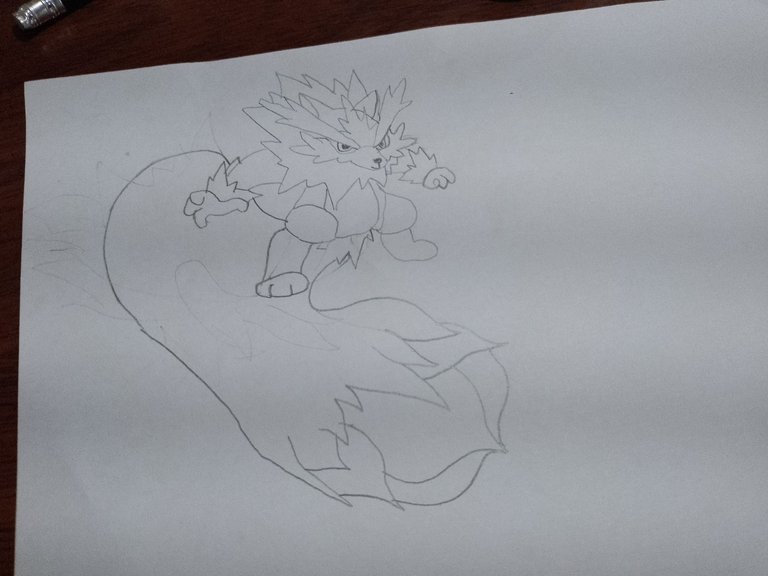
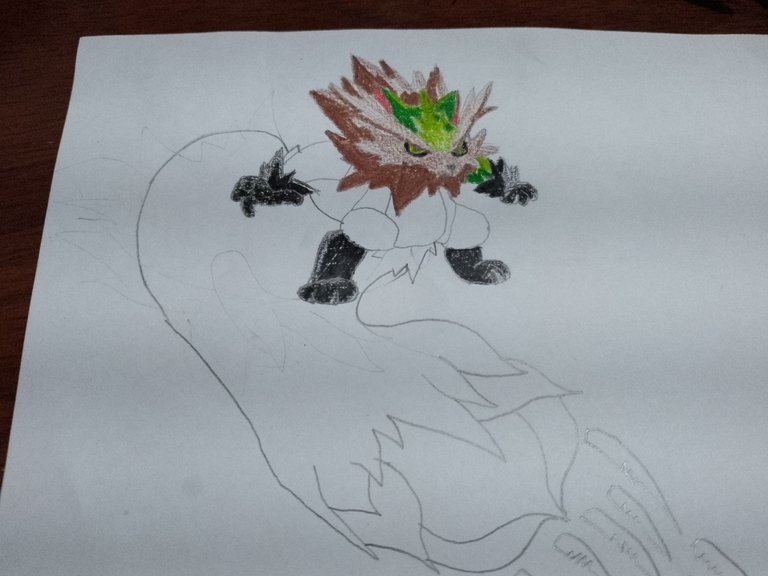
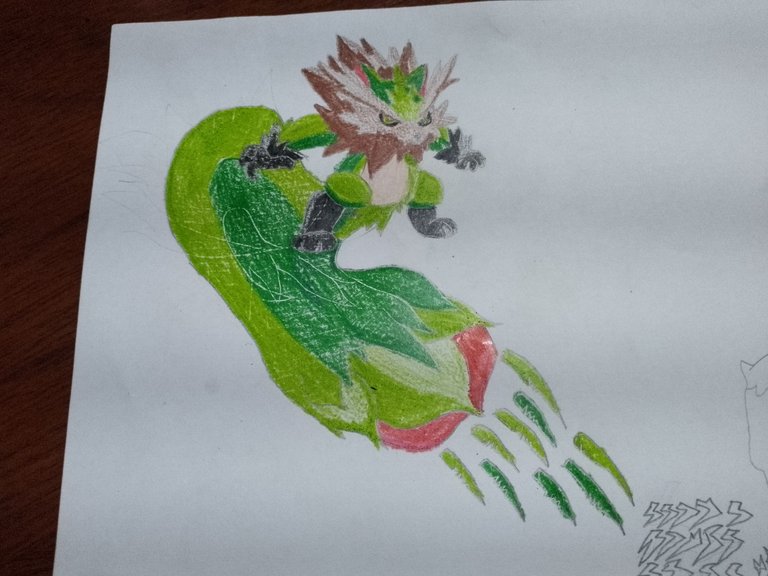
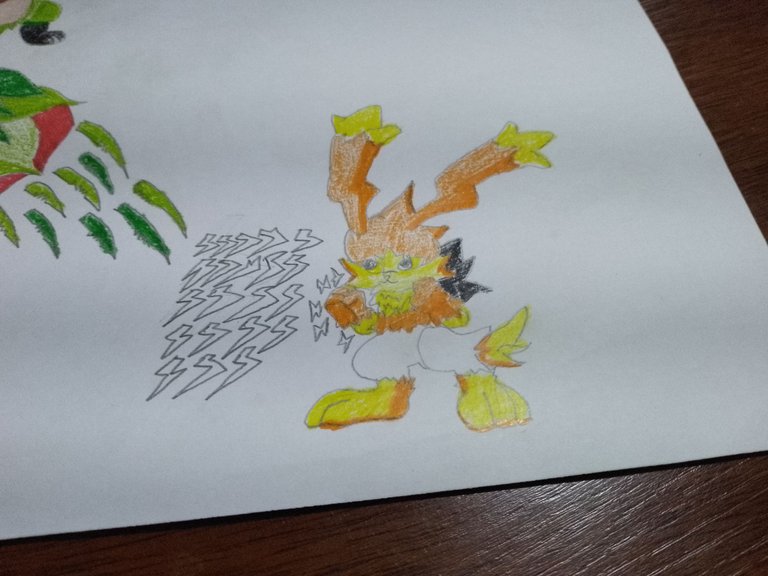
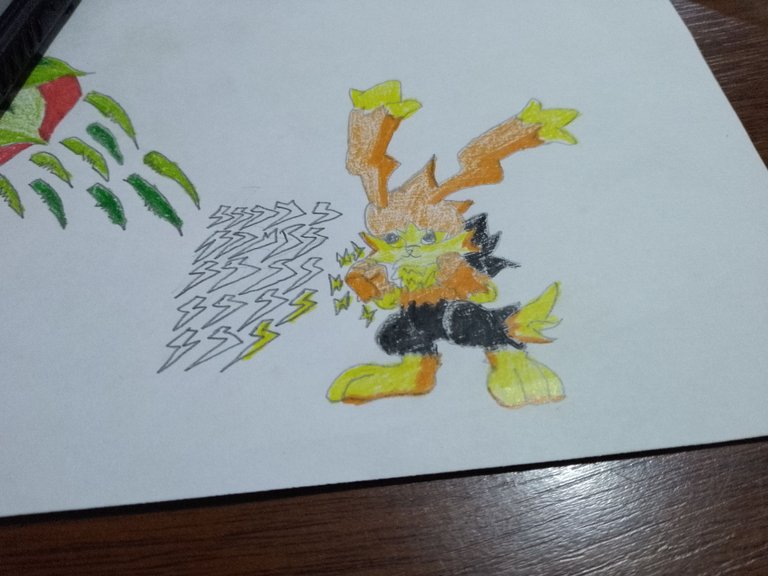
As we know our creature called grass raccoon got its name which is wrackoo and when it evolves it changes its name to wrackdoom, this evolution will be the same that we will draw without any doubt the scheme and realization of the drawing will be a little more complicated than our previous image. In the same way our little bunny was baptized as zappit and when evolving like our raccoon his name changes to zappity. It is to imagine that with its evolution the strength, agility and its attack must change and improve in each case each one has its strong point; in the case of wrackdoom it is necessary to be very careful with its tail and zappity is very fearsome for its fists and kicks, but it is necessary to be careful also of its slaps.
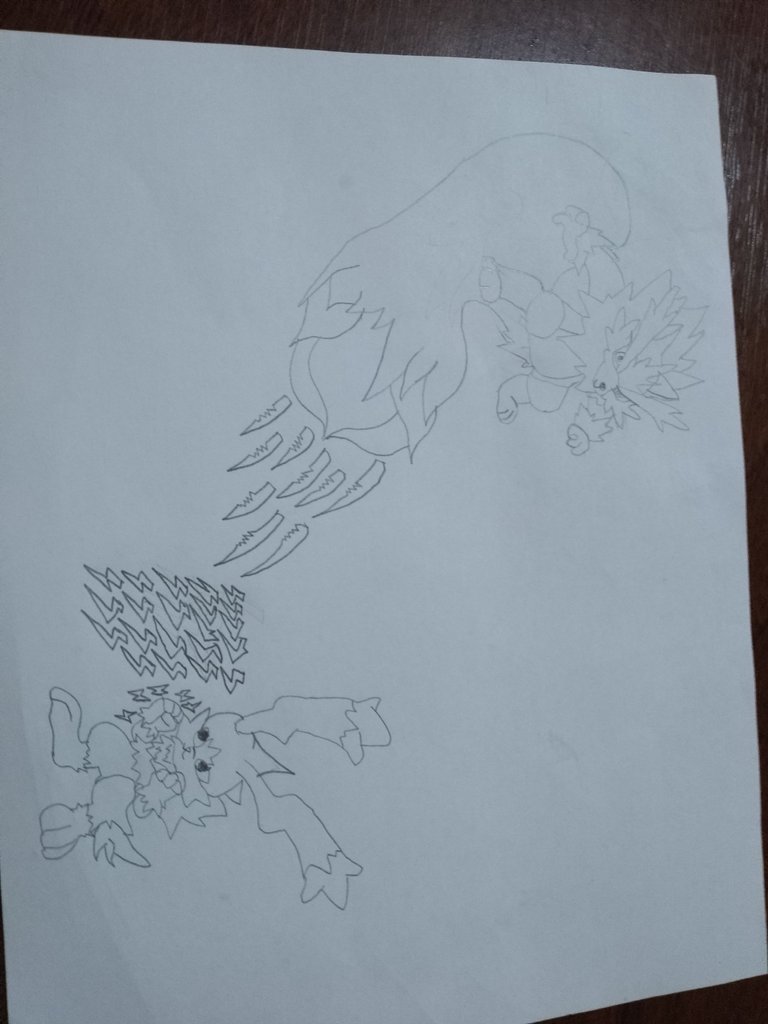
However, we do not know the specific powers of these beasts so I took the pleasure of making a drawing in which these two beasts fight each other applying defensive and offensive powers. In the case of wrackdoom we will take the tail as the source of this attack power, which consists of enlarging its tail to release a large amount of very sharp and very dangerous grass needles, for this zappity must apply its defensive barrier where he will have to position his fists in fighting position and with the electricity accumulated in his hands, create an electric barrier that protects him from his attack. However, this defensive power could be of a special type and can be used only once in battle.
Como sabemos nuestra criatura llamada mapache de hierba obtuvo su nombre el cual es wrackoo y al evolucionar cambia su nombre a wrackdoom, dicha evolución sera la misma que dibujaremos sin duda alguna el esquema y realización del dibujo sera un poco más complicada que nuestra anterior imagen. De igual forma nuestro pequeño conejito fue bautizado como zappit y al evolucionar al igual que nuestro mapache su nombre cambia a zappity. Es de imaginar que con su evolución la fuerza, agilidad y su ataque debe cambiar y mejorar en cada caso cada uno tiene su punto fuerte; en el caso de wrackdoom hay que tener mucho cuidado con su cola y zappity resulta muy temible por sus puños y patadas, pero hay que cuidarse también de sus bofetadas.
Sin embargo, no conocemos los poderes específicos de estas bestias por lo cual me tomo la dicha de realizar un dibujo en el cual estas dos bestias luchen entre sí aplicando poderes defensivos y ofensivos. En el caso de wrackdoom tomaremos la cola como la fuente de este poder de ataque, el cual consiste en que agrande su cola para soltar una gran cantidad de agujas de hierba muy filosas y muy peligrosas, para esto zappity deberá aplicar su barrera defensiva donde tendrá que posicionar sus puños en posición de lucha y con la electricidad acumulada en sus manos, cree una barrera electrica que lo proteja de su ataque. Sin embargo este poder defensivo podría ser de tipo especial y se pueda utilizar una sola vez en batalla.
**WHAT CREATURES WILL WE DRAW? **
**¿QUE CRIATURAS DIBUJAREMOS? **

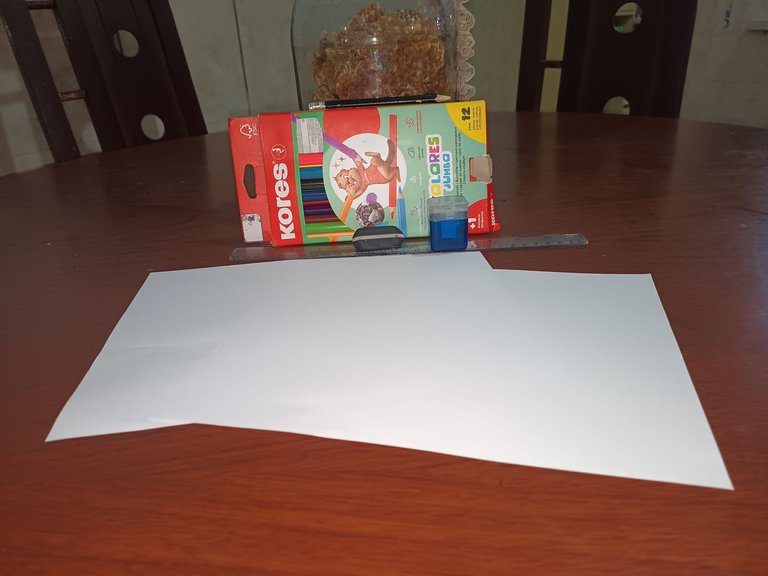
MATERIALS
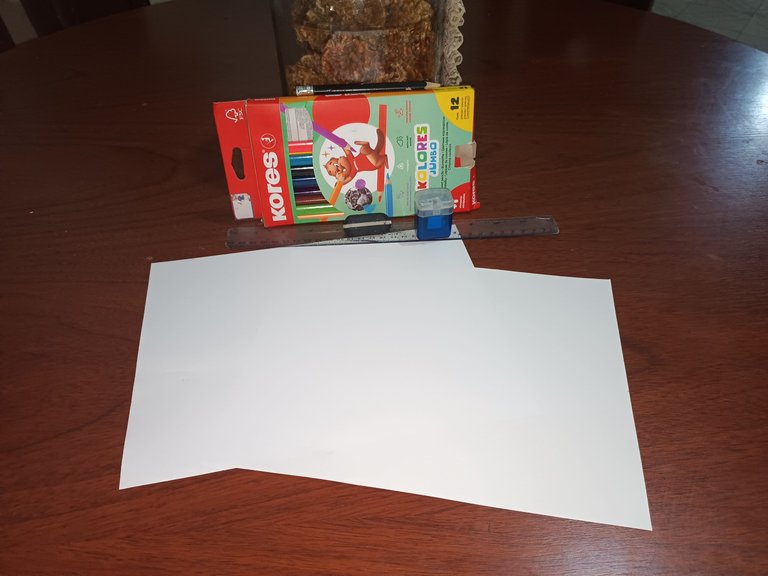
The materials we need are very simple and easy to obtain, such materials are:
a pencil
A rubber
A pencil sharpener
** A colors**
two sheets
MATERIALES
Los materiales que necesitamos son muy simples y fáciles de obtener, tales materiales son:
un lapiz
una goma
un sacapuntas
colores
dos hojas
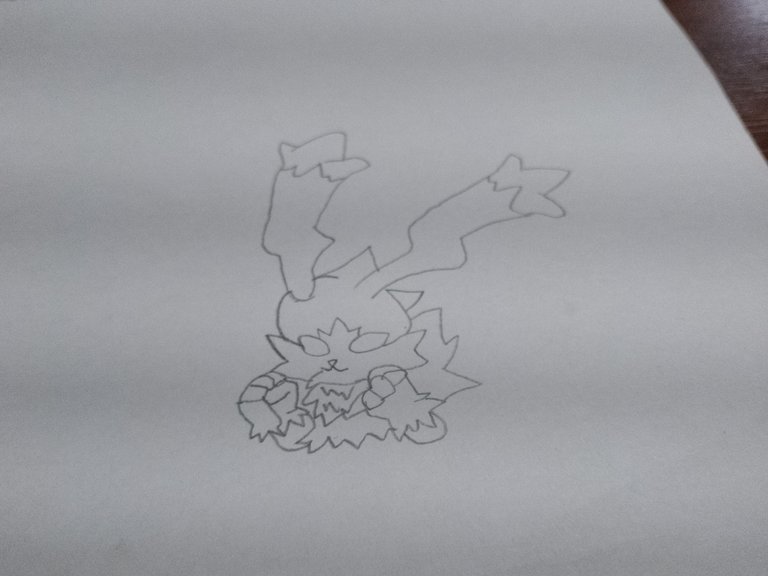
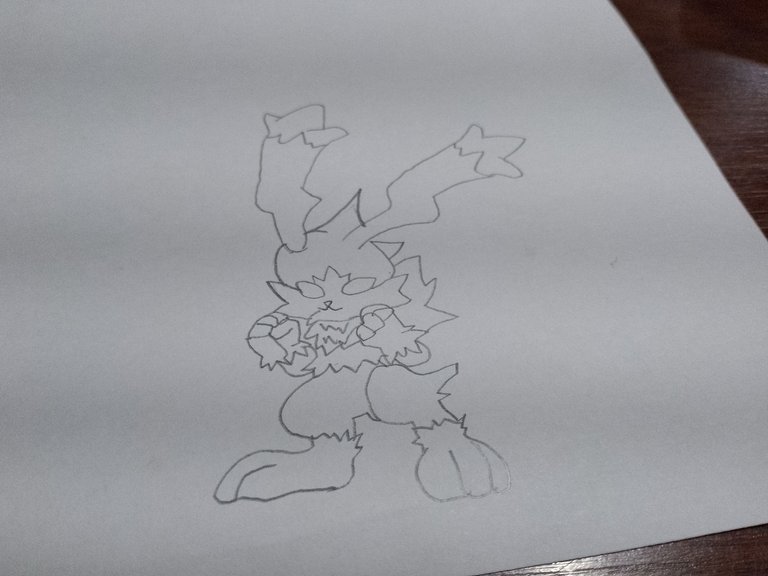
DRAWING OF WRACKDOOM
STEP 1
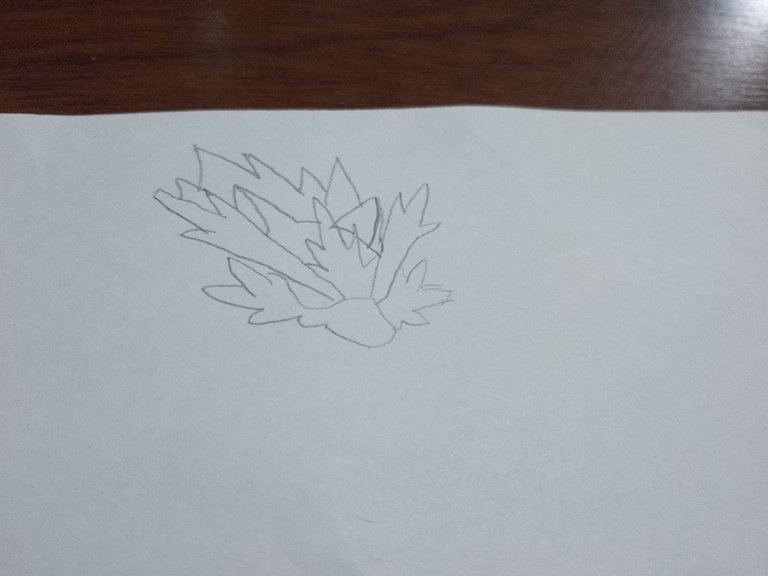
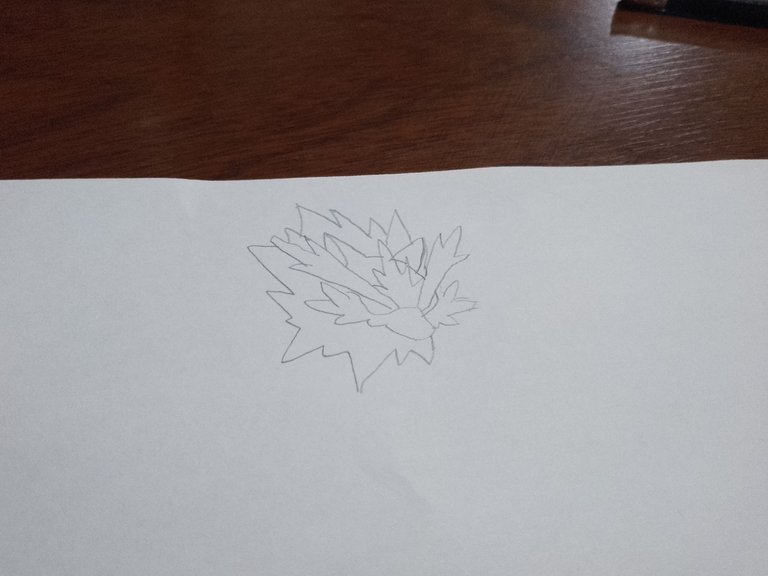
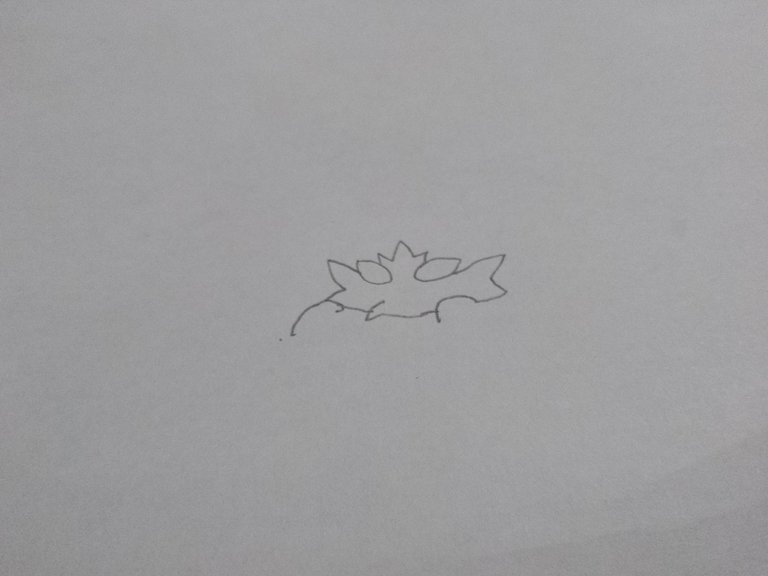
To start with our first creature we will apply the same strategy of our last drawing to adjust the size and symmetry of this one, therefore we will start drawing the wrackdoom's snout following the shape of the drawing, when we finish it we will continue with the eyebrows of this one; in this case the eyebrows don't have so much perspective since they have the same height so it will be a little easier to make it. We draw the line of the eyebrow starting from the top of the snout making our line upwards, then we will make the ends of this line and when we finish it we will apply the same technique with the next eyebrow.
To finish with this first step we will draw in a simple and easy way the whiskers of our raccoon and then we will draw its ears, which have a sharp but not complicated shape, therefore we will look where they start from and when we find the point we will start our stroke until we finish with the first one and make the shape of the head to apply the same strategy with the opposite ear and finally we will draw the mane of this following the scheme and shape that the drawing has, applying the stroke that suits you best. Remember friends always keep calm when drawing, you may not get it right but with calm you will be able to do it.
DIBUJO DE WRACKDOOM
PASO 1
Para comenzar con nuestra primer criatura aplicaremos la misma estrategia de nuestro último dibujo para ajustar el tamaño y simetría de este, por lo tanto iniciaremos dibujando el hocico de wrackdoom siguiendo la forma del dibujo, al terminarlo seguiremos con las cejas de este; en este caso las cejas no poseen tanta perspectiva ya que tienen una misma altura por lo que resultará un poco más sencillo realizarla. Trazamos la linea de la ceja iniciando desde la parte superior del hocico realizando nuestra linea hacia arriba, para luego hacer los extremos de esta al terminarla aplicaremos la misma técnica con la siguiente ceja.
Para acabar con este primer paso dibujaremos de una manera sencilla y fácil los bigotes de nuestro mapache para luego realizar las orejas de éste, las cuales poseen una forma afilada pero no complicada, por lo tanto miraremos de donde parten y al encontrar el punto iniciaremos nuestro trazo hasta acabar con la primera y hacer la forma de la cabeza para así aplicar la misma estrategia con la oreja opuesta y por último dibujaremos la melena de este siguiendo el esquema y forma que posee el dibujo, aplicando el trazo que más les convenga. Recuerden amigos siempre mantengan la calma al dibujar puede que no les salga bien pero con calma podrán hacerlo
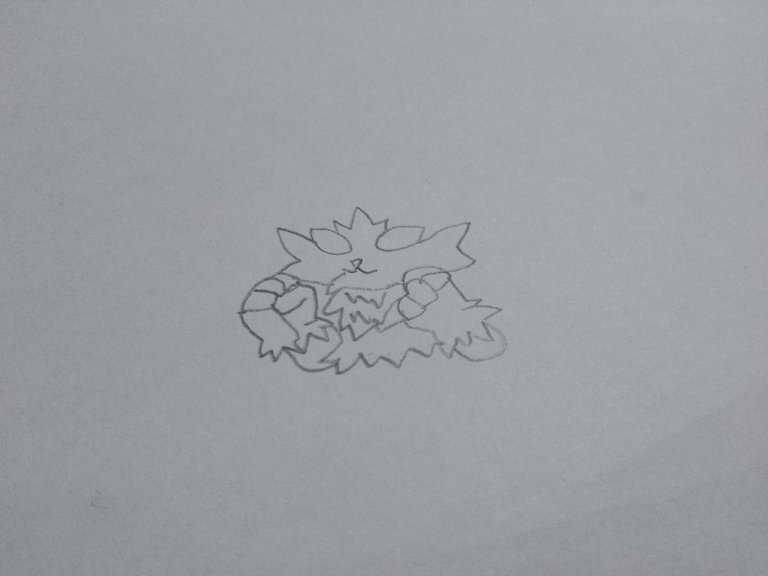
STEP 2
As we can see, the face of our creature is already completely done, so we will start with the lower part, drawing the body of the raccoon and its legs, therefore, we will start from a point of the mane to make a small straight line, having this line drawn, we will make a small circle starting from that line, which is the leg of our raccoon. Once the circle is finished, we will start from this one to make another straight line not too far from the previous one so that it does not give a bad contrast to the drawing and keeps a good shape.
To start with the foot we will have to make an inclined line and then we go down to make a part of it, having ready we make one more straight line to make an oval between it and we would have ready one of the raccoon's feet to give him that detail of the claws, we will simply make two curved lines. From the circle of the leg we will make a line that will begin straight and then it becomes curved upwards to make the complete body of our raccoon, already ready we make one more line a little bit paid to the one of the body from there part the drawing of our second leg applying a kind of circle for the foot we will make first a form of boot; finishing we will make a small curved line and a bigger one for the aspect of the claws of this one.
Finishing this step, we will have to draw a small line that starts from wrackdoom's mustache and one more that starts from his mane, this to draw his arm having them ready we draw his fur with strokes that meet in a point to give him a pointed shape that simulates the fur of the beast to finish we draw his hand finishing with this penultimate step.
PASO 2
Como observamos ya la cara de nuestra criatura está completamente hecha por lo tanto empezaremos con la parte inferior llegando a dibujar el cuerpo del mapache y sus piernas, por lo tanto, empezaremos desde un punto de la melena para realizar una pequeña línea recta al tener esta línea plasmada haremos un pequeño círculo que parta desde esa línea, tratándose de la pierna de nuestro mapache. Terminado el círculo partiremos desde este para realizar una línea recta más no muy separada de la anterior para que no le de un mal contraste al dibujo y mantenga una buena forma.
Para empezar con el pie tendremos que hacer una línea inclinada y luego bajamos para realizar una parte de este, teniendo lista realizamos una línea recta más para así plasmar un óvalo entre esta y tendríamos listo uno de los pies del mapache para darle ese detalle de las garras, simplemente haremos dos líneas curvas. Desde el círculo de la pierna haremos una línea que empezará recta y luego se torna curva hacia arriba para hacer el cuerpo completo de nuestro mapache, ya lista realizamos una línea más un poco pagada a la del cuerpo de allí parte el dibujo de nuestra segunda pierna aplicando una especie de círculo para el pie realizaremos primero una forma de bota; terminando haremos una línea curva pequeña y una más grande para el aspecto de las garras de esta.
Terminando este paso, tendremos que dibujar una pequeña línea que empieza desde el bigote de wrackdoom y una más que empieza desde su melena, esto para dibujar su brazo teniéndolas listas se dibuja su pelaje con trazos que confinen en un punto para que le de una forma puntiaguda que simula el pelaje de la bestia para finalizar realizamos su mano acabando con este penúltimo paso.
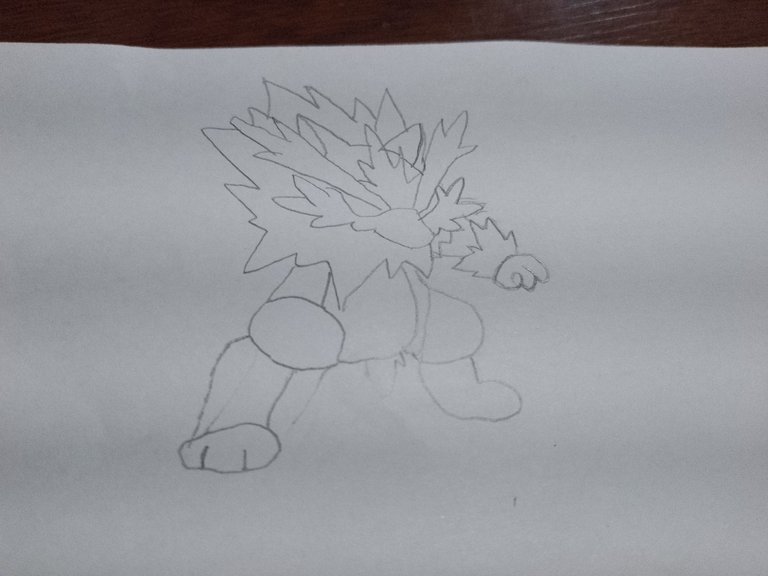

*STEP 3
In this step we will draw the missing arm and the tail of wrackdoom in addition to its attack, for this we must draw a curved line down a little long that starts from the mane and the next part also from the mane of our animal only a little lower if it will be shorter than the previous one, giving it a perspective that our raccoon is in an attack position. Now we will draw the hand, then we will trace finger by finger until we finish it.
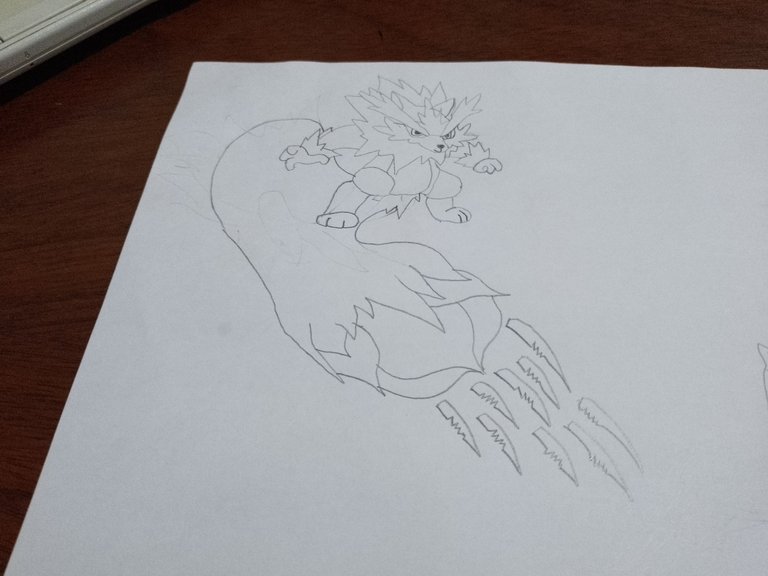
We begin with the tail which starts from the lower part of the left leg of wrackdoom therefore our stroke will begin from there taking a curve upwards arriving to a stop where it will go down towards the direction where the rabbit is, that is to say its opponent the same will happen with the second line that complements the tail without forgetting to draw the fur of this with pointed convergent that simulates its fur. Then we will draw the kind of cocoons that this one has, when we finish them we will begin the drawing of its attack drawing one by one each needle that this one has thrown and ready our first beast would be ready.
PASO 3
En este paso dibujaremos el brazo faltante y la cola de wrackdoom además de su ataque, para ello debemos trazar una línea curva hacia abajo un poco larga que parta desde la melena y la siguiente parte también desde la melena de nuestro animal solo que un poco más abajo si será más corta que la anterior, dándole una perspectiva de que nuestro mapache está en una posición de ataque. Ahora dibujaremos la mano, entonces iremos trazando dedo por dedo hasta acabarla.
Iniciamos con la cola la cual parte desde la parte inferior de la pierna izquierda de wrackdoom por lo tanto nuestro trazo iniciará desde allí tomando una curva hacia arriba llegando a un tope donde bajará hacia la dirección donde se encuentra el conejo, es decir su oponente lo mismo pasará con la segunda línea que complementa la cola sin olvidar dibujar el pelaje de esta con convergentes puntiagudas que simule su pelaje. Luego dibujaremos la especie de capullos que esta posee, al terminarlos iniciaremos el dibujo de su ataque dibujando una por una cada aguja qué este haya lanzado y listo nuestra primera bestia estaría lista.

DRAWING OF ZAPPITY
STEP 1
As with our wrackdoom drawing we will start with zappity by first drawing his snout and whiskers as well as his eyes. First we must draw his eye with an oval shape from there we will draw the whiskers on the left side taking care of their pointed shape to take care of the fur aspect. Next we will draw the small intermediate fur and when we finish it we will do the same procedure with the other eye. Now we will begin with the dangerous zapitty's fists, for this we must make a superior curve and from there we will start the realization of the fingers and thus finish with his hands, repeating the technique in each one of the hands.
Then we will draw the fur of the chest which starts from his chin we draw a straight line down and we will make his fur in a pointed way and the same with his bottom fur but, we can not forget to make his arms so we will make the fur which separates his hands from his arms, doing the same way as the previous fur and so we will finish the first step.
DIBUJO DE ZAPPITY
PASO 1
Al igual que con nuestro dibujo de wrackdoom iniciaremos con zappity por dibujar en primera instancia su hocico y bigotes al igual que sus ojos. Primero debemos dibujar su ojo con una forma ovalada de allí partiremos a dibujar los bigotes del lado izquierdo cuidando su forma puntiaguda para cuidar el aspecto al pelaje. Seguídamente dibujaremos el pequeño pelaje intermedio y al acabarlo haremos el mismo procedimiento con el otro ojo. Ahora empezaremos con los peligrosos puños de zapitty para ello debemos hacer una curva superior y de allí partirá la realización de los dedos y así acabar con sus manos, repitiendo la técnica en cada una de las manos.
Después dibujaremos el pelaje del pecho el cual parte de su barbilla trazamos una línea recta hacia abajo e iremos haciendo su pelaje de una manera puntiaguda y lo mismo con su pelaje de abajo pero, no podemos olvidar hacer sus brazos por lo tanto realizarlos el pelaje qué separa sus manos de sus brazos, haciendo de la misma forma que los anteriores pelajes y así dar por terminado el primer paso.
STEP 2
We will proceed to draw the zappity's head, therefore our line starts from the right mustache taking little by little a curve until we reach a certain point where we will stop and we will make the dangerous ears of our rabbit, we will draw a line from the center of the head upwards when we reach a point where it will give a curve and will go back upwards to finish it. Then we would continue for the final part of the head and we make the same procedure with the other ear.
From the fur of the chest we will make a curved line downwards to make the right leg of our rabbit when we finish it we will make the zappity foot following as well as possible the form of our guide image. Next we will make a straight line which will represent the between leg of the creature and we will make the same technique that with the previous leg, continuously we will make the tail of zappity with the pointed fur of always following our guide image until finishing with it and to finish our drawing we will make its defensive power therefore, we will draw a variety of rays together to the front of this simulating a shield of electricity.
PASO 2
Procederemos a dibujar la cabeza de zappity por lo tanto nuestro trazo partida desde el bigote derecho tomando poco a poco una curva hasta llegar a cierto punto donde nos detendremos y haremos las peligrosas orejas de nuestro conejo, trazaremos una linea desde el centro de la cabeza hacia arriba al llegar a un punto donde dará una curva y volverá hacia arriba para darla por terminada. Entonces seguiríamos por la parte final de la cabeza y realizamos el mismo procedimiento con la otra oreja.
Desde el pelaje del pecho partiremos un trazo curvo hacia abajo para hacer la pierna derecha de nuestro conejo al acabarlo realizaremos el pie de zappity siguiendo lo mejor posible la forma de nuestra imagen guía. Seguídamente realizaremos un trazo recto el cual representará la entre pierna de la criatura y realizaremos la misma técnica que con la anterior pierna, continuamente haremos la colá de zappity con el pelaje puntiagudo de siempre siguiendo nuestra imagen guía hasta acabar con ella y para finalizar nuestro dibujo realizaremos su poder defensivo por lo tanto, dibujaremos variedad de rayos juntos al frente de este simulando un escudo de electricidad.

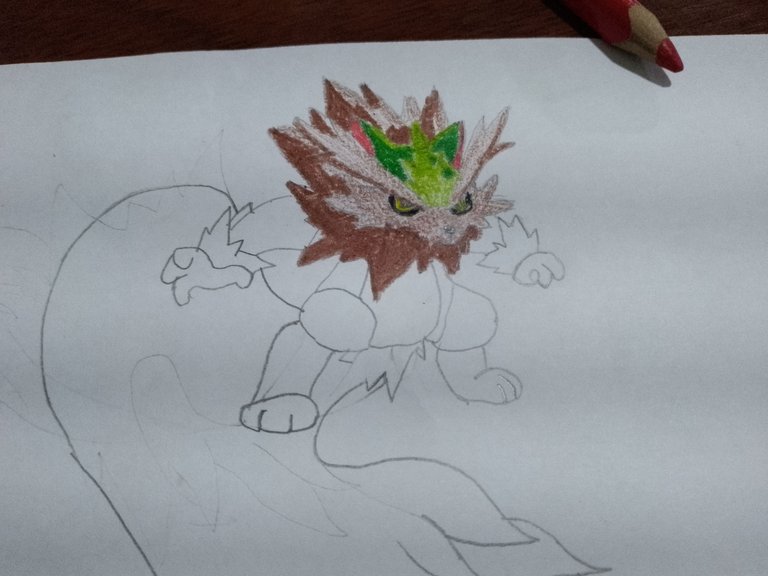
To finish this work we will coloring however, the way of coloring is different in each person for that reason I will leave the step by step by images of the coloring of this drawing and remember my friends any drawing that you make do it very calmly. Well my friends this was all for today I hope you liked this drawing and I will be back soon with a new content Take it away minimi!
Para finalizar este trabajo nos tocará colorear sin embargo, la forma de colorear es distinta en cada persona por dicha razón dejare el paso a paso por imágenes del coloreo de este dibujo y recuerden mis amigos cualquier dibujo que realicen háganlo con mucha calma. Bien mis amigos esto fue todo por hoy espero les haya gustado mucho este dibujo y volveré pronto con un nuevo contenido ¡Llévatelo minimi!
READY FOR THE FINAL RESULT OF OUR GRASS RACCOON
LISTOS PARA EL RESULTADO FINAL DE NUESTRO MAPACHE DE HIERBA
Imágenes tomadas por mi papá de su Tecno camon 18P.
images taken by my dad of his Tecno camon 18P.
Todos los derechos reservados de @elmiguelacho. No autorizo el uso de ningún material de mi propiedad
All rights reserved by @elmiguelacho. I do not authorize the use of any material of my property.
...Gracias... Dando Lo Mejor Para Tí...
...Thank You... Giving The Best For You...
Portada editada en Canva
Cover edited in Canva
Logos propiedad de/Logos owned of @hiveio, @hivesucre
Traducción realizada en/Translation made in Deepl
You really put in a great lot of work, I love your drawing.
Yes amigo, I know that it's much words but I like explain my work step by step
The exchange of strikes on the battlefield is creating a balance of power in favor of the smart element in the battle.
Thank you for sharing your exceptional art work.
There must always be a balance of power in a battle, but the smarter player is the winer. Thank you for your visit and comment
Que gran dibujo hijo y que poderes sugieres para estás criaturas. Todo está de lujo, sigue así que tienes talento
Gracias padre, los poderes están increíbles lo tengo en cuenta, a pesar que he perdido un poco el talento seguiré haciendo más dibujos para volver a mi prime como dicen jajaja.