Un saludo a todos los miembros de esta maravillosa comunidad. Un gran abrazo a todos mis seguidores y a los usuarios que siempre apoyan mis publicaciones con un voto positivo e incluso con sus apreciados comentarios.
Hoy quiero compartir con ustedes una figura en Origami que es el arte de crear figuras u objetos con una sola hoja de papel sin usar tijeras ni pegamento. La figura que realizare hoy es un Pájaro, esta figura la haré con papel iris y luego haré otra con papel reciclado para contribuir con el medio ambiente, si tu la deseas hacer la puedes crear con cualquier tipo de papel, aunque recomiendo el iris gracias a su facilidad para hacer los dobleces.
Greetings to all the members of this wonderful community. A big hug to all my followers and users who always support my posts with a positive vote and even with their appreciated comments.
Today I want to share with you an Origami figure that is the art of creating figures or objects with a single sheet of paper without using scissors or glue. The figure that I will make today is a Bird, this figure I will make with iris paper and then I will make another with recycled paper to contribute to the environment, if you want to make it you can create it with any type of paper, although I recommend the iris thanks to its ease of making folds.
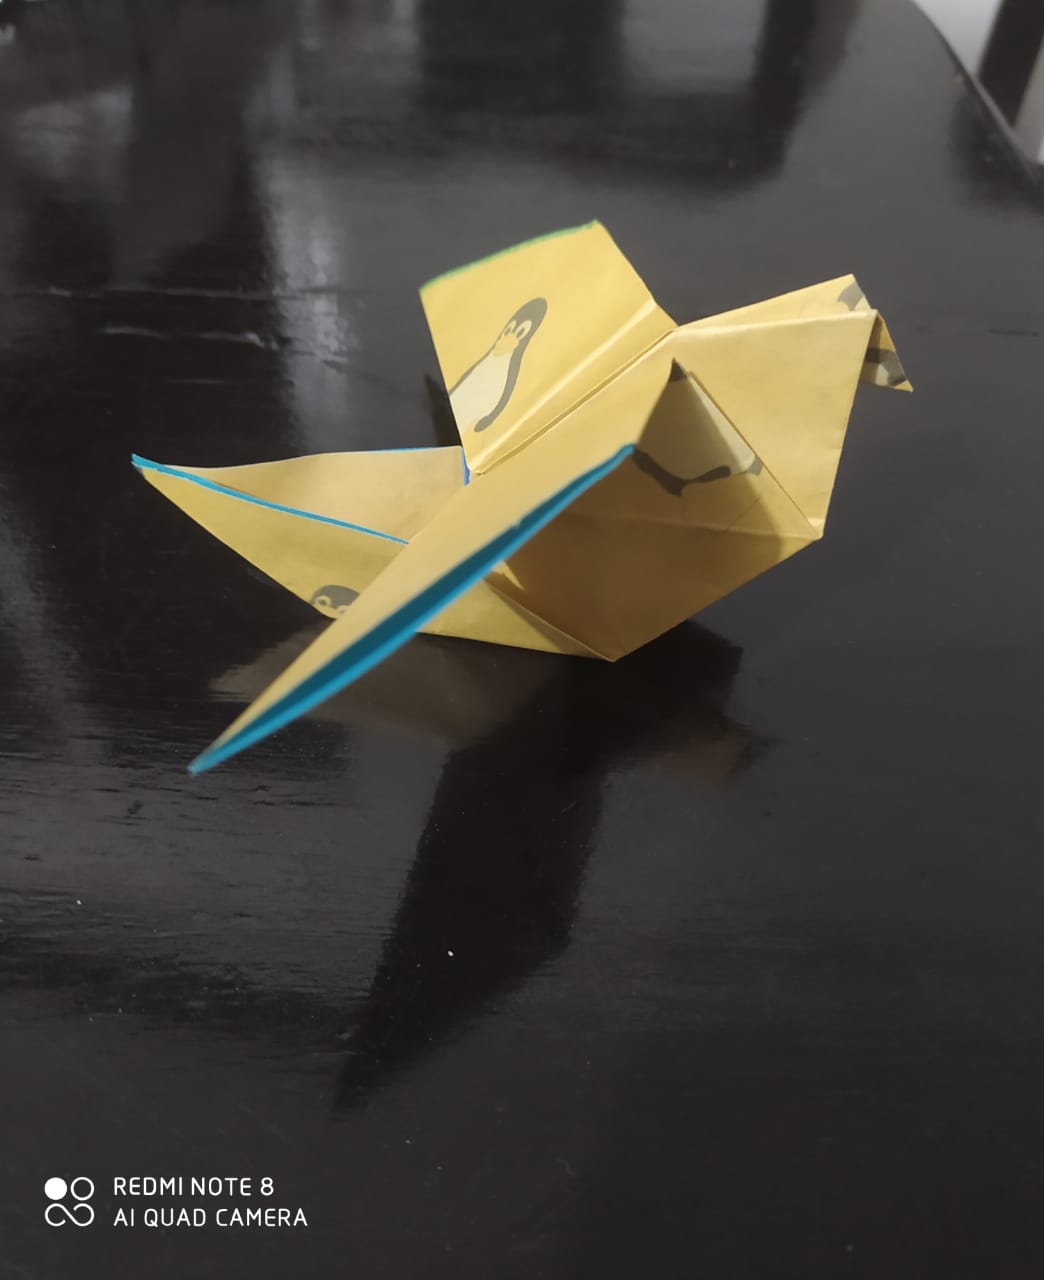
Pájaro en Origami
Origami Bird.

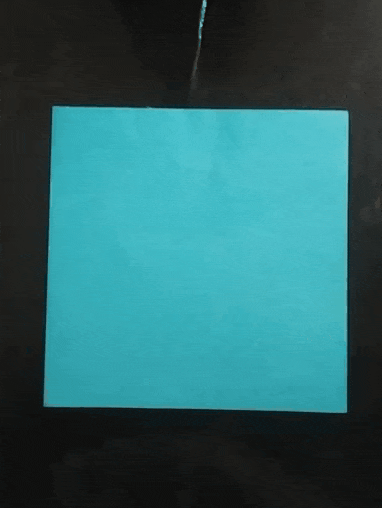
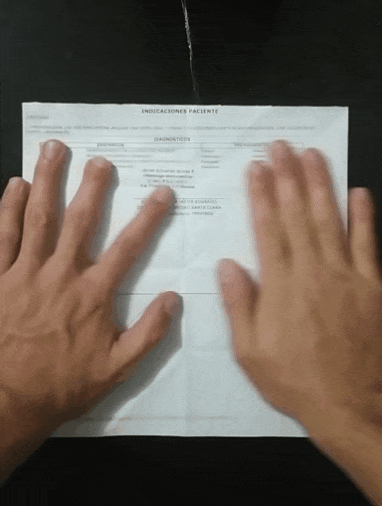
Primero que todo debemos disponer de una hoja de cualquier tamaño pero debe ser cuadrada, en este caso haré el Pájaro de Origami con una hoja iris y luego con una hoja reciclada. A continuación el paso a paso del Pájaro de Origami:
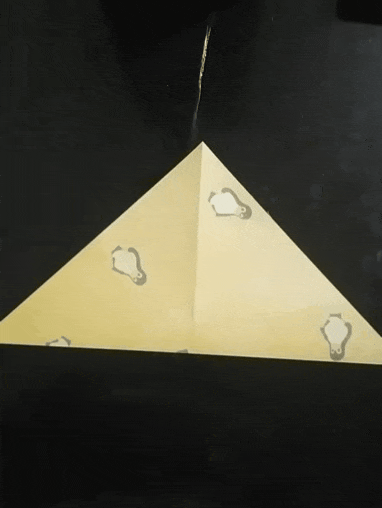
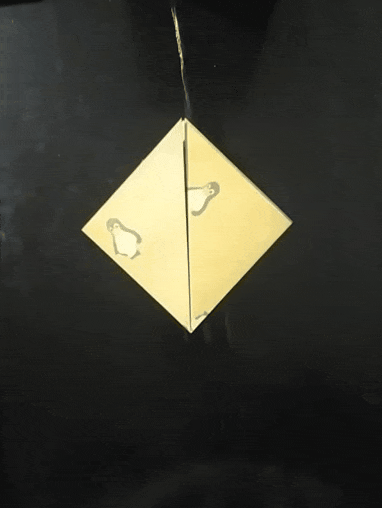
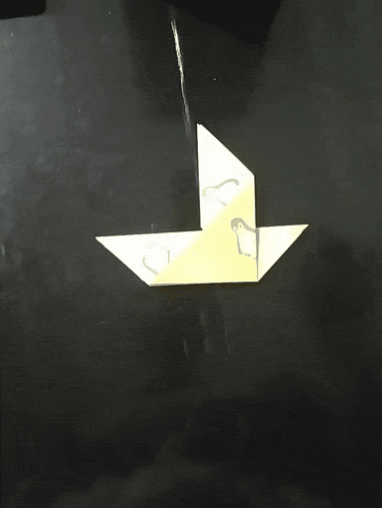
Debemos tomar la hoja y doblaremos una punta hacia el extremo contrario realizando un corte diagonal y repetimos el proceso con la punta restante y así nos quedara un triangulo. Luego tomamos una de las puntas laterales y la llevaremos hasta la punta superior, hacemos lo mismo con la punta contraria y de este modo nos quedara un rombo. A continuación los gifs explicativos.
First of all we must have a sheet of any size but it must be square, in this case I will make the Origami Bird with an iris sheet and then with a recycled sheet. Here is the step by step of the Origami Bird:
We must take the sheet and fold a point towards the opposite end making a diagonal cut and repeat the process with the remaining point and thus we will have a triangle. Then we take one of the lateral tips and we will take it to the upper tip, we do the same with the opposite tip and in this way we will have a rhombus. Below the explanatory gifs.it.
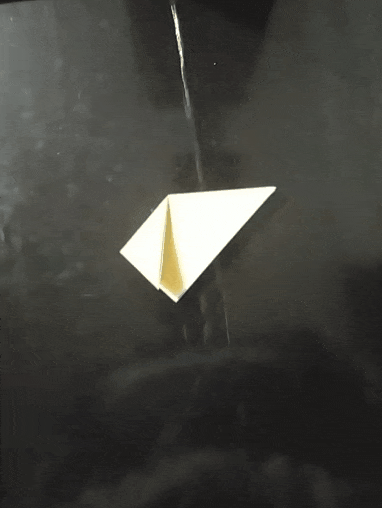
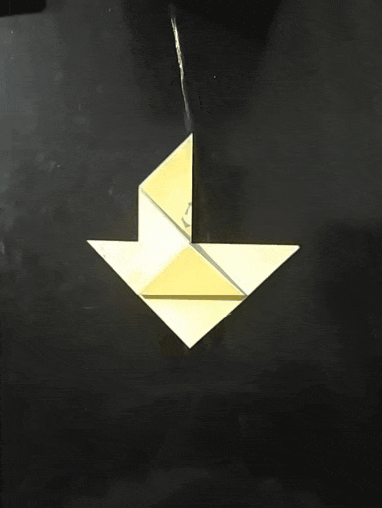
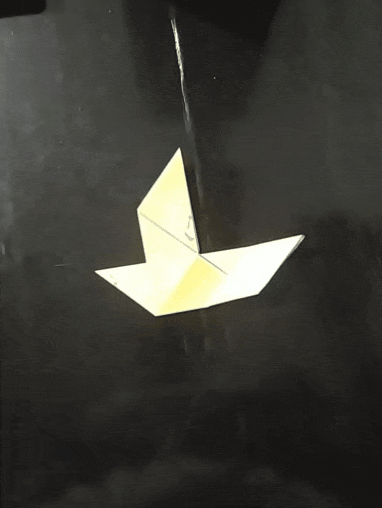
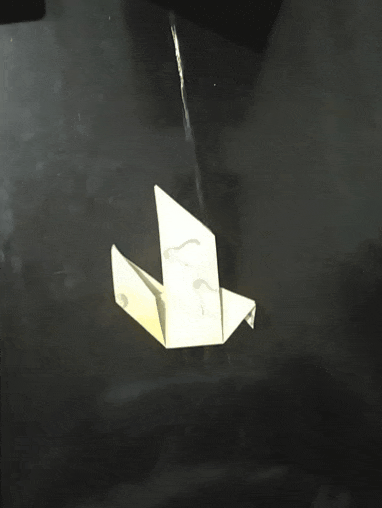
A continuación podremos ver como nos quedo finalmente el Pájaro en origami, espero lo hayan podido hacer.
Then we can see how the Bird in origami finally stayed, I hope they could have done it.
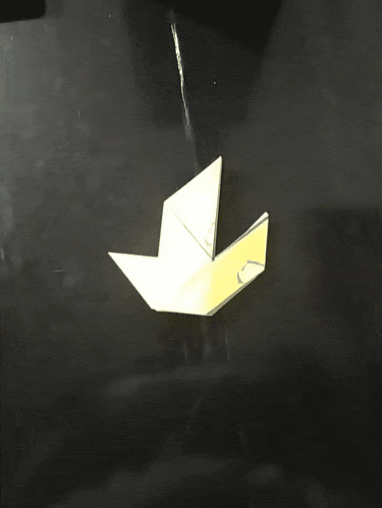
Por ultimo aquí podremos ver el proceso completo de la creación de la figura de Pájaro en Origami. Espero disfruten el gif.
Finally here we can see the complete process of creating the figure of Bird in Origami. I hope you enjoy the gif.
Espero les haya gustado la figura del día de hoy, si deseas puedes apoyarme con un voto positivo y un reblogueo. Espero hayan disfrutado el Origami del día de hoy y puedan hacerlo en casa. NO OLVIDES COMENTAR.
Si quieres ver más trabajos como este puedes visitar los siguientes artículos.
I hope you liked the figure of today, if you want you can support me with a positive vote and a twitter. I hope you enjoyed today's Origami and can do it at home. DON'T FORGET TO COMMENT.
If you want to see more works like this you can visit the following articles.
Hola @pixresteemer. Muchas gracias por el apoyo a mis publicaciones son de mucha ayuda. Saludos desde Colombia.
View or trade
BEER.Hey @juancho10, here is a little bit of
BEERfrom @pixresteemer for you. Enjoy it!Learn how to earn FREE BEER each day by staking your
BEER.Hola @beerlover. Muchas gracias por los tokens y gracias a @pixresteemer por hacerlo posible. Saludos desde Colombia.
👋 Hi @juancho10, I was flipping through the blockchain and stumbled on your work! You've been upvoted by Sketchbook / a community for design and creativity. Looking forward to crossing paths again soon.
✅ Join the Sketchbook Community
Hola @sketchbook.bot. Muchas gracias por el apoyo a mi publicación, yo también espero volver a cruzar caminos contigo. Saludos desde Colombia.