Fuente
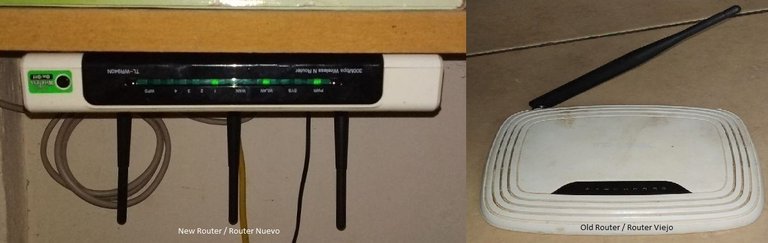
I learned this procedure with friends who know more about networking than I do and also reviewing here and there on the internet and in this post I bring together everything I know in this regard and the examples I use in this post are with screenshots of the two TP-LINK brand routers with which I have this system at home.
El procedimiento lo aprendí con amigos que saben más que yo en cuanto a redes y también revisando por aquí y por allá en internet y en este post aglutino todo lo que sé en este respecto y los ejemplo que uso en este post son con capturas de pantalla de los dos routers de la marca TP-LINK con los que tengo este sistema en mi casa.
To start we have a router that is already working and giving a wi-fi connection, we look at the configuration of that router, for which we must access from our browser the IP address of that router which generally for most manufacturers is: 192.168 .0.1 or 192.168.1.1. We can do this by cable or wi-fi connection since that router already has its established network.
Para comenzar tenemos un router que ya está funcionando y dando coneccion wi-fi, miramos la configuración de ese router, para lo cual debemos acceder desde nuestro navegador a la dirección ip de dicho router la cual generalmente para la moyoria de los fabricantes es: 192.168.0.1 o en su defecto 192.168.1.1. Esto lo podemos hacer mediante coneccion por cable o por wi-fi ya que ese router ya tiene su red establecida.

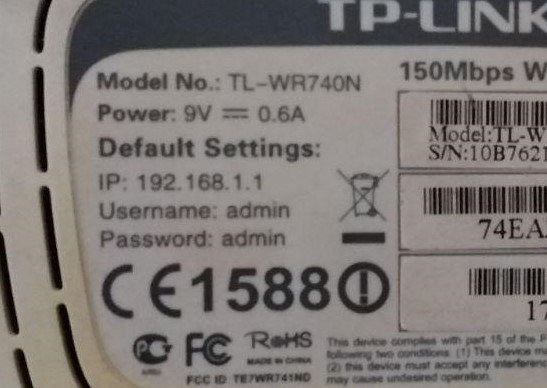
After finding the address, we proceed to put in username and password, which in most cases is usually: user: admin and password: admin, but this depends on the manufacturer, although all the routers I have seen have this information written on one side or below.
Luego de encontrar la dirección, procedemos a colocar en nombre de usuario y la contraseña, la cual en la mayoría de los casos suele ser: usuario: admin y clave: admin, pero esto depende del fabricante, aunque todos los router que he visto tienen esta información escrita por un costado o por debajo.
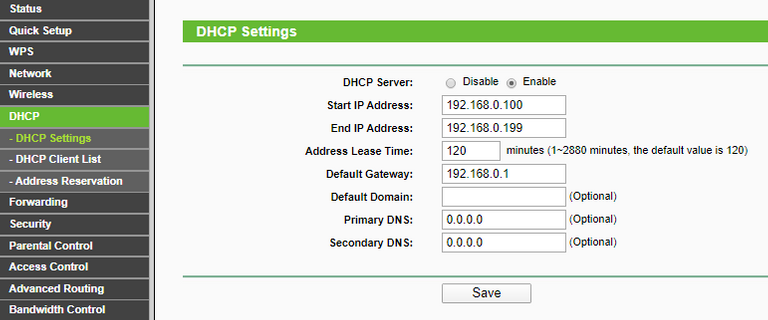
Already within the configuration we look for the DHCP section and make sure that it is enabled, this is the only change in this router and in some cases it is already made by default
Ya dentro de la configuración buscamos el apartado DHCP y nos aseguramos de que esté habilitado, este es el unico cambio en este router y en algunas casos ya esta hecho por defecto
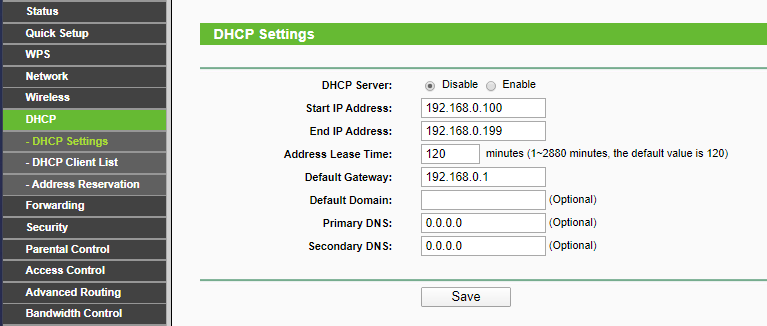
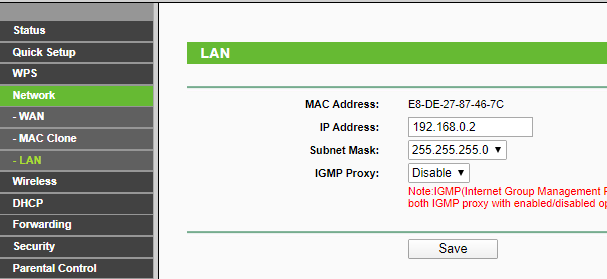
Then we proceed to configure the second router, for which we must first reset it, most of the routers come with their reset button, then we connect to it via LAN cable or also by the wi-fi network that this generates by default as it is On, we access its configuration as we did previously, (192.168.0.1 or 192.168.1.1 and user: admin and password: admin), then within the configuration we look for the DHCP section and disable it and then we look for the LAN section and depending on the information of the main router we are going to make the change in this router in the LAN section, if the main router has the address 192.168.0.1 we change it to 192.168.0.2 and if it has the address 192.168.1.1 we change it to 192.168.1.2.
Luego procedemos a configurar el segundo router, para lo cual primero debemos resetearlo, la mayoría de los router vienen con su botón de reset, luego nos conectamos a el mediante cable LAN o también por la red wi-fi que este genera por defecto al ser encendido, accedemos a su configuración como lo hicimos anteriormente, (192.168.0.1 ó 192.168.1.1 y usuario: admin y clave: admin), luego dentro de la configuración buscamos el apartado DHCP y lo deshabilitamos y después buscamos el apartado LAN y dependiendo de la información del router principal vamos a hacer el cambio en este router en el apartado LAN, si el router principal tiene la direcion 192.168.0.1 la cambiamos por 192.168.0.2 y si tiene la direcion 192.168.1.1 la cambiamos por 192.168.1.2.
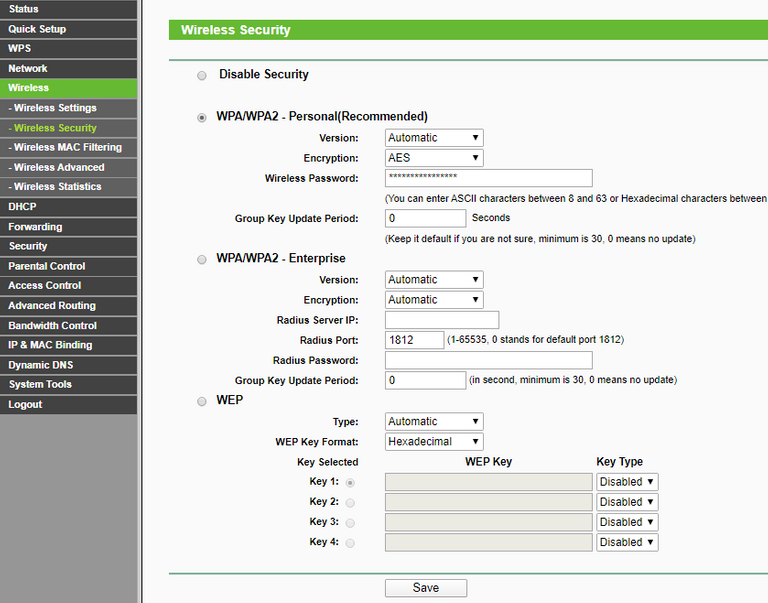
To continue we connect both routers through the LAN cable, but this detail caused me several inconveniences because I did not know until after several trials and errors and research via google and asking professional friends in the area, the cable must be placed in both routers in port number 1, then we restart the router and it should already be giving wi-fi connection, now what you have to do is configure the name of the new network offered by this router which is done in the WIRELESS section of the configuration and place it the password, as it did when we configured our main router for the first time at the time.
Para continuar conectamos ambos routers mediante el cable LAN, pero este detalle me causó varios inconvenientes porque no lo supe hasta después de varios ensayos y errores e investigación vía google y preguntando a amigos profesionales en el área, el cable debe estar colocado en ambos router en el puerto número 1, luego reiniciamos el router y ya debería estar dando coneccion wi-fi, ahora lo que hay que hacer es configurar el nombre de la nueva red que ofrece este router lo cual se hace en el apartado WIRELESS de la configuración y colocarle la clave de acceso, como se hizo cuando configuramos nuestro router principal por primera vez en su momento.
It is important to choose a good place to place the second router to optimize your signal and place the LAN cable in a way that is not so obvious, of course, it all depends on how important the aesthetics are for each one.
Es importante escoger un buen lugar para colocar el segundo router para optimizar su señal y colocar el cable LAN en una forma que no sea tan evidente, claro que todo depende de cuan importante sea la estética para cada uno.
Any questions about it you can ask me and comment, see you at hive.
Cualquier duda al respecto pueden preguntar y comentar, nos vemos en hive.
Turn the router into an extender, nice!
!discovery 30
Easy and cheap
This post was shared and voted inside the discord by the curators team of discovery-it
Join our community! hive-193212
Discovery-it is also a Witness, vote for us here
Congratulations @neoado! You have completed the following achievement on the Hive blockchain and have been rewarded with new badge(s) :
You can view your badges on your board And compare to others on the Ranking
If you no longer want to receive notifications, reply to this comment with the word
STOPTo support your work, I also upvoted your post!
Do not miss the last post from @hivebuzz:
Support the HiveBuzz project. Vote for our proposal!