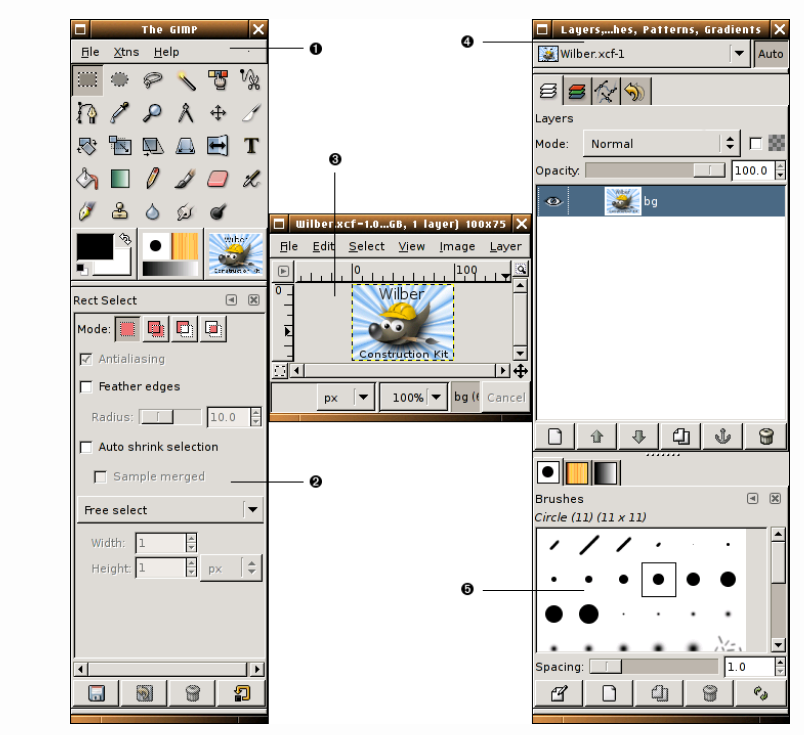
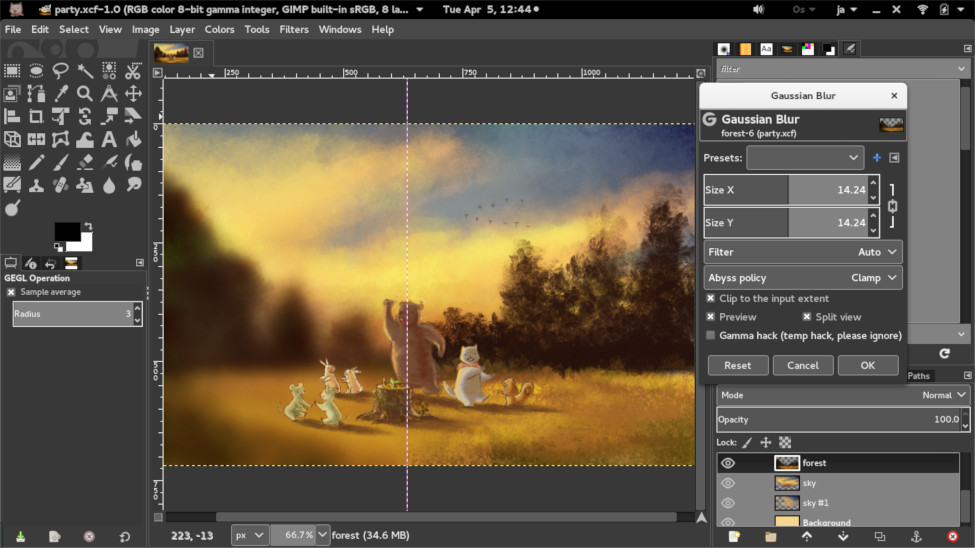
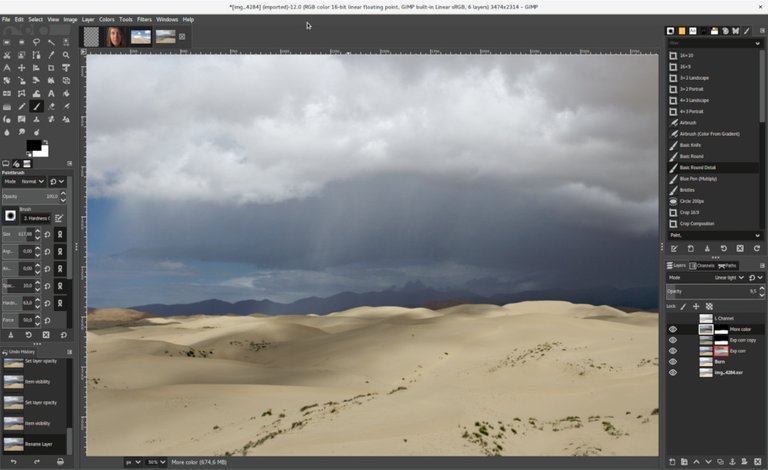
En esta parte de esta serie de tutoriales de dedicados GIMP veremos cada una de las ventanas que se muestran en la captura, explicando qué son y cómo funcionan.
Y las tareas que podemos hacer desde ellas.
Dado que el tema es bastante extenso hos nos dedicaremos a la Caja de Herramientas.
In this part of this series of dedicated GIMP tutorials we will see each of the windows shown in the screenshot, explaining what they are and how they work.
Since the topic is quite extensive we will dedicate ourselves to the Toolbox.
And the tasks that we can do from them.
La caja de herramientas. / The toolbox.
La caja de herramientas es el verdadero corazón de GIMP como lo define la propia guia oficial.
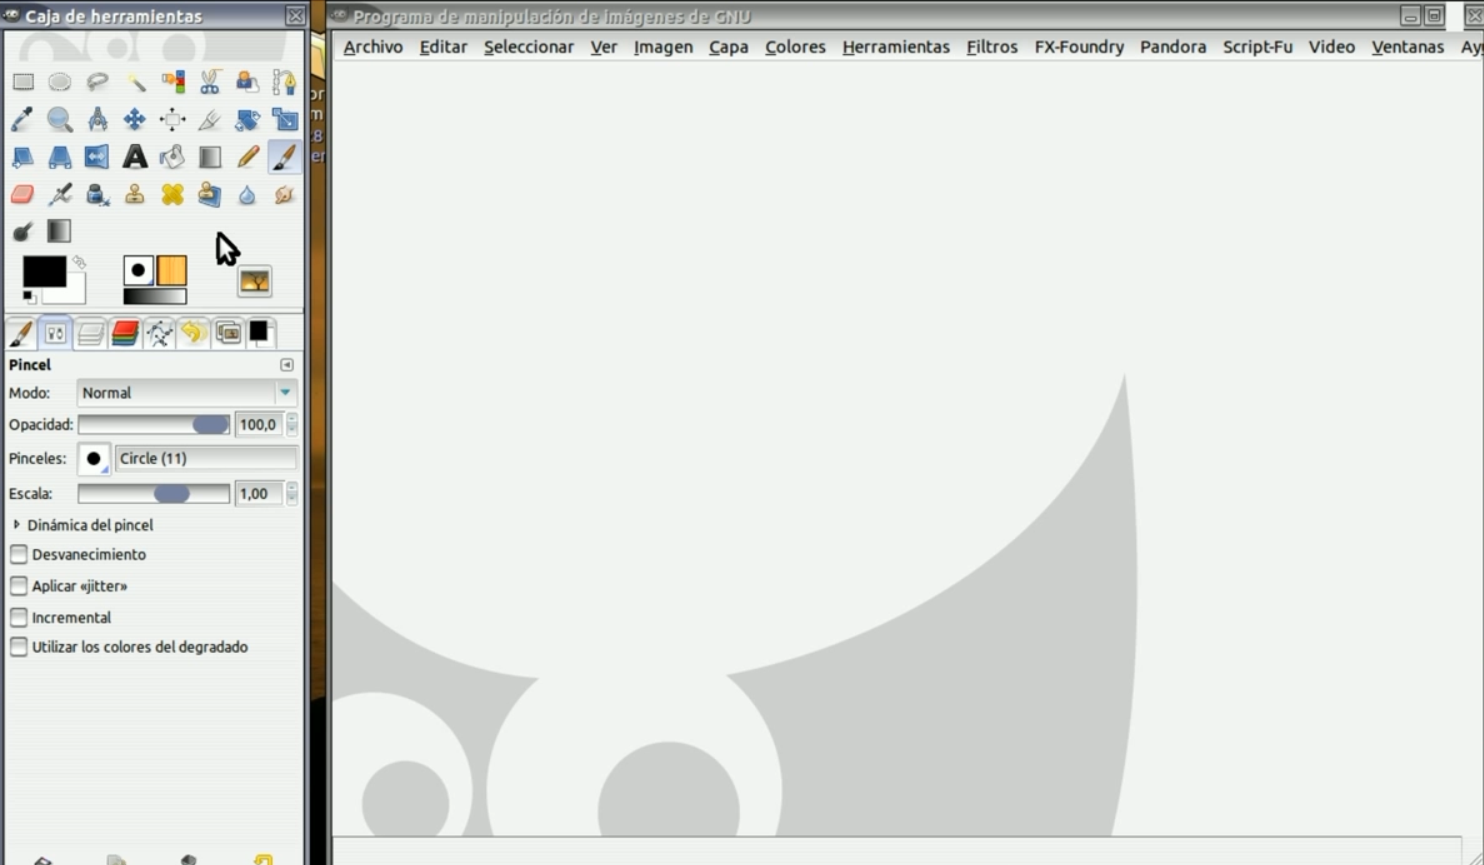
Allí encontraremos todos los instrumentos que nos sirve como en la mayor parte de la interfaz de GIMP, al llevar el ratón sobre algún elemento y dejarlo allí un momento, aparece un “mensaje” descriptivo que, a veces, también muestra la tecla de acceso rápido.
Es de destacar que, en algunos casos, podemos presionar la tecla F1 para obtener ayuda sobre el elemento que se encuentra debajo del cursor.
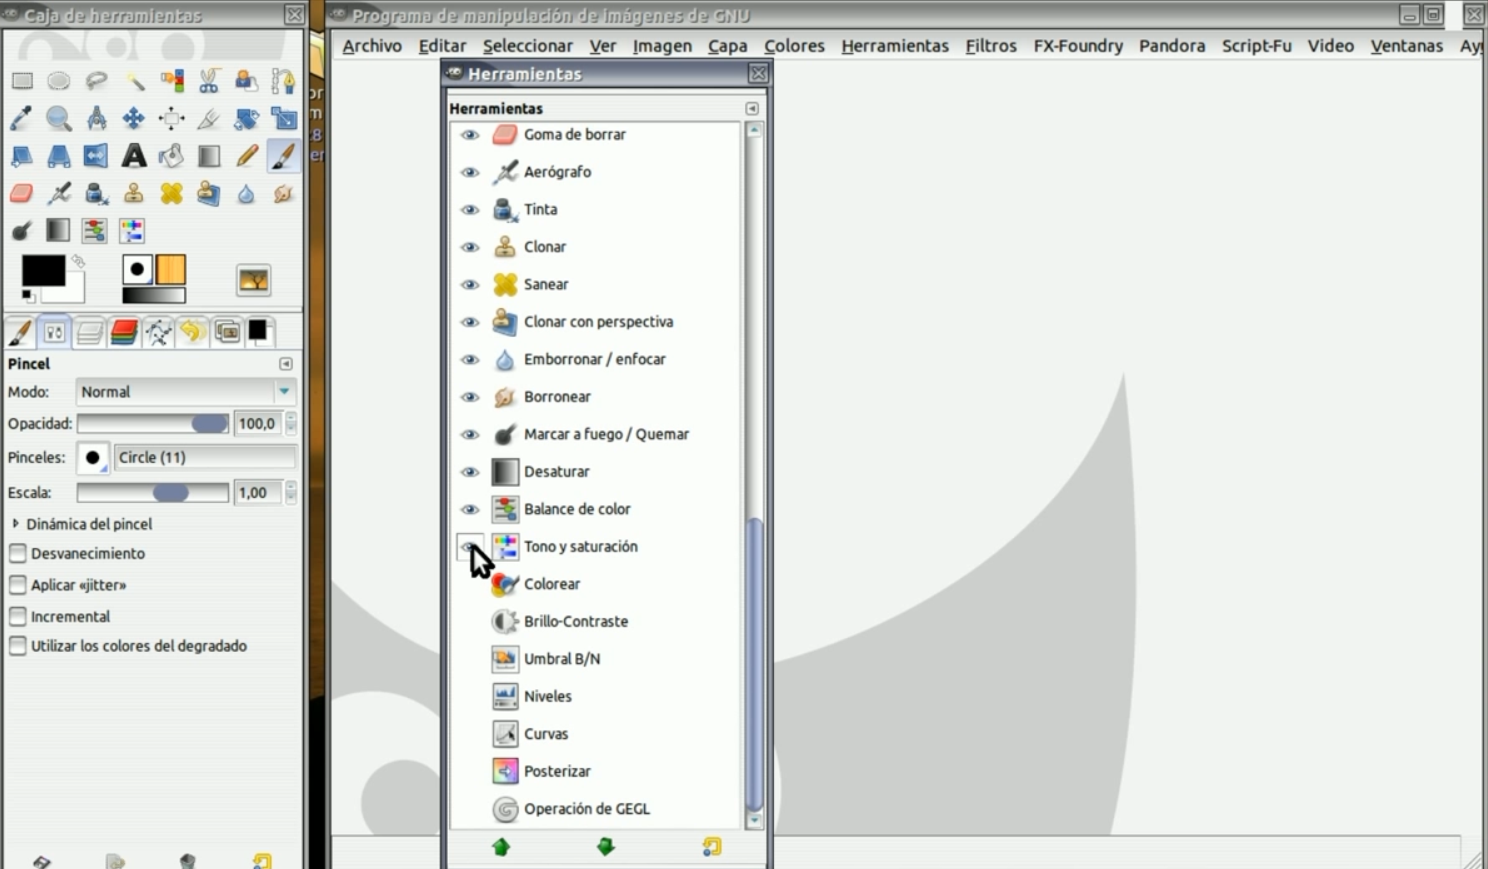
Si queremos personalizar la caja de herramientas (un detalle bastante normal después de haber instalado GIMP)
Para ello vamos a la pestaña Ventanas en el Menú Principal de GIMP, seleccionamos Diálogos Empotrables y en el menú que se despliega verticalmente seleccionamos Herramientas.
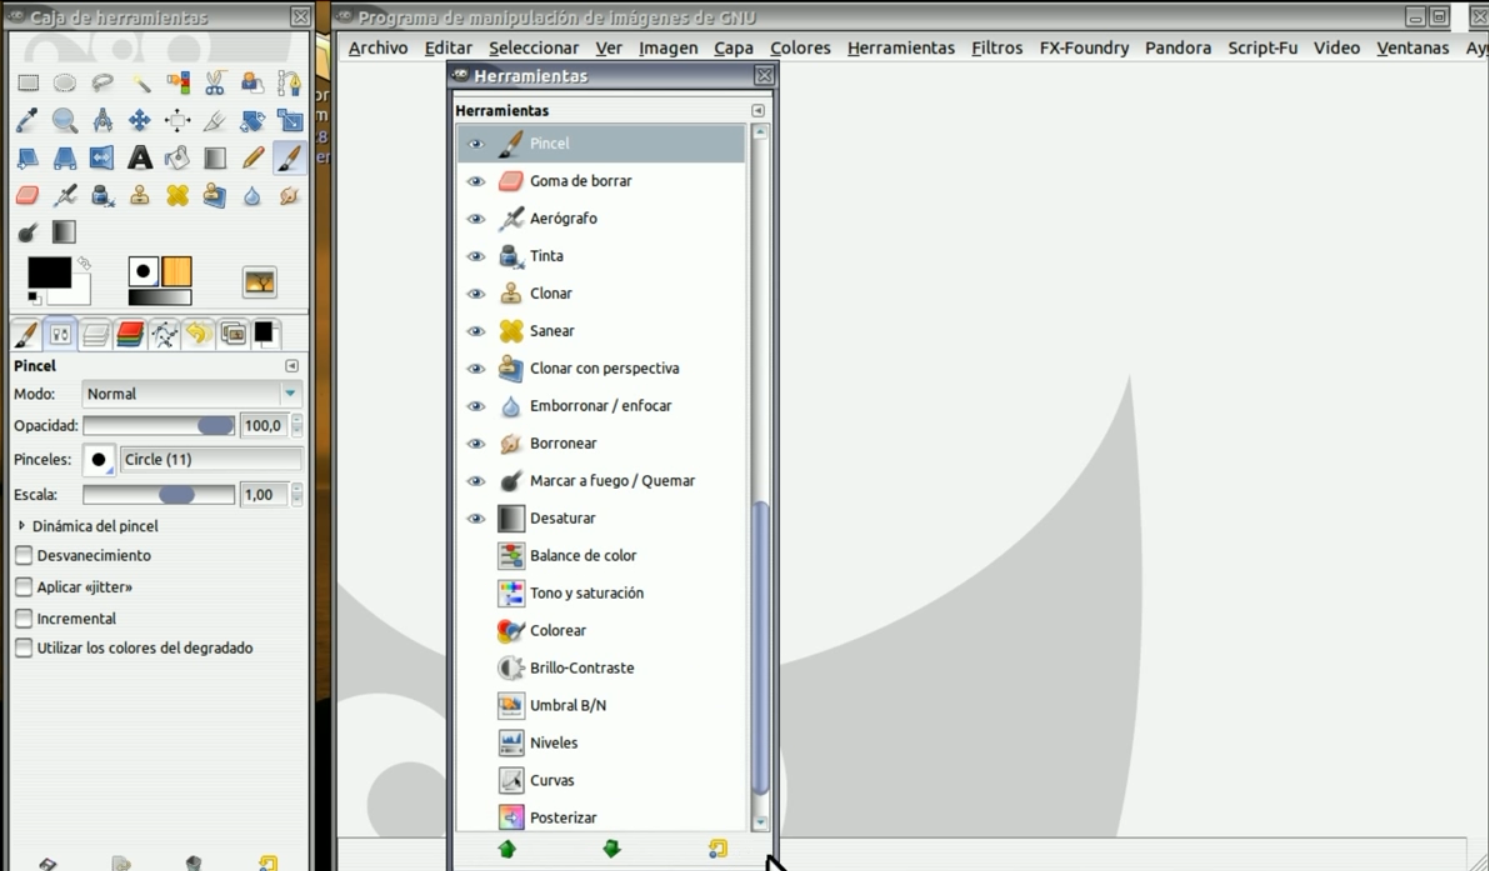
Marcamos cada una de las que queremos agregar y vemos como aparece el ojo que significa que ha sido seleccionada.
Lo mejor es seleccionar todas las opciones por defecto.
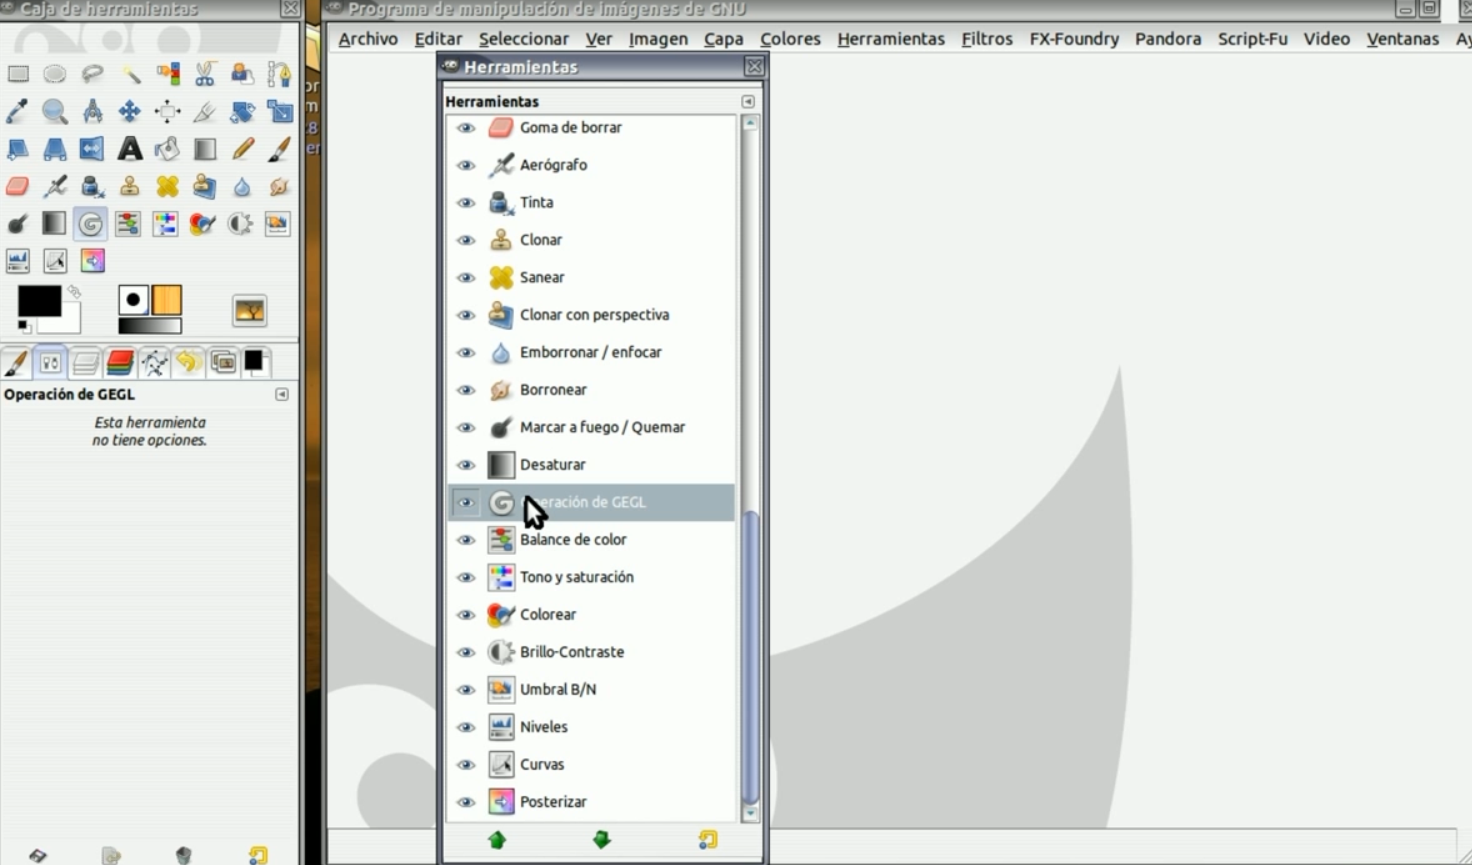
Si queremos cambiar la herramienta de lugar ya sea en el menú vertical o a la izquierda del panel es suficiente seleccionar la herramienta CEGL y desplazarla con el ratón apretado hacia arriba o hacia abajo.
GEGL son las iniciales de “Generic Graphical Library” y se ha agregado a GIMP a partir de la versión 2.6
The toolbox is the true heart of GIMP as defined by the official guide itself.
There we will find all the instruments that serve us as in most of the GIMP interface, when you move the mouse over an element and leave it there for a moment, a descriptive "message" appears that, sometimes, also shows the hotkey .
It is noteworthy that in some cases we can press the F1 key to get help on the item below the cursor.
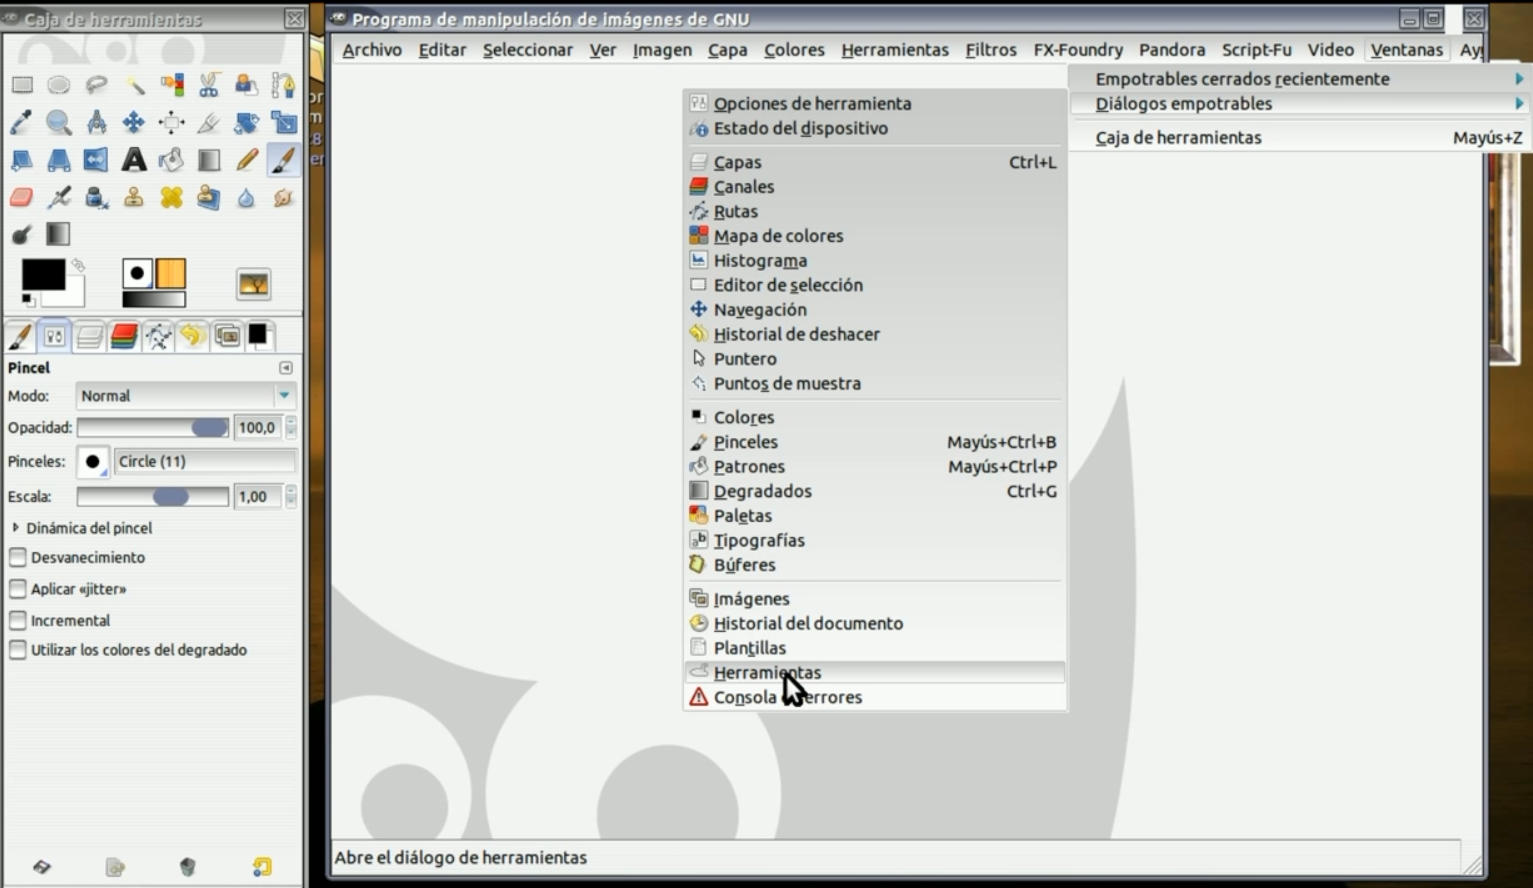
If we want to customize the toolbox (a fairly normal detail after having installed GIMP)
For this we go to the Windows tab in the GIMP Main Menu, we select Dockable Dialogs and in the menu that is displayed vertically we select Tools.
We mark each of the ones we want to add and see how the eye appears, which means that it has been selected.
It is best to select all the default options.
If we want to change the place tool either in the vertical menu or to the left of the panel, it is enough to select the CEGL tool and move it with the mouse pressed up or down.
GEGL stands for “Generic Graphical Library” and has been added to GIMP as of version 2.6


Congratulations @losapuntesdetux! You have completed the following achievement on the Hive blockchain and have been rewarded with new badge(s) :
You can view your badges on your board and compare yourself to others in the Ranking
If you no longer want to receive notifications, reply to this comment with the word
STOPThanks for supporting my content @hivebuzz!
You're welcome @losapuntesdetux 👍🙂