It's time to make our girls fall in love, beautiful earrings

Hola feliz día para todos espero se encuentren bien, tenía tiempo sin hacer una publicación lamentablemente estaba muy enfermo tenía fiebre dolor de espalda y no tenía mucho ánimo de escribir estos pendientes los hice un día antes de enfermarme pero como me sentía muy mal no pude escribir el paso a paso gracias a Dios ya me siento mejor, les contaré sobre los pendientes son unos pendientes con forma de corazón fue un poco difícil ya que los elabore con un albre un poco duro pero creo que quedaron muy bien y son super fácil de realizar bueno sin más que decir espero les guste 👍🌹🍓🌺💘
Hello happy day to all I hope you are well, I had time without making a publication unfortunately I was very sick I had a fever back pain and I did not have much encouragement to write these earrings I made them a day before I got sick but since I felt very bad I couldn't write the step by step thank God I feel better now, I'll tell you about the earrings they are heart-shaped earrings it was a bit difficult since I made them with a slightly hard wire but I think they turned out very well and are super easy to do good without more to say I hope you like it 👍🌹🍓🌺💘.
What do we need.
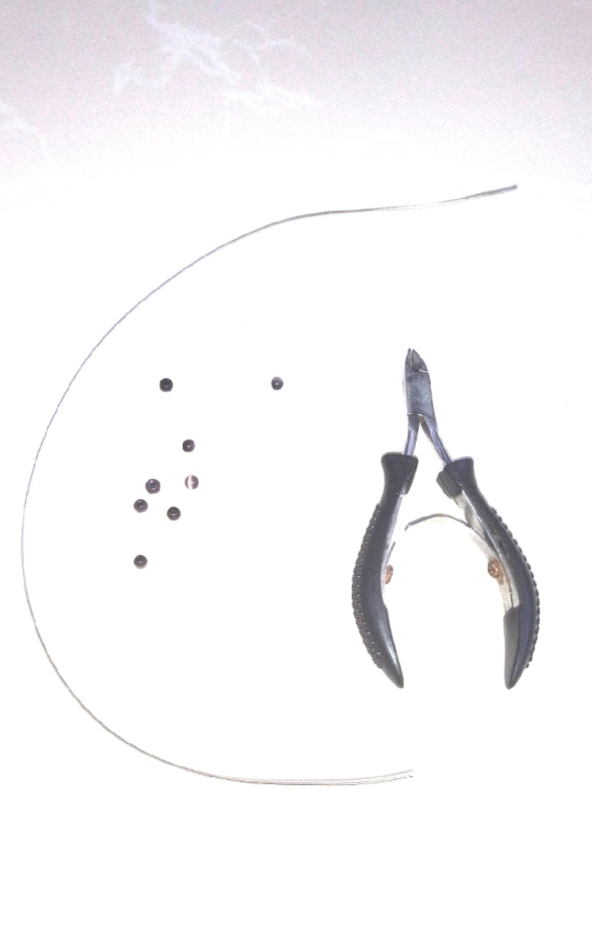
- piedras de bisutería
- alambre para bisutería calibre 22
- pinzas
jewelry stones
22 gauge jewelry wire
tweezers
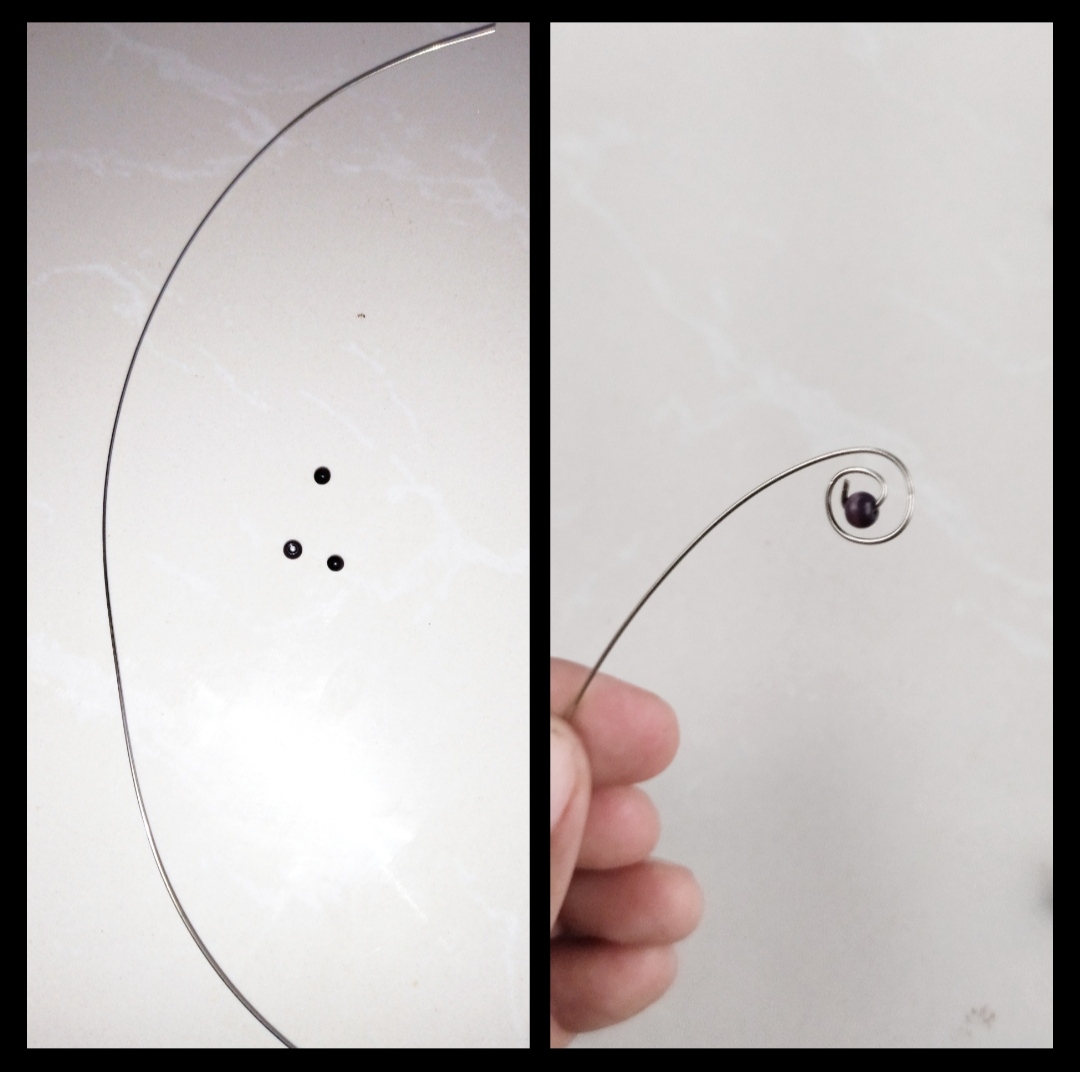
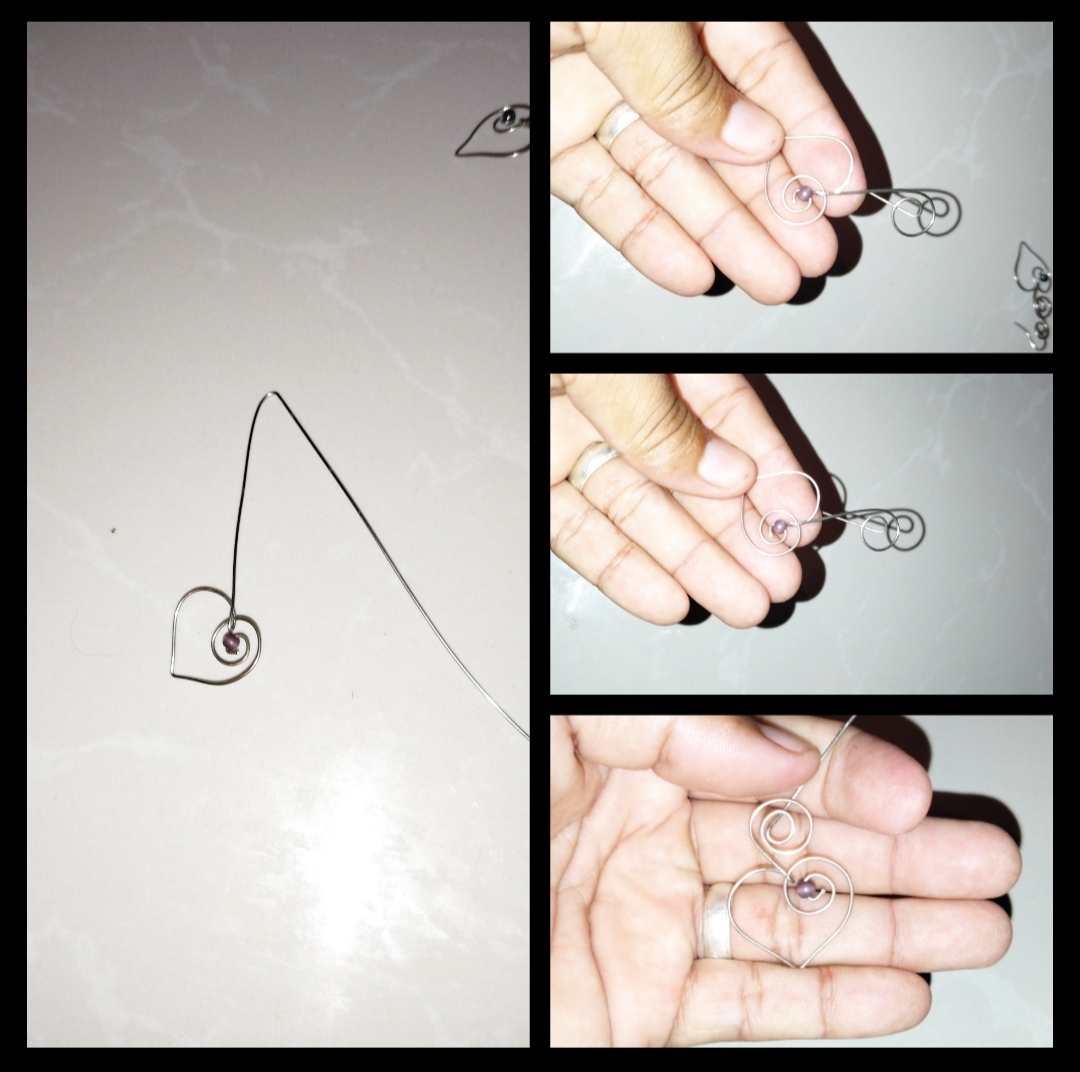
Paso 1: Para realizar nuestro primer paso cortaremos un trozo de alambre de unos veinte centímetros o un poco más largo luego de cortar y medir el albre doblaremos un poco una punta haciendo una especie de U luego pondremos una piedra de bisutería después de colocar nuestra piedra le daremos vuelta al rededor de la piedra firmando un espiral super fácil luego de doblar le daremos un poco de forma de corazón después de tener la mitad de nuestro corazón doblaremos hacia arriba para hacer la otra mitad trataremos que se parezca mucho a un corazón debemos de tener mucha paciencia y amor como pueden ver en la foto ya se está pareciendo a un corazón..
Step 1: To carry out our first step we will cut a piece of wire about twenty centimeters or a little longer after cutting and measuring the wire we will bend a bit a tip making a kind of U then we will put a jewelry stone after place our stone we will turn around the stone forming a super easy spiral after folding we will give it a little heart shape after we have half of our heart we will fold it up to make the other half we will try to make it look a lot like a heart we must have a lot of patience and love as you can see in the photo it is already looking like a heart.
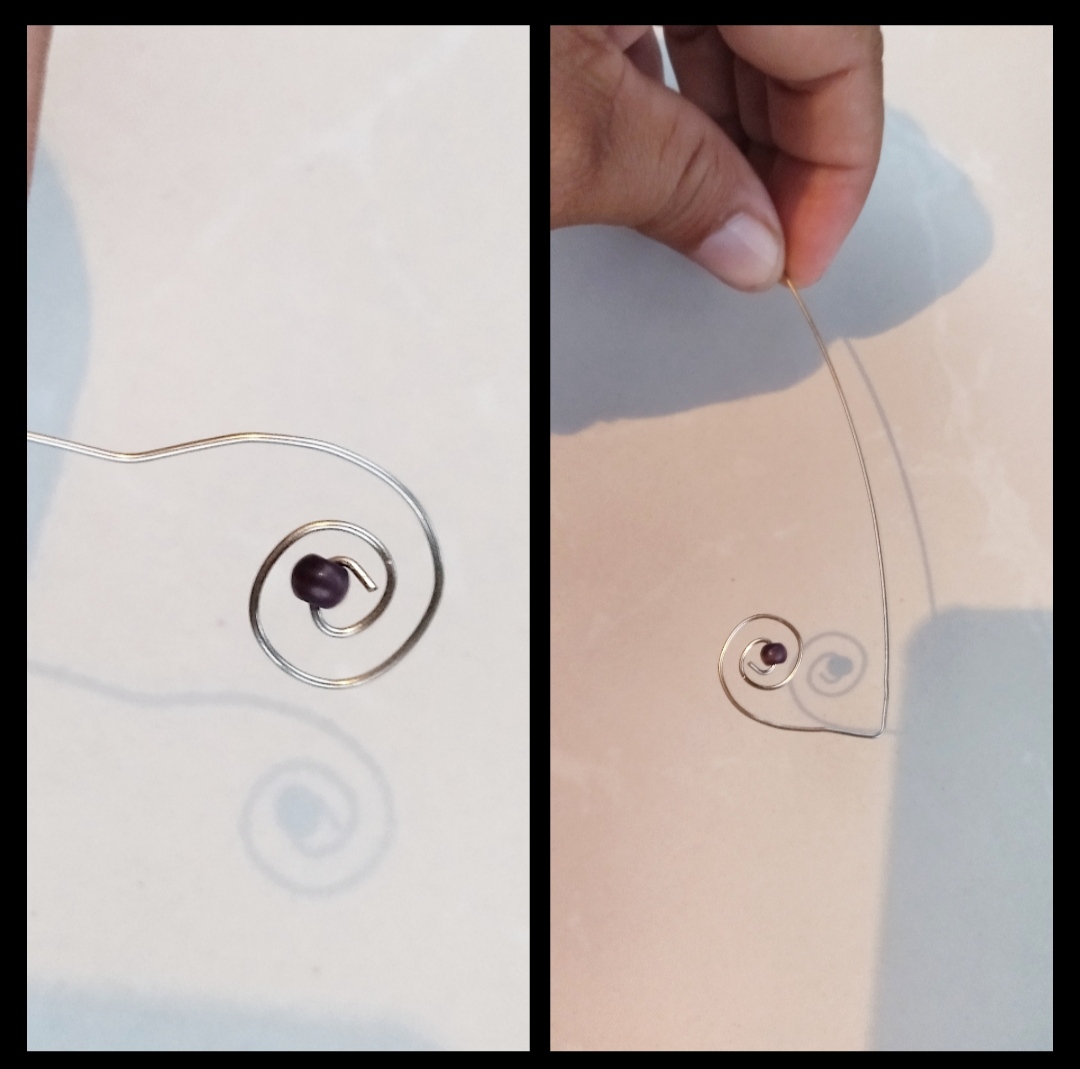
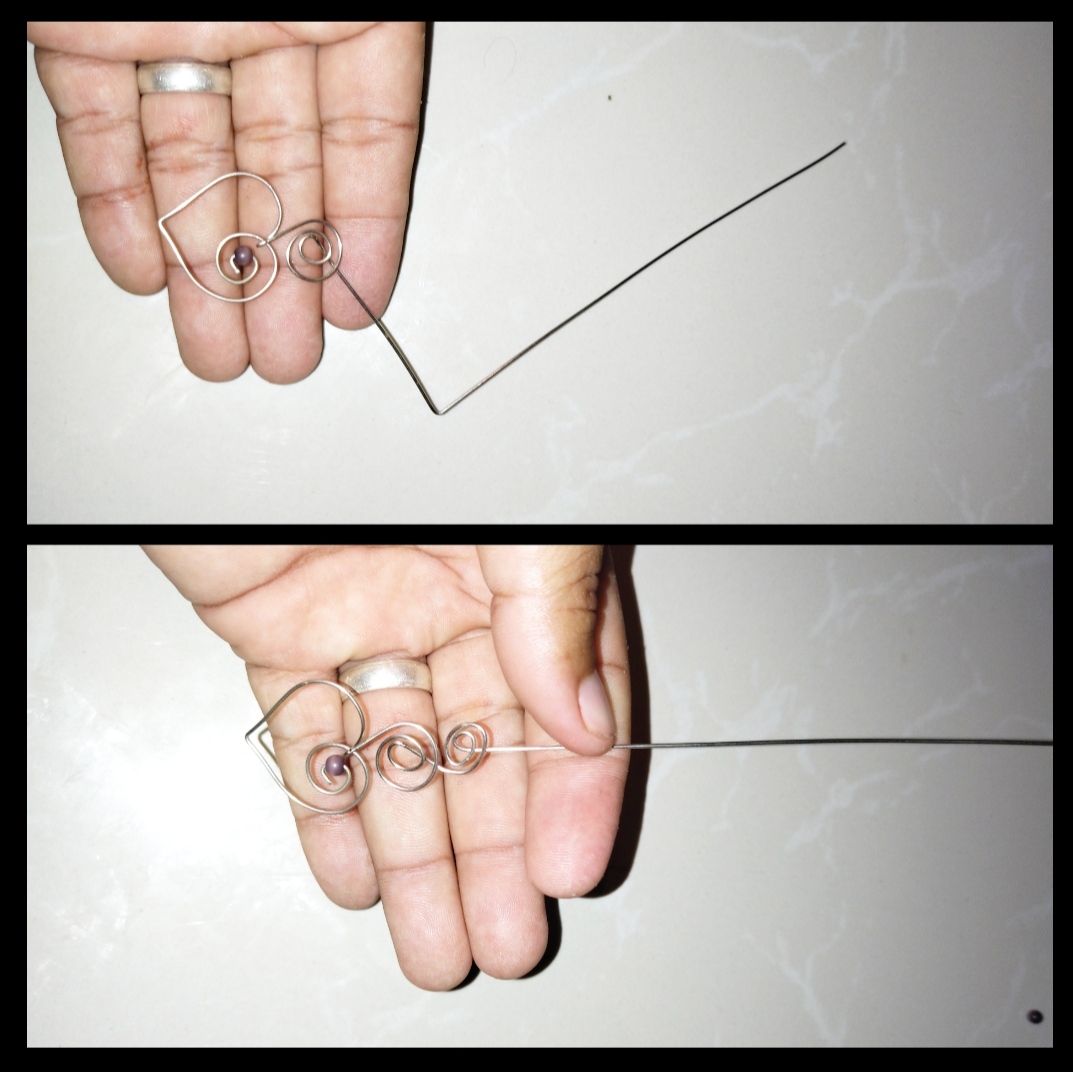
Paso 2: Para nuestro segundo paso trataremos de hacer el otro lado del corazón les recomiendo tener muchísima paciencia esta parte es un poco complicada ya que tenemos un trozo de alambre largo y debemos de pasarlo por es espiral luego de lograr pasarlo sin dañar el alambre lo doblaremos hacia su derecha tengan en cuenta que debemos de darle forma a nuestro corazón constantemente debemos de estar pendiente porque se deforma con mucha facilidad y mientras más vueltas tenga el alambre se verá mal el corazón así que debemos de tener mucho cuidado es este paso. .
Step 2: For our second step we will try to make the other side of the heart I recommend you to have a lot of patience this part is a bit complicated since we have a long piece of wire and we must pass it through the spiral after being able to pass it without damaging We will bend the wire to its right, keep in mind that we must constantly shape our heart, we must be aware because it deforms very easily and the more turns the wire has, the heart will look bad, so we must be very careful in this step.
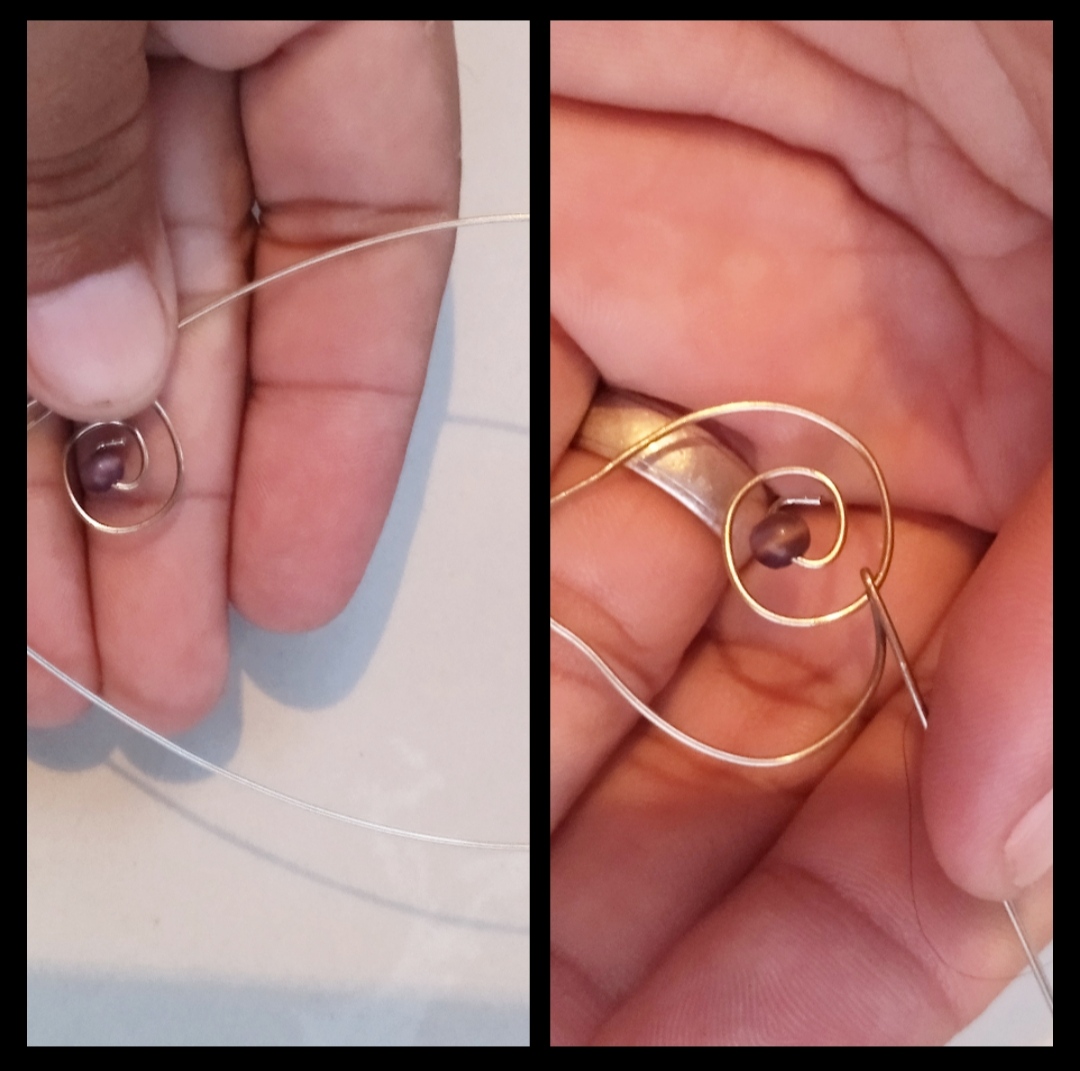
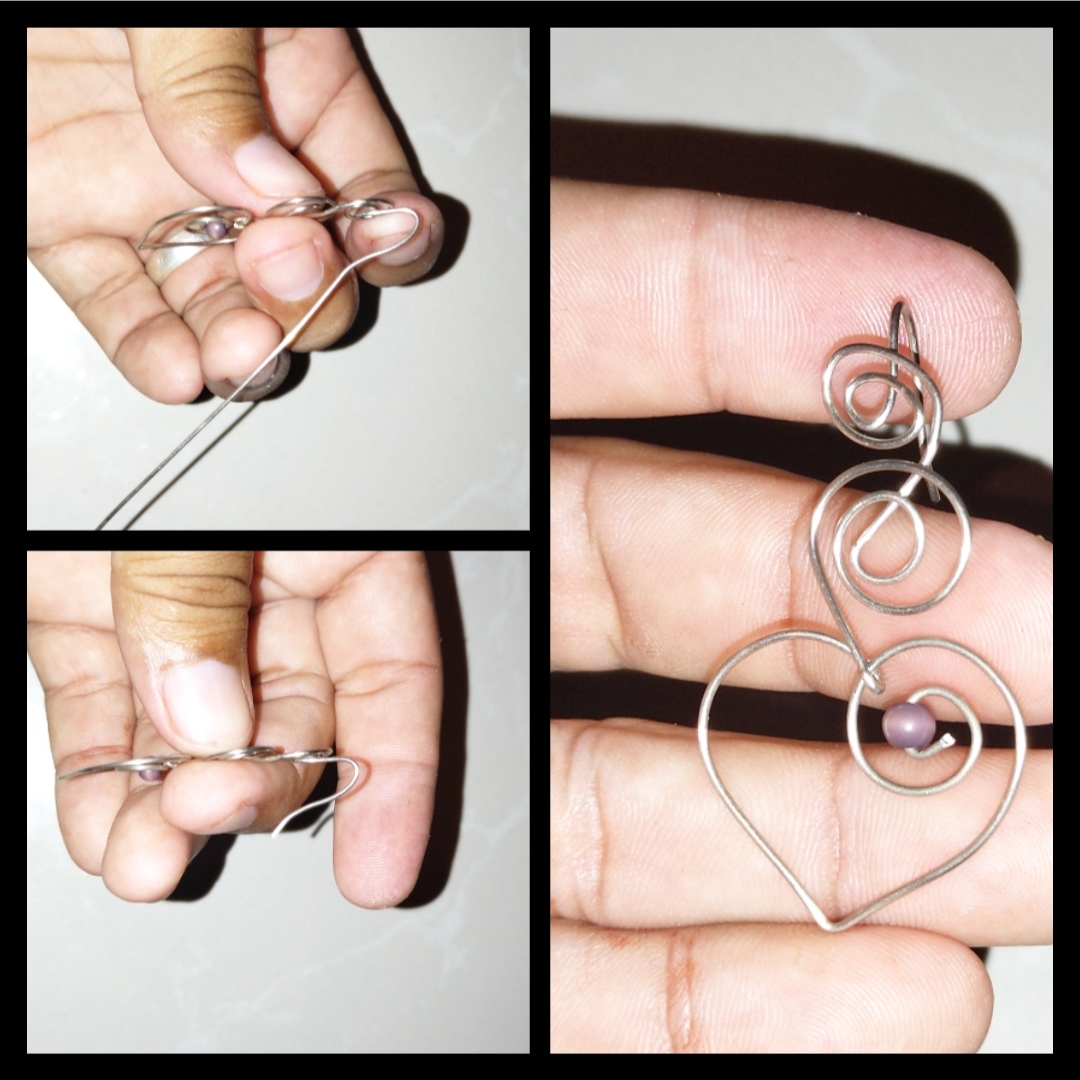
Paso 3: Para lograr nuestro tercer paso debemos de tener en cuenta como queremos que nos quede los espirales yo quiero uno más grande que el otro el primero debe quedar más grande pero como lo logramos tomaremos el trozo de alambre y doblaremos hacia atrás dejándolo en forma de L trataremos de que nos quede un poco largo el trozo de alambre que vamos a utilizar luego de tener el alambre doblado le daremos vuelta para darle forma de espiral trataremos wñde que el resto del alambre nos quede hacia arriba para poder hacer el otro espiral.
Step 3: To achieve our third step, we must take into account how we want the spirals to fit. I want one larger than the other. The first one should be larger, but since we achieved it, we will take the piece of wire and bend it backwards. Leaving it in an L shape, we will try to make the piece of wire that we are going to use a little long. After having the wire bent, we will turn it to give it a spiral shape. We will try to make the rest of the wire face up to be able to make the another spiral .
Paso 4:Bueno ya estamos casi listo es muy fácil en este paso les mostraré como terminal de hacer el espiral y como hacer el gancho para colgar el pendiente en la oreja, para este paso aremos lo mismo que en el paso anterior solo que dejaremos el trozo de albre un poco más corto y en ves de doblarlo hacia la derecha lo doblaremos a nuestra izquierda super fácil siempre el albre que nos quede lo dejaremos en la parte de atrás del pendiente porque así el frente del pendiente se verá muy bien, bueno para terminar con los pendiente aremos el gancho como lo aremos recuerden que todavía nos queda alambre ese alambre lo doblaremos formando una U pero viendo hacia bajo le damos un poquito de forma y cortamos el exceso como pueden ver el pendiente es una sola pieza no debemos empatar el alambre ingenioso y muy lindo espero les guste.
Step 4: Well we are almost ready it is very easy in this step I will show you how to make the spiral and how to make the hook to hang the earring on the ear, for this step we will do the same as in the previous step only that we will leave the piece of wire a little shorter and instead of folding it to the right we will fold it to our left super easy always the wire that we have left we will leave it in the back of the earring because that way the front of the earring will look very good , well to finish with the earrings we will make the hook as we will do it remember that we still have wire left, we will bend that wire to form a U but looking downwards we give it a little shape and cut off the excess as you can see the earring is not a single piece we must tie the wire ingenious and very cute I hope you like it.
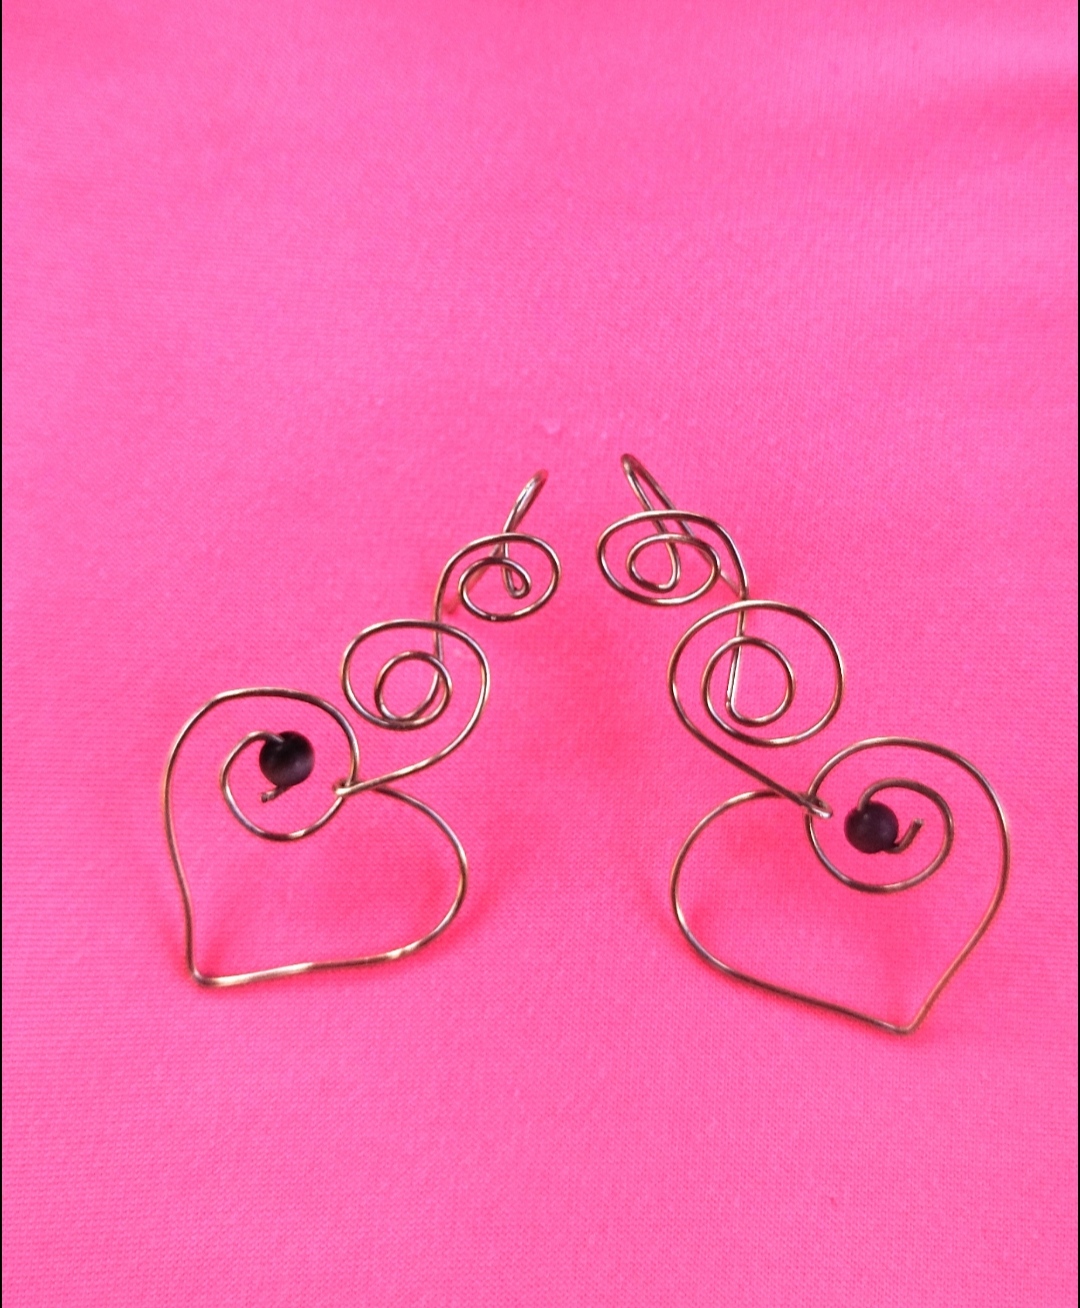
listo nuestros hermosos pendientes , espero que a las damas les guste, fue un gusto compartir con ustedes .
ready our beautiful earrings, I hope the ladies like it, it was a pleasure to share with you.
Todas las Fotos son de mi autoría y fueron tomadas con mi Celular Redmi 9T
All Photos are my authorship and were taken with my Redmi 9T Cellphone
Gracias @alexanderflx por este tutorial muy bien explicado nos encanta la forma tan sencilla que le das a los pendientes, un accesorio realmente hermoso.
Hola, muchas gracias siempre es un gusto compartir con ustedes, estos pendientes son muy sencillos de hacer.♥️❤️❤️💘🌺🍓🌹
Que bonito trabajo @alexanderflx me encantó 😍
Hola, muchas gracias es un gusto.
Congratulations @alexanderflx! You have completed the following achievement on the Hive blockchain and have been rewarded with new badge(s):
Your next target is to reach 3750 upvotes.
You can view your badges on your board and compare yourself to others in the Ranking
If you no longer want to receive notifications, reply to this comment with the word
STOPCheck out the last post from @hivebuzz:
Support the HiveBuzz project. Vote for our proposal!
Un trabajo hermoso, gracias por compartir tu proceso, eres excelente @alexanderflx dando la forma al alambre 🥳
Hola, espero estés bien, es un gusto compartir con ustedes, muchas gracias por tu visita me siento muy agusto por tu comentario gracias, feliz tarde.